ONLINE ART COURSE – FIGURES MODULE – BEGINNING THE FIRST PROJECT
This was not a module in the course that I was particularly looking forward to, because it’s not an area of art I am keen to get into. However, as I began the first figure studies, I found myself enjoying it better than I’d expected.
The first project of the module was to draw a series of small sketches of figures performing different actions, working with watercolour and ink pen. There are eight figures in all, but Phil, our teacher, told us that he did not expect us to draw them all in one week. Generally speaking, Phil guided us step by step for the first of each pair of figures, and for the second one, left us more to our own devices to complete it.
I decided not to follow any of his suggested choices as I didn’t like all of the images, so I made my own choice. I decided to limit myself to four of the eight figures. Phil suggested that if we wanted to, we could return at a later date and draw the ones we had left out. This may be one of his suggestions for the Rest Week at the end of this module. I don’t think I shall draw more than four, though.
Figure One
I chose to draw the first figure in the series, as this one was accompanied by a full explanation by Phil, and was a good place to start. It was of the back view of a young woman walking, and was a good simple one to start with.
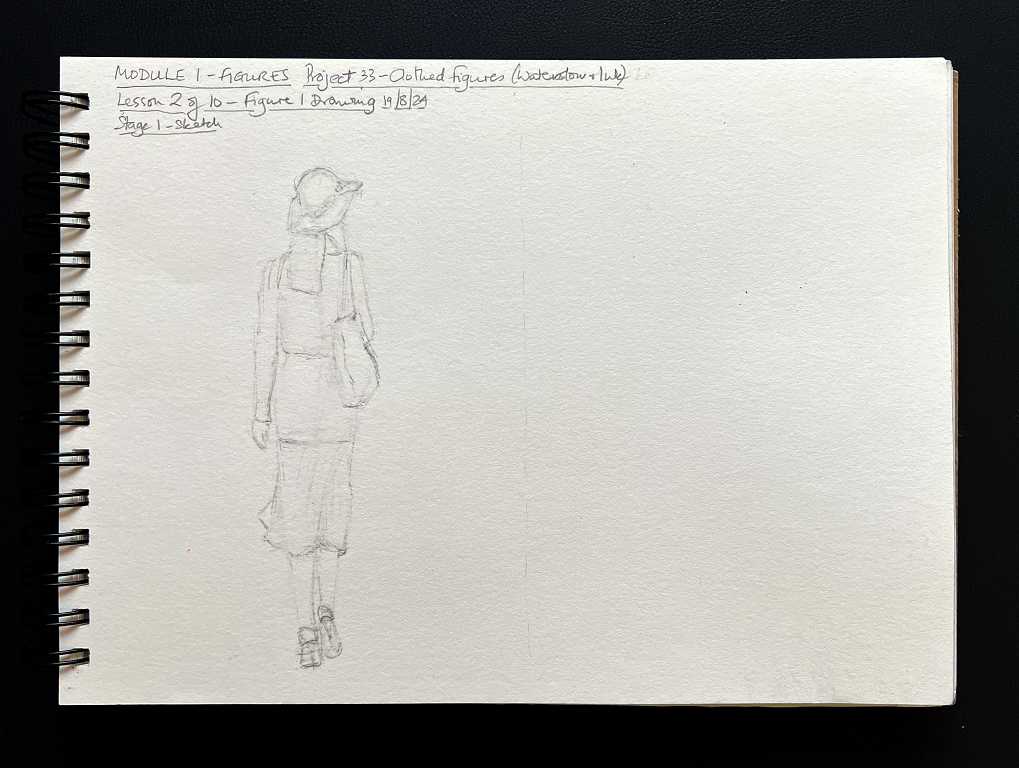
We began by doing a pencil drawing, and Phil showed us how to divide the body. The head size is about a seventh of the total height of the body, so this enabled us to judge woman’s height from the beginning. Using this method also enabled us to make our drawing larger than the reference photo; the size might be different but the proportions remained the same. This particular picture was relatively easy because her clothes also showed clear divisions across her body, which really helped.
Once we were happy with the pencil drawing, we dropped in some watercolour in a sketchy fashion.
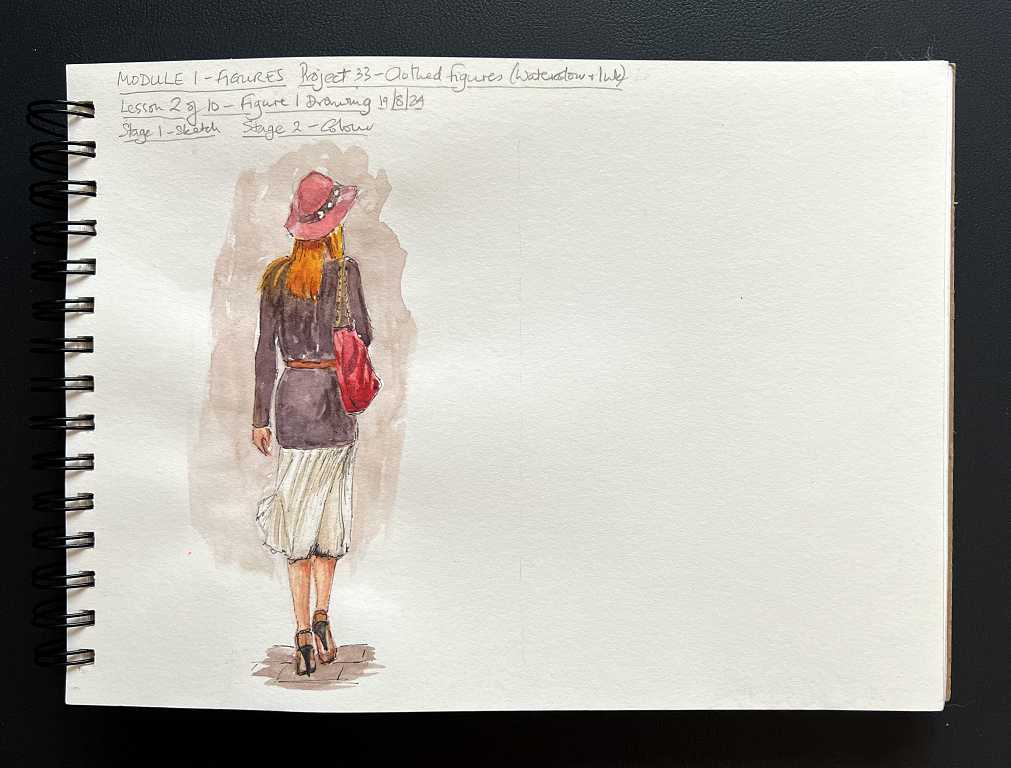
After the paint was dry, we went back over it with a fine ink pen to define the details. I was quite pleased with how this one turned out.
Figure Three
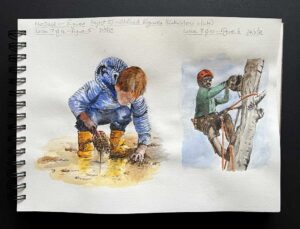
I omitted Figure Two because I wasn’t very keen on it. Figure Three also had full instructions from Phil. This was a picture of a man skateboarding, and I found this one a lot more challenging. Phil taught us about “lines of action” – a thread running through the figure, indicating the positions of the torso and limbs. For Figure One, this line of action was pretty much a vertical line, with slight variations to indicate the curve of her spine, but for Figure Three this was a lot more complicated.
As usual, I struggled with angles and proportions. Once I had drawn my line of action and filled it out with the substance of the figure, I began to add detail. I soon realised that the proportions were not correct. Phil taught us how to see different areas in relation to one another, and this is very good observation training. Eventually I got it pretty much right, but it involved quite a bit of erasing in the process!
Here is the finished result.
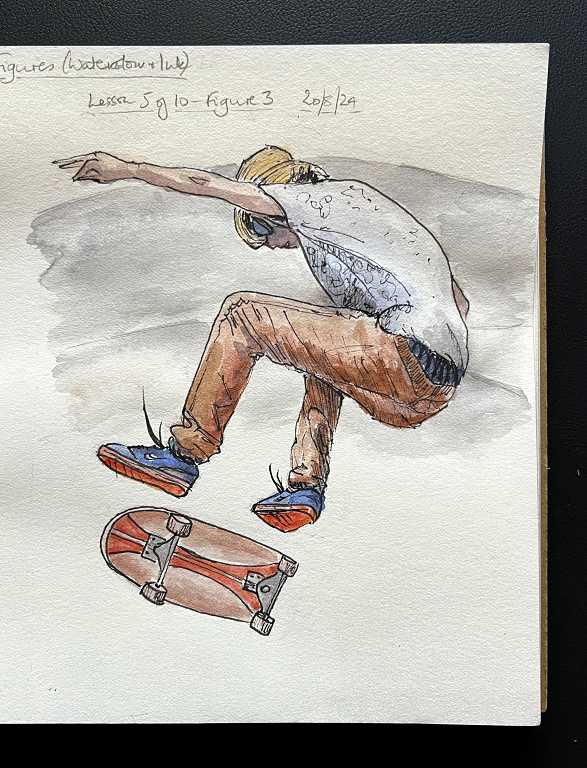
One of the most difficult parts was getting the feet right!
Figures One and Three
The first two figures I drew, both on the same page.
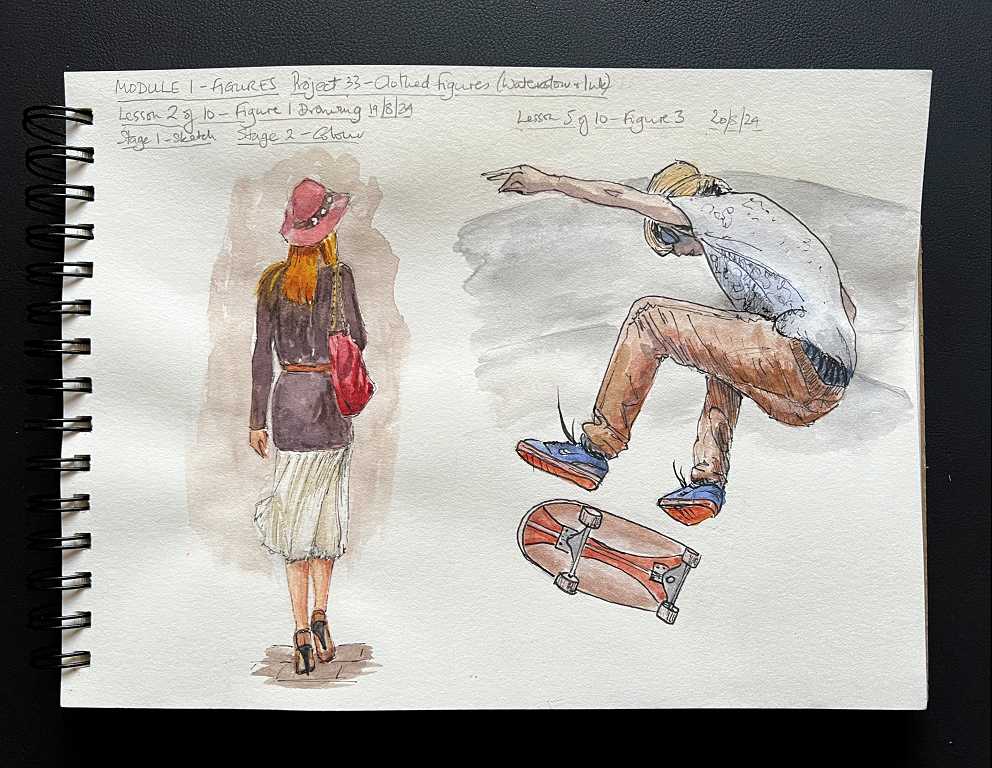
All good practice!
Although figure drawing is not something I am keen to pursue, this is proving a very useful exercise. I do need to hone my observation skills, so that the angles and proportions I draw will improve. It doesn’t really matter what the subject is, and these figure studies are as good as any for this exercise. If I decide I need further practice with proportion and angles, I can always return to this project and draw the other figures. The trouble is, there are always other things I want to draw and paint, and the list is getting longer all the time!