Before cutting the petal shapes from the rectangular pieces, I drew the outlines freehand, roughly following the design of the red shape I drew on the template, so that each one is different. I then stamped the bright red petals with a background rubber stamp which I’ve got, with an all-over crazed pattern, which didn’t cover as fully as I thought it would, so after the initial stamping, I continued stamping randomly over the petals without re-inking the stamp, and got a better effect. Unfortunately it doesn’t show up very well in the photos – the colour I used matches the dark red card. I then inked the edges of the petals with Pumice Stone Distress Ink – this has to be my favourite colour of Distress Inks because whatever colour card you use it on, it has the effect of simply darkening the existing colour. It’s very useful, and I think I probably use it more than any of the other colours.
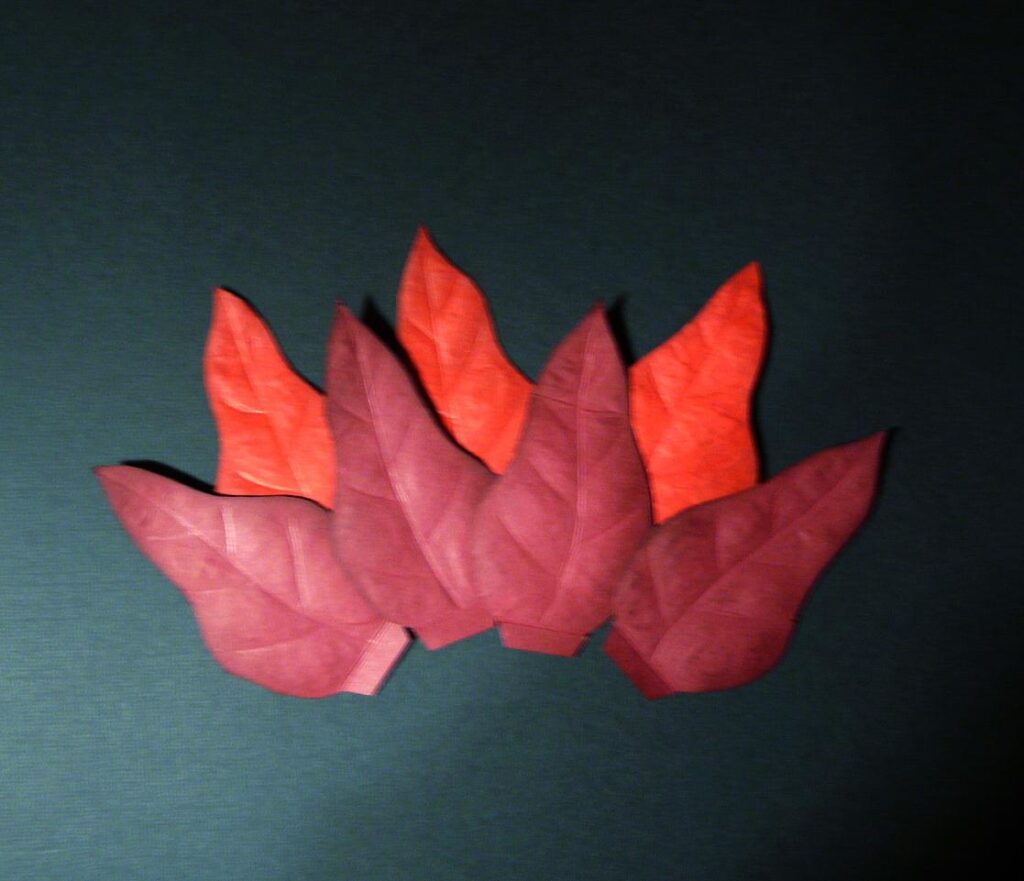
After doing this, I embossed each petal with my ball-ended embossing tool, onto a piece of funky foam. This gives the petals a 3-dimensional, realistic look, and I’m very pleased with the result. Unfortunately this photo is slightly out of focus, but you get the general idea:
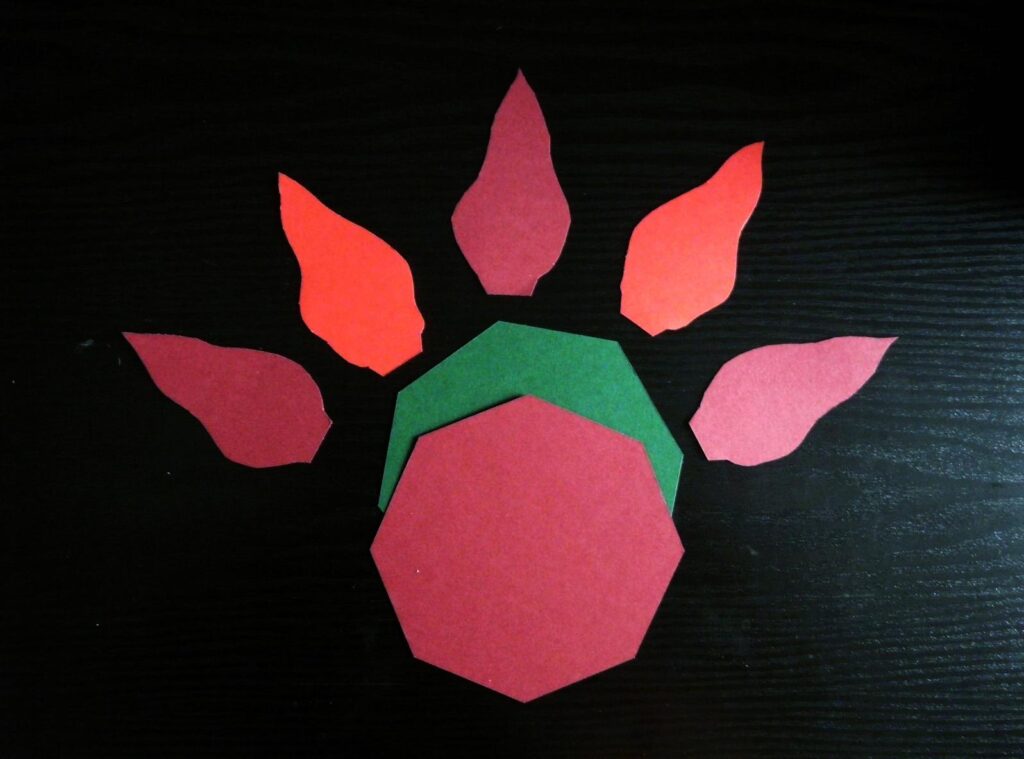
The flowers are made up by attaching some double-sided tape to the 1/4 in tab at the base of each petal, and sticking them to the back of the two squares – one large and one small – and to one of the green octagons. To soften the look of it a little, I used my corner-rounder punch on the squares. This is the inner flower, with four dark red petals stuck on each of the two squares. I decided to make a poinsettia centre out of little stamens and some wired crystals that I bought in a cake decorating shop – I made a hole through the centre of the squares after I’d glued them together, and also made a little green centre piece from a couple of flowers I’d cut with Jiminy Cricut recently but hadn’t used – I inked these with Forest Moss Distress Ink by spreading the inkpad on my craft mat, spritzing it with a little water, and smooshing them around in the ink. After drying them with my heat gun, I painted the edges with gold Perfect Pearls.
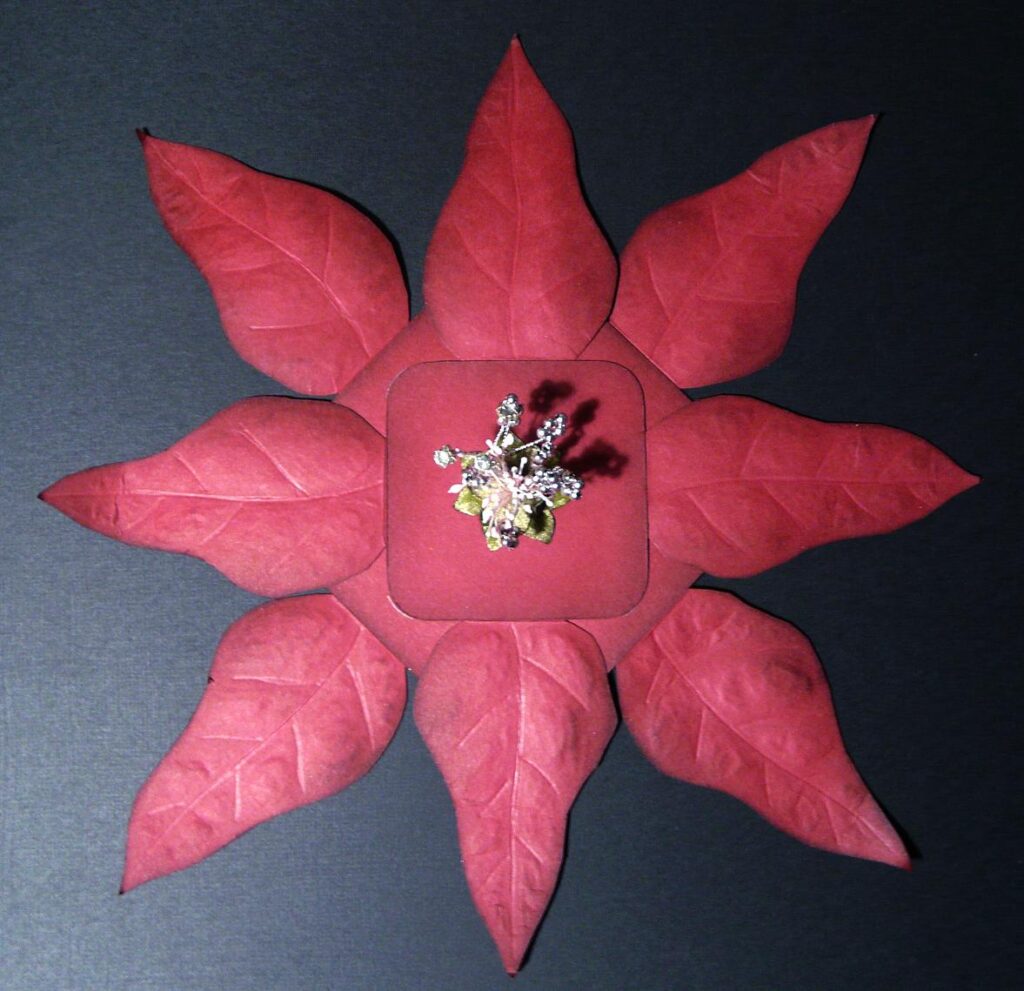
You can see that the smaller square is laid on top of the larger one at 45 degrees, so that the petals alternate with those attached to the larger square below.
When I do my next poinsettia explosion box, I think I might make the centre a circle rather than a square. The outer one is fine as a square, but I think a circle would look nicer.
The outer flower uses all the remaining petals, the bright red rubber stamped ones, attached all around one of the green octagons.
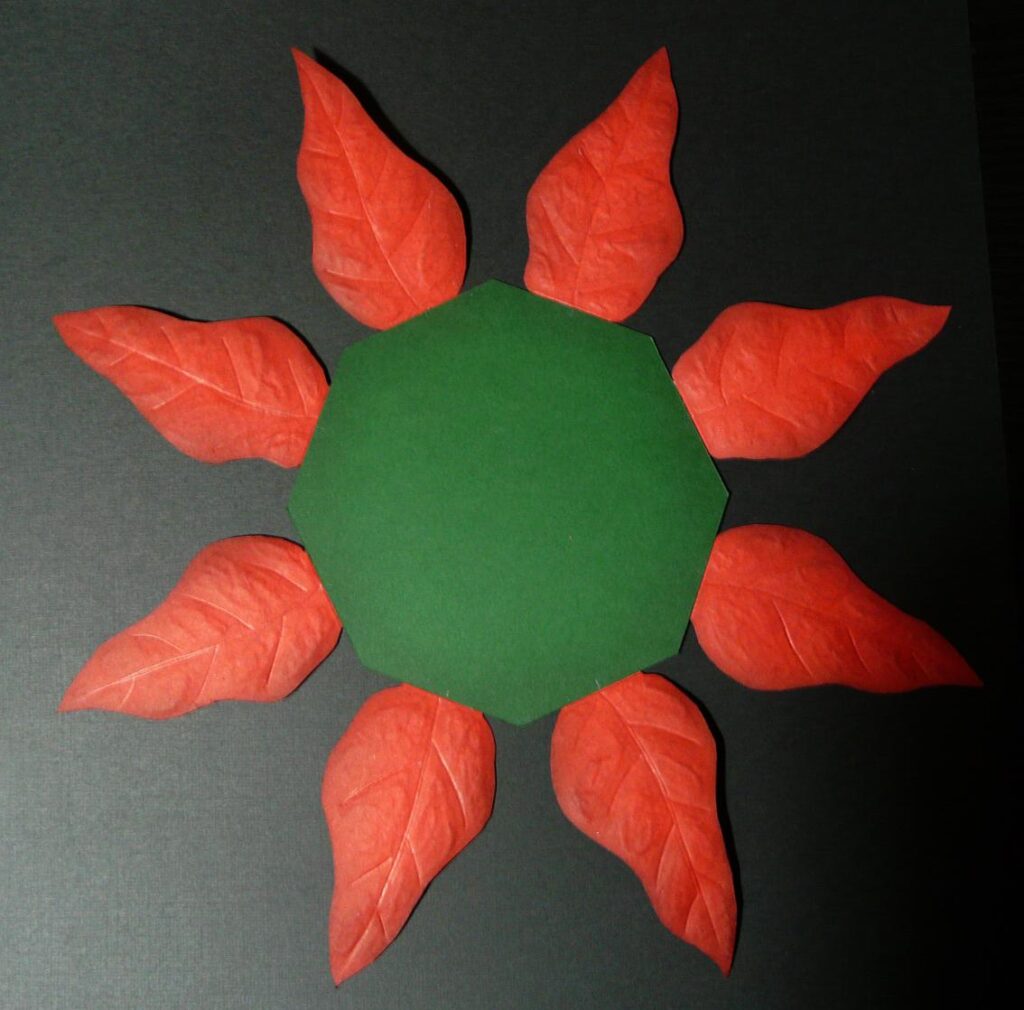
You can see that I have also inked around the edge of the green octagon – again with Pumice Stone Distress Ink.
The final step was to fix the inner and outer flowers together, lining up the petals so that they overlap.
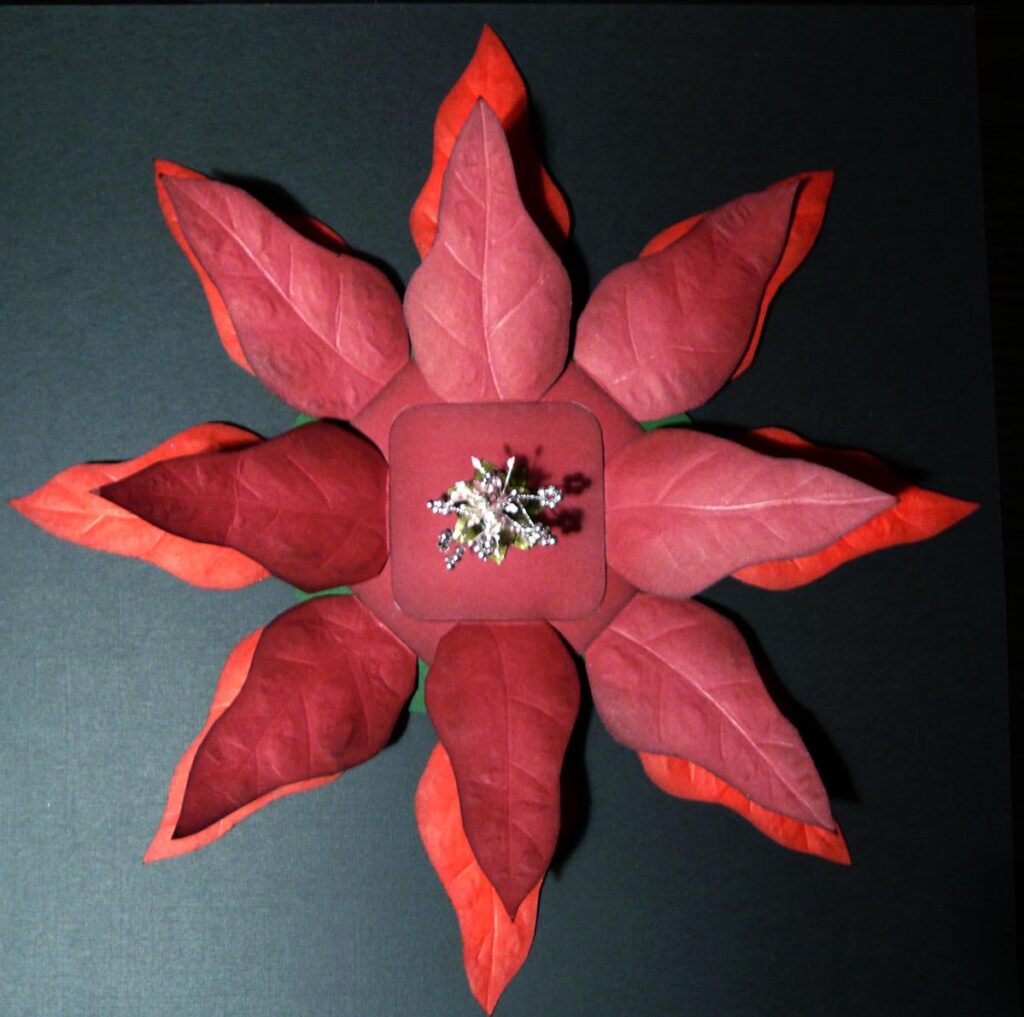
I stuck the two layers together with several strips of double-sided tape. I was a bit concerned that the wire and the backs of the stamens would be rather thick and make a lump, but I spread them around on the back of the inner flower, and layered them between small pieces of double sided tape, which distributed them nicely, as well as sticking them down firmly, and it came out nice and flat.
That’s it for today – next time I am going to make a start on the box itself. I have to decide how to decorate the green panels making up the eight sides of the box – it is a choice between stamping and embossing, and I need to sleep on it to decide!