BEGINNING A NEW DOMESTIKA COURSE – INTRODUCTION TO ISLAMIC ART
At the beginning of this month, I began a new Domestika course. This one (full title: “Introduction to Islamic Art – Creating Biomorphic Patterns”) seemed a natural follow-on from the mandala drawing course. Lots of pattern, repeated elements and so on.
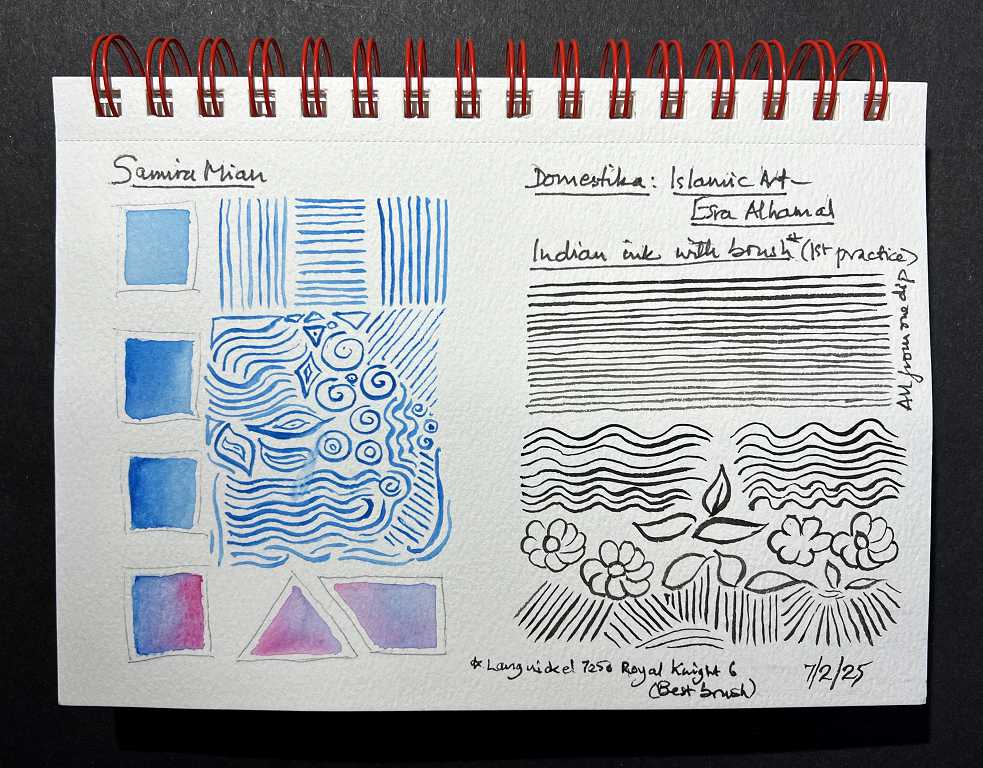
I am also following Samira Mian on YouTube and running her tutorials in tandem with the Domestika course. When I visited the course teacher’s website, I discovered that these two ladies know each other, and have done teaching together.
Esra Alhamal, the course teacher, specialises in the biomorphic style, also sometimes known as Arabesque but that is somewhat misleading for various reasons. Samira Mian, on the other hand, teaches the repeating geometric designs. The two teachers complement each other, and I am enjoying doing both styles concurrently.
I haven’t posted anything about this until now because I was working on various practice exercises and wanted to complete some of the course tasks before posting.
The first exercises were to practise drawing lines with ink and a brush. I have always used ink pens for this kind of thing in the past, and wasn’t sure why we couldn’t do this for the course, as it’s very much easier! I have learnt that you can alter the thickness of the line according to how much pressure you apply, and for the flowing designs, the brush gives a more natural and fluid effect.
It takes a huge amount of practice and I’ve decided to do some exercises with the brush every day to try and improve my technique.
I have a lot of brushes but very few seemed to match the description that Esra uses – a fine round brush with relatively long bristles, coming to a fine point. In the following photos you can see that I have experimented with various brushes, and have finally decided on my Langnickel 7250 Royal Knight 6 brush as the best for my purposes. I may buy the brush Esra recommends – she gets a very fine line with it.
My first practices were in my small watercolour sketch book, alongside some of Samira’s exercises. I shall be posting about those another time.
All the other exercises were done on the backs of scrap printer paper which was fine for practising.
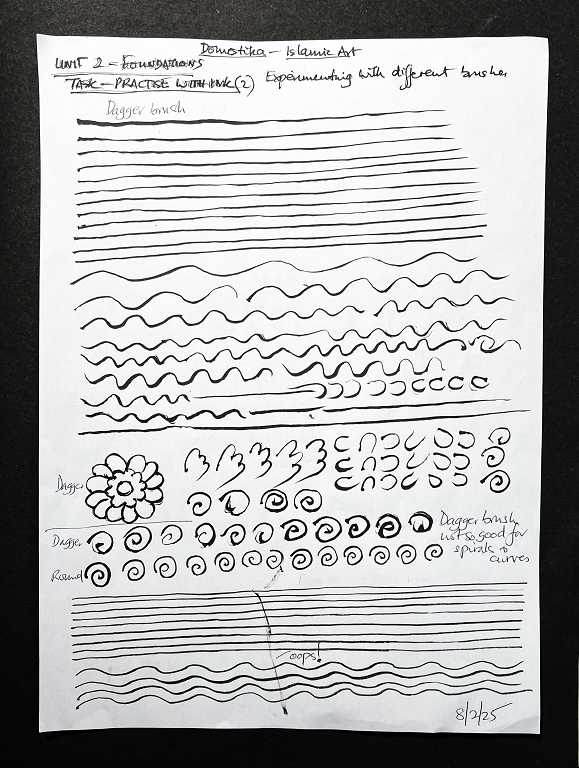
Esra suggested filling a whole A4 sheet daily, with straight and wavy lines, shapes, spirals, flowers and leaves, just to get the feel of the brush. For the second exercise I tried using my dagger brush. This is quite large with a lot of bristles which come to a very fine point. I thought the bulk of those bristles would hold a lot of ink and save me having to dip too often. The dagger brush worked surprisingly well for straight lines, or lines with a slight curve, but it was hopeless for the smaller shapes! Very difficult to control. For the test shapes at the bottom of the page I went back to the round brush. I managed to drop the brush and it made a mess on the paper, but it didn’t matter as it was just practice on a piece of scrap.
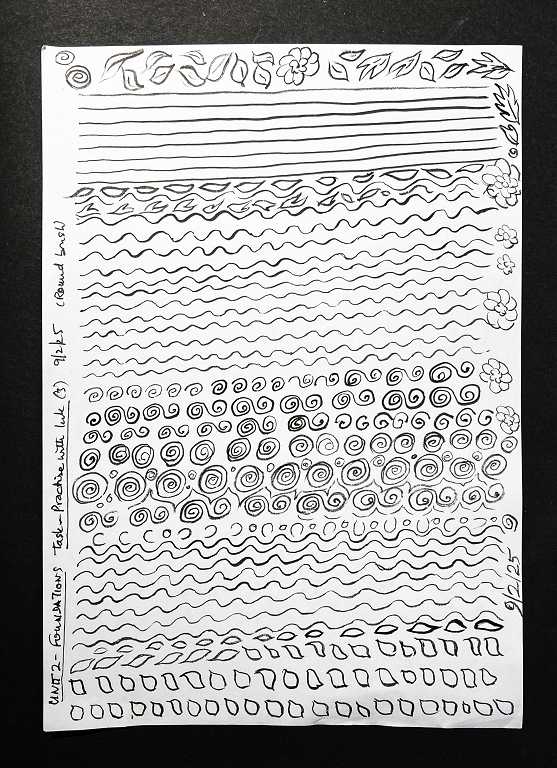
The next day’s samples, all done with the round brush:
On the 10th February, the next day, I worked in the studio on my light panel. I downloaded Esra’s test pages which had motifs that we could trace. This was the next practice exercise and I did them out of order, so I’ll add the pictures later.
On 11th February I completed this batch of practice sheets with a half sheet.
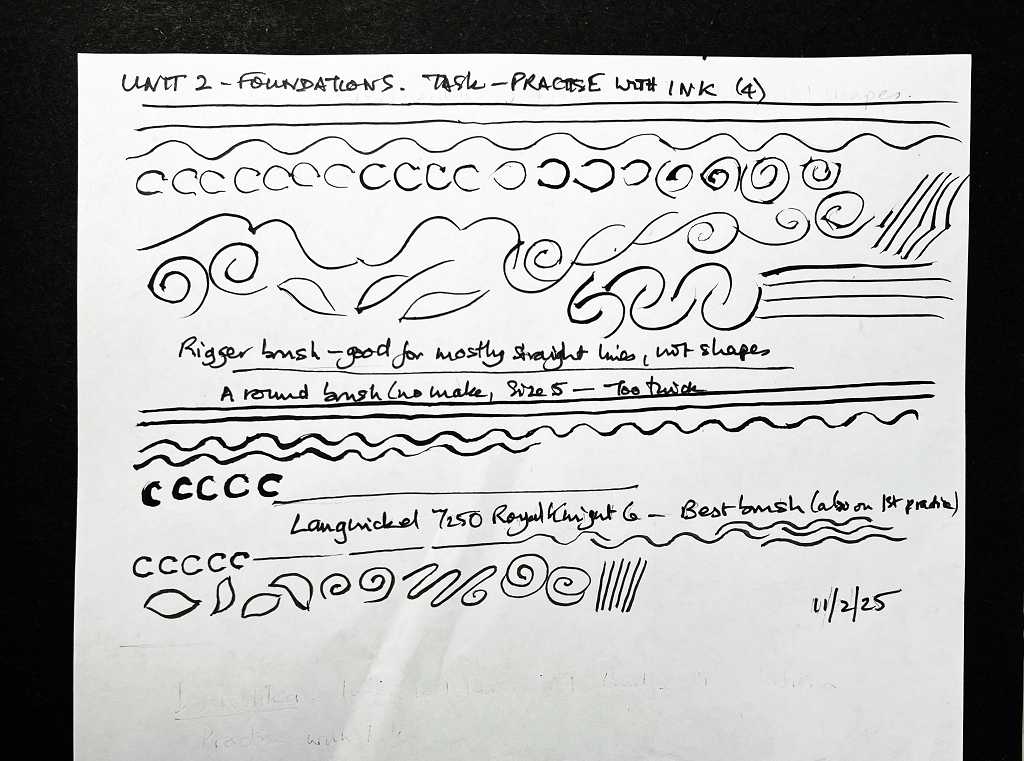
For this one, I decided to try my rigger brush. For the straight lines, or lines with wide curves, this did pretty well, but it was completely uncontrollable for the small shapes! I expect I could make it work with a lot of practice, but the small round brush is easier to control.
The middle row of samples was done with another fine round brush, as I temporarily mislaid the Langnickel one. This brush was pretty awful and I didn’t get good results with it.
Eventually I found the Langnickel brush and I completed the bottom row of samples with that.
I probably won’t post any further photos of my ink work practice unless I get so good at it that I want to show off!! I shall continue to try and draw some lines and shapes every day in order to get more confident and more accurate with the brush. I want to be half-way proficient before tackling the final project of the course.
Using up the remaining ink
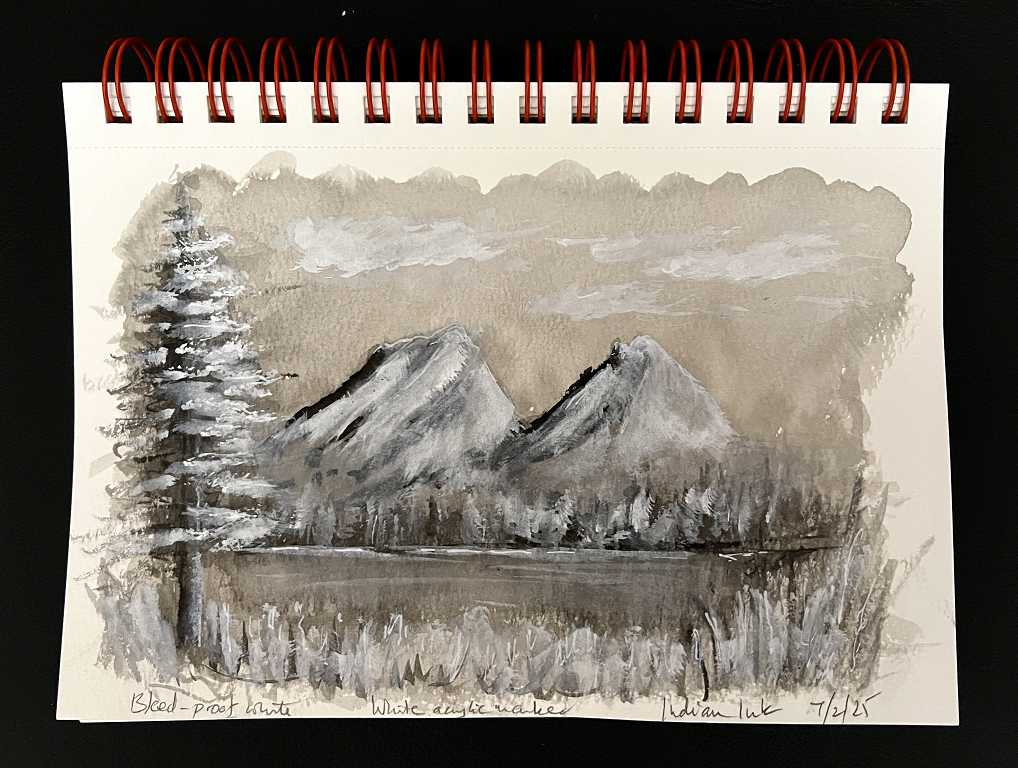
The ink I have been using (Dr. Ph. Martin’s black Indian ink) comes with a pipette in the lid, and I’ve been decanting a little into my glass egg cup. At the end of each session I have used the pipette to return the remainder to the bottle, but there is always a residue in the egg cup.
I decided to add a little water to this, and make a few quick sketches in my watercolour sketchbook. It seems a shame just to wash it away if I can use it! These little pictures are not my best work but fun to do, and finished with further ink work.
The first one:
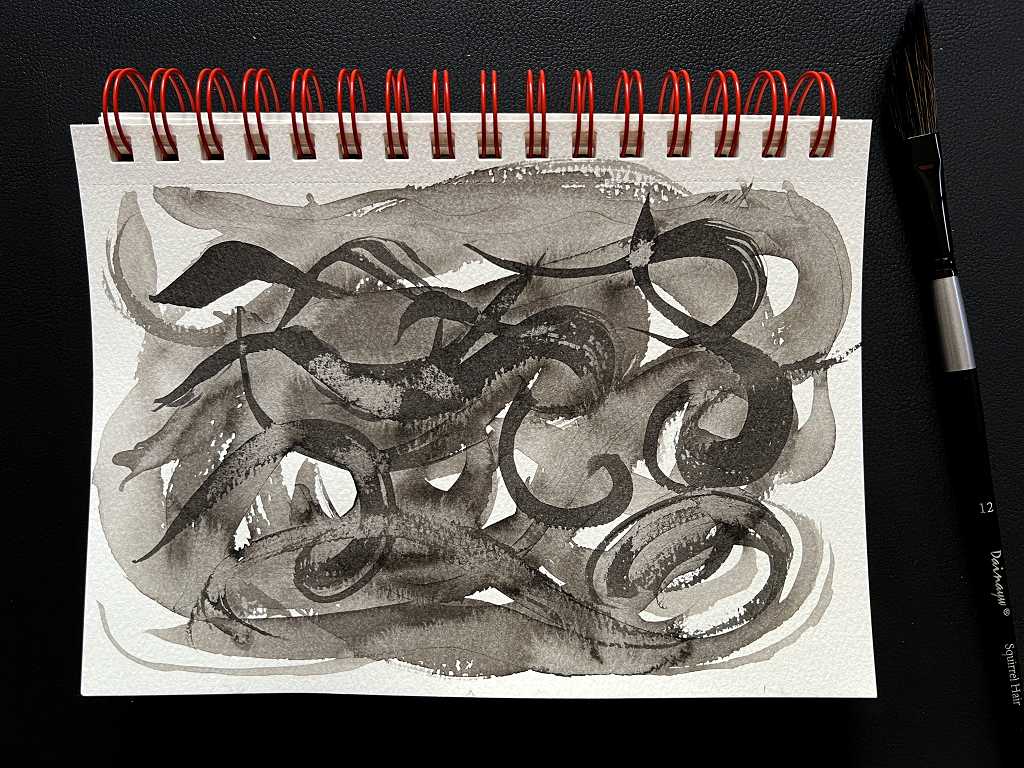
The sketch on Day 2, using the dagger brush. This brush is very floppy when wet, and difficult to control, but you can do some marvellous mark making with it. In this case I did a lot of overlapping swirls.
This needed a little something extra, so I inked in some quotes I found online about ink and drawing.
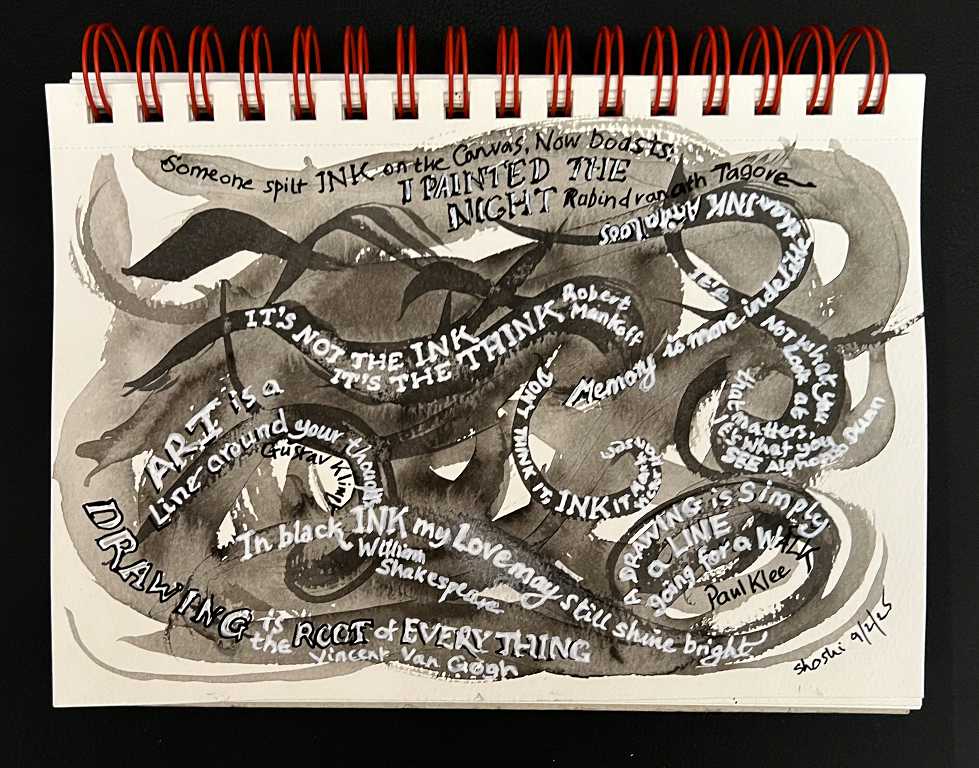
I’m really quite pleased with how this one turned out!
The final one was of some fir trees. I added quite a bit of ink pen work to this one – permanent black brush pen, permanent grey brush pen, white acrylic marker. While the ink was still wet I manipulated it a bit with a wet brush.
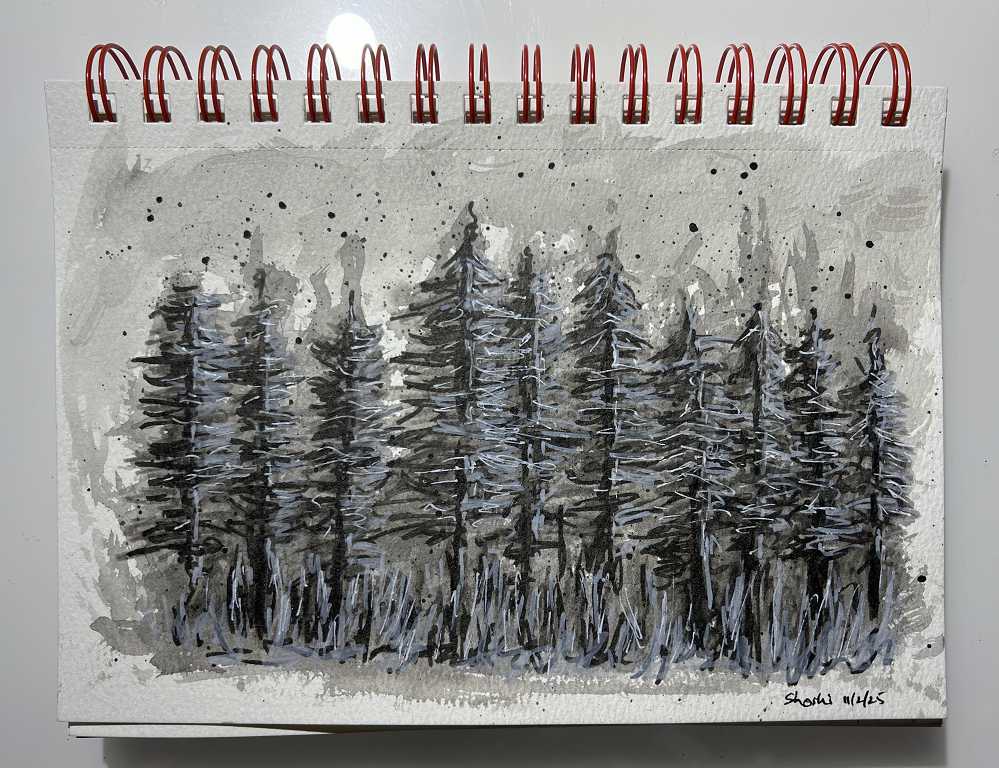
I had done the spattering with the left-over ink from the day before. Once dry, this ink is permanent so you can work over it.
Just a bit of fun, and a bit of “waste not, want not”!