TYPEWRITER ALBUM PART 5 – TRANSPARENCIES
A way to add more interest to an album is to introduce transparent pages or embellishments. Luise Heinzl frequently does this.
I was able to print on acetate with my old laser printer but wasn’t sure how it would work out on the new one. I am always a bit scared to try new media in a printer for fear it might cause a paper jam, and I wasn’t sure what paper setting to use. I chose “heavy glossy” for the first print and it came through fairly slowly, and I could detect some very slight indentations where the rollers had pressed on the acetate. When I changed the setting just to “glossy” it worked absolutely perfectly.
When the print comes out, the toner is slightly matte against the shiny acetate, and you can feel it. If you turn the acetate over, you have a perfect image with a uniformly shiny surface and the toner-surface is underneath and more protected in situ. Of course, the image is reversed, so if you want it the right way around, you have to reverse the image left-to-right before printing.
This new printer is a dream, especially as I now have a generic driver installed on both upstairs laptops – the Linux Lenovo Thinkpad in the office and the Windows one in the studio (not connected to the Internet, but essential for using my favourite and very ancient designing software!).
Luise Heinzl’s Typewriter Ephemera kit butterflies
One of the journaling cards in the kit has an entire butterfly on it, and in her video, Luise printed this out on acetate and then fussy-cut the butterfly and applied it to the paper print. Some of her mixed media ephemera pieces were tucked between the butterfly layers to great effect.
I took this same image and made a montage on a single sheet of A4, with the image in different sizes so that I would have a choice of butterflies to use in different situations.
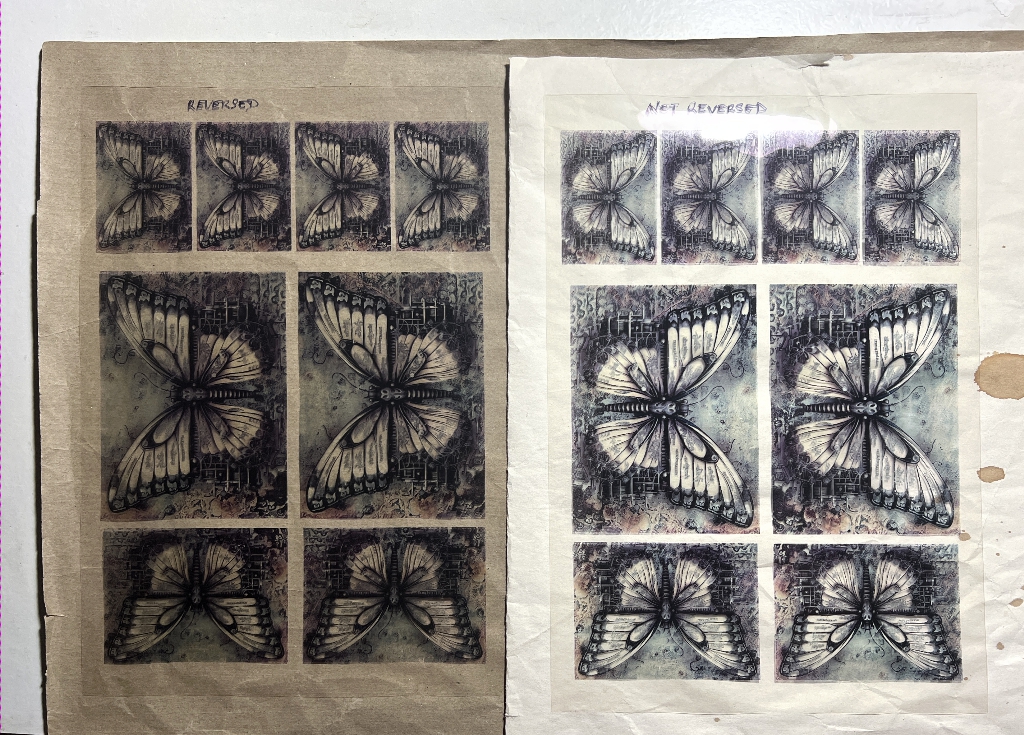
I laid these two prints on a darker and lighter background respectively to show the difference. I have written on the top of each one with a Sharpie pen, “Reversed,” and “Not reversed,” which I shall do on all subsequent acetate prints so I know I’ve got things the right way around.
Vintage Photo kit from Margareth of SevenPlaza
Some time ago I purchased this amazing kit from Margareth. Here is a sample of a few pages to show what it contains.
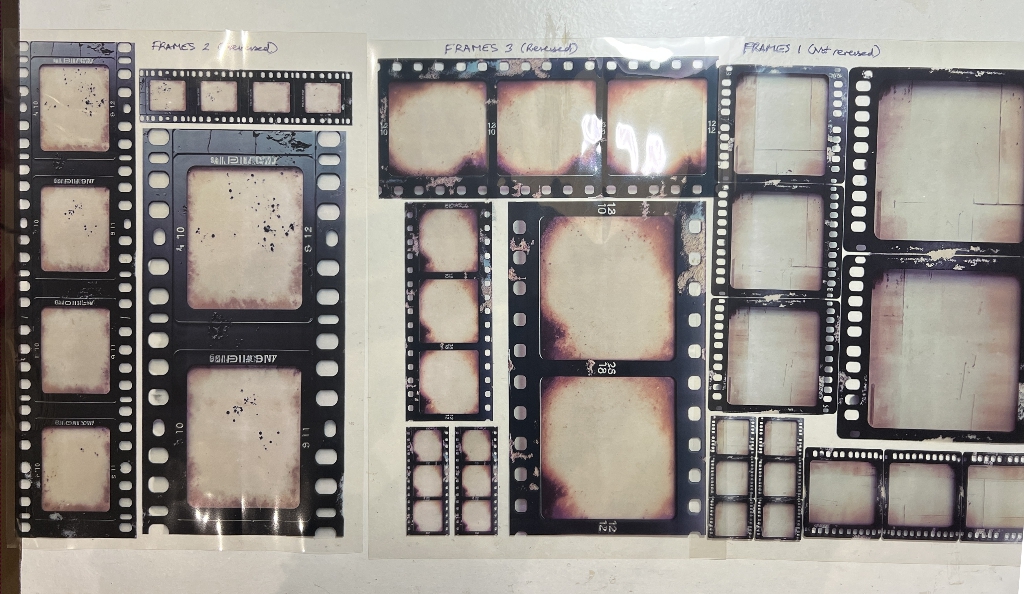
There is a huge collection of frames and photo mounts for use with any image you want. You can print them on normal paper and stick an image on, or on acetate or self-adhesive sticker paper for transparencies, or washi paper for a translucent look. I printed out a few on sticker paper with great success on my old printer, and the other day I printed out the whole kit on laser acetate, and these sheets are now filed away ready for use.
Here is a close-up showing the quality of these images.
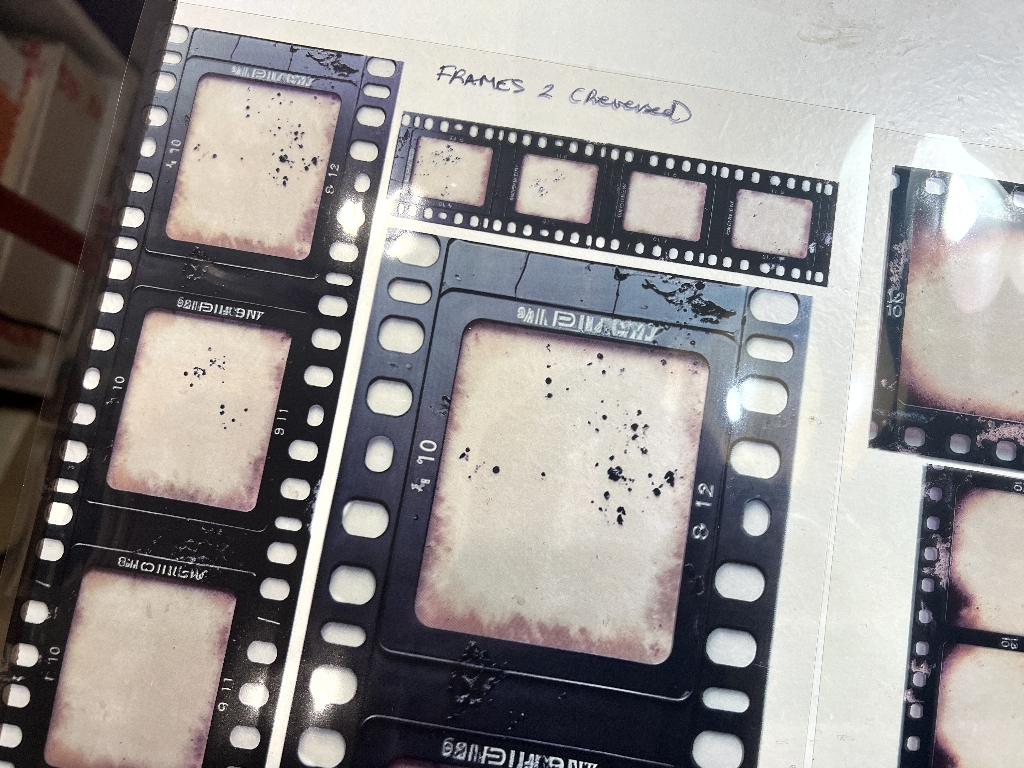
Many of them have a 3-D appearance, and the window in each one is aged and spotted. Instant vintage! You can take a clean modern image and put it behind this transparency and it immediately looks ancient! Here’s an example – I took a page of vintage figures and laid an acetate sheet of the photo frames on top.
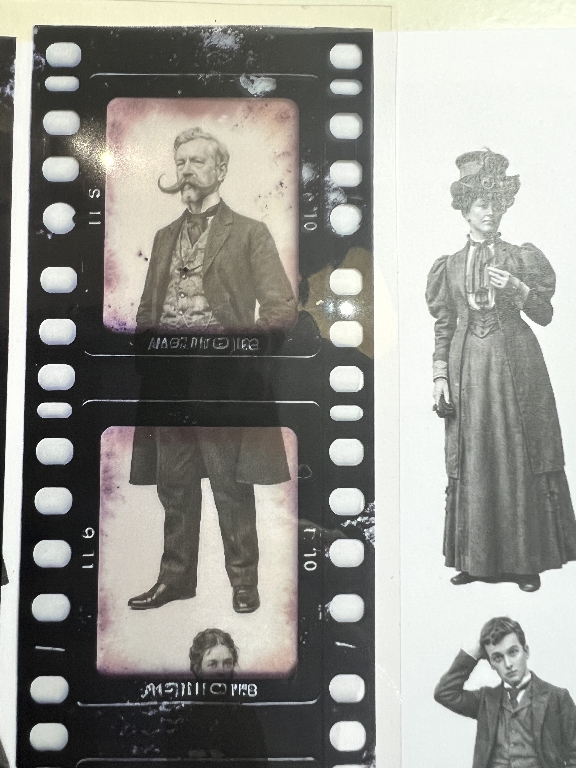
Obviously you would cut the image to size, and also cut out the frame of your choice – in this picture it looks a bit weird!!
These framed images make fantastic vintage focal points in projects. I am going to include some in my Typewriter album. I have used one or two of the stickers in my Checkatrade folio a while back. I think the acetate version works better than the sticker because there is no rippling where it overlays the image if you have fussy-cut it.
With acetate, you can also cut a hole in a page and use a printed acetate image as a window, revealing what is on the following page. This is definitely something I am keen to try. Transparent pages or parts of pages make an intriguing addition to an album.
I am very much looking forward to using some of these transparencies in my current album project.