At last I have finished my embroidered felt slippers. This post is a complete account of the project from start to finish. Each stage has been covered in previous posts on this blog.
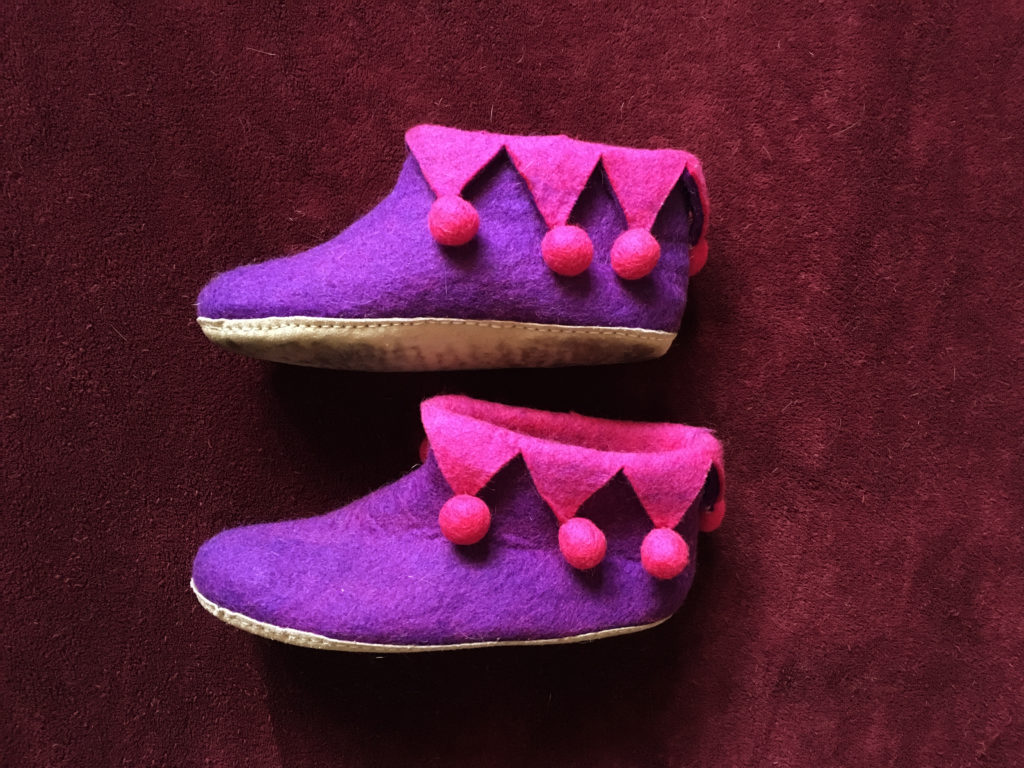
I bought these slippers in Totnes at the end of March. I fell in love with them and just had to have them! They seemed to be crying out for some embellishment, and I was keen to try my hand at some felt appliqué.
I began by cutting out some simple flower and leaf shapes from different coloured felt, using small paper patterns that I drew.
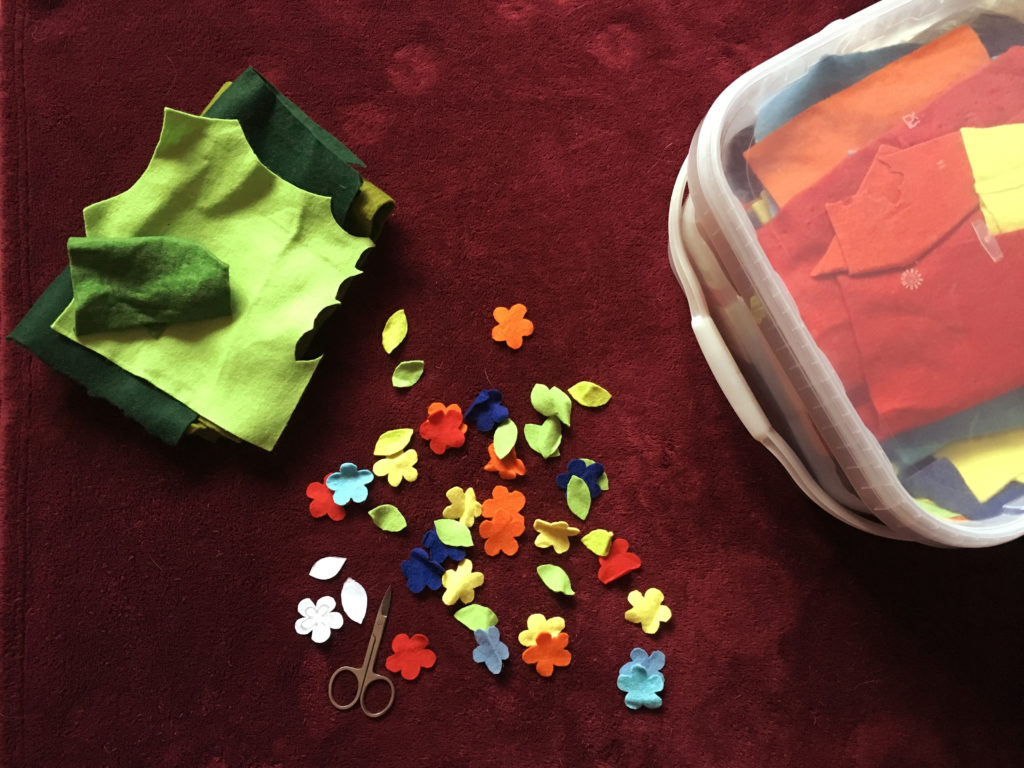
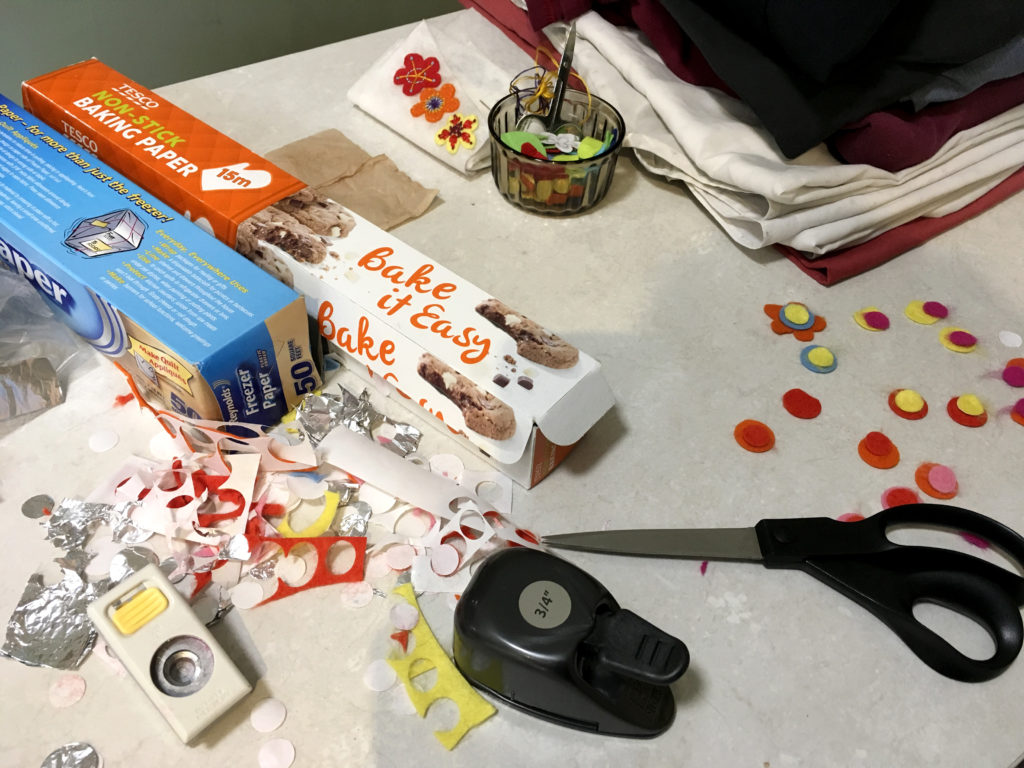
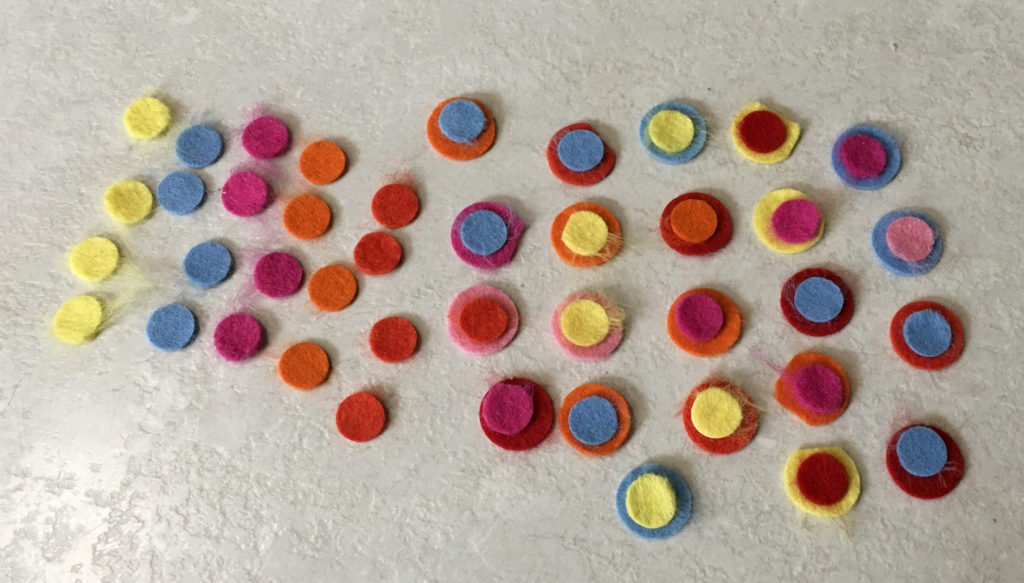
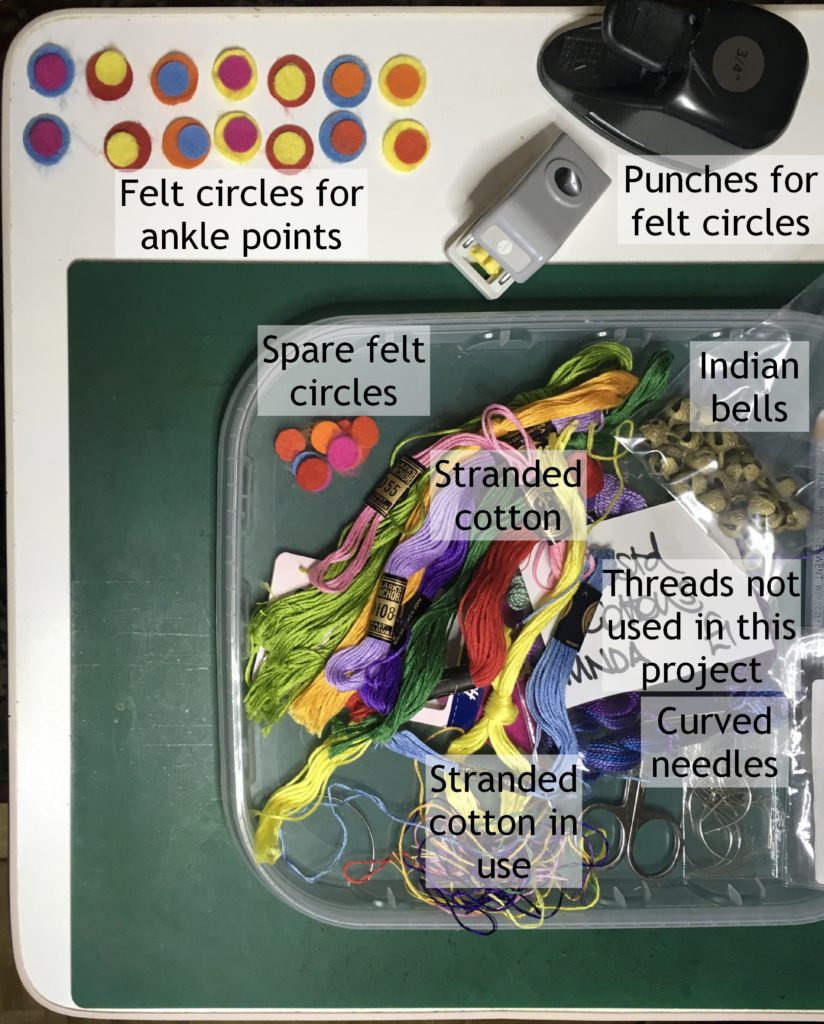
I also cut out a lot of small circles in two sizes for the flower centres, using punches. Having experienced problems in the past trying to cut fabric with a punch, which caused the punch to jam, this time I ironed on some freezer paper in order to stabilise the felt and give it some stiffness. Later, when I did some more, I found that all I needed to do was to sandwich a piece of felt between two pieces of scrap paper and it worked just fine. In the picture below, the kitchen foil was used to keep the punches nice and sharp – you can sharpen scissors and punches by cutting through a wadge of folded foil.
The circles cut out. I have paired up most of them, in colours that I wanted to combine together. Some of the circles came out a bit fluffy around the edges, but this was soon remedied with a pair of fine sharp scissors.
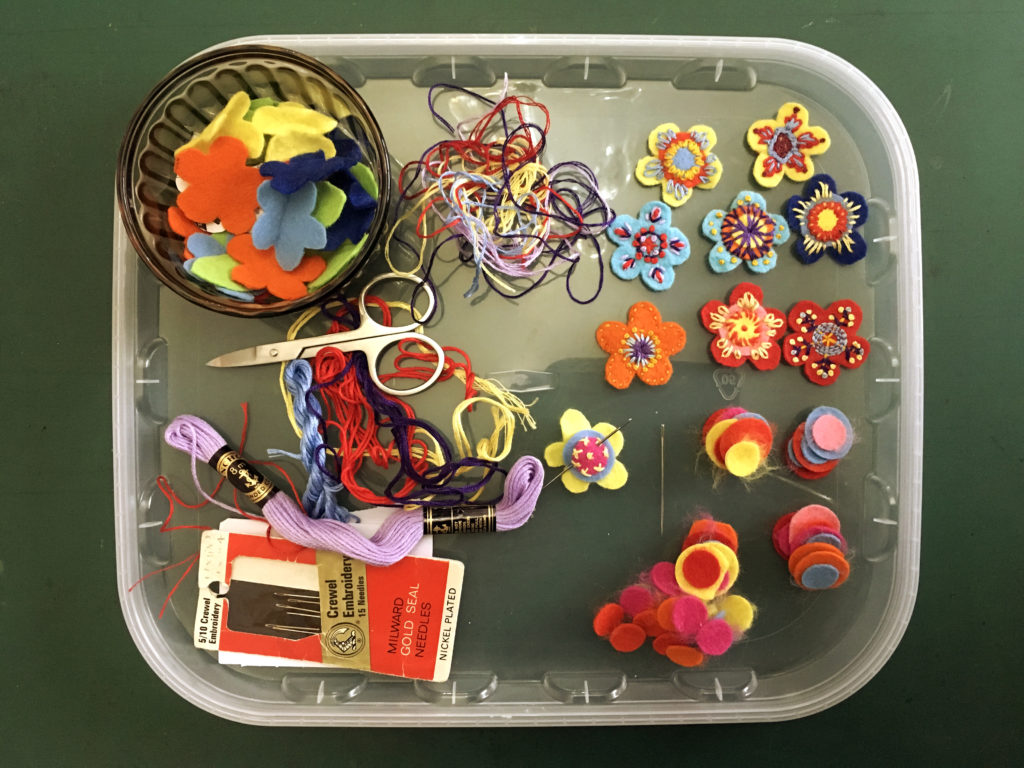
Beginning to sew the flowers. Most of them are two or three layers thick, with the layers joined with various embroidery stitches. I used three strands of stranded cotton throughout – I have a large quantity of this in many different colours, and I like the versatility of this thread. I kept all my bits and pieces on the lid of my felt storage box – it made an ideal tray!
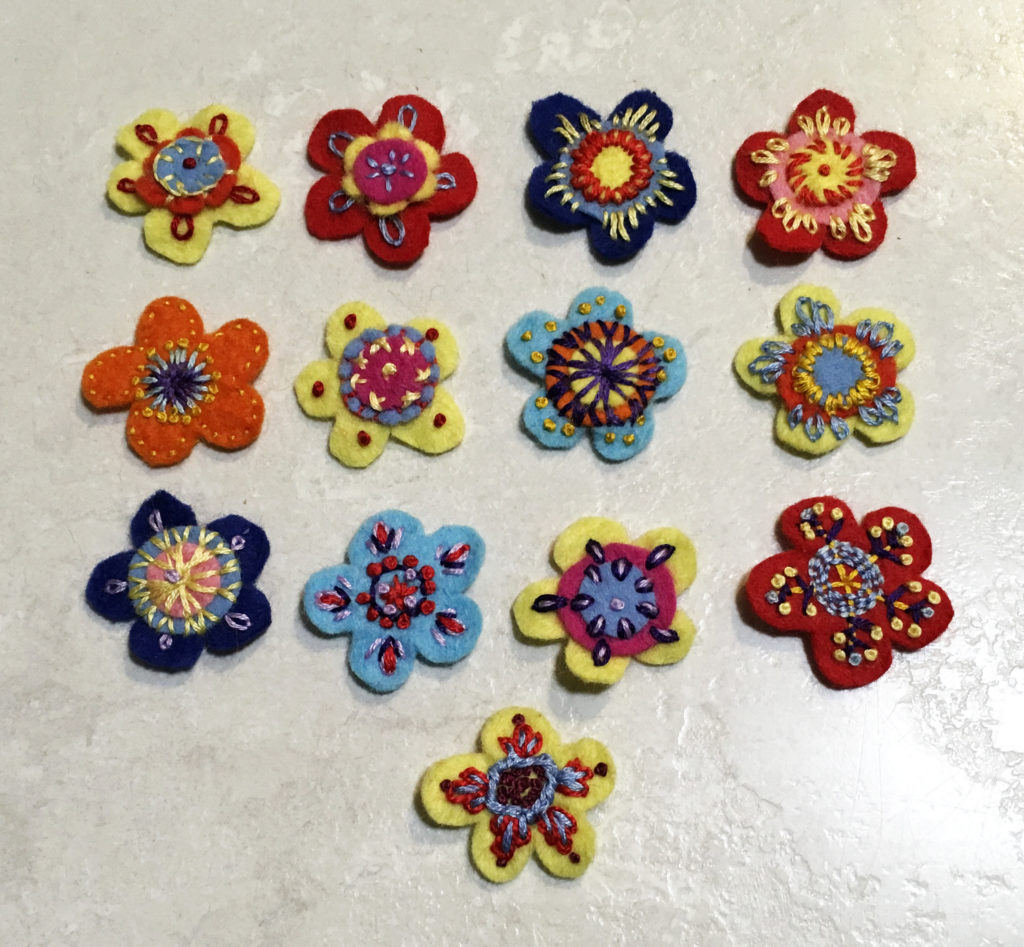
This is the first collection of flowers that I completed.
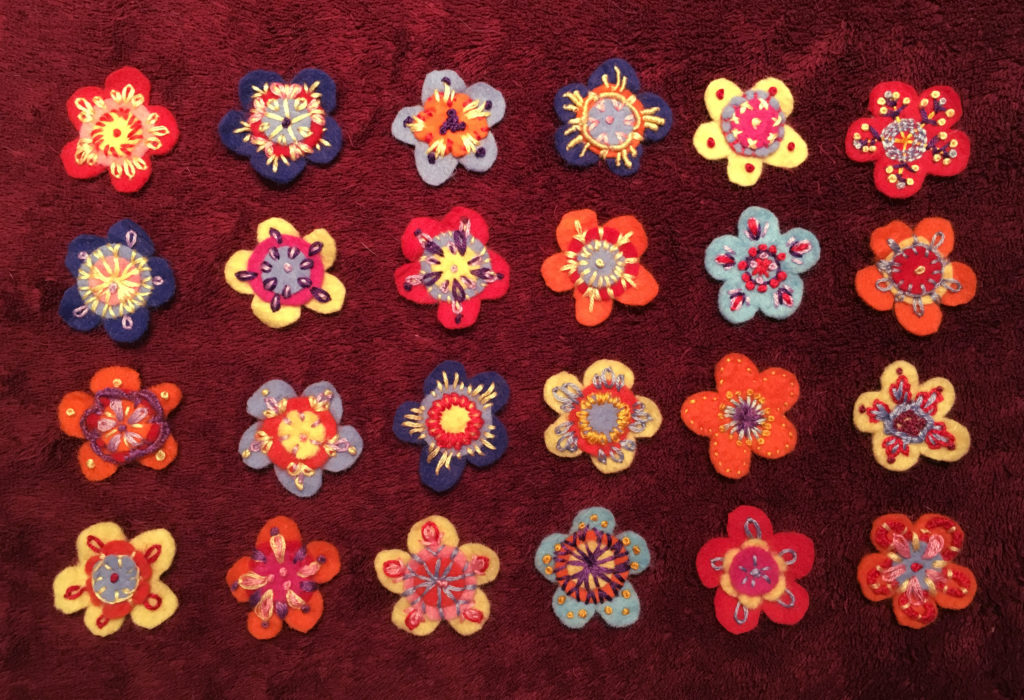
The complete set of flowers that I made. I don’t think there are any repeats – they are all different!
The flowers and leaves being pinned onto the slippers. This way, I could play around with the arrangement and get them where I wanted.
All the flowers stitched into place on the slippers. I had to use a curved needle from now on, because it was impossible to access the back of the work. All the embroidery had to be done from the front, and the slippers were not flexible enough to be able to use a straight needle. The felt is quite thick and robust. This proved to be quite difficult to begin with, but I soon remembered my skill with a curved needle, learnt while I was a member of the Westcountry Embroiderers many years ago, when I was making boxes and other 3-D pieces.
It was now May of this year, when I began to embroider the flowers on the slippers. I extended their outlines with different stitches, which made them come together more cohesively and soften their edges as well.
Not much progress was made during June, because I was busy with other things.
During the next three months I didn’t touch them. There was a lot going on, and I was very busy with new experimental cooking amongst other things, but at the end of September I thought I really should get back onto this project, if they were ever going to be finished in time to wear when the weather got cold.
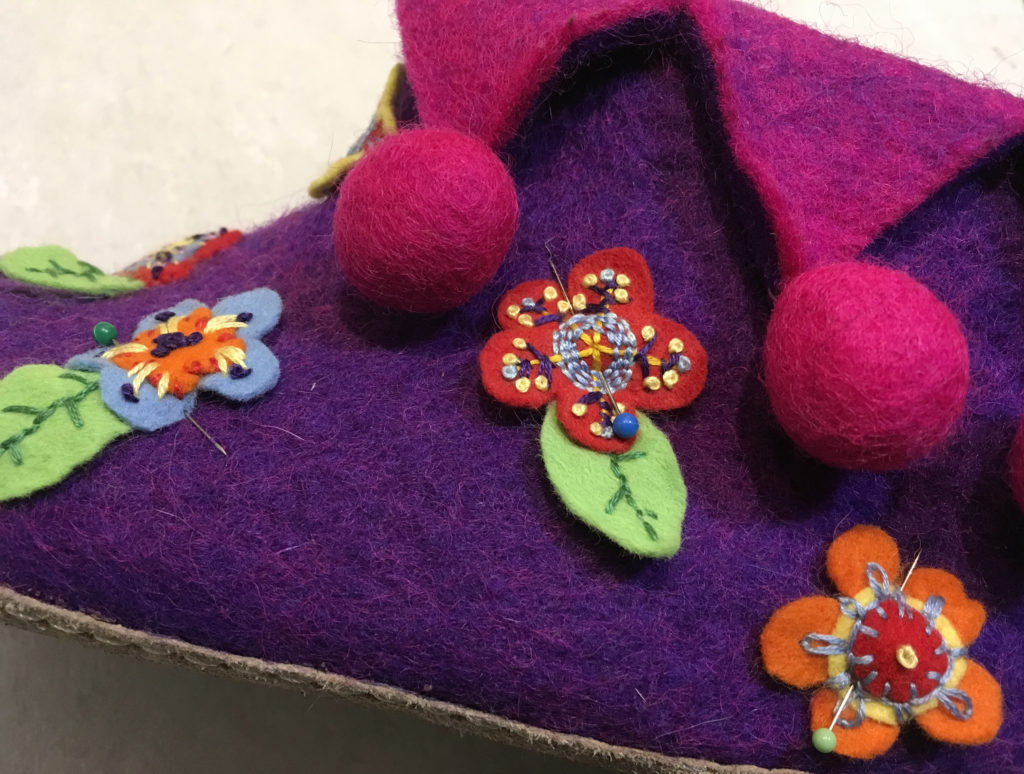
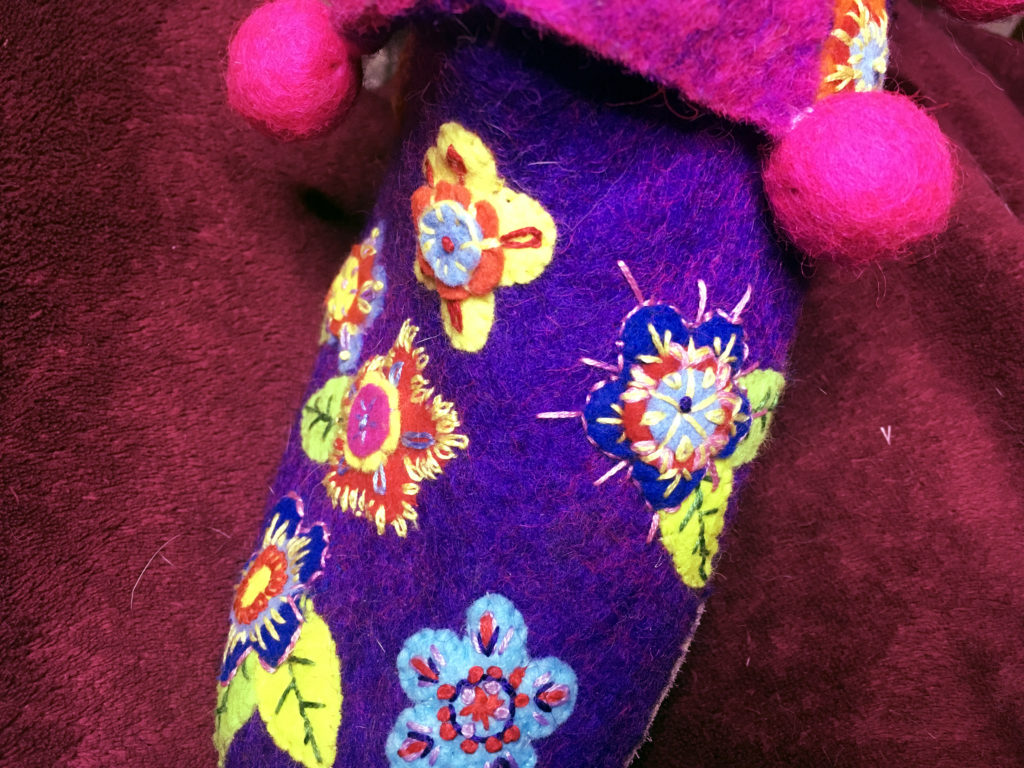
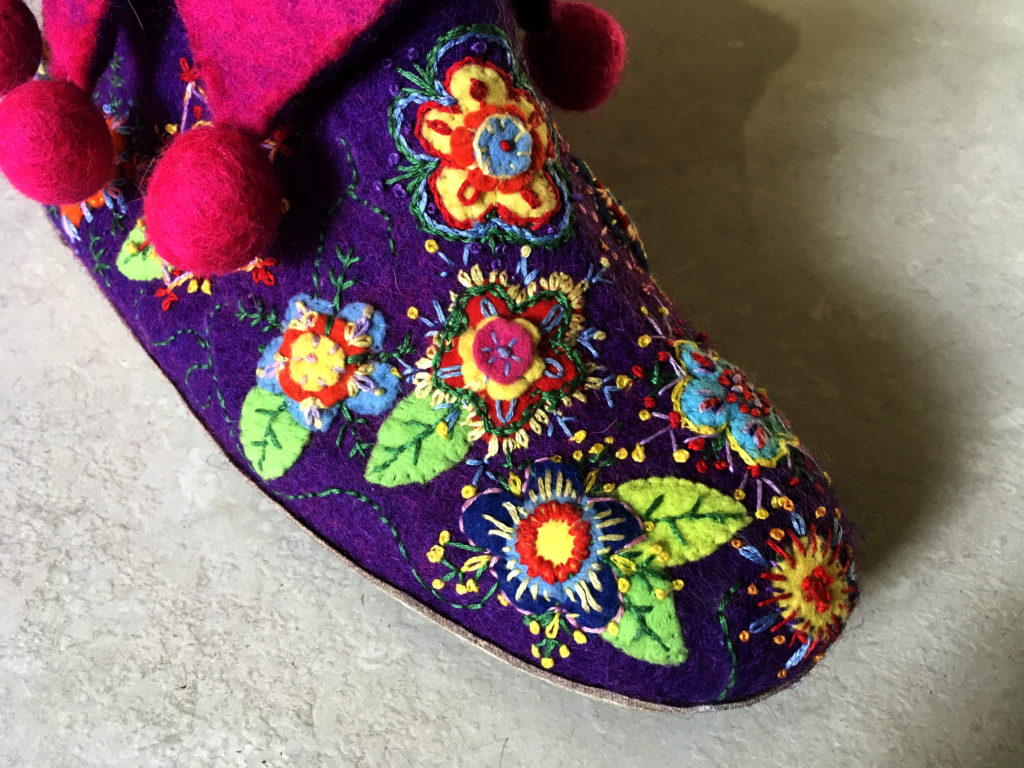
This photo shows the flowers on the first slipper almost complete.
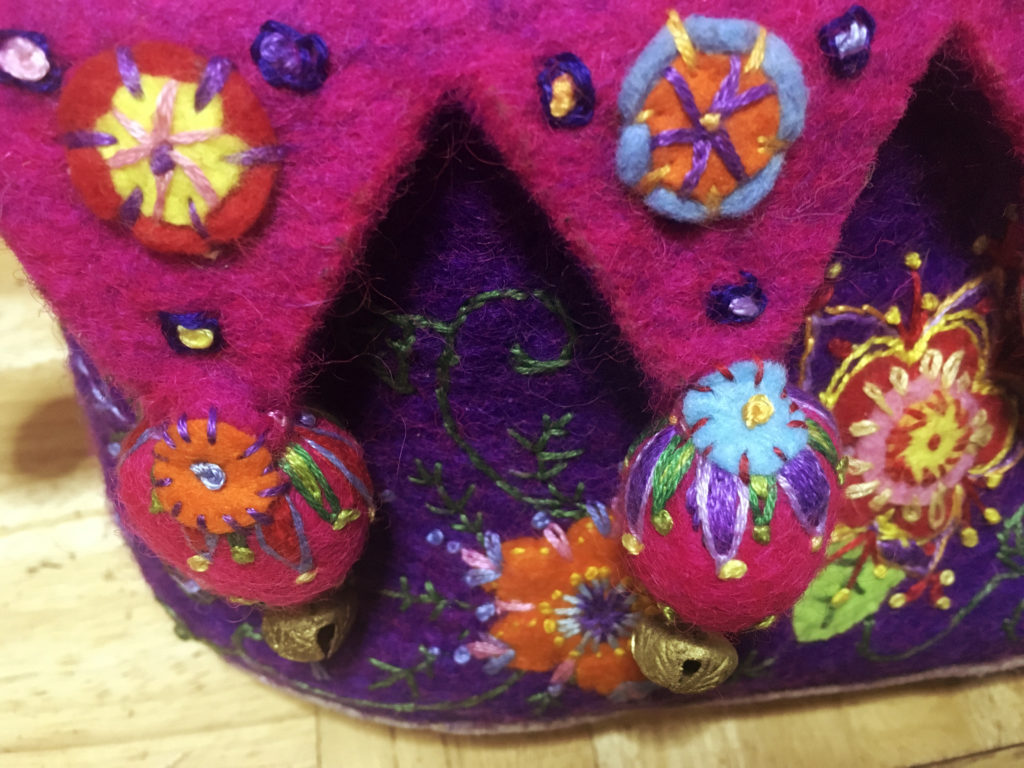
A couple of close-up shots.
This month, I positively steamed ahead, determined to get the project finished. Here is slipper 1, with the flowers complete, and some trailing stems added, to link them together. I did these in back stitch and wasn’t 100 percent happy with them…
Beginning work on slipper 2.
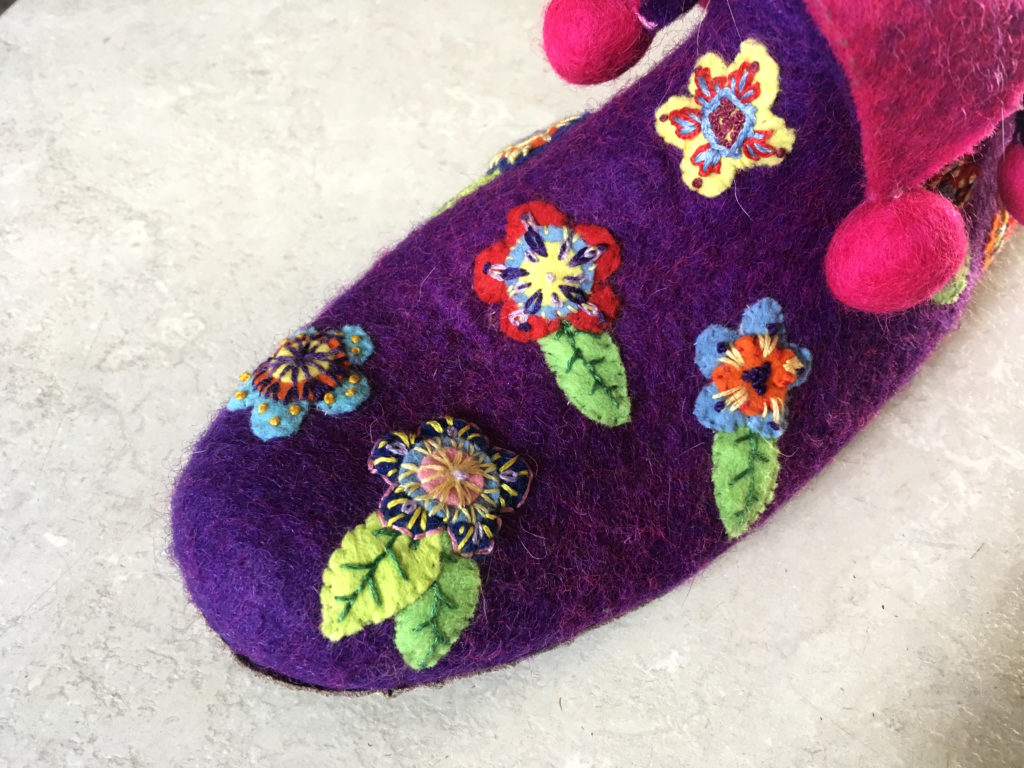
The two slippers together at this stage, showing work in progress.
Rapid progress being made. The colour of this next photo is a bit odd – artificial light, and I didn’t edit it very well…
I emphasised the stems I’d embroidered on slipper 1, by going over the back stitch with stem stitch. It was a bit uneven and lumpy, but a definite improvement.
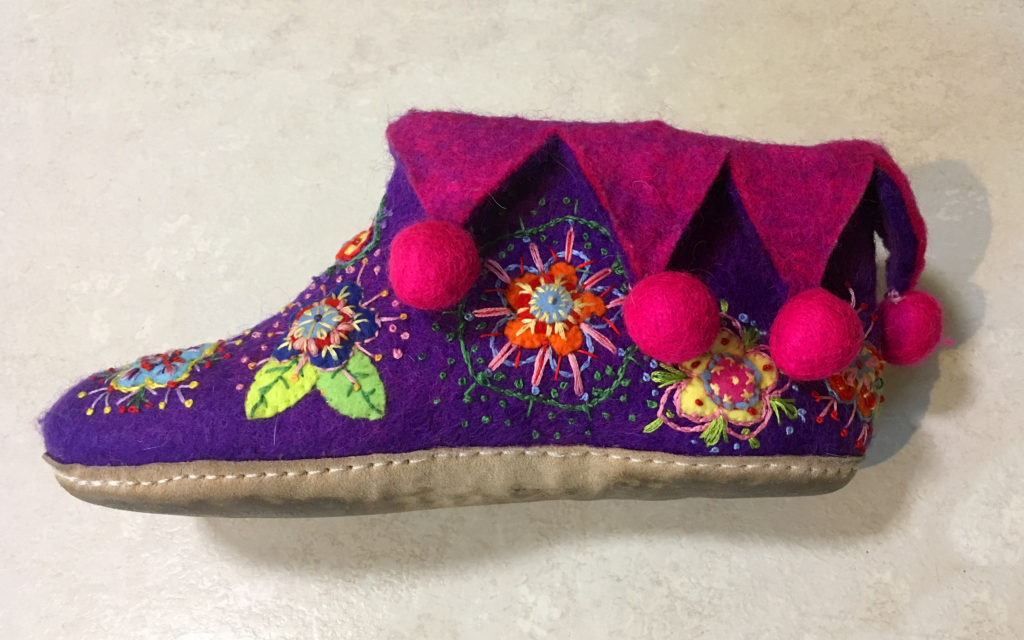
After this, I forged ahead so rapidly that I didn’t stop to photograph the different stages. The remaining work involved embellishing the ankle points. These were the materials I used.
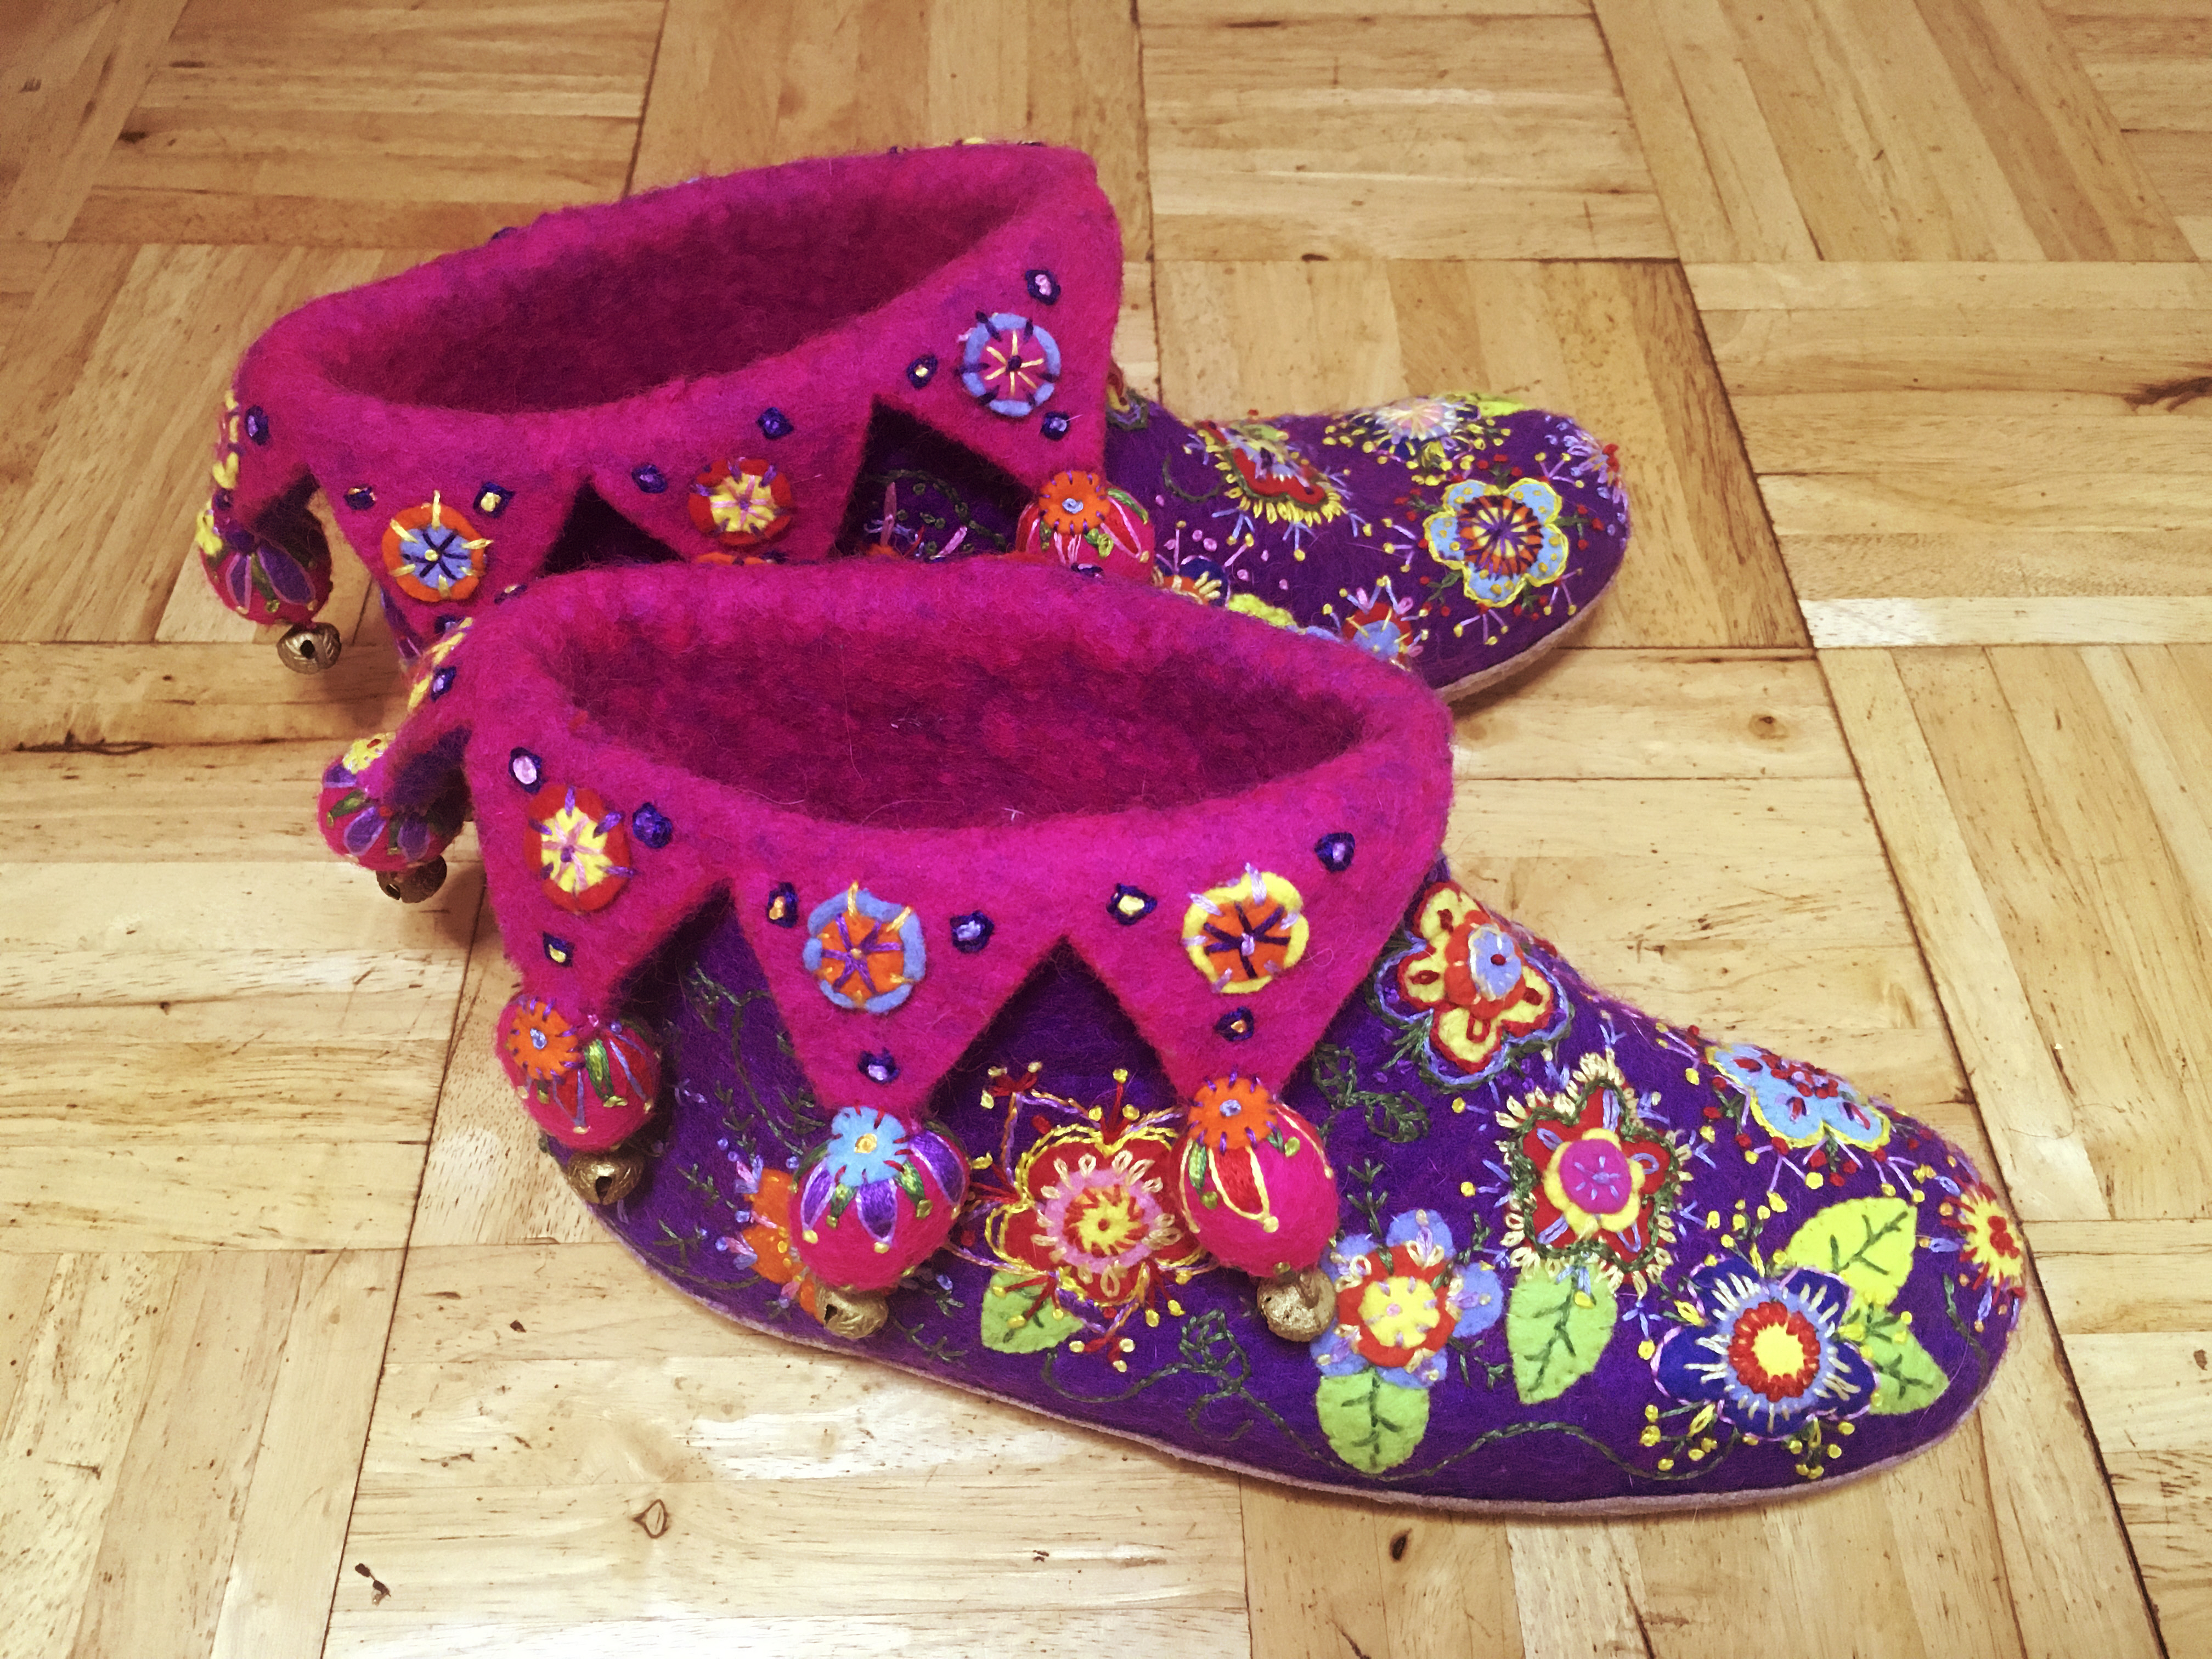
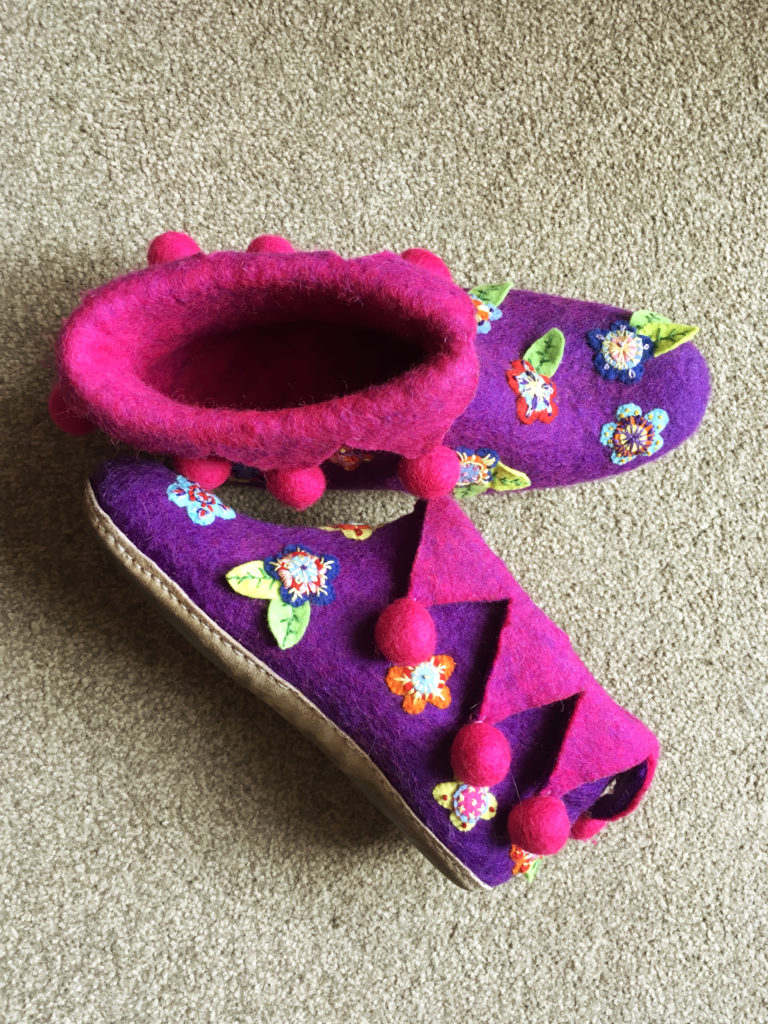
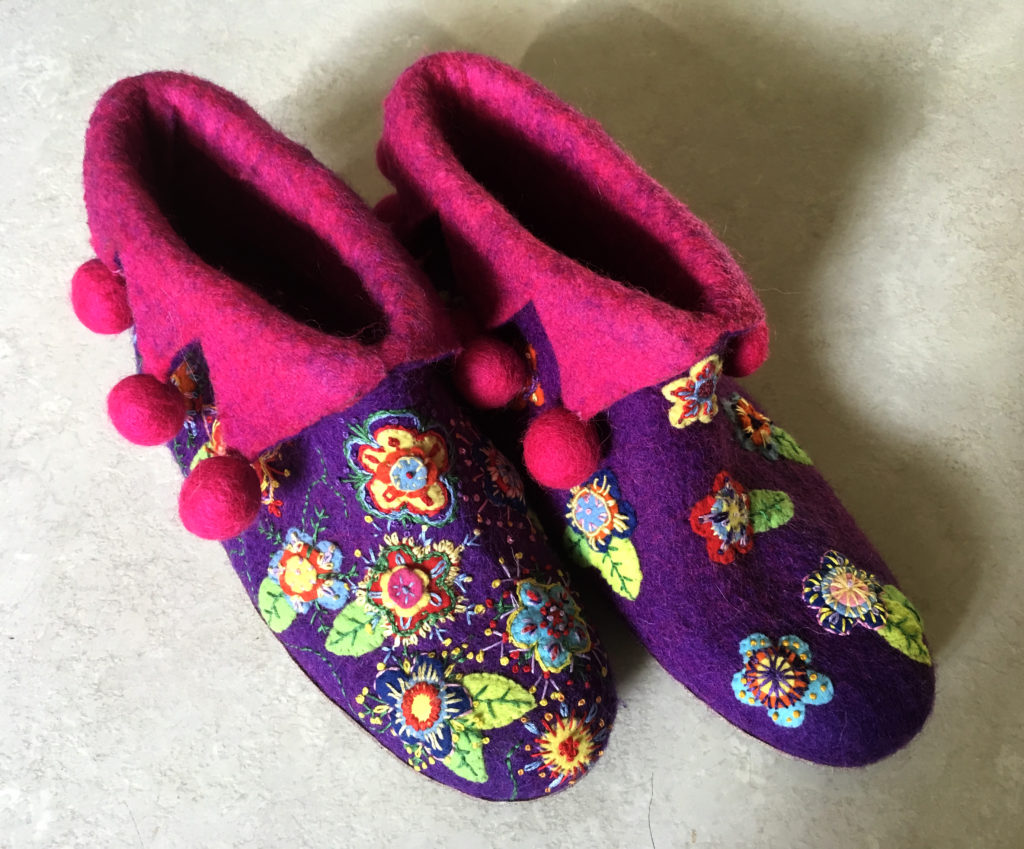
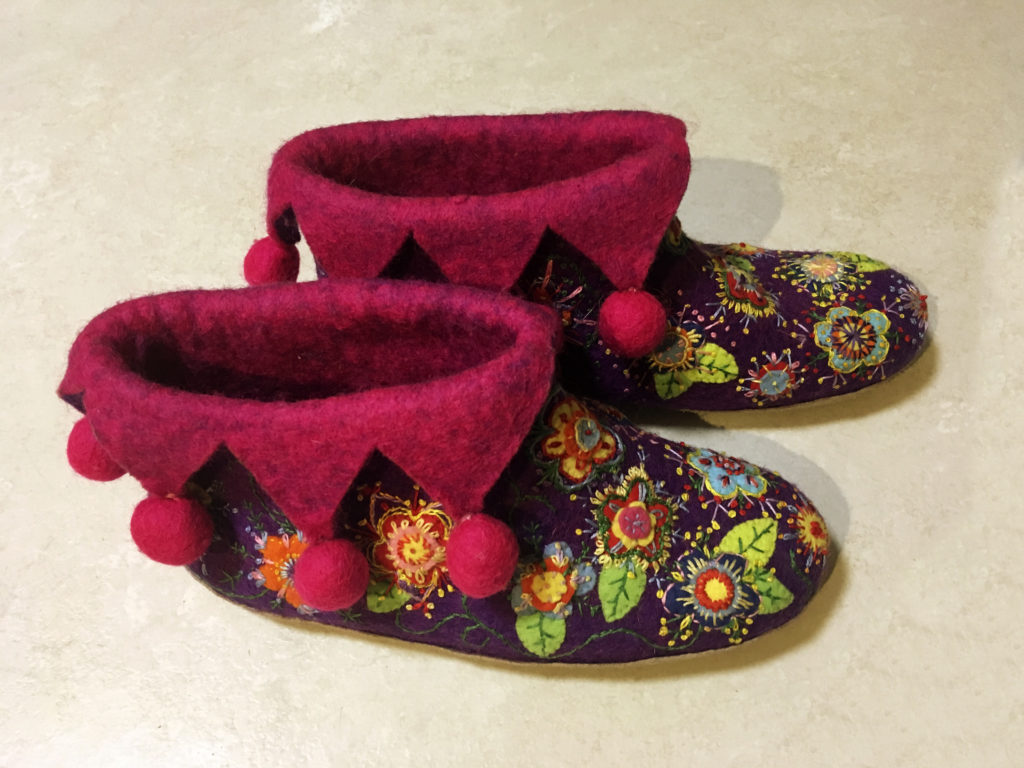
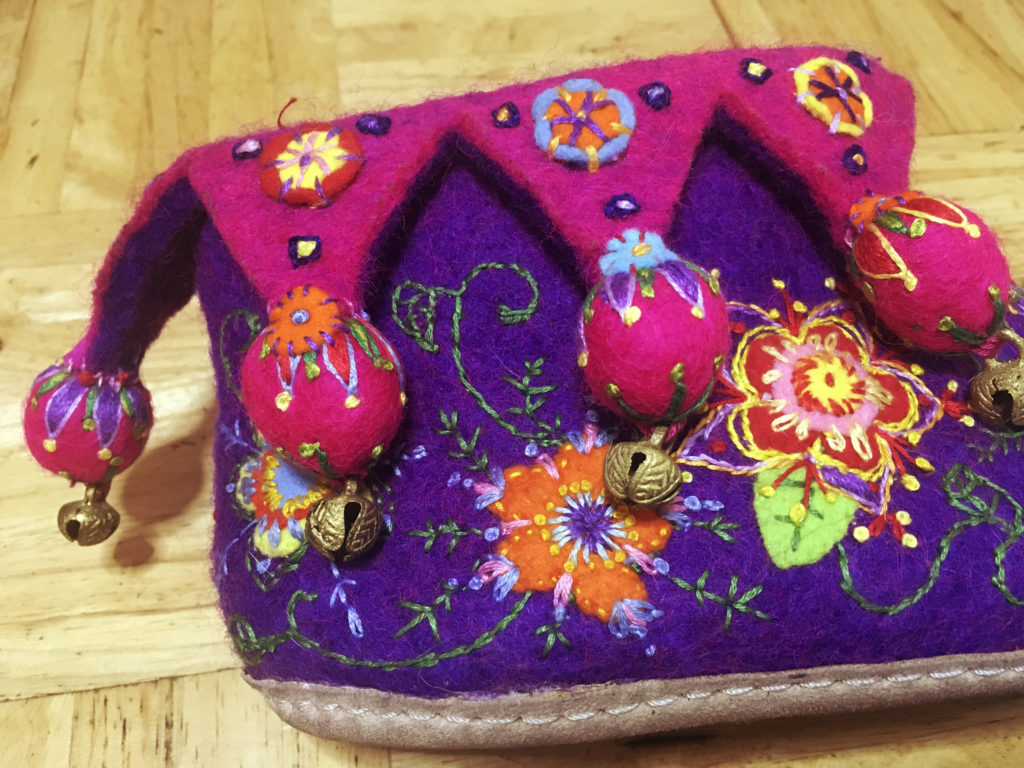
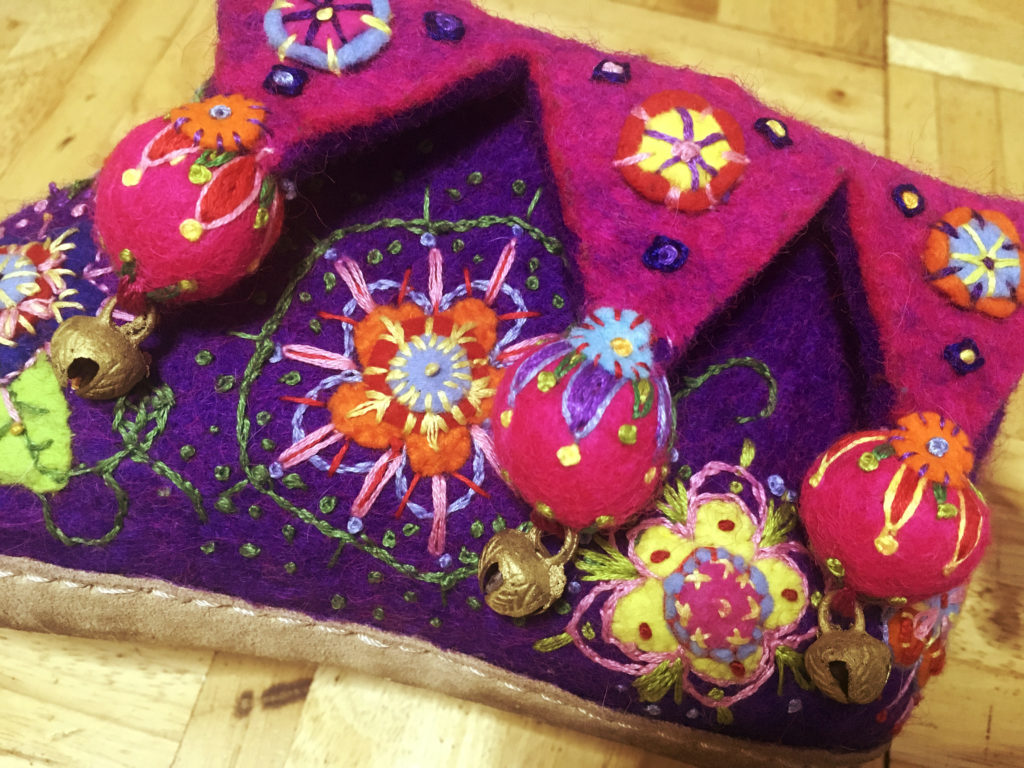
Here are the slippers with the embroidery complete.
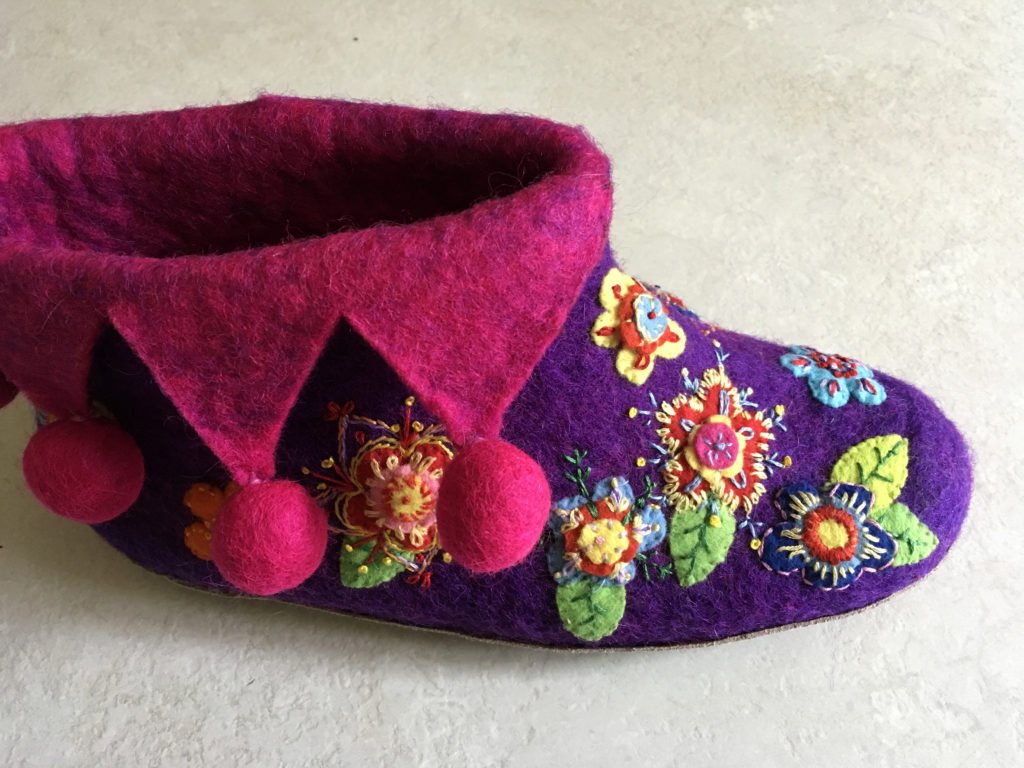
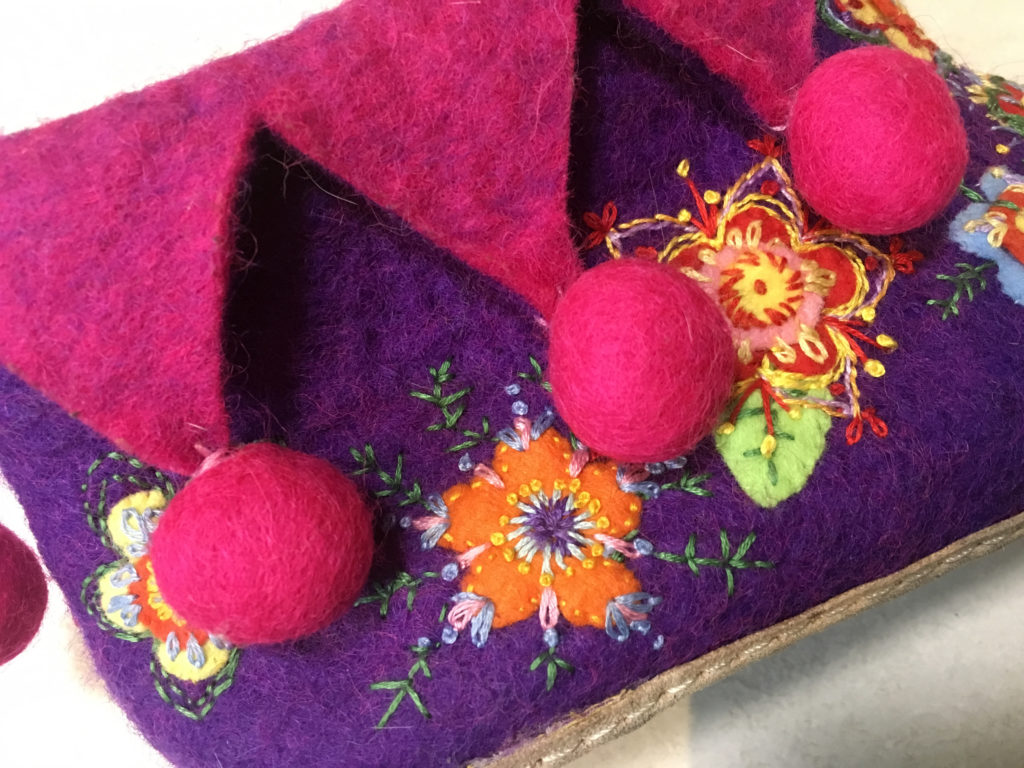
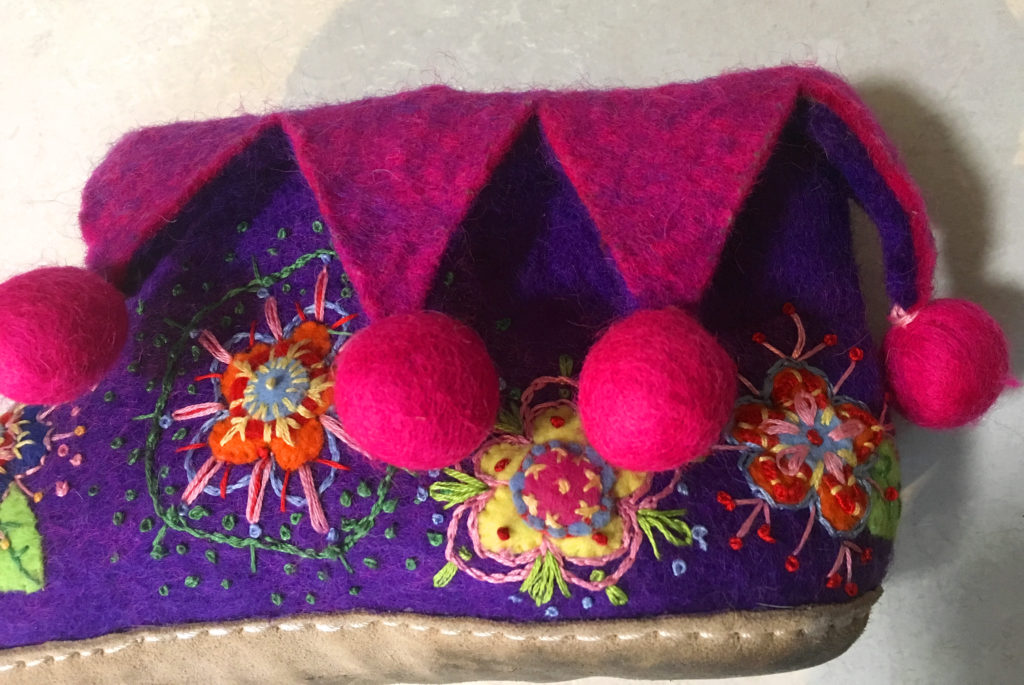
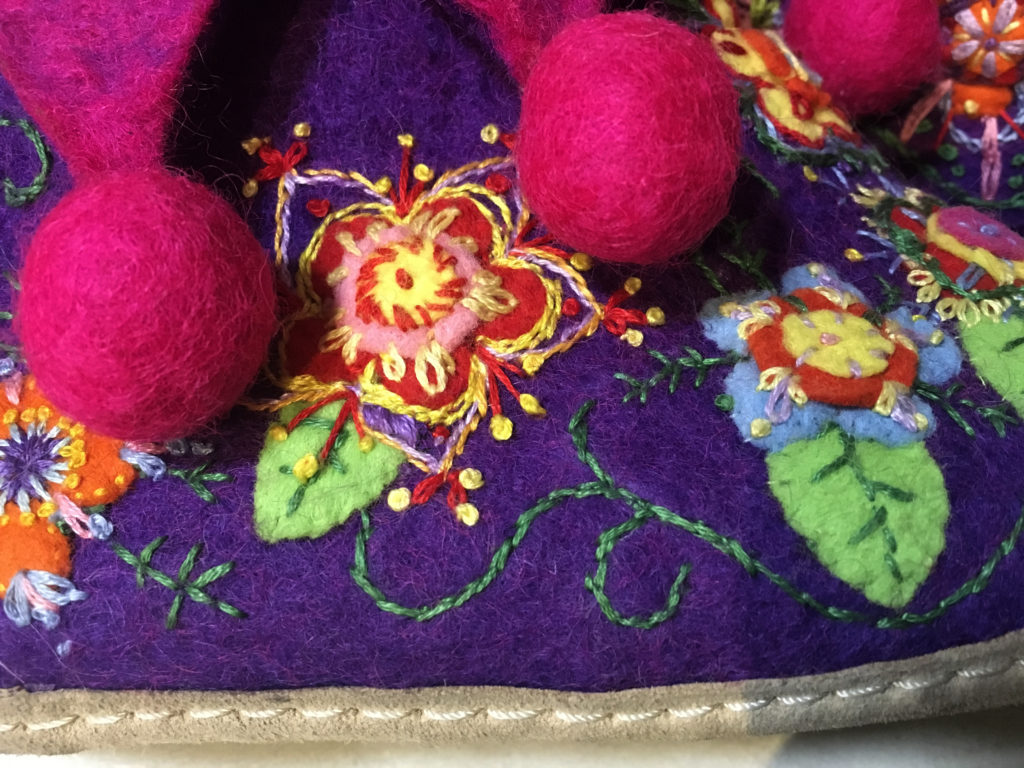
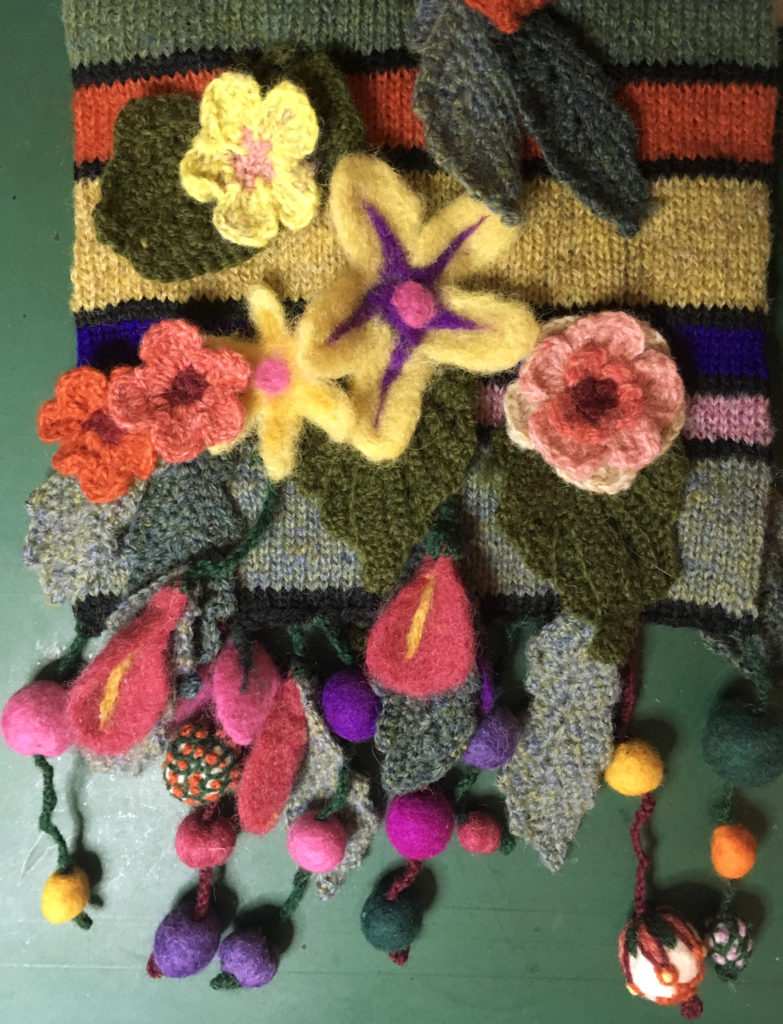
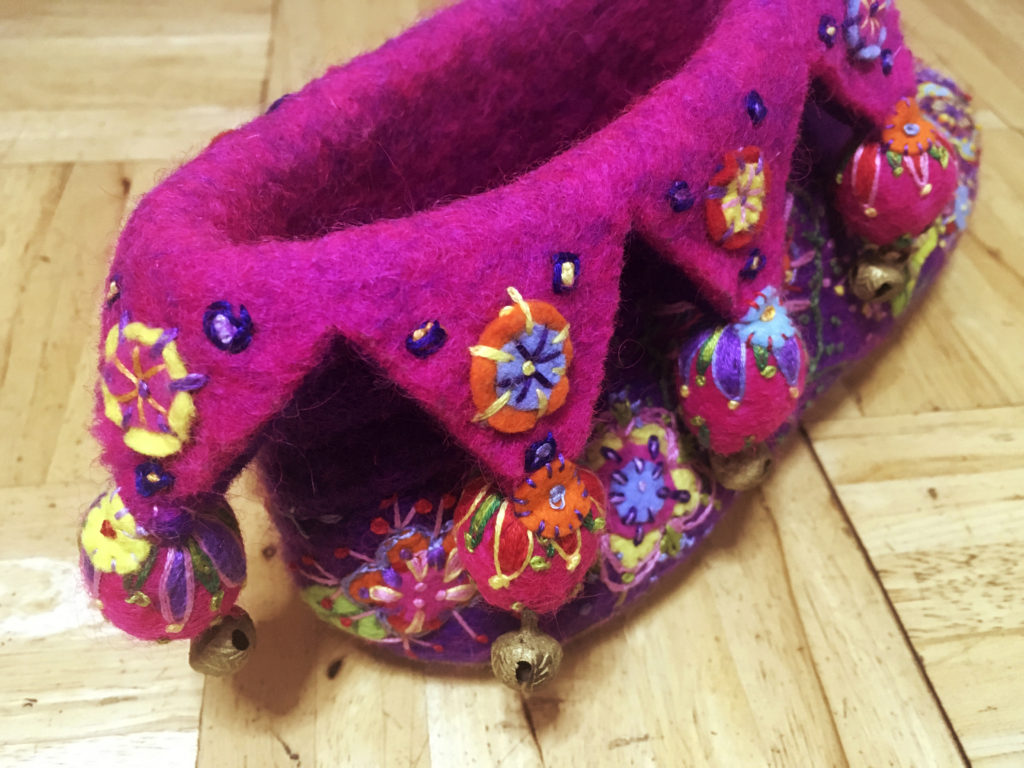
I cut more circles to go on the ankle points, and surrounding each one, I added a triangle of French knots. However, with three strands of stranded cotton, these looked too small and insignificant, so I went over them again with the full 6 strands, which was better, but of course they came out rather uneven. Needing a better finish, I outlined each one with small chain stitches in the dark blue thread, and I was pleased with the end result. Keeping the outline colour the same added cohesion to the design. I also added embroidery to the felt baubles on the end of each point, top and bottom, and was super-pleased with the result! I love this effect. I did something like it on my multi-coloured scarf.
I then encountered a problem, which was why I did not manage to complete the slippers in time for last week’s WOYWW, which I didn’t join in with. I realised that with all the handling of the baubles, twisting them around in order to cover them with embroidery, I had stretched the felt at the point of each triangle where it joined the bauble.

The points had become misshapen and rather fluffy. I thought I might be able to remedy this by needle-felting the points back into shape, but this didn’t work at all, and all I succeeded in doing was spearing myself a couple of times with the felting needle – ouch!!! – NOT to be recommended, I can tell you! I was getting a bit desperate at this point, and tried needle felting some additional felt onto the points; I had a fairly close match in colour but it wasn’t great, and it just looked thicker and lumpy, so I abandoned that idea altogether.
I decided the only answer was to stitch the baubles more firmly onto the points. By doing this, the actual point on the end of the triangle was lost, but the result was a much more stable finish and it felt a lot stronger, and I was pleased with the result.

Thinking about it overnight, I realised that the finish wasn’t that great, with the stitches showing, so I cut some more small felt circles and added them over the place where the bauble was joined to the point, and secured them with a French knot in the centre, and some stitches around the edges. This result was great, and gave the ankle flaps a better finish altogether, in my opinion – they looked more complete.

In this close-up you can see in more detail what I mean. You will also see that I have added some little bells to each of the baubles!
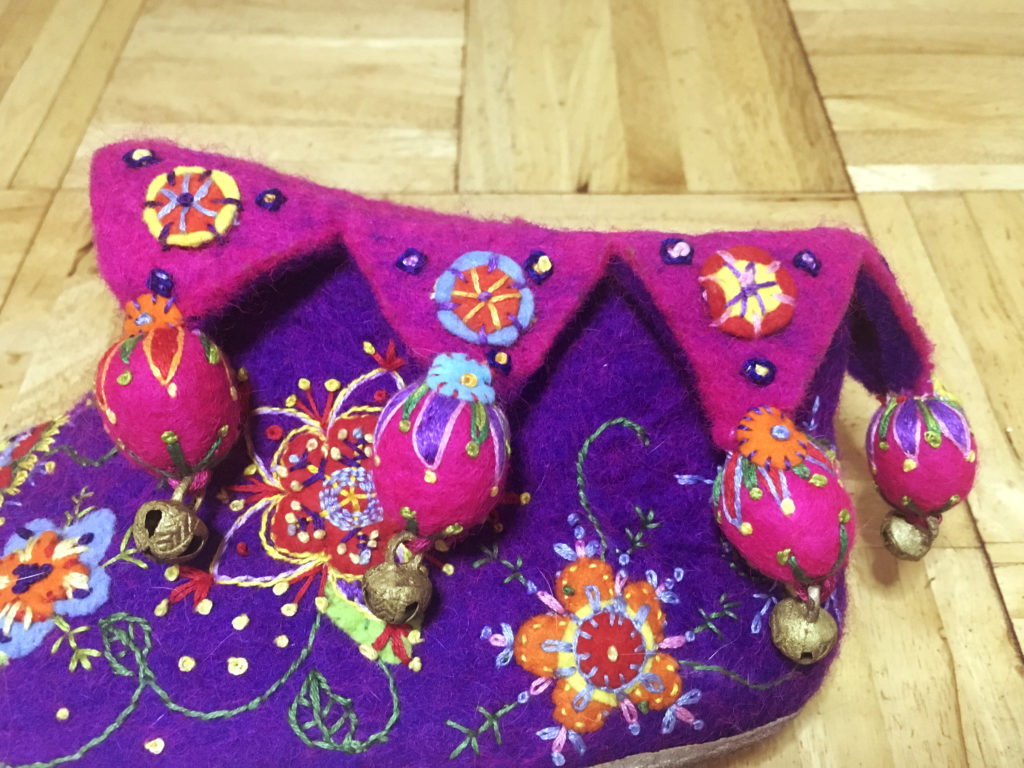
I have had a small pack of these little brass bells in my stash for years. I can’t remember where I got them, but they are Indian in origin, and make a sweet tinkling sound.
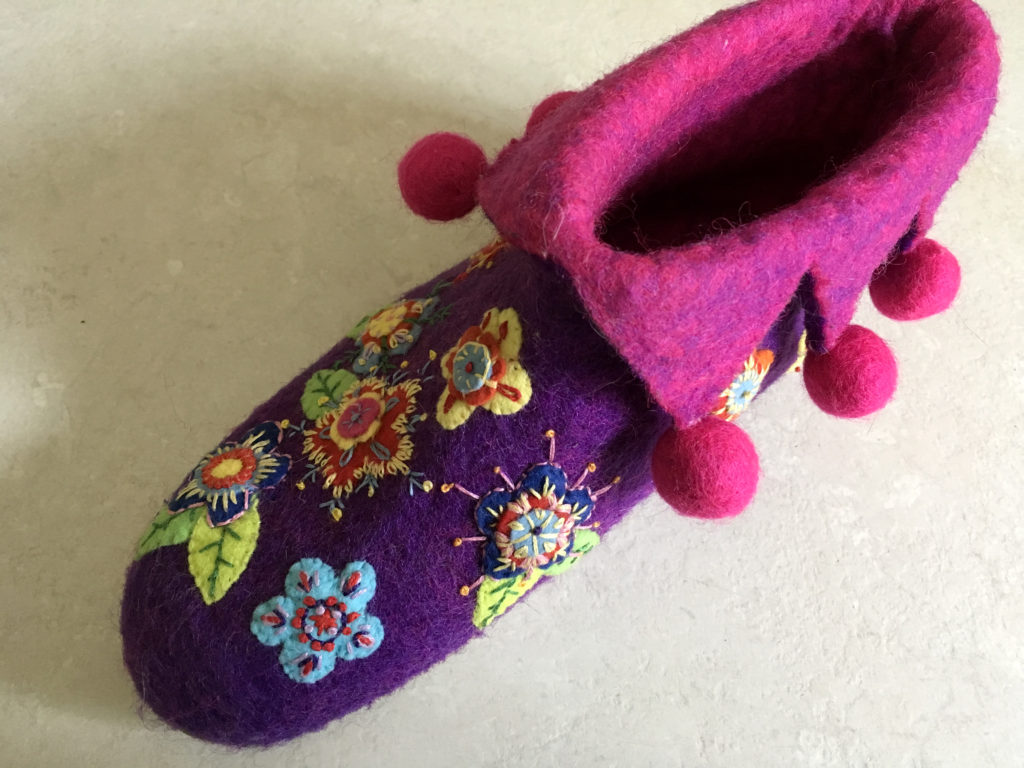
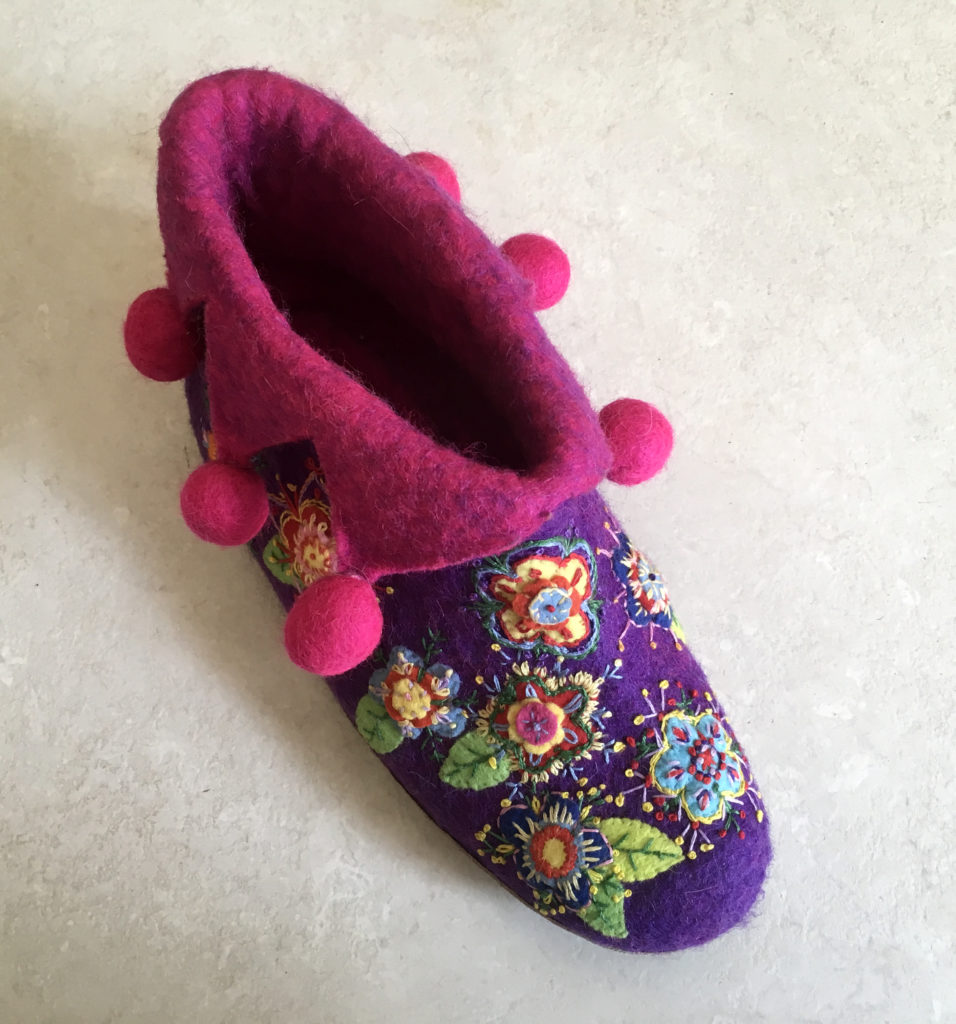
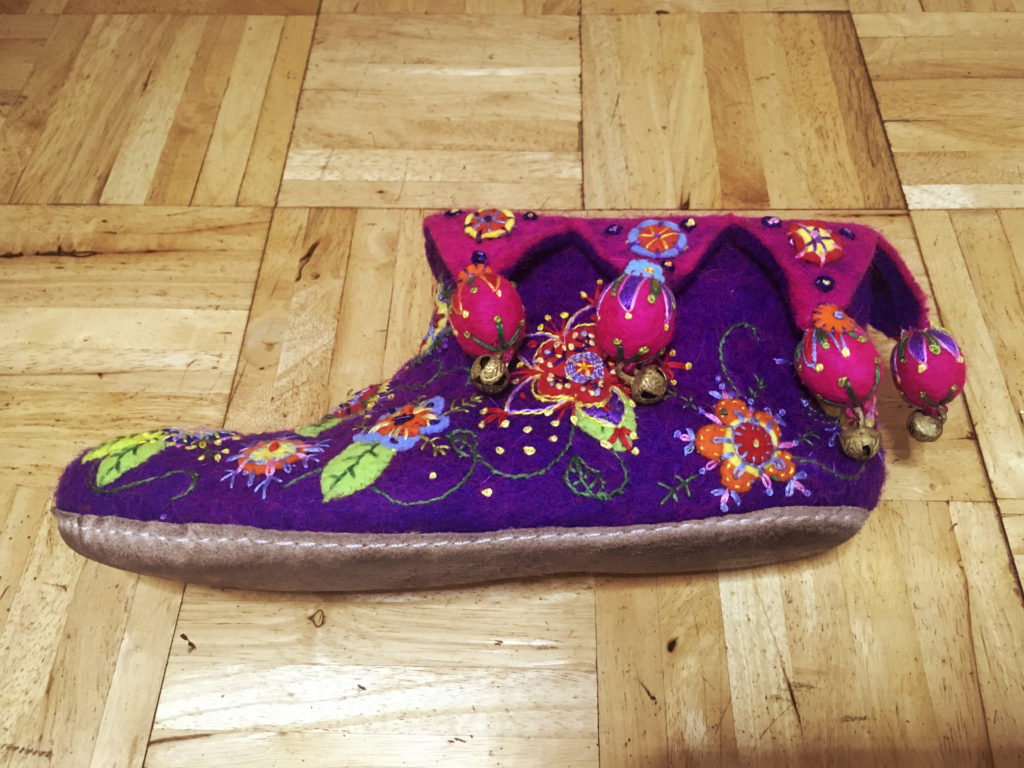
The completed slippers. In this photo you can see that they aren’t actually the same size! I hadn’t noticed that before. They don’t feel different when they are on. I suppose this is what you get with hand-made things!
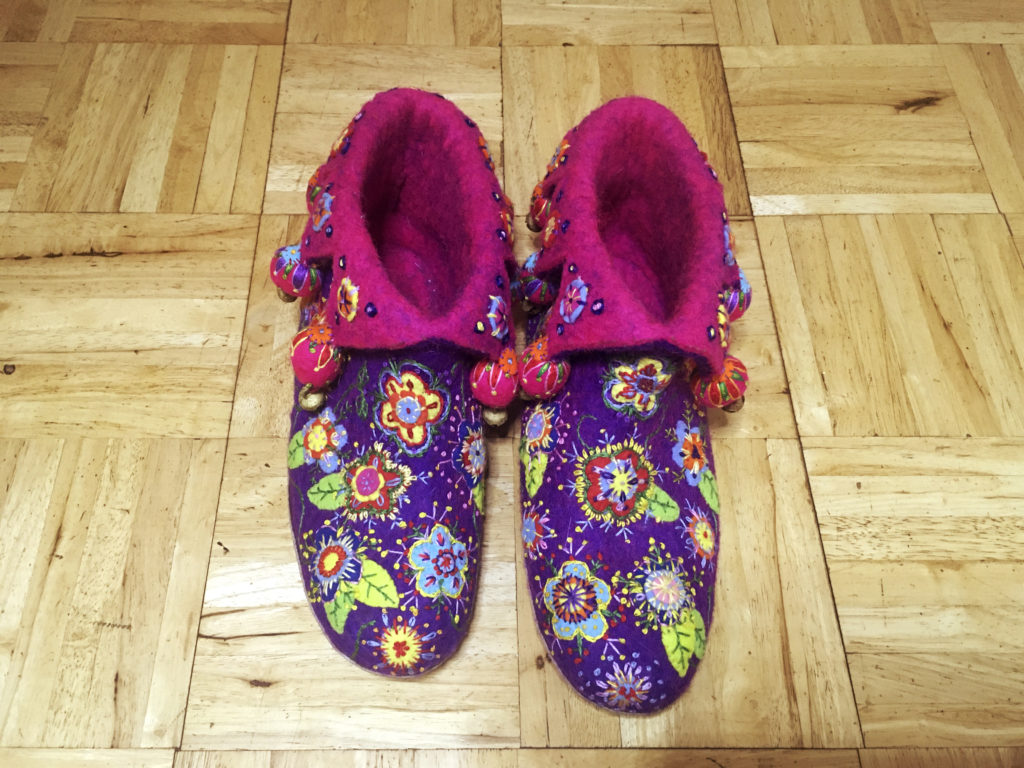
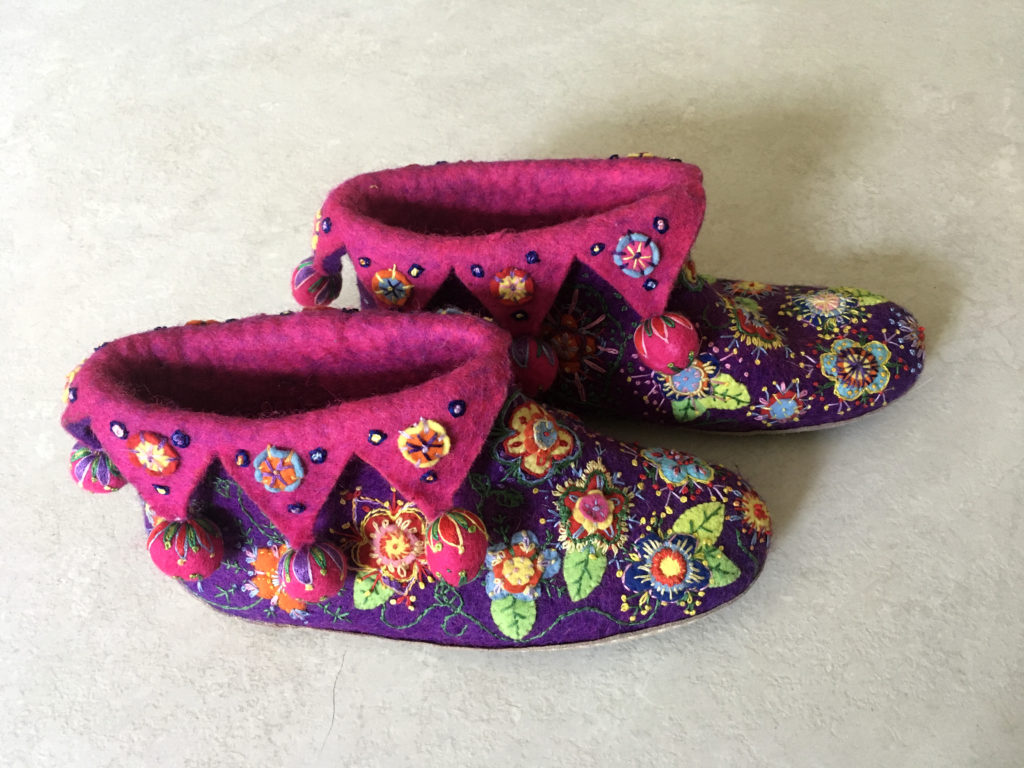
Some more photos of the finished project.
On my feet!

I have made a video slideshow of this project. At the end is a short video clip where you can hear the sound that the little bells make.
Altogether a very satisfactory project! If the shop where I bought the slippers had not closed down, I would like to have taken them back to show them what I’d done with them!
You have made my day! No – my week! I have waited so long for these slippers to be finished and now they are and I love them. What a lot of work has gone into them but how worthwhile. I love how you overcome the problem with the points, the little felt circles that you added at the end look as if they were meant to be and simply add to the overall look.
What a project – what a huge success – congratulations and thank you for sharing. They truly are beautiful.
Hugs, Neet 7 xx
What beautiful results and worth all your time to jazz them up, I love them.