MIXED MEDIA PROJECT FOR MARGARET, AND COLLAGE PAPERS
Last night I began work on the mixed media project I am making for our neighbour Margaret, who has kindly given me another batch of her crafting materials.
Mixed media hanging panel
I’m not really sure what to call this! I haven’t made anything like it before.
Yesterday evening I began work on the project, which is going to be made entirely from things that she has given me, apart from some paints and inks. I decided to make the base panel from layered Christmas cards.
By the way, the grey mat is a new acquisition! It is a large silicone mat designed for cake icing, but I thought it would make an ideal working surface on my pull-out unit; I have been using large pieces of scrap paper for glueing onto, and they get progressively more sticky until they start affecting the piece I am working on. This mat wipes completely clean with a damp cloth, so it is ideal. It also has inch and centimetre measurements and concentric circles which might well come in useful.
Anyway, back to the base of my project. I chose the largest cards in the pack, and had to be careful not to line up the fold, which would make the board weak at that point. I trimmed some other cards to fill in the gaps, and glued all the layers together (3 or 4 – can’t remember exactly) with PVA adhesive, spread on with a plastic credit card.
To prevent the board warping, I folded the other half of the silicone mat over the top of it, and put some heavy books on top and left it overnight to dry.
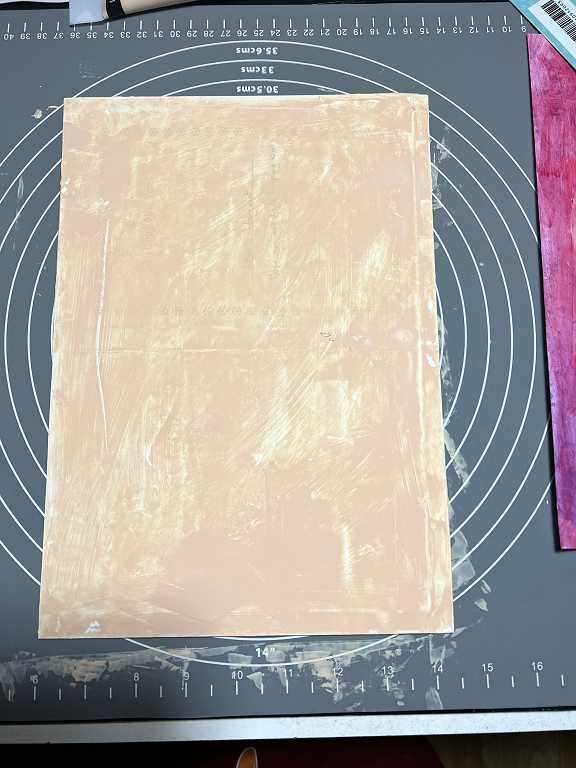
Today I began work on the panel, firstly by spreading a coat of gesso onto it with the credit card. Some of the printing showed through a little but this would soon disappear with subsequent layers.
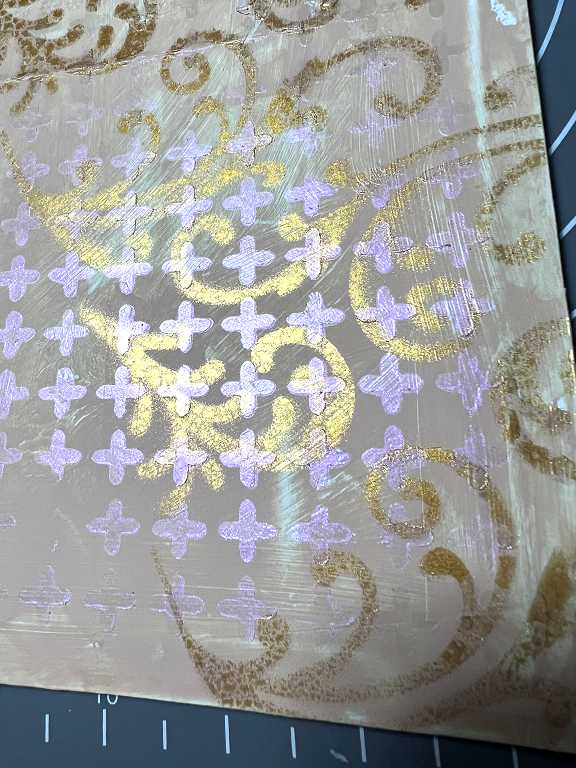
Once the gesso was dry, I applied a layer of Windsor and Newton Portrait Pink acrylic paint – I love this pink colour which isn’t a sugary sweet girlie pink but more of a flesh tone. I again used the credit card for this. The finish wasn’t perfect, but that was the effect I wanted.
I chose my Gothic Small Pointed Cross stencil and used a make-up sponge to apply some Arteza Playful Pink, which is a gorgeous pearly iridescent pink of a much more pretty-girlie shade!
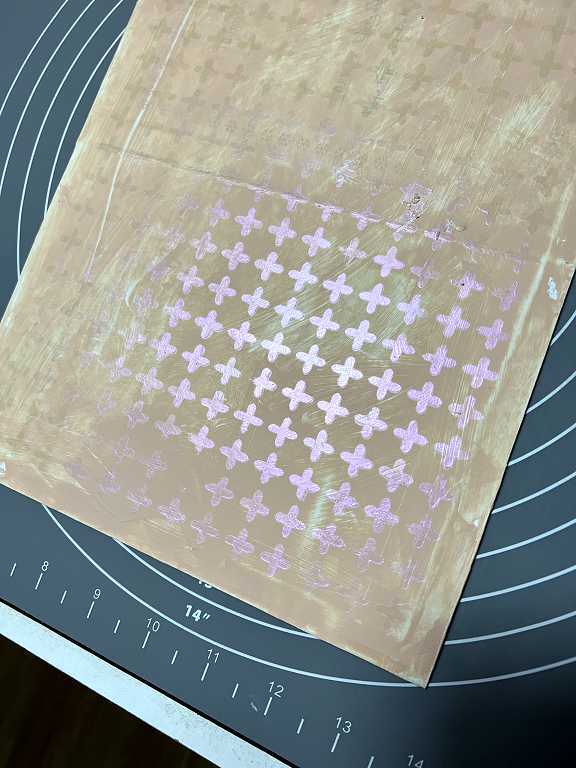
The effect is very subtle, as I didn’t want the background to be overwhelming. The Playful Pink catches the light very nicely.
I then added some further stencilling, this time using my large swirl stencil which wasn’t designed to be a stencil. It was the negative space left from cutting several swirls on the cutting machine, years ago, for a project I was working on. One day I must cut this again, using a more durable material, because the cardstock is rather fragile. As I use it as a stencil, however, I am hoping that successive layers of acrylic paint will make it stronger.
This time, I used Seth Apter’s Goldmine Izink spray, which again catches the light, and gives a subtle effect against the pink.

This is as far as I have got for now. I am plannning the layout and what bits and pieces to include.
Collage papers and elements
I went shopping in Marks and Spencer’s yesterday afternoon, and wandering around upstairs, came across a rack with swatches of their furnishing fabric. I asked an assistant whether these were free, and she said yes, and suggested I helped myself! I took her at her word, and made this selection. These little fabric fragments have a variety of different textures and some are very soft and velvety. They will make interesting additions to collages, and I also love the subtle neutral colours.
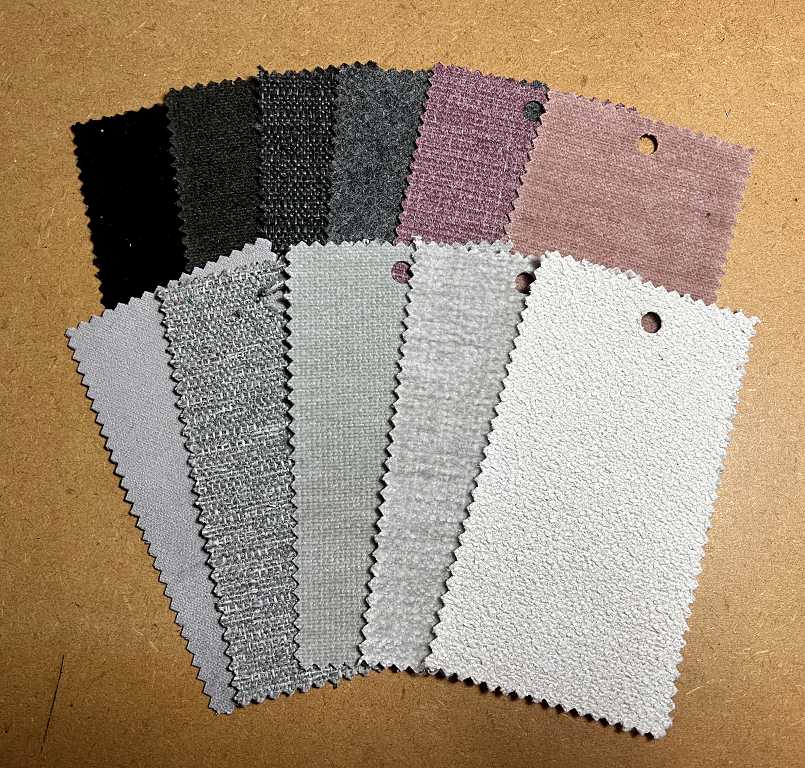
Our neighbour Margaret has also given me some scraps of fabric, including two squares of patchwork which were obviously intended to be made up into a cushion cover. These mostly triangular pieces are of the sort of fabric I love – batiks and hand-dyed, and separated by bands of black fabric. I think the two strips that came in the bag of goodies were left over from this. I didn’t like the design of the patchwork very much, so I unpicked it all – it does seem a shame in a way, because a lot of work had obviously gone into it, but I wouldn’t have been able to use it in that form, and taken apart it had more potential for me.
In this photo yu can see the fabric pieces and the black strips, and also the pieces of interfacing used to back the pieces. Some of this was too damaged by my unpicking to be any use, but I am going to try inking some of it. I rather like the fact that there are construction lines drawn on it. All these pieces are laid on top of a piece of red paper which looks to be hand-made paper, which will definitely be useful for me.

Grotty scrapbooking paper with a facelift
Many years ago when I began papercrafting, I bought a lot of stuff to get me started, including a pack of 12 x 12 inch scrapbooking paper, most of which I didn’t really like! It sat in the drawer for years, and I did use a bit of it on occasion. When Mum died, I made an album about her life, and a box to keep it in, and decided I really should use some of this awful paper! I applied a lot of layers of ink to the pieces, and it was pretty unresponsive as it had a slightly waxy finish to it. There were a lot of pieces of striped paper with letters and numbers on them, but the design became a lot more subtle with the layers of ink. If I had been doing it today, I would have used a combination of gesso and acrylic paint, which would have involved a lot less work.
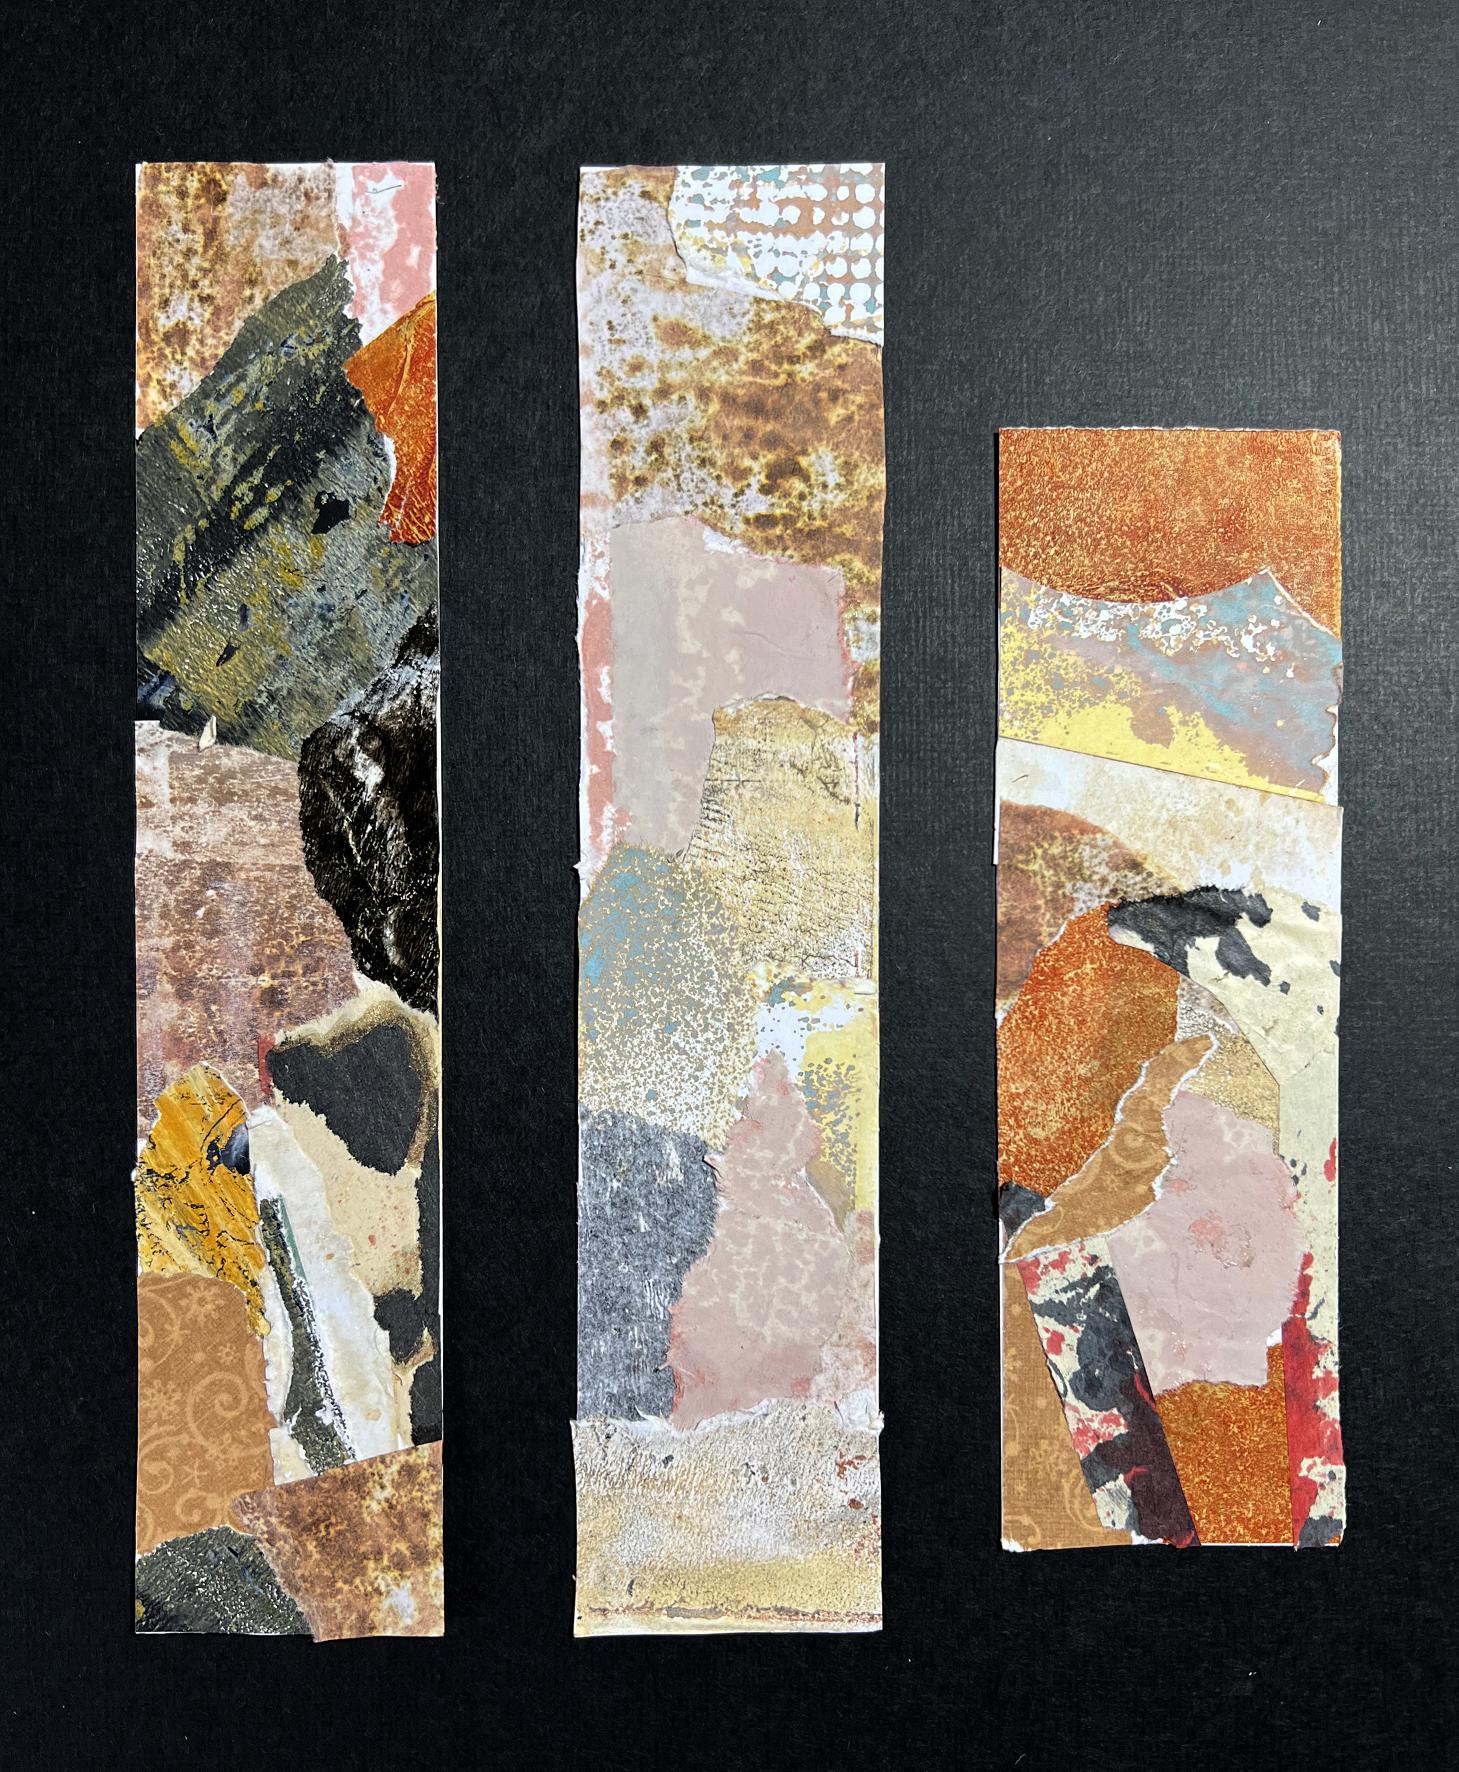
These are some strips of the stuff that were in my card scrap box, and I dug them out and thought I might be able to do something with them, to make collage elements.
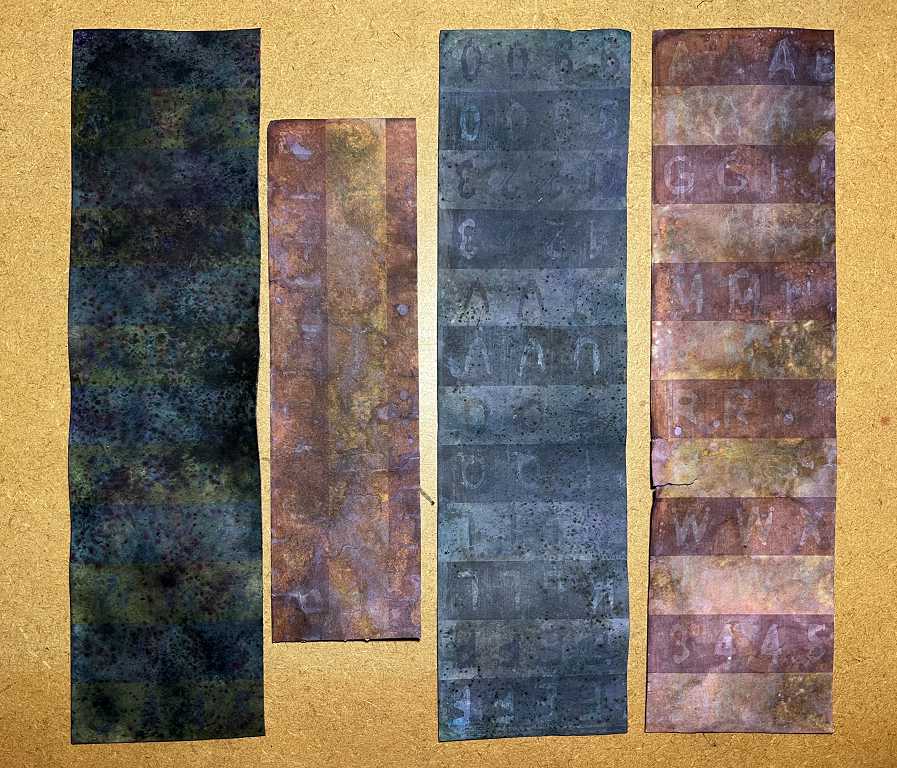
When I turned them over, the backs were a lot more interesting! I coffee-stained them to tone down the white a bit, and this is the result.
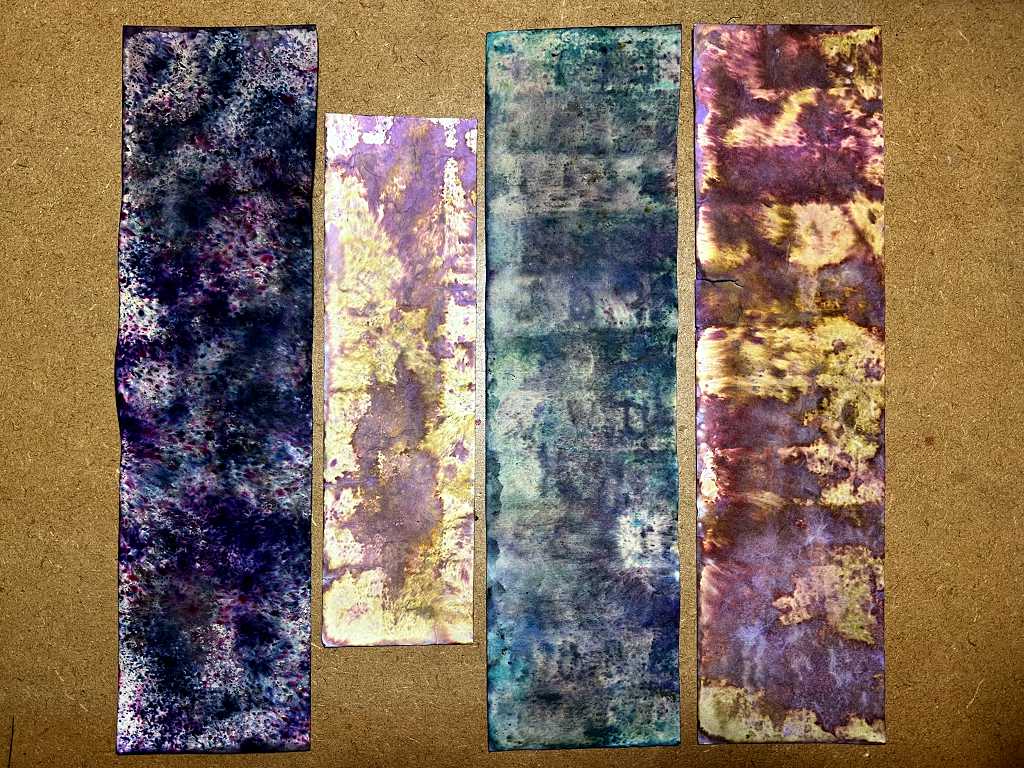
Really quite exciting! It just goes to show that you should never, ever, throw anything away because you don’t like it!!! Everything is redeemable with a bit of effort and imagination, and if you still don’t like it, you can always add more layers until you are happy.
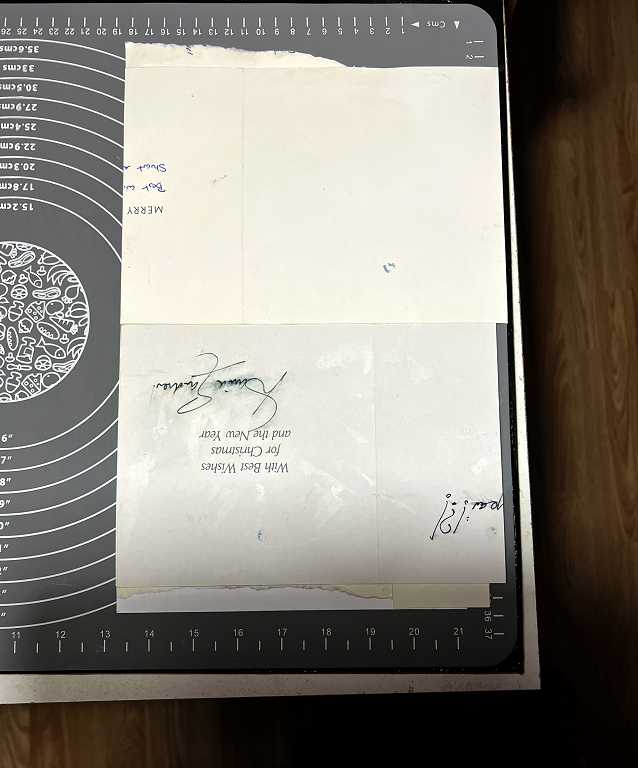
Margaret’s old Christmas cards
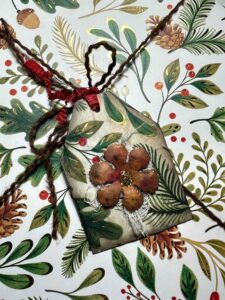
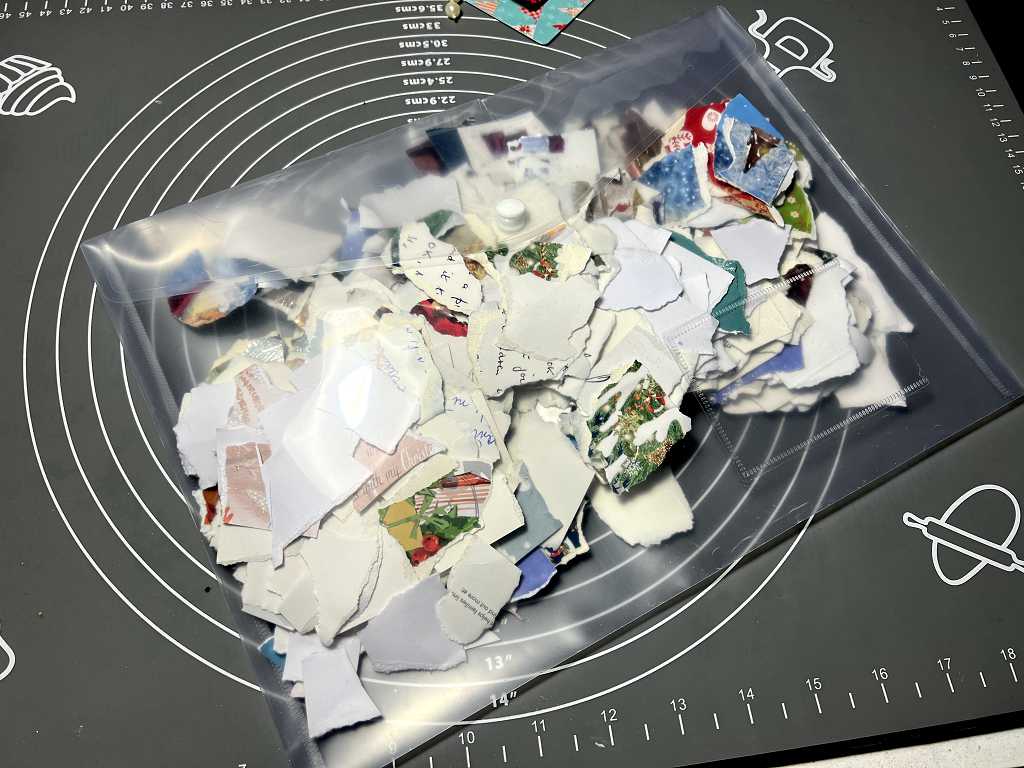
Time to turn my imagination onto the pile of old Christmas cards. I’d already cut some up into strips for making paper ruffles. I started to tear up the others into small fragments, and inked the edges with Vintage Photo Distress Ink to age them a bit and reduce the stark whiteness of the torn edges. This is the first small batch I did last night.
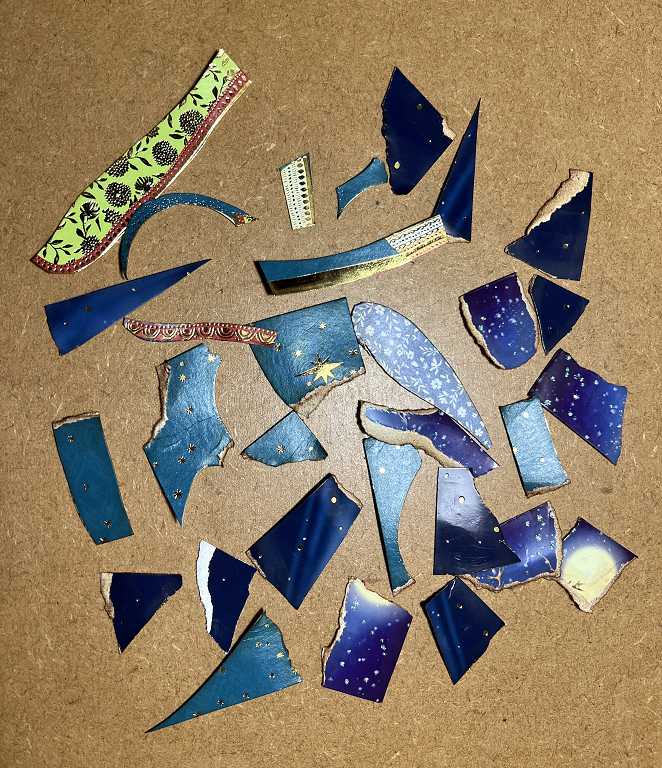
Today I ripped up the rest,and put them in a polywallet ready for inking.
What I intend doing is to stick them down onto strips of card (of which I have masses – offcuts from various projects – these tend to mount up like crazy and this is a good way to use them up).
I made these strips fairly recently, using bits and pieces from my scrap folder.
You can also leave bits overlapping the edge of the base strip.
The Christmas card fragments are mostly quite shiny. Once they are stuck down, I may add a thin layer of gesso to soften the colours a bit, and then there is the potential for adding more layers, with stamping, or adding collage elements to create a unified whole for use in projects.
Kings’ robes get a makeover
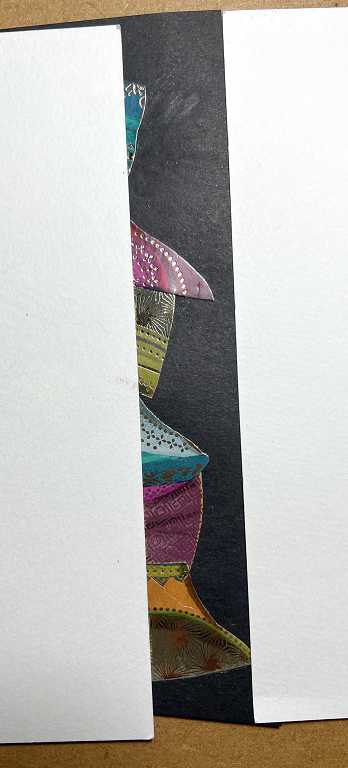
One of the most fun things I did last night was to cut out the robes from the three kings on two identical Christmas cards. The colours were really vibrant, and embossed with gold.
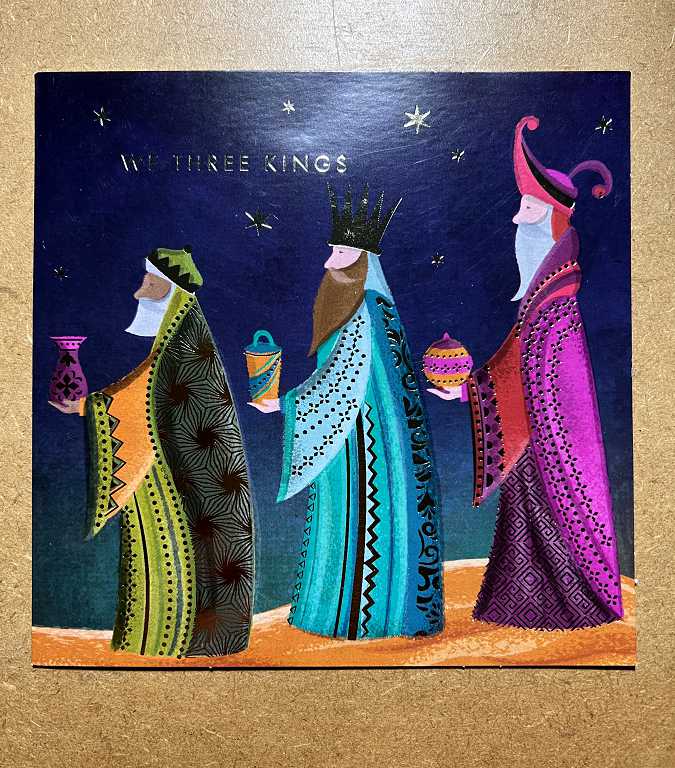
I cut around the robes from both cards, and stuck them down onto a scrap of black cardstock.
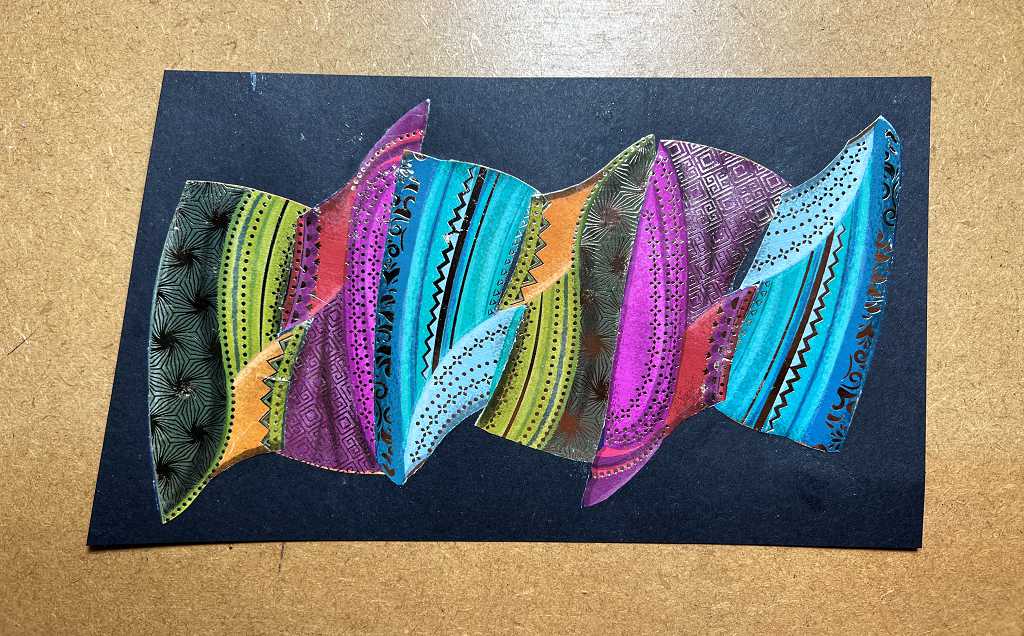
The gold catches the light. As always, these surfaces are very difficult to photograph.
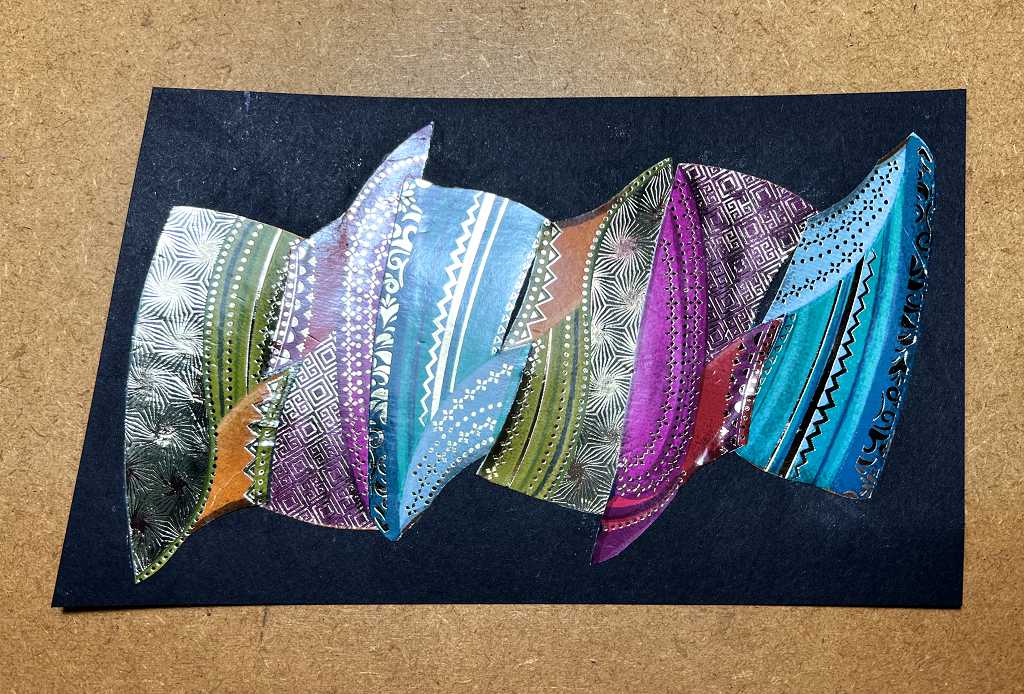
The resulting pattern is qite unrecognisable as kings’ robes!! I really love this effect.
I tried masking off different areas with some white paper to show how the piece might be cut into strips, should I so decide – but at the moment I really don’t want to cut into this gorgeous piece!
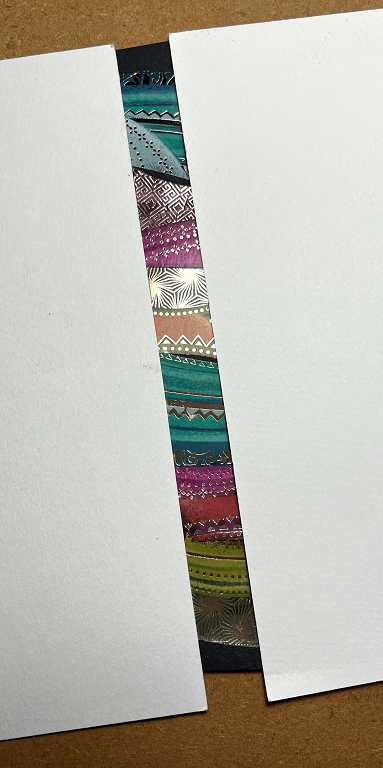
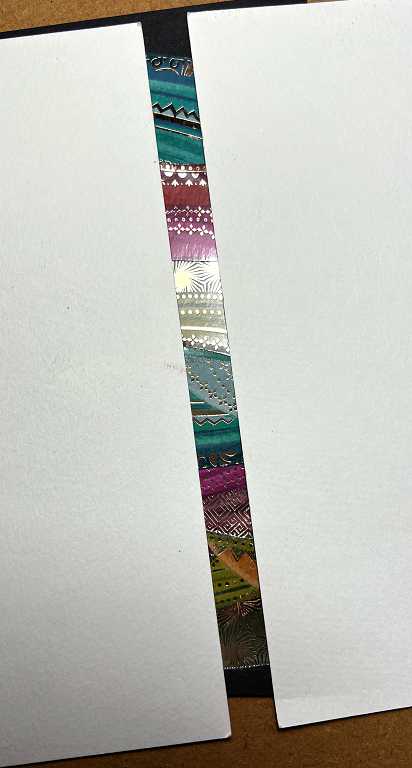
The edge of the piece.
From another card featuring the three kings, I cut off their heads (poor fellows…) as they had nice sparkly gold haloes.
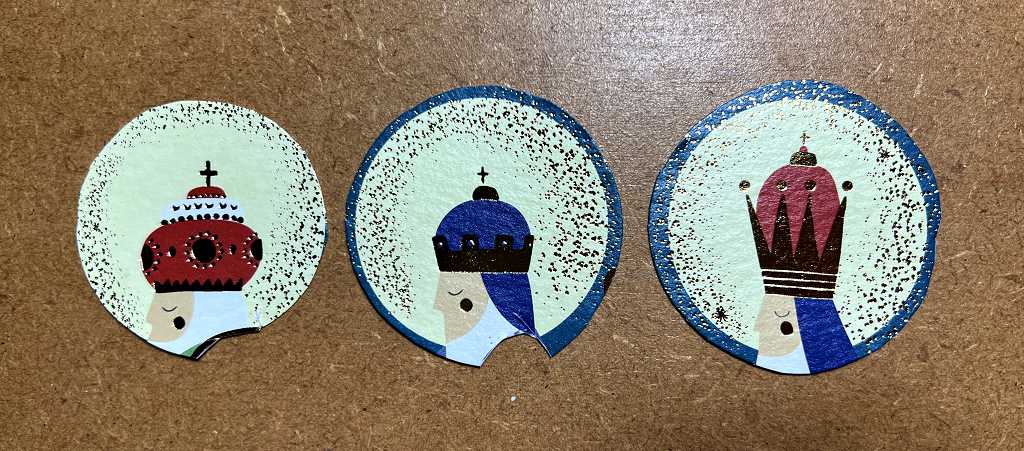
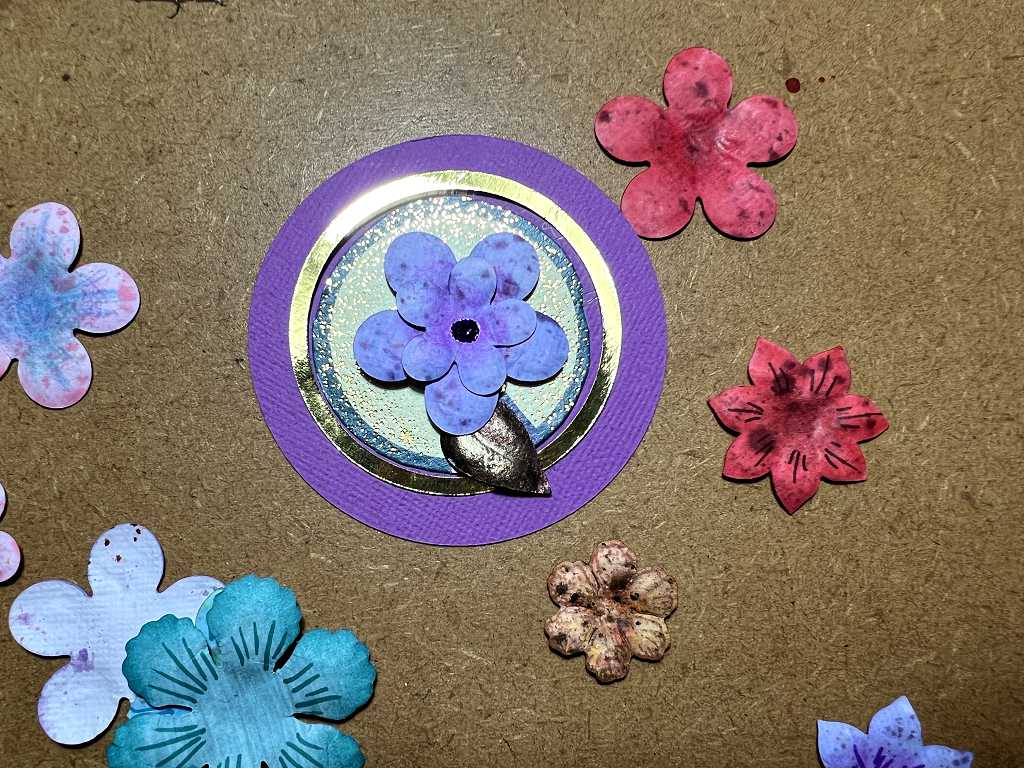
Here is a mock-up of the sort of thing I might end up doing with them. I found some circles cut on my cutting machine, including a circular gold frame, and some of my flowers.
The leaf at the bottom covers up the king’s neck, but in actual fat it doesn’t look like a neck and doesn’t really need covering. Definitely some potential here!
I am having a great deal of fun with all this new stash from Margaret. I am now looking a lot more favourably at recycling greetings cards, although I shall still go on using them as book pages.
Here’s a link to the little album I made for my niece, about Dad’s life. Everything in this album was made from recycled materials (apart from paint, glue and ink, and a few bits and pieces in my stash) and the pages were made from old greetings cards.
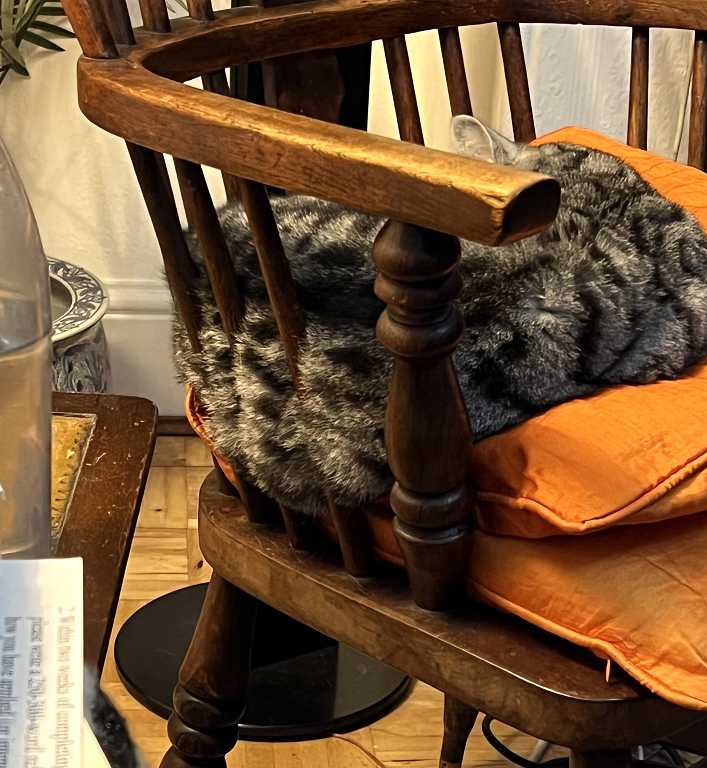
Kitties
Finally, a funny picture of Lily asleep on the wooden chair, with her fur sticking through the bars!