JUNK JOURNAL – MAKE A JOYFUL NOISE PART 2
I have made some progress on this new project. This is the sort of project that doesn’t have a definite plan. As I see different materials, I am getting ideas of how to use them, and the project will evolve as I work on it. At this stage I have only a vague idea of how it will be when it is finished!
Cover embellishment
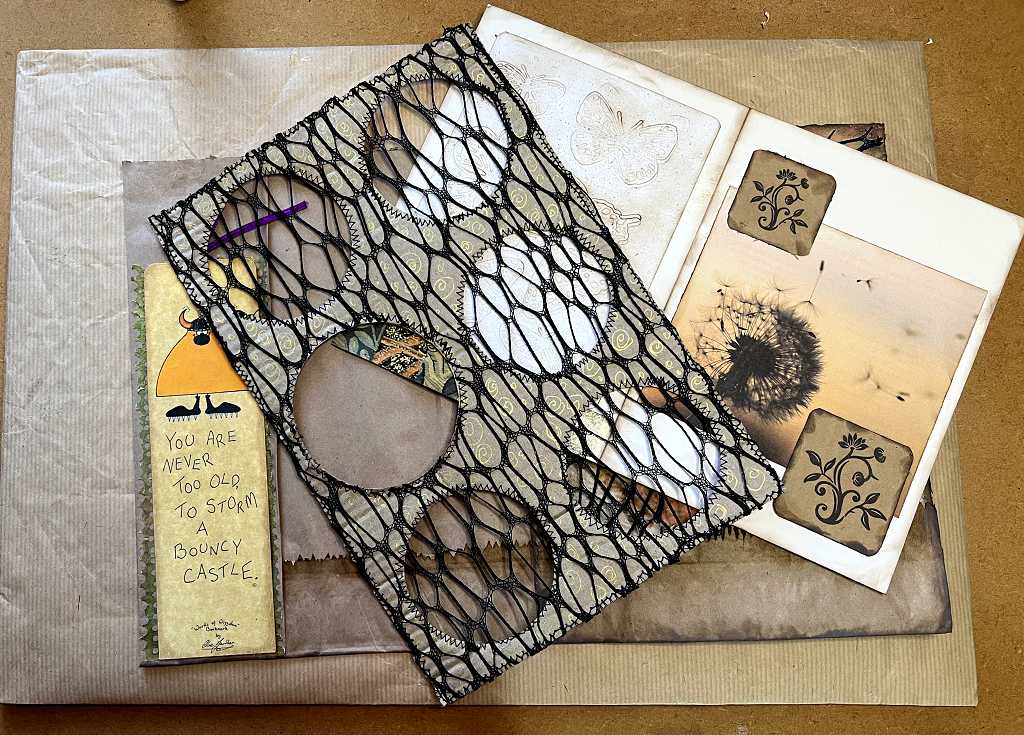
My first thoughts were to make a mixed media cover with various noise makers incorporated into it, but I didn’t have any particular plan. I had a grocery delivery on Tuesday, and they delivered my six pots of yoghurt in a shallow cardboard tray with holes cut in the top to hold the pots. I was about to throw this away when I thought that perhaps I could incorporate it in my album. I cut the top part off (the part with the holes) and threw the rest away.
I was pleased to discover that this piece of cardboard with holes in it is going to fit pretty well on my cover! I am now planning to put a noise maker in each hole.
Covering the yoghurt tray with mesh
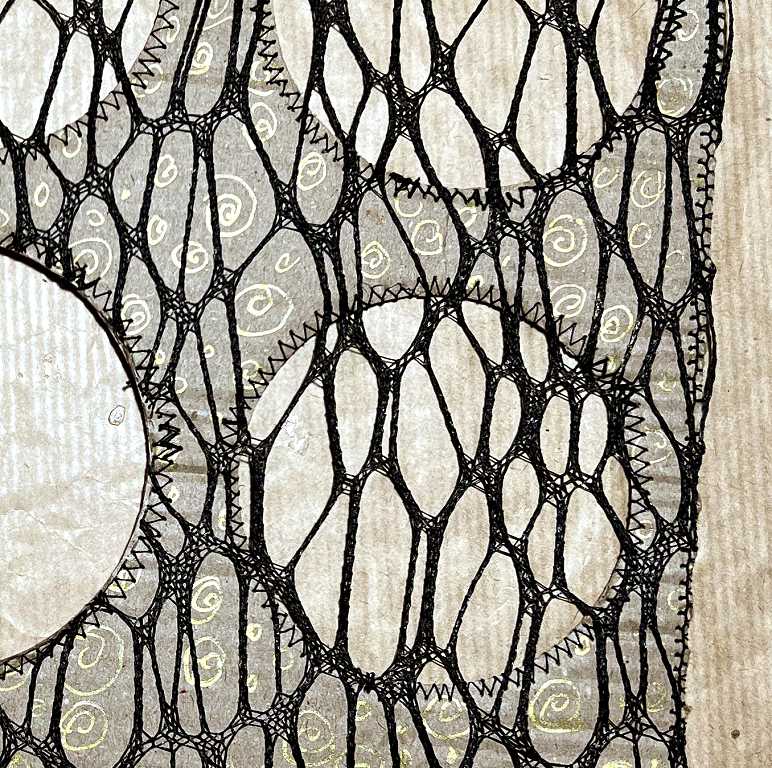
This piece definitely needed some embellishment to create a nice textured background for my noise makers. I cut a piece of black plastic mesh and wrapped it around the piece, sticking the mesh to the back with double sided tape. This stuff is very difficult to work with, because it is quite springy, and is doesn’t stick down very easily. The double sided tape worked quite well, but I needed a way to secure the mesh around the holes. I used my sewing machine and used a zigzag stitch around all the holes and around the edge. Sewing round the edge was really difficult because the double sided tape made the thread sticky. I had to sew very slowly and I kept having to stop to get things moving smoothly again.
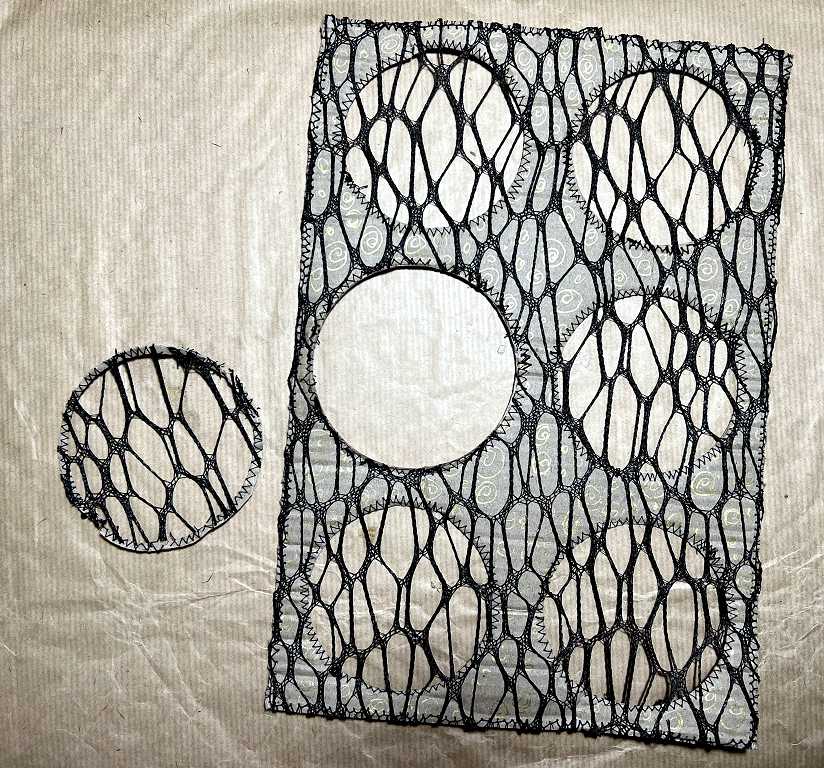
The cardboard still looked pretty plain, so I added some spirals with a gold Posca pen, working through the holes in the mesh. (I know, I would have done better to have done this before attaching the mesh!). Here’s a detail.
The machine stitching has held everything in place really well, and I think it looks good with the mesh.
Enlarging one of the holes
As you can see, I have made one of the holes slightly larger and cut away the mesh. I had to run another line of machine stitching around the hole before cutting it, so that the mesh would remain attached.
The reason for doing this is that I want to incorporate a jar lid into the lid, and it is slightly larger than the existing holes.
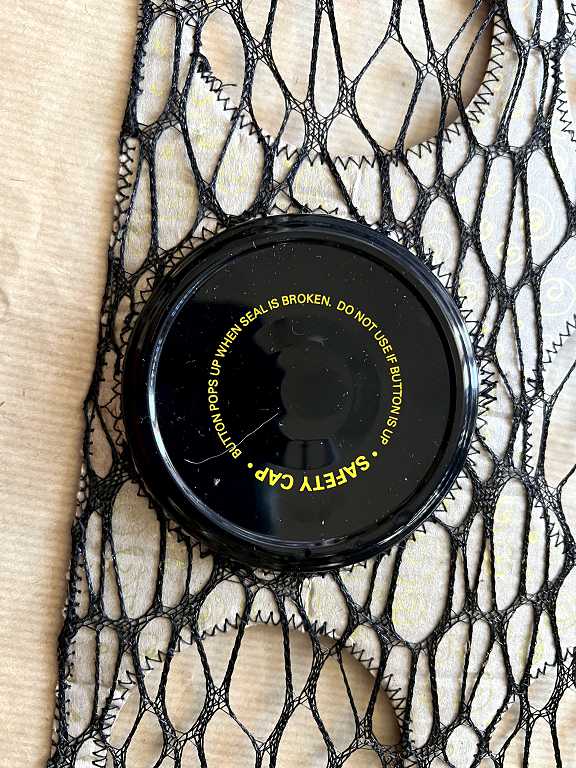
This will be fixed in place eventually with hot glue. The jar lid itself will probably also have some embellishment. The reason for including it is that when you press the safety button, it makes a very satisfying noise!
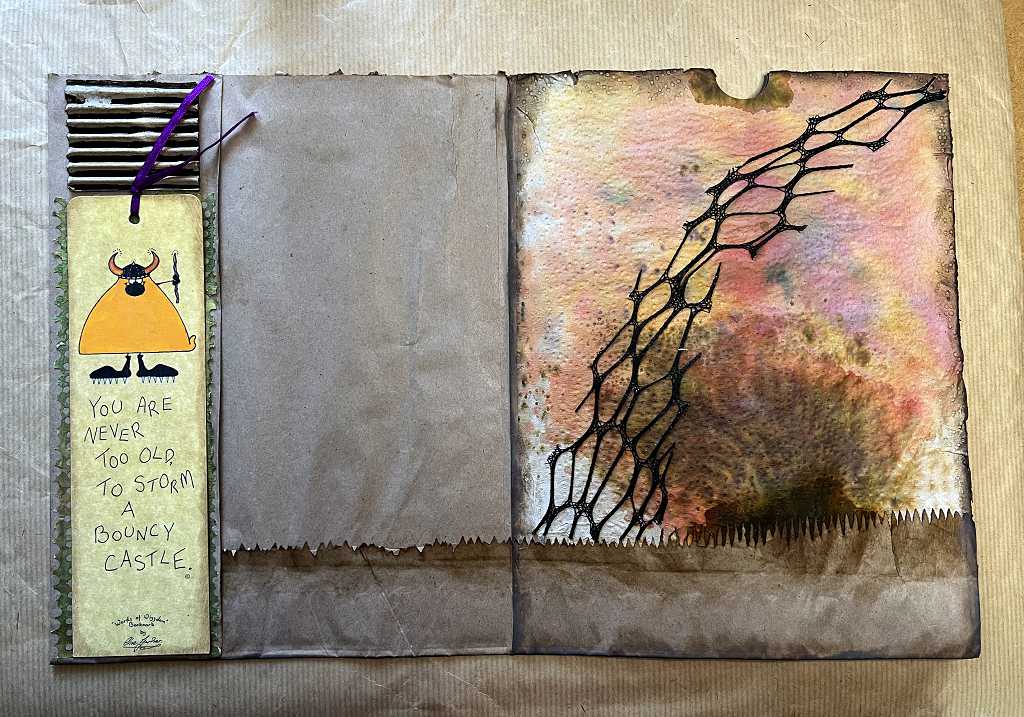
This is the reverse of the piece, showing the mesh held in place with the double sided tape and the machine stitching.
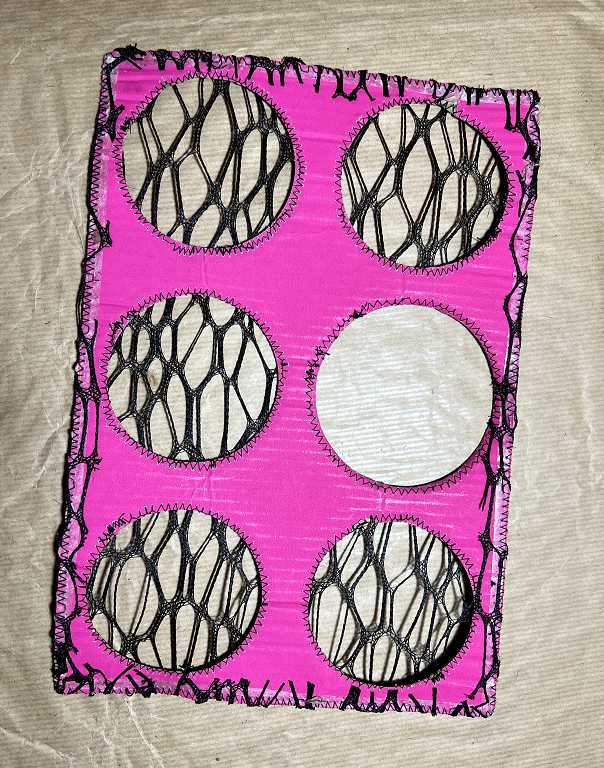
I definitely had to use the reverse side of this piece of cardboard, because there was no way I was going to have that shocking pink showing in my album!
Sorting my materials
During this afternoon’s session, my studio gradually turned into a total tip. There is no way to work tidily on a project like this. I was pulling out stuff from folders – fancy papers, potential noise makers, charms, cord, you name it. Eventually, before closing for the evening, I sorted everything into piles so I had a slightly better idea of what I’d got.
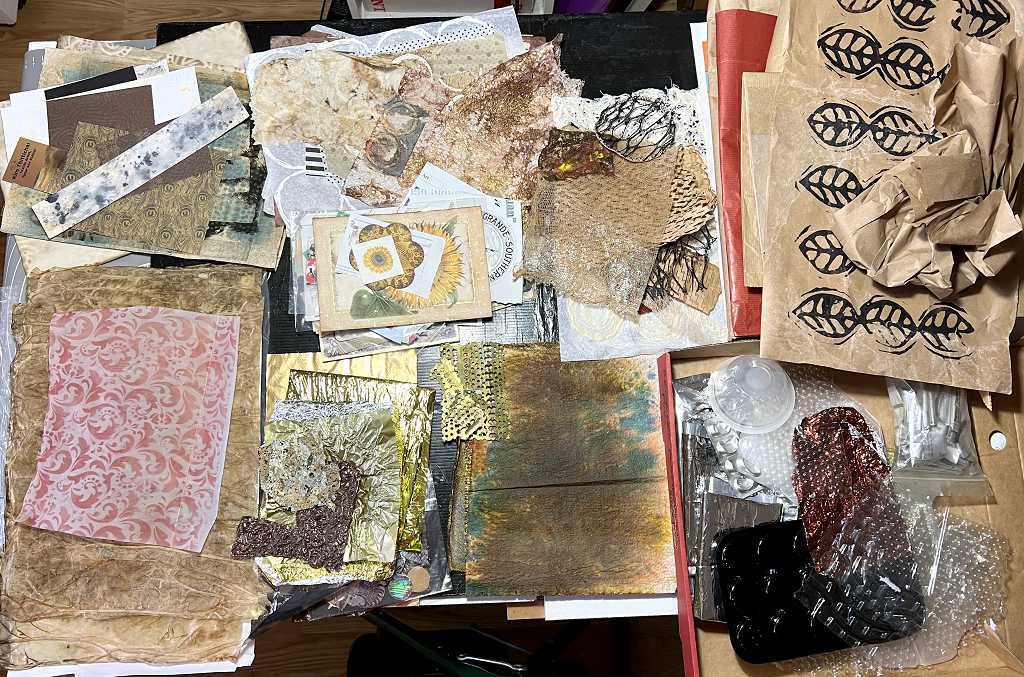
Clockwise from top left: interesting papers and card scraps. Tissue papers, some printed, some gel-printed, some with added texture (paint, fibres etc.). Various forms of mesh – packaging paper, acrylic skins, melted Tyvek – all stuff from my collage fodder folders. You can see the circle I cut from the cover piece. I’m sure I can incorporate this somewhere. Brown paper, including bags – various thicknesses and degrees of crinkliness. Pizza box containing various scraps of plastic, textures, medication tablet blister packs, packaging from chocolate boxes… anything I consider worth saving for creative purposes. Interesting papers gleaned from gel print stash, scratch papers (cleaning off brushes, stencils etc.). Metallic plastic and foil – chocolate wrappers (some melted), scraps of acrylic skins etc. DIY rice paper, vellum (that failed piece from a previous project – now deliciously warped and extremely crackly!). Centre: Pictures from magazines, greetings cards, catalogues etc. Punched medication leaflets sprayed with gold.
Potential noise makers
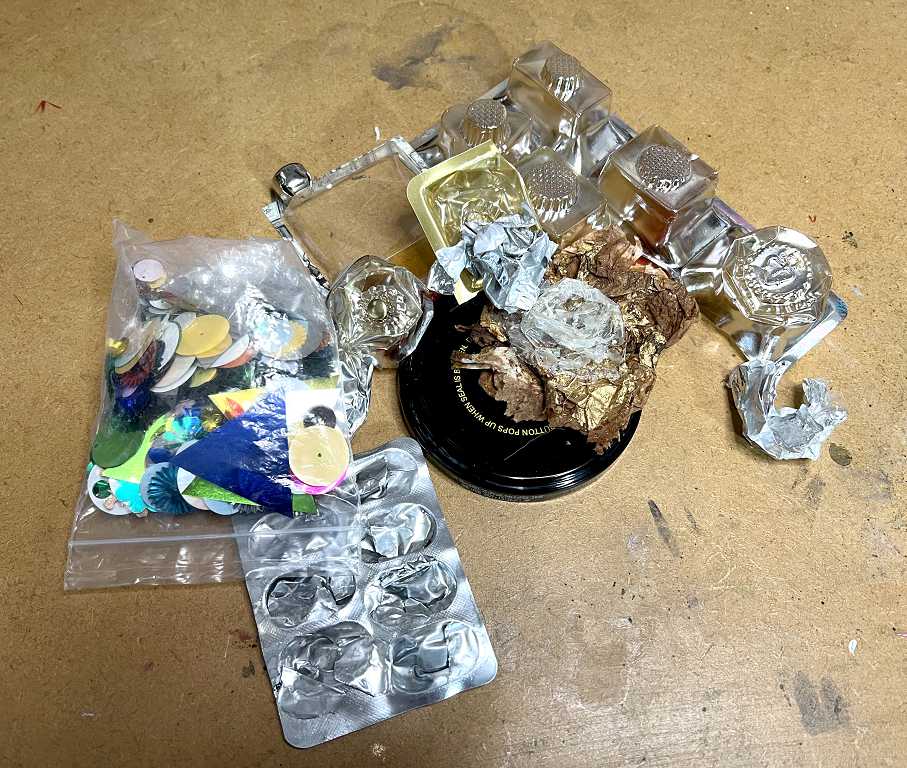
Chocolate box packaging, scrunched up plastic foil, jar lid (safety button), medication blister pack, bag of mixed sequins (hoping to make some sort of shaker), bells. I shall also add Velcro and magnets for interactive noise-making.
I forgot to photograph a small pile of splat box papers. These are pieces of kitchen paper which I layer in a cardboard box which I use when I spray things with ink etc, to protect my surroundings. Eventually the inks build up on the papers and soak through to the underlying layers, at which point I peel off the top layers and add fresh papers to the bottom. I’ve got a pizza box full of kitchen papers used for mopping up ink and these splat box papers go in there. They make fabulous collage fodder, especially when I’ve sprayed wth gold.
Making progress on various fronts
I’ve started working on several pages for the book as well as the cover. I haven’t any plan for the order of them yet, or what is going to be the centrefold of the book. Once I’ve got enough, I’ll place them in some kind of order.
Folded brown paper bag
This is the paper bag with the interesting irregular folded up piece at the bottom. I tore off the top part to reduce the height and folded it in half. I have reinforced each side by inserting a piece of card to fit, glueing it in place a the top. The right-hand side is open at the top to form a pocket, and the flimsy bag is reinforced with two sheets of card, and a notch cut with a circle punch at the top. I have embellished it with a piece of splat box paper tucked behind the irregular edge of the bag, and added a bit of the mesh offcut from the cover. I stuck this down with some extremely sticky spray adhesive. On the left-hand side, the bag is glued closed with its cardbord insert, and the left-hand edge of it has been folded in and glued top and bottom to form a pocket. I’ve put a fun bookmark on this – it was given to me by a friend over 20 years ago!! I layered it on top of some gold-sprayed punched medication paper and filled the top with a piece of corrugated card. I coloured the “valleys” with dark brown Tombow brush marker and rubbed some gold gilding wax across the “mountains” but this really doesn’t show up on the photo. I am not sure what to put on the rest of this side.
Turning the bag over
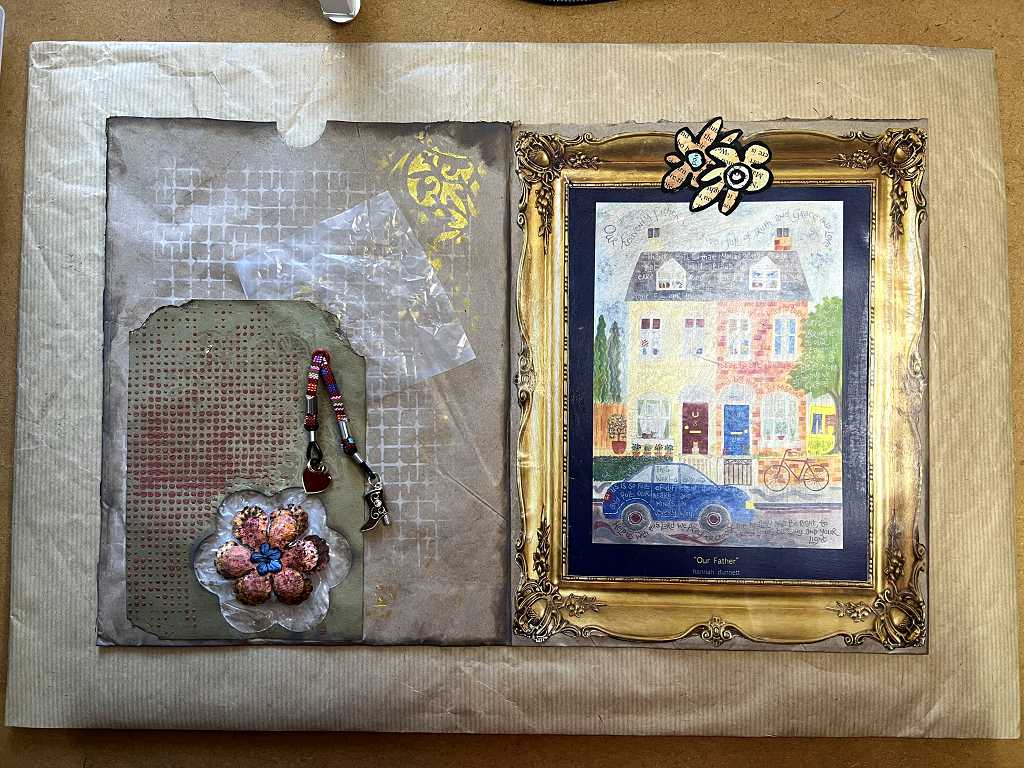
On the right-hand side I stuck down the front of an old greeting card and fussy cut a frame from some junk mail which happened to fit. I added some of my book page/watercolour flowers at the top to cover the company logo. Before sticking it down, I sanded the card to remove the shine, and to distress it a bit.
I added some stencilling with white ink and gold paste to the left-hand side. I found a scrap of card in my stash from which I’d cut a flower shape, and thought I could use this. It also had some stencilling on it, which I think is moulding paste coloured with paint. I cut a small piece of crinkly cellophane and tucked this behind the card, holding it in place with glue stick while I punched a hole and added an eyelet. I pulled some glasses cord through this and added a couple of charms on the ends, securing the cord on the back with masking tape. Once this was done, I glued the second of the two pieces of card inside the pocket to cover up the back of this embellishment, so that the large tag which I shall make to go in the pocket won’t catch when I push it in.
The flower is a layered one from my stash of cutting machine cut flowers coloured using my mask and spray technique, and including Infusions. Behind the flower shaped hole I stuck a layer of scrunched up cellophane with a ball of some more of the same behind it. The idea was that pressing down on the flower would make a sound, but this is less satisfactory than I’d hoped. It makes the page rather thick.
Here’s a detail of that embellishment.
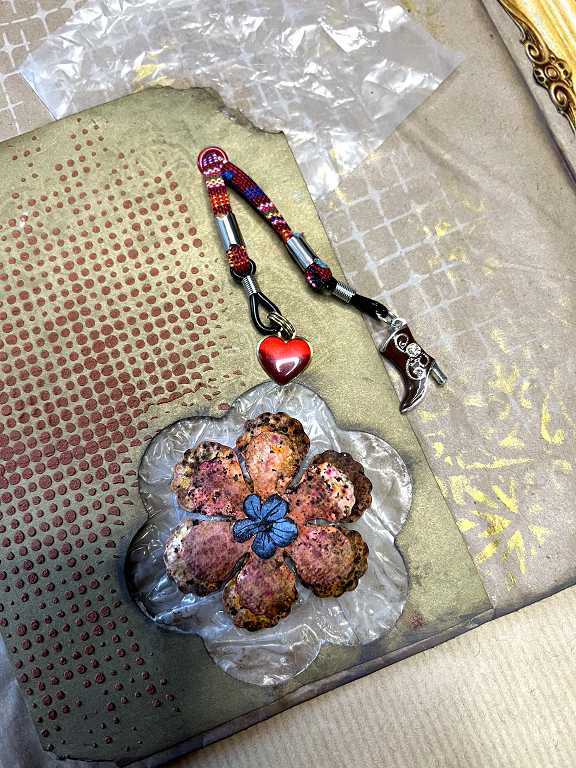
The fragment of cellophane attached behind the embellishment is very crunchy, and emits a nice sound when you fiddle with it.
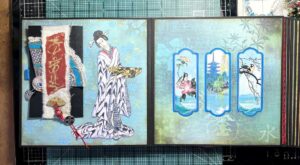
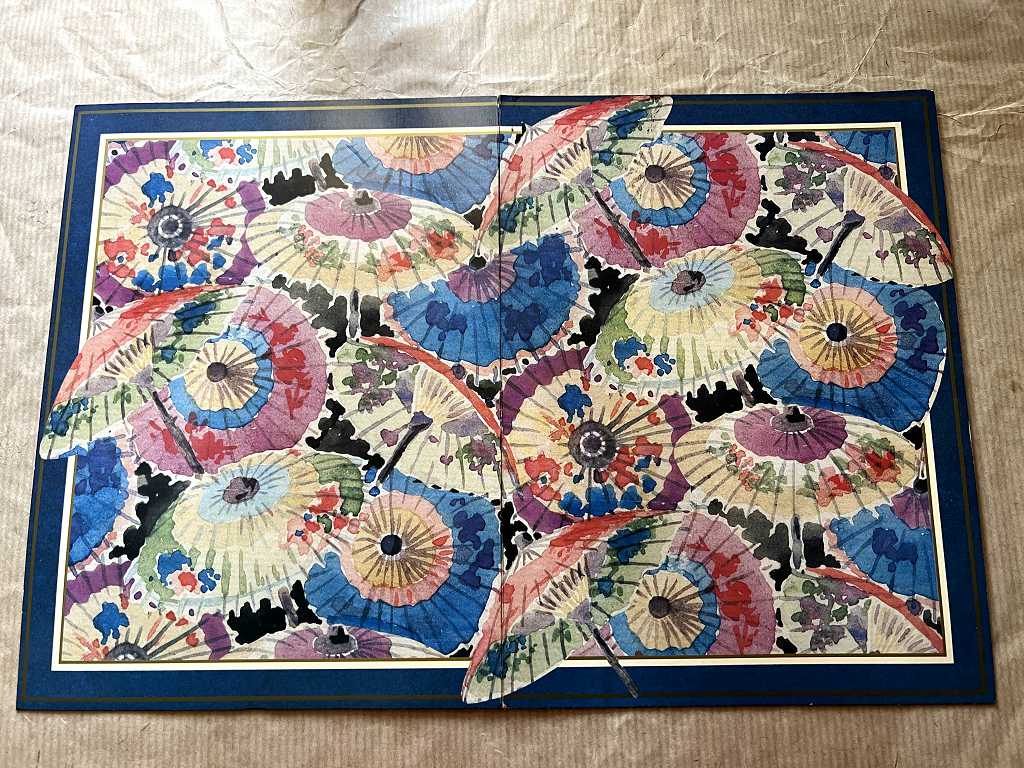
Greeting card page
I thought I would use this particular greeting card as-is, because the picture goes right across the front and onto the back. I love the picture. Again, I roughed it up a bit to remove the shine and distress it a little.
The reverse of the page
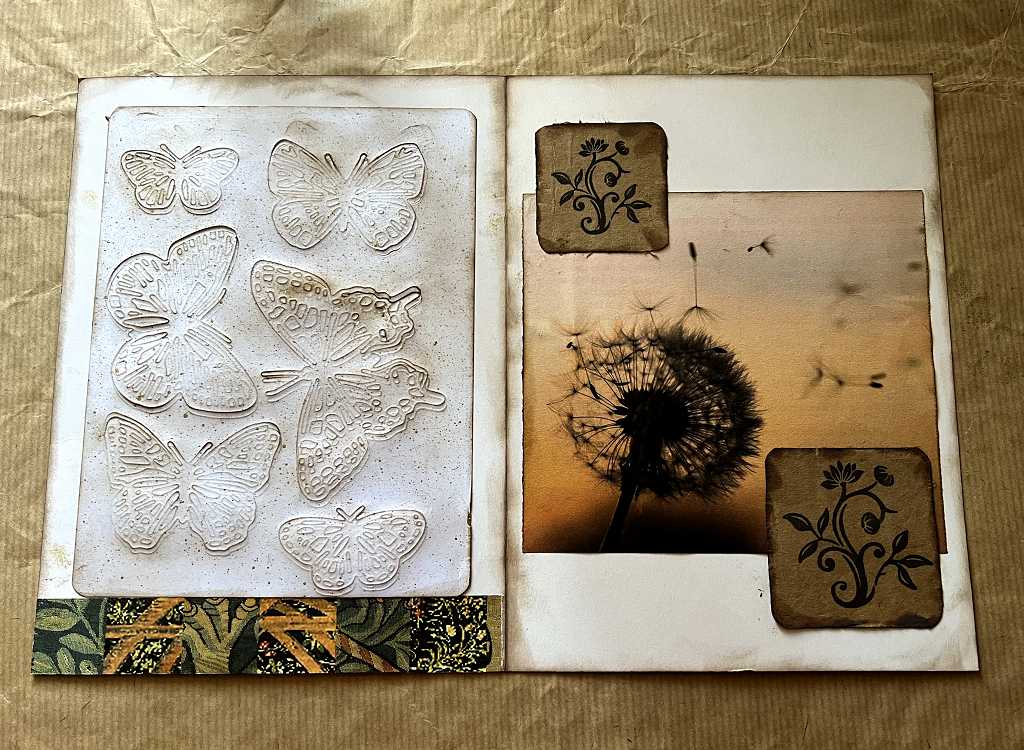
This is a work in progress. On the left I stuck down a reject piece from my stash. This was a failed die cut – I discovered that this particular card did not cut properly. Some of it is cut right through but most of it is onlly partial. I couldn’t bear to part with all those lovely butterflies so it went in my stash. I have now rounded the corners and added some ink with a blending tool, and added some spatters. I may add some gold. There’s a scrap of collage paper across the bottom.
On the right-hand side I’ve pasted down a magazine image, and two small pieces of printed cardboard which I saved from some packaging. When I had my 70th birthday someone sent me a bouquet of flowers by post and the box was really pretty. I cut loads of printed images from it, knowing they would come in some day. With rounded corners and some inking, they are perfect for a project like this. I will probably be adding more to these pages.
Not all the pages may feature noise-makers but as I said at the beginning, this project is evolving as it goes, and I may get some ideas for them!