RIBBON BEAD DANGLES
The other day I watched a YouTube video from HappyBird’s Glitter Nest on how to make sparkly ribbon beads. I was intrigued by this as I am currently making some more charms and embellishments, after recently organising my charms.
These beads are quite easy to make, and very lightweight. You can make them whatever size you want, and they require minimal equipment and materials.
Equipment and materials required
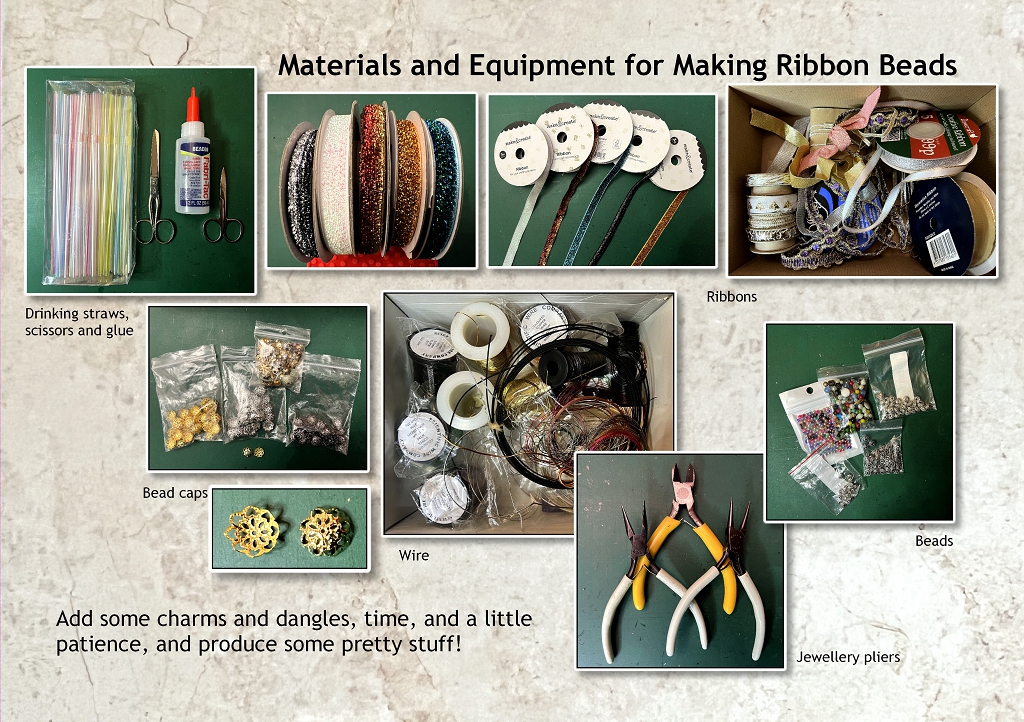
- Plastic straws to wind the ribbon around
- Ribbon – any kind will do but the beads look like little jewels if you use glitter ribbon or gold or silver
- Fabric glue – I am using Fabri-tac
- Bead caps – these decorative elements are shaped like little hollow domes – you can get them in many diferent styles and sizes. I have a couple of mixed bags, and also some larger ones which are most suitabe for this project, in bright silver, darker silver and gold – they are quite cheap to buy
- Wire
- Snips to cut the wire
- Jewellery pliers to make loops in the wire
- Scissors
- Further beads, spacer beads and dangly charms for embellishment
Making the beads
Winding the ribbon
I applied glue all round the end of the straw, to the width of the ribbon, and started to wind the ribbon around. It only took a few turns to be about the size of the bead cap. I cut the ribbon off, and stuck it down with more glue.
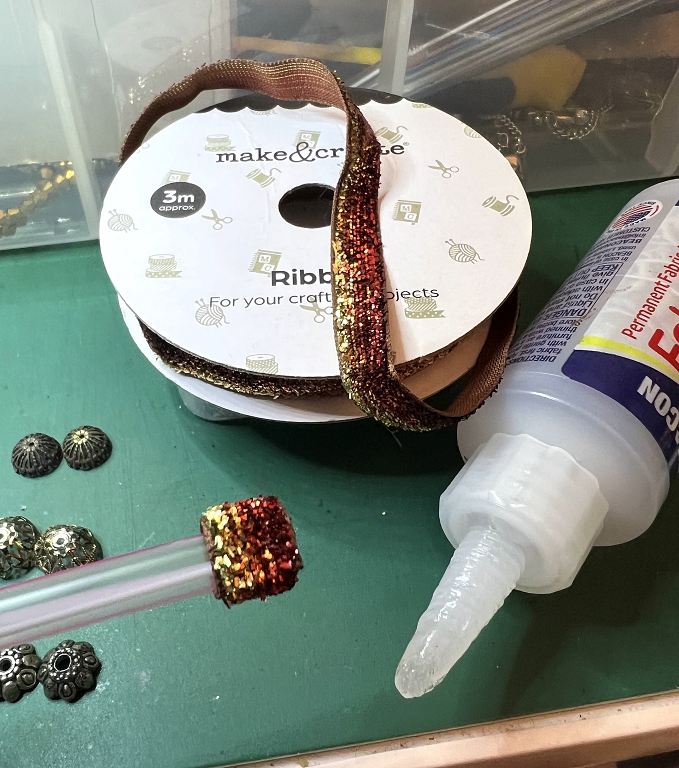
Adding the bead cap
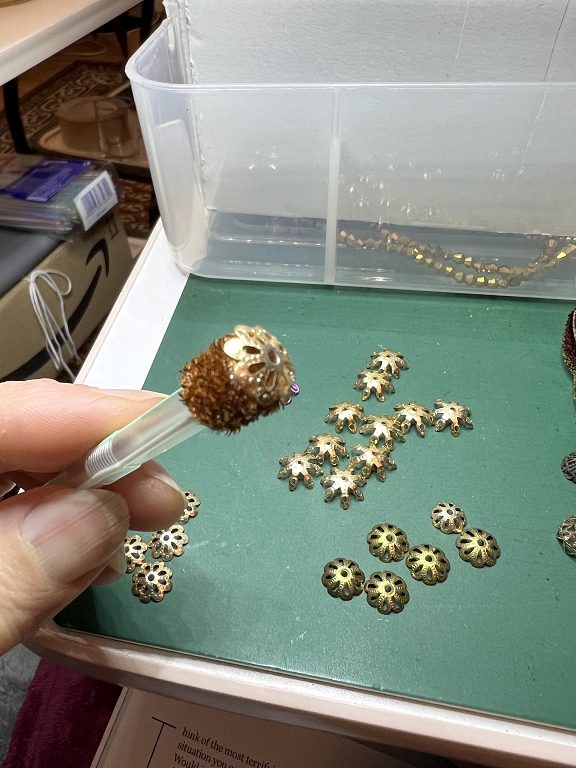
You have to apply quite a bit of glue to the end of the wound ribbon in order for there to be enough contact with the inside of the bead cap. Centre it and press it on well. Set aside the straw with the attached bead and let the glue set.
Finishing the bead
Once the gue is set, you can cut off the straw flush with the bottom of the bead, and apply another bead cap to cover the end.
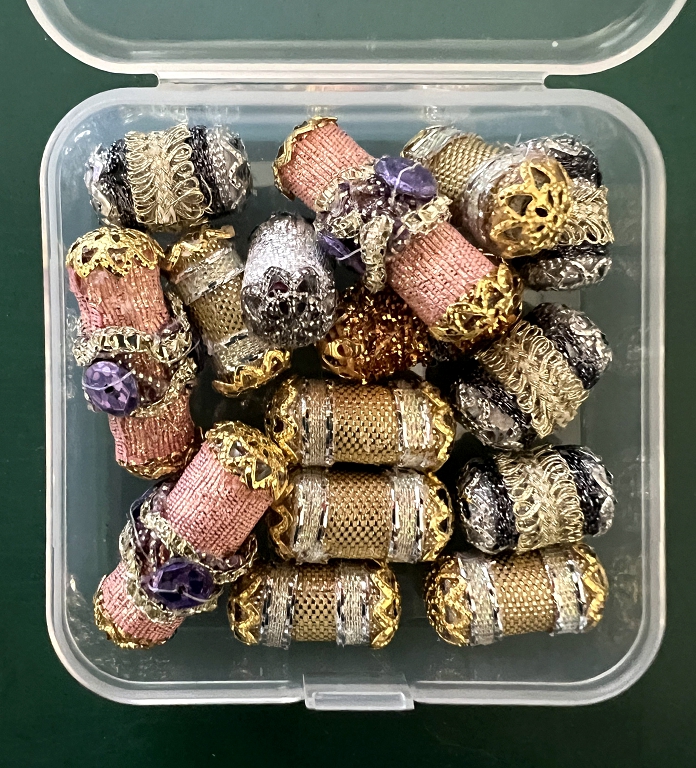
The first batch of beads completed
These beads were all made from the new spools of ribbon which I bought in the charity shop on our recent shopping trip.
The bead caps are a mixture, mostly from the mixed bag.
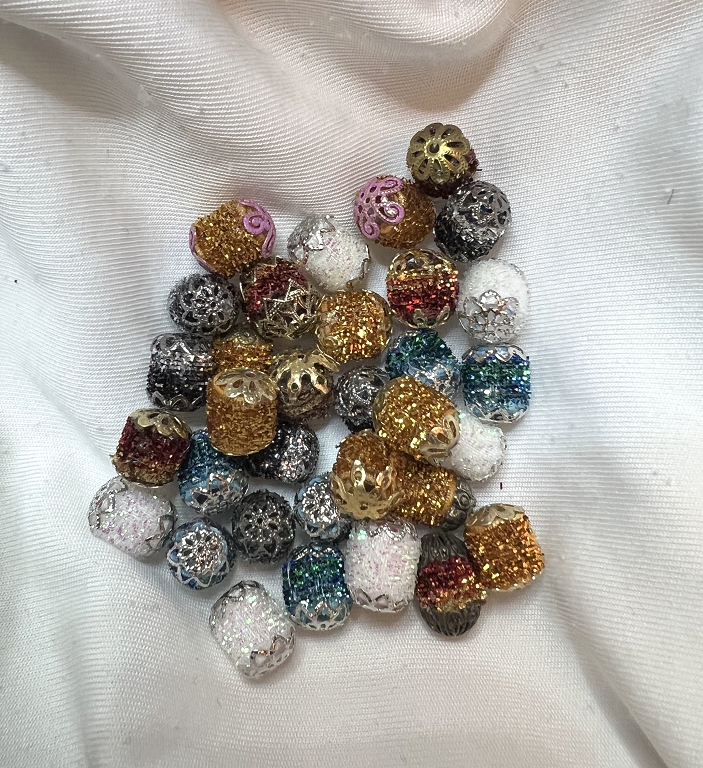
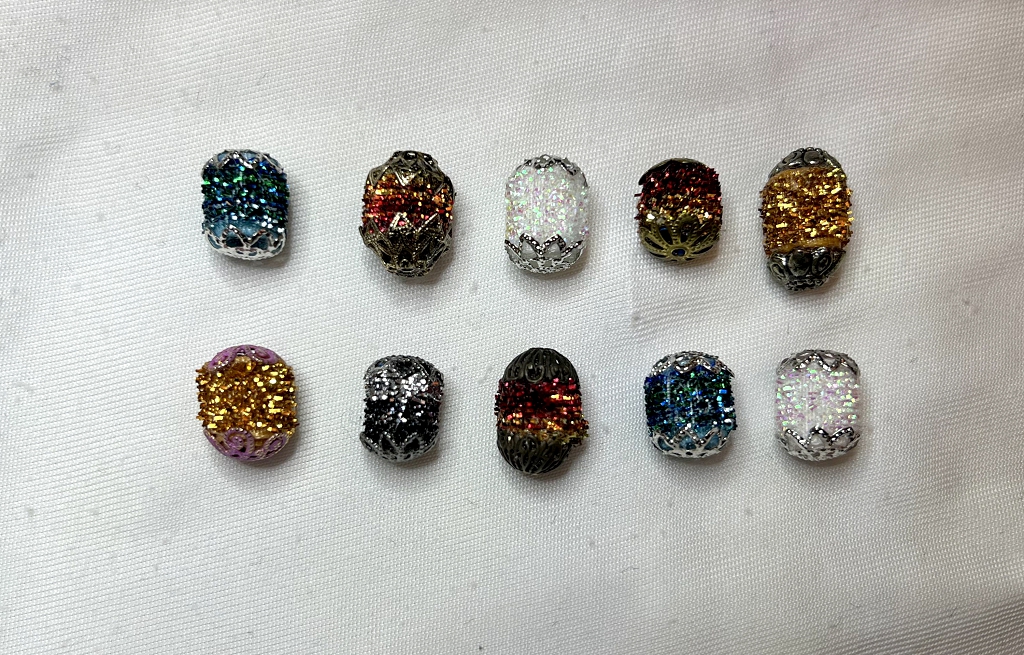
Here is a selection of individual beads. It is a shame that the photo doesn’t show just how sparkly and jewel-like they are.
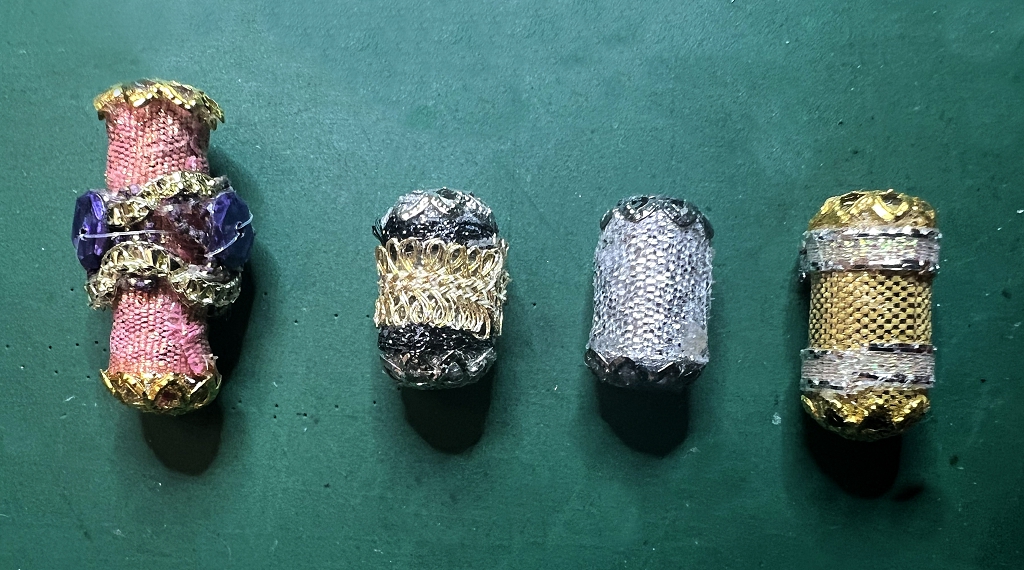
Making some longer beads
Since the ribbon is not very wide, most of these beads have come out almost round. I wanted to make some longer ones, so I had a rummage in my stash. I have a box of gold and sparkly trims, and had forgotten that this also contained ribbons, so I was able to make a few more from those.
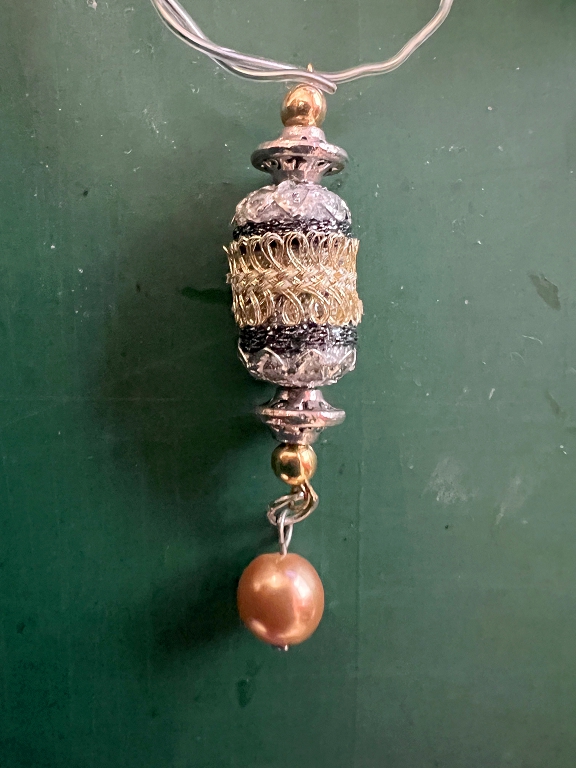
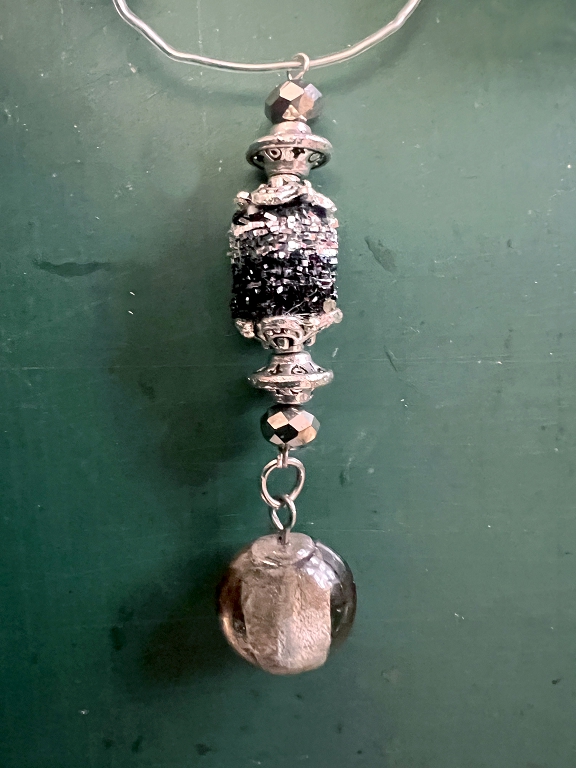
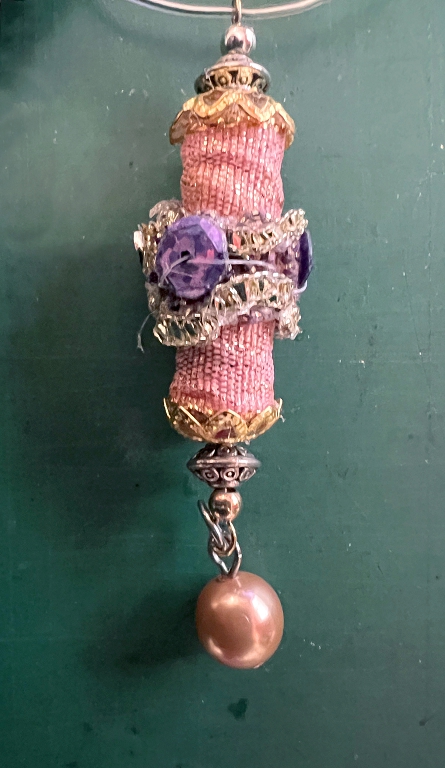
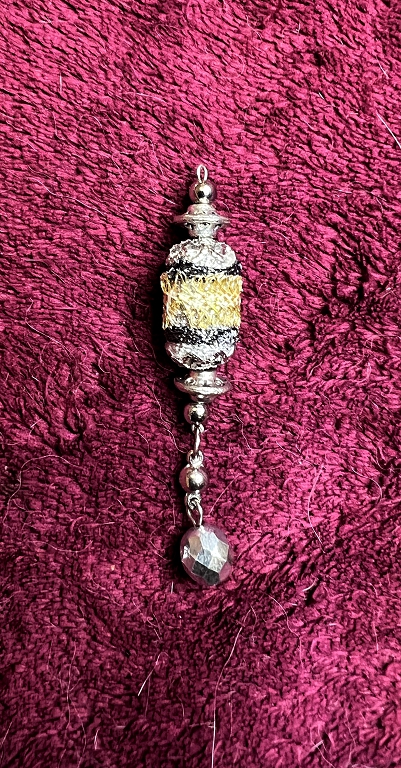
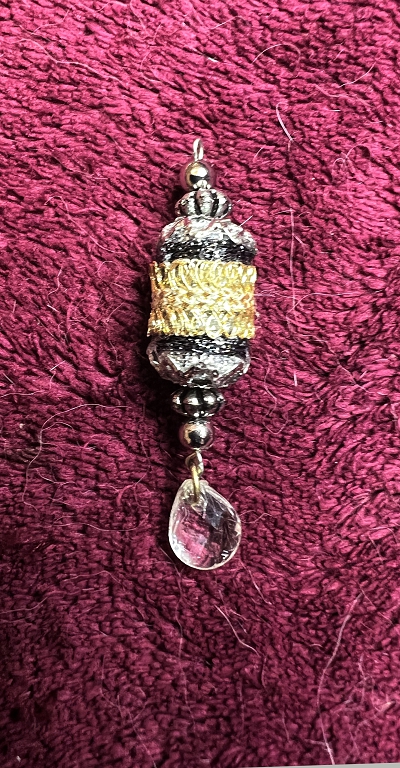
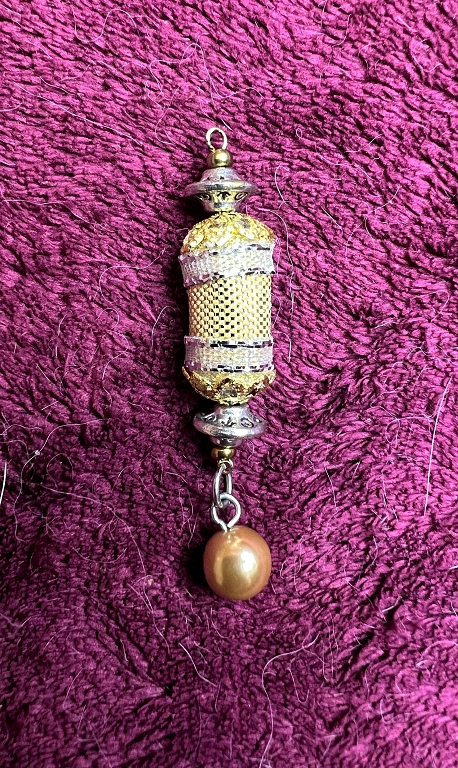
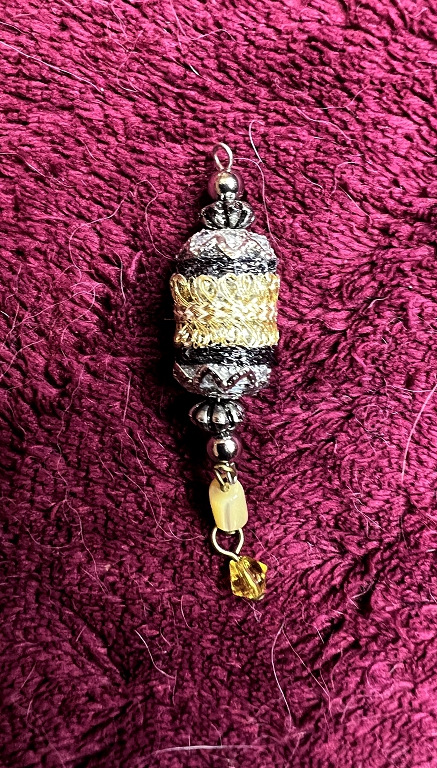
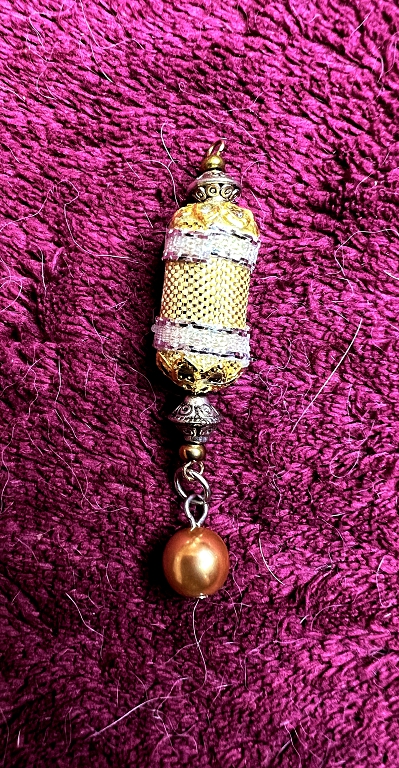
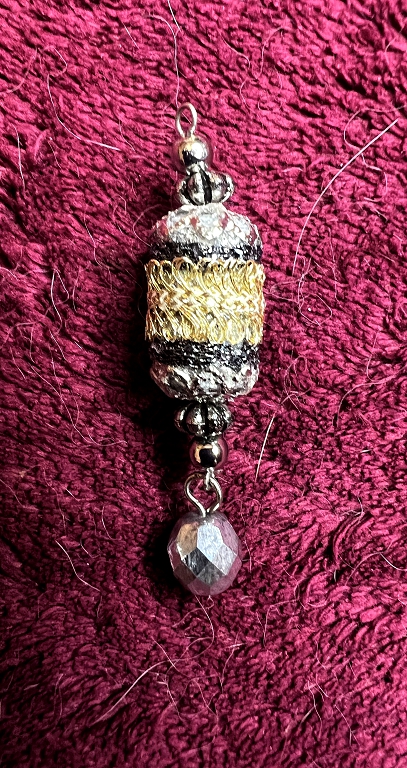
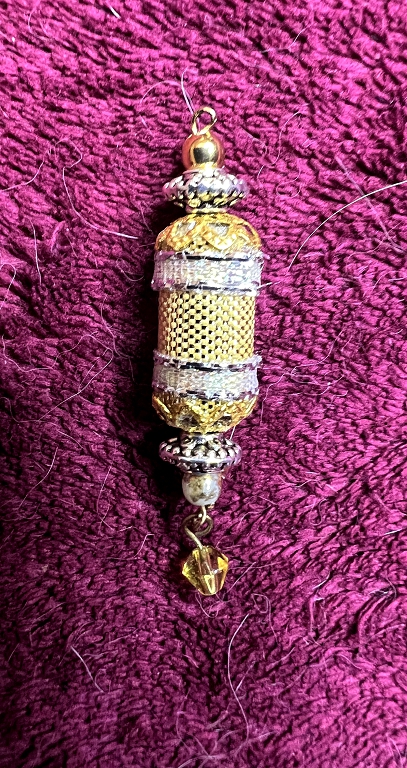
The longer beads offer the opportunity for further embellishment. I added some very fine trim, and I have a short length of gorgeous sequined braid which I added to the longest beads – about 3 sequins go around the centre of the bead.

Here are the completed longer beads that I made.
Adding dangly embellishments
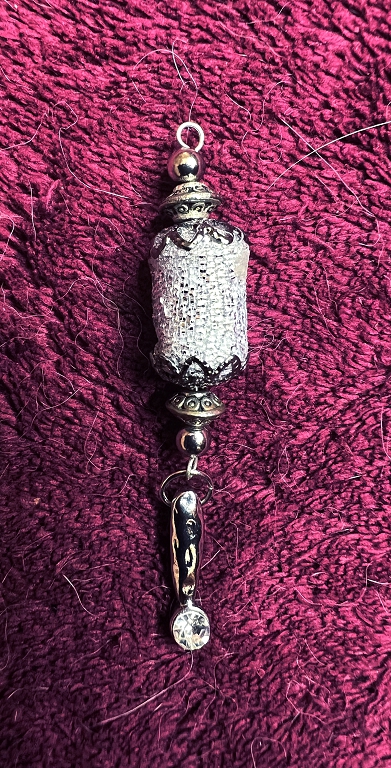
In order to make these beads into charms, I threaded further embellishments onto them. I began by extending the beads at each end.
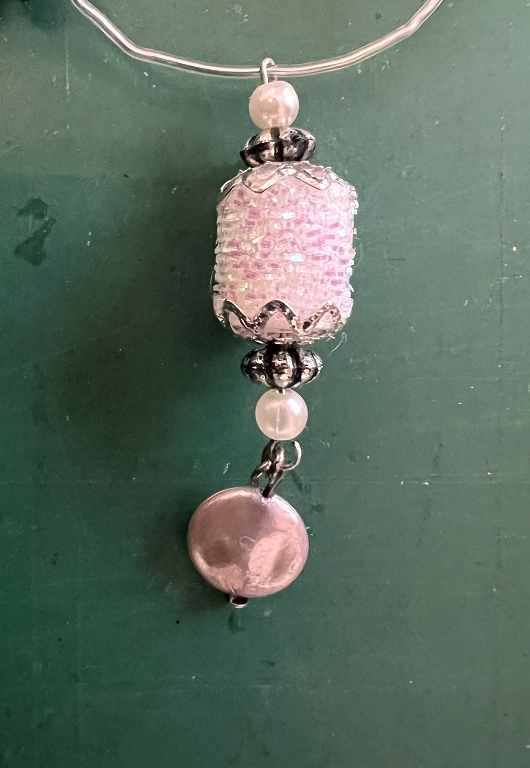
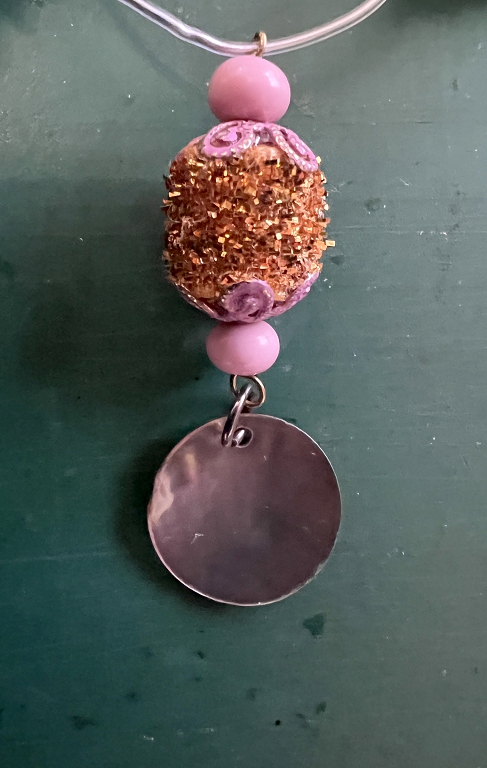
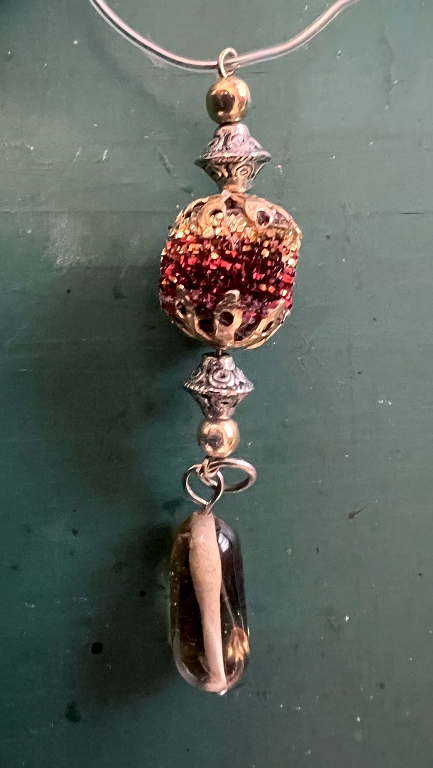
This is where the wire comes in. You take a length of wire and make an eye at one end. Thread on a small bead, then a bead spacer, then the ribbon bead with its end caps, then another spacer and another bead. Trim off the excess wire and make another eye, and this stage is complete. All that is now required, if desired, is to add a dangly of some sort with a jump ring – charms, end beads, tassels – anything really.
Salvaging parts from junk jewellery
On our recent shopping trip I bought several necklaces from charity shops, specifically with danglies in mind. Some of them are too large for this project, being out of proportion with my beads, but I managed to gather quite a few.
I also got out my box of junk jewellery.
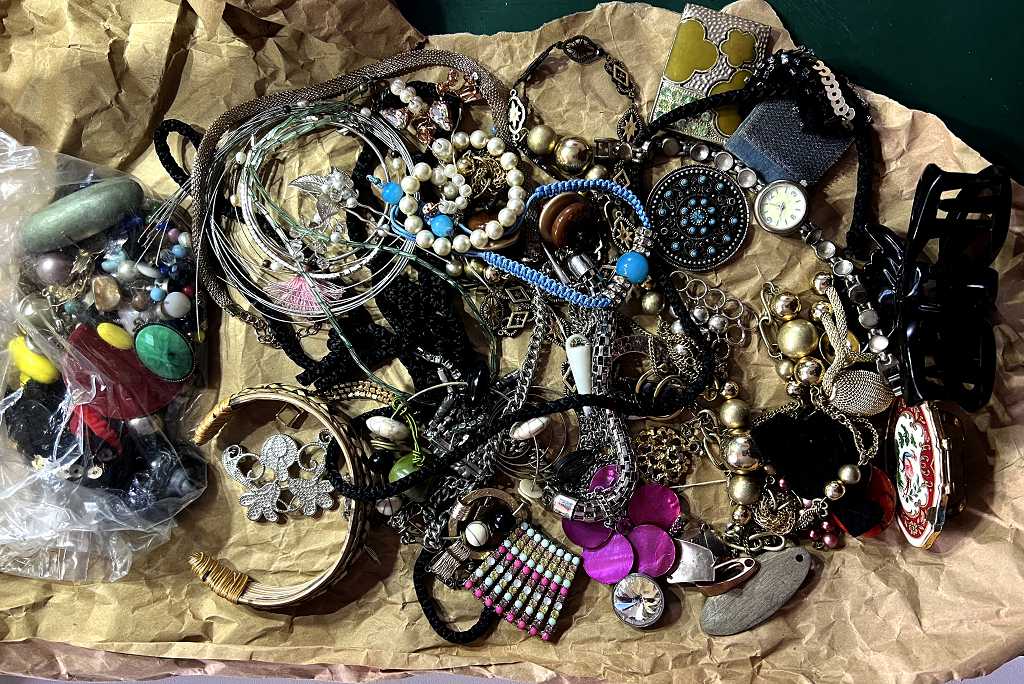
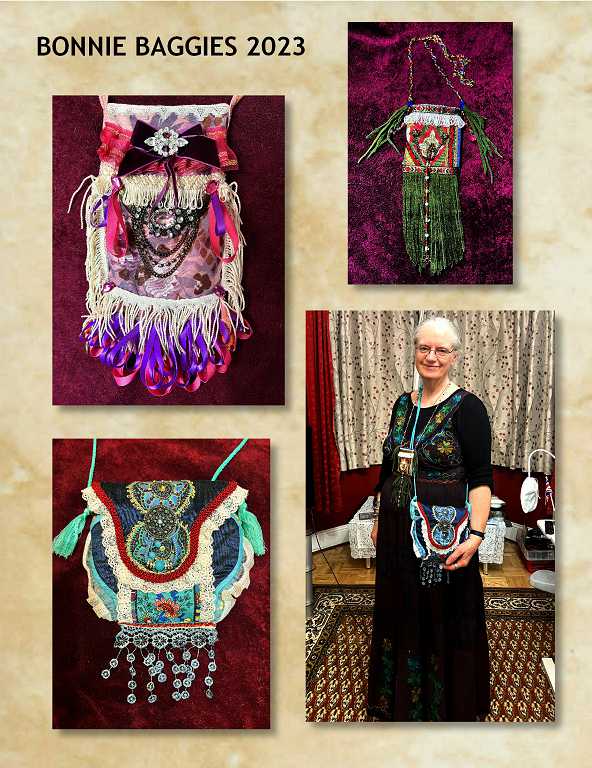
I have acquired this over the years from charity shops, village fetes, and a job lot from Ebay which I got several years ago (the above photo is this mixed bag). Some of the pieces are in good condition and could be worn. Most of these aren’t to my taste but I’ve saved a few. Some of the pieces are broken or have missing gems, and there are some odd earrings. All of these can be taken apart, with the jewellery findings, chains and beads being salvaged and stored elsewhere. Sometimes there are quite large solid elements, such as brooches, or the large focal point of a necklace, and these can be used to embellish the covers of journals or on bags. Jewellery that I wouldn’t be seen dead in gets a new lease of life and the parts become beautiful in different settings.
Here are some examples of bags I’ve made, with junk jewellery embellishments. These baggies are also a great way of using scraps of fabric and trimmings.
I went through all this junk jewellery and selected a lot of pieces with suitable danglies on them, including charm bracelets, and necklaces with detachable danglies. Any of these can be used in their own right as charms in projects like albums, key chains, bag embellishments and so on, or added to other embellishments as I am doing here.

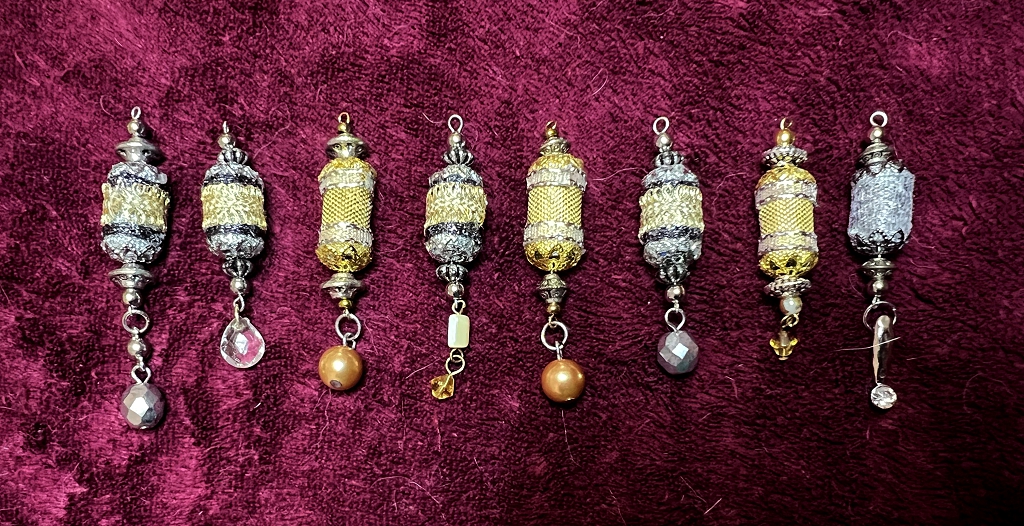
All my completed ribbon beads have an eye at the top and bottom, formed by the wire used to attach the embellishments. All that is required is a jump ring to attach the charm.
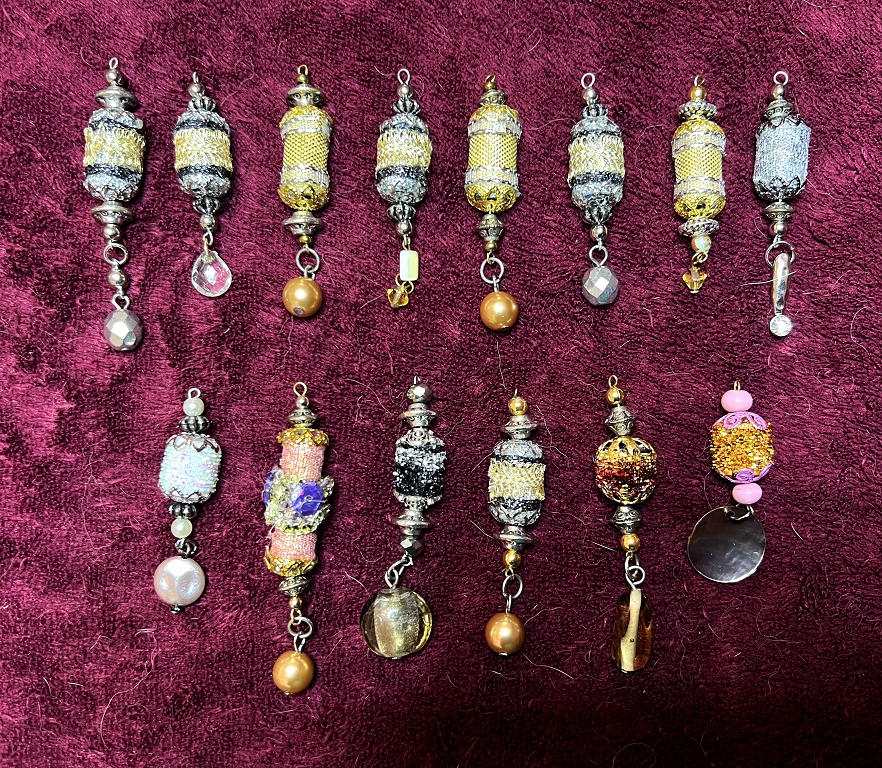
My completed dangly bead charms
This is the first half dozen from the longer beads.
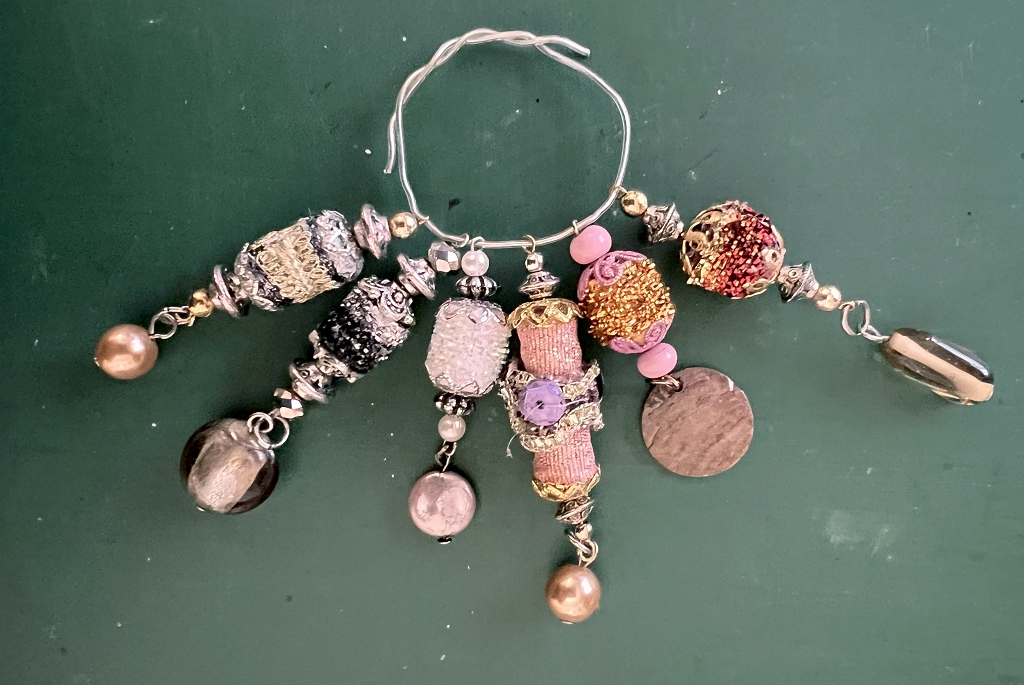
This is the second batch that I made.
I am planning to add embellishments to the smaller round beads that I made at the beginning, to turn them into dangly charms as well.
Dangly charm storage
I’ve seen an interesting video where someone made a display box with upright cards on which you could hang charms like this. I don’t think I’ve got room in my studio for this, but I think I could adapt the idea in book form. Storing them in this way means that you can see what you’ve got at a glance, rather than having to rummage in a box. They also look really pretty when stored like this! They can be attached temporarily to the card with a bulb pin so they don’t go astray.
Completion of the project
Here is the complete set of dangly charms made from the longer beads.
This has proved to be the most fun project! It’s pretty fiddly and I did get a bit frustrated with the wire part, but got better at it with practice. The result is just so pretty, rich and jewel-like that it’s really worth the effort! They will make lovely embellishments for so many projects.