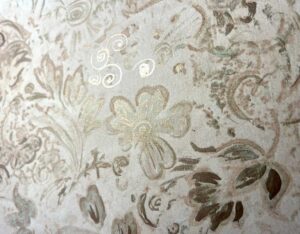
PACKAGING PAPER CLUSTERS WITH GOLD HEAT EMBOSSING
I am indebted to Luise Heinzl for her layered moths on heat embossed coffee-stains tutorial for this project. I have adapted it slightly for my own use.
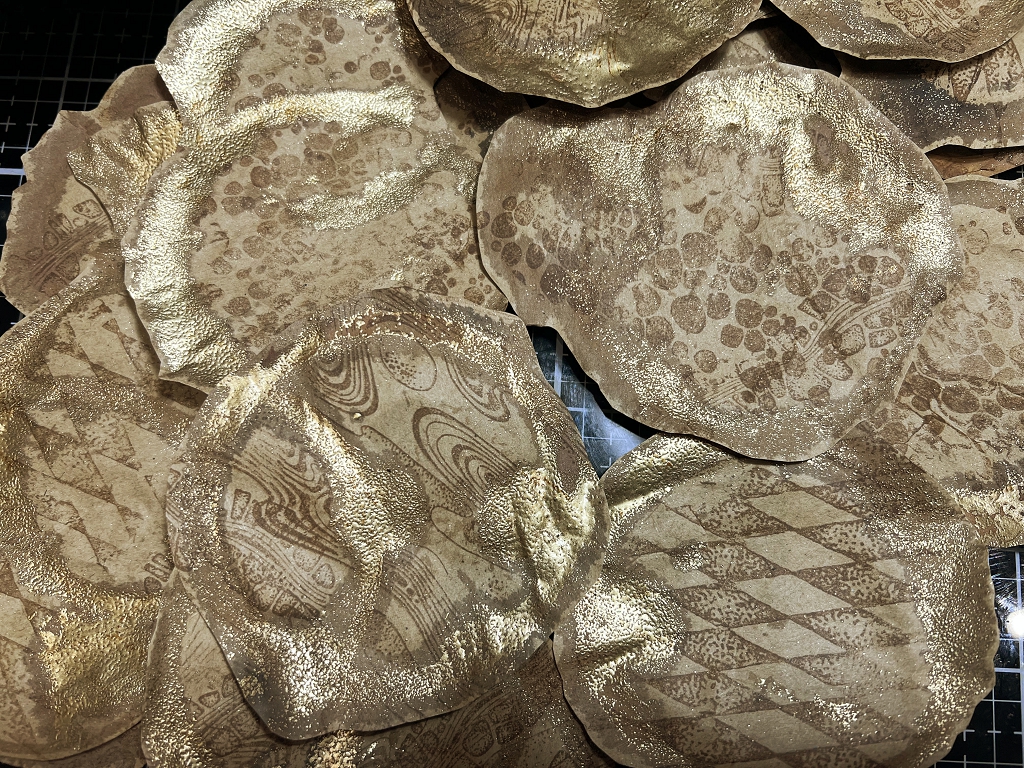
She used a cup dipped in coffee to make her circular marks for the base layer of her clusters, but having just decided that my rust water is now ready to use, I decided to use that instead, and I’m very pleased with the result.
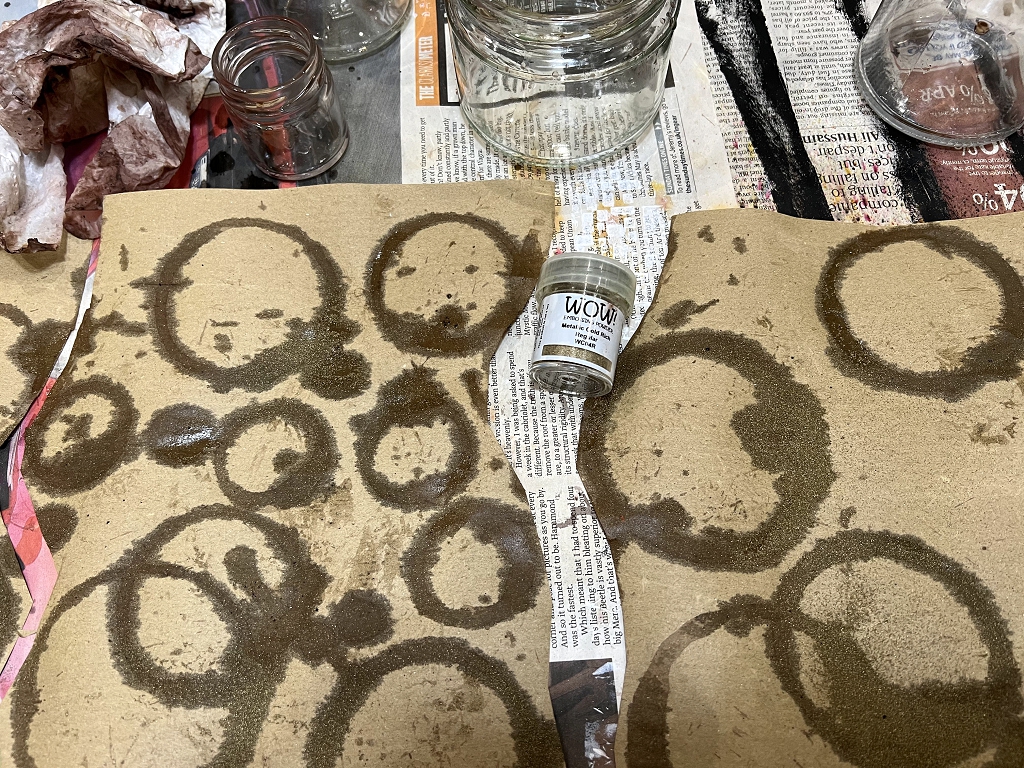
Making circular stains on packaging paper
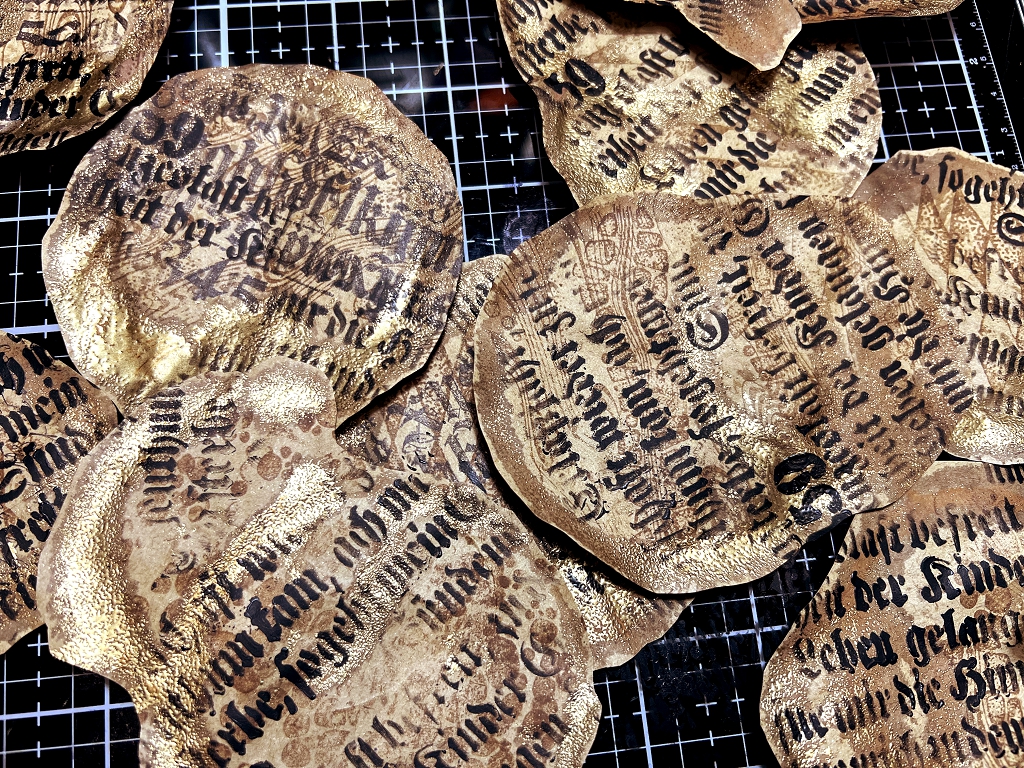
I spread out a nice long piece of packaging paper onto some newspaper on my table. I selected some jam jars of varying sizes, and dipped them in the rust water and stamped the paper with them. I think the rust water makes a good substitute for the coffee. As Luise did, I made some stains as single circles, and others overlapping. Unfortunately the stains bled into the paper a bit more than I intended but the end result is pretty good.
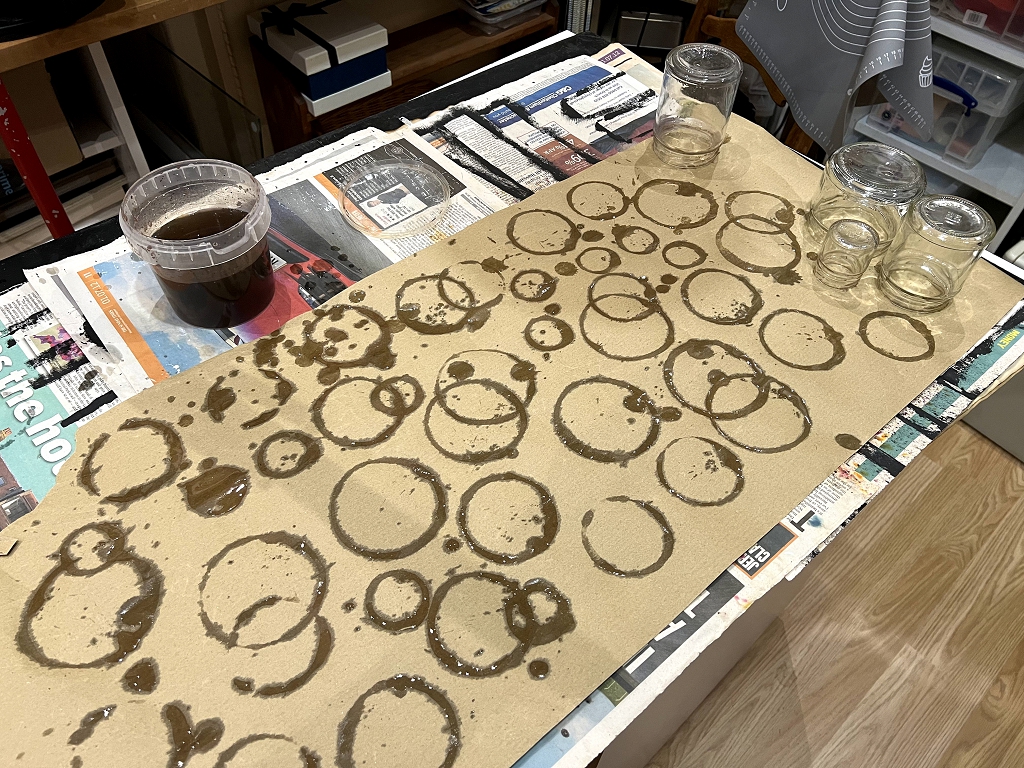
At this stage the stains are still quite wet. I mopped up any obvious puddles and allowed the circles to dry sufficiently to allow the gold embossing powder to stick. I also cut the piece of paper into more manageable lengths for the embossing process.
Heat embossing the circles
I sprinkled on the gold embossing powder and tipped it off onto the next sheet until all the circles had at least some powder on them. Like Luise, I didn’t want to cover the circles completely with the powder, so that some brown would remain.
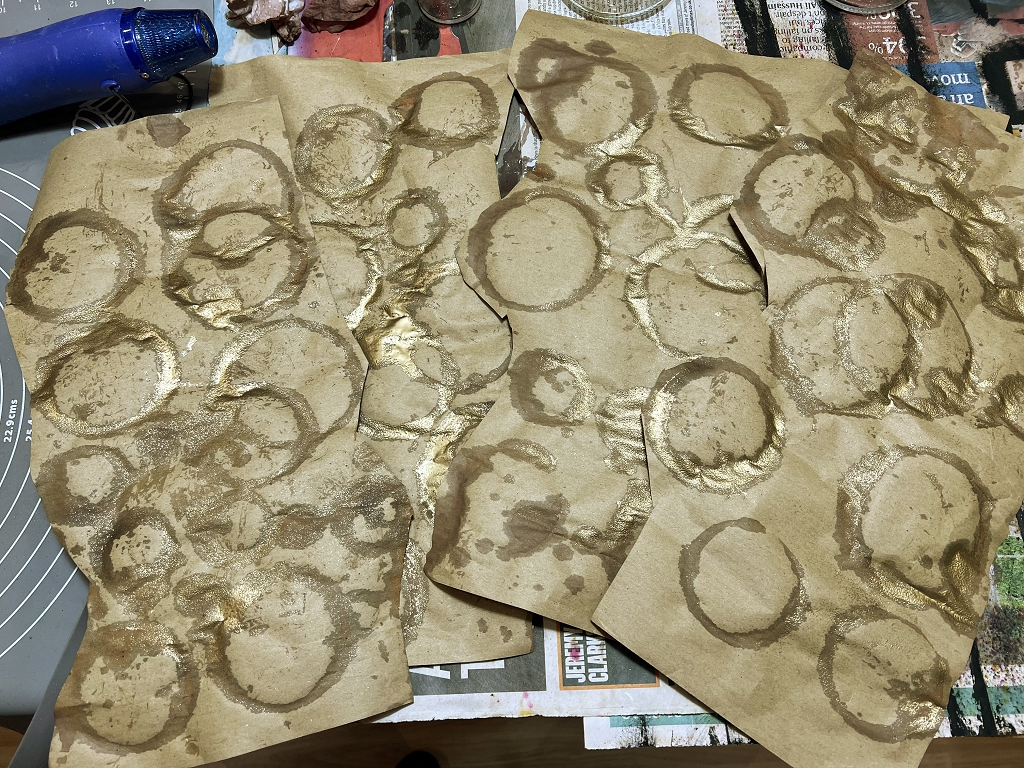
As she did, I heated the papers from the back, which prevented the heat tool from blowing the powder away. Also, because the paper was wet, it was going to take longer for the powder to melt, and heating from behind meant that the drying process took place more quickly.
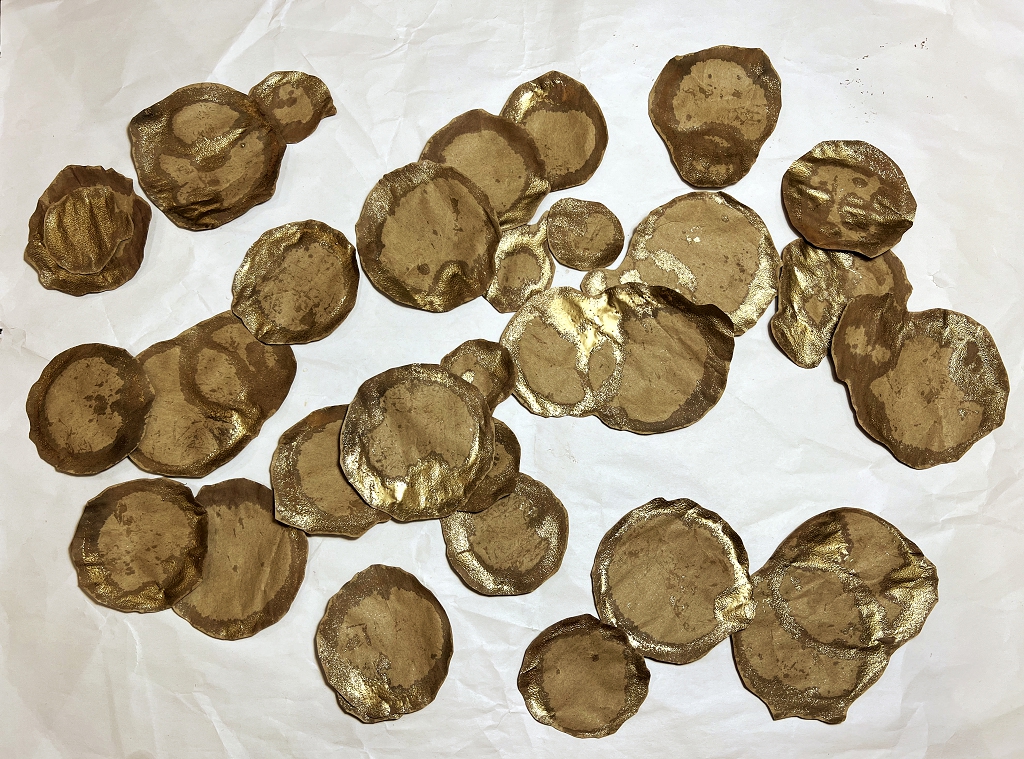
Cutting out the circles
This is the result. Some of the circles were not so good, but I was able to select most of them to take them into the next stages. I deliberately did a lot of them, to allow for rejects.
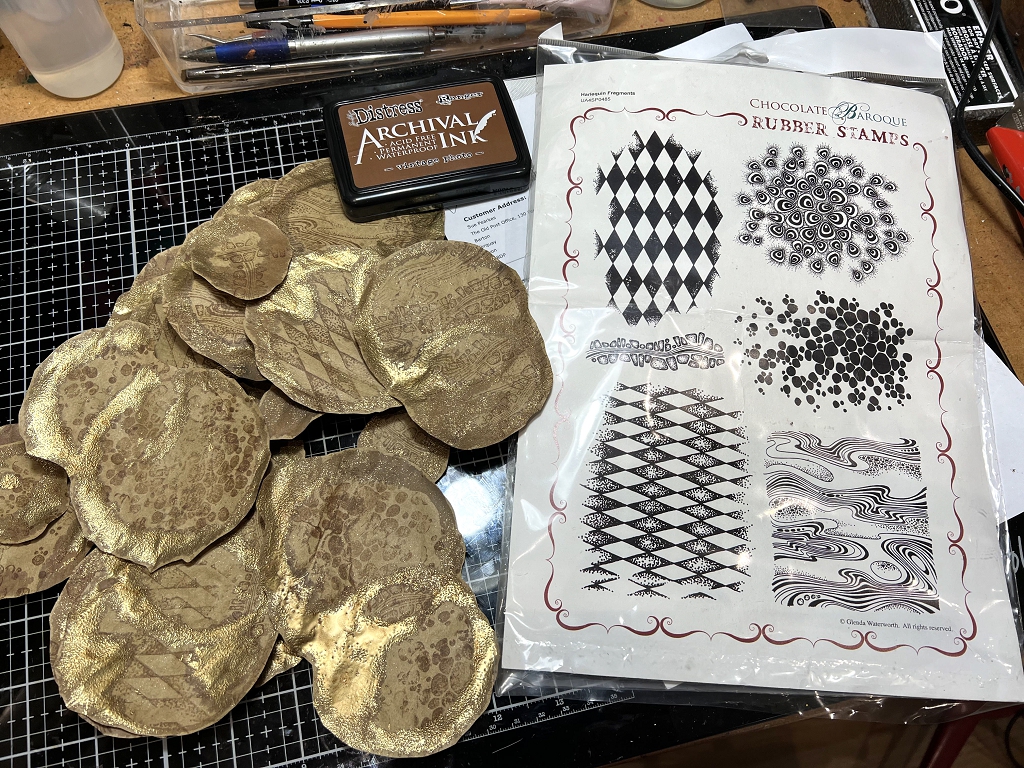
Background stamping
I chose several background stamps from my collection and randomly stamped the circles using brown archival ink. I didn’t use a stamping block but simply pressed the stamp down with my fingers. That way I got a more random, grungey look where the stamp didn’t always make full contact. Most of this would be covered up anyway, but as always with multi-layered projects, glimpses of the lower layers will always be visible to a certain extent so it’s worth doing these initial stages.
Text stamping
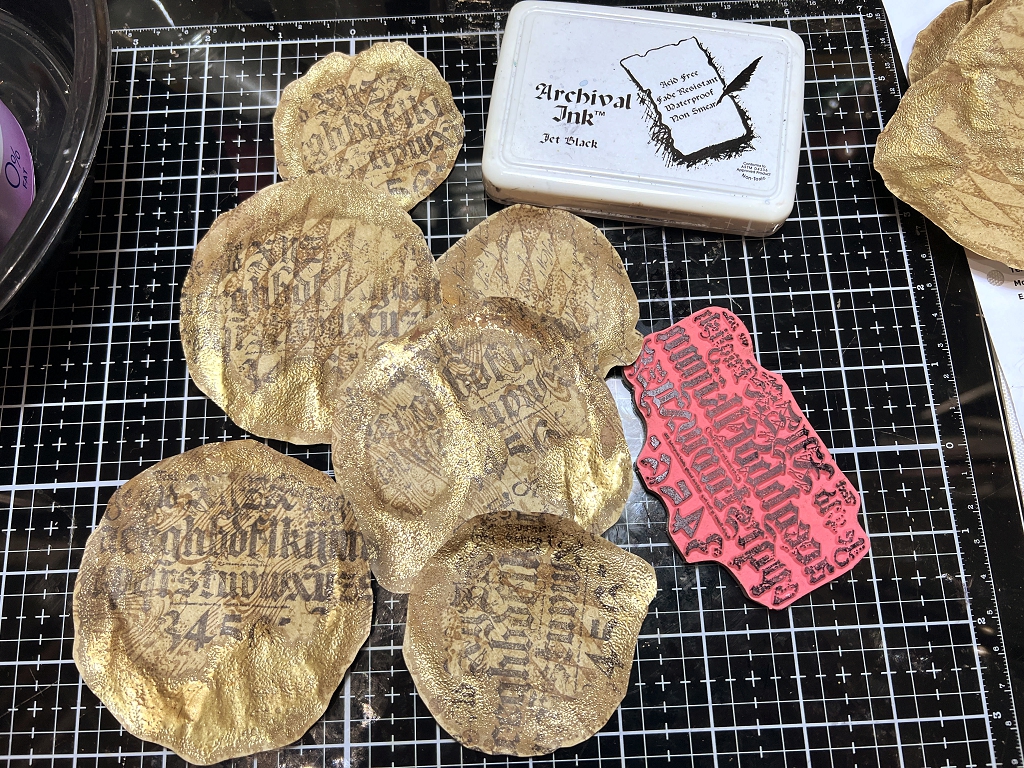
The next stage was to add some text stamping, this time with black archival ink.
I don’t know if my ink pad is a bit dry, but this didn’t come out as dark as I’d hoped, so I decided to add some stencilling as well.
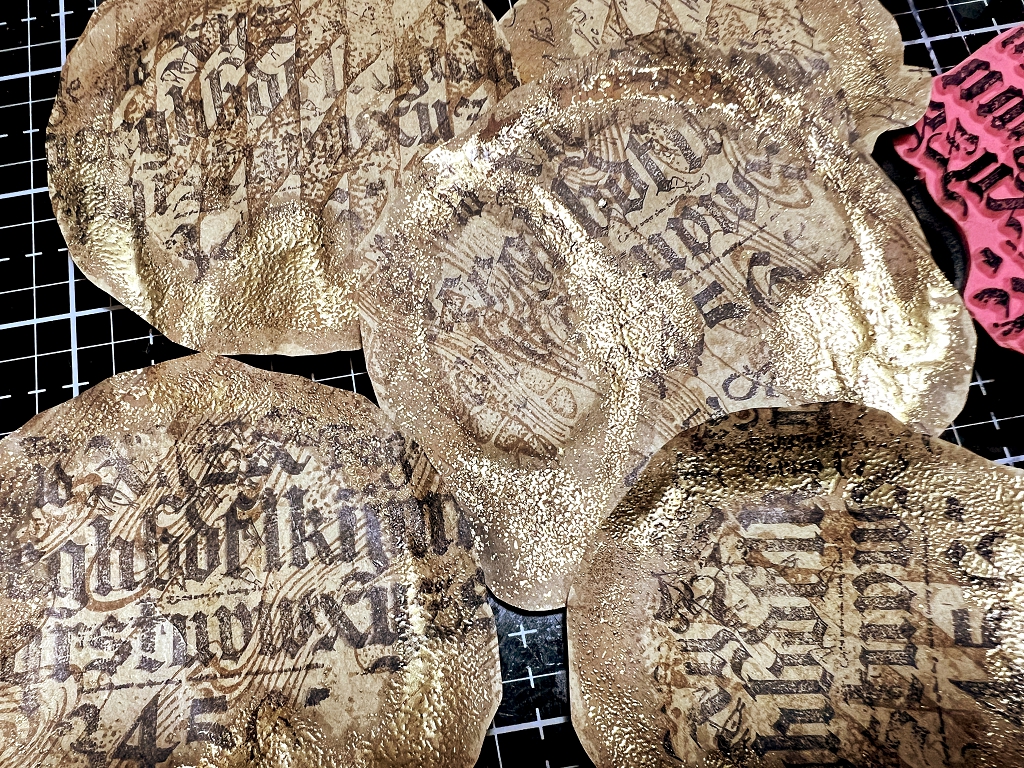
Text stencilling
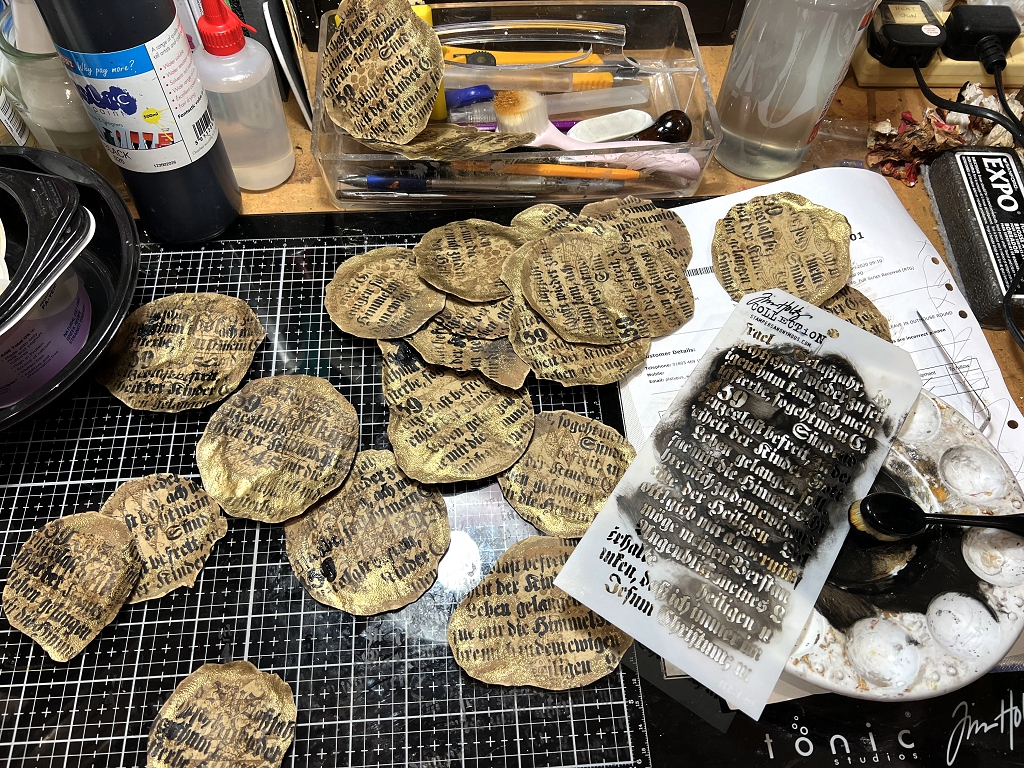
I did this with black acrylic paint, and the result was a lot better.
Parts of the underlying stamped text, and the background stamping, are still visible, and it all adds dimension and interest with each succeeding layer. These pieces could stand alone as embellishments, and I may keep back some of the better ones for that purpose.
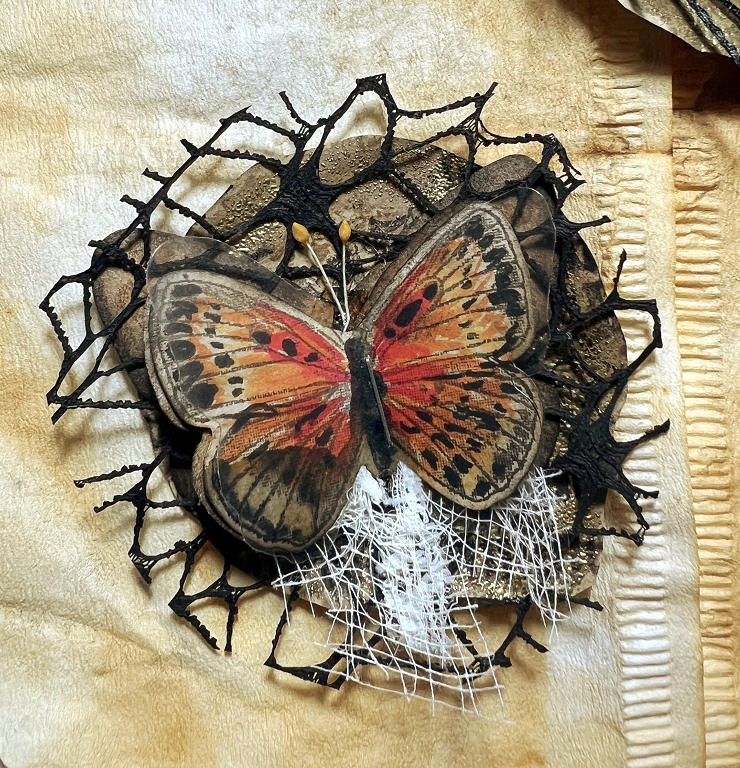
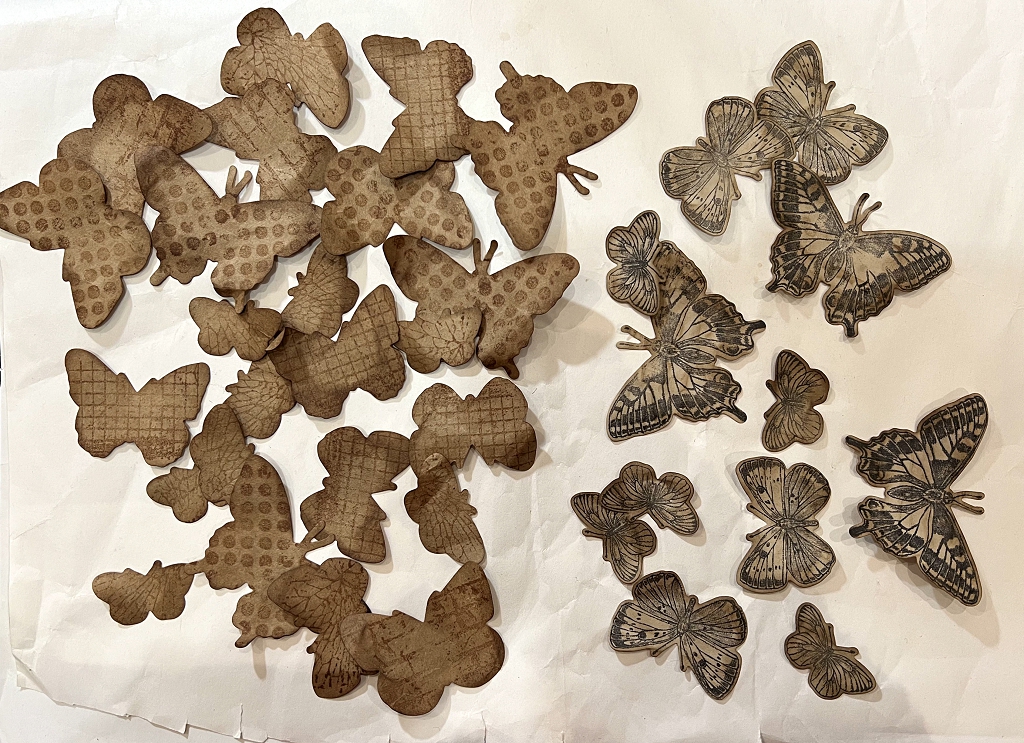
Butterflies
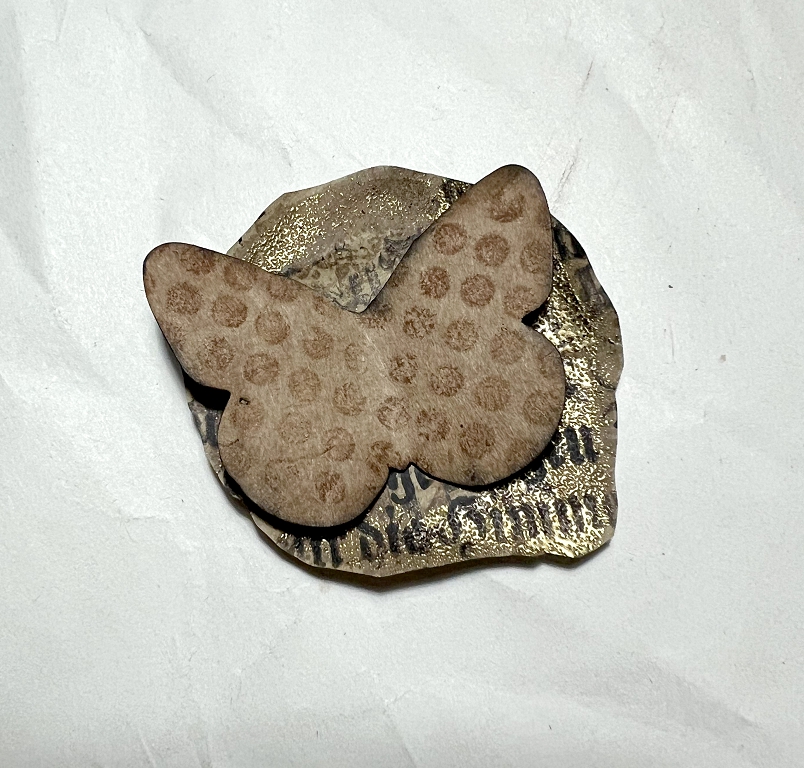
Layer 1 – textured stamping

I die-cut a lot of butterflies from a stamp and die set I have. I stamped a few before die-cutting them, and these would feature as the top layer. Again, these were cut from packaging paper, but a thinner variety than the circles.
I stamped the plain ones with background stamps, using brown archival ink, and inked the edges of the butterflies.
I flipped the wings up and glued the butterfly’s body down onto the circle.
Layer 2 – plastic mesh
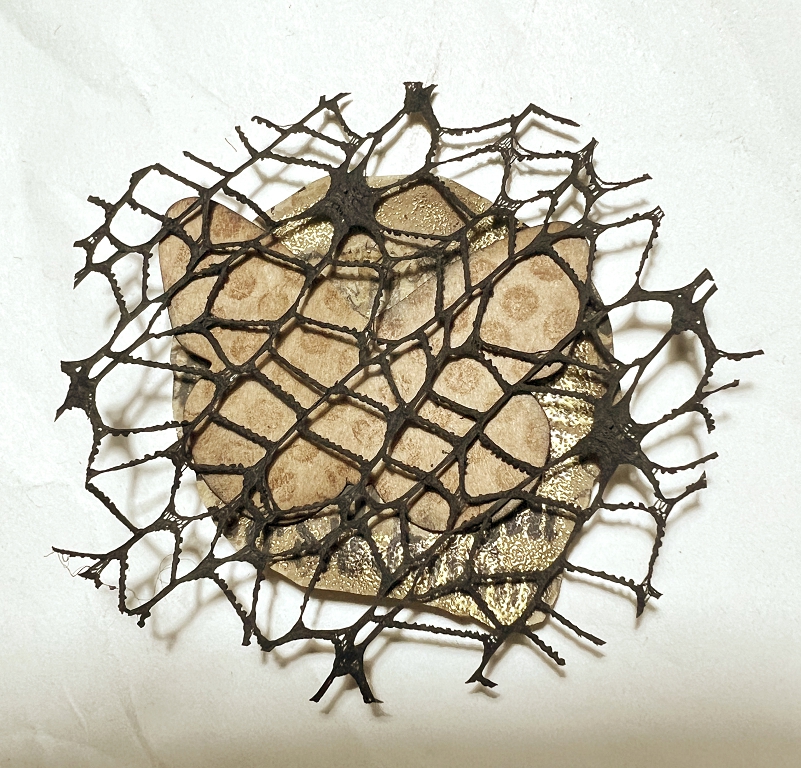
There wasn’t really any need to glue this mesh down, as it would be held in place by subsequent layers. I have several rolls of this plastic mesh, in different colours and designs. I only had this particular design, which is quite fine, in white, so I painted it with black acrylic paint. Later, I trimmed it down a bit more around the edges.
Layer 3 – another texture-stamped butterfly
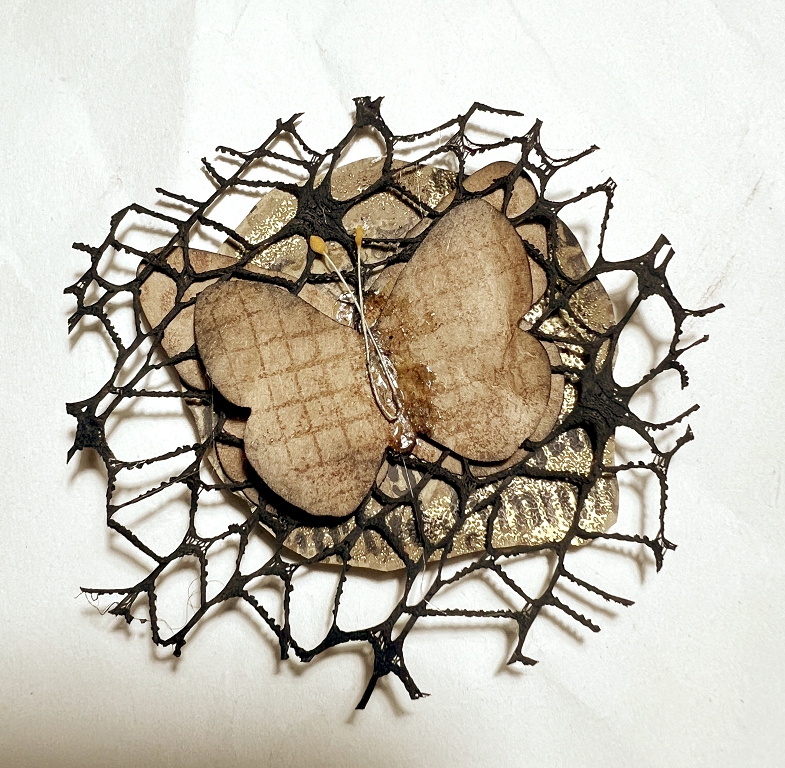
No need for this butterfly to be exactly the same size and shape as the first one. The more variety the better, actually. Again, I glued down just the body, so that the wings could be flipped up. At this stage I also added the antennae, which were formed from a flower stamen. I have a box of parts for making paper flowers, and you can get these little stamens, which make ideal antennae. At this stage, I cut off all the antennae from the die-cut butterflies, as they were not required, being replaced by these more life-like ones.
The lower butterfly doesn’t show up so much now, but again, each layer adds to the richness and depth of the whole. I did add a bit of black ink to the edges to make them stand out a bit more, though.
Layer 4 – scraps of lace, cheesecloth, burlap, etec.
In my lace stash I’ve got quite a long piece of quite tatty lace which had been unpicked from something. It really isn’t decent enough for anything where a clean look is required, but ideal for something like this. I trimmed off the solid borders and pulled it about to distress it, and stuck it down. Later, I added a bit of frayed gauze as this bit of lace wasn’t quite enough.
Layer 5 – the final butterfly
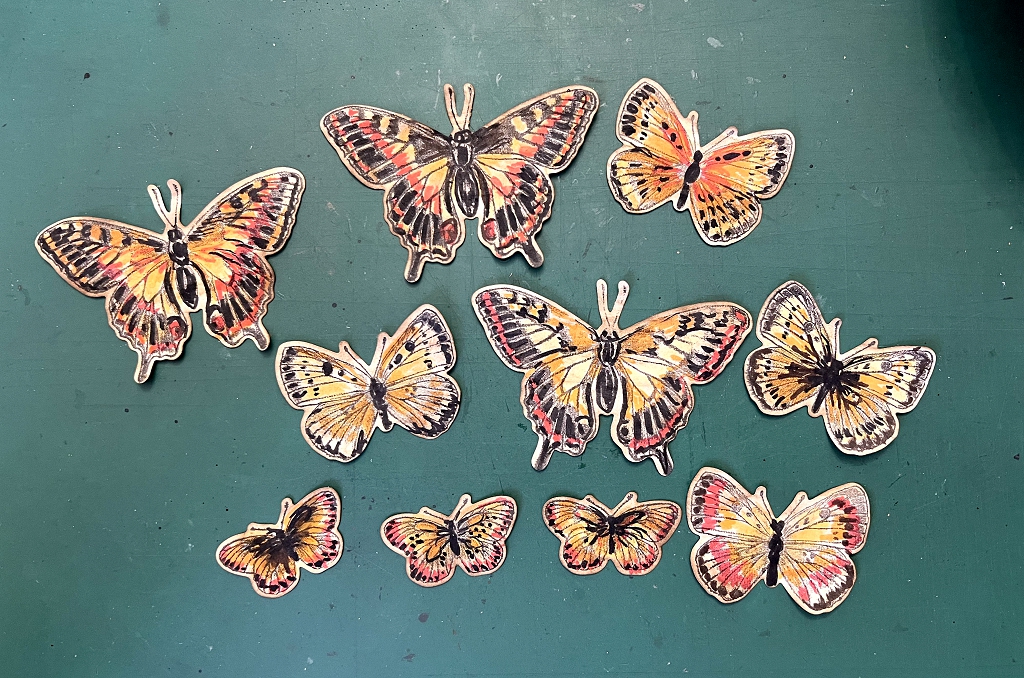
I coloured the stamped die-cut butterflies with Tombow Dual Brush Markers. The colours are quite muted, being on the brown background. At this stage, these butterflies still have their die-cut antennae, soon to be cut off.
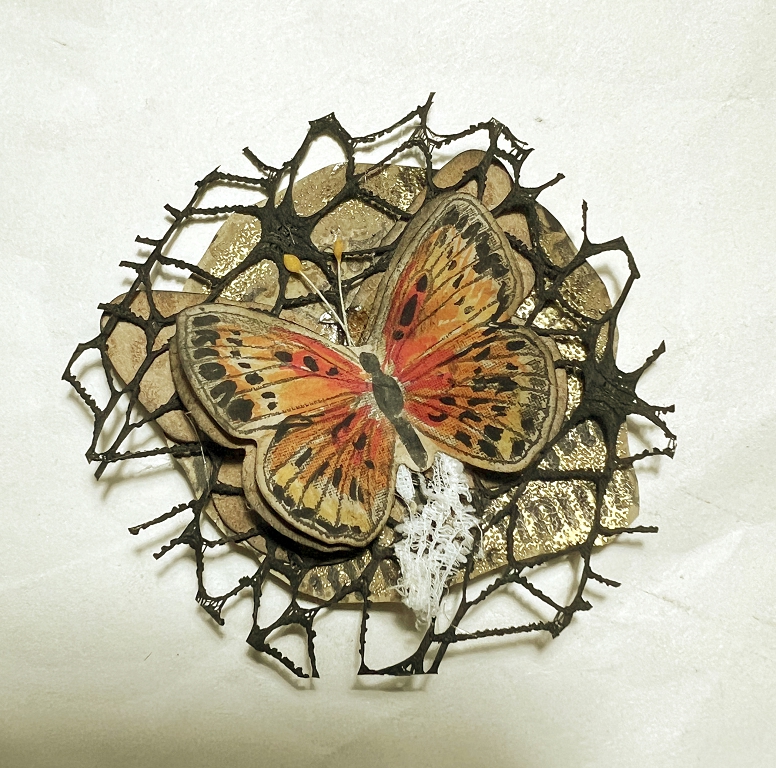
Again, I stuck the butterfly down leaving the wings free. You have to attach the antennae underneath this layer.
Layer 6 – acetate
I used the same butterfly dies to cut some from acetate. I have a pizza box full of acetate scraps of various thicknesses gleaned from packaging etc. I had a terrible job with this – the die didn’t seem to want to cut right through the acetate, and I had to fussy-cut the bits that were missed. I then realised that the acetate is thinner than the usual cardstock, and when I added a couple of shims to the die-cutting machine “sandwich” (various cutting plates required to make the machine work), it cut like a dream. I ended up with more die-cut butterflies cut from the cream coloured scraps of card that I used as shims, and these spare butterflies won’t be wasted. I lost a couple of the acetate ones on the floor for a while – these acetate butterflies are quite invisible unless they are against a dark background!
Any glue is going to show through the transparent acetate, so I stapled right through the whole cluster to hold everything in place.
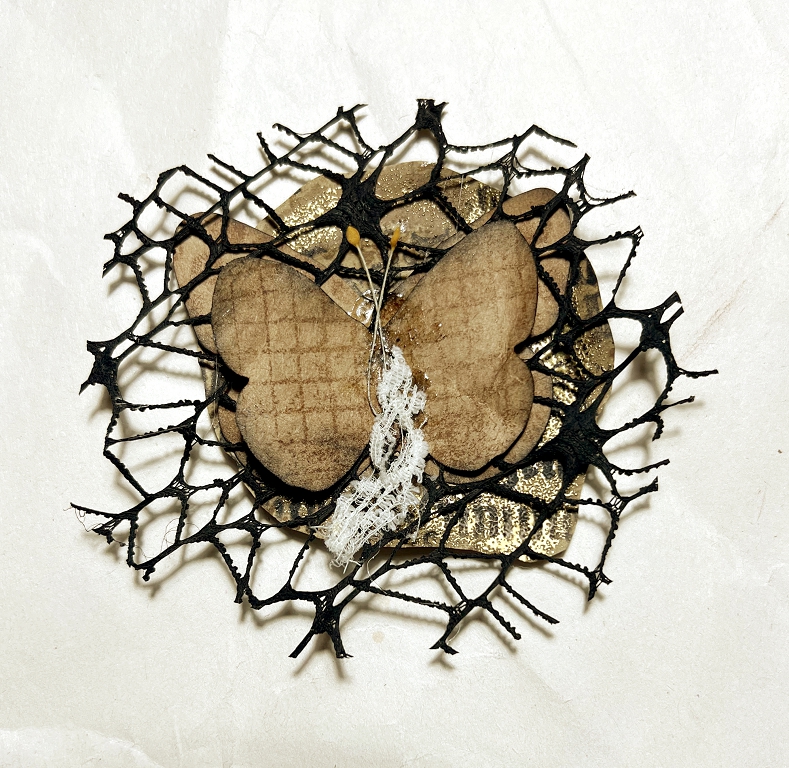
Three finished clusters
Here are the three clusters I made yesterday. You can’t see the acetate, but it gives the butterflies a nice shiny surface in real life, which adds to the textural variation of each piece.
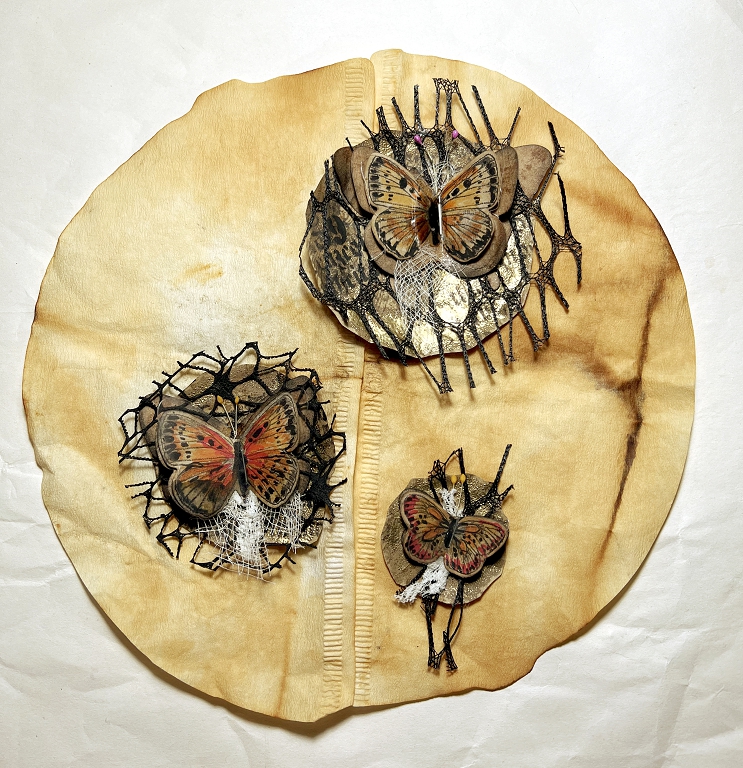
I photographed these three clusters on a background formed by placing two semi-circular pieces together. These two pieces were originally cone-shaped coffee filters that I used to strain my batch of rust water into a clean container, reserving the rusty nails for the next batch. I opened the coffee filters out and really loved the stains left by the rust.
In the photo, they look pretty flat, but in real life, with the wings lifted up, they are quite dimensional. Also, the gold is a lot more shiny in reality, and glimpses of it glitter through the layers.
I am going to use these three clusters to embellish a page in my “Make a Joyful Noise” album. I have plenty more rust-stained and gold-embossed circles to work on, and I plan to make a whole collection of these little embellishments. I have a lot of fussy cuts of butterflies and moths, and I also want to do some with other subjects as well, such as mushrooms, which I think would go well with this grungey, autumnal look.
Finishing touches
I am not able to add the final touches to these elements until they are all complete. Luise used a very interesting spattering technique across her whole collection of clusters which I am keen to try, flicking acrylic paint from the underside of a flexible palette knife. This results in lines rather than spots, and it was most effective in an off-white colour. She then added some normal spattering with the same paint, watered down.
I shall do another post about these clusters once the set is complete and I am able to add this finishing touch.