POUCHES AND PAPERCLIPS FROM TOILET PAPER ROLLS
Continuing with my album elements project, I have made a collection of items from the cores of toilet paper rolls.
I recently came across a YouTube video and learnt how to emboss the toilet rolls and make tiny pouches out of them. As I folded and cut them, it occurred to me that one could also make hidden paperclips from them. They are a bit more bulky than the ones I’ve made before from cardstock, but I am pleased with how they turned out.
Embossing the toilet rolls
The first step is to flatten the rolls. Then I chose a selection of embossing folders and ran the toilet rolls through the machine, which not only embossed the pattern very nicely on them, but flattened them further. Of course, on the back, the pattern is “debossed” rather than embossed, because of how the embossing folder works, but that is fine for this purpose.
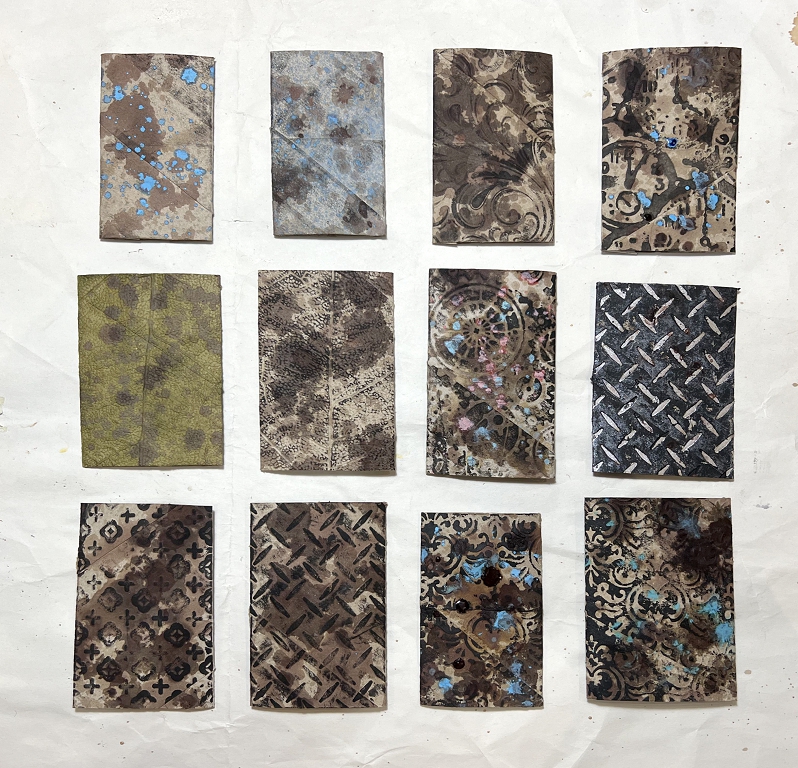
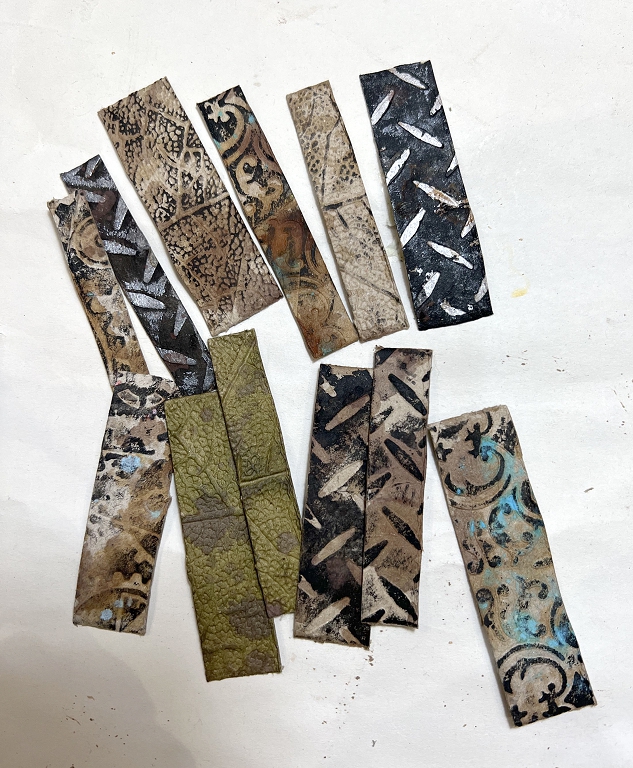
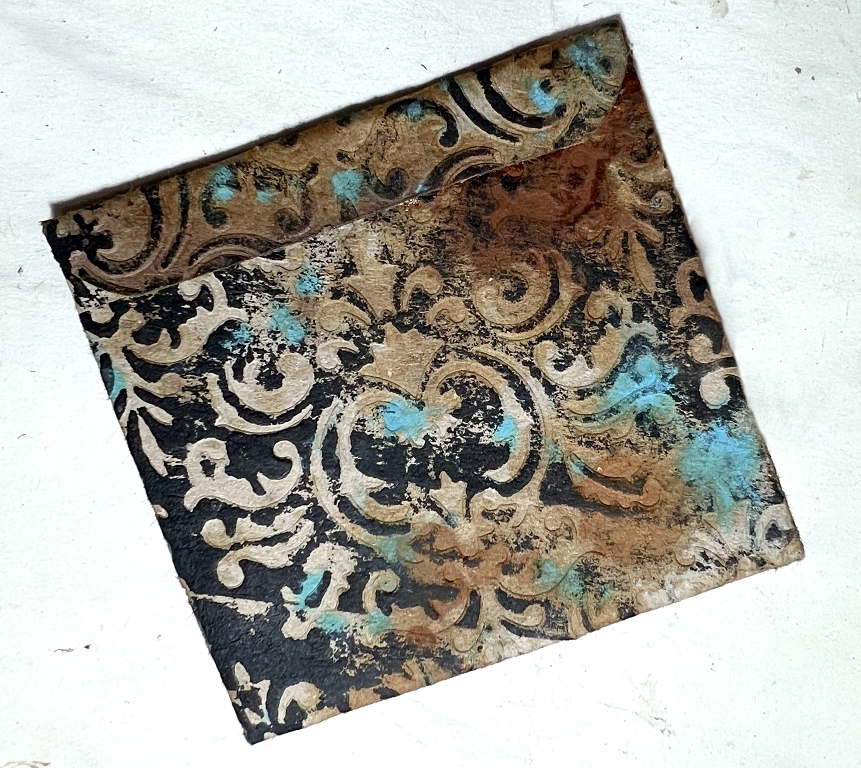
Once the embossing is done, you can have some fun with inks and paints to bring out the patterns. Here are some detail shots.
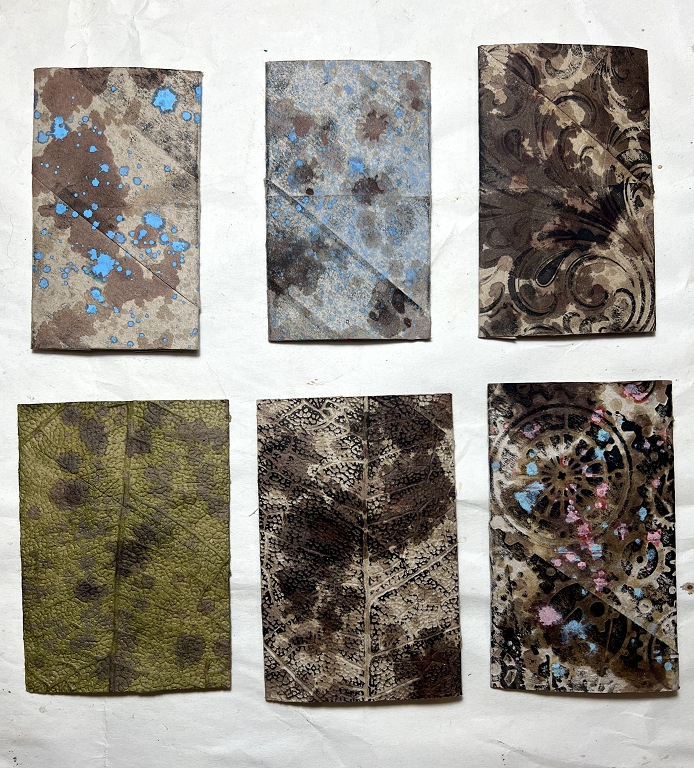
I used a combination of spattered rust water, Distress Oxide spray spattered on, and Distress Spray Stains for these. The two smaller ones at top left were not embossed. I quite like how the diagonal structure of the roll shows on these.
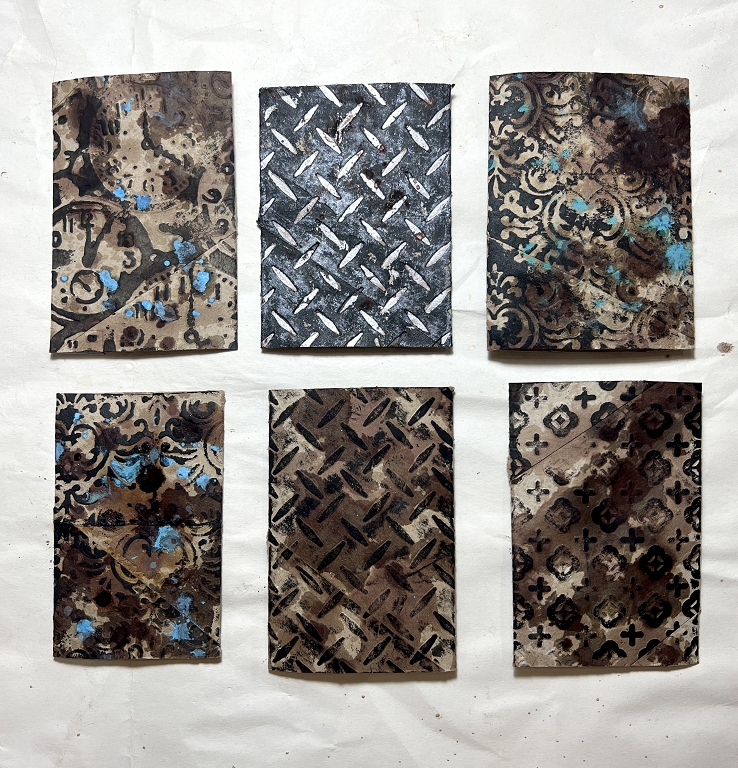
I particularly like the industrial-style embossing folder for the two central ones. I spent more time working on the top one. I first painted the whole thing with black acrylic paint, and then applied some silver metallic acrylic paint over the raised embossed part, using a brayer. for the bottom one, I brayered on some black acrylic paint so it just touched the raised parts.
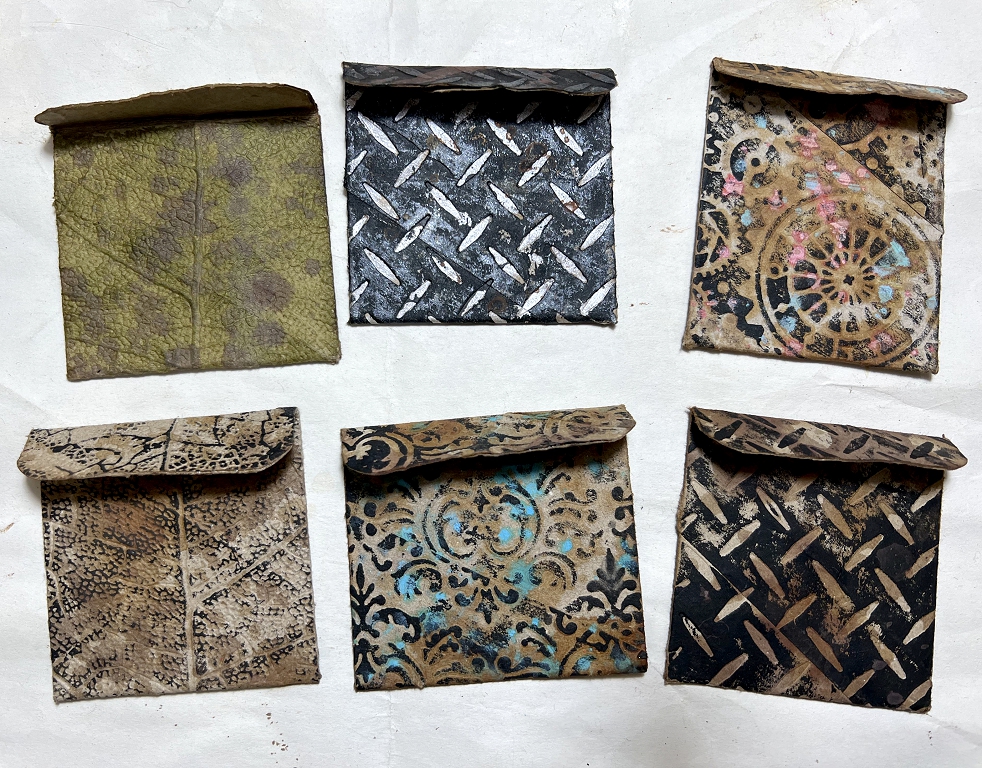
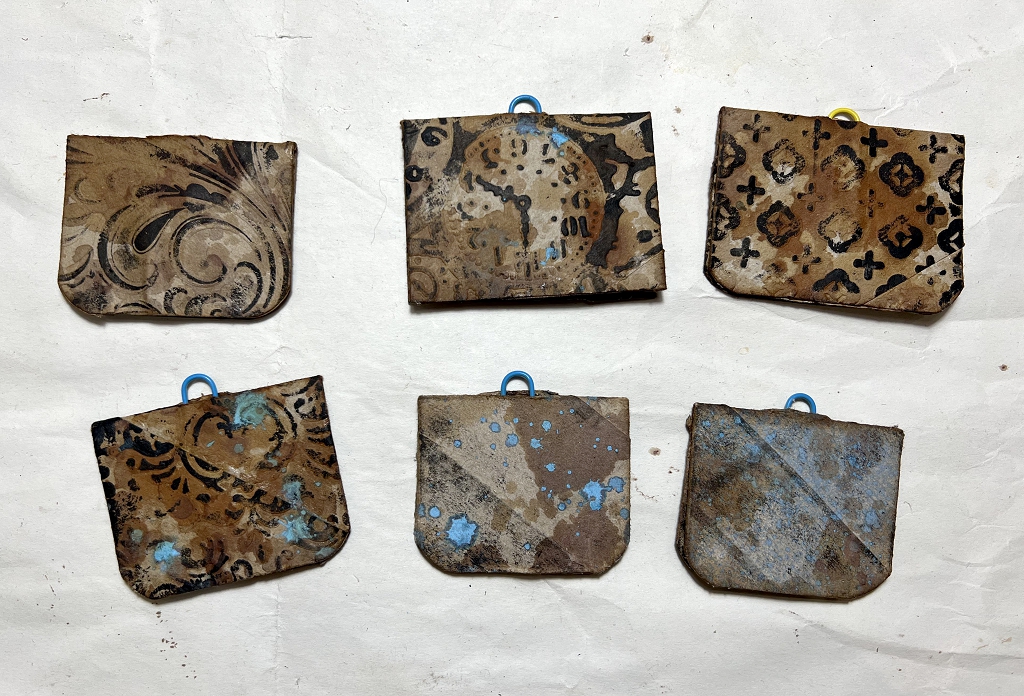
Making the pouches
To make the pouches, I folded up a small amount at the bottom of the back side, to form the closed bottom of the pouch. I turned it over and folded a slightly larger amount at the top, to form the flap on the front of the pouch. They were quite difficult to fold because they were so thick, and I used my bone folder to flatten the fold as much as possible. I then unfolded these parts, and cut away the inside part so that in each case, the folded over part was only a single thickness, which reduced the bulk. I saved the offcuts. I rounded the corners of the front flaps.
These are the offcuts.
Detail shot of one of the pouches.
Later, when I was embellishing the pouches, I stuck the wider offcut back inside the flap to line it. The reason I didn’t leave it in place to start with was because the fold was too bulky. This way, I left a little gap on the inside of the fold so that it would lie flatter. I didn’t do this immediately for all the pouches, because in some cases, the flap liner served to cover up the back of any closure I added.
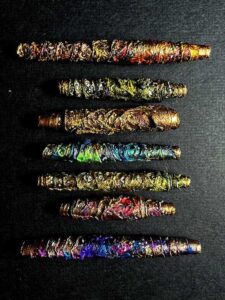
Hidden paperclips
I chose the smaller toilet rolls for these. When I first got out the rolls from my stash, I was amazed at the variation in length and width of the flattened rolls. I buy the cheapest toilet paper I can find for my stoma management as I don’t need posh soft paper for this – I have a second roll of decent stuff for normal use. The cheaper paper definitely comes in smaller rolls than the more expensive paper. For art purposes this is fine – it all adds to the variety!
To make the hidden paperclip, I simply folded the roll in half, and pressed the fold as much as I could. I unfolded it again, and cut a slit in the outer part of the fold, and slipped a large paperclip through the slit, so that each side of it was sandwiched between the two layers of the fold on either side. I squirted glue between the layers and pressed the whole thing together till the glue was set. On most of them, I left the top of the paperclip projecting a little out of the slit so that I could add an embellishment if I wanted. The top could also be covered by a page tab.
I rounded the corners on most of them as well.

I like how the rust water reacts with the ink, making it turn much darker, almost black. I also like how the structure of the toilet roll also shows in some of the patterns.
In the next posts, I will be showing how I embellished all these elements.
Computer news
I am feeling extremely chuffed this evening! This is the first post I have made on my new laptop running Linux, and the pictures are the first ones I have edited on Linux, using the free, open-source photo editing software, GIMP. This took quite a bit longer than my old Serif PhotoPlus software on the Windows laptop because I had to navigate my way around the interface – everything is there, but some of it goes under different names, and it’s all in different places! By the time I’d finished, though, I was familiar with where to find all the basic editing elements I always use. The Linux forum people are extremely helpful, and yesterday I got some very good answers to my enquiries as to how to transfer the photos from my iPhone. One person even told me how to alter the settings in the phone so that the photos would be saved in regular jpg format rather than Apple’s native HEIC format which needs converting. Actually, you can open and edit HEIC files in GIMP and save them as jpgs, but this is easier.
I am planning to try and use the Linux laptop as much as possible from now on, so that I get more familiar with everything. There are ways to run Windows programs on Linux but so far I haven’t had much success with most of it, so I’ve decided, after spending days trying to get things to work, to abandon most of it, and use the native Linux programs which are obviously going to work better. I was delighted to discover that all my old Word documents open fine in Libre Office (the free, open-source Linux office suite) and can be saved either in the native format, or as .doc or .docx if you want to share the files with other people. Also, their equivalent of Excel will open all my accounts spreadsheets, complete with formulae which all work as they should, so there’s no difficulty in making the transfer there, either. My old Serif desktop publisher, PagePlus, will not work, and I have a lot of files created with it, but the most important ones are the templates which I can redo on the Linux setup. I am intending to keep the old laptop in the office running Windows but disconnected from the Internet, so that I can continue to use those files if I need to.
Once I am fully confident, my hubby has agreed to let me install Linux on one of his laptops, and help him to use it. All he does on the computer is surf the net, emails, watch YouTube, buy and sell on Ebay, and use Word – all of which he can continue to do on Linux, just substituting the equivalent for Word which is very similar and he’ll soon get used to that.
The reason for the decision to move to another operating system is because of the drastic changes Microsoft has made in recent months with Windows 11. If you are not familiar with what has been going on, just search on YouTube and you will see that things are going from bad to worse, and individuals, corporations and even state governments are abandoning Windows like the plague, in favour of Linux.
Oh these are lovely – my goodness nothing goes to waste with you Shoshi – not even loo rolls ha ha! I love them, they are so cute, and you have there my favourite combination of colours: turquoise and brown, such a lovely duo!