ISLAMIC ART ALBUM – FOURTH AND FIFTH PAGES – CENTREFOLD SHAMSA
For the centrefold of the first signature of this album, I decided to do a full page spread. As with the shamsa on the first page, I drew a half shamsa, because a full circle would be too small to be able to draw any detail. The pages of this book are quite small.
I managed to do the tracing correctly again. With a circular design with radiating sections, it is a bit more complicated than a motif design which is bilaterally symmetrical. You have to choose a pattern repeat and trace this first from the design. You then fold it and trace it again so that you end up with a mirror image beside the original on the tracing paper. You repeat the process until the design is complete.
Drawing the pattern repeat for tracing
Here is the drawing of the one-eighth pattern repeat. (This is one-eighth of the full circle shamsa, but obviously only one-quarter of a half shamsa.)
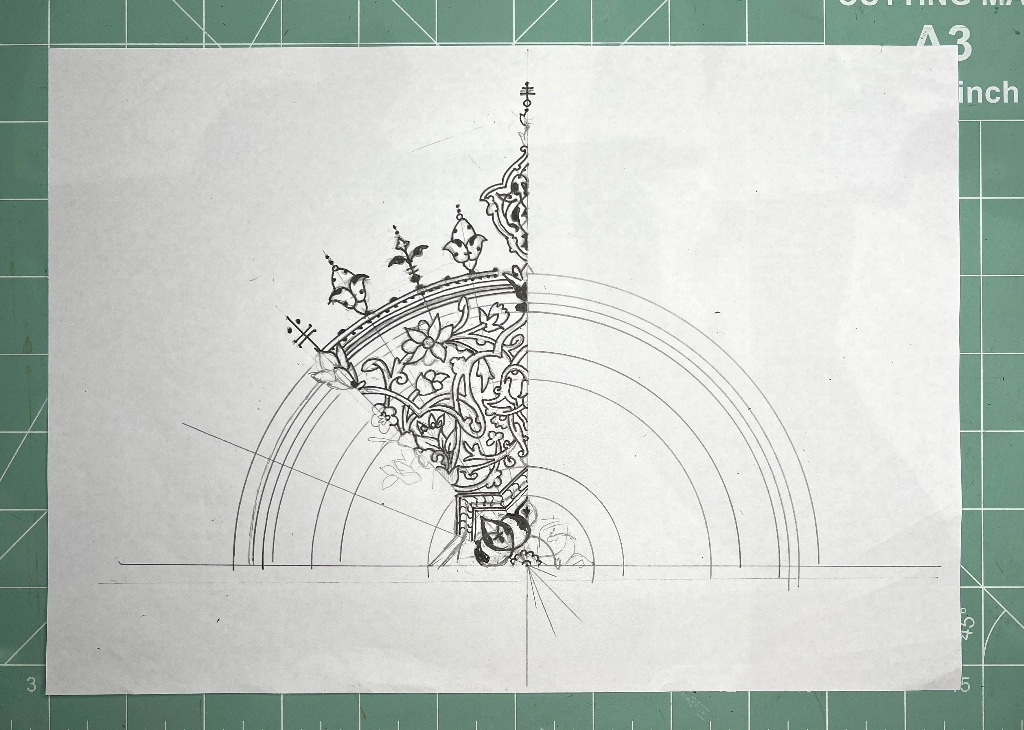
I used my Divide and Rule tools to draw the grid and then drew the design into one section.
Tracing the design
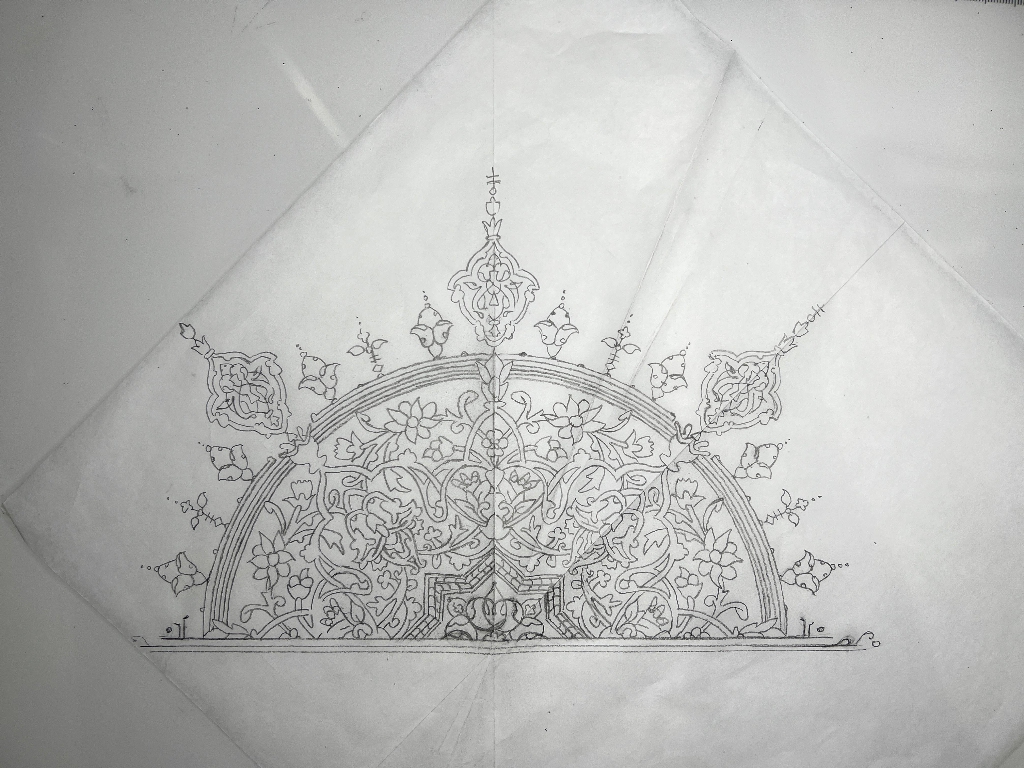
You can see the folds in the tracing paper where I folded it to trace the next section. I should have started at one side rather than in the middle of the piece of tracing paper, because as I traced, it rotated around and almost came off the edge of the paper. You can see that the top of one of the rays is missing, and I wasn’t able to trace the full length of the base line. It didn’t matter because I was able to utilise complete sections to transfer this onto the page.
I used the light panel to do the tracing.
Transferring the tracing to the page
I taped down the page with the full tracing on top, and used a burnishing tool to transfer the lines. This is a metal tool that I have had for many years, which was part of a set of tools for an entirely different purpose, but it works fine for this. The correct tool for Islamic art – both for transferring the traced design, and also for burnishing the shell gold – is an agate burnisher, but I don’t have one of those. A teaspoon would do just as well! One day I would love to own an agate burnisher because they are so beautiful. Perhaps if I ever graduate to using real gold (shell gold – gold leaf ground together with gum arabic and painted on), I might treat myself. This burnishing is what gives the final result its absolutely gorgeous mirror gold finish when you use real gold.
![]()
As before, I hinged back the tracing paper frequently, to make sure the transfer was going OK, and went over any faint parts.
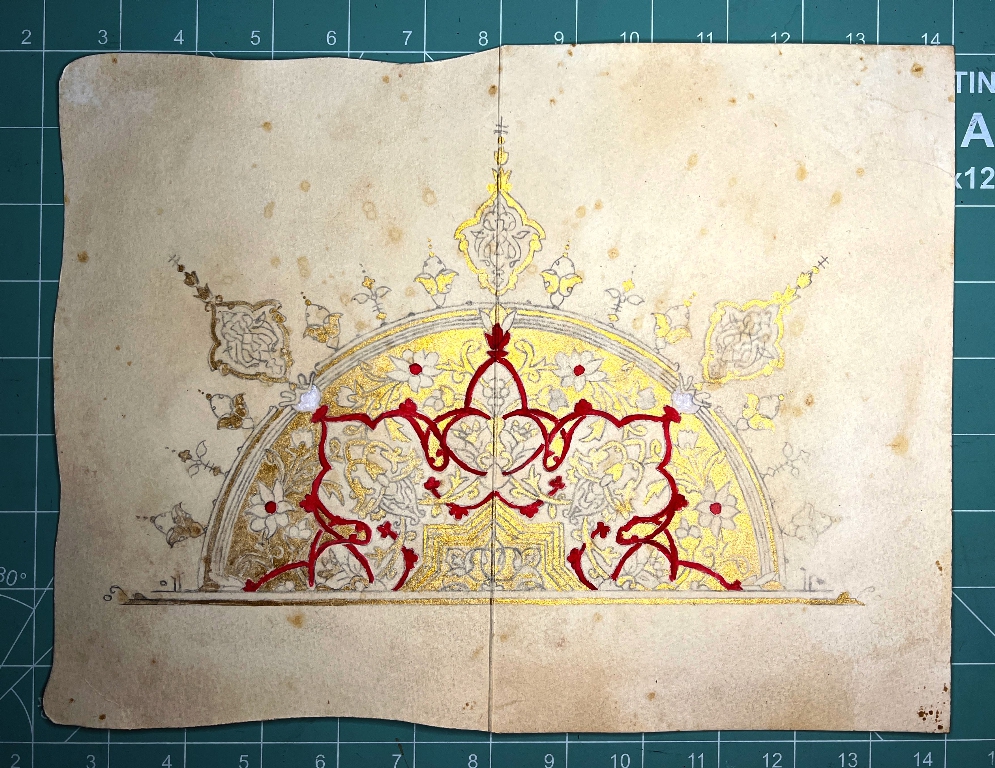
The completed transfer
![]()
There were only a few places where I needed to touch it up with a pencil.
Painting the gold and colours
I began with the gold, using my gold gouache as before. As you can see, there are parts where the trailing stems of the biomorphics are gold against a gold background. I painted almost up to the pencil line so that I would be able to see where to add the black outlining later. This did involve a lot of tidying up in the final stage.
As before, I used my Kuretake Gansai Tambi watercolours for the coloured parts of the design.
I began with the red interlaced outline which creates the inner part of the design. I left tiny gaps to show the overs and unders.

Filling in the blue background.
I added some turquoise and a bit of green to complete the biomorphics. There were still various parts that needed colour.

At this stage it looks a complete mess! I knew that once I got the outlines in it would be better, and I would have to fill in a lot of gaps where I hadn’t painted close enough to the pencil lines. I had a great deal of trouble with the turquoise motifs around the perimeter because the fine line design was complicated. I began by adding a bit of colour and leaving blanks to fill in the design later, but when I came to do it, I couldn’t really see the original transfer and the whole thing was a mess. I blocked out the whole shape with more turquoise paint, and because it was too dark, I went over it again when it was dry, mixing in some Dr. Ph. Martin’s Bleed-Proof White in an attempt to cover up the messy black lines.
Once everything was dry, I redid the transfer of this small part of the design. Again it wasn’t that easy to see as the pencil didn’t transfer very well to all that paint, but I used the tracing as a reference and got it as good as I could get it.
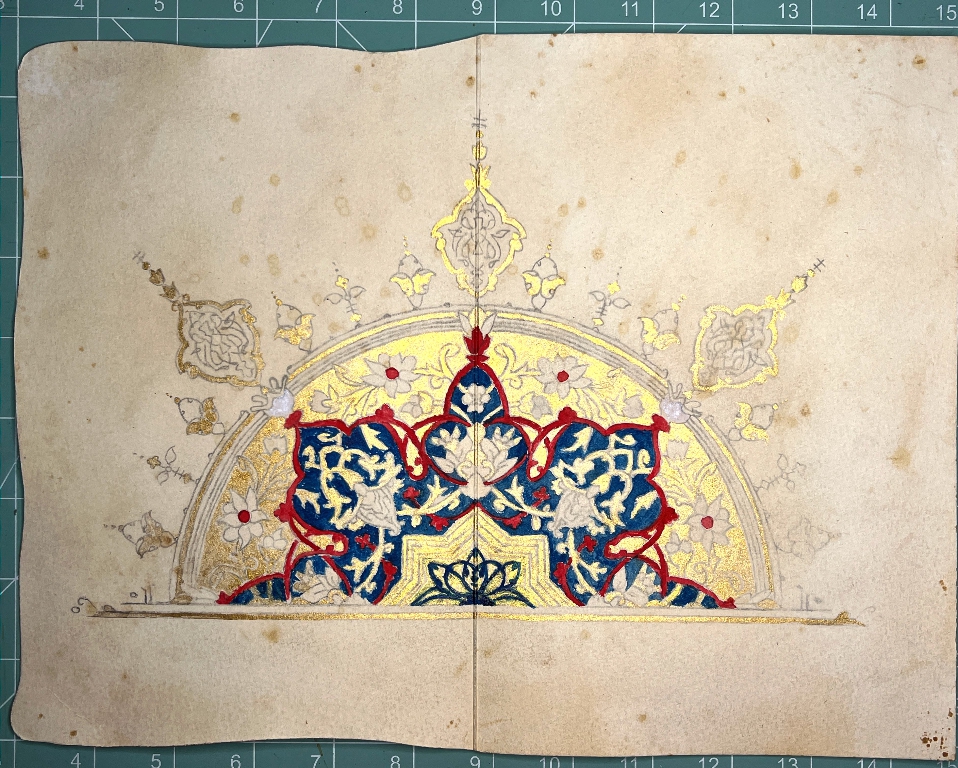
Final touches
There was a great deal of tidying up to do. I wasn’t happy that the blue background was dark enough so I went over that again. I also added shading and highlights to the flowers, and touched up colour, gold and black ink outlines where necessary. This took some considerable time but as I progressed with the work, I was very happy to see how it was all coming together and looking much better with every step!
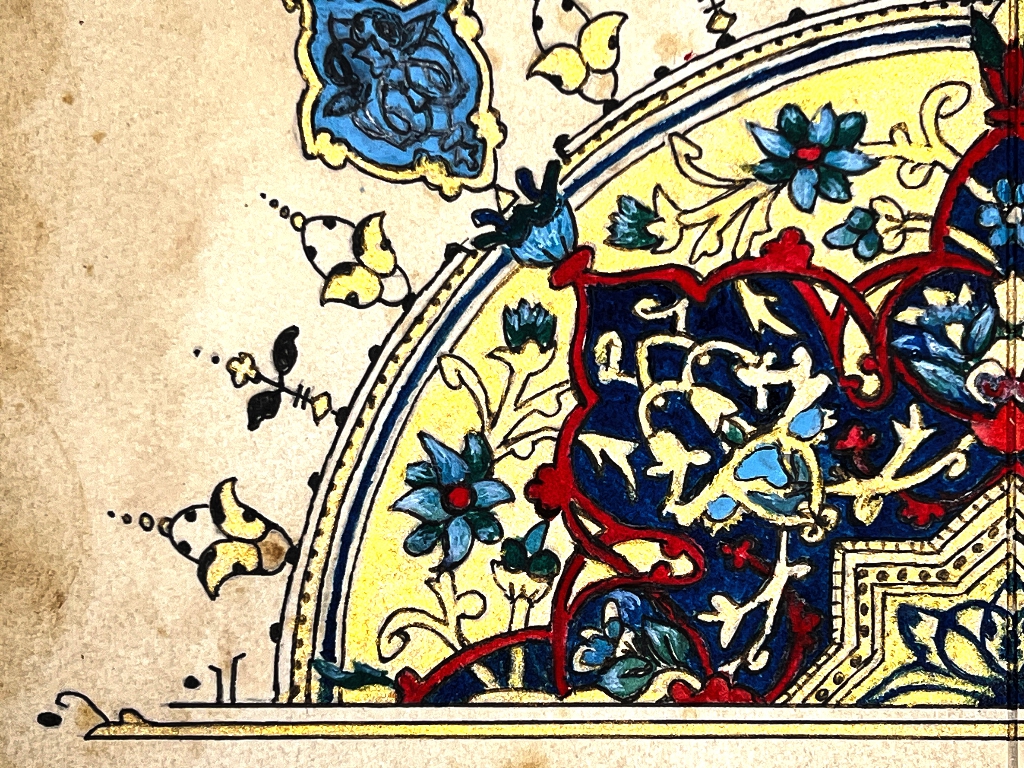
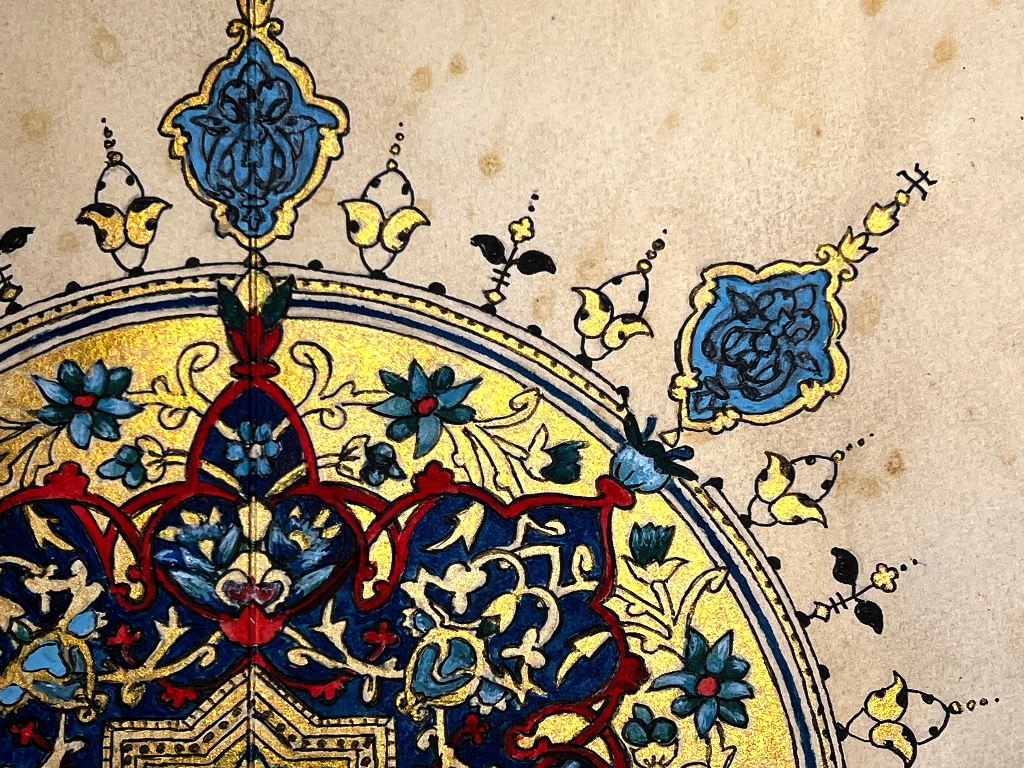
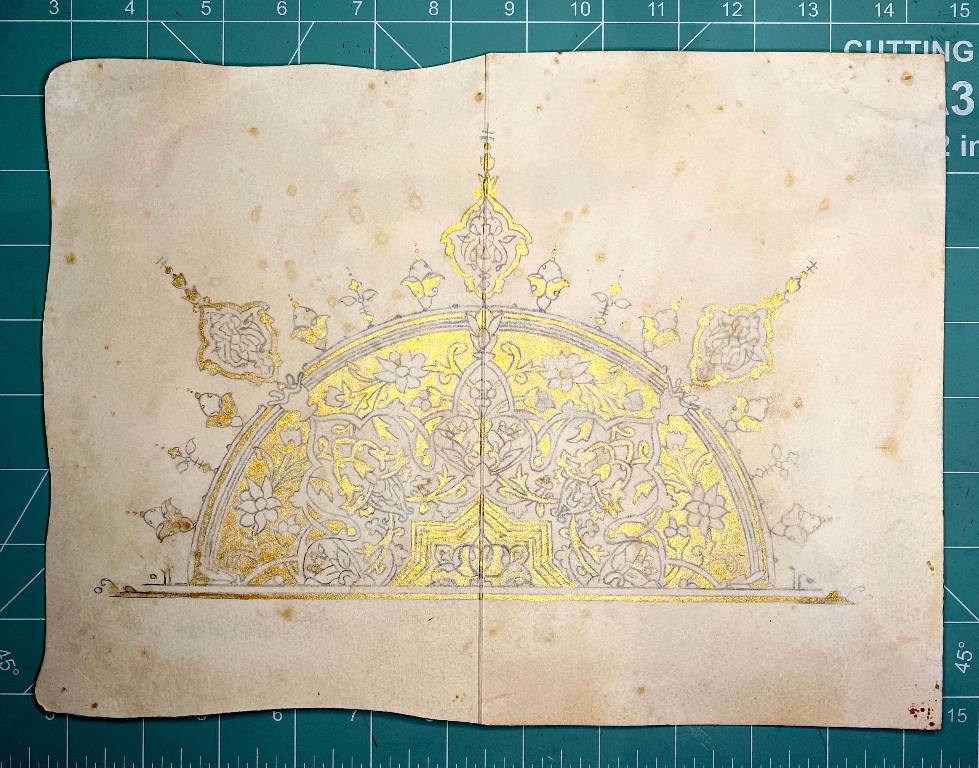
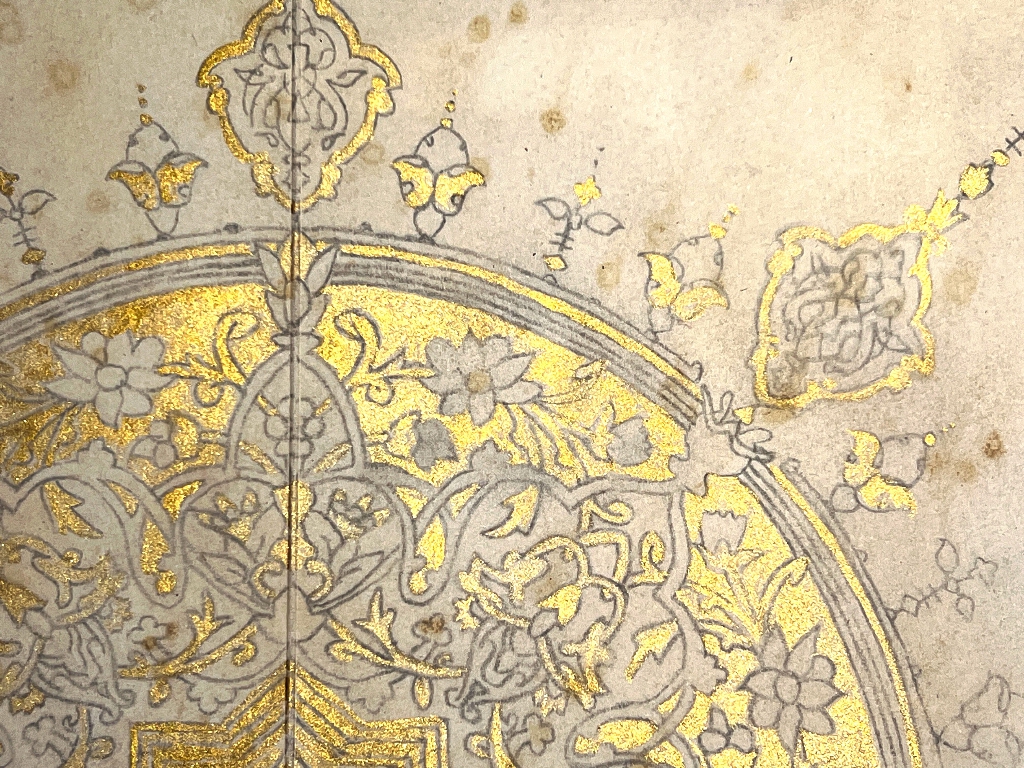
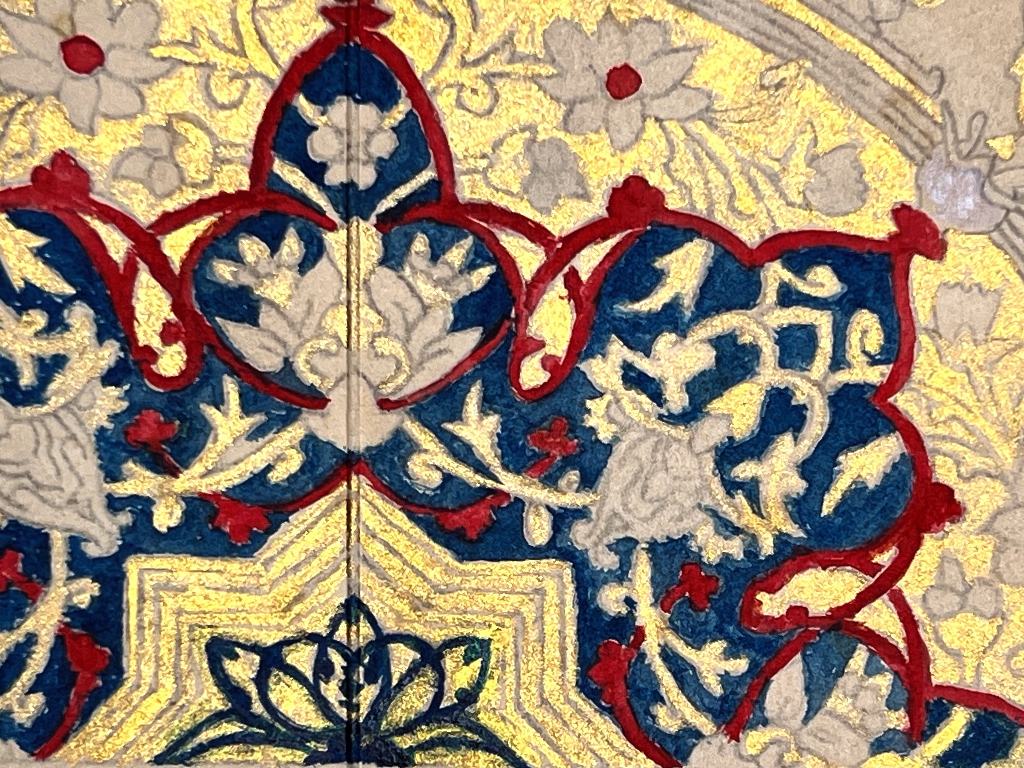
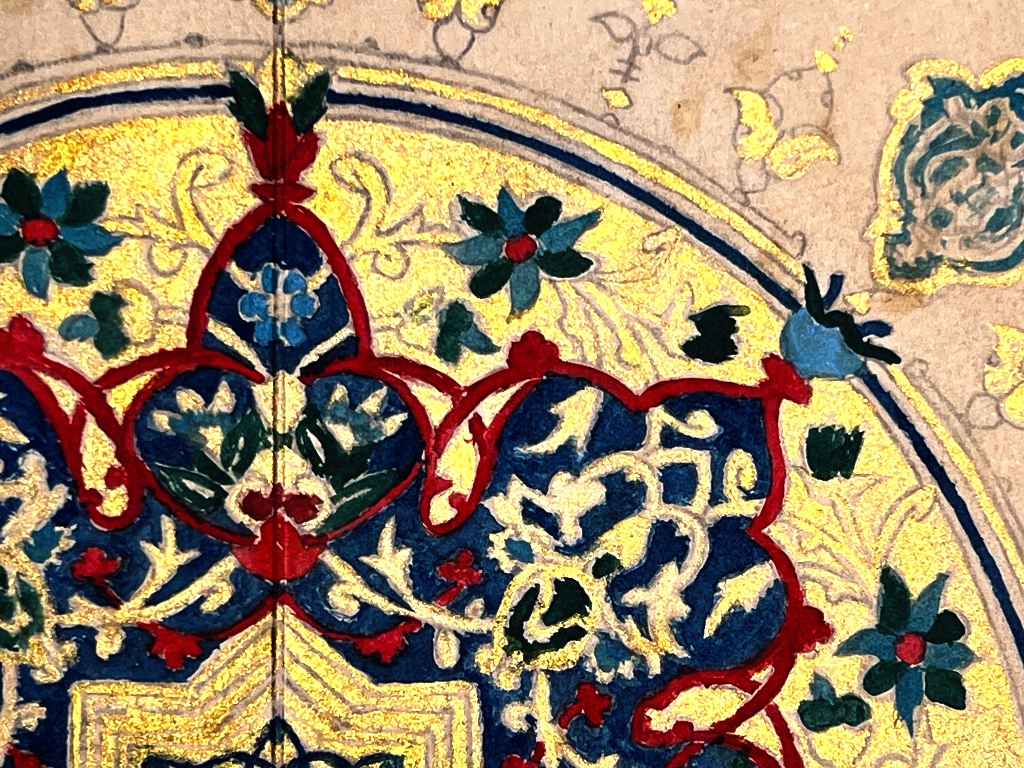
The finished shamsa
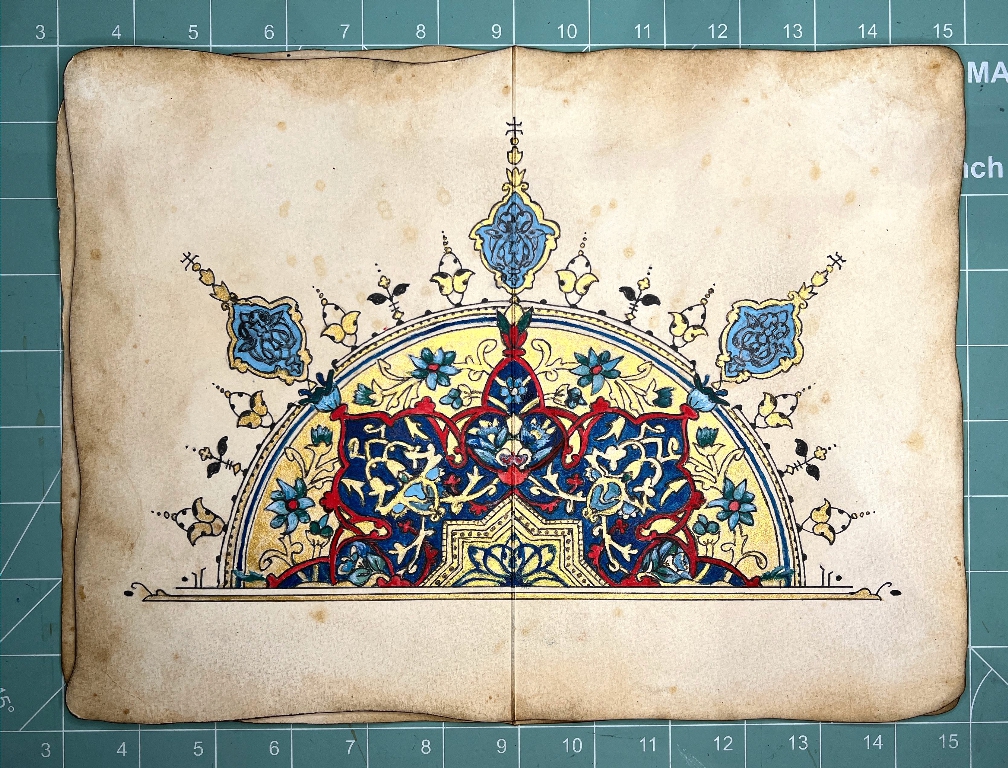
I am very pleased with how this has turned out. I trimmed the right-hand side of the sheet to an irregular shape and inked the edges, and laid this centrefold over the other sheet, to show how the irregular pages will look once the book is bound. Here are a couple of detail shots of the completed painting.