WORKING WITH UV RESIN
I am following Crafty with Toni, one of my favourite YouTube artists. She recently posted a video about UV resin. I have steered clear of resin until now as I thought it would be too much hassle, mixing the two parts, and expecting to have to buy a lot of different moulds etc. I had never heard of UV resin, but when I think about it, something similar is used by our dentist these days. He fills a tooth and then shines a blue light on it to cure it. This is much simpler than regular resin in that it is only one part, and you cure it under a UV lamp, which happens very quickly. Any spills can be wiped up easily with isopropyl alcohol.
My new kit
I decided to buy a small starter kit on Amazon, and have some fun with it.
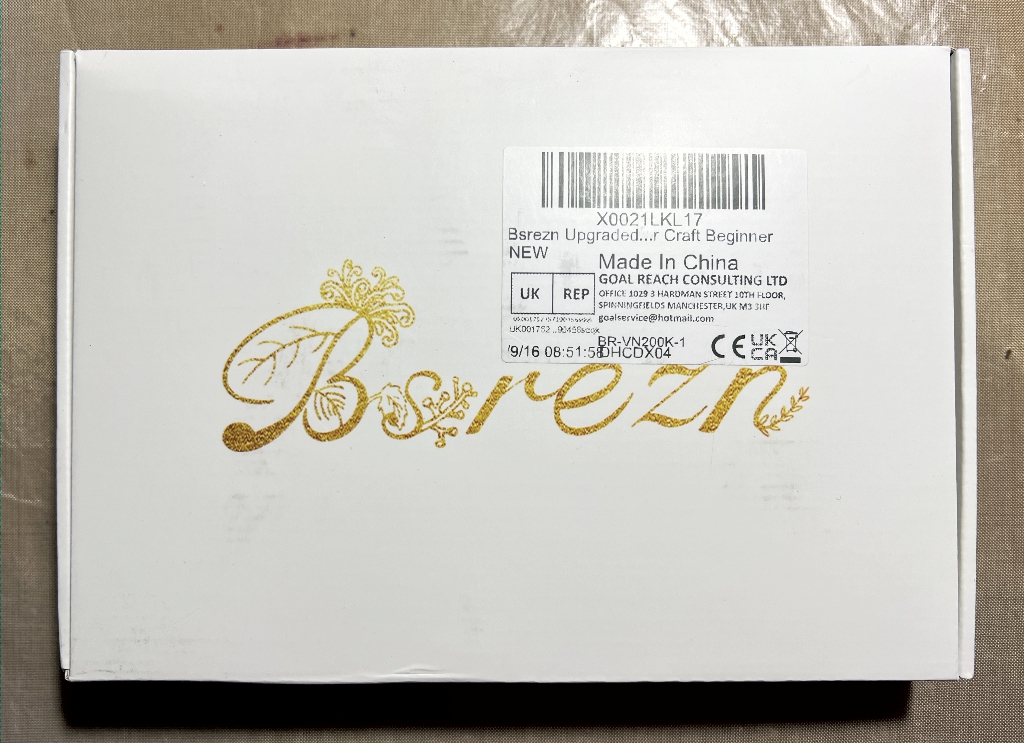
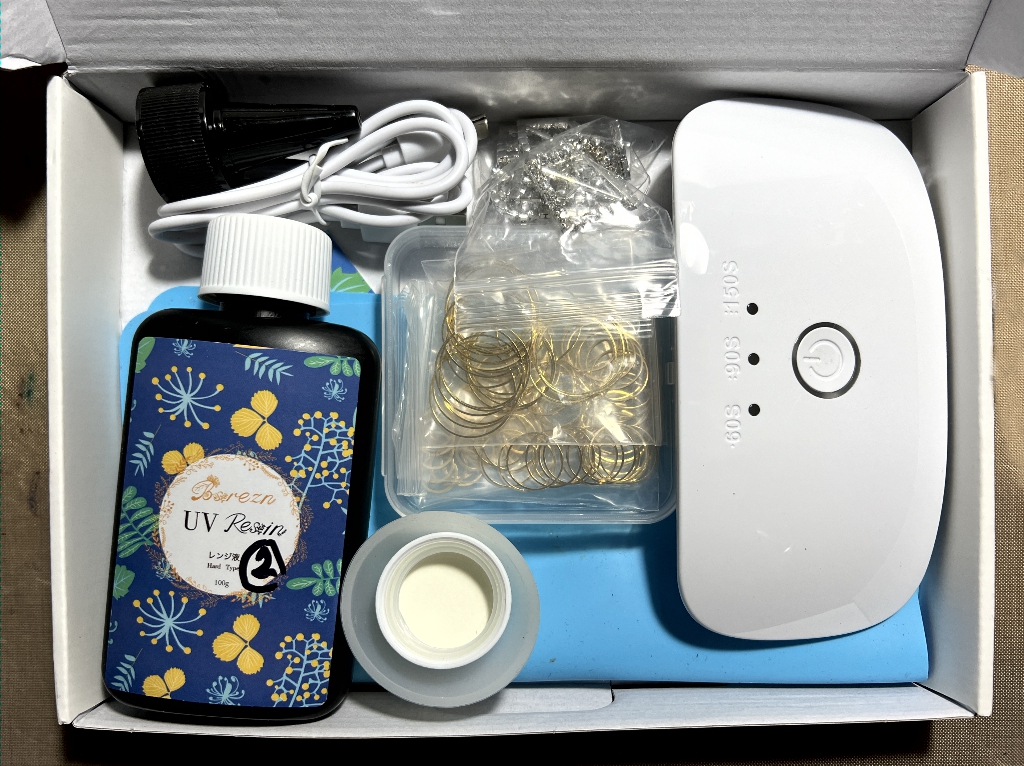
The contents of the box with some additions. It came with two bottles of the resin. In the top left-hand corner you can just make out the black nozzle cap which you use to replace the white screw cap. There is the small blue silicone mat, the USB cable, the UV lamp on the right and some plastic disposable gloves. After removing one of the bottles of resin, I have added a few of my own bits and pieces to the box. I bought the mixed bag of gold rings and the diamanté ribbon buckles (centre and top) from Amazon, and I also had the small silicone cup at the bottom which is at present containing the white screw cap from the other bottle of resin. I also bought a small roll of resin tape but this is too big to go in the box. You can use this to stick down various frames and jewellery bezels to prevent the poured resin from leaking out before it is cured.
Charms and transparent discs
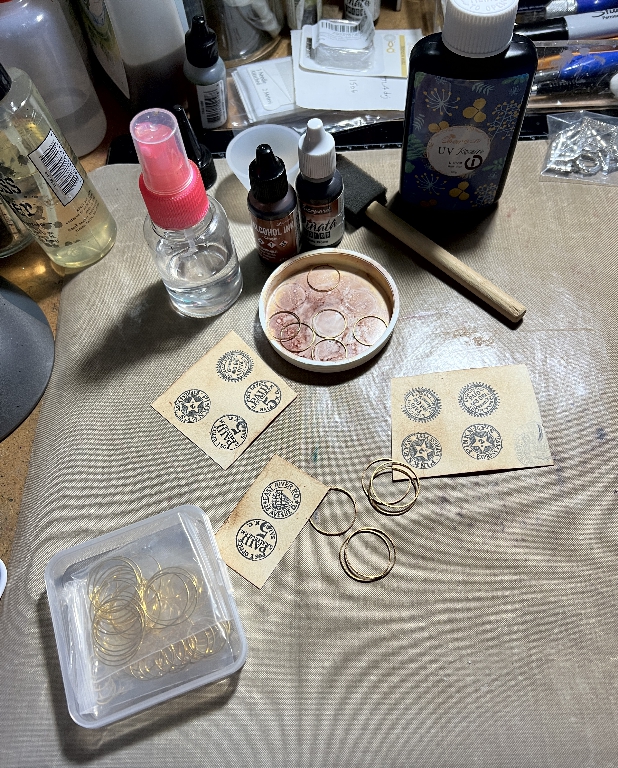
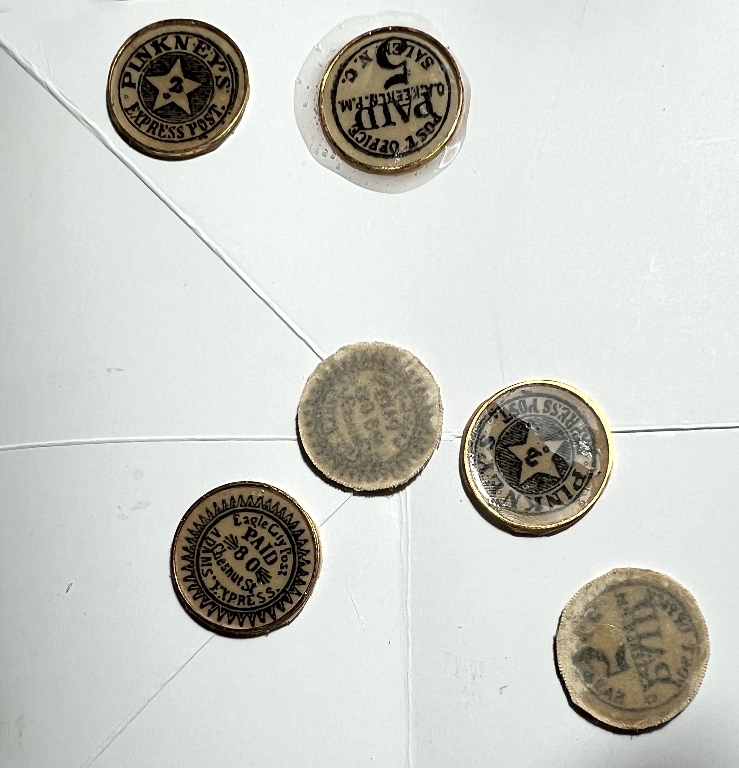
I chose half a dozen each of two different sizes of gold rings, making sure that the larger ones would fit over some small circular stamps I have. Using black archival ink, I stamped these onto some scrap cream card which I had inked with Vintage Photo Distress Ink. The gold rings were a bit bright for this project so I darkened them a bit with some brown alcohol ink.
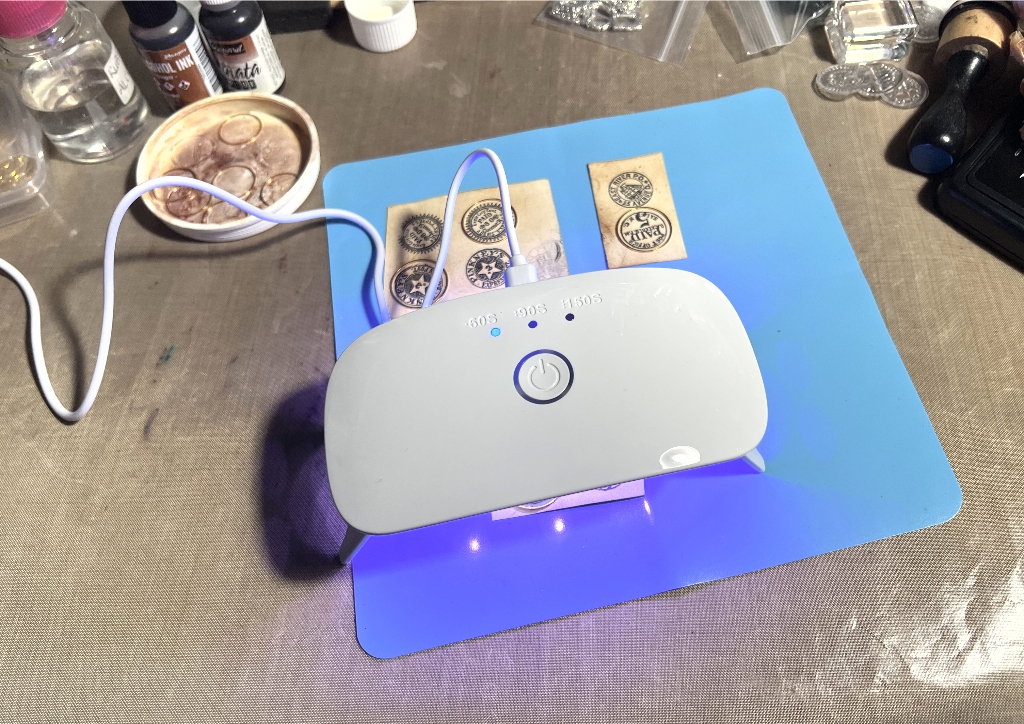
I laid the larger rings on the card, lining them up over the stamped images, and carefully filled them with resin. I pushed the resin to the edges of the rings with the aid of a cocktail stick, and ran my heat tool over them to remove any air bubbles. I was then ready to cure the resin, using the little UV lamp which stores flat in the box, but which has legs that you open out so that you can place the lamp over the pieces. There are three different times you can set by pressing the button on the top of the lamp once, twice or three times. The resin took a bit longer than I expected to cure, but I just put it back under the lamp for further exposure.
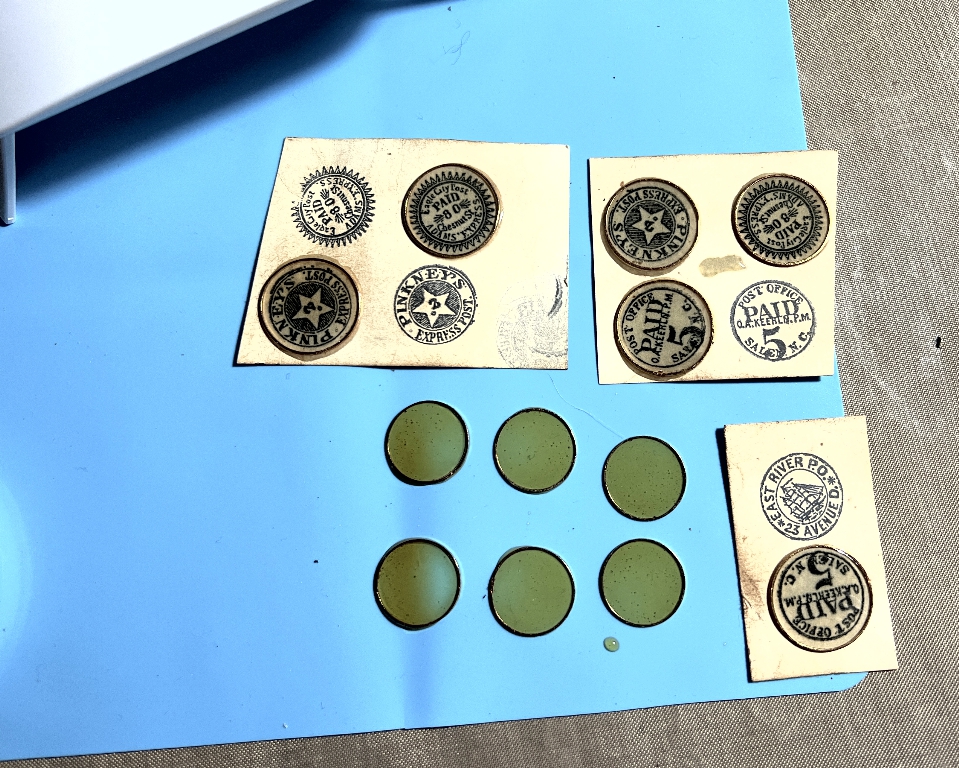
After this, I poured a little resin into the silicone cup and added a single drop of Caramel alcohol ink, and stirred it well. I laid the smaller rings onto the blue silicone mat and flooded them with the resin and cured them. This was the result thus far. I didn’t resin all of the stamped images for the charms because some of them didn’t turn out very well.
I cut the charms out of the card scrap. I noticed that on the back, the the archival ink had seeped through the card a bit, perhaps because it reacted with the resin. (See the two near the bottom in the next photo.) If I was going to stick these elements down, it wouldn’t matter, but I wanted to make dangly charms from them and the back had to be presentable, at least. I decided to back them with some scrap black card which had originally been a paper carrier bag. The one at top right has far too much glue and it seeped out all around, but didn’t batter because it would all be cut off, but it did take a bit longer to dry.
Once the glue was dry, I cut them out once more, and sanded around the edges which were pretty rough. I got out my tiny electric drill set and after making a guide depression in the top of each charm with an awl, I drilled a little hole in each charm.
The transparent discs
![]()
I laid these on a printed piece of paper to show their transparency. I love the rich golden colour of the resin with the alcohol ink. These elements will look great laid down on a page.
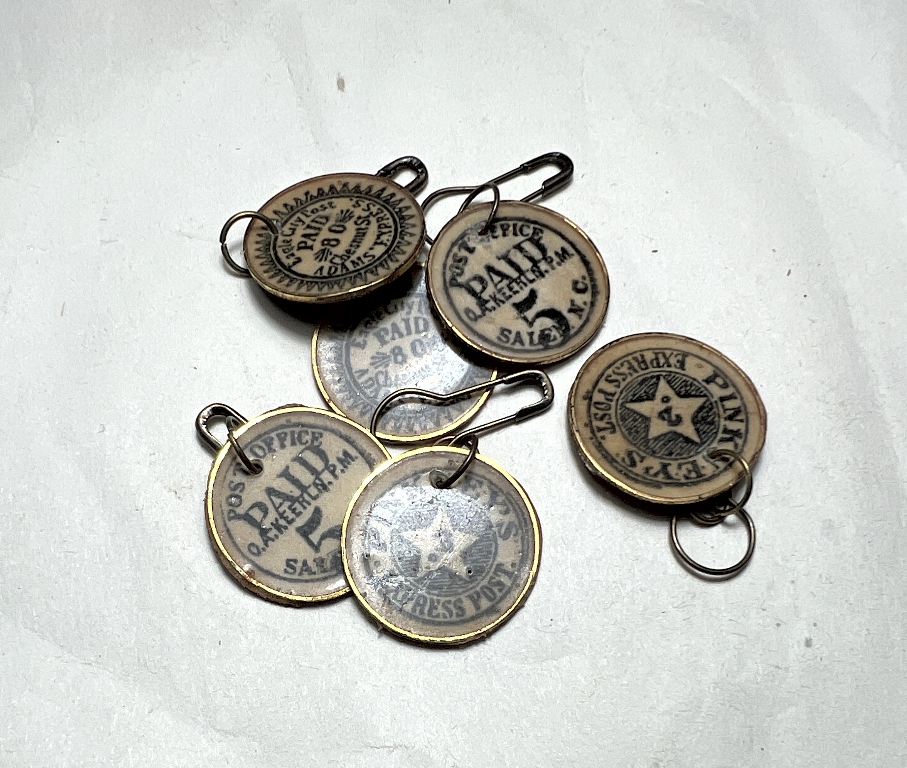
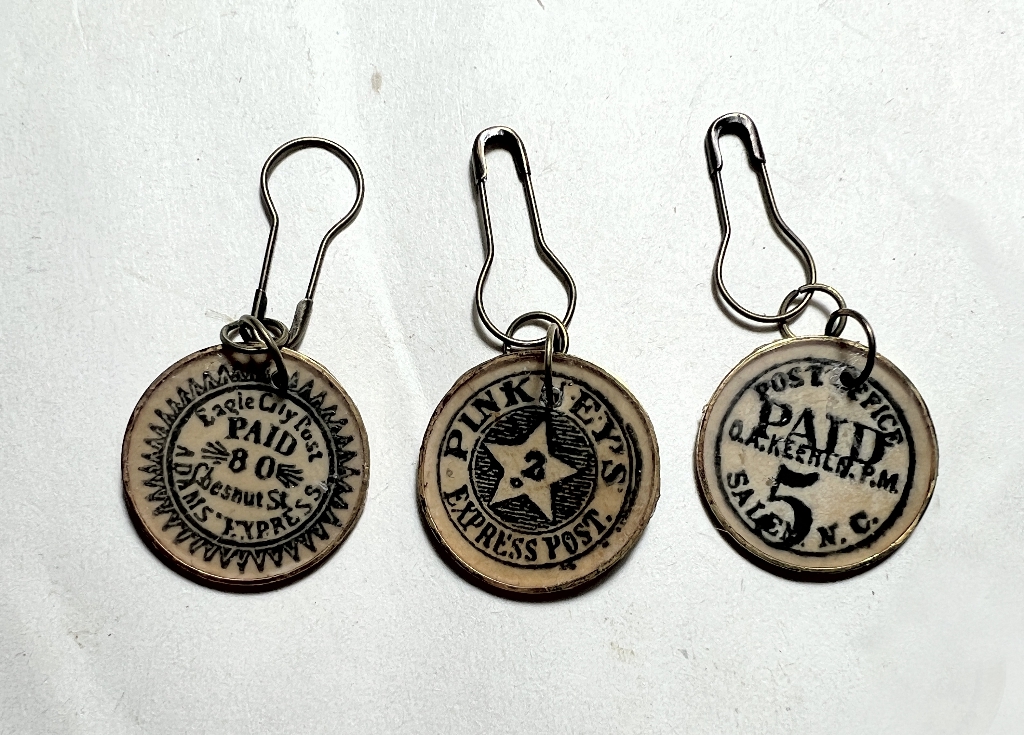
Here are all the completed elements. I added a couple of jump rings to each charm and threaded through a bronze coloured bulb pin.
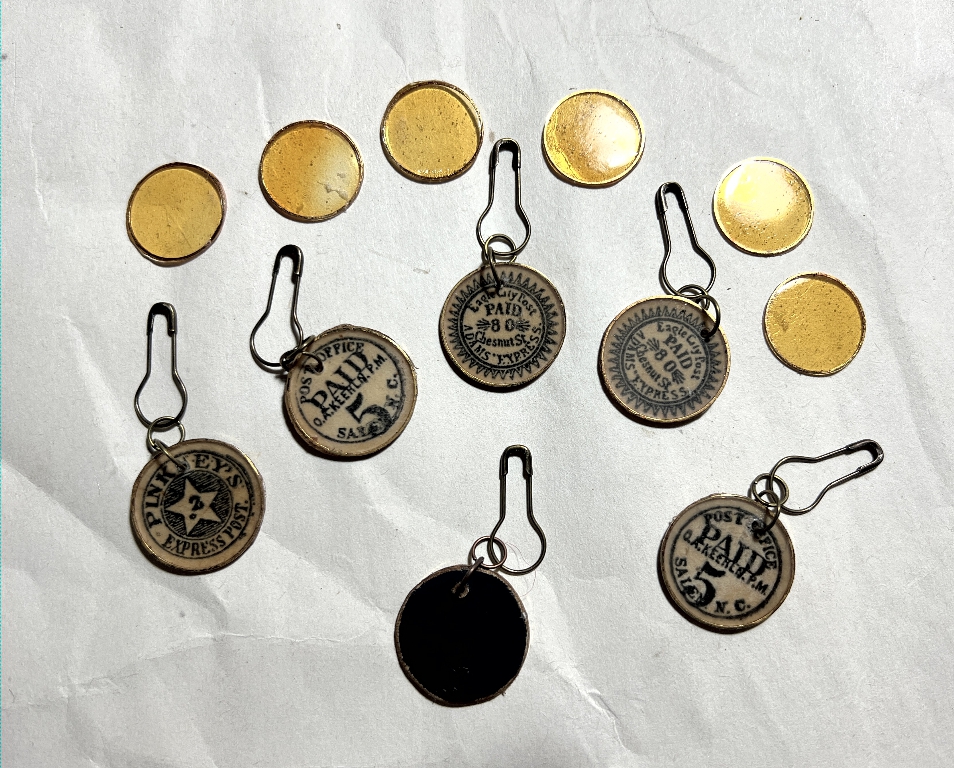
I have turned over the one at the bottom to show the reverse. I sanded the edges of all the charms with my new sanding tool, which removed the black finish of the bag paper, especially around the hole which I needed to sand to make it flat. I loved the distressed look of the sanding but the white it revealed was much too bright for this project, so I inked around the edges with Vintage Photo Distress Ink. This was too dark so I sanded again to bring back some of the lightness, and added a tiny bit more ink until I was happy. The backs of the charms are now quite interesting – plain black but with the slightest flicker of white that was still stained with the ink. I repeated the process until it met with my satisfaction.
Conclusion
I had so much fun making these! It is also a fantastic way of using up your scraps. I could see that it might become addictive… The stamping works so well. You can also stamp a background texture. I shall definitely be making some more, and I also got a great idea from Toni. In her recent job lot of new materials for all this fun, she bought a mixed bag of brass rings, some of which were over 2 inches in diameter! I have got a box on my studio shelves labelled “Rings and Shapes” and I have a number of odd-sized rings which might do very well for this technique. You can also add dried flowers or leaves, or fragments of anything you might have available., such as sequins or gilding flakes. If you want to make transparent ones with an insertion, you would put in half the amount of resin, cure it, and then add your decorative element before pouring in more resin to seal it in, and then curing it again under the lamp. There are so many possibilities to try with a project like this.