BEGINNING A SECOND LINEN APRON, AND SOME HOMESPUN PHILOSOPHY
From the outset, I intended to make two vintage-style linen aprons, and last week I began working on the second one. This one will have floral embroidery on it, in a more traditional style. I have already cut the various pieces to make the apron from the linen sheet and they are ready to be sewn as before.
Inspiration
A few weeks ago my hubby lent me a beautiful book that he bought at one of his History Society lectures, on art inspired by Devon gardens. The book is richly illustrated and shows many different forms of art work. I photographed a few of these to use as inspiration for projects, and some of the floral illustrations were ideal for this current project.
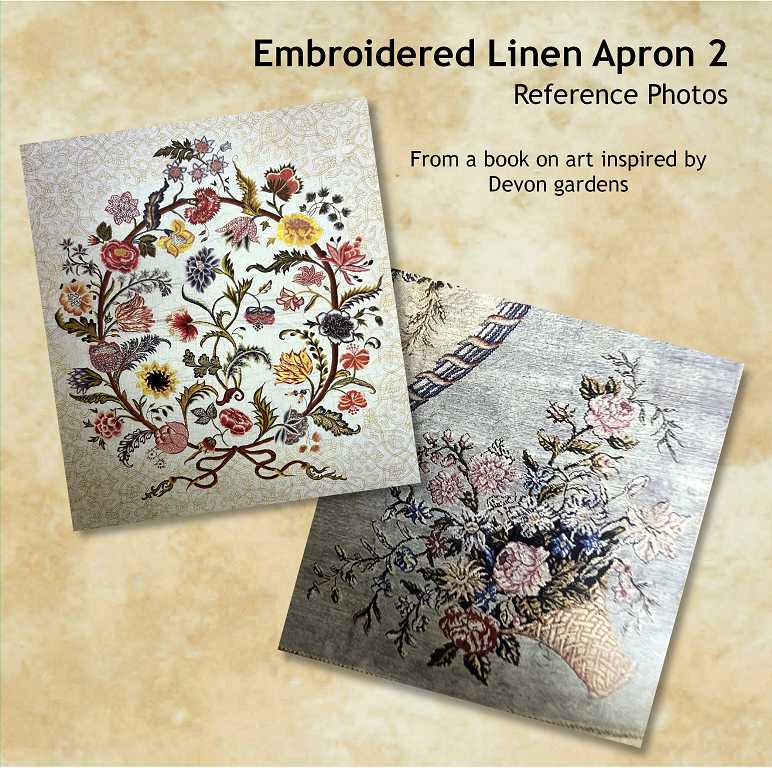
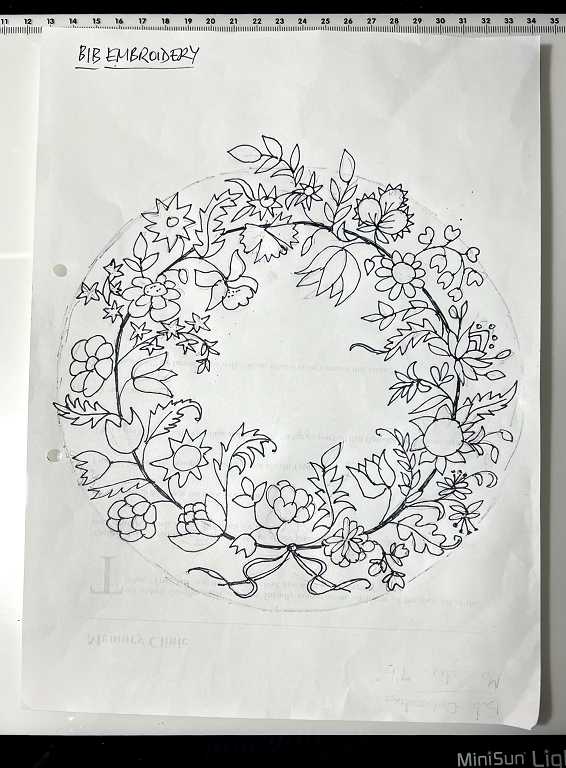
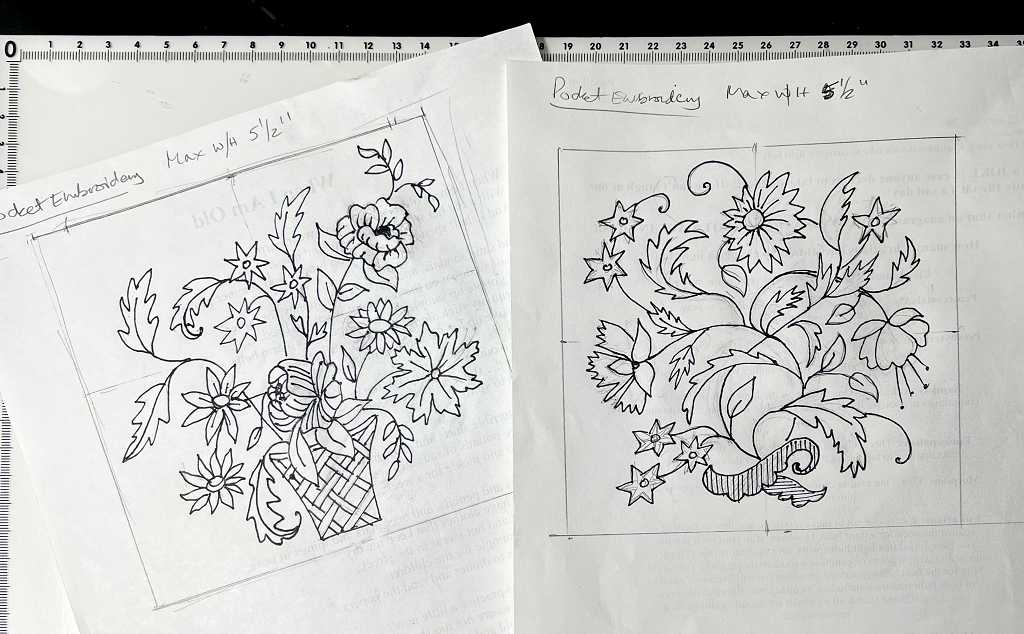
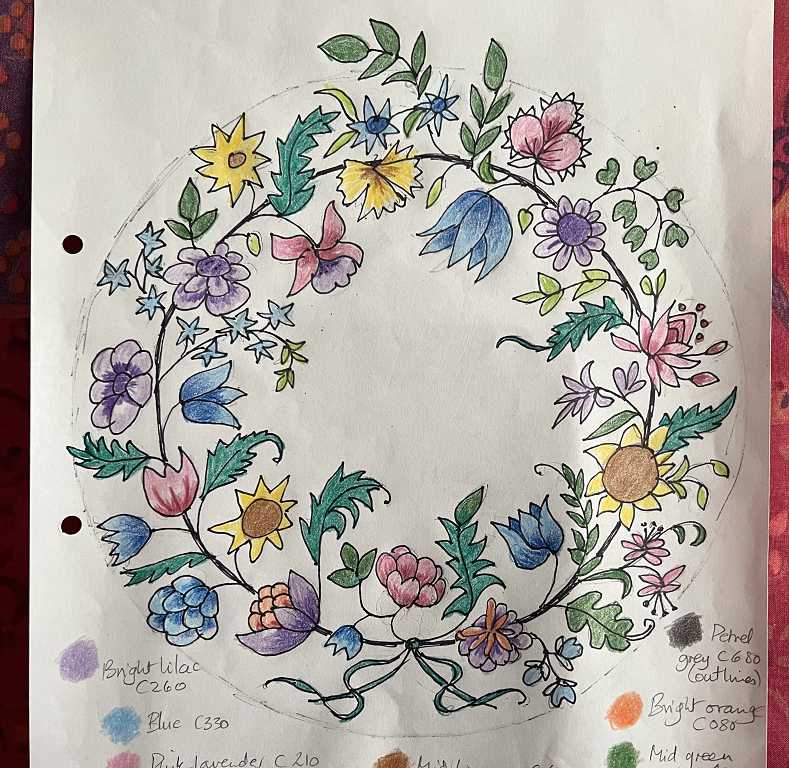
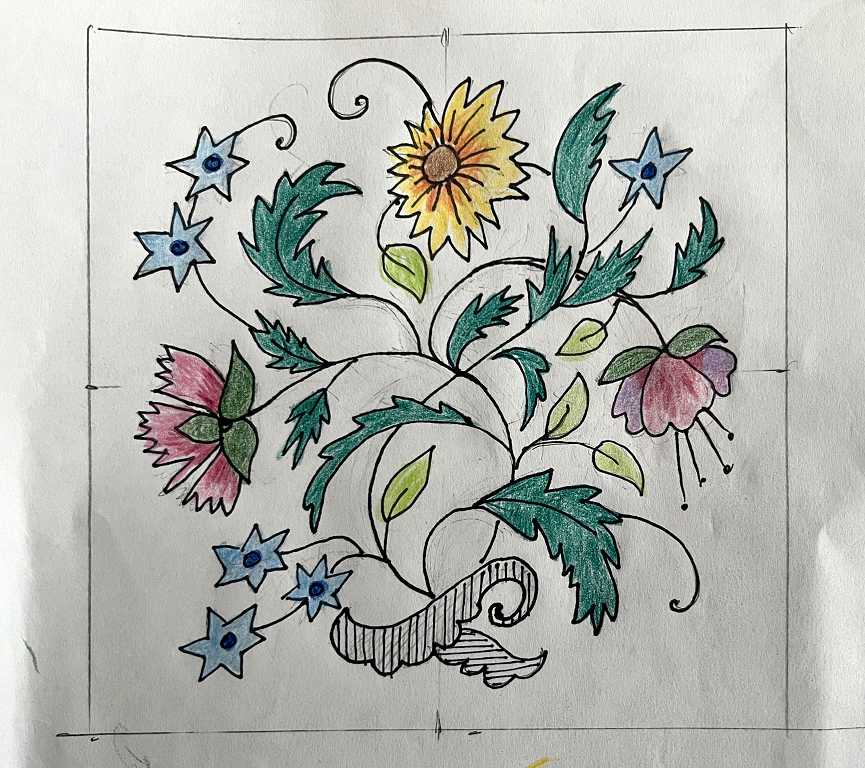
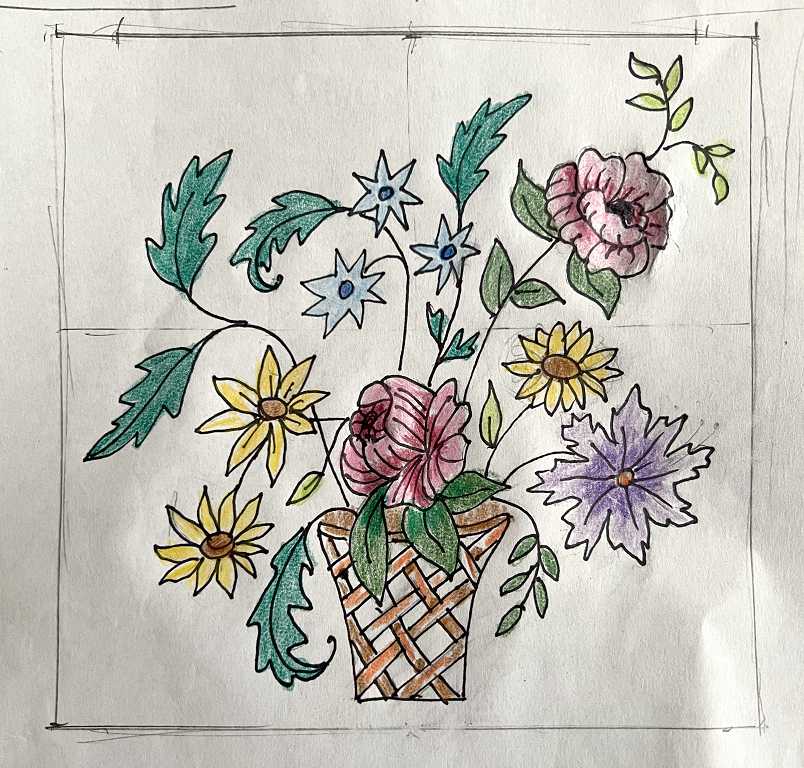
I think the top picture is a painting – I didn’t write down the details of the pictures I took – it certainly isn’t an embroidery, but it may be a wallpaper motif. I loved the circular design and thought that minus the central part, it would make an ideal subject for the bib of the apron. I adapted that central part for the embroidery on one of the pockets. The other picture shows a corner motif from an Axminster carpet, and simplified, this formed the basis for the embroidery on the second pocket.
Drawing the designs
One evening I spent some time sketching out the designs onto scrap printer paper, making sure they were the correct size for the apron pieces. When I was happy with them, I went over the pencil lines with a fine black Sharpie pen.
Transferring the designs onto the fabric
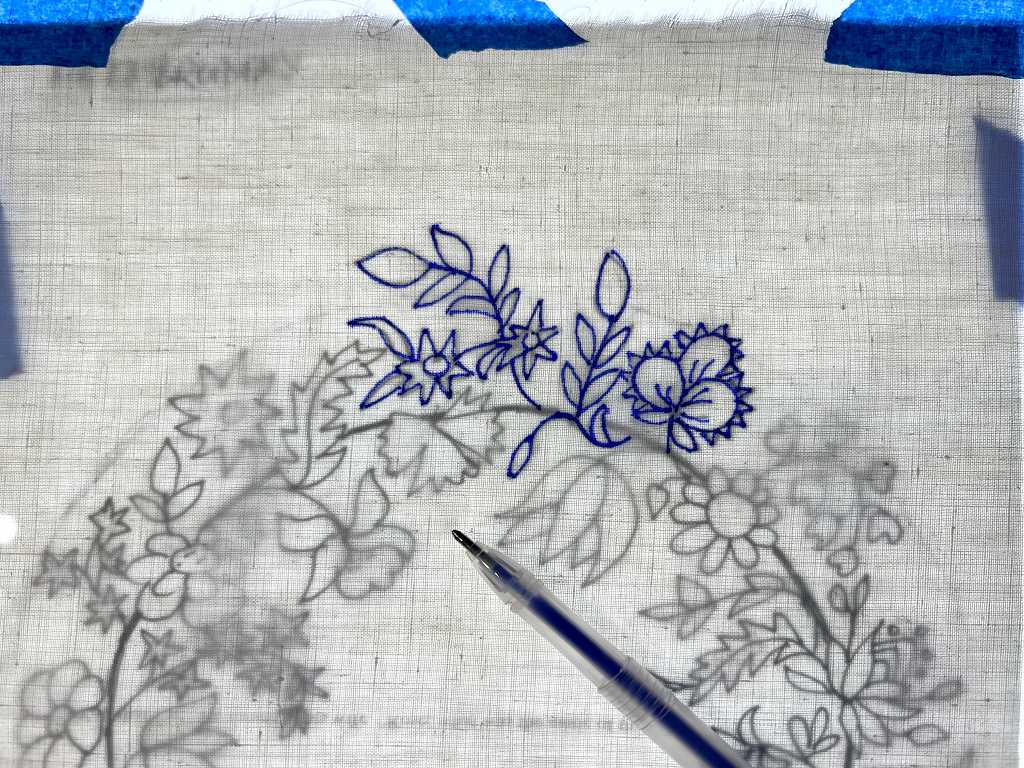
Once everything was correctly drawn and the designs tidied up, it was time to trace them onto the fabric pieces. For this I used one of my new heat-dissolvable transfer pens. These proved excellent on the first apron. The lines are fine, and quite distinct – there are different colours in the pack, for use on both light and dark-coloured fabrics, and for this I chose the blue one. The marks do not fade or rub off as you work. When you iron the fabric once the embroidery is complete, the marks miraculously disappear! It’s quite fascinating to watch. This is better than the original marker that I used, which was water-soluble. This means you have to wash the fabric in cold water (hot fixes the colour) to remove the marks, which makes more work, and in some cases you may not want to get the work wet.
To transfer the designs, I taped the paper design down onto my light panel, and laid the fabric piece over the top, ensuring that it was centrally placed horizontally. The vertical placing was adjusted to be slightly higher than central, for a more pleasing effect on the finished apron.
I taped the fabric down as well, and switched on the light panel. I then realised that using scrap printer paper perhaps wasn’t the best choice, because the printing on the other side became clearly visible! Next time I shall use paper which is blank on both sides. (Fortunately this doesn’t show up too much on the photos).
Here is the tracing after I had just begun.
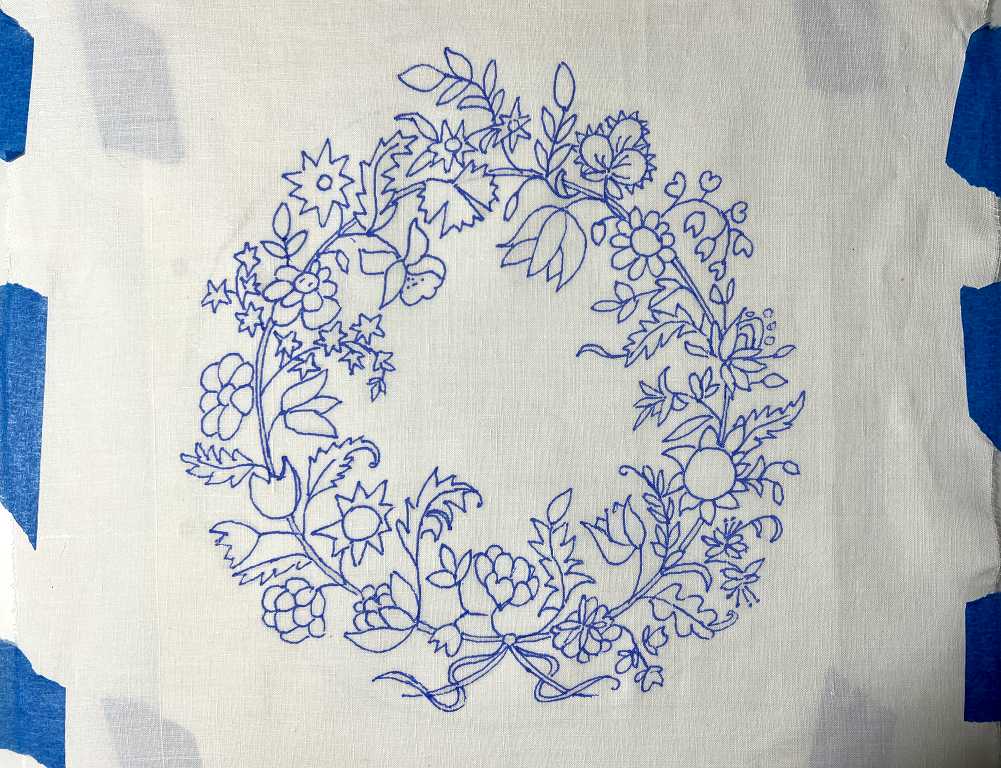
The completed tracing, for the bib of the apron.
The pocket designs traced onto the fabric pieces.
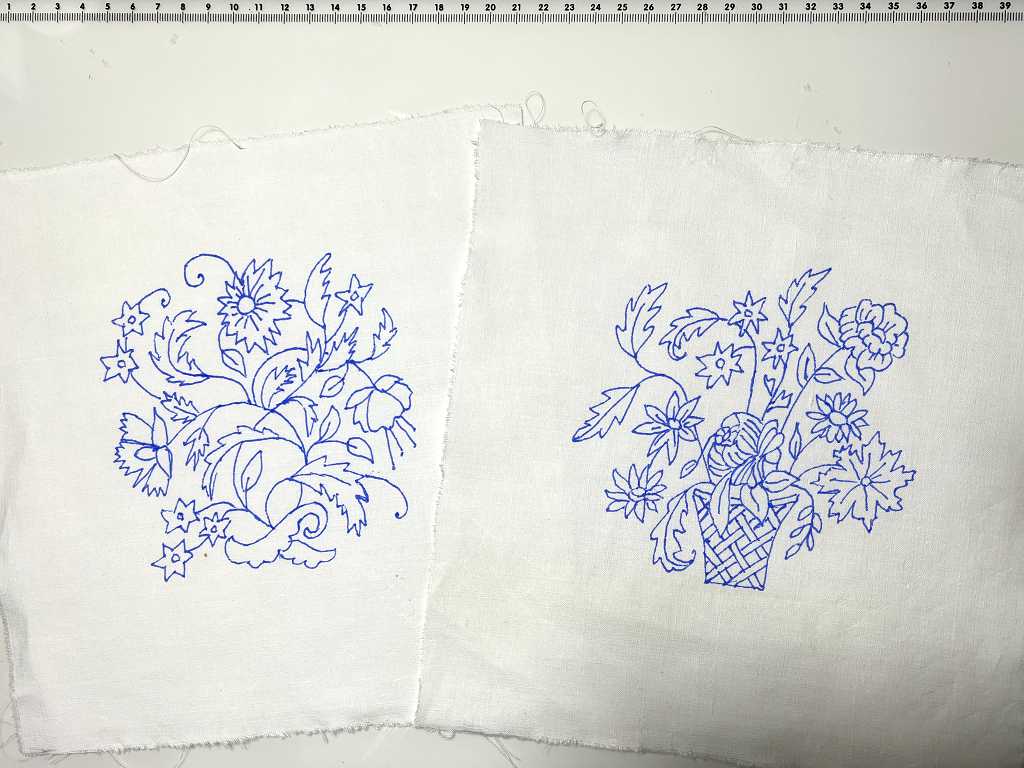
You will notice that on the second one, I have omitted the leaves sticking up on the top right-hand corner of the design, as I considered it to look better balanced without them. I have also evened out the basket-weave as I hadn’t drawn it straight on the original design.
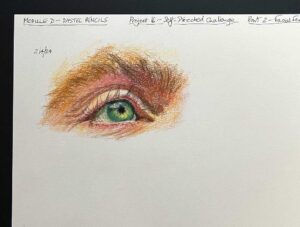
Colouring the designs
To make it easier to work the embroidery, I added colour to the designs, using my Derwent Coloursoft coloured pencils. I shall use these as reference photos when I embroider the designs. At the bottom of each sheet I made up a palette of the colours of pencils I used. I have a good stash of stranded cottons and will match the colours as I go, adding the shading with long and short stitch.
I have yet to decide what stitches I am going to use for the embroidery. With the first one it was relatively easy because the ferns were an existing project in the embroidery book and I was able to follow most of their stitch ideas. In this case it is different as I am working from scratch. There may be a certain amound of experimentation going on when I do the embroidery, but we shall see!
Using the first apron
A word about starch
I have been wearing the first apron in the kitchen. Originally it was pretty floppy and looked very creased and a bit like a dish-rag, so when I washed it for the first time, I starched it with traditional laundry starch. Don’t get me started on spray starch – I hate it with a passion! 1) It stinks. I hate any artificial fragrances, especially those strong so-called floral ones which smell like the chemicals they are! – and spray starch has a particularly nauseating sweet fragrance. 2) It is hard to direct exactly where you want it, and there is always a certain amount of starch which goes beyond the edge of the fabric. I don’t want this all over my ironing board (or in the studio, my ironing pad), and many years ago, I learnt the hard way that if it gets on the floor, it becomes lethally slippery. You have been warned! 3) It simply does not do nearly as good job as the old-fashioned boiled variety.
To make the starch, you put some of the powder in a jug – the amount is determined by the degree of stiffness you require in the fabric. For table napkins I use more, making them really crisp, but for the apron I used a half-strength mixture. To this powder you add a small quantity of water, and work it into a paste. After this, you top it up with absolutely boiling water (essential, to activate the starch and make it work properly), stirring very well so that it is all activated, and mixed smoothly. When it’s thick, it has the consistency almost like wallpaper paste but without the lumps. Pour this into a bowl and dilute it with cold wter to the degree of stiffness you require – I usually add the same amount of water as I had prepared starch in the jug. Mix it well.
When it’s ready, dunk the fabric into it, swirling it around and squeezing it to ensure that the starch has reached every part of it. Wring it out gently with your hands, and then spin-dry it, and hang it up to dry. If you let it dry completely, you have to spray water onto it before you can iron it and get the finish you want. I try and keep an eye on it so that it doesn’t get too dry, but my iron is powerful, and with the addition of some sprayed water, I usually manage to get the effect I want. Put it in the airing cupboard to finish drying.
The first apron definitely benefited from starching. The straps from the bib, crossing over at the back and being attached to the waistband wtih buttons, get really creased, and I find it is impossible to get them to lie flat and look pressed and crisp, but I’m not too worried about that. I can put the apron on without undoing the buttons, and then straighten the straps as well as I can (more for comfort than anything else).
When the apron is dirty, the stains can be soaked out overnight in hot water to which has been added some oxygen bleach powder and a small quantity of biological washing liquid. I usually spray the stains with a spray oxy-bleach stain remover to help loosen them, spraying onto dry fabric and then putting them to soak overnight with my other linen – table napkins etc. They all go in a hot wash wih the towels, after I’ve washed all the other laundry (clothes and bedding). Once done, and they’ve had a chance to dry enough for ironing, they go in the airing cupboard to complete the drying process, and there they remain until I need them next.
Looking to the past and simpler, happier lives
If we are entertaining anyone for lunch or tea, I like to get out my best table linen – embroidered table cloths and matching napkins etc., which I inherited from my grandmother. For years she used to spend the winter months in the Canary Islands where they used to do the most beautiful embroidery (they may still do so, for all I know), and she would return home to Scotland armed with lovely new table linen, most of which I inherited. There is nothing like fresh, fragrant, crisp white linens, especially when they are embellished with embroidery and/or lace. Such a shame people no longer bother about things like this, but I was fortunate to be born at the right time and had a mother and grandmother who would train me up to acquire the same domestic skills as they had, and to love and appreciate them as they did.
It saddens me greatly that these pursuits are now looked down upon as demeaning, and suggesting that those of us who choose to do these things are somehow lesser than high-flying career women, and that staying at home and looking after husband and family is a form of slavery. Nothing could be further from the truth. With the right attitude, these things are liberating and fulfilling, and for those who have children, there is no greater privilege or responsibility in this world than to bring them up in the fear and love of God and family, and prepare them to be good, upright, successful and contented citizens. I appreciate that with the cost of living these days, most wives find it necessary to have a full-time job in order to pay the bills, but much of this is driven by materialism and wanting all this “stuff” that our parents and grandparents probably never dreamed of, and were anyway happy to live without. This change in societal norms has been highly successful in killing the institution of the family, to the greater detriment of wider society. The evidence of this is all around us and it breaks my heart to see it.
Well, my little apron project has turned into a philosophical commentary on modern society, hasn’t it! I think the increasing popularity of vintage style clothing and old-fashioned home-making skills, and the rediscovery of things hand-made (look at the huge popularity of crochet, for example) show that many people are tired of the way things have become in our modern day, and they yearn for the simpler, happier life where stress and modern diseases were rare.