Before I get started on the main theme of this post, I’d like to share what arrived from Ebay recently.
Glorious hand-made papers
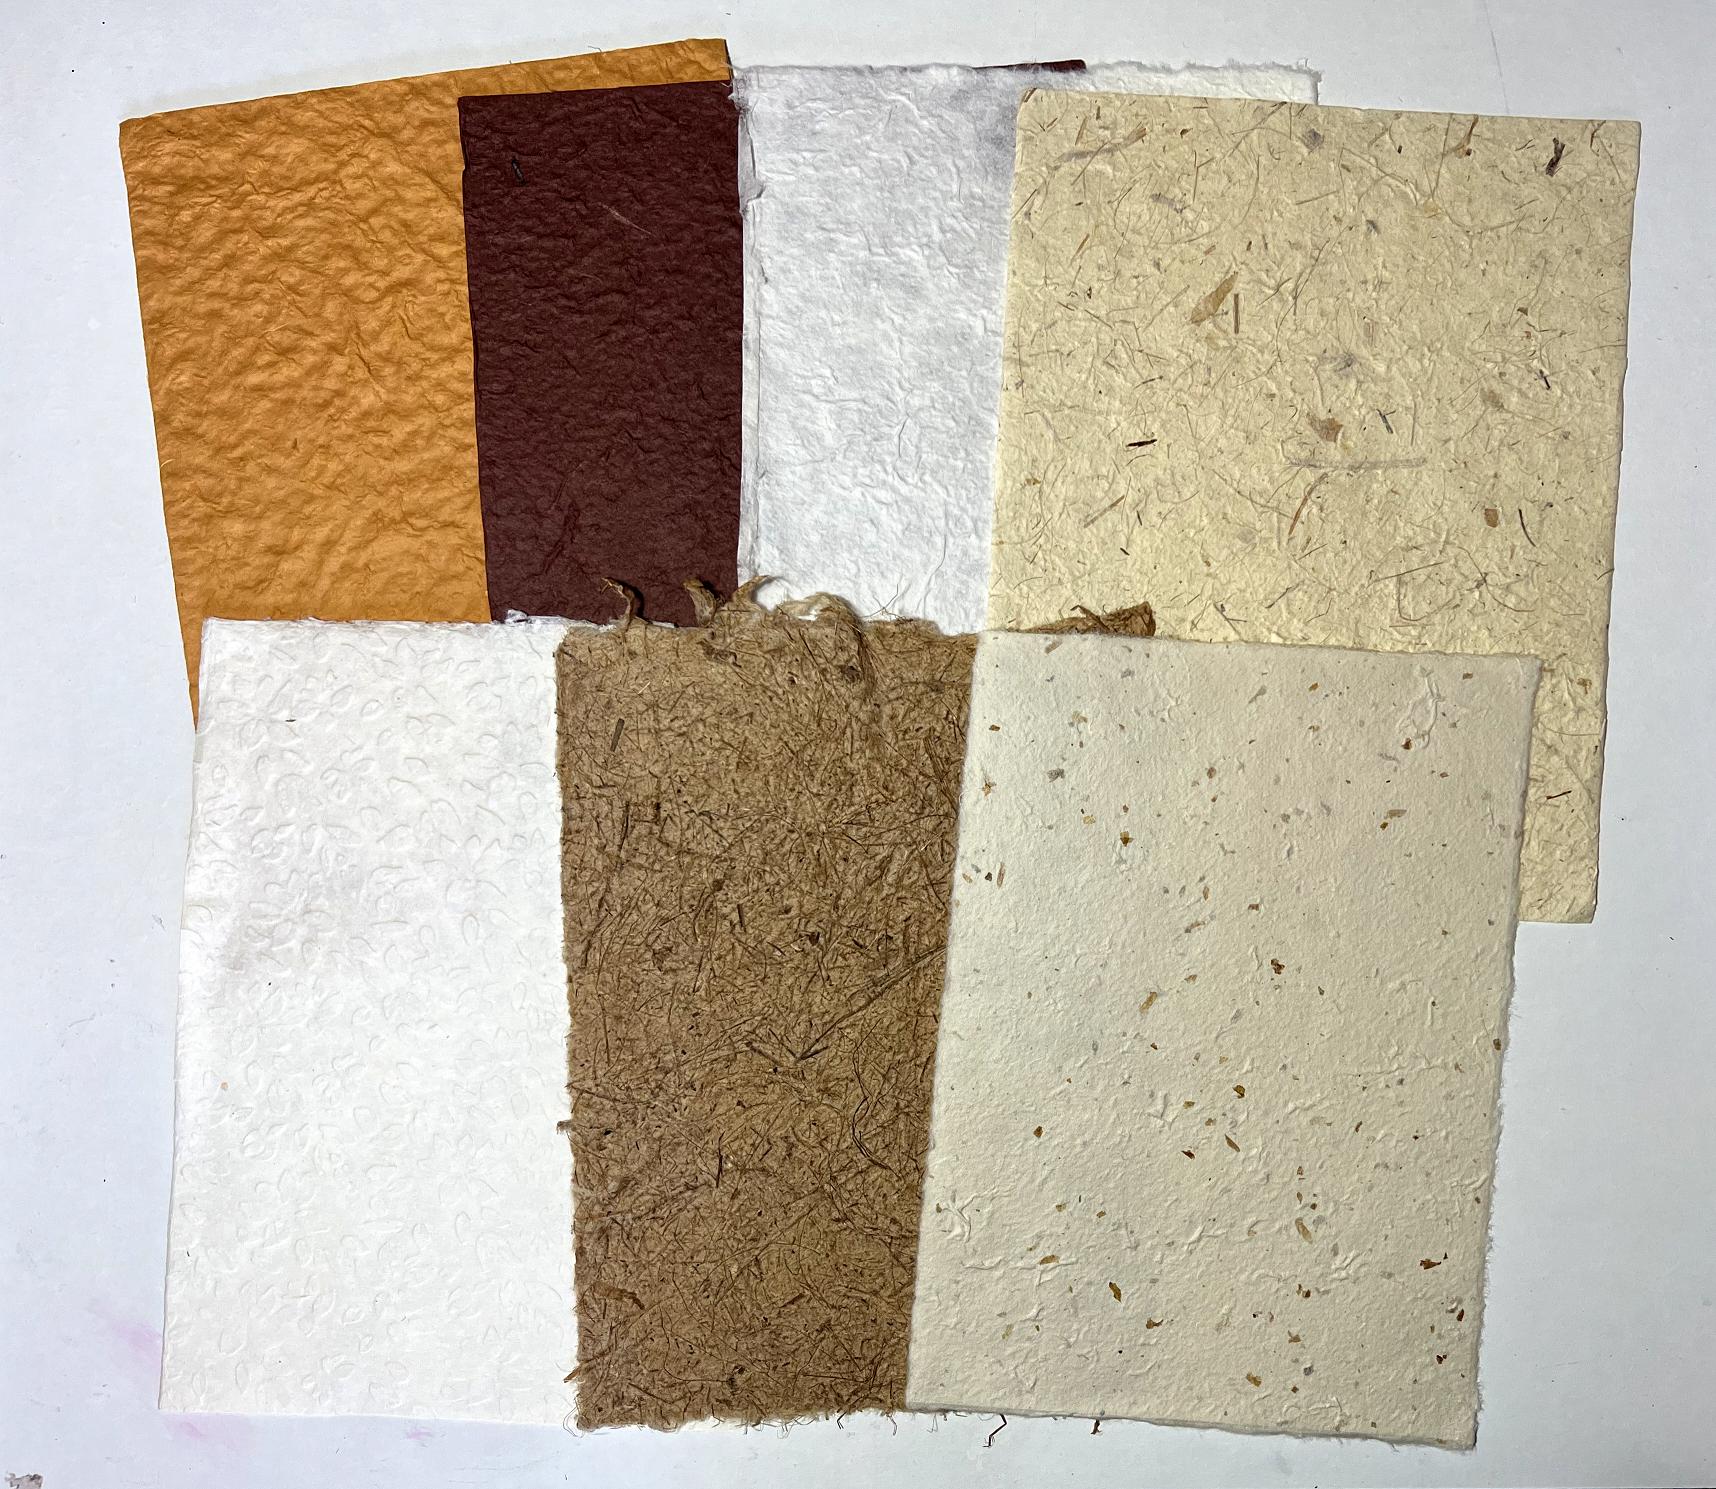
A fabulous mixed collection of 20 sheets of A4 hand-made papers. They are all quite thick, and deeply textured, and the most beautiful earthy natural colours. They also have genuine deckle edges from the paper-making process which will add interest to collage pages. They are extremely tactile and I can’t wait to start using them! They were also very reasonably priced, working out at about 40p each.
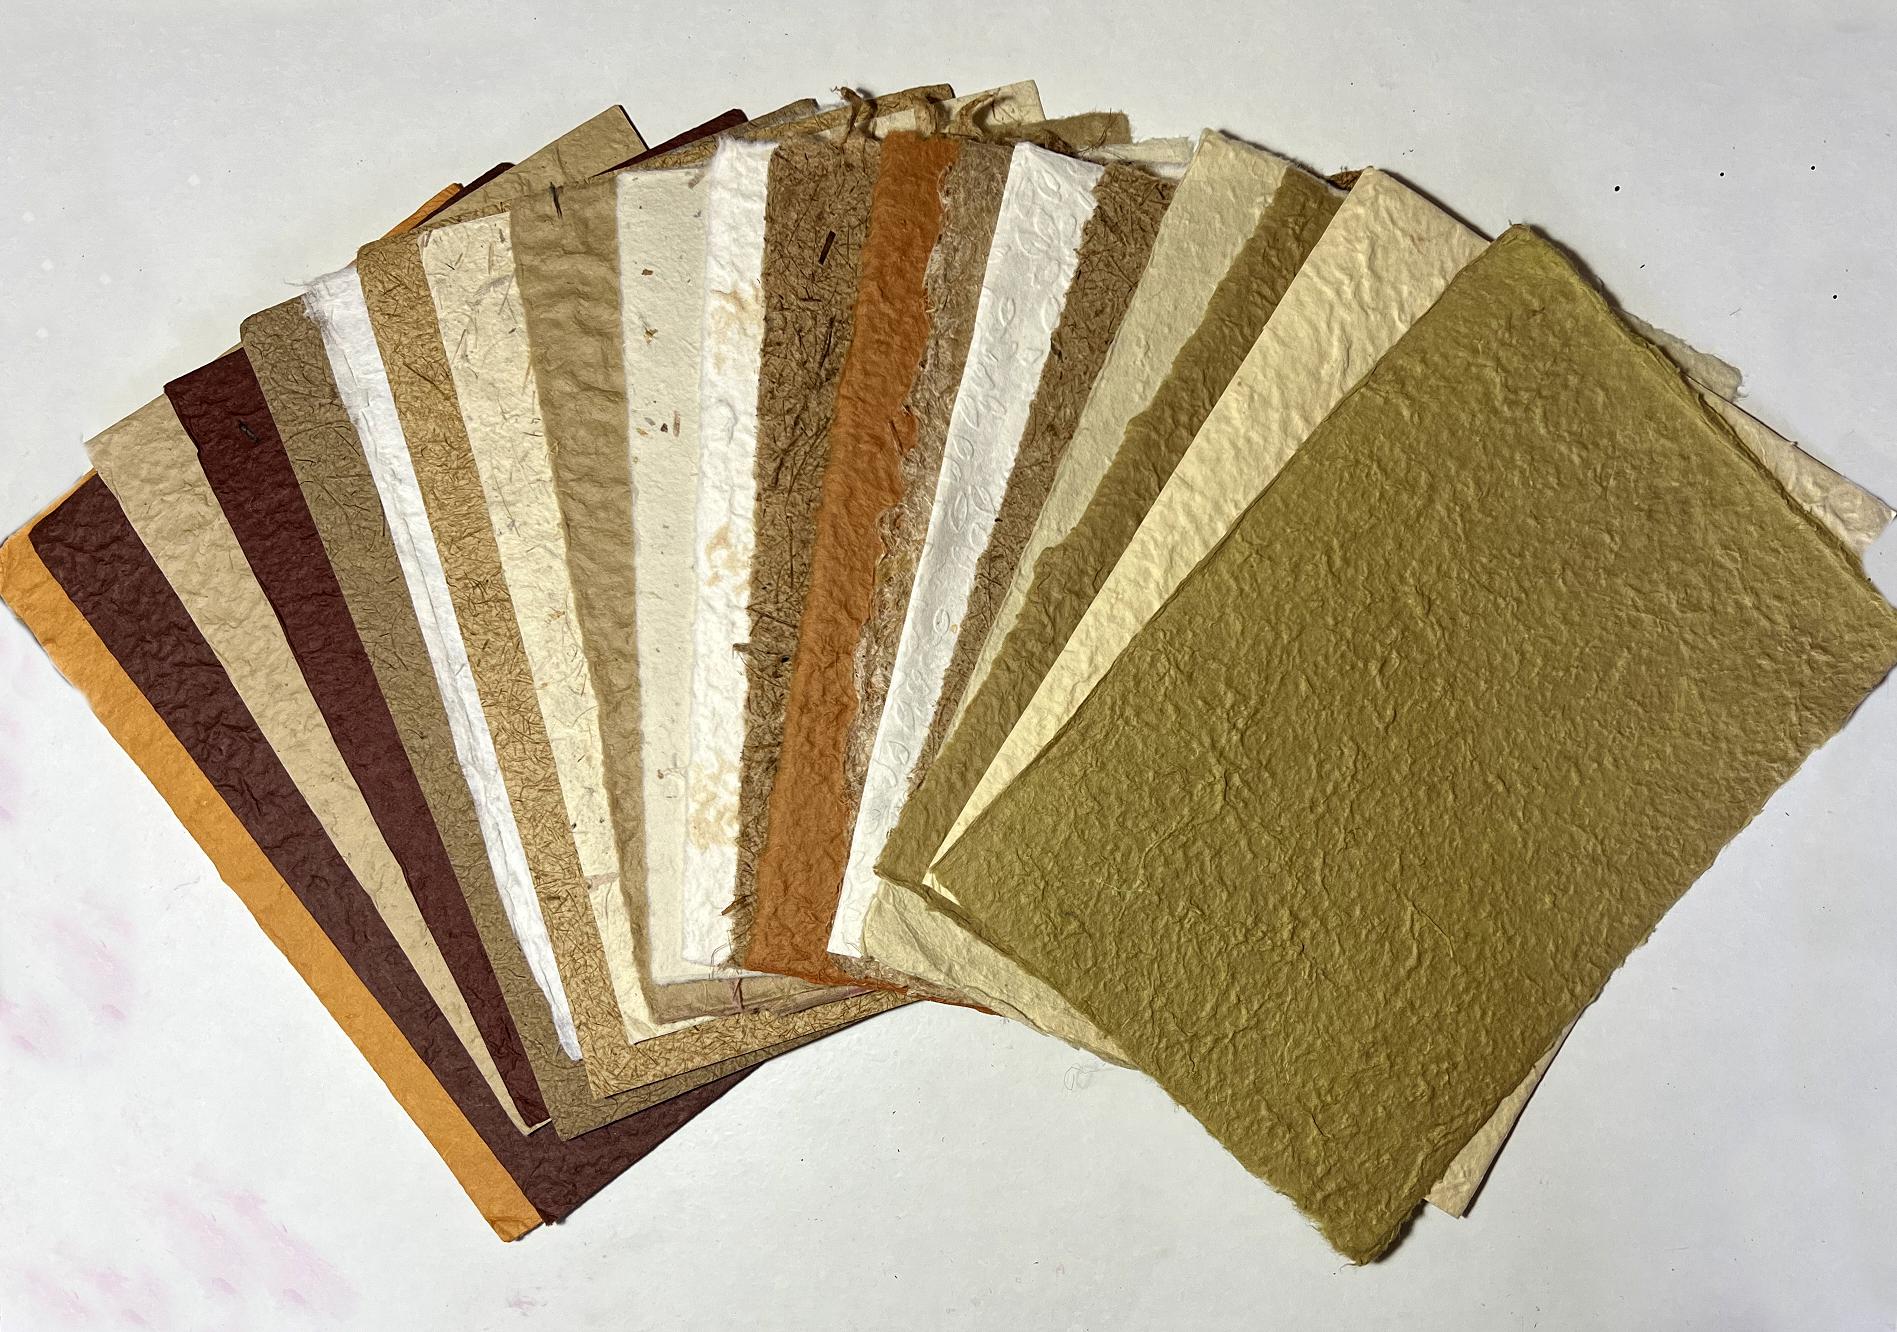
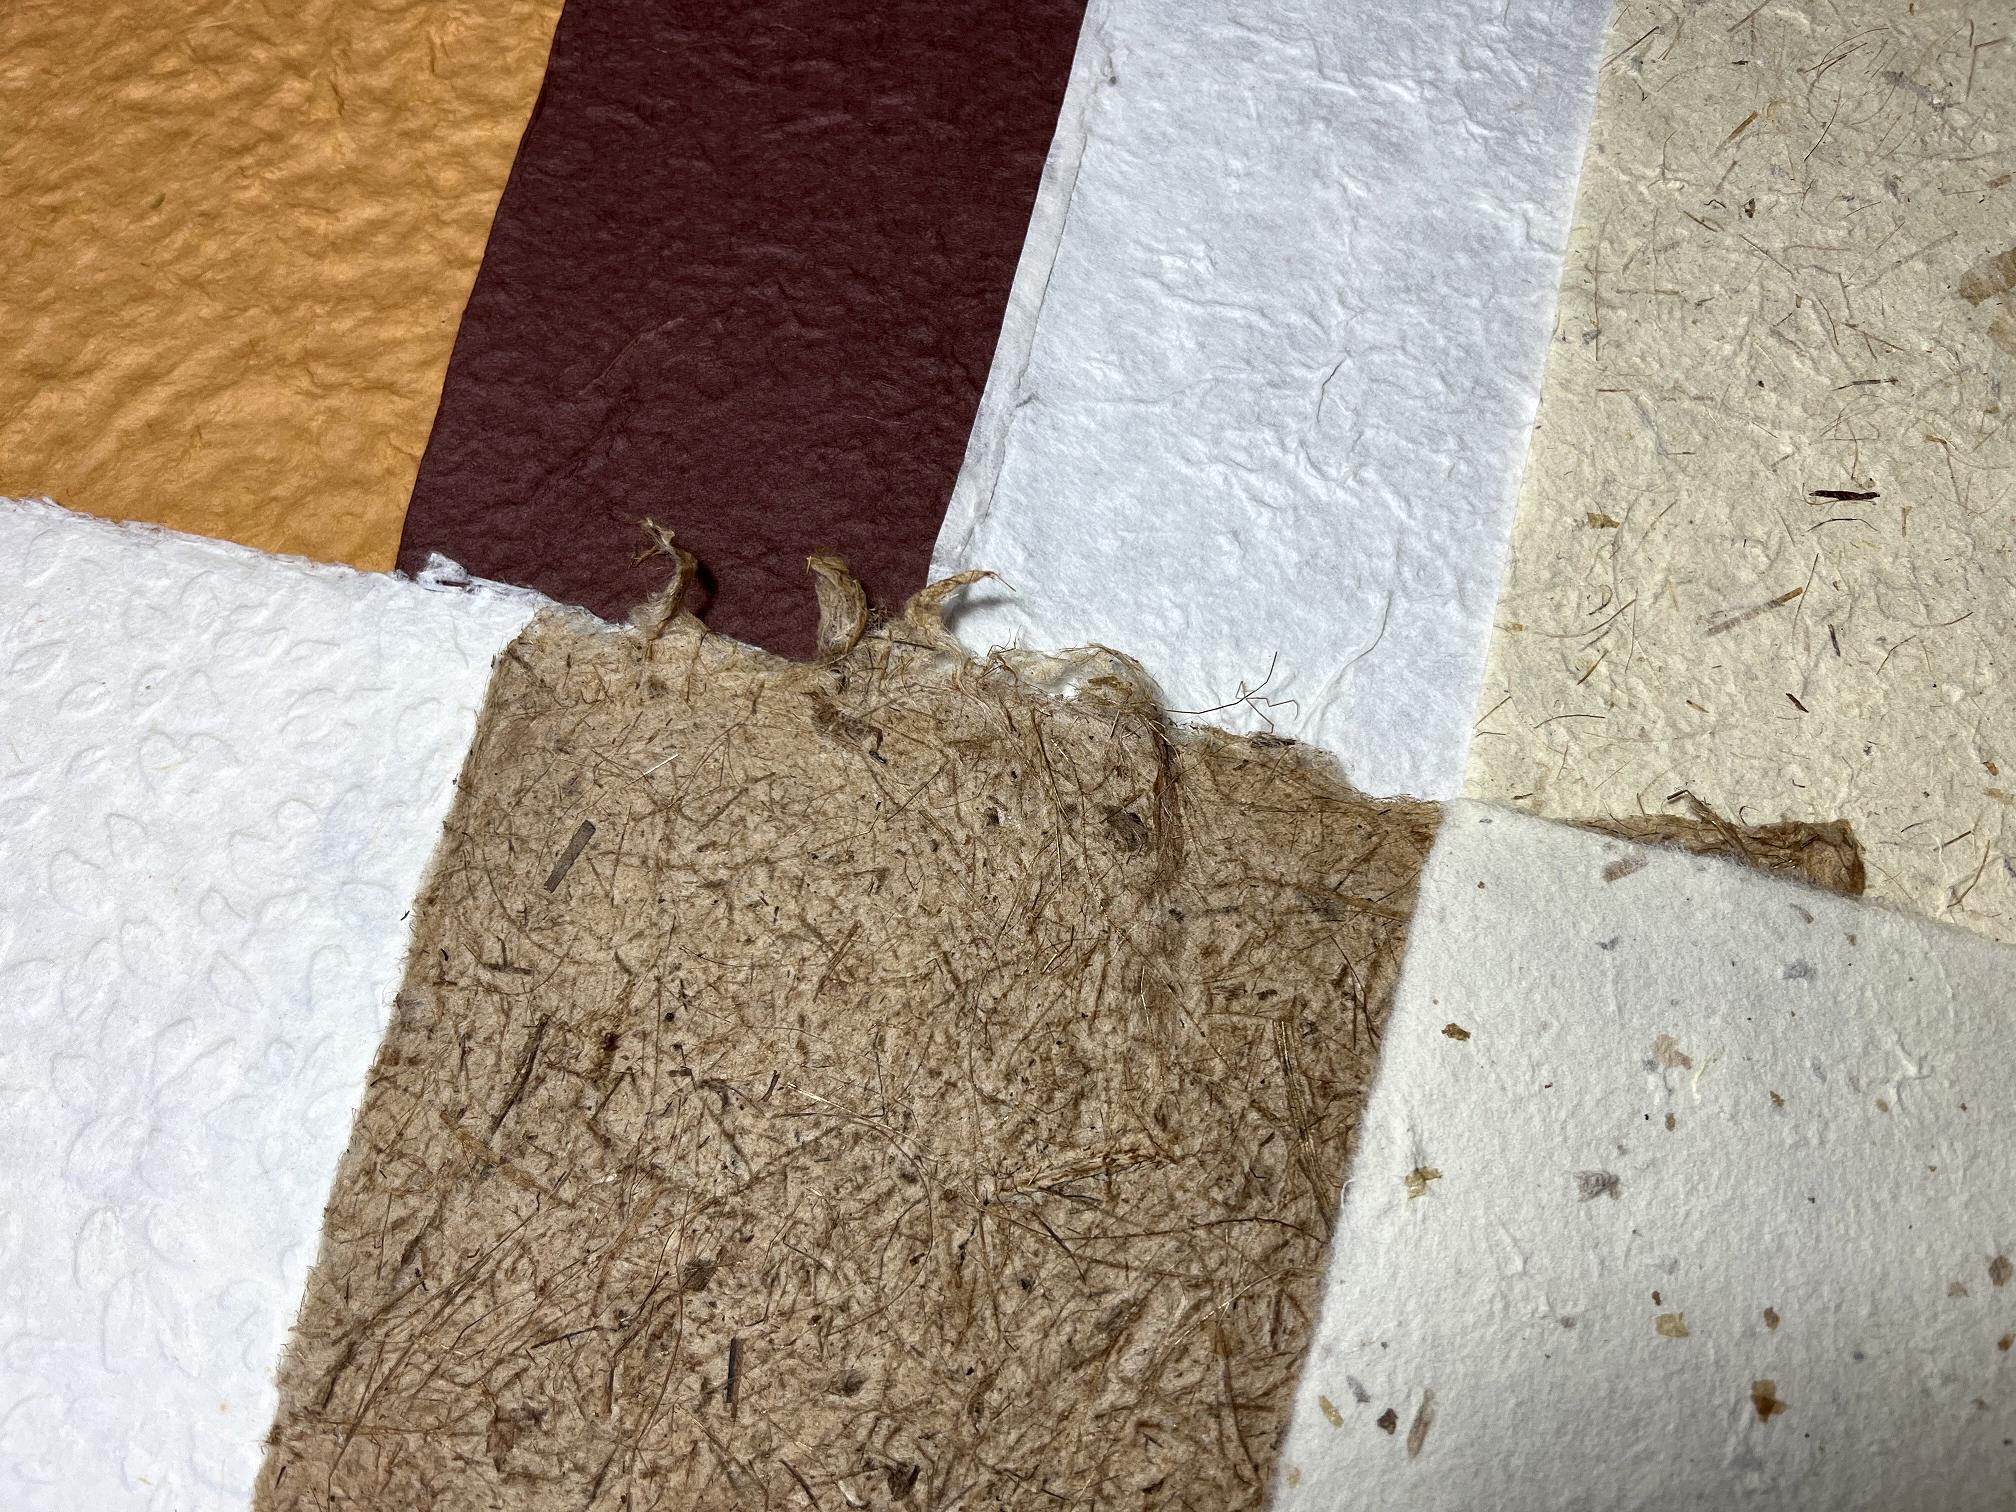
Here is a small selection in more detail.
Drawing inks
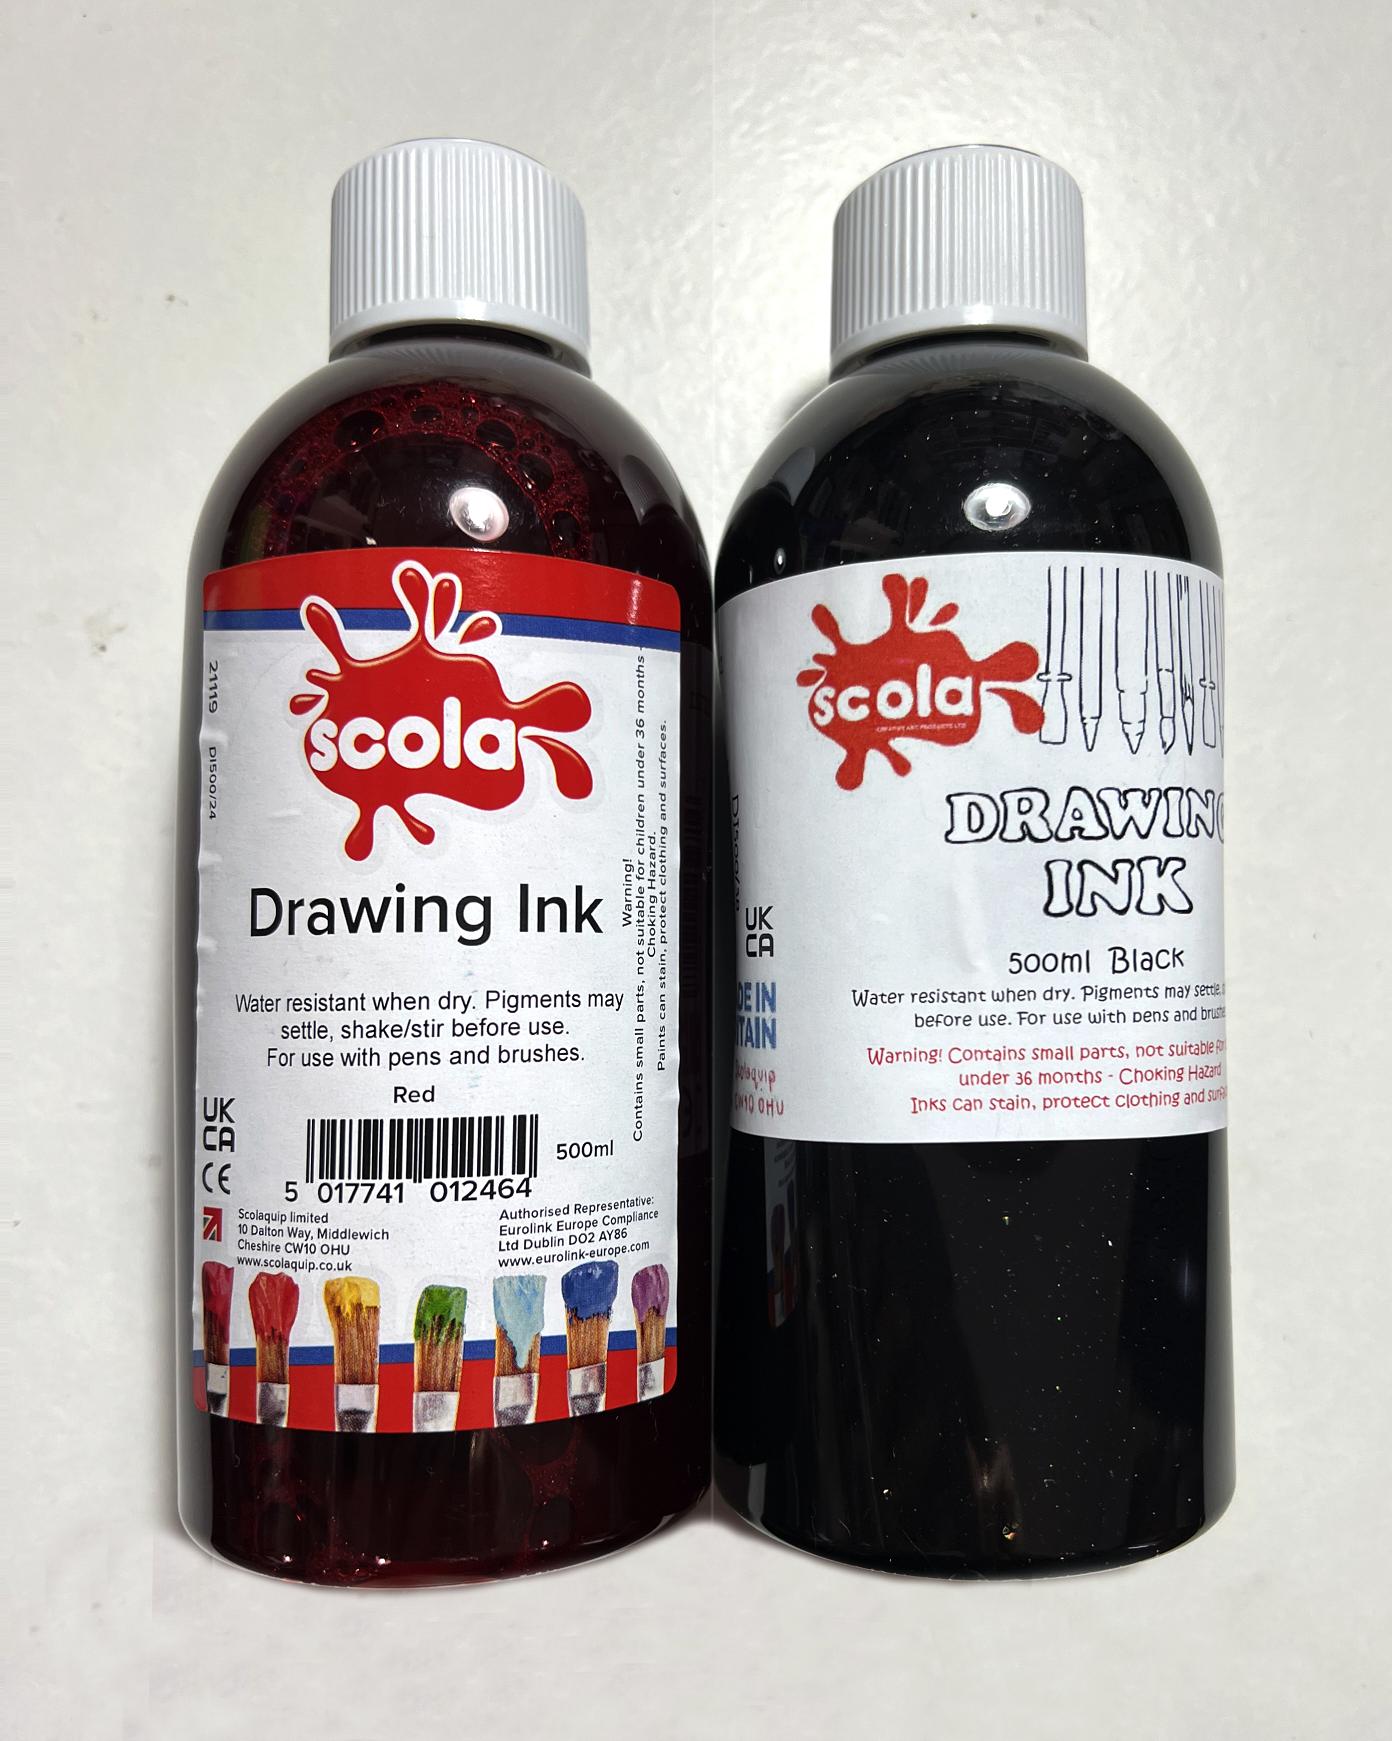
I also got two 500 ml bottles of drawing ink, one in red and the other in black. I have found that the craft inks such as the Tim Holtz Distress Spray Stains and the Dylusions spray inks seem to disappear at an alarming rate once you start spraying liberally with them! They are quite expensive too. This brand of drawing ink dries waterproof which is also an advantage, and they come in various different colours. They will be very useful for mark making and generally splashing around! It doesn’t say they can be sprayed, but if they prove too thick for this, I can’t see why they couldn’t be thinned a little with some water. I think I am most likely to be using black and red for now, and will continue to use the craft spray inks for the other colours.
Now for my main subject – an exciting experiment, trying to replicate something beautiful! My brain has been in overdrive over this.
Papers unobtainable in the UK
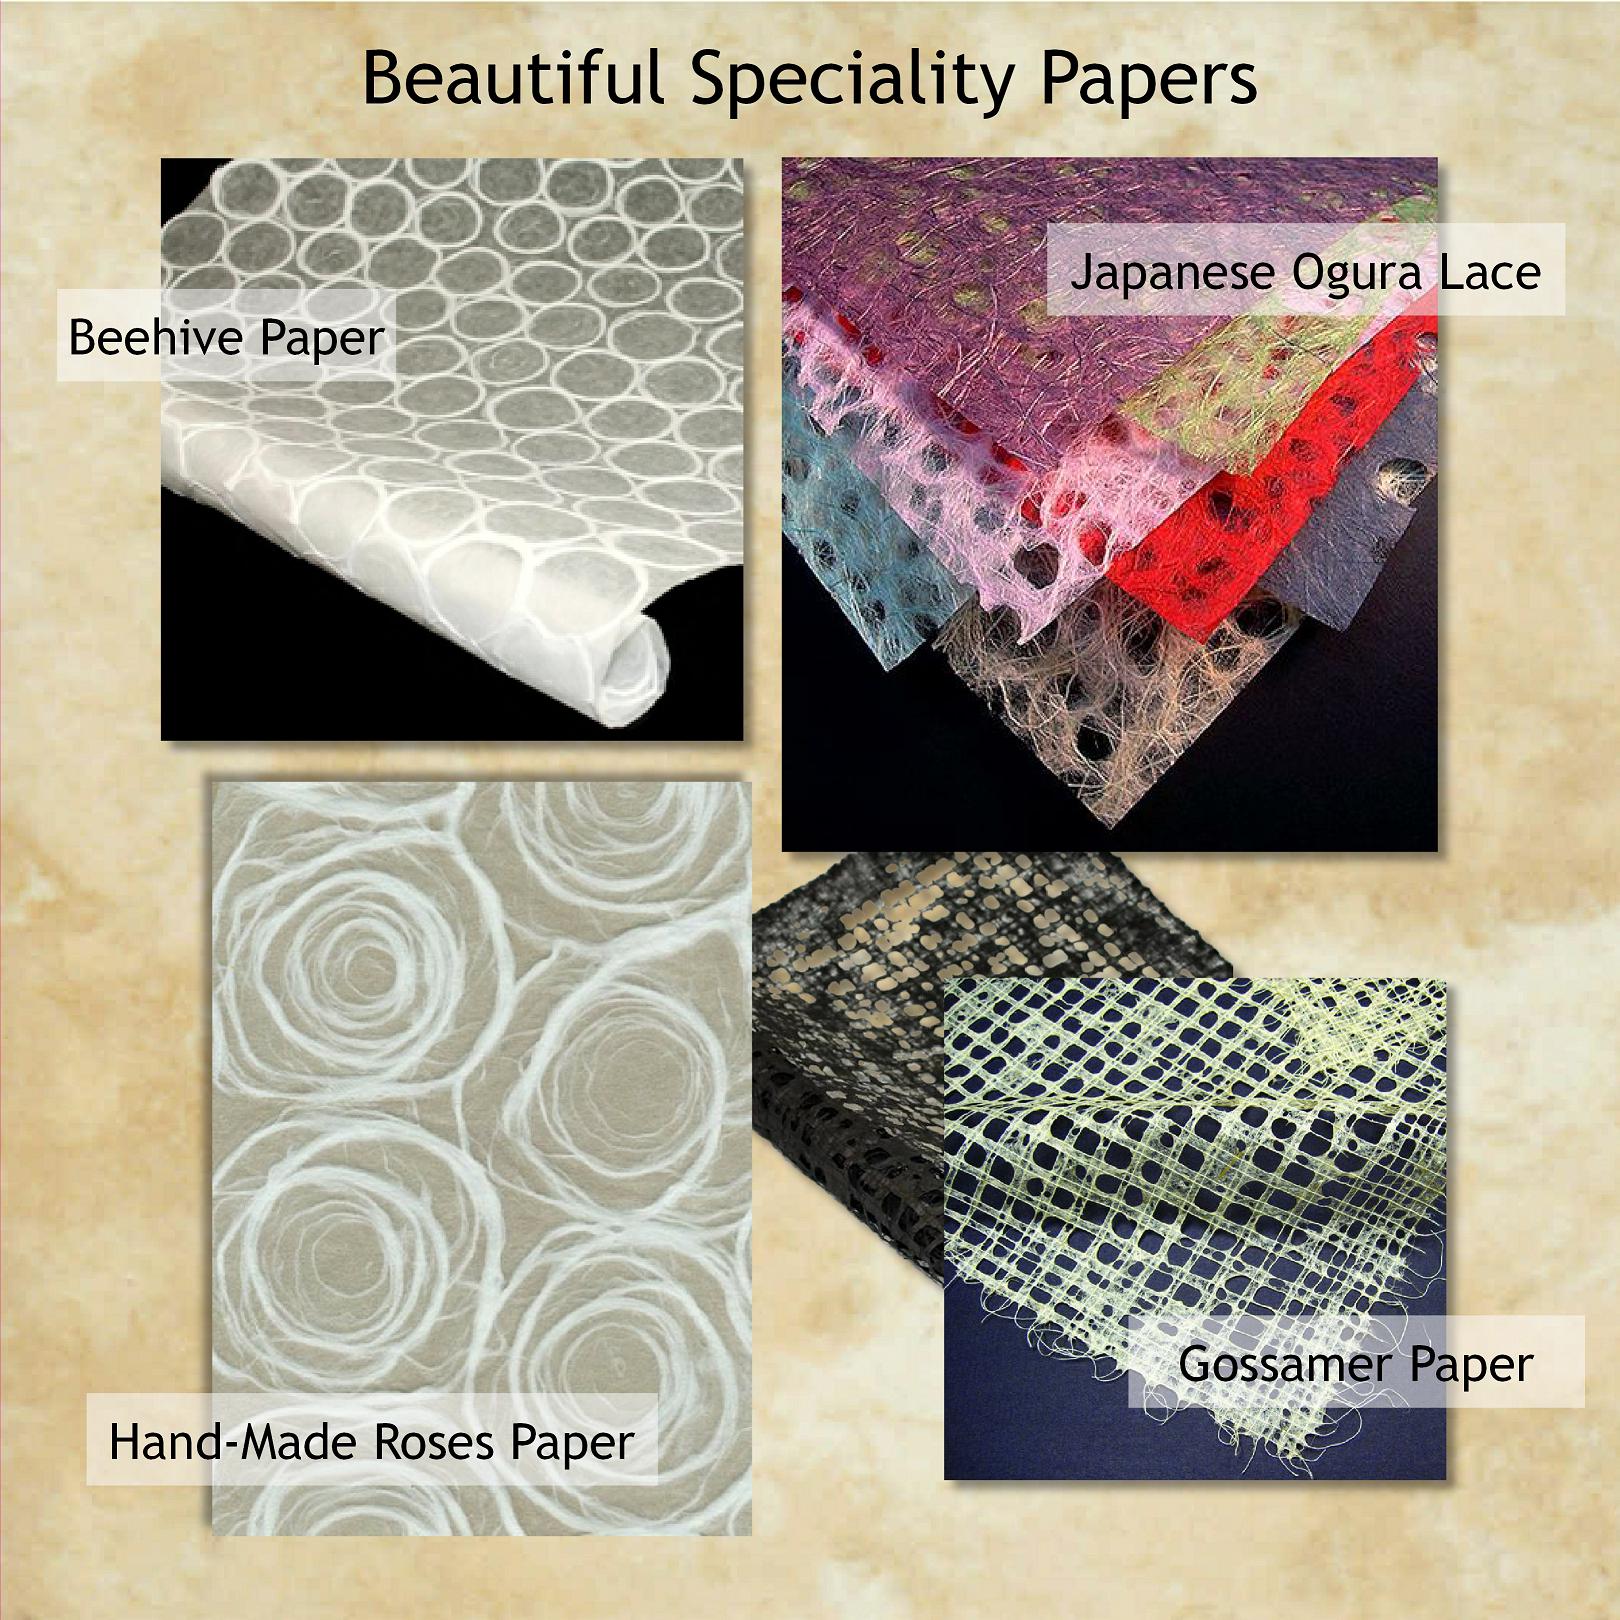
Froyle is frequently seen on her YouTube videos using glorious feature papers which are not always obtainable outside her native New Zealand. She has done a couple of videos showing how one might make her favourite “hand-made roses” using textured gels etc. but so far she has not come up wth an idea for creating the absolutely beautiful gossamer paper or the Japanese Ogura lace paper. This latter is obtainable from the UK Etsy site but none of it has the beauty of Froyle’s.
Here are some pictures I was able to search out online, of these beautiful papers that she uses.
Thinking outside the box
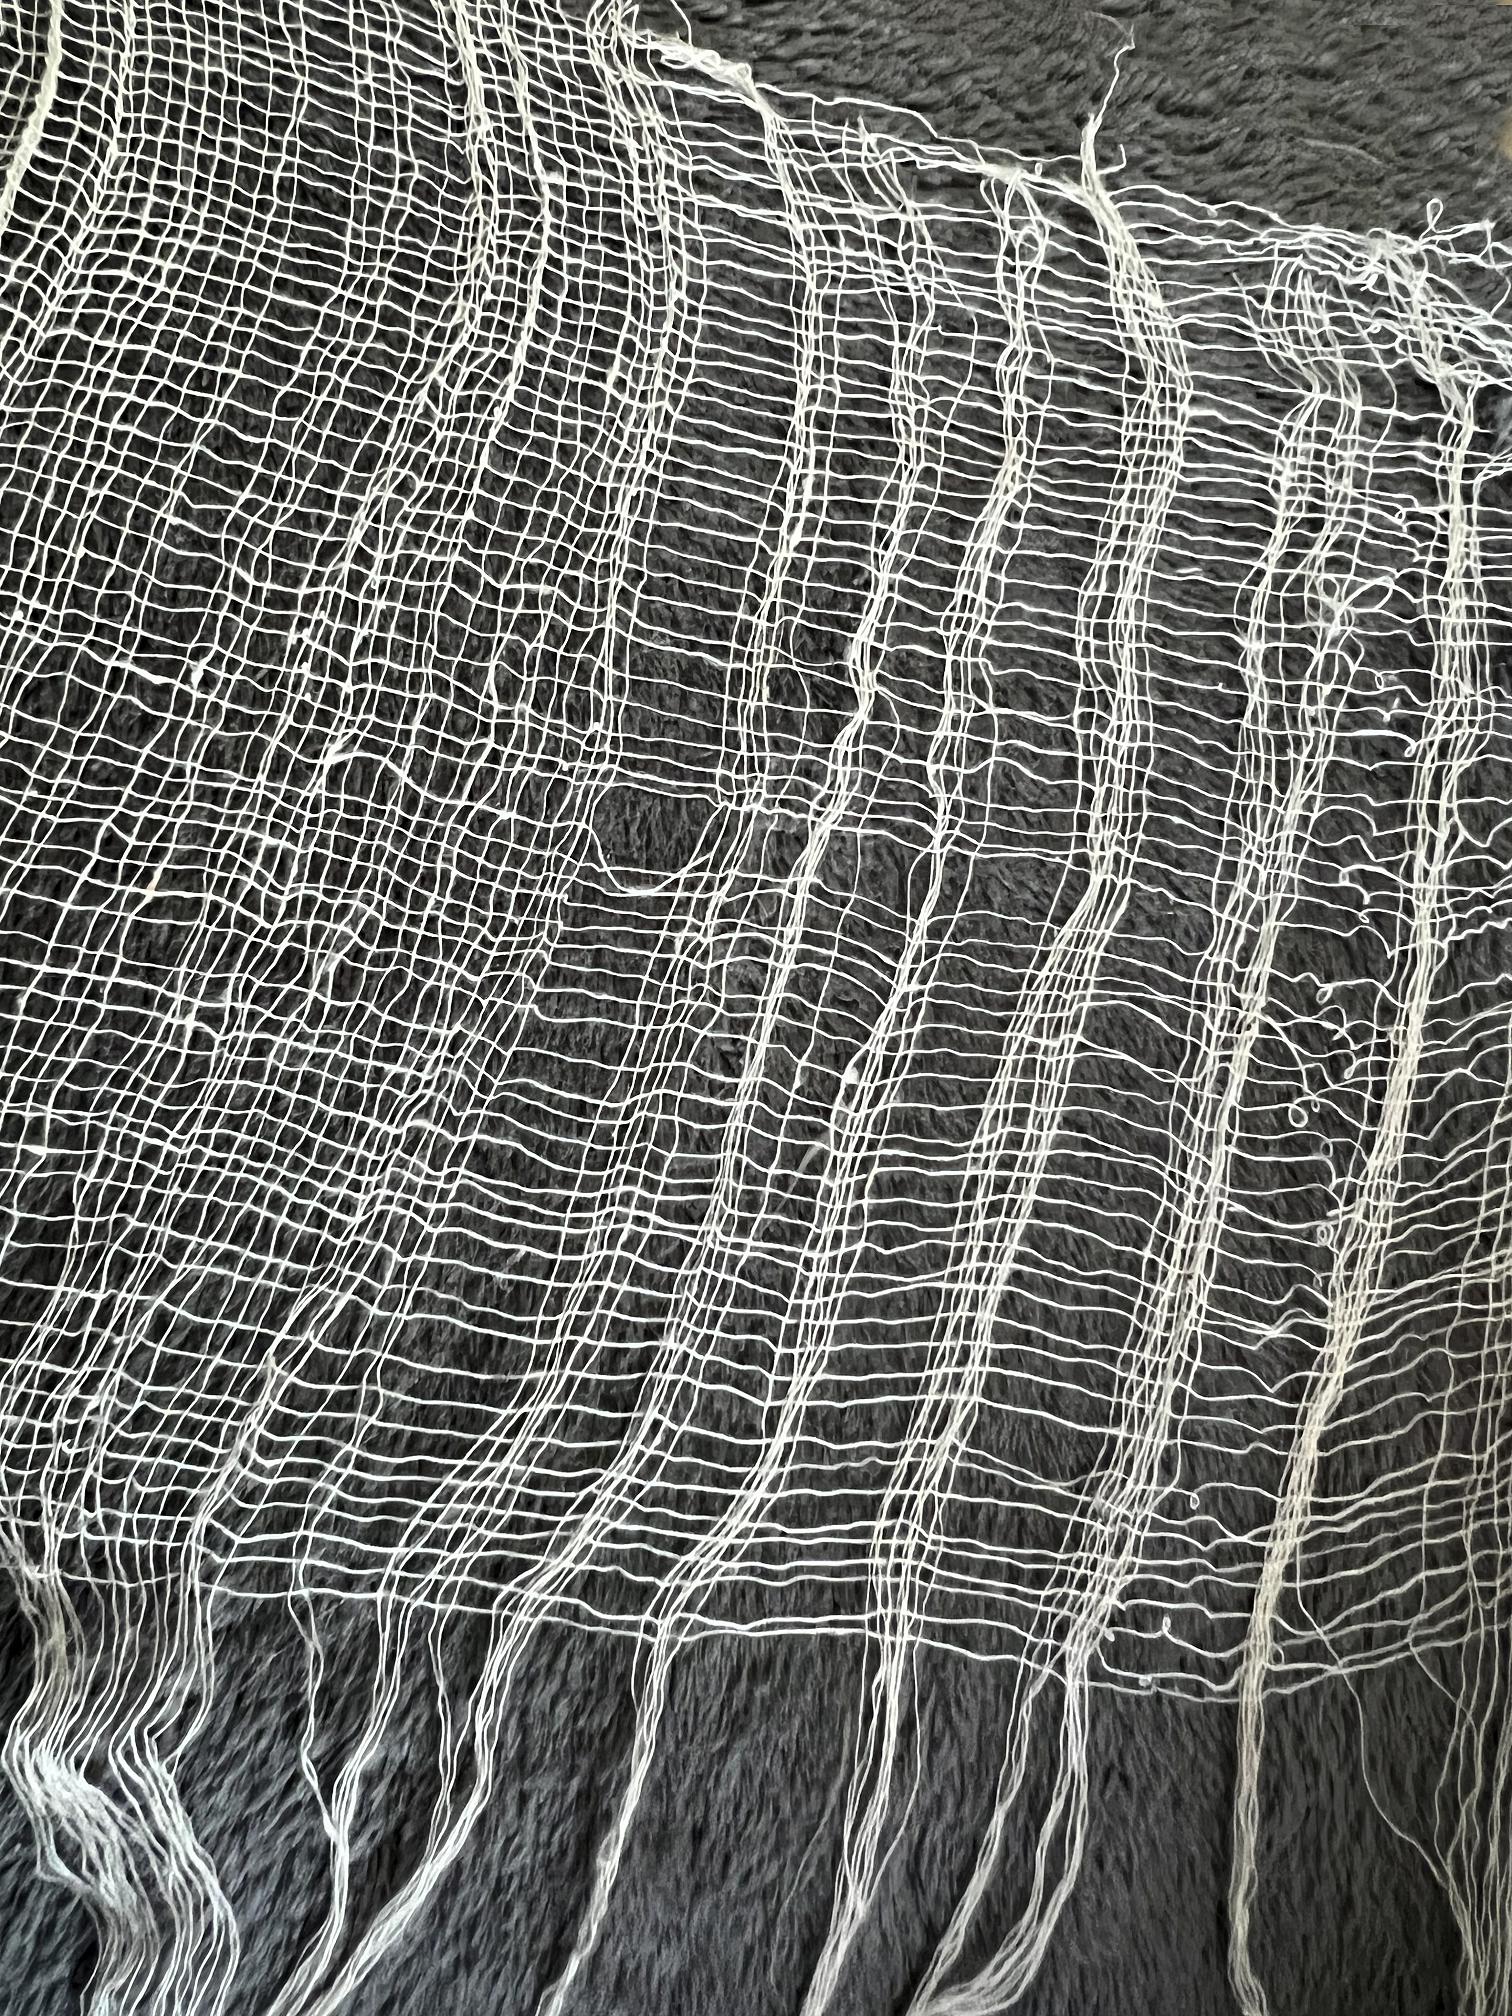
I love seeking out potential art supplies in unlikely places! I have often used Polyfila (joint compound) as a texture paste in the past, and picked up textural objects from builders’ merchants or agricultural suppliers. Florists and cake-making suppliers are also useful sources. I have a large roll of plasterer’s scrim of unknown source – very old, as well as the plastic self-adhesive drywall tape, and recently, in my mixed media storage area, I found an unopened pack of grout cleaning cloth that I hadn’t remembered buying, but obviously thought at the time that it might provide some interesting texture.
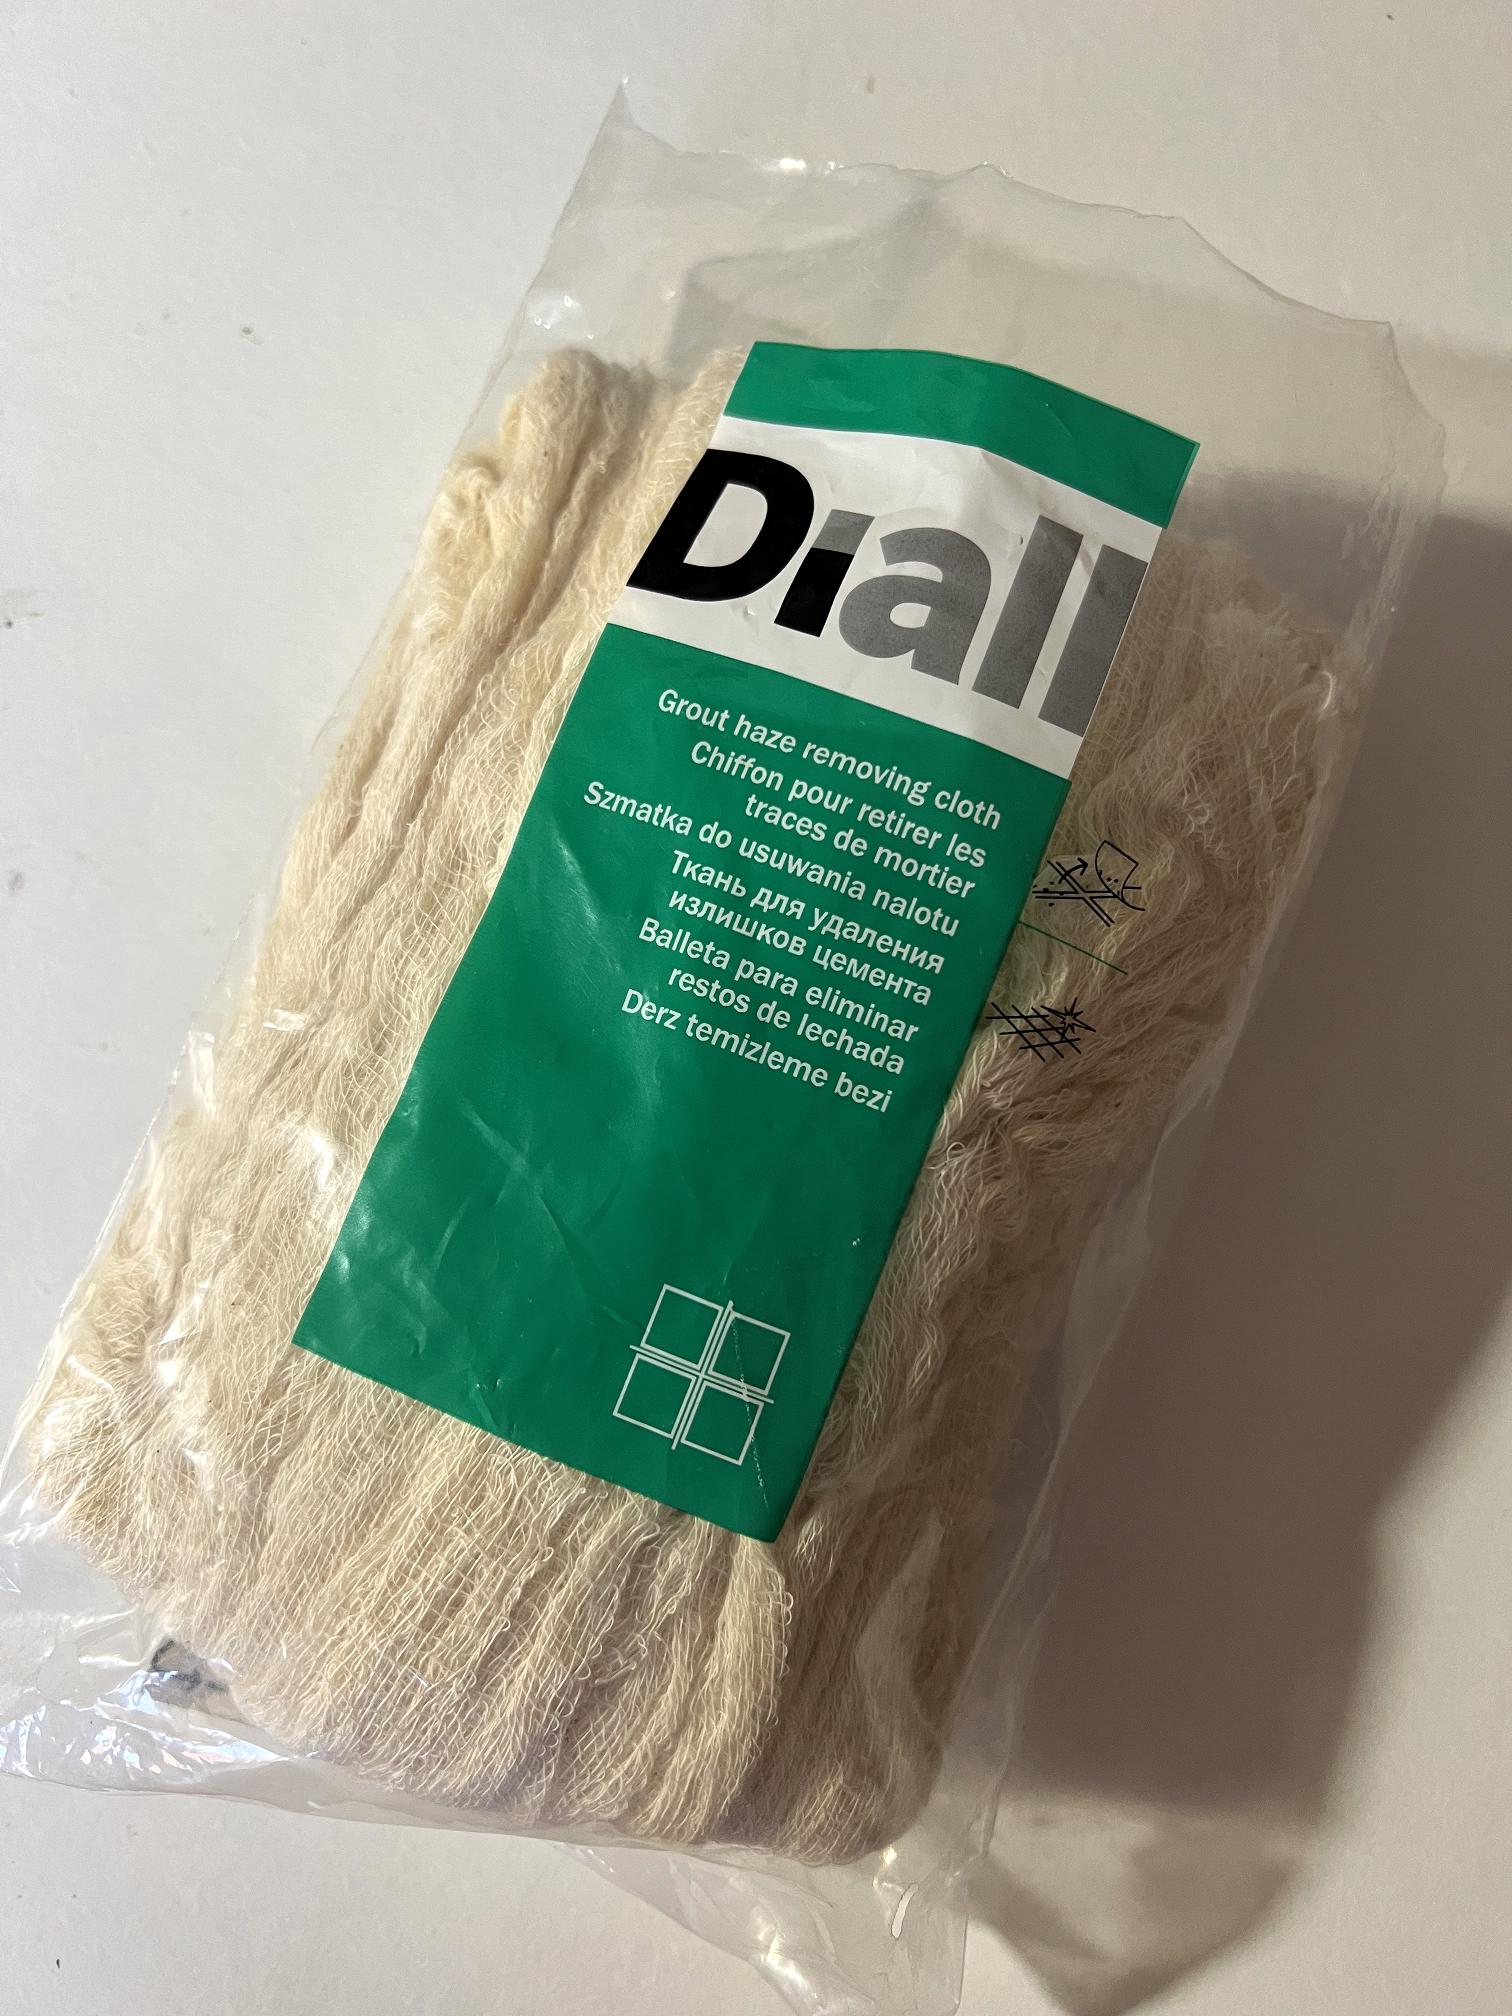
This fibrous gauze-like cloth is 100 percent cotton, unbleached. It resembles very loosely woven cheesecloth. When I opened it, it appeared to be a long scrunched up ribbon of cloth rolled around a cardboard core, but when spread out, it proved to be a lot wider than expected – I think you are supposed to cut off what you need for each job.
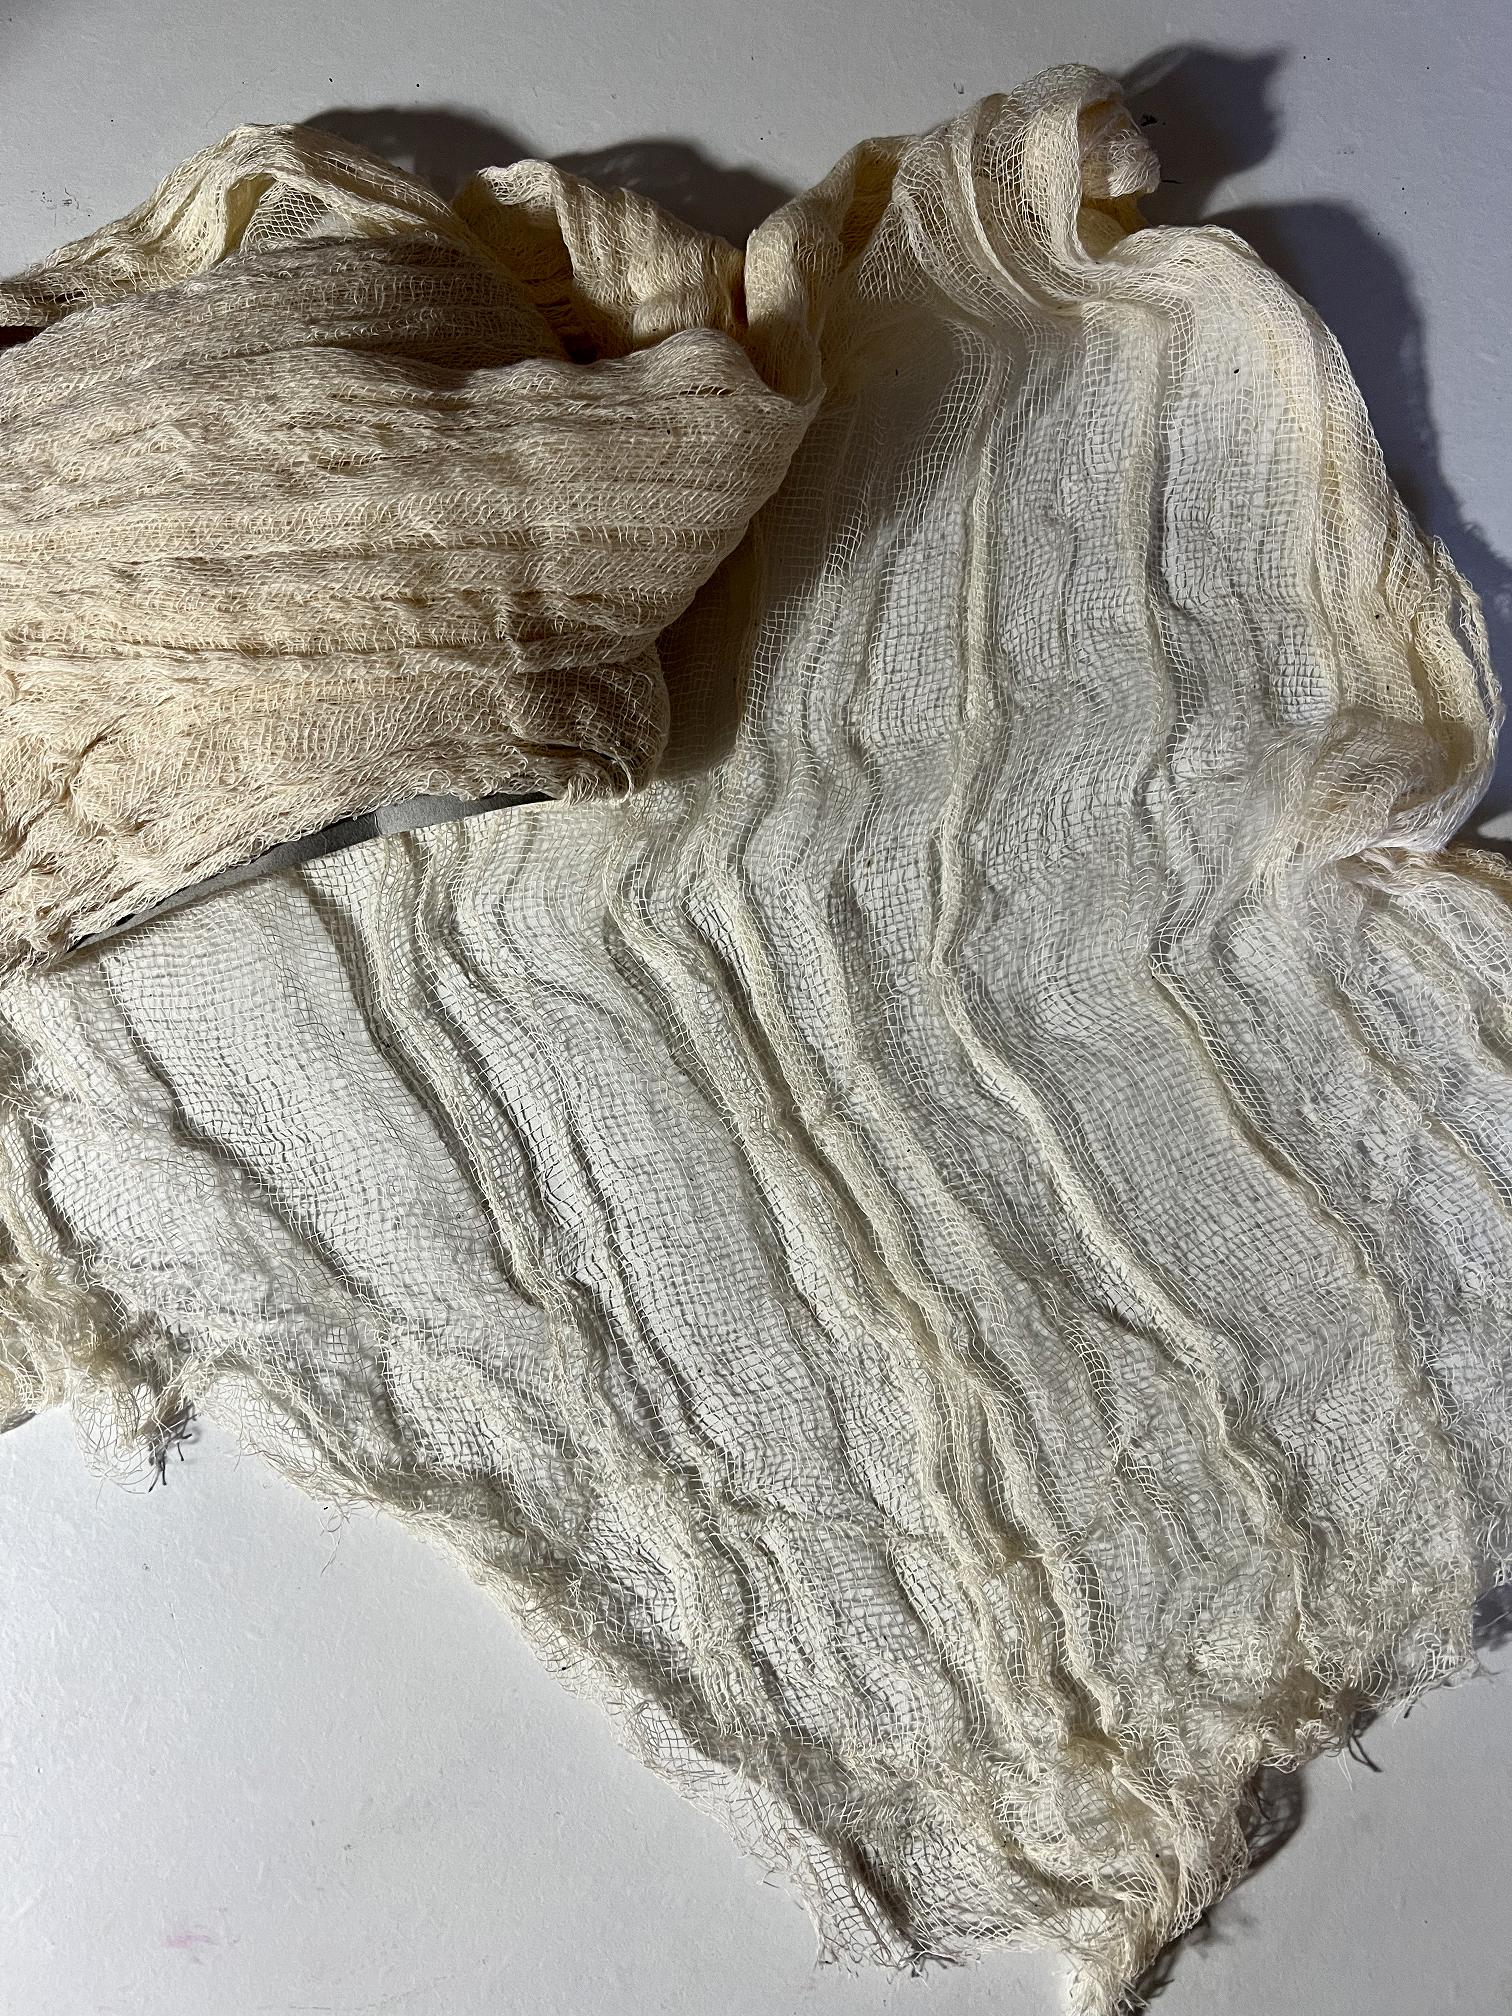
Pulling the cloth apart
Being a very open weave like cheesecloth, I thought it could be easily pulled apart and the fibres laid down on a brushed-on pattern of gel medium on tissue paper on a plastic substrate. In this way I could create something similar to the gorgeous hand-made papers so favoured by Froyle. Until I found it on the shelf, I had made a few searches online for loose fibres that could be used for this, but without success.
With my first attempt it proved a bit more difficult to pull apart than I’d expected because it tended to bunch up as you pulled off the weft threads, and knot itself into quite a tangle. It was easier when I started off with a smaller piece, and cut off the selvedges along the sides, but that first time, there was an interesting bonus I didn’t expect. Quite a few of the fibres twisted together and bunched up, forming cords that were quite hard to pull apart. This is just what I needed to create the “paper roses.” However, when I ran out of these, I found that I could easily twist the loose fibres together to produce the same result, and this was a better method in the long run because cutting the edges off the cloth and cutting smaller portions of it made it a lot easier to pull apart and speeded up the process. It also really helped, doing this in the sitting room while watching TV with my feet up, as I could spread a short length of the cloth on the arm of the settee – I’ve got a fleece throw over it and this grips the piece nicely and enables me to keep it spread out while I tease out the fibres. The process is actually rather relaxing and addictive!
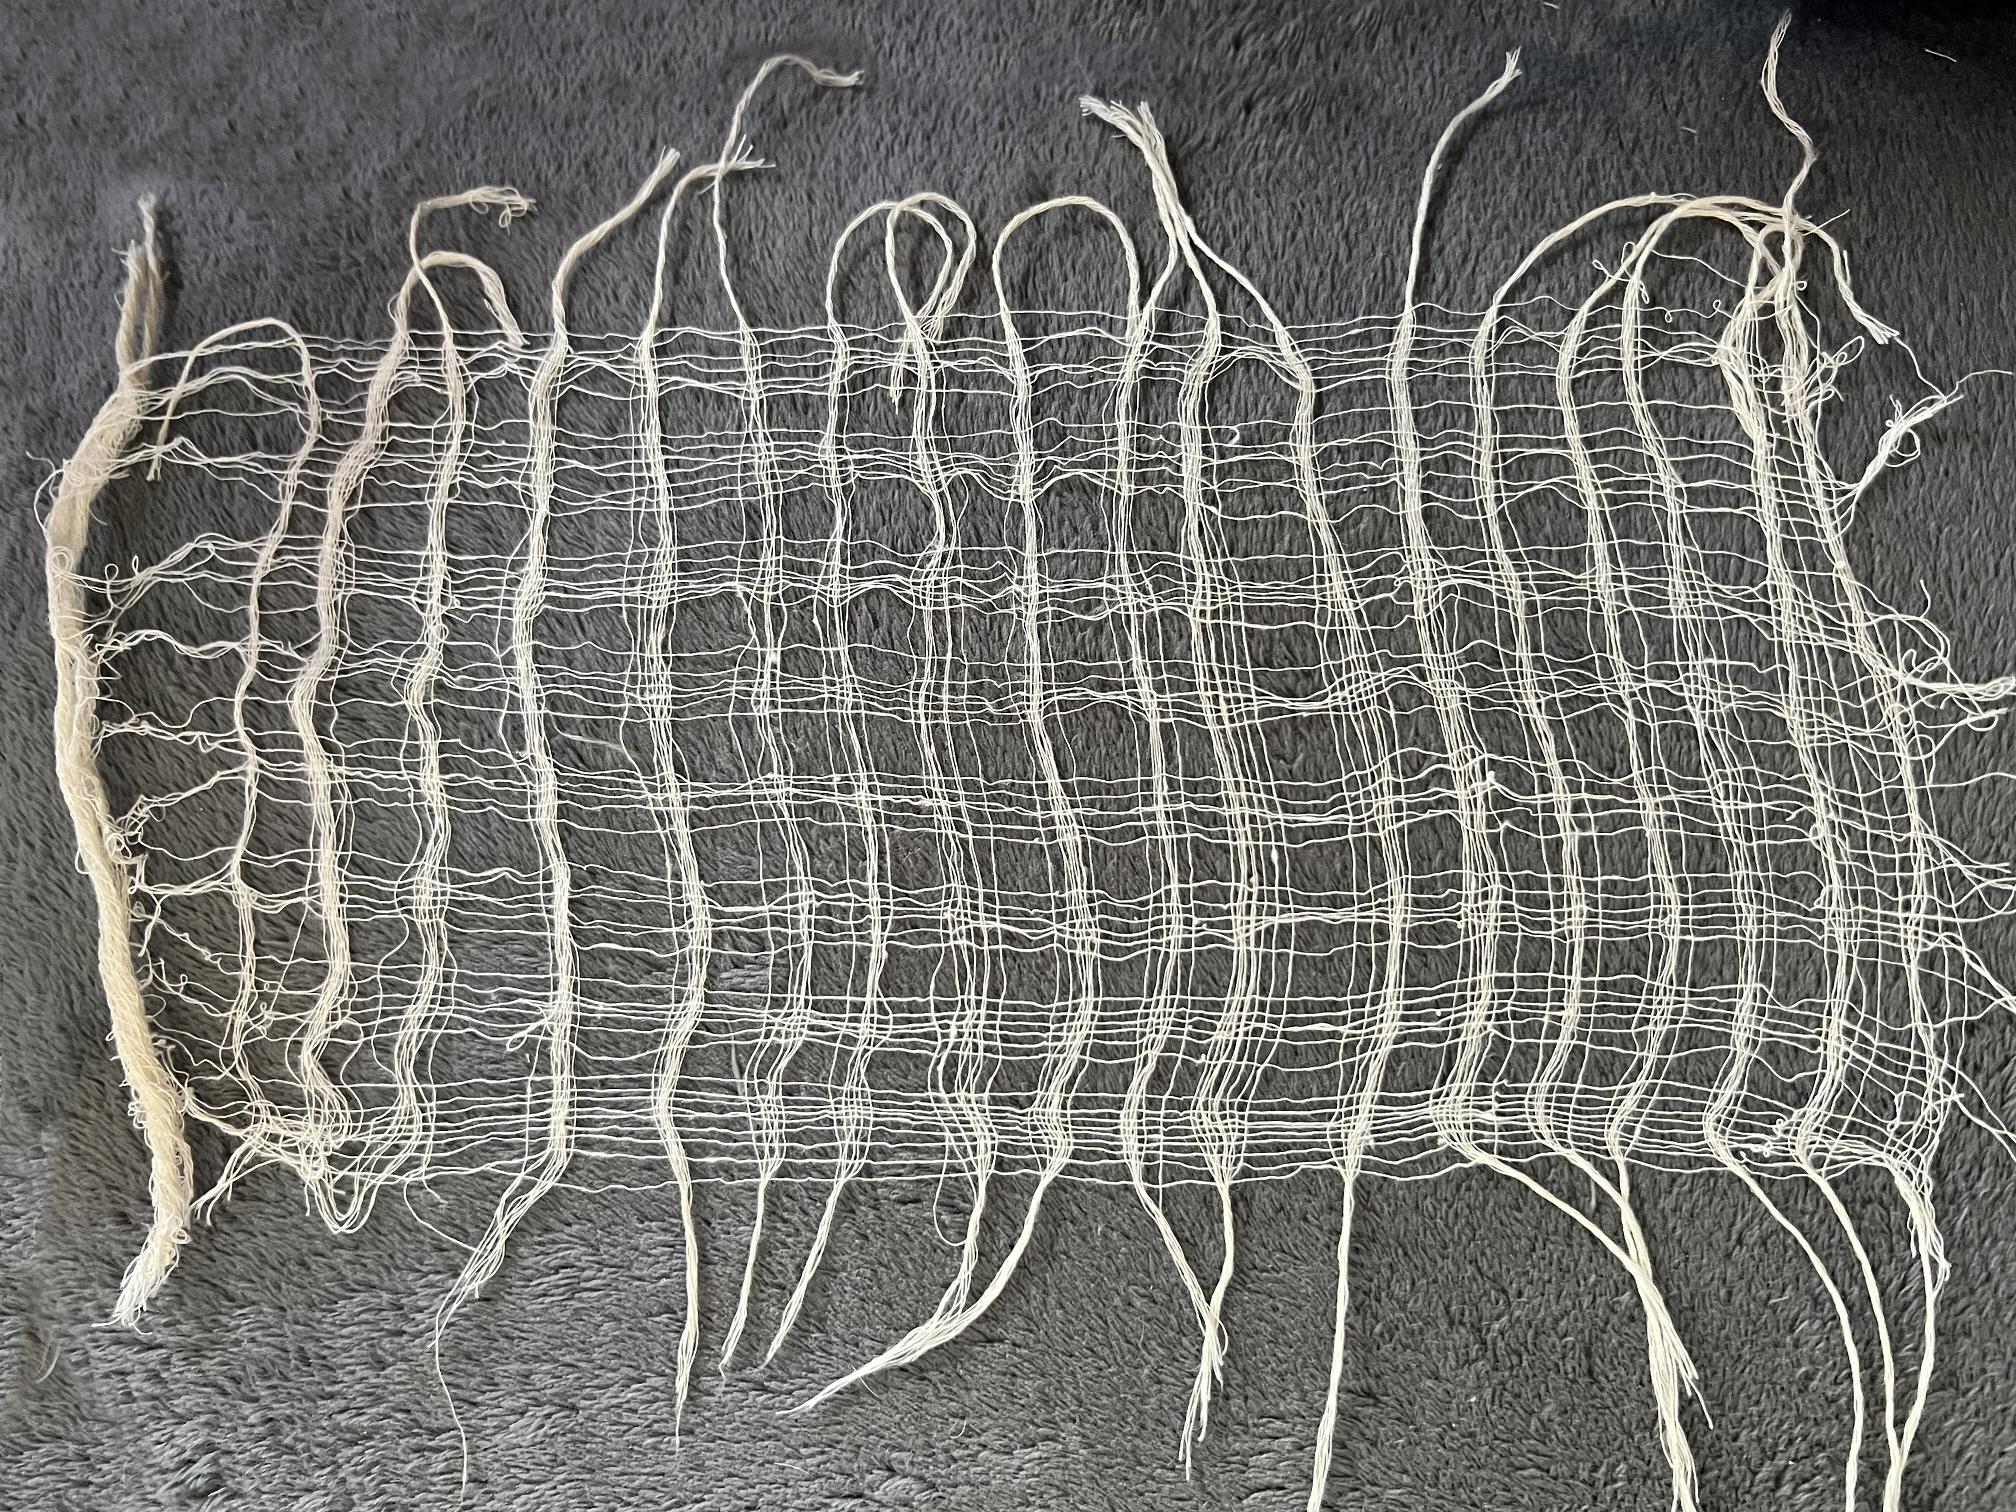
The next photo shows the three stages. At the top is a piece of the cloth as it comes from the bag. At the bottom are the fibres I managed to pull off, and in the middle are tighter cords.
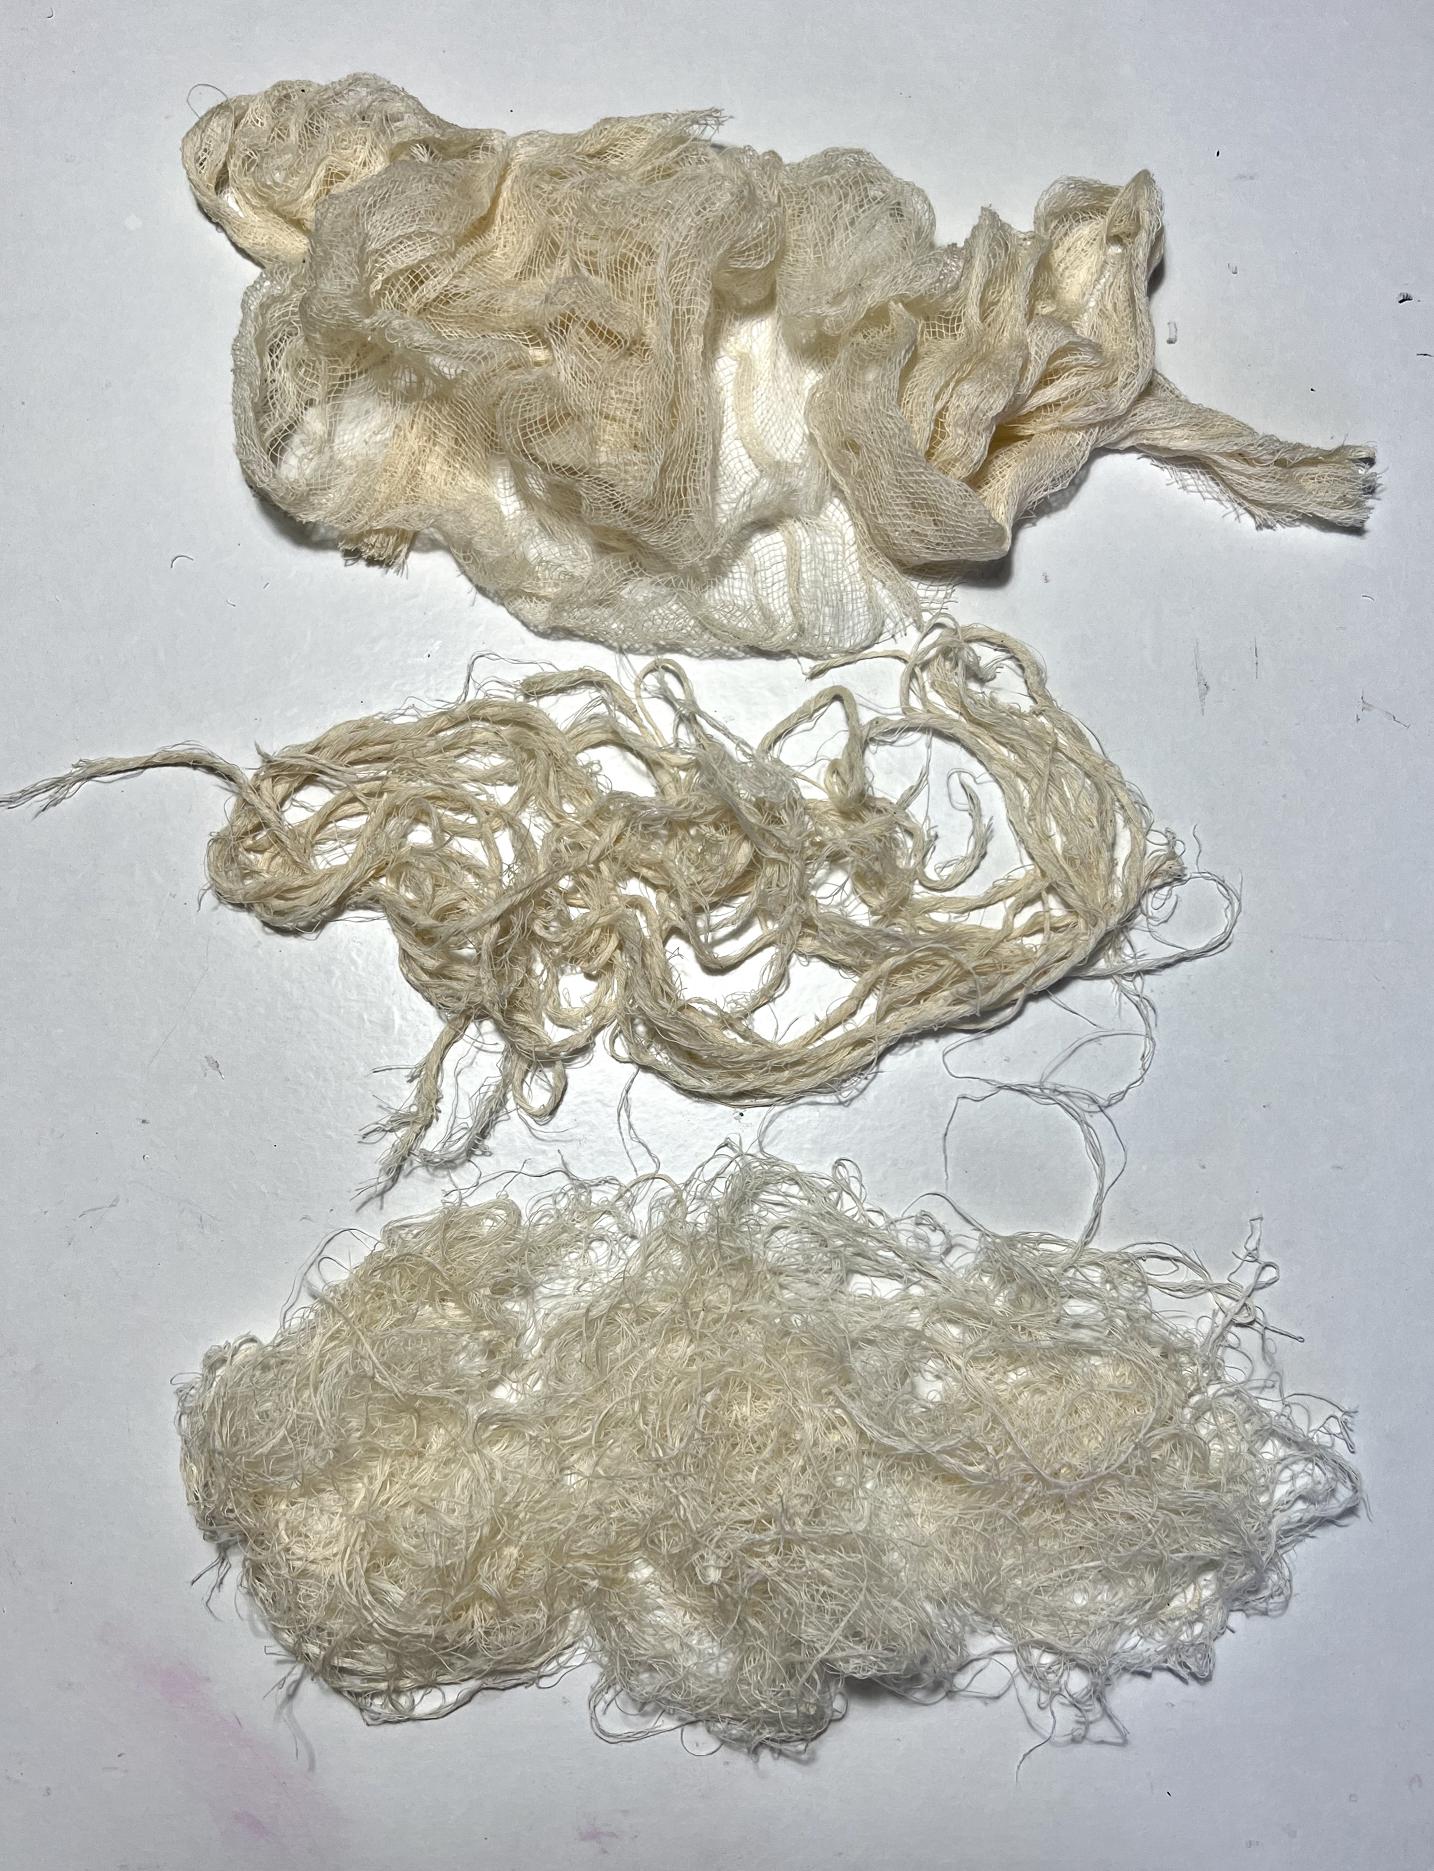
The separated fibres were just what I needed to try creating the Ogura lace paper. The gossamer paper would probably be the most difficult to replicate and at this stage I put it on hold while I gave it some thought. The beehive paper is easily done by making marks with a cylindrical object dipped into white acrylic paint or moulding paste and printed onto tissue paper.
Being pure cotton, this soft stuff is going to take inks and paints beautifully, and it is also lovely in its unbleached state. When stuck down as collage elements, the tissue paper between the textured areas should blend in and become transparent, leaving the fibrous raised areas opaque. Sections of it should be easy to tear apart, just like the real thing.
The first stage of creating the papers using the fibres from the ripped apart cloth
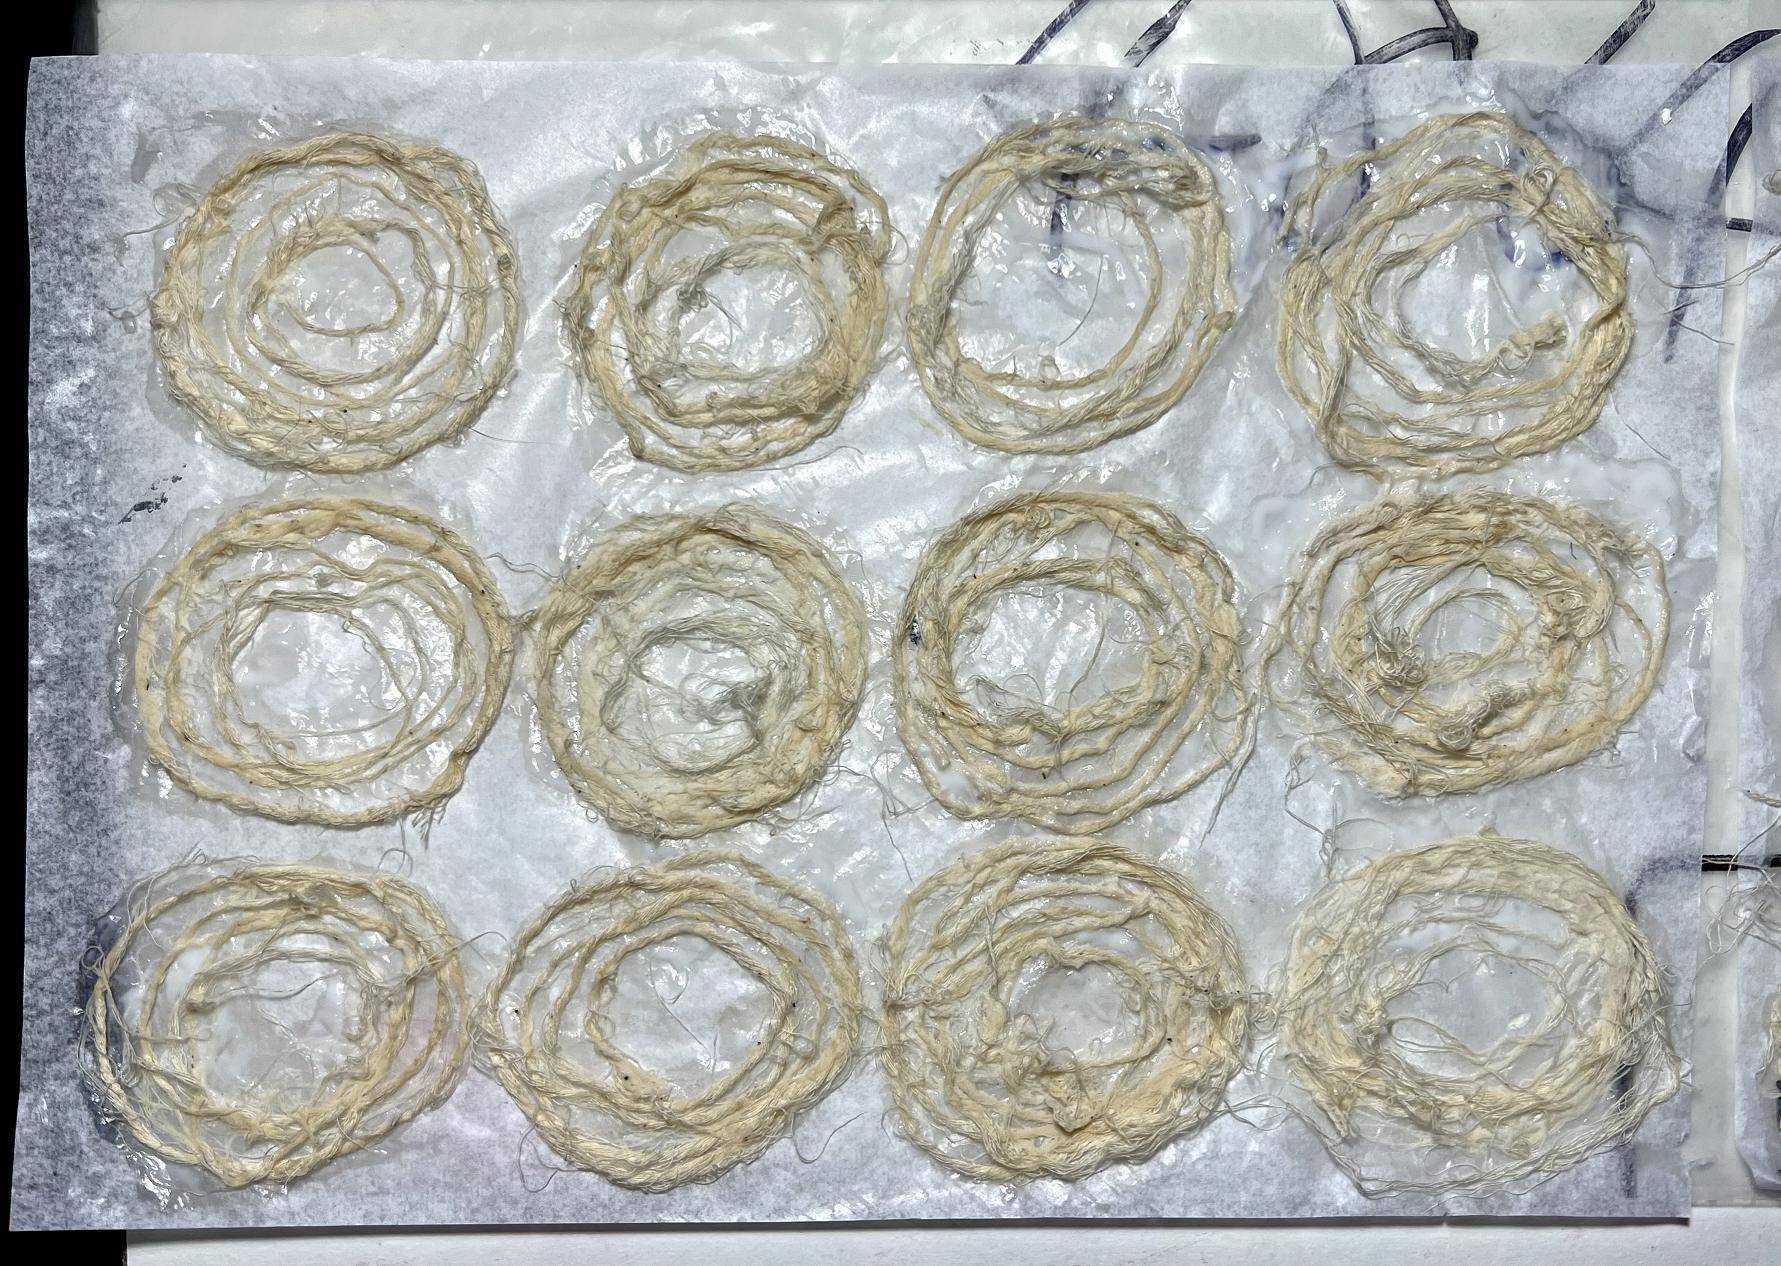
First, the “hand-made roses.” These went down petty well. I used some Golden Satin Glazing Fluid as an adhesive, onto white tissue, roughly drawing the shape with the fine pouring nozzle on the bottle. The black marks you can see are writing on the plastic sheet I was working on.
The first stage of the “Ogura Lace” paper drying. I could see that depending on how this peeled off, it would need another layer of fibres. I laid down some Golden polymer and then spread the fibres on top. I created circles with my finger wherever there were none,
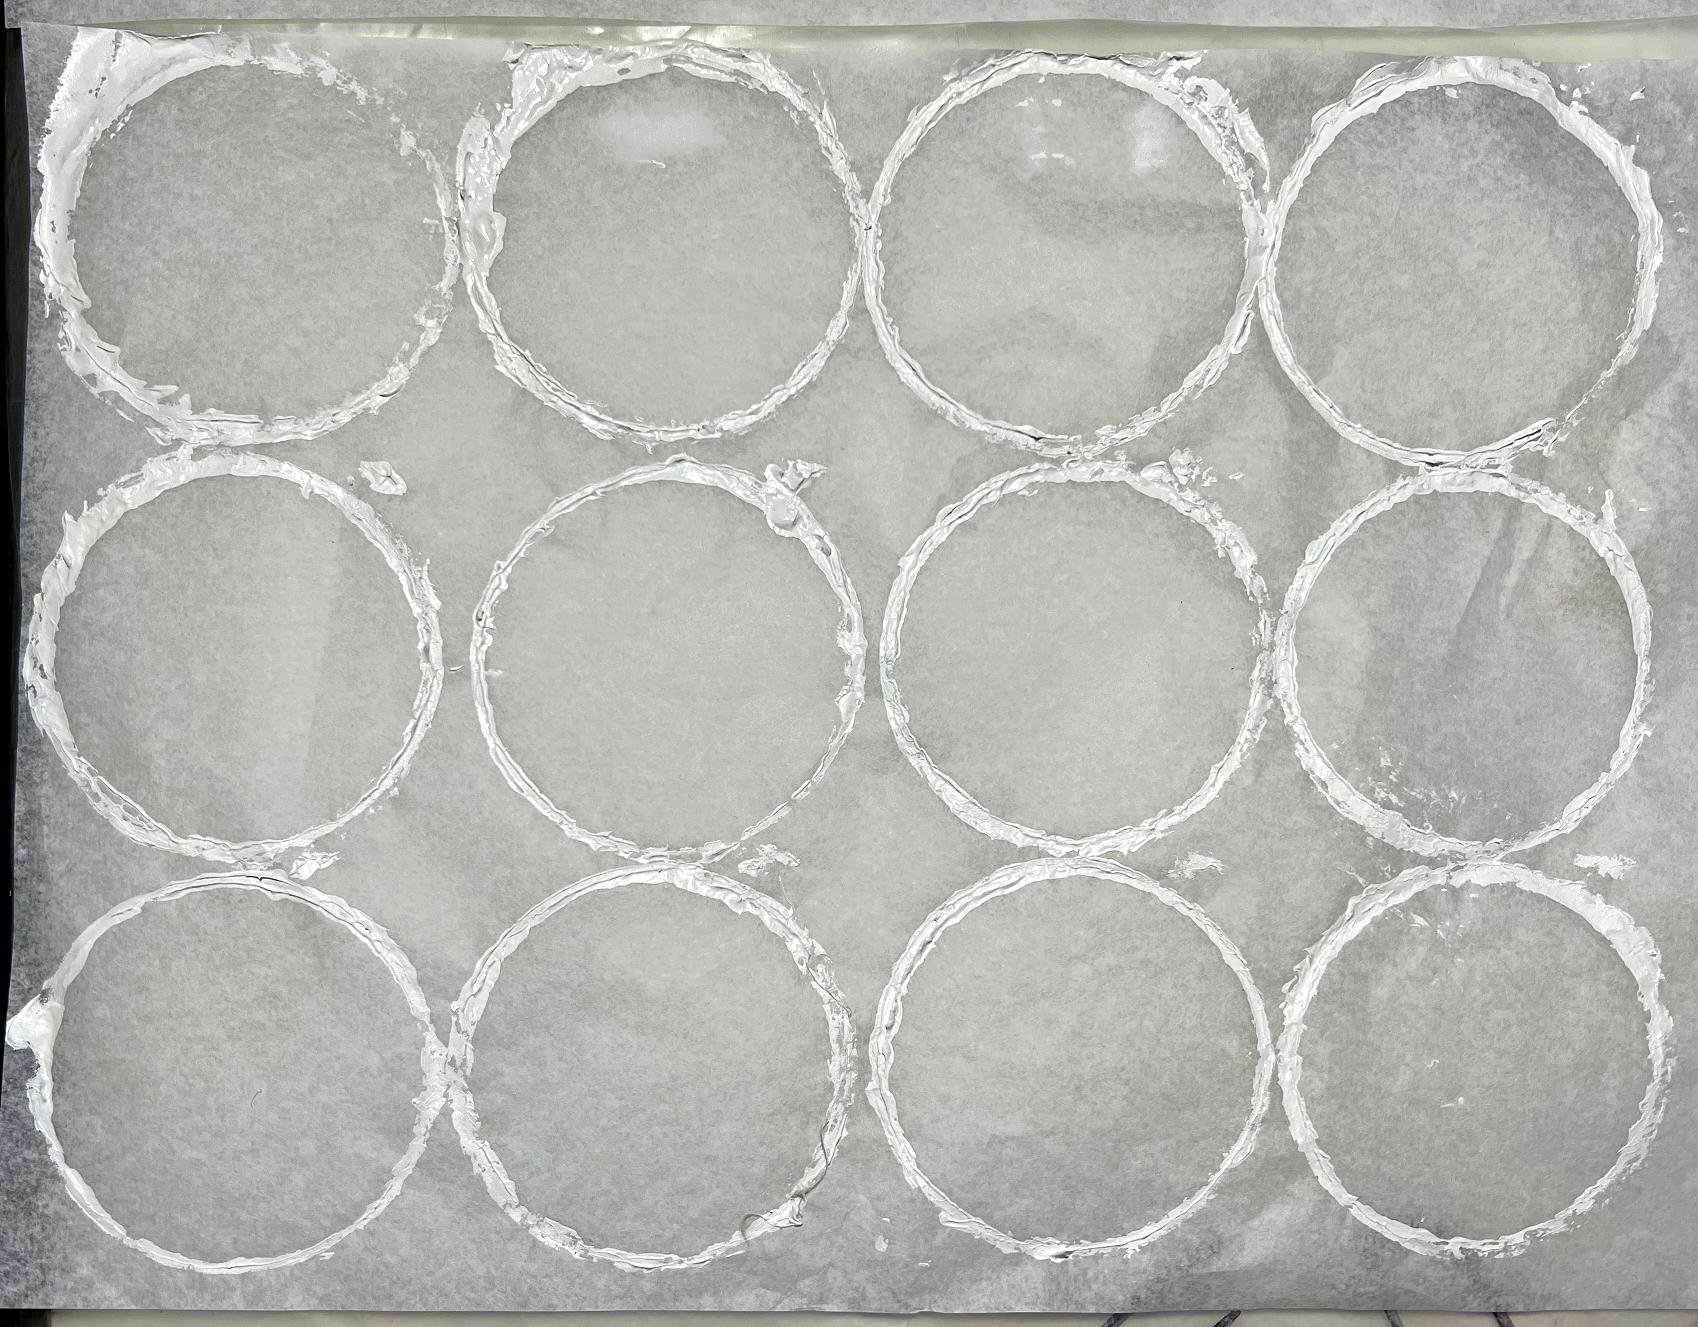
The “Beehive” paper. I created the circles by dipping the lid of a plastic pot into some white acrylic paint and stamping this onto tissue paper.
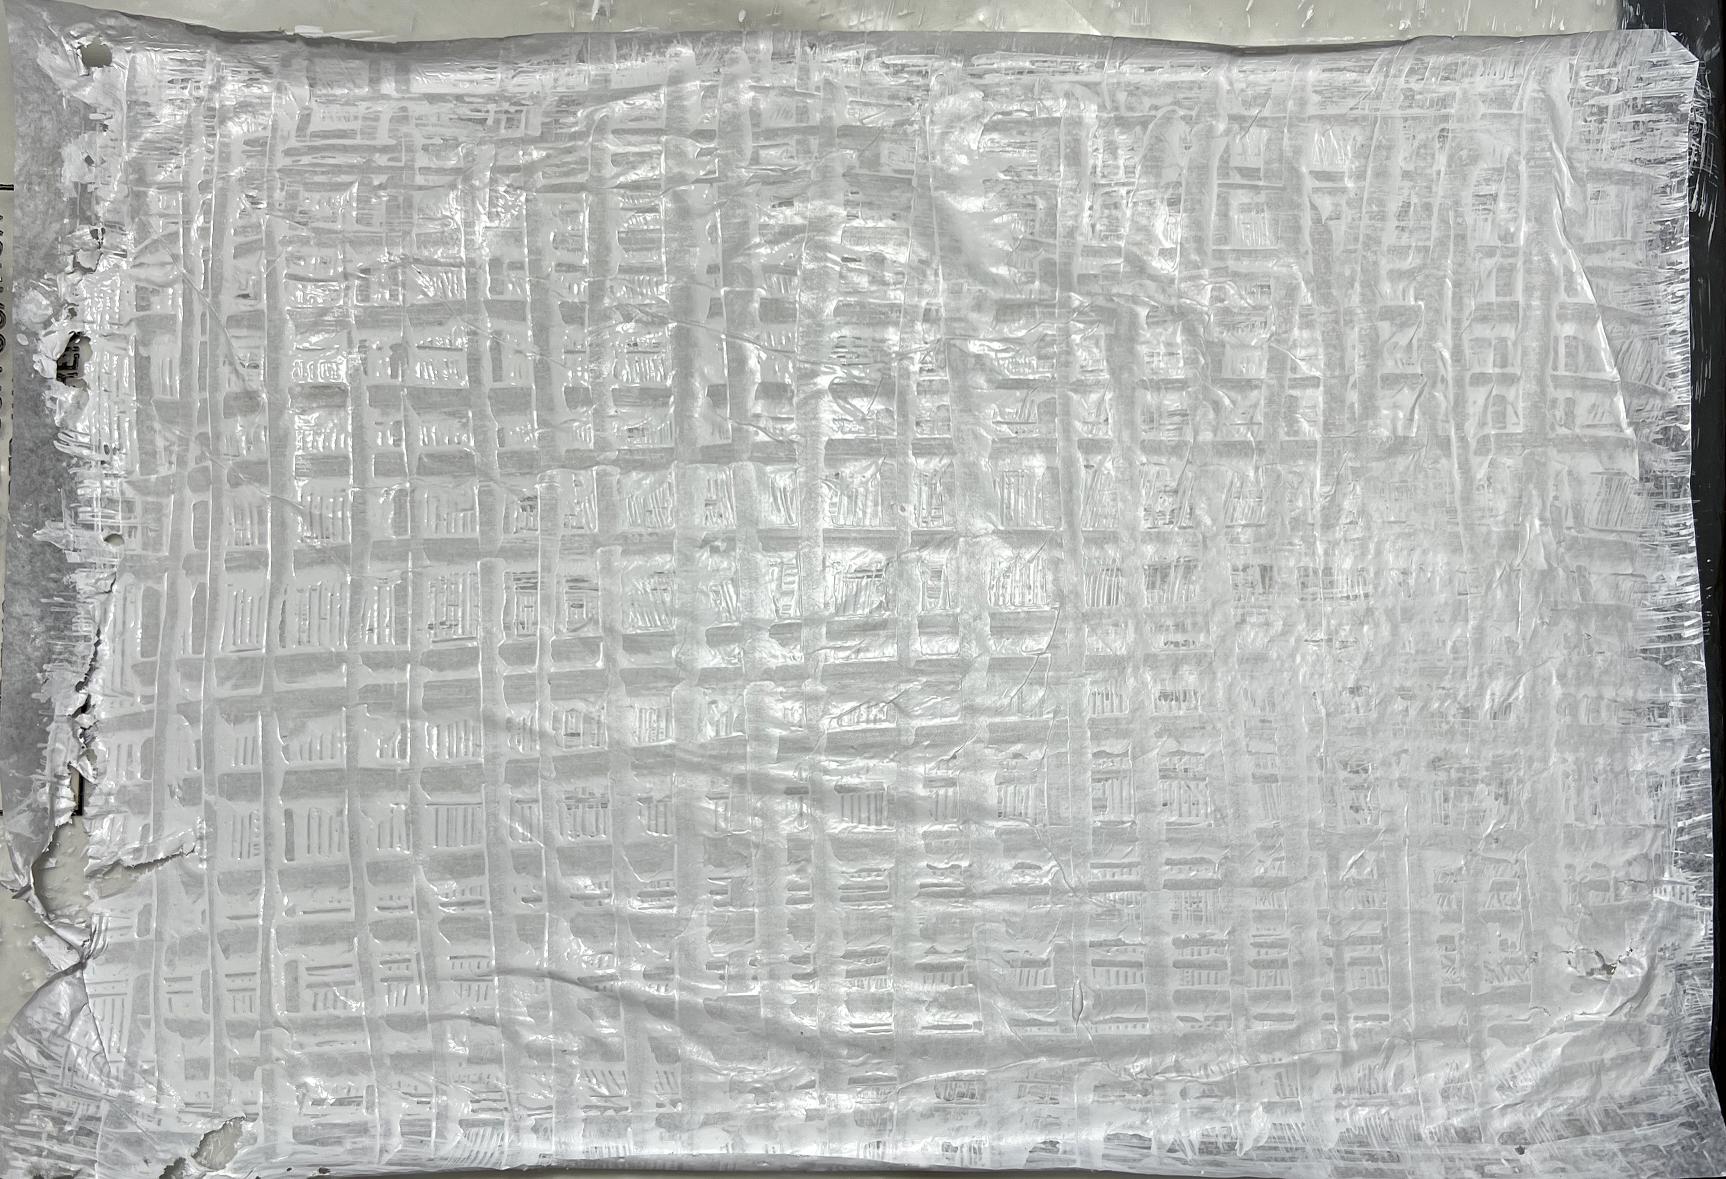
An early experiment in creating the Gossamer paper. I dragged some white acrylic all over the surface of a piece of tissue paper with my silicone pastry brush to create some open spaces and then dragged a silicone texture tool vertically and horizontally. So far not too successful – after I did it, I remembered that the horizontal and vertical lines represent solid material, not the holes! Once dry, the paper pulled off the plastic all right, but whether it’s going to be any use for anything I don’t know, but I’m not in the habit of throwing stuff away at the first sign that something is not right! It could be the beginning of something – maybe with some coffee staining or ink spraying, or using it to pull a print on the gel plate, something may come of it.
As the other papers were drying, I could see they would need another coat of acrylic medium over the top to hold the loose fibres down. Initially I traced the basic shape of what I was doing with the glazing gel which has a fine nozzle on the top. What would have been better would be to cover the whole surface with this, or with soft gel medium, and lay the fibres on top. This would strengthen the tissue paper in between and make the whole thing more stable as well as providing better overall adhesion. I knew I would definitely need to add more fibres to the Ogura lace one.
Stage 2
The pieces definitely needed another coat of medium after they were dry. I also added a lot more fibre to the Ogura lace one, wrapping lengths of it around my finger and sticking down the circles randomly across the surface. It was beginning to look better. I thought I would probably rub away quite a bit of the underlying tissue once I was satisfied I’d got enough fibre down.
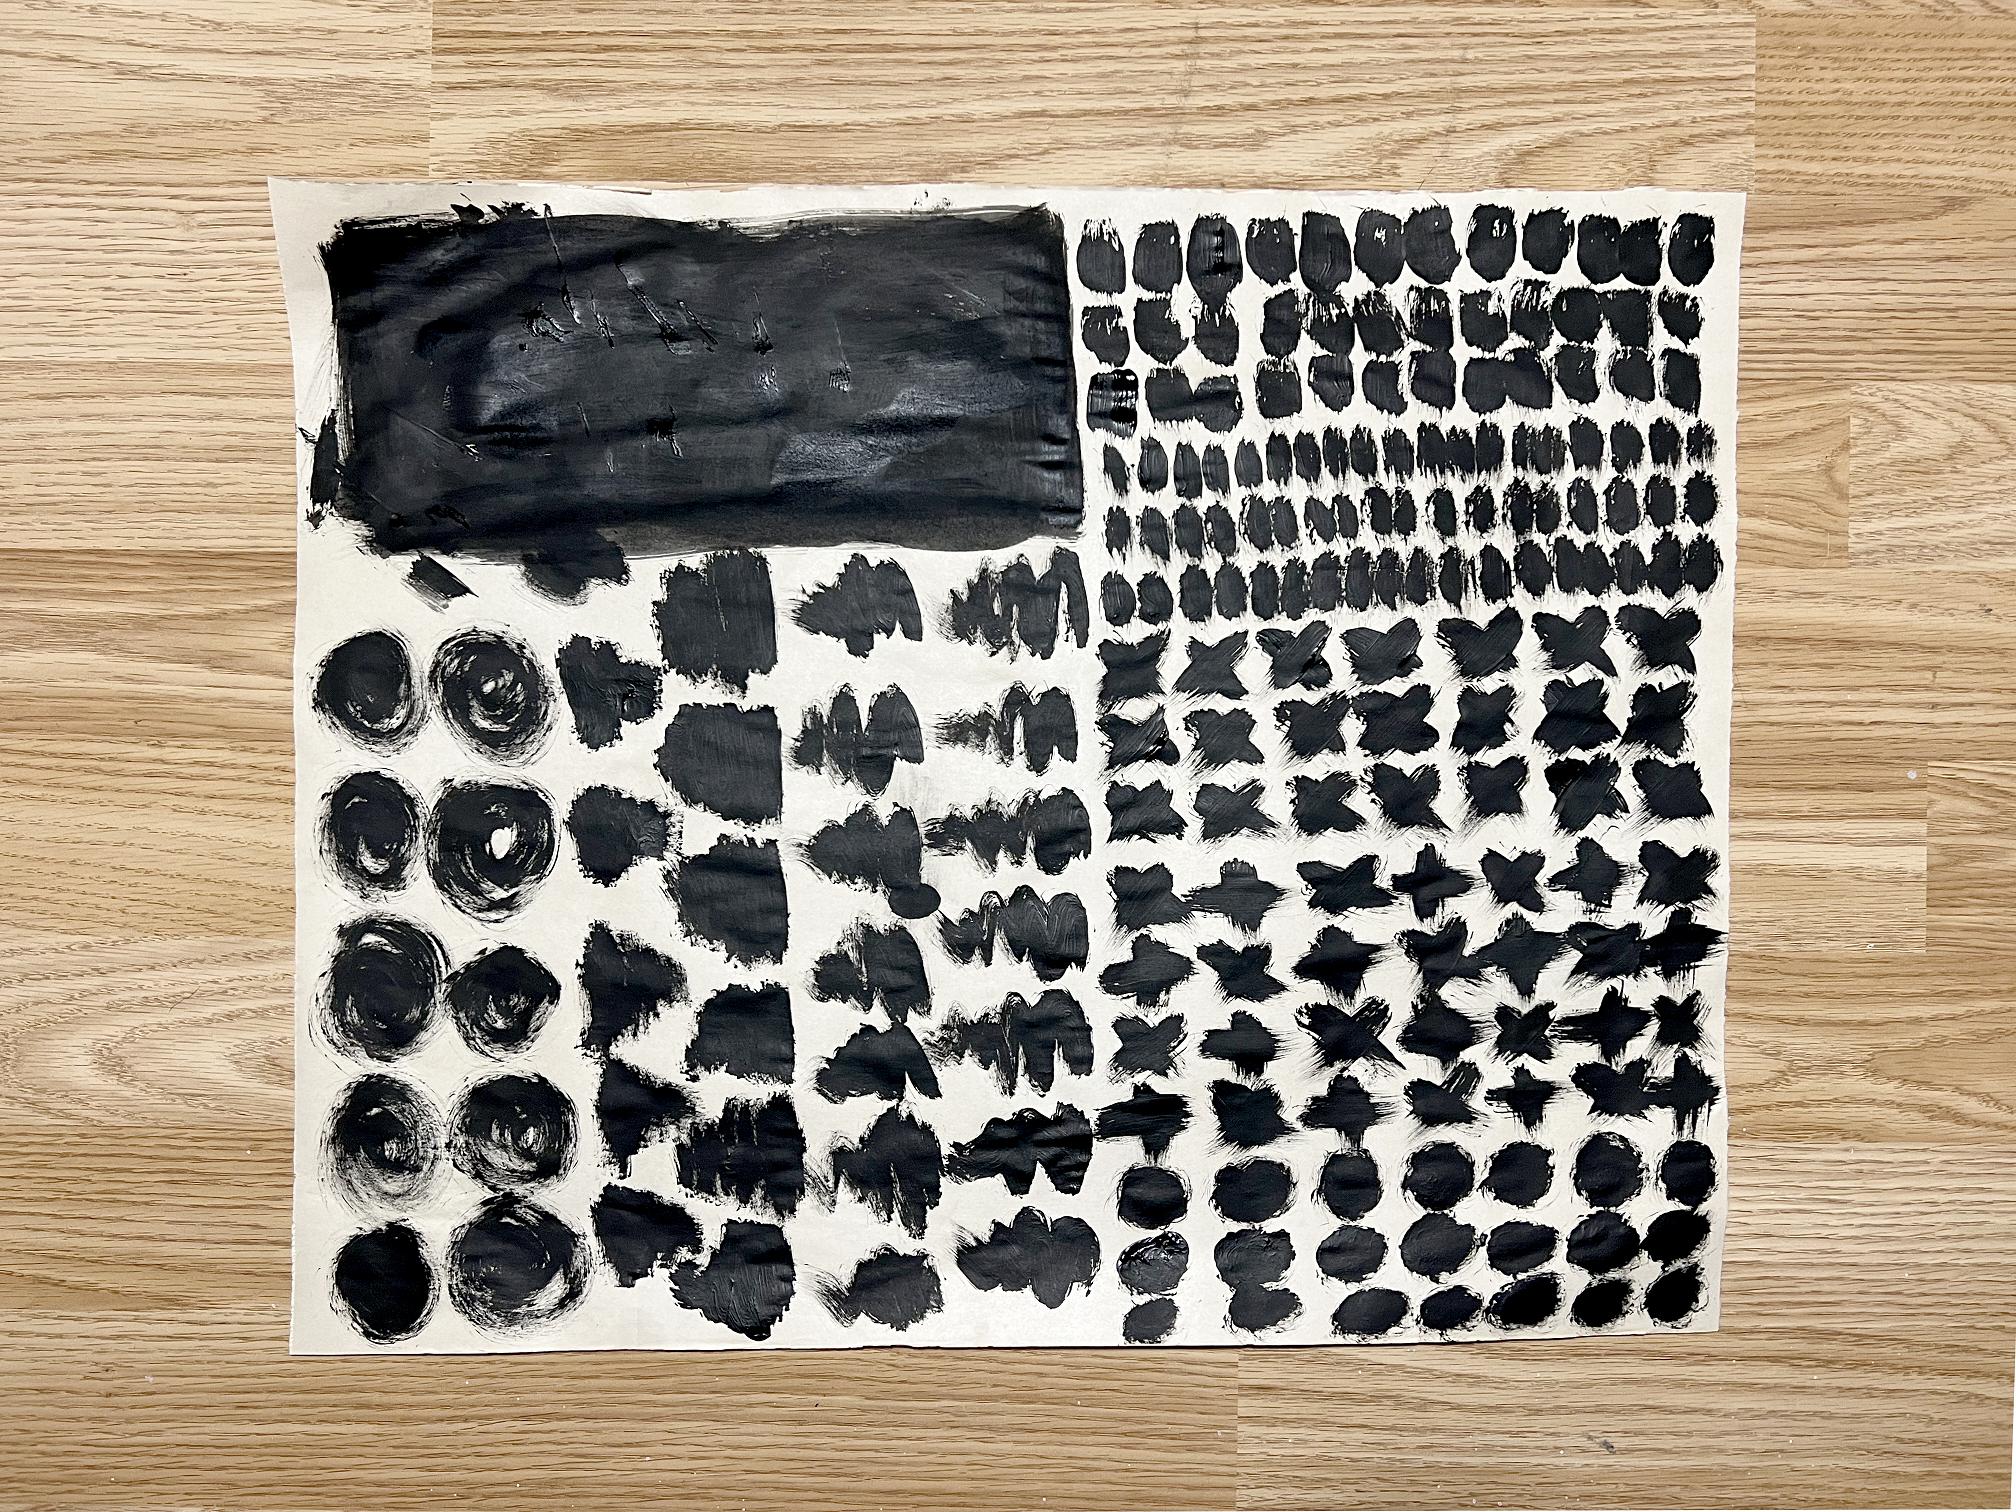
Some mark making
After the day’s session there was a fair bit of paint to use up. In another blog post I shall describe how I made and tested some foam stamps. I had a lot of black paint left over after that, so grabbd some Amazon packaging paper and cut it down a bit, and used it as a substrate for some brush-cleaning mark making.
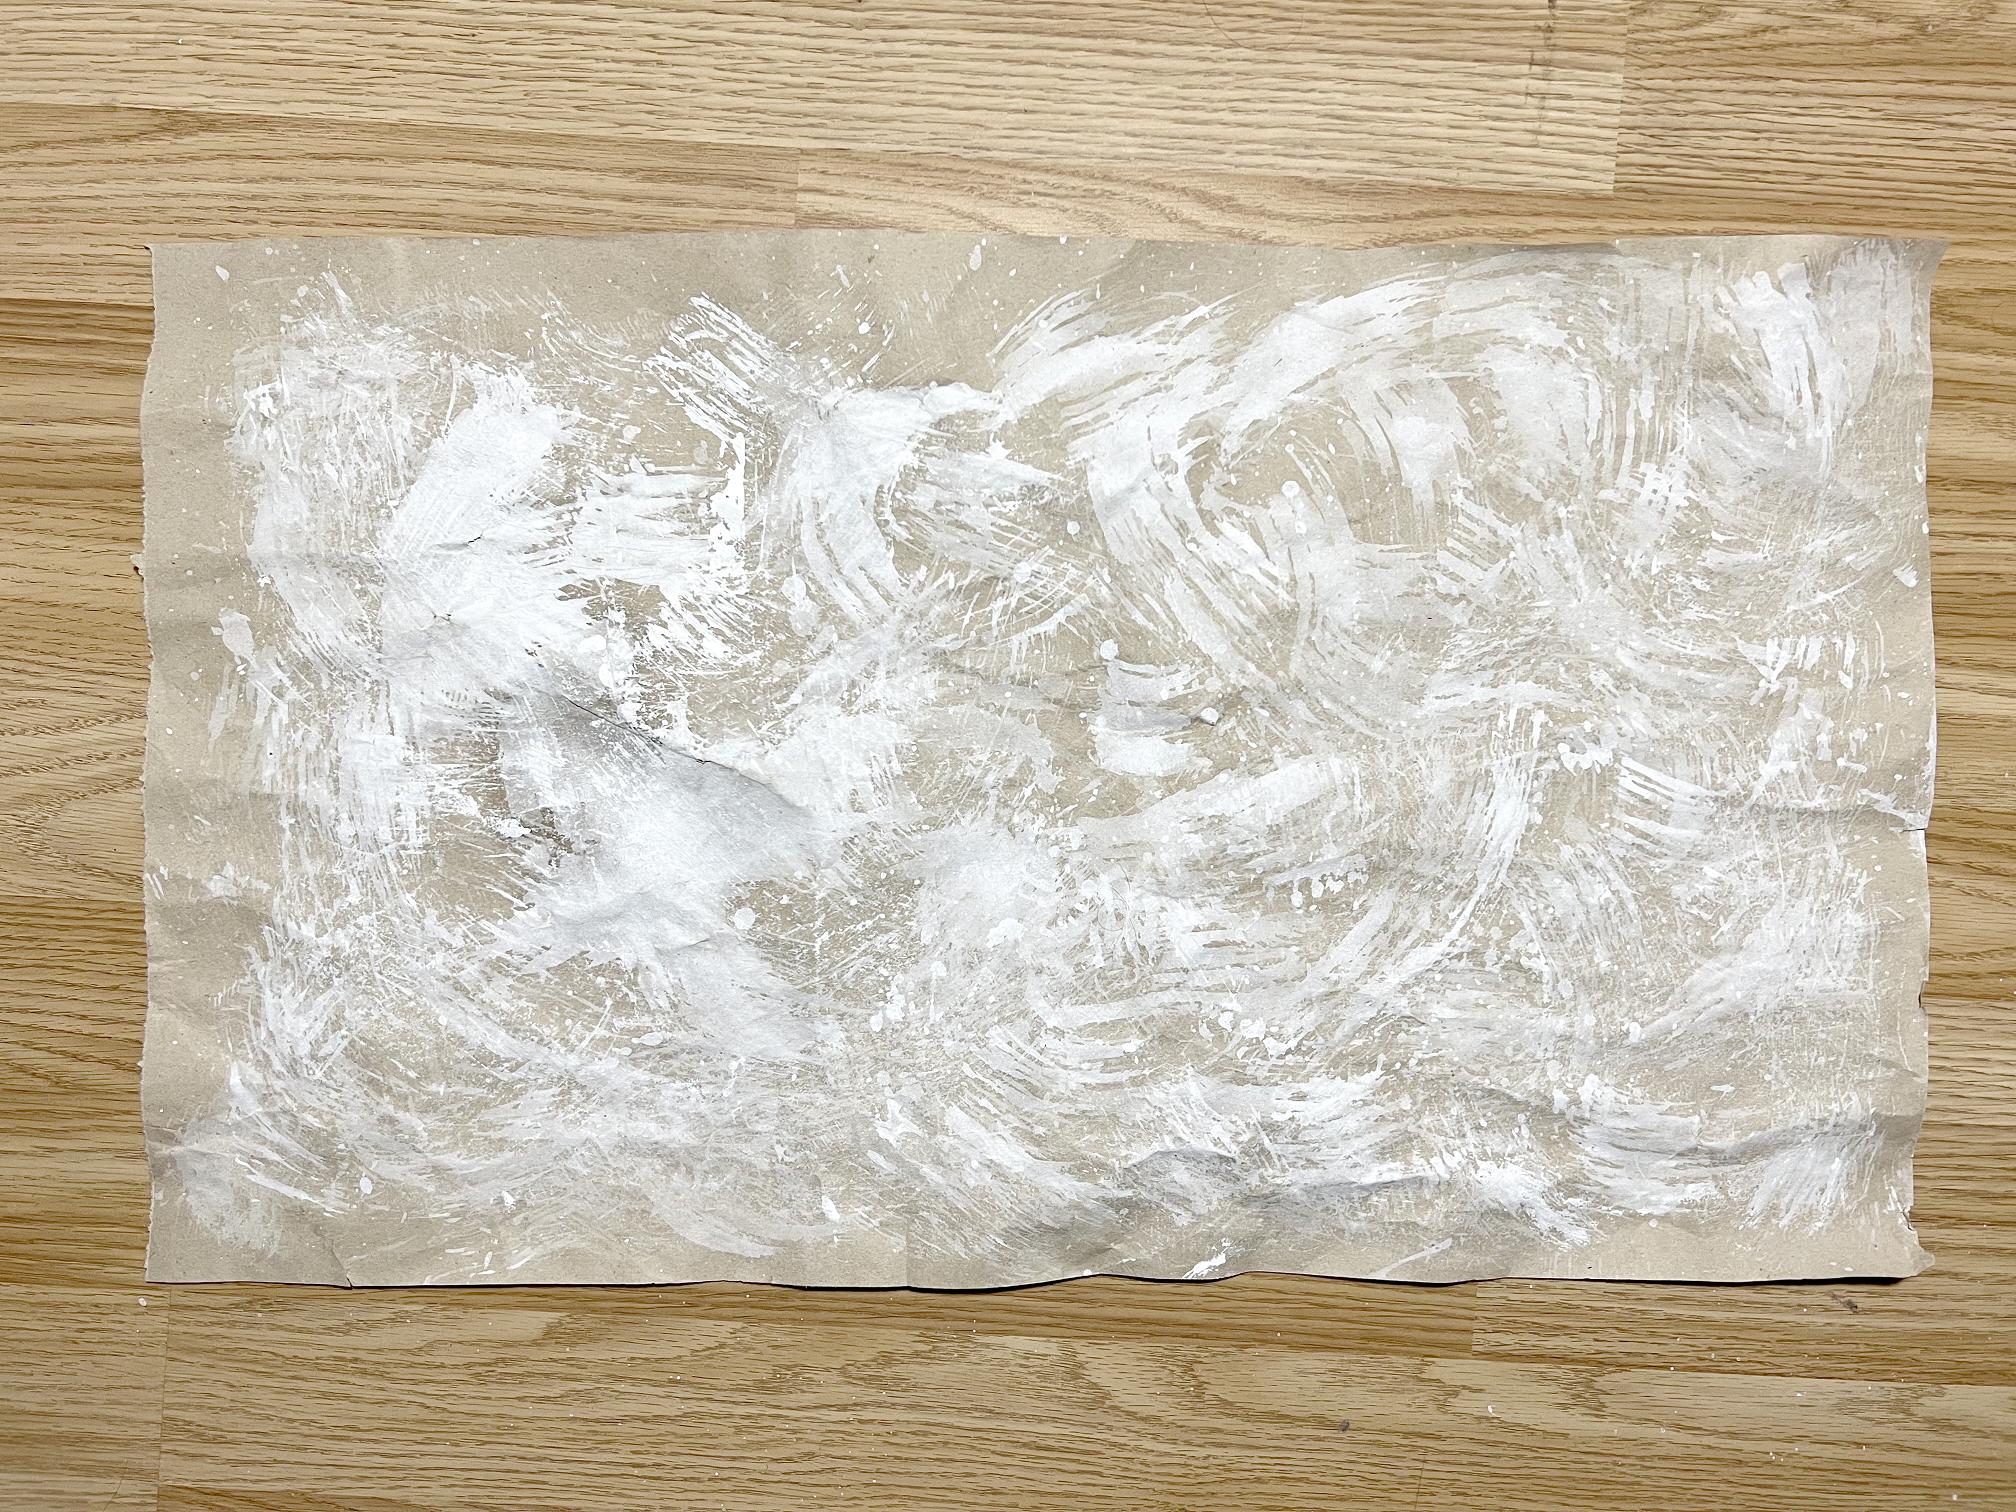
There was also a lot of white paint left over from the speciality paper experiment, For this scratch paper, I just slapped the paint on with the pastry brush. This works best if it’s well watered down, and you can create great spatters too. I can add coffee staining to this piece, or leave it as-is.
Stage 3
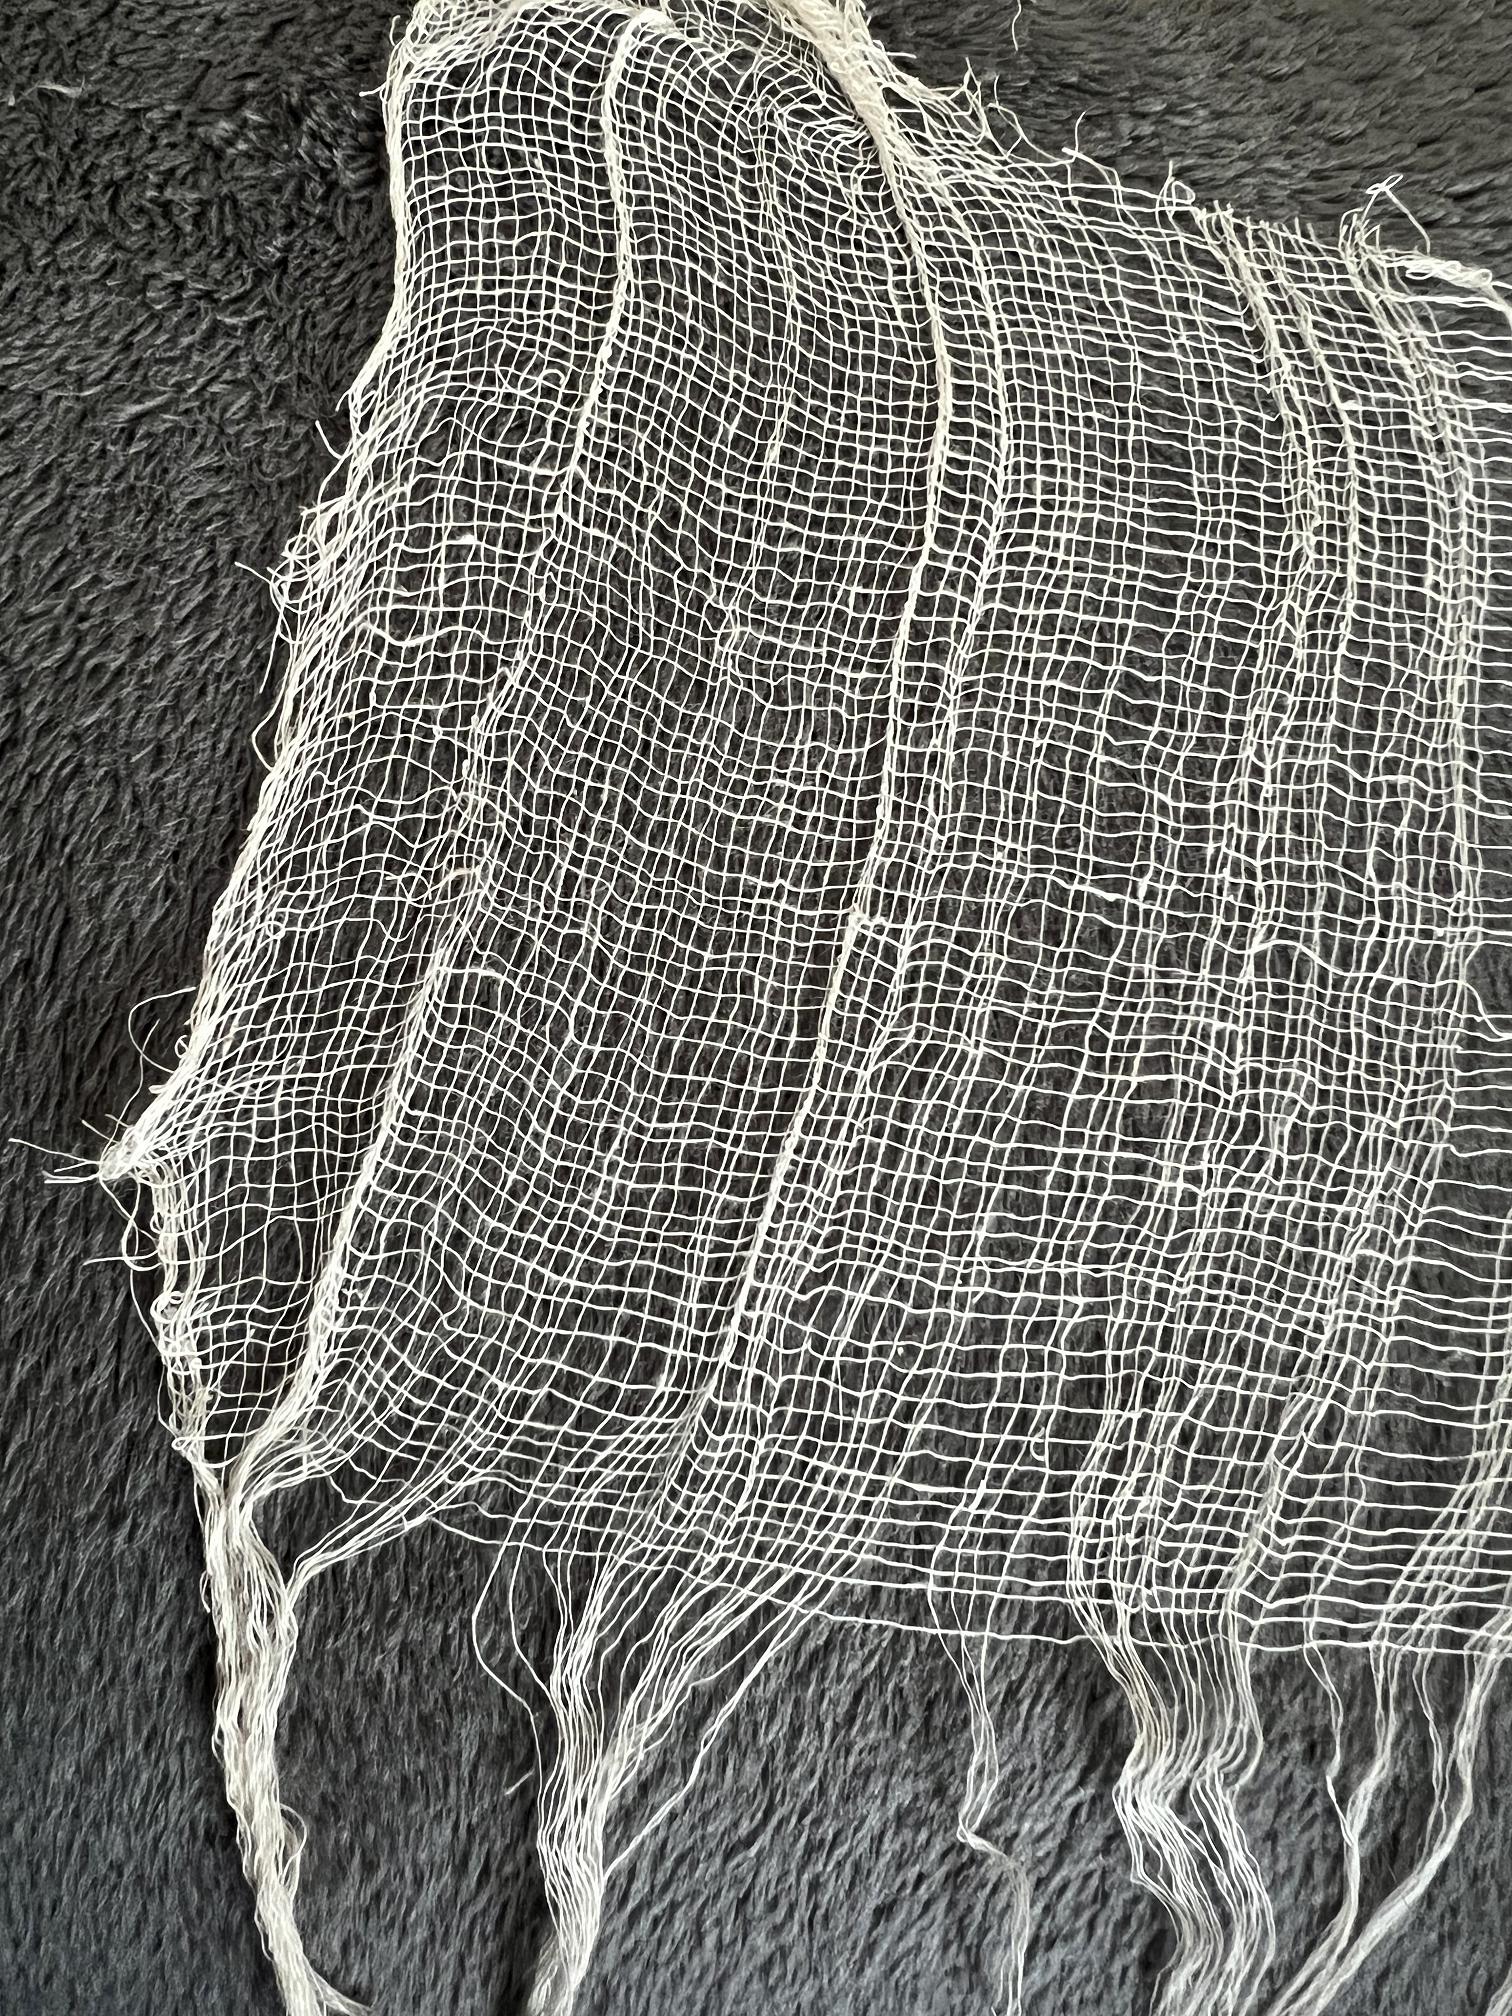
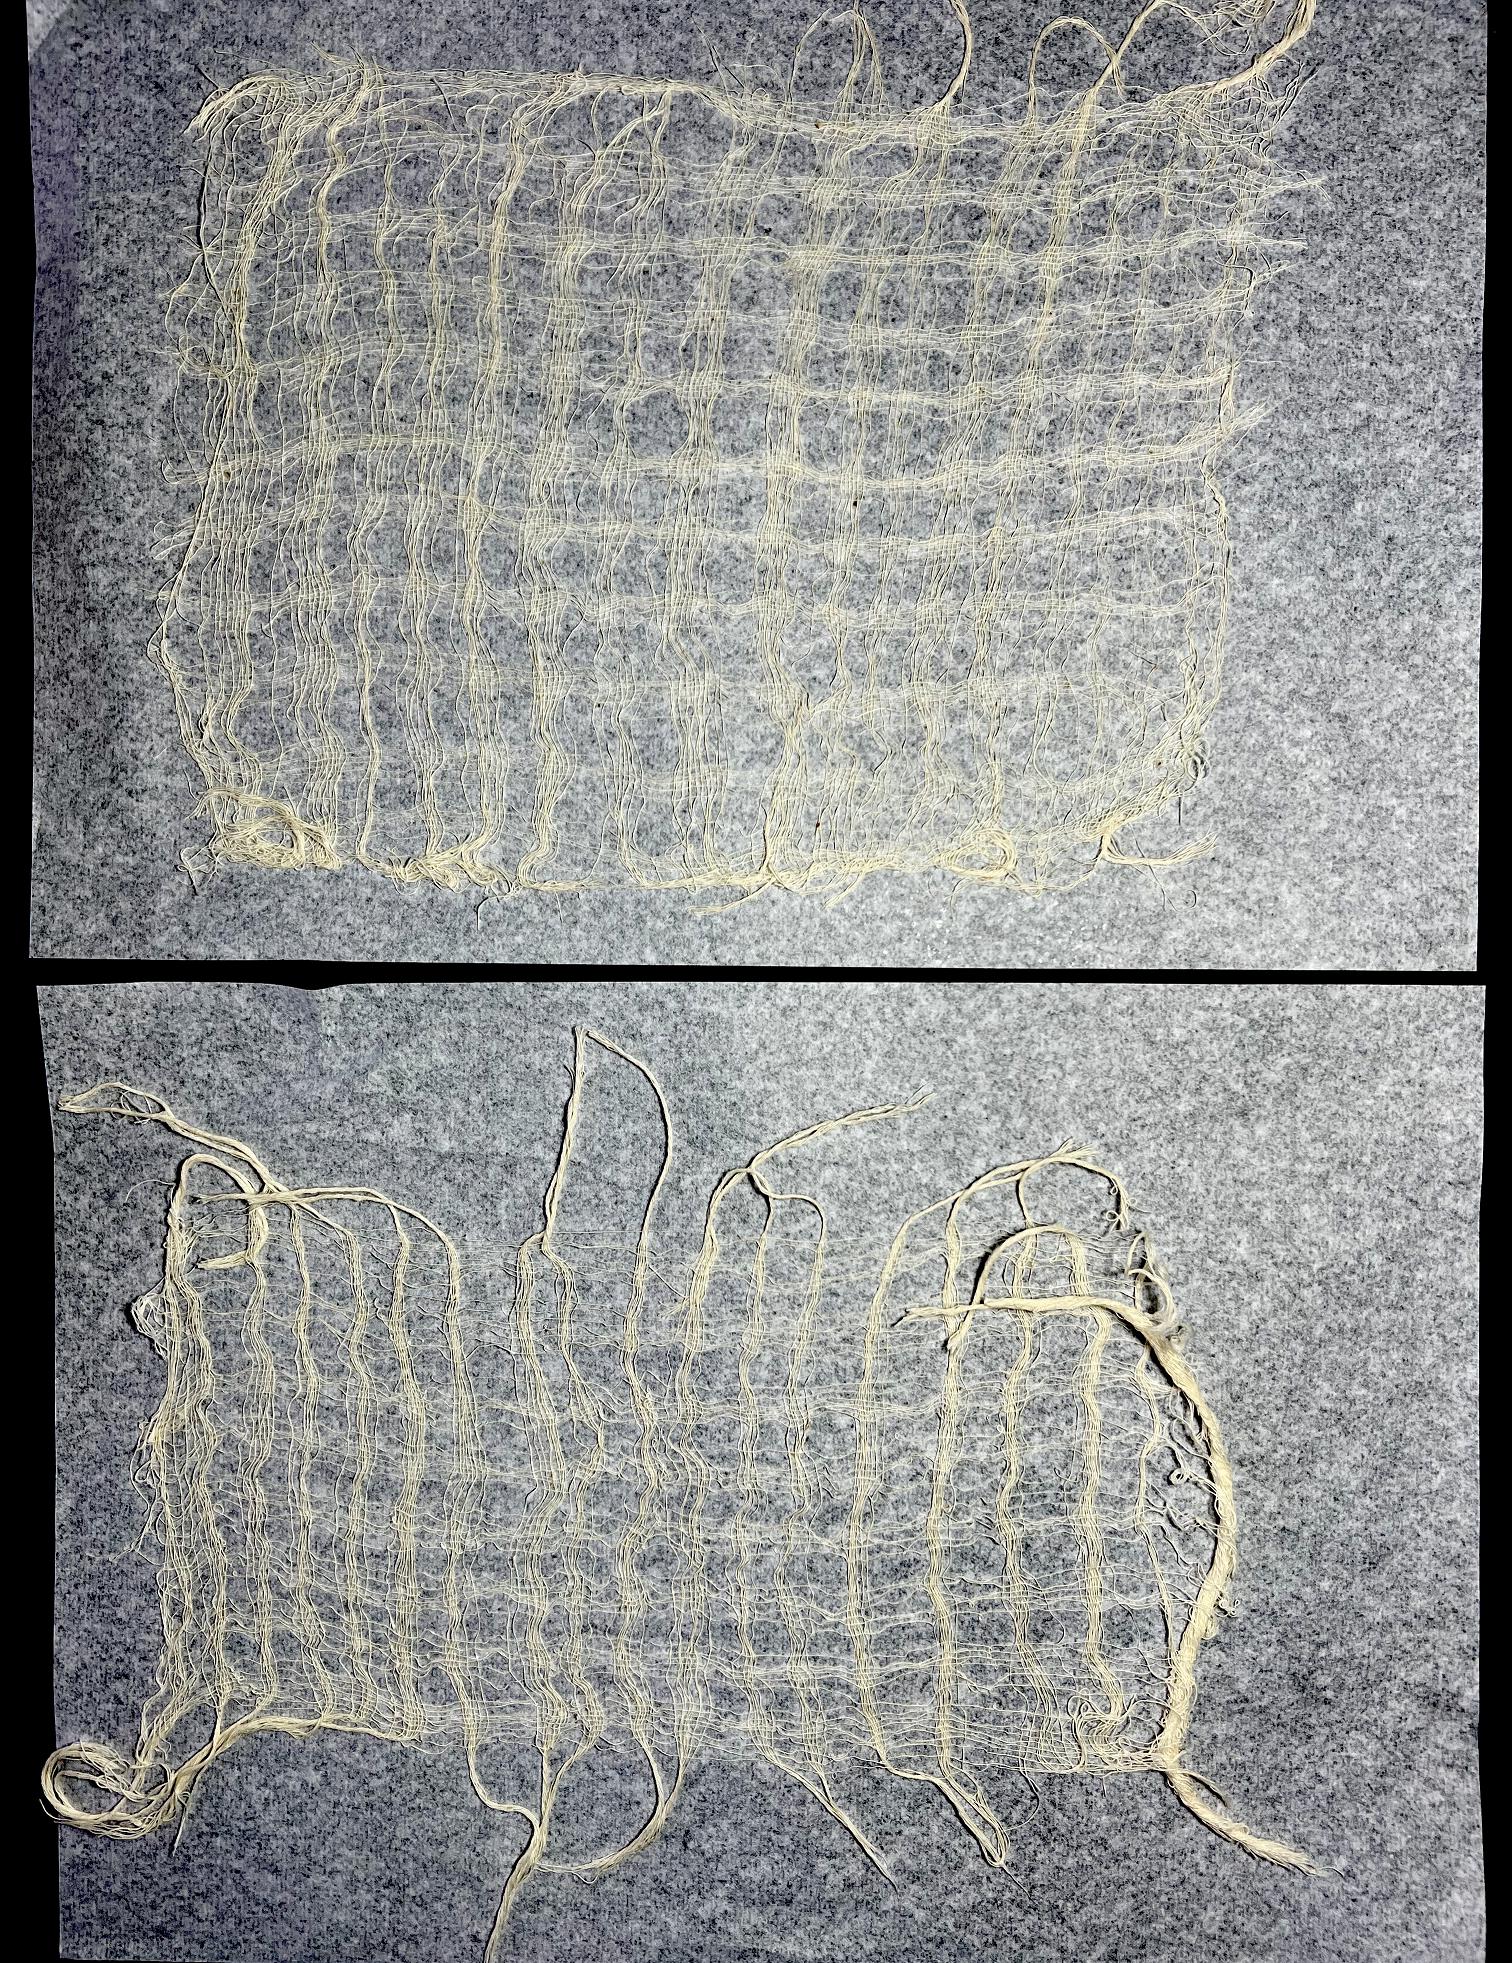
Quite a few days later. I’d been busy with other things and also feeing too tired to spend time up in the studio, especially after it got so hot. While resting on the recliner, I spread out pieces of the grout cloth on the arm of the settee and began pulling out fibres.
At this stage, looking at the gap you can see on the right of the above photo, I thought that I might be able to move the fibres into horizontal and vertical bands, leaving gaps between, in imatation of the gossamer paper.
Obviously these pieces were pretty unstable. I had to think of a way of stabilising them so that they would be usable.
I began by laying them down on a plastic document sleeve, and spraying with spray adhesive. This remained very sticky for a couple of days and I wondered if the pieces would ever be dry enough to handle!
This is when I decided to lift both pieces and put them face down onto tissue paper. They stuck down quite well. After another day they were dry and no longer sticky.
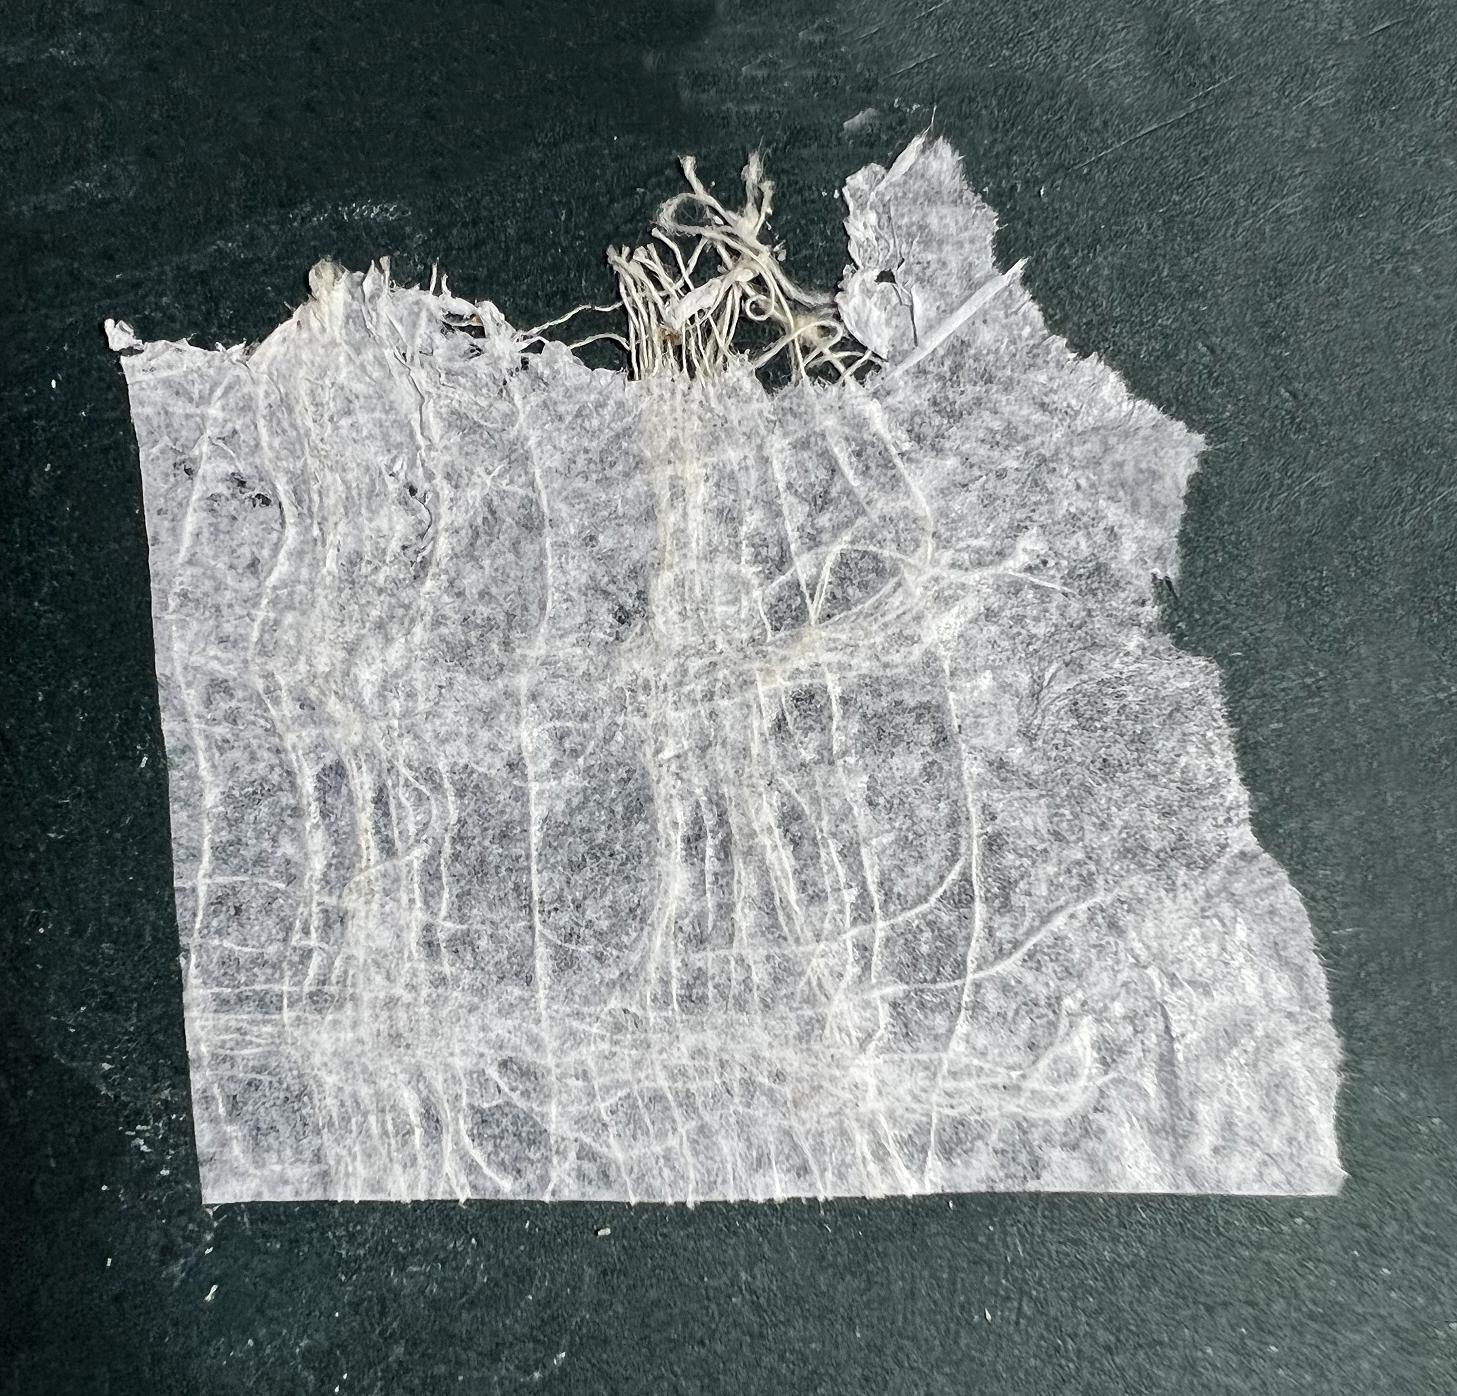
Here is a detail shot. I tried to get as much contrast as possible by photograping the pieces on a black background.
To test how I might use it, and not wanting to waste anything that was good, I painted the top surface of the corner of one of the pieces with gel medium, where the fibres weren’t laid down in a very neat pattern, and stuck it face down onto the damaged edge of one of my gel printed tissue papers.
![]()
I dried it with the heat tool, and then painted the surface with a wet brush, and very gently rubbed away the tissue paper backing. Although the pattern of the gel printed paper did begin to emerge underneath, this didn’t prove to be a very good choice, because being tissue paper as well, I was beginning to rub that away too. Also, the paper was too patterned to show up the fibres properly. In principle, though, this process did seem to be working.
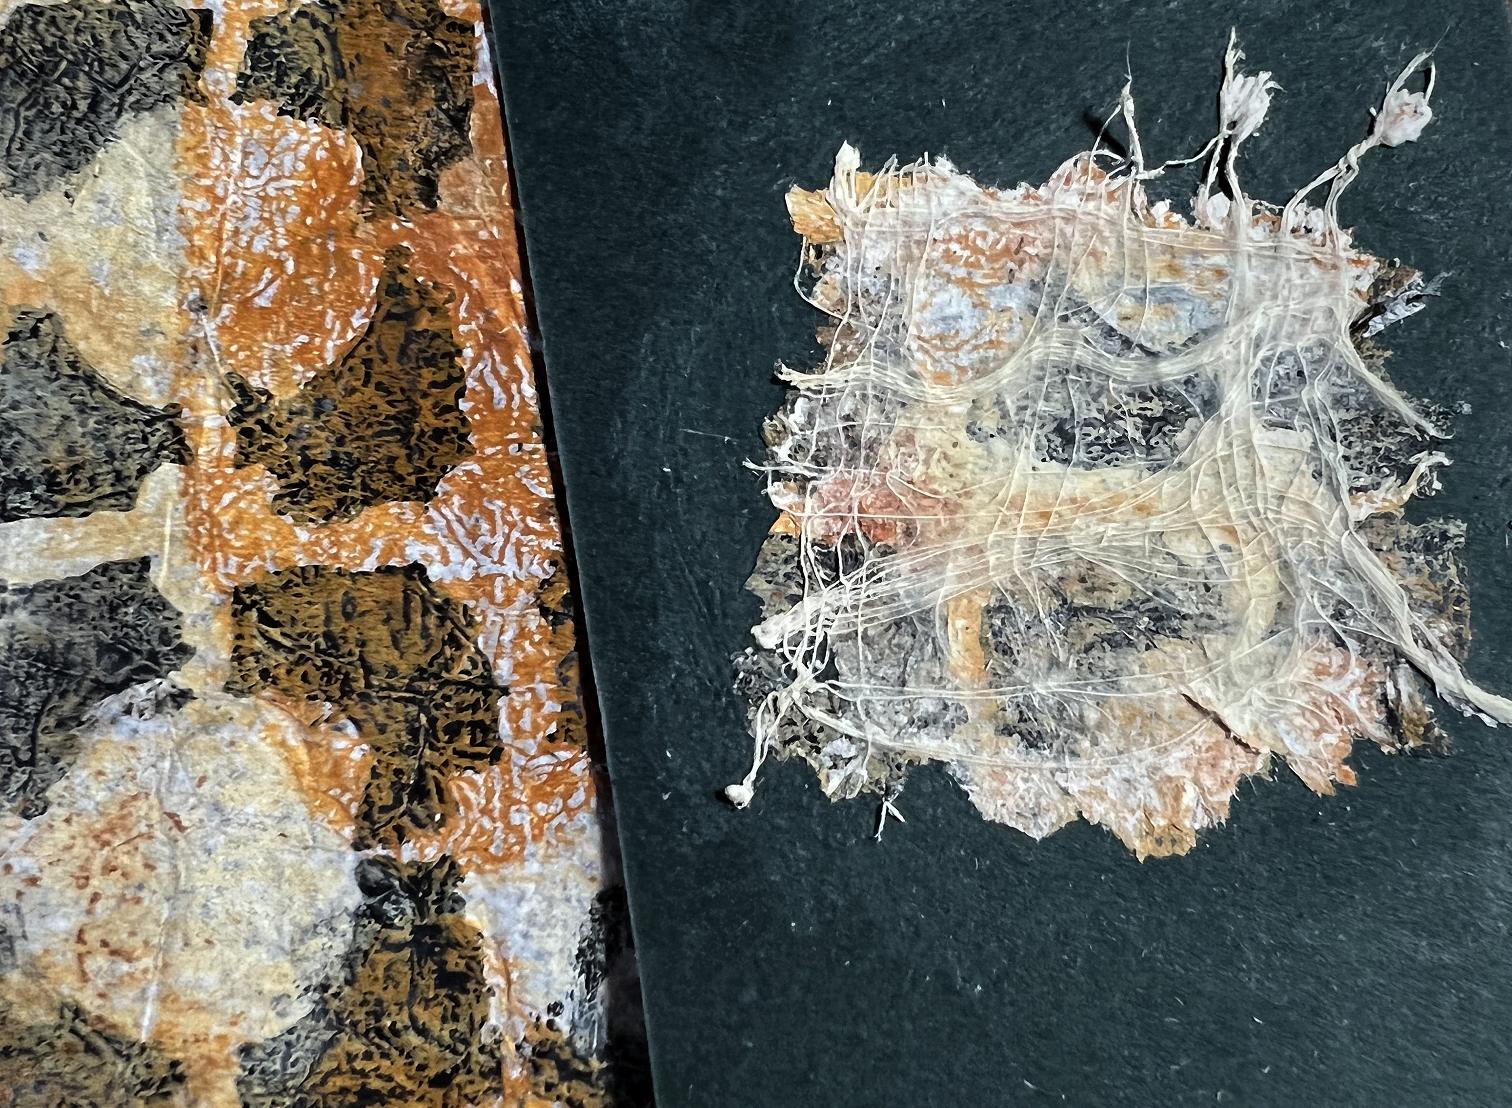
Once it was dry, it looked a bit better. Here it is, beside the piece of collage tissue.
I attempted it again on a piece of scrap black cardstock with a bit more of the sample piece. Here it is, laid face down on the cardstock, ready to be rubbed away.
This worked out much better. I could rub quite hard with no danger of damaging the card underneath. This is the result.

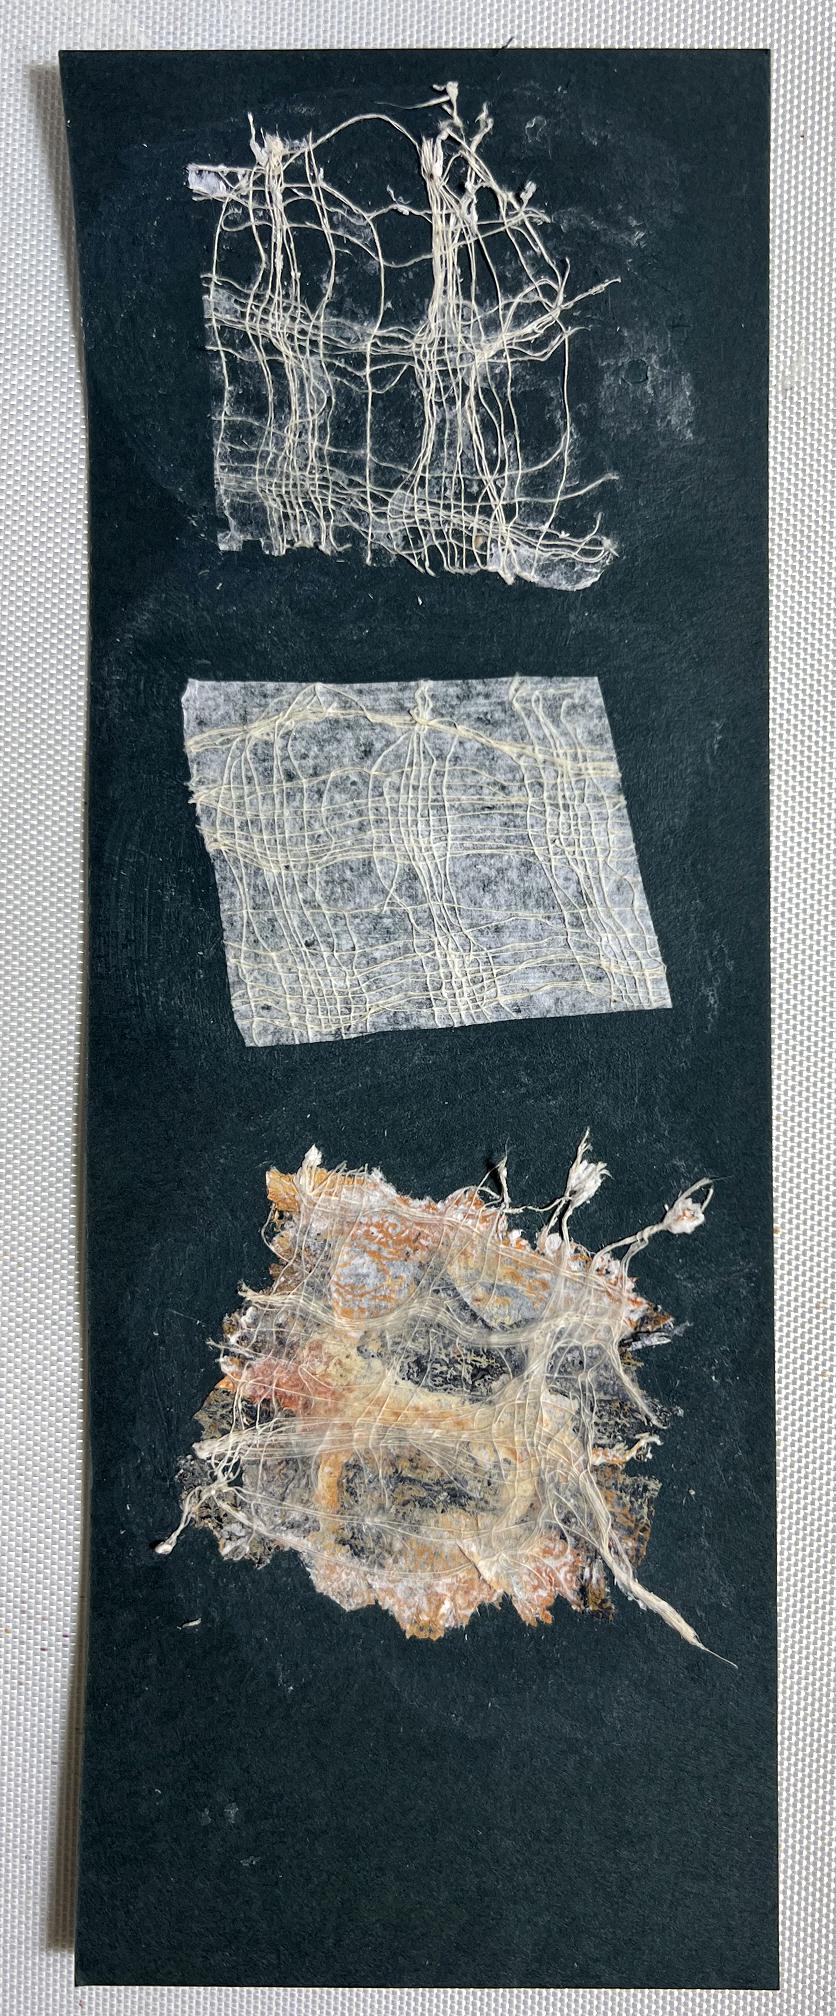
I also tried simply sticking a piece down, face up, with its tissue substrate remaining in place, to see whether this would become more transparent oncedry. It is the centre piece in this strip of the three samples on black cardstock.
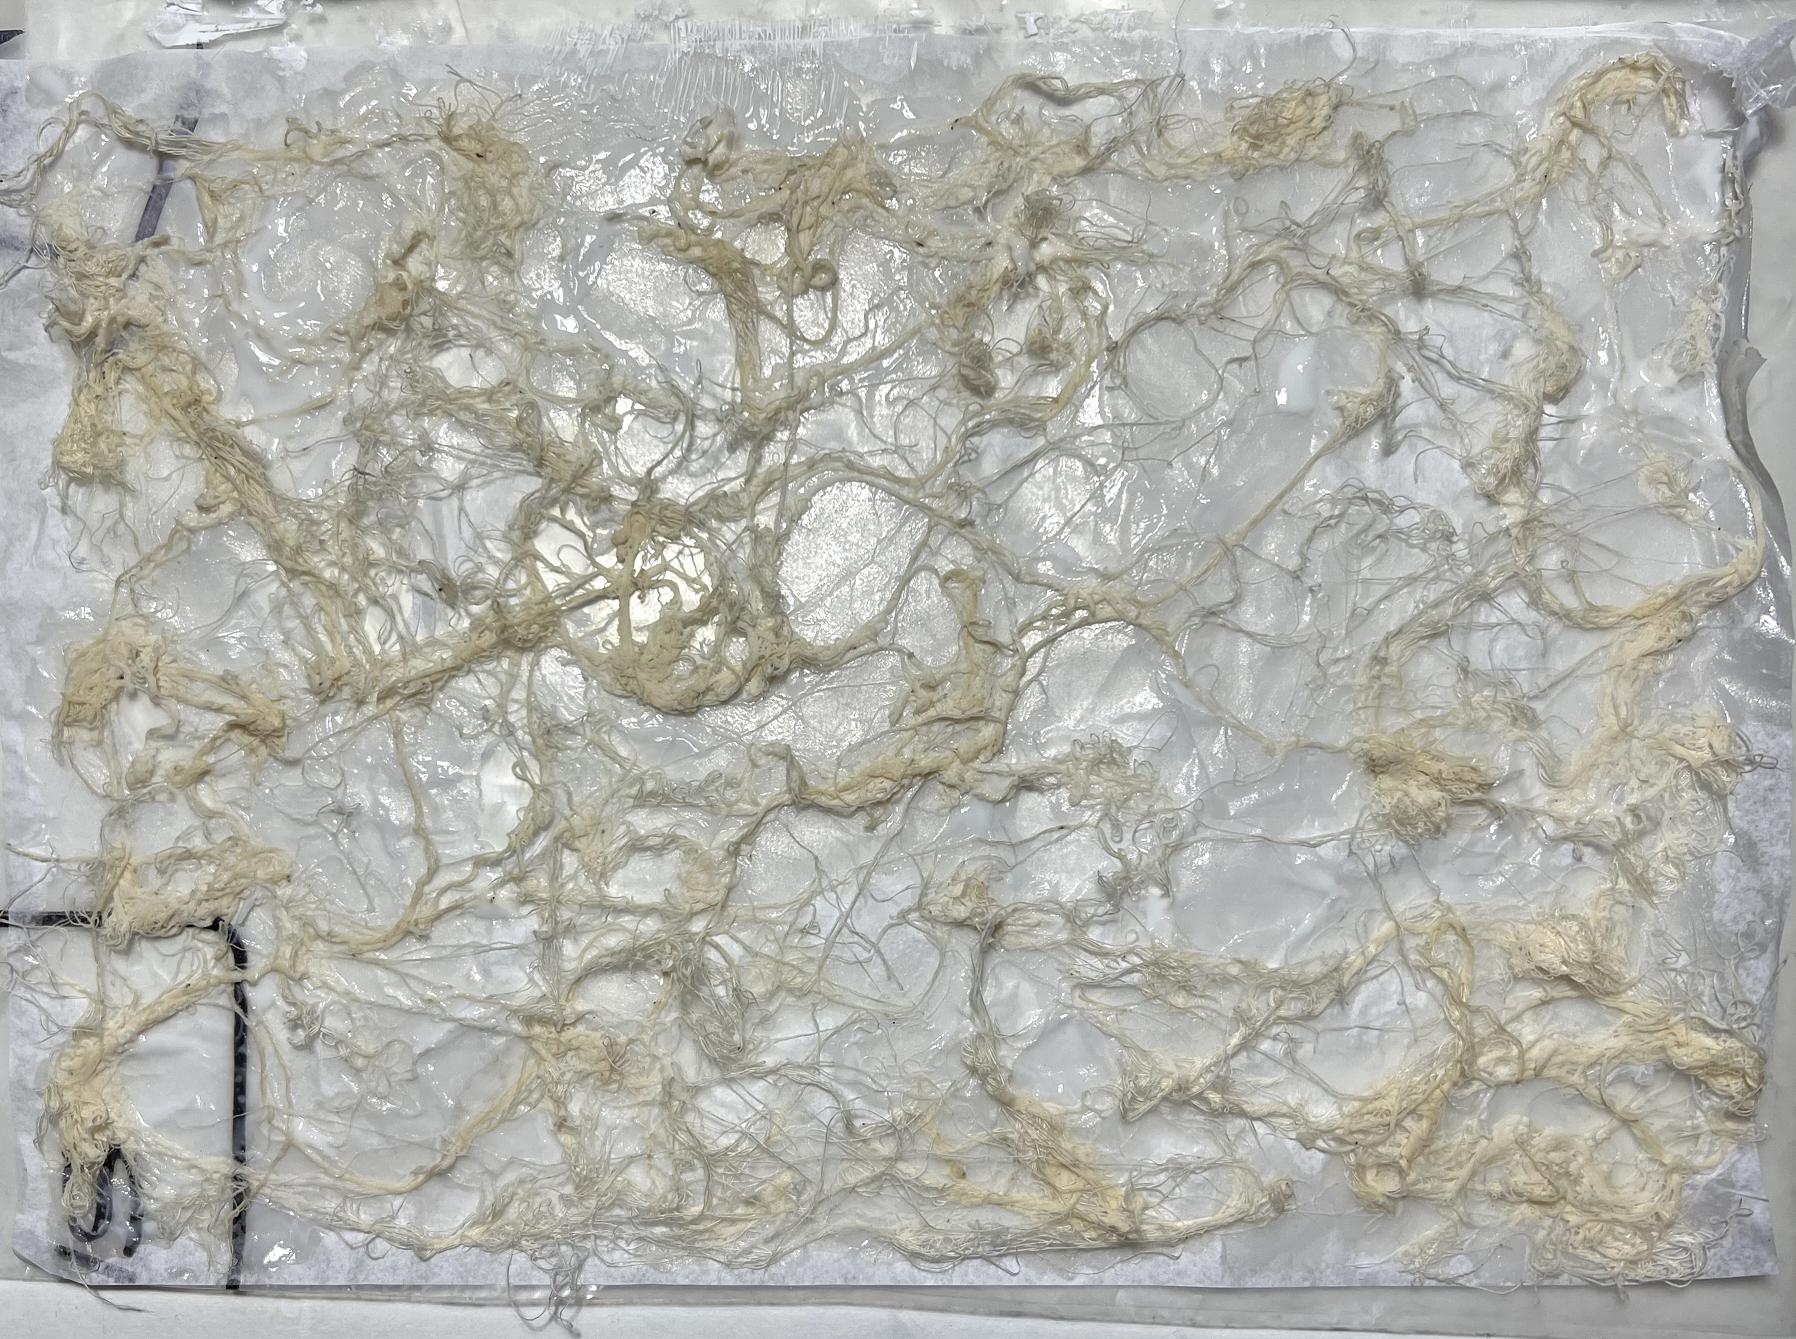
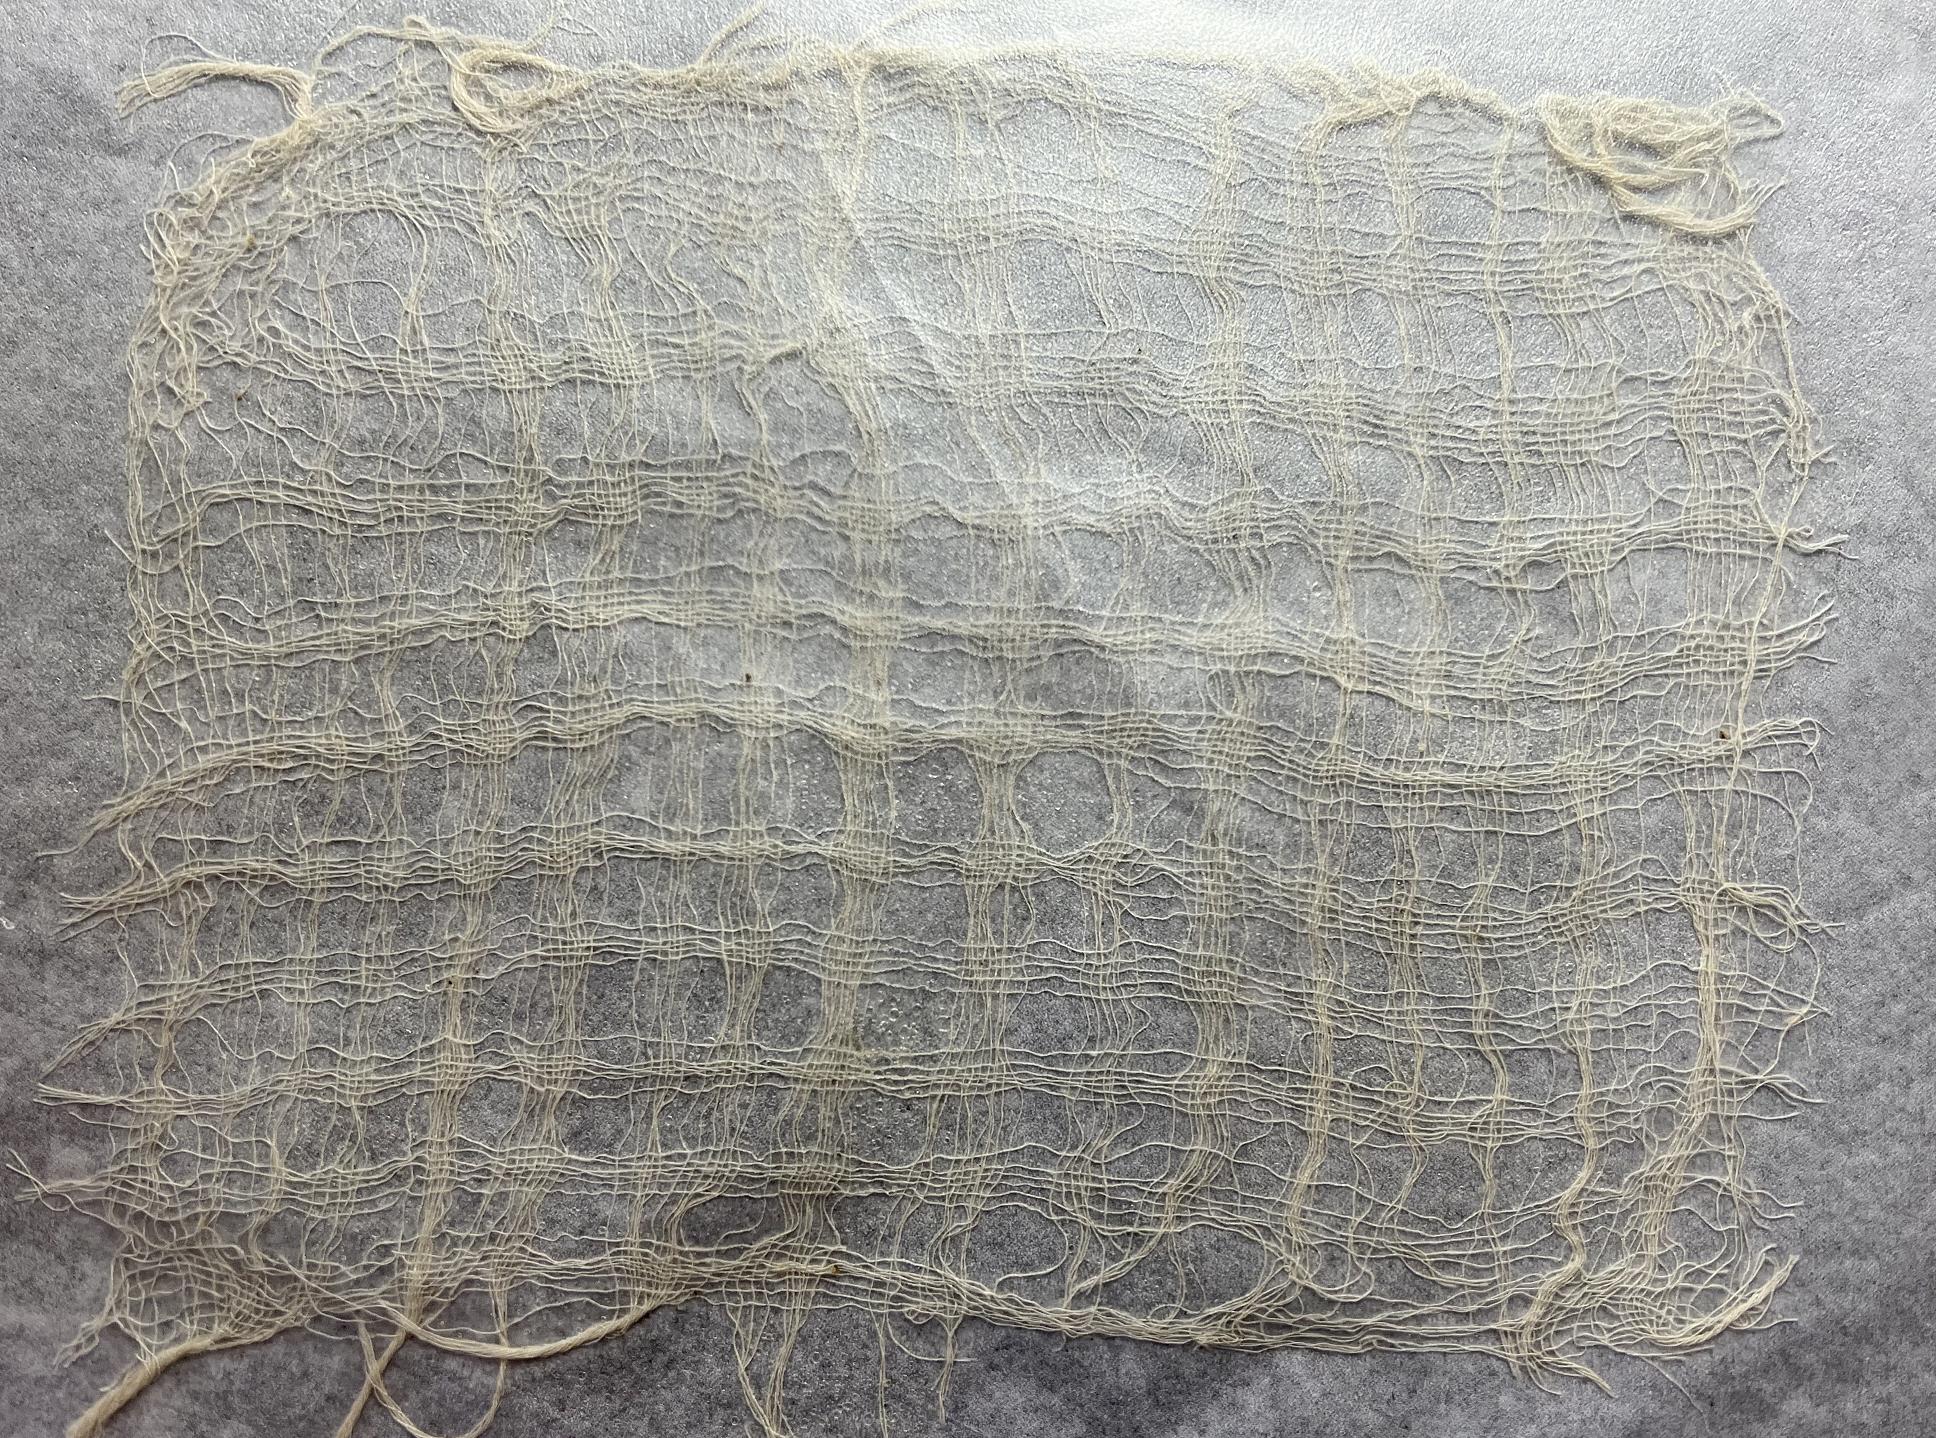
Moving on to the Ogura lace piece, this photo shows the piece after it was dry. After sticking the fbres onto tissue paper I had painted the entire surface with gel medium to hold the loose fibres in place.
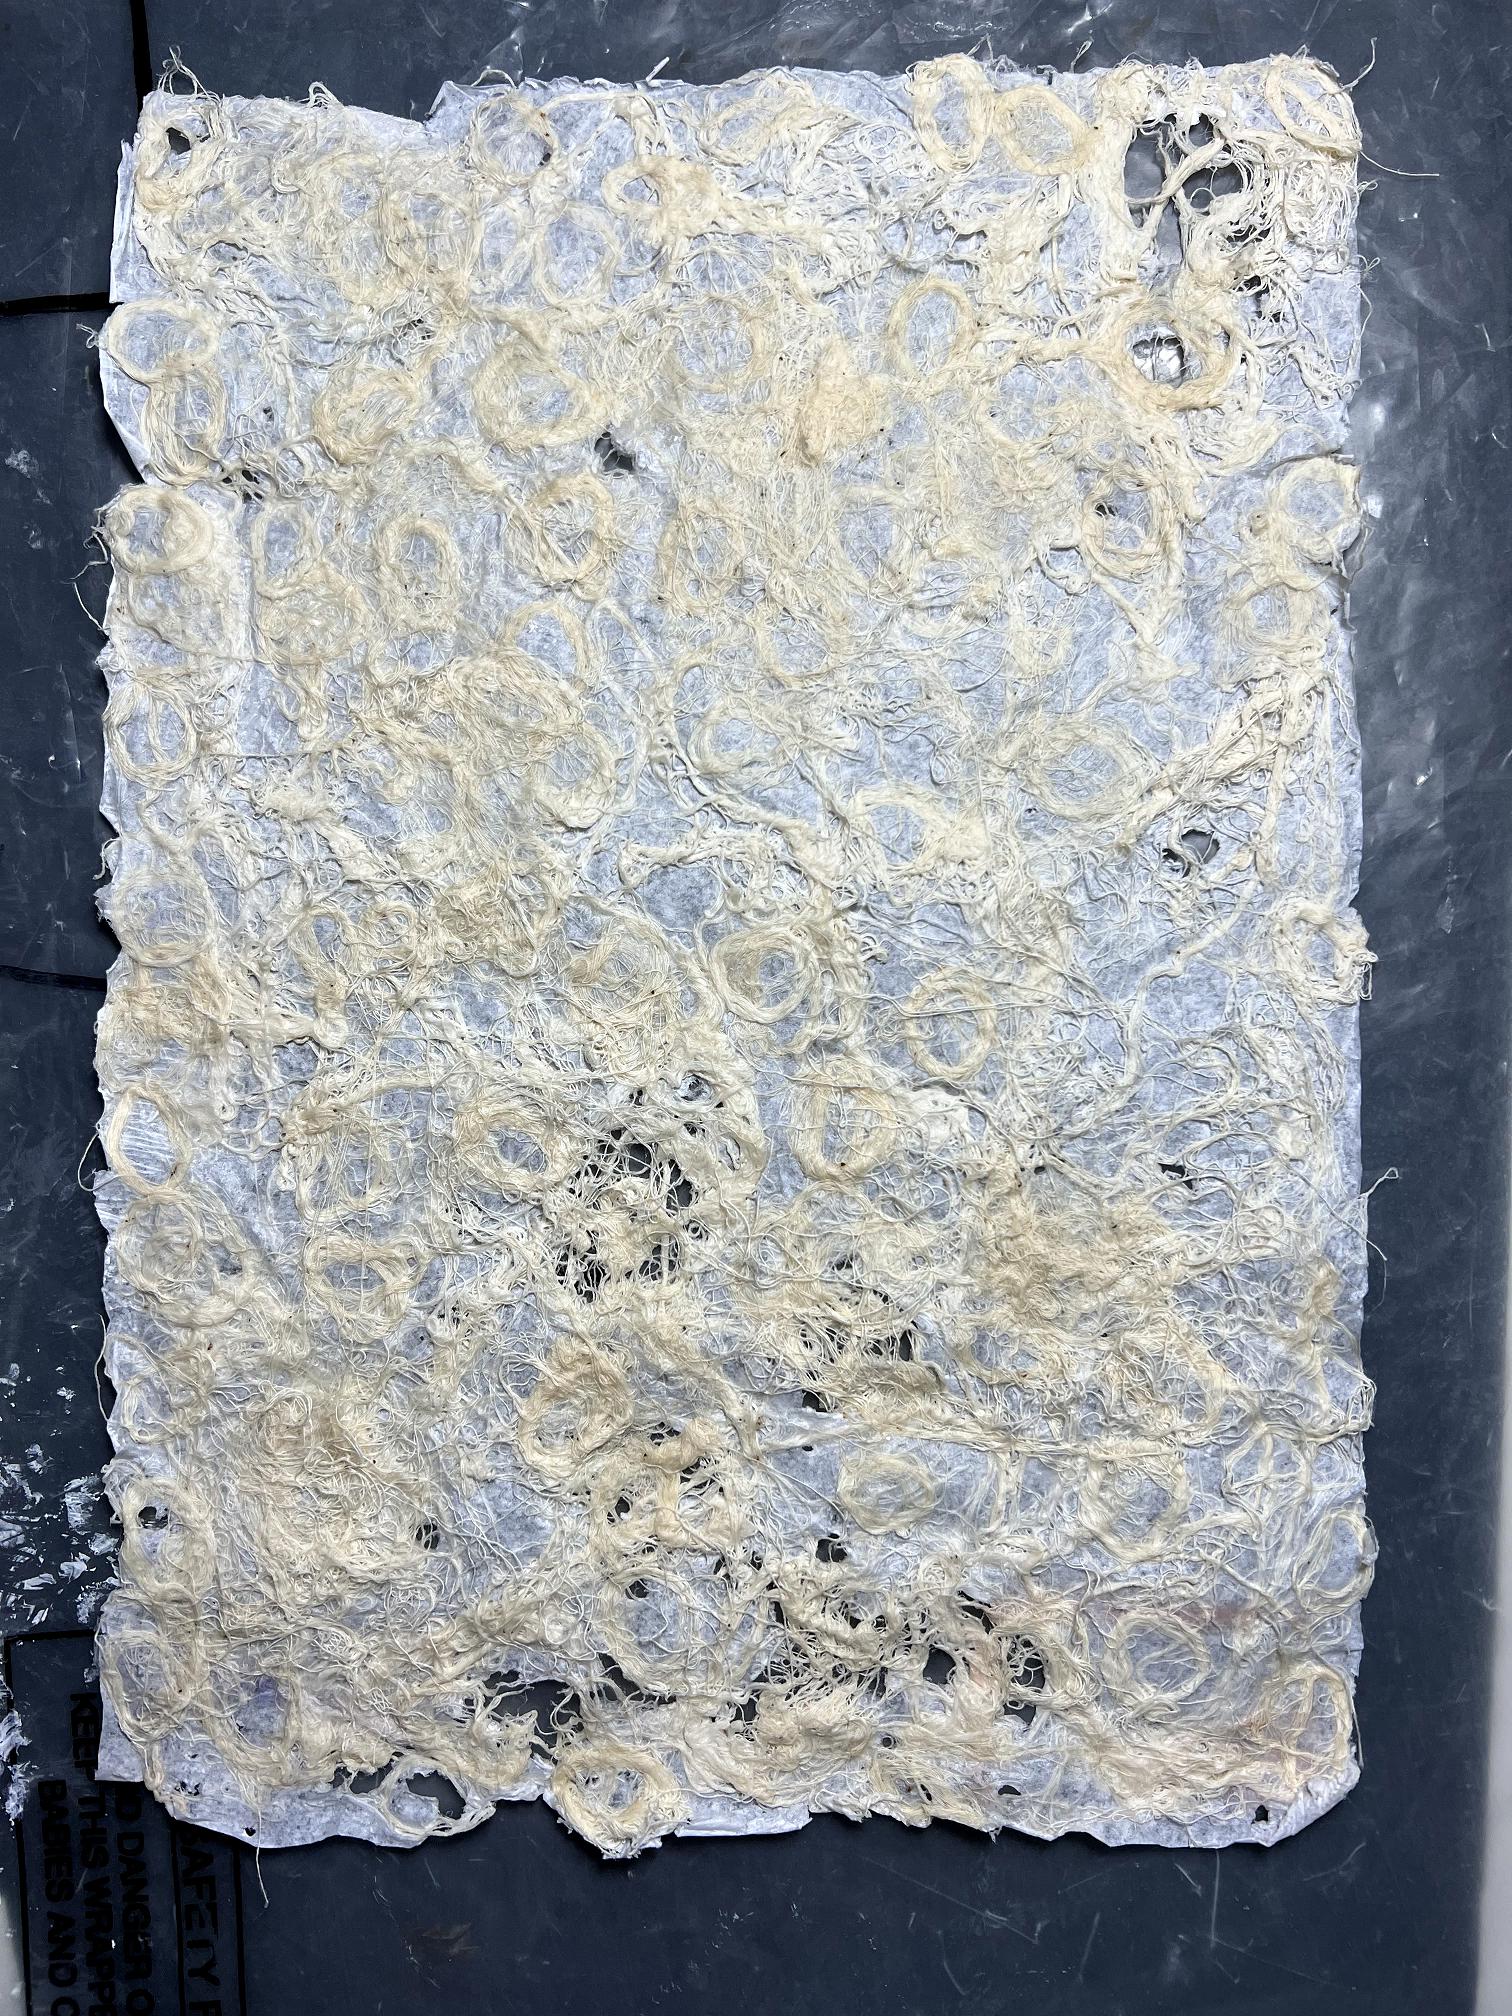
The whole thing was much too solid with hardly any holes. It felt pretty tough with all the gel medium on it.
I decided to try rubbing away the tissue paper between the fibres but they were mostly too thickly covered with gel medium. I soaked the whole thing in water, first just plain water and then with some washing up liquid in it, and repeatedly screwed it up, and also rubbed it against itself vigorously. It reminded me of wet felting! This did break down the surfaces a bit and generated a few more holes.
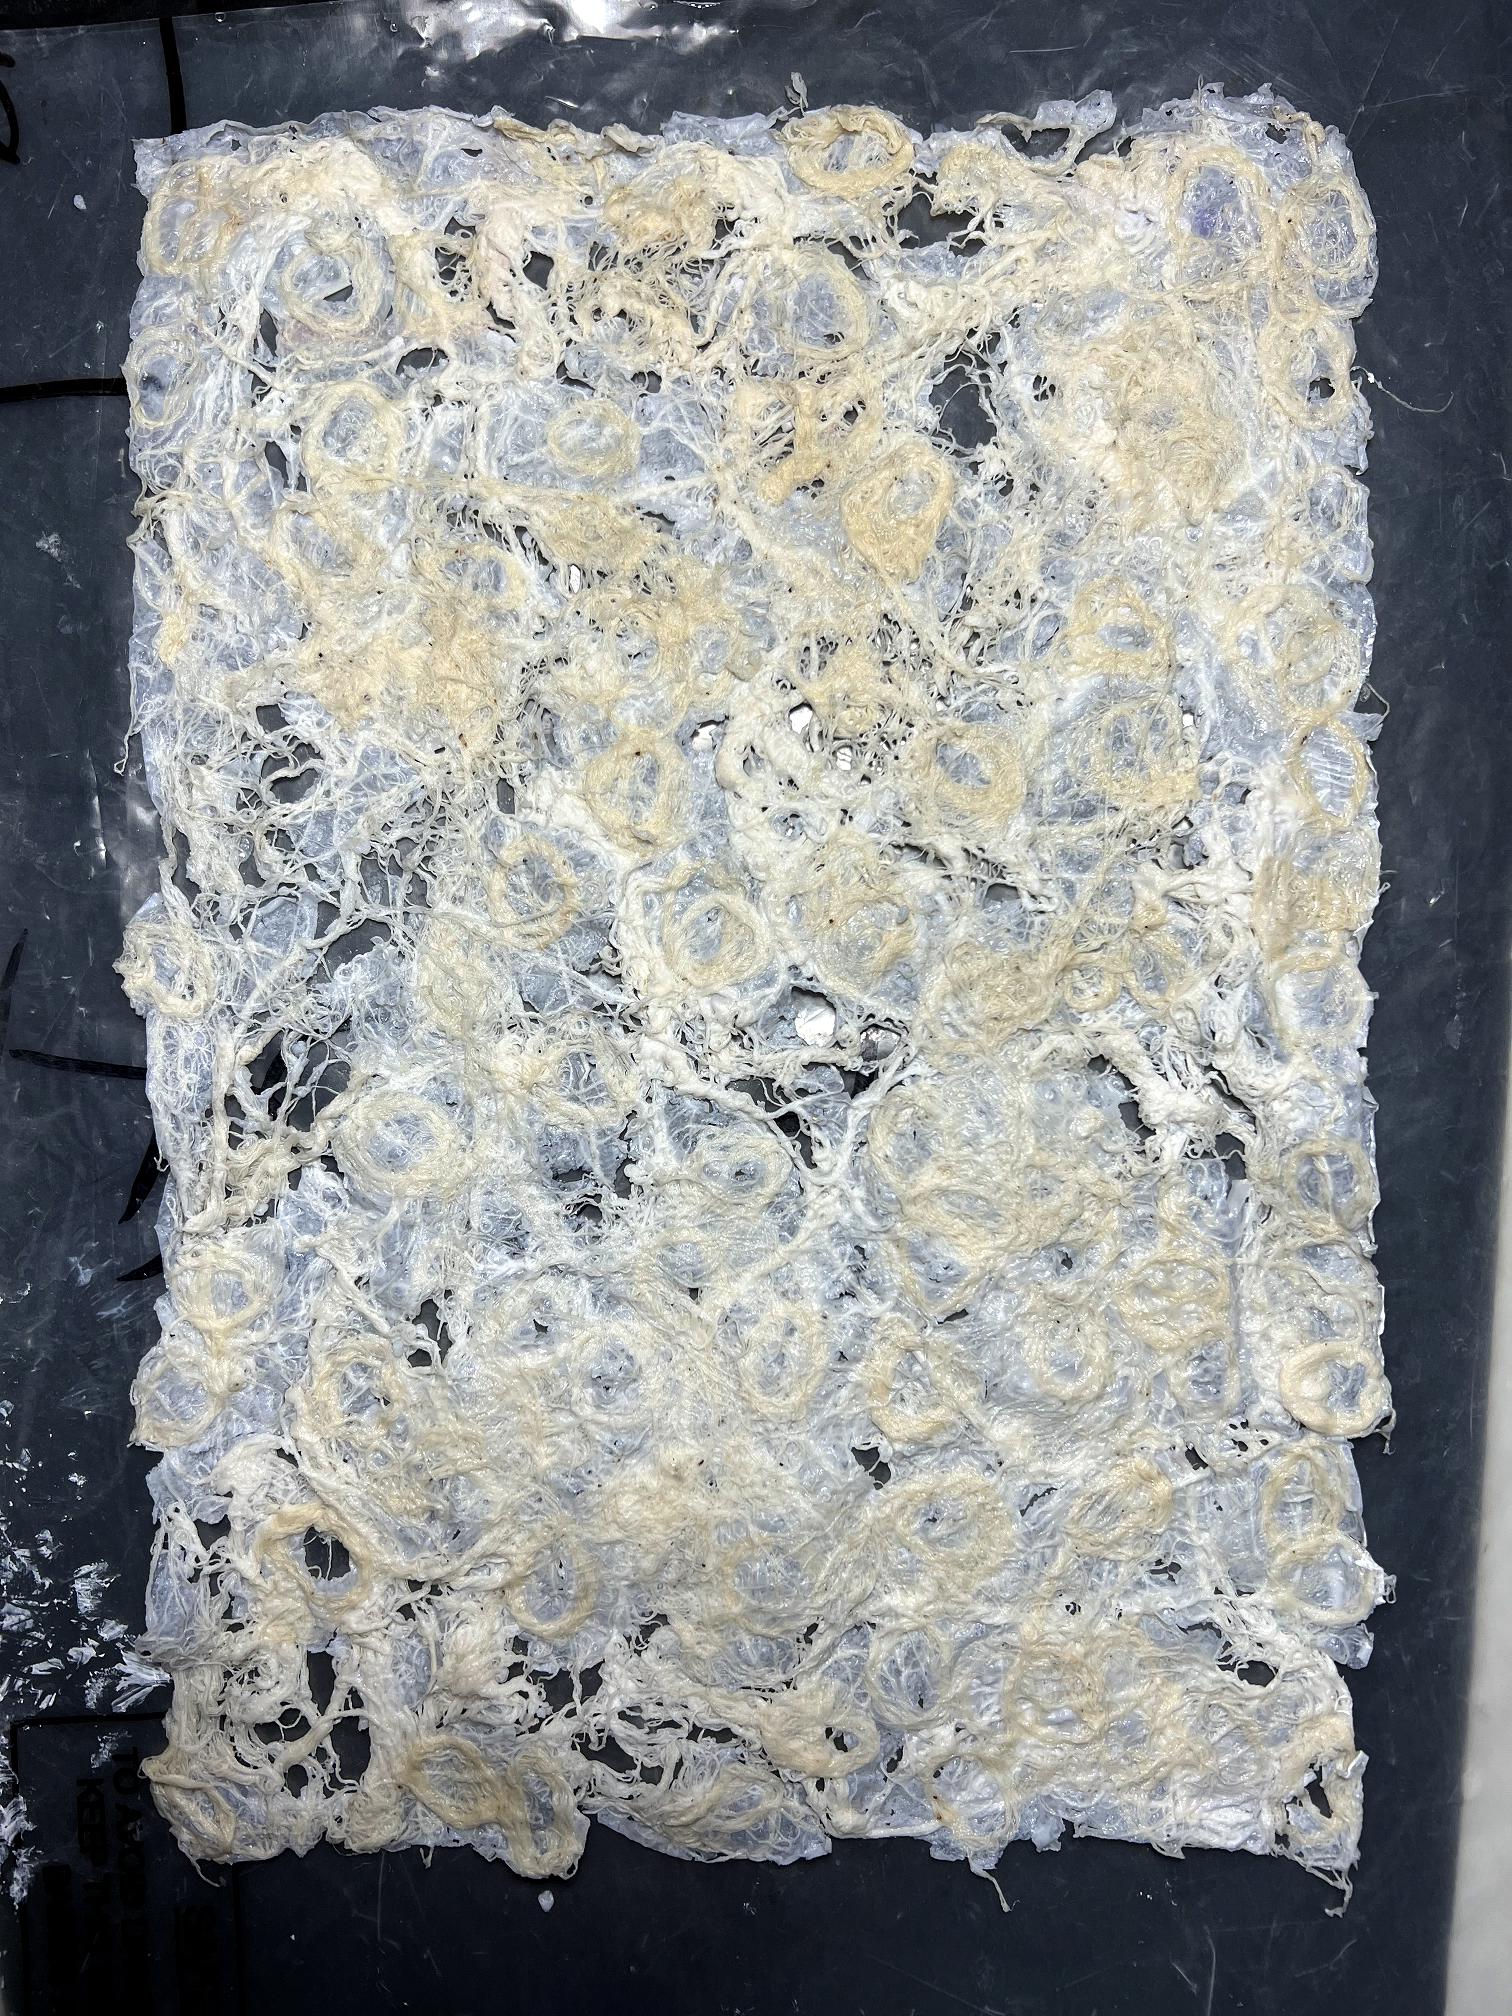
I attacked it with a metal implement, rubbing away between the fibres to try and create more holes, and then resorted to my hot knife, piercing holes through the plastic. Neither method worked terribly well but I did end up with a more lacy result.

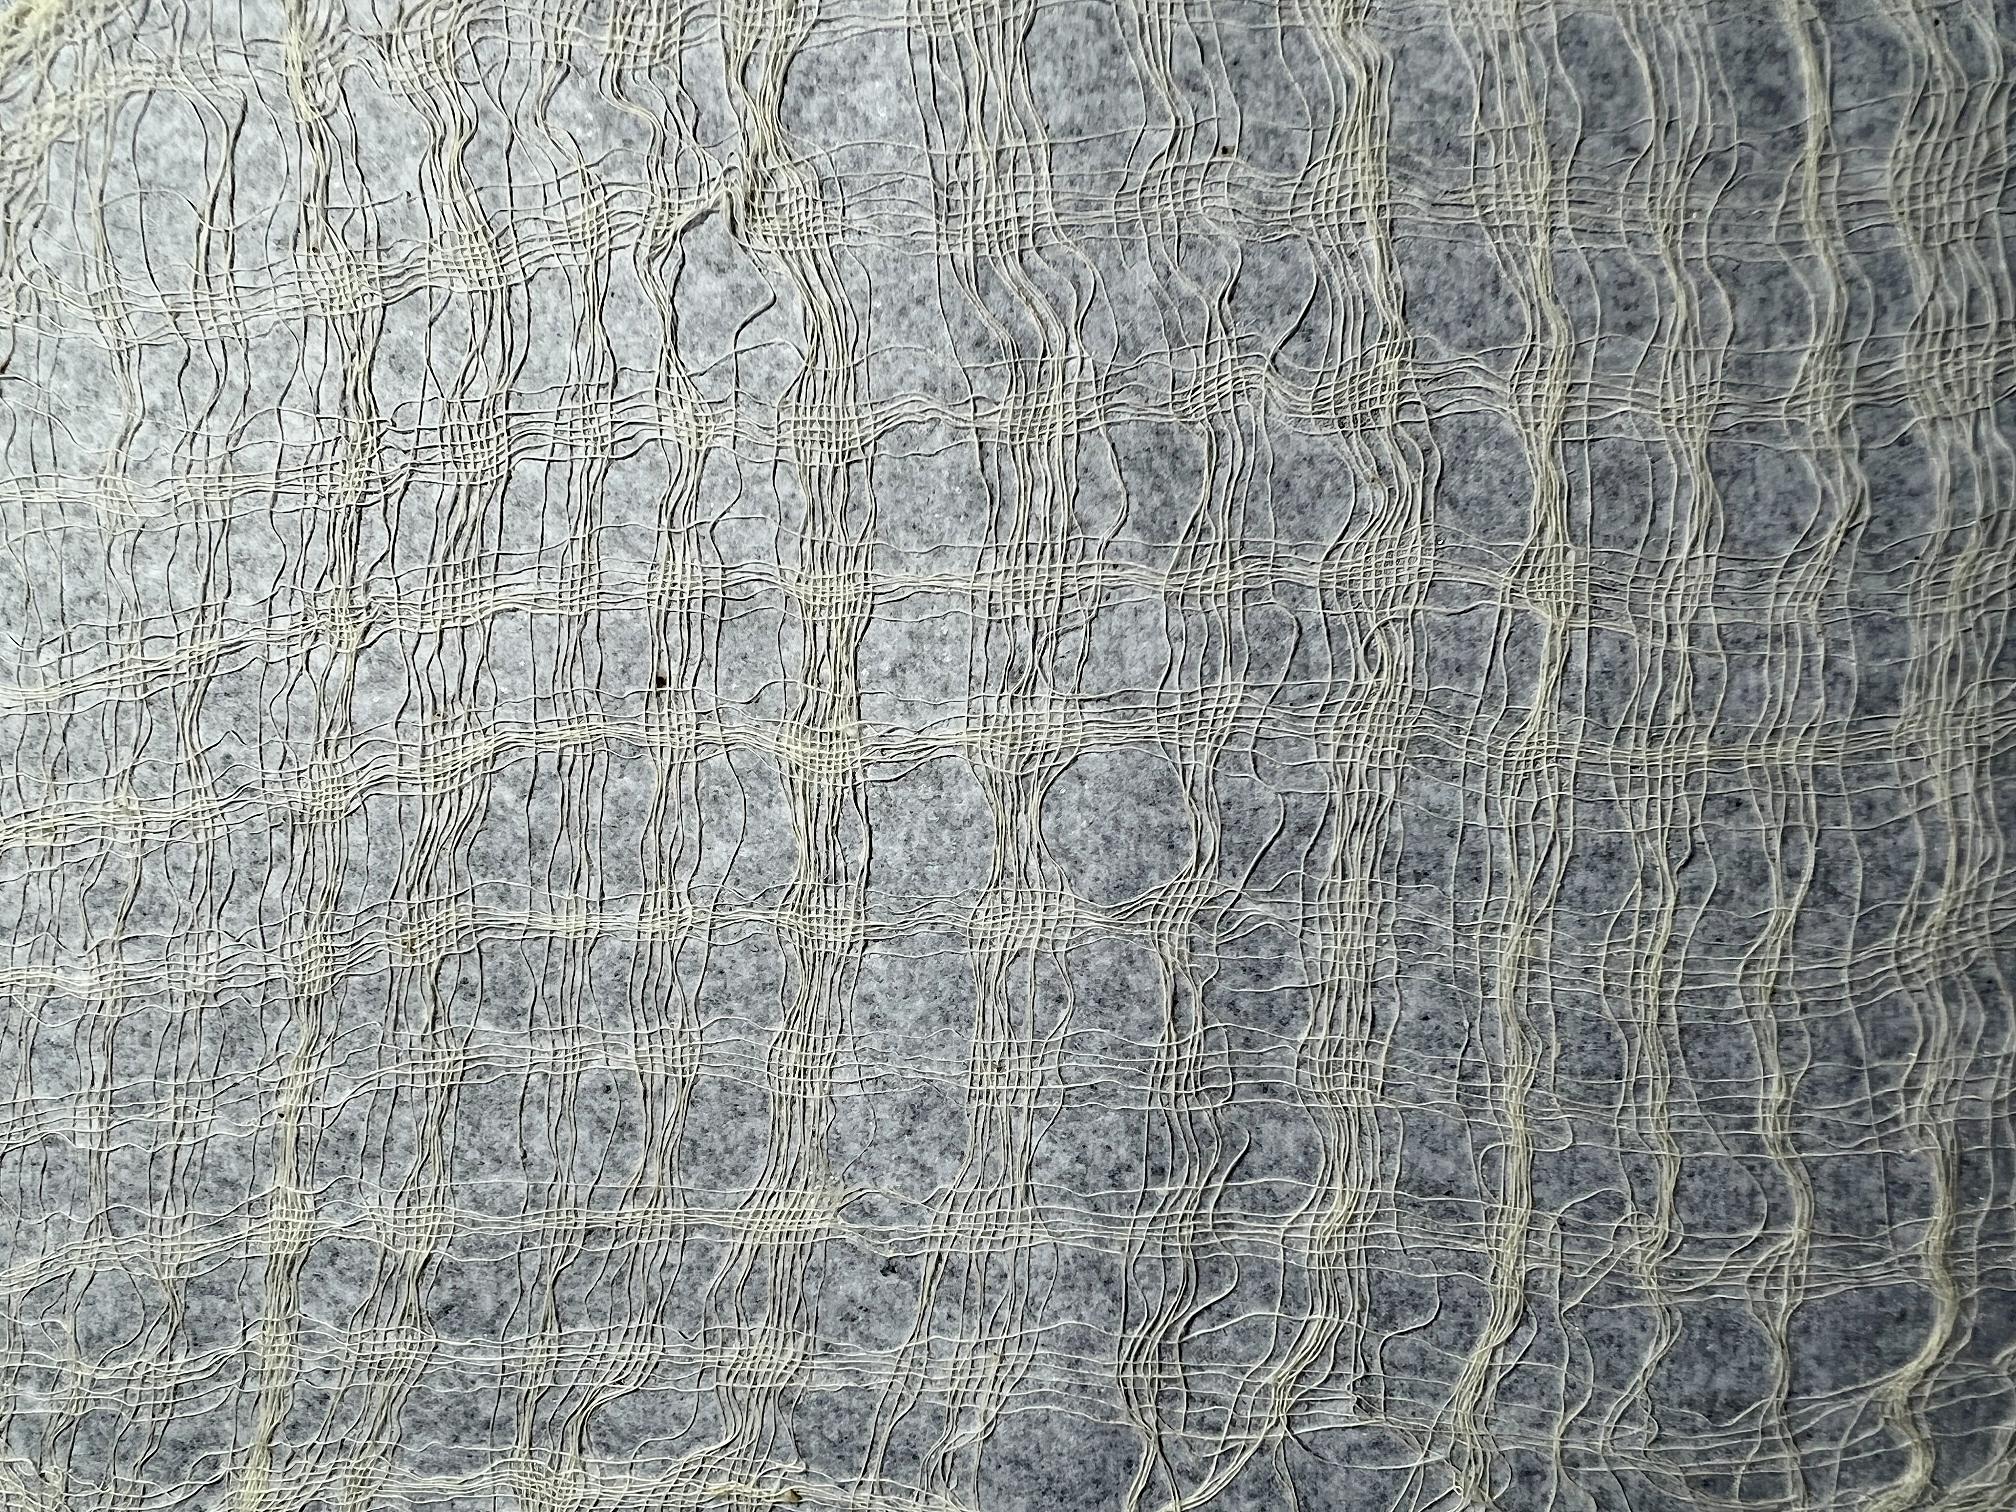
Here’s a close-up.
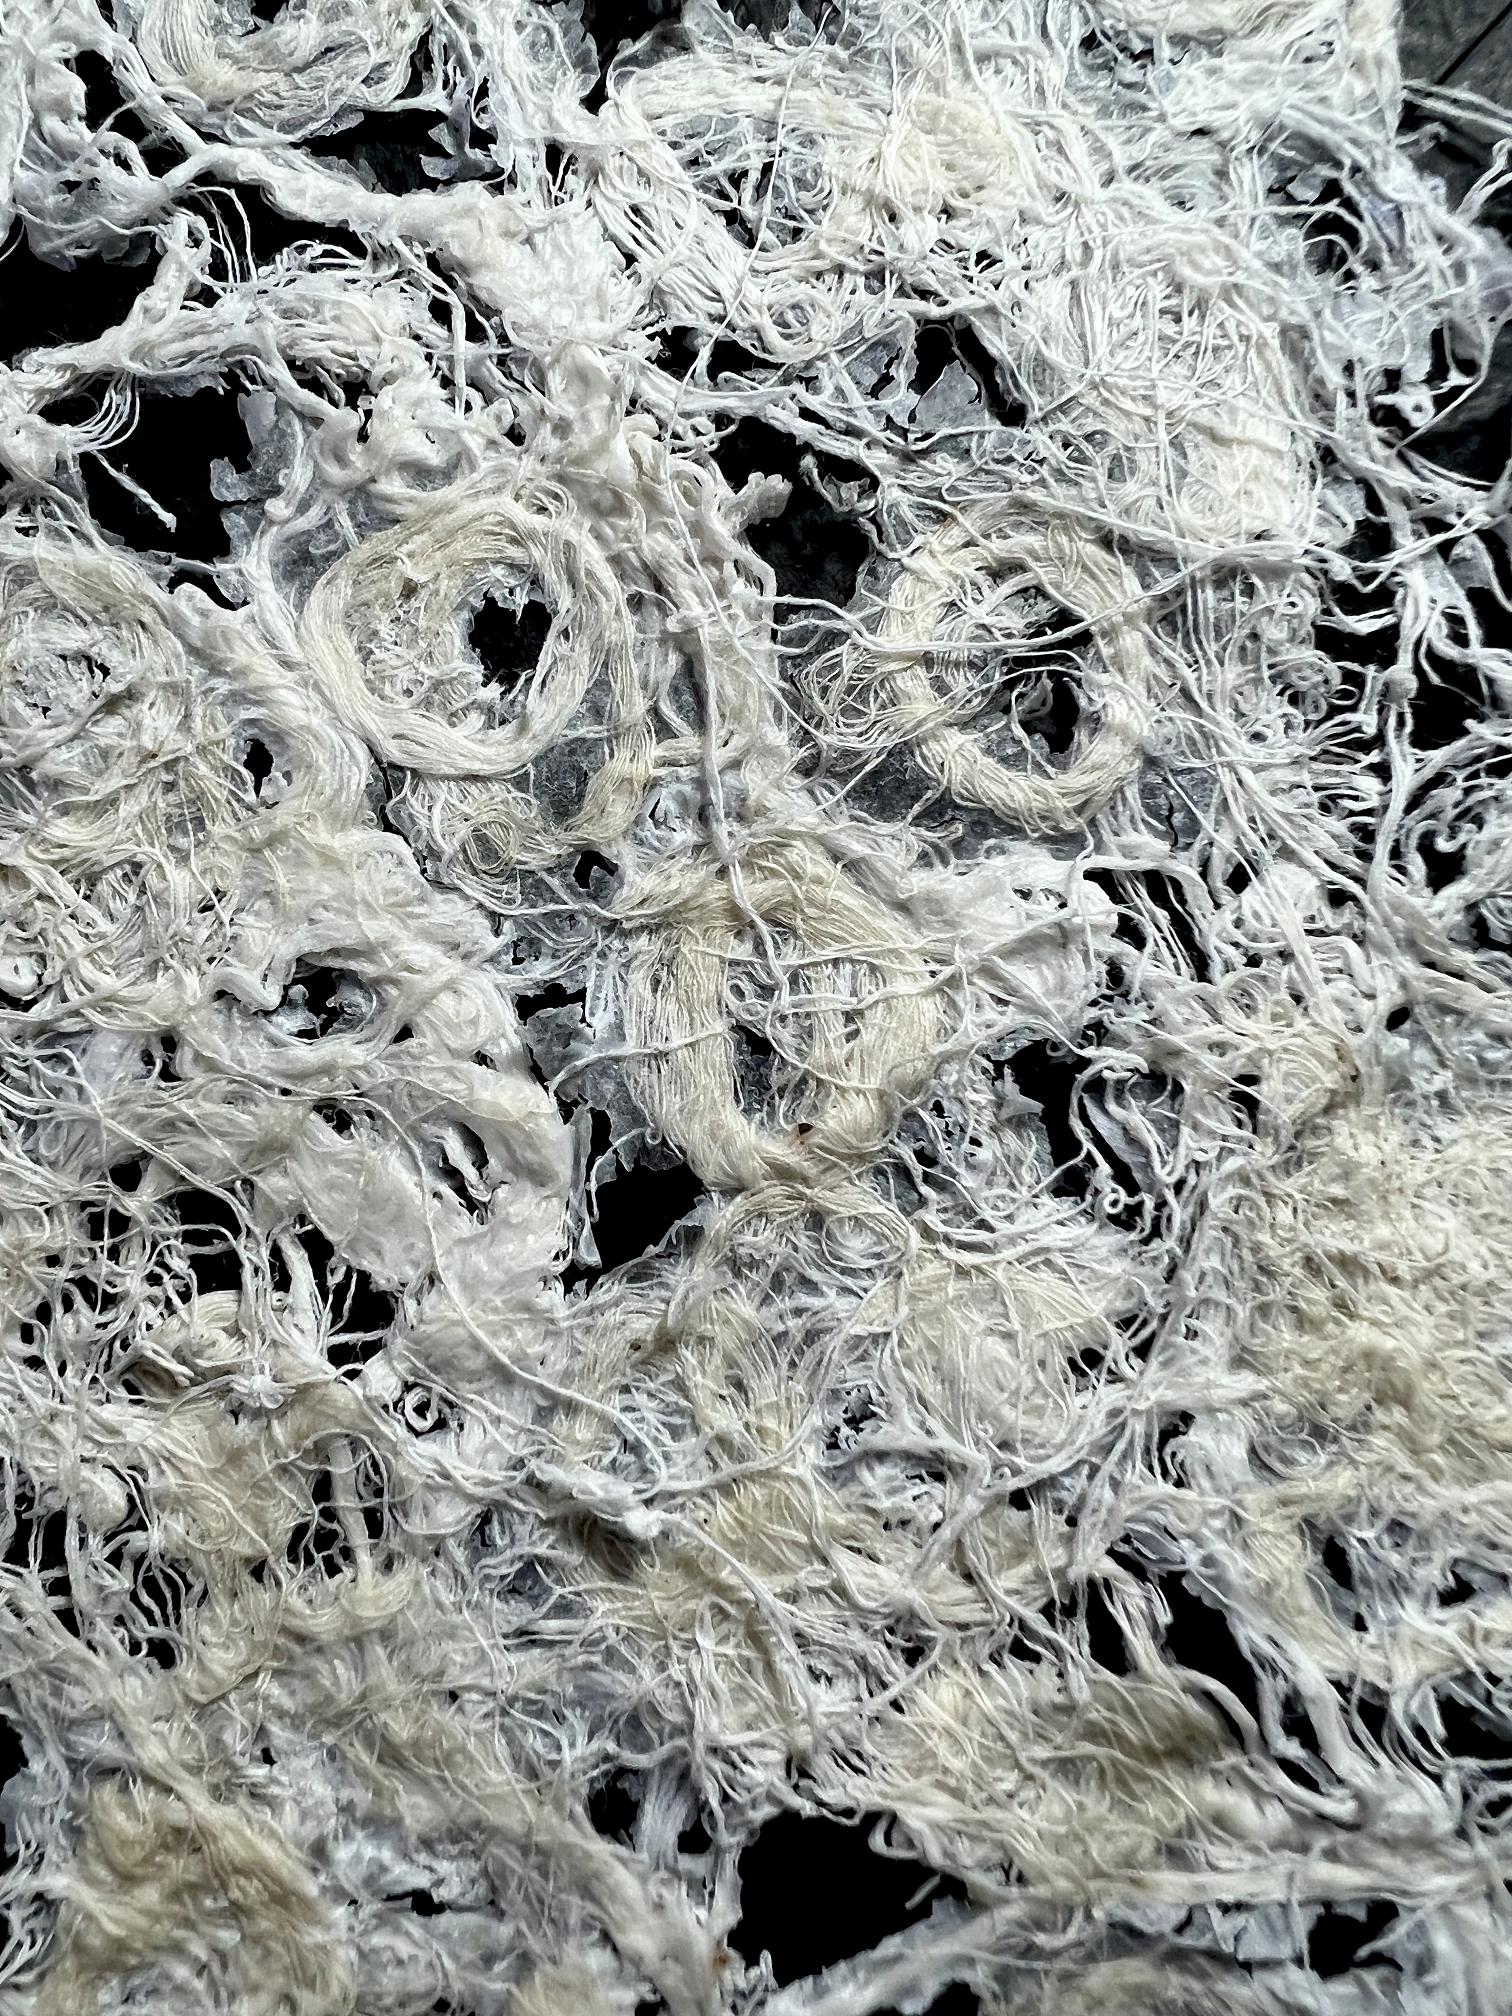
However closely or otherwise it resembles the original Ogura lace, this is definitely a useable textured collage piece! The whole process was much too laborious though, and highly experimental, and I am going to have to think of a better way of doing it. I am not going to let this defeat me!
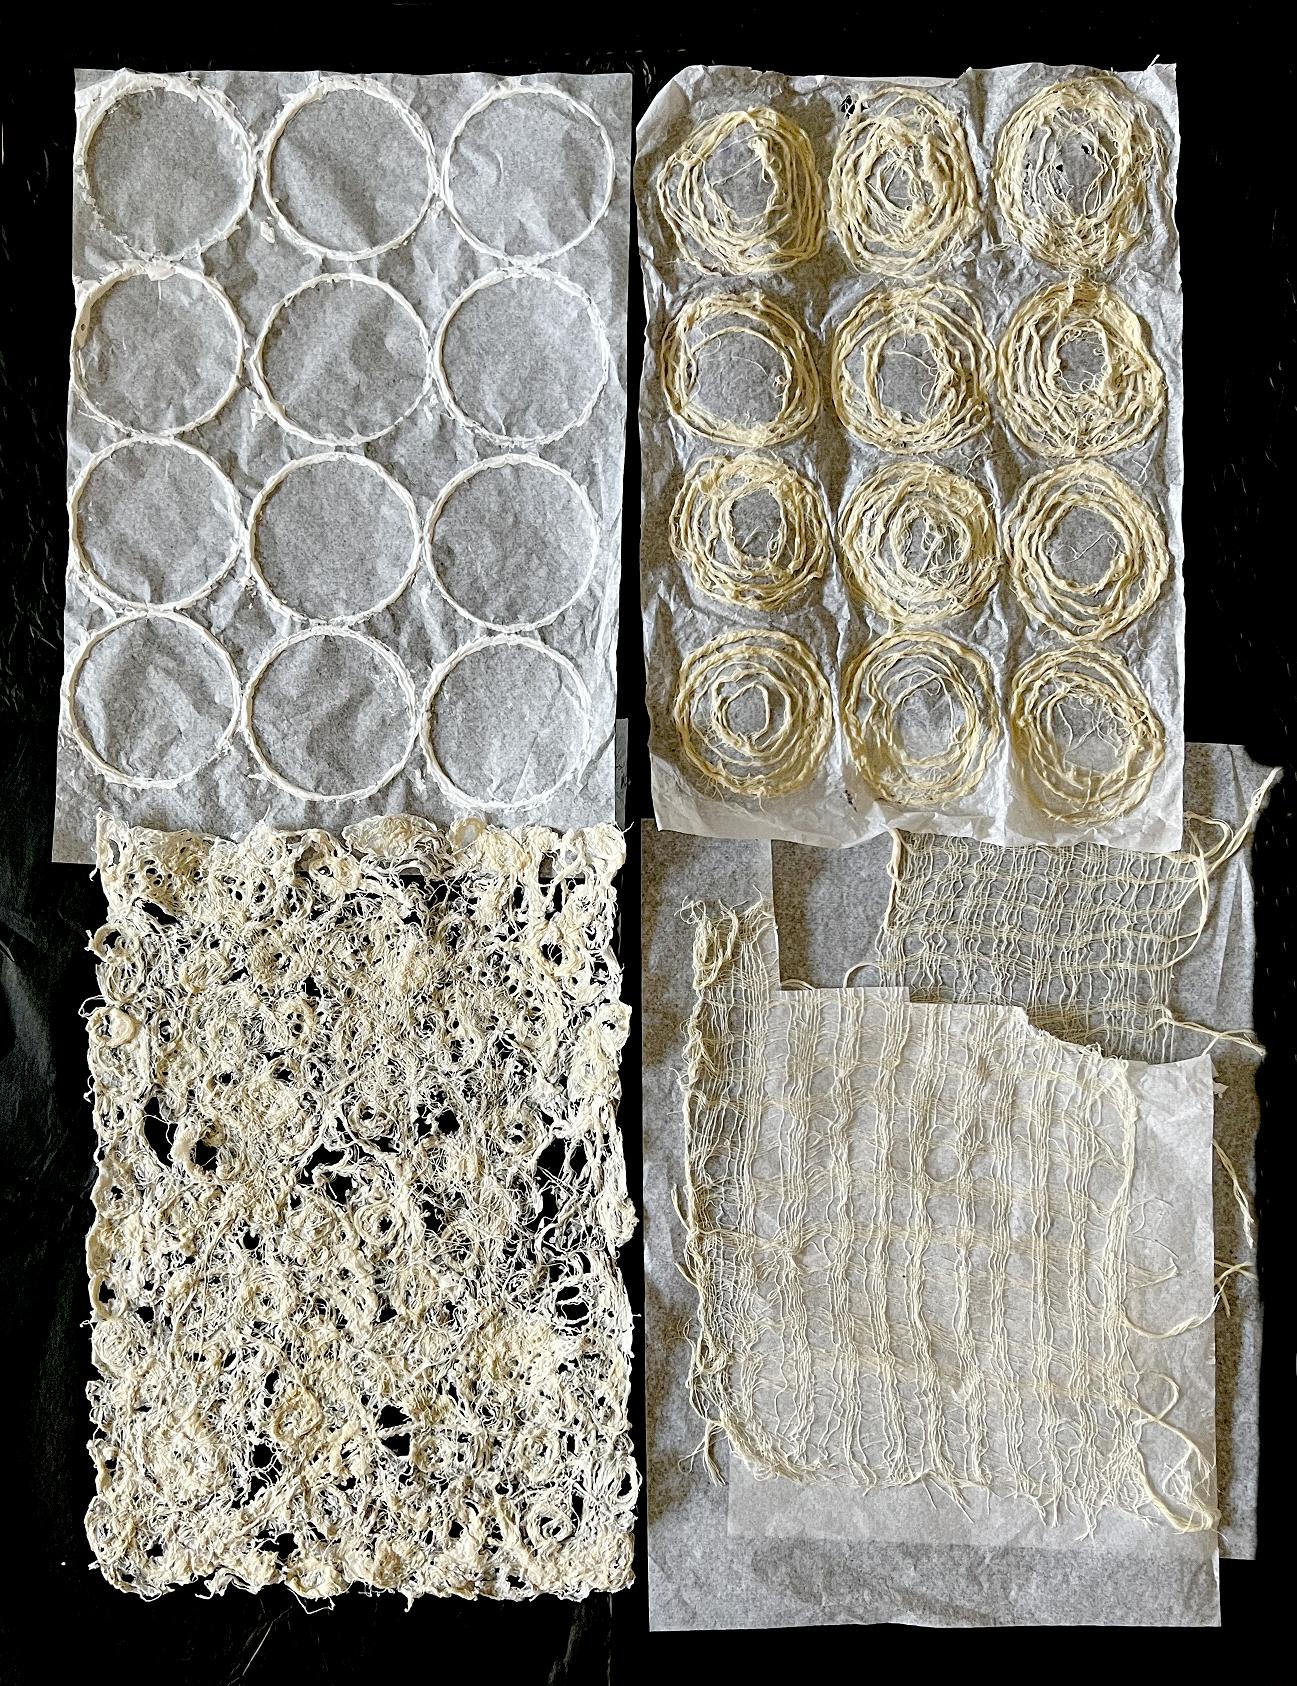
Here are all my experimental pieces together. Clockwise from top left: Beehive Paper, Hand-made Roses, Gossamer Paper, Ogura Lace.
Just to compare with the originals that I was trying to emulate, here’s a montage showing them side by side.
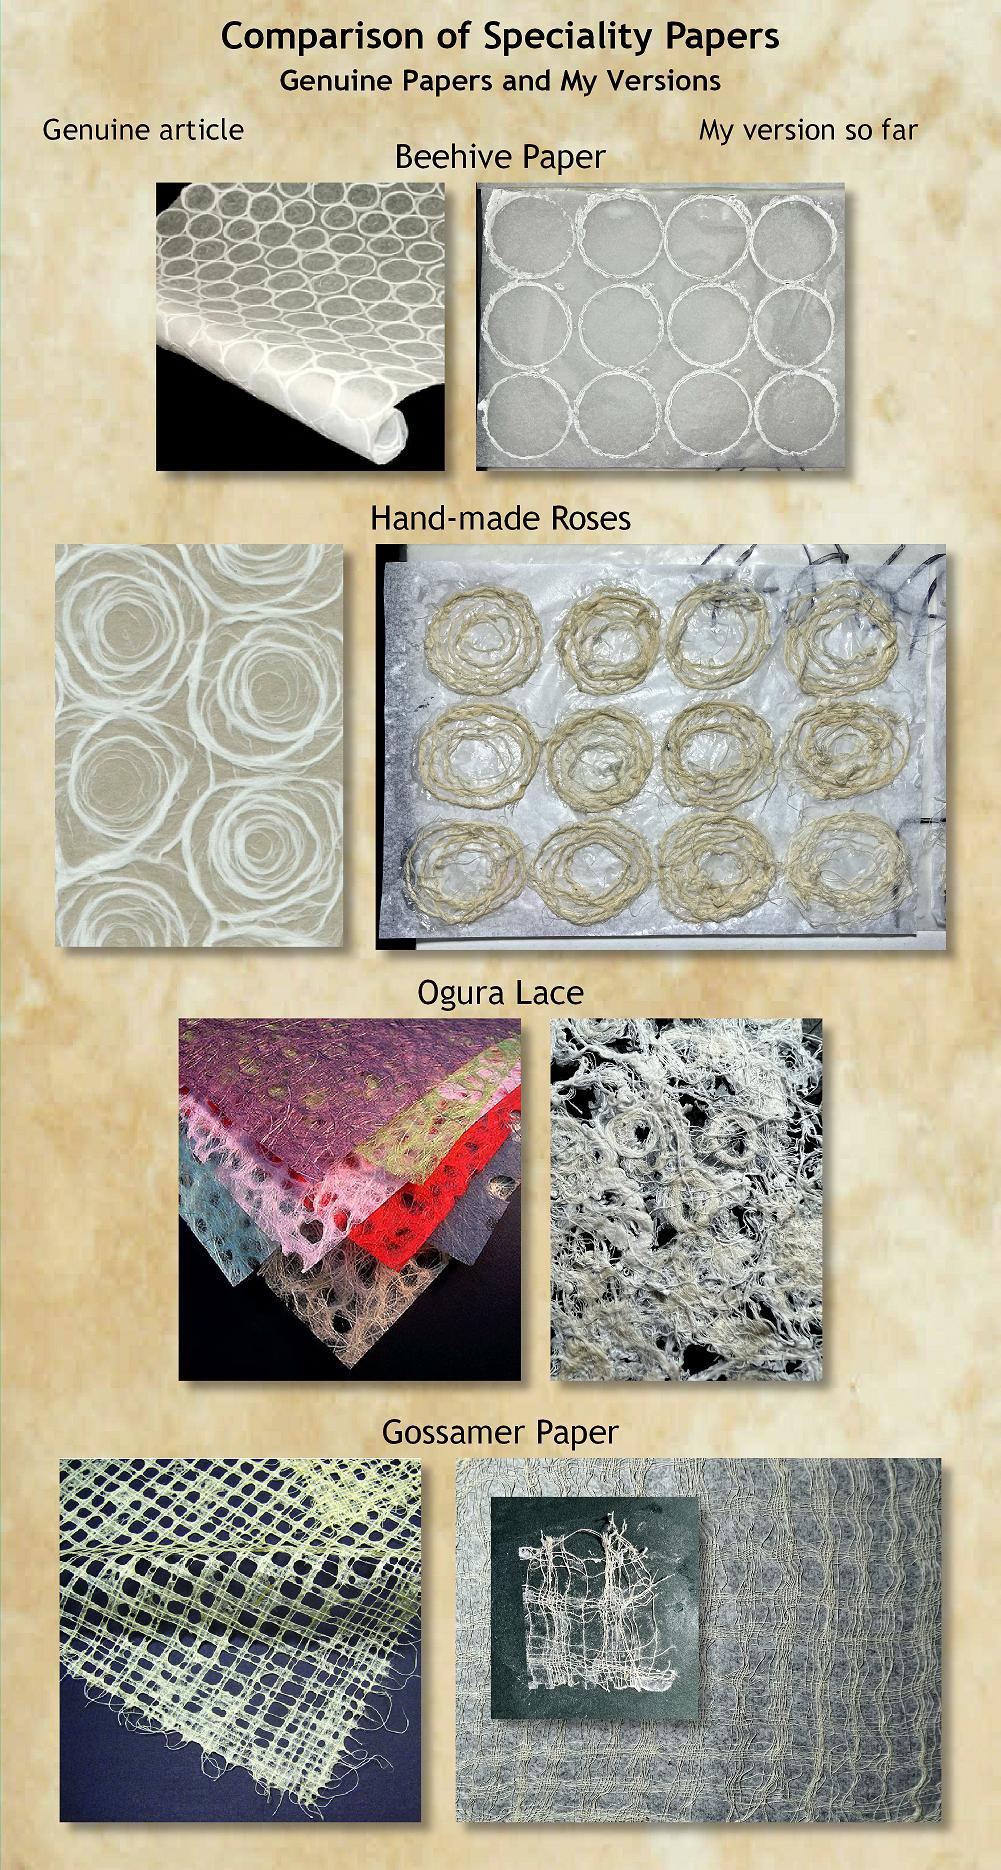
All in all I don’t think I’ve done too badly. However, the processes definitely need refining. The most successful and easiest to do were the beehive paper and the hand-made roses, both of which I am very pleased with. Froyle’s hand-made roses are actually more like the ones I have created than the ones in the picture I was able to find online. Both the hand-made roses and the beehive paper motifs can be separated either by tearing or cutting, and laid down as individual elements, which is what I propose doing.
I shall continue to think about this and hope to come up with better results. These speciality papers are just gorgeous, and it is so frustrating that they are unavailable here in the UK. This isn’t the first time I’ve come across this, but at least with the papers, necessity could prove the mother of invention if I can refine the process sufficiently to produce a viable alternative. With other things, though, this is not possible. I have been following a Christian researcher on YouTube who has written a book that I am keen to buy, but it is unavailable here in the UK (something to do with customs regulations or some-such) and there is no e-book version available either. It is deeply frustrating watching the interviews, following the author’s research and seeing the book reviews, and knowing that they are beyond our reach. I have contacted the author and asked if his organisation could publish a Kindle version – after all, millions of books are now available for digital download and the technology is there, and it seems wrong that a whole nation should be forbidden access because of some bureaucratic regulation. They would also be able to expand their market if a digital alternative was available, too, which would be to their advantage as well as to ours. We live in an increasingly global environment (for good or ill) and there surely must be advantages to this somewhere.