ONLINE DRAWING COURSE – OPTIONAL EXTRA CHARCOAL LANDSCAPE, AND A NEW DRAWING TOOL
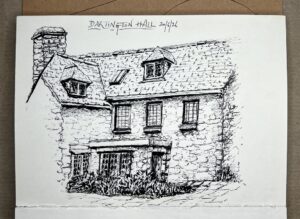
Since this extra lesson was optional, I thought I would work it in graphite instead of charcoal. This was going OK (more or less) but eventually I realised that there were some large very dark areas and I wasn’t getting the result I wanted with the 8B graphite pencil. I therefore got out my 6B charcoal pencil, and eventually a piece of willow charcoal, and added charcoal to the drawing. I’m not sure this was a good idea, because the graphite is quite reflective, and the charcoal is definitely matte.

I really wasn’t too happy with it. I had great difficulty with the great bank of bushes under the house – my rendering looks like a fountain, or one great big bush, and definitely not really bushy looking! I was quite pleased with the steps, particularly the distant ones, and the house was more or less OK, but I was most pleased with the trees and the bushes at bottom left, which did come out quite well.
Phil, the teacher, wanted this to be a really quick, sketchy charcoal drawing, and his rendering was certainly that. Mine has a lot more detail in it. I am not keen on really loose sketchy charcoal drawing, which is why I decided to do this one in graphite to begin with, but perhaps I would have been better using charcoal throughout, and just adding a bit more detail than Phil did. I didn’t follow the brief with this one but I didn’t think it mattered really, since this was an optional extra project anyway.
This is the end of the second of the four charcoal projects (“Landscape Sketches”). The next one is a drawing of a rhino, which should be fun, and the final one is a self-directed challenge, like we did with the graphite module. Since there is only one drawing in the next project, it should be completed fairly quickly. I am looking forward to moving on to a different medium now as charcoal really isn’t my thing!
A new drawing tool
Today a new drawing tool arrived from Amazon. It is called a proportional divider, and is used to add reference points onto your sketchbook from the image you are copying.
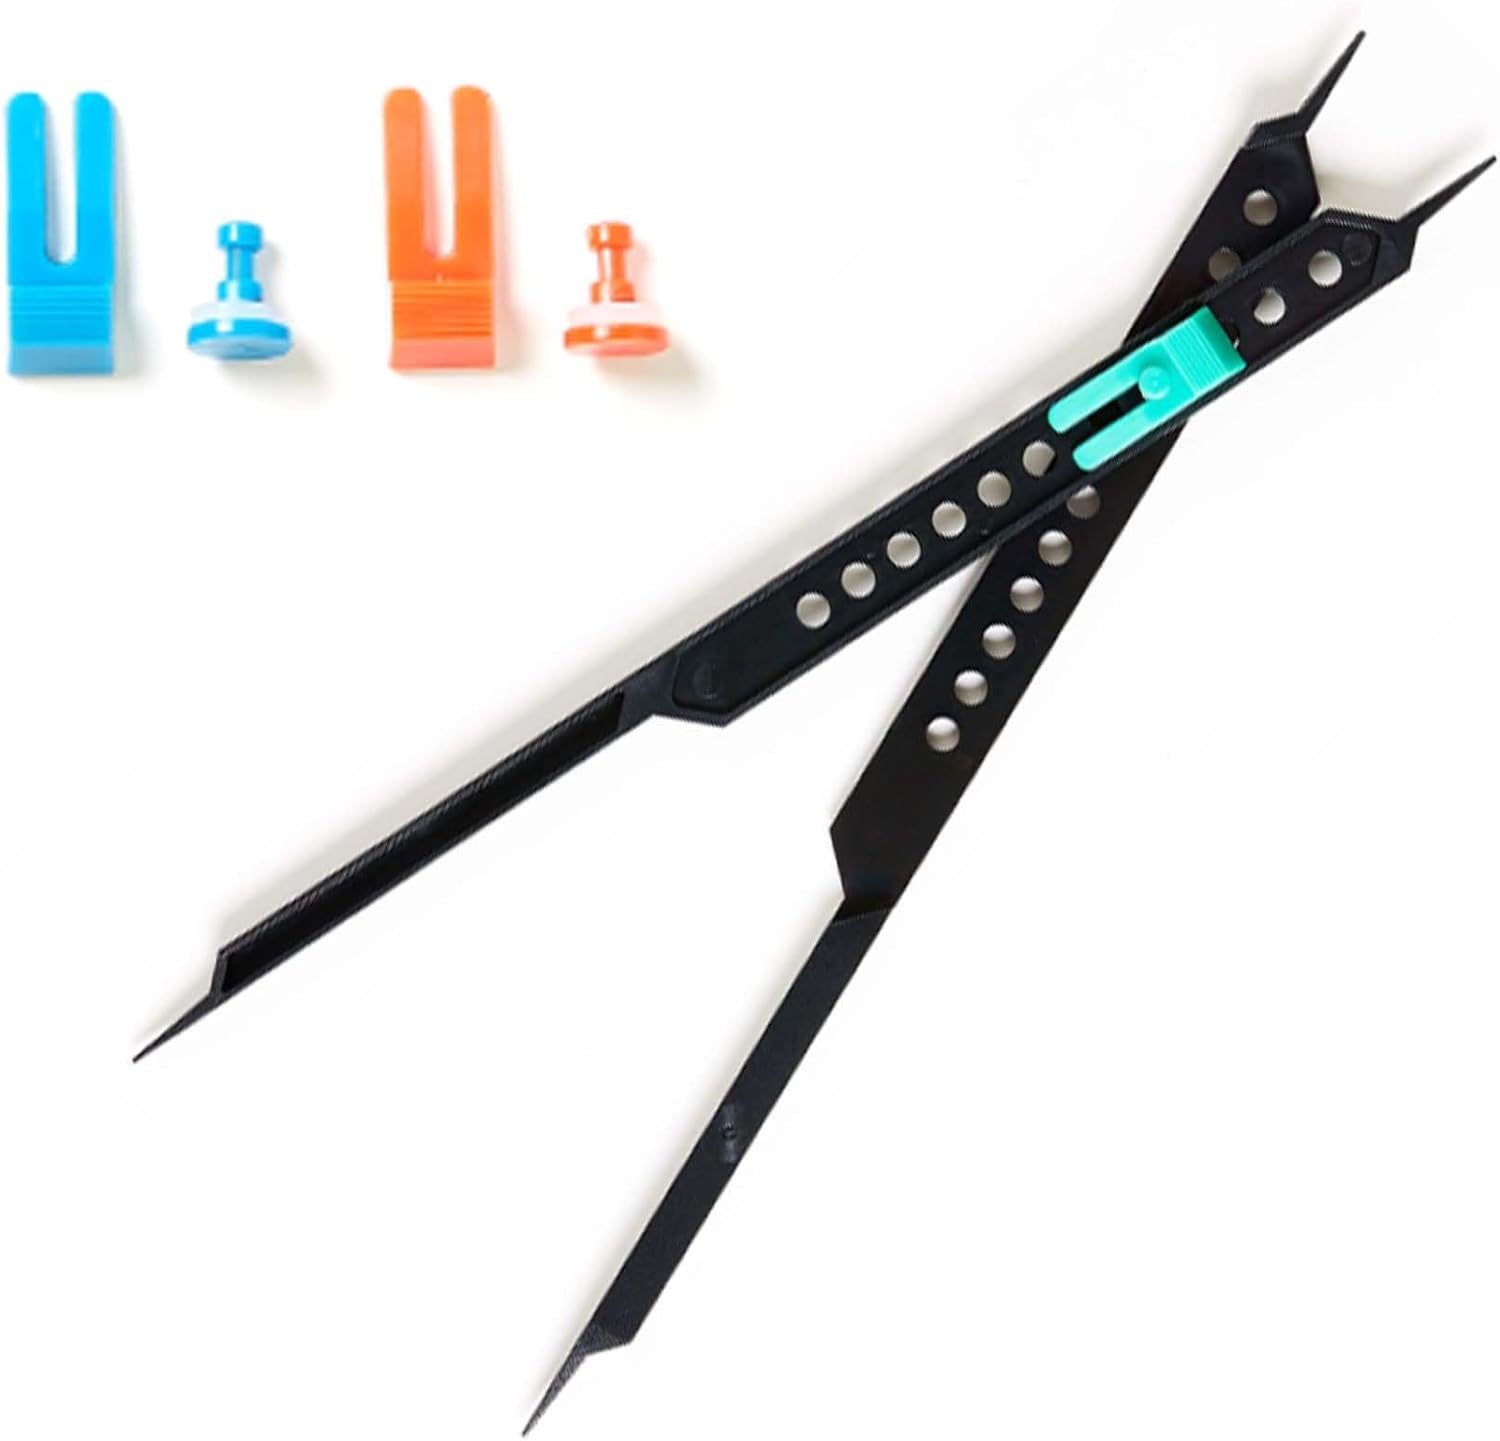
(This is the Amazon photo). The one I bought is plastic, and was only £4, but you can spend £30 or more on a nice brass one. For my purposes, this is perfectly adequate.
The peg joining the two halves together is removable by sliding back the U-shaped piece and removing it, and you can then take the peg out and insert it in whichever holes you wish, and lock it in place again with the U-shaped piece. Once in place, the two halves of the divider are easy to move, but there’s enough friction to hold them in place while you use the tool. I am not sure what the spare pegs are for – all the holes are the same size. Maybe they are provided in case you lose one. Some of the more expensive proportional dividers have slots in the two arms instead of a series of holes, and an infinitely adjustable pivot that slides along the slots, and you tighten it with a screw.
To draw something the same size as your original image, you just spread the divider so that its points are the same distance apart as two reference points on your image, and use it to mark the equivalent points on your sketchbook page.
To make your drawing a different size, you need to set the pivot so that the two ends of the divider are set to the correct proportions of the original image – I found the best way to do this is firstly to test the width of the picture with the smaller end of the divider and see if the larger end matches with the height of the picture. If it doesn’t, you move the peg to a different set of holes. There’s probably a rule for doing this, but trial and error seemed to work for me! (This particular proportional divider didn’t come with any instructions.) You can then draw a rough frame for the drawing in your sketchbook, which will have the same proportions as the original image. Once you’ve done this, you can begin plotting reference points from the original to your sketchbook page, knowing that however wide you spread the divider, the two ends will maintain exactly the same proportions.
In order to make your drawing larger, you adjust the points on the smaller end of the divider to match the two reference points on your original image, and then flip it over and use the larger end to mark the reference points on your drawing.
To draw something smaller, you set the larger end of the divider on the two reference points on your original image, and then flip it over and use the smaller end to mark the reference points on your drawing.
I used it on today’s graphite/charcoal drawing and it was absolutely brilliant for getting all the proportions and distances correct! It took a while, but once I’d marked the most important points, I had a good framework to begin my drawing. This is something I really struggle with by eye.
It’s a bit difficult to describe in words, but there are plenty of YouTube videos showing how to use it. It’s such a simple device, and it works a treat.