Storage for my spray inks
It’s been a good few days since I posted. I have been working hard on my ink pad/spray storage unit. This job has proved to be a lot more protracted than I had hoped, but I am on the home stretch now.
From my previous post, you will see that I had a complete rethink regarding this project, and decided to attach a series of tubes cut from black drainage pipe to the sides of the ink pad storage unit. With the help of our excellent mitre jig, I was able to cut the tubes into short lengths with a right-angle cut at one end, and a 45-degree cut at the other. Yesterday I was still working on finishing the rough edges of these cuts – a job that takes quite a long time.
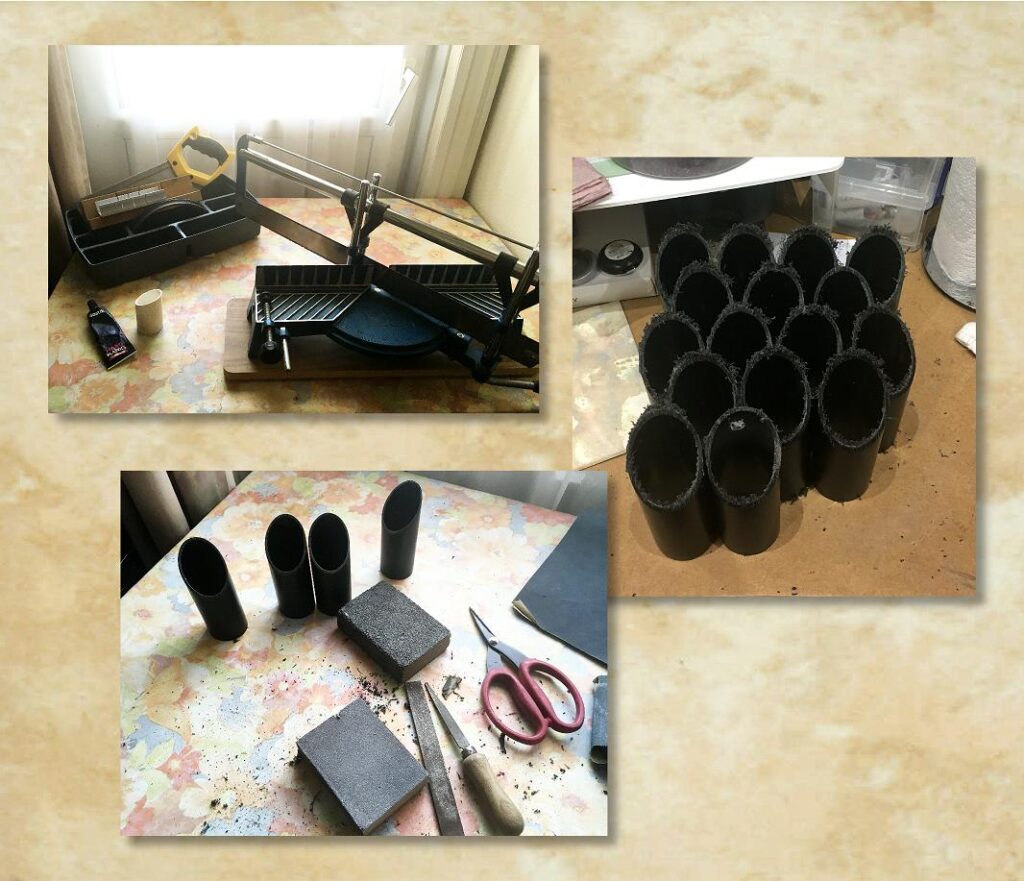
Next came the most difficult problem – how to attach the tubes to the unit. This proved much more difficult than I anticipated. My hubby produced his hard plastic glue again but that simply didn’t work – I think because the pipe is made of a different sort of plastic from the unit. It would not be easy to attach them using any kind of glue which took time to set, because there was no way of fixing the tubes in place while the glue was drying. Being set at an angle made this impossible. I tried using narrow strong double sided tape but this was a total failure.
Re-examining the unit itself, I noticed that the trays I had bought, and stuck together to form the tower, had grooves and ridges on the sides, to slot into adjacent trays. The grooves didn’t present a problem, but the ridges meant that the side of the unit was not presenting a flat surface onto which to stick the tubes. I had a good rummage in my studio and eventually found my Dremel rotary cutter, which I bought years ago for something I thought I needed to do but which proved unnecessary, so this tool had never actually been used. I had given it to my hubby for a while but he wasn’t using it so I got it back.
This proved to be just the thing for grinding off the offending ridges. Here is a close-up of the underneath of a couple of trays, showing the spigot projecting from the bottom, to engage with the top of the adjacent tray beneath it, and the grooves and ridges on the sides.
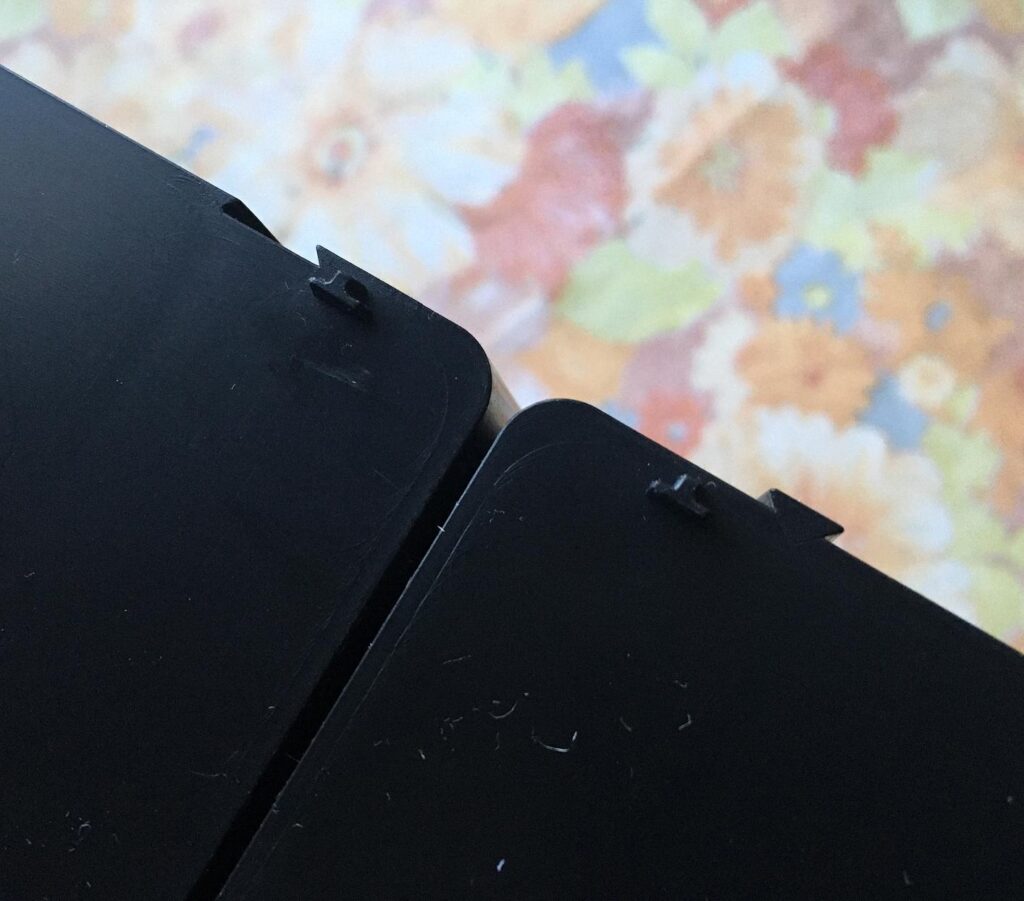
It took me quite a long time to grind these off both sides of the completed unit – a couple of sessions. I had to go fairly slowly and press very lightly with the Dremel, or the heat from the friction tended to melt the plastic and clog the grinding wheel. It was also not possible to apply the side of the grinding wheel flat against the ridge towards the centre of the unit, because the Dremel was too thick, which meant that the ground off part was far from neat, but I wasn’t too worried about this becuase it would be covered up by the tubes anyway.
Here is the result.
I managed to sand them down to smooth them out a bit.
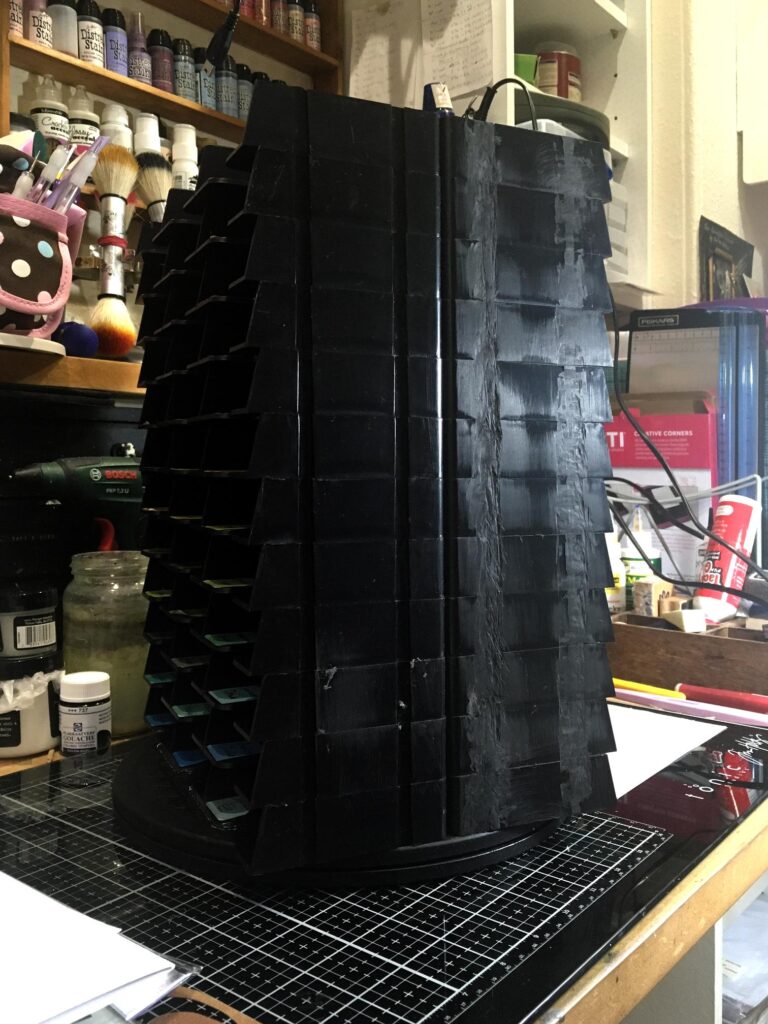
Unfortunately, all the vibration made the revolving base come off the unit. I could see that my hubby’s glue had not really bonded very well with the revolving base, which again was not the same as the hard plastic of the unit. The dry glue was easy to flake off the revolving base, but it was completely welded to the bottom of the unit, so this had to be sanded off to make it smooth.
I decided to re-attach the unit to the revolving base with strips of strong double-sided carpet tape this time, and this seems to be satisfactory.
Then I had to find a way of attaching the tubes. In the end I stuck the first group of 4 (which I’d already stuck together with strong double-sided tape) to the bottom of one side of the unit using magic tape – that rather thick, squishy transparent stuff that you can use for attaching things to walls etc without the use of screws (I’ve attached hooks and things in the kitchen with this – brilliant stuff). Once I had one row in place, I decided to attach the tubes individually, using hot glue. This proved pretty messy, and I had to work fast as the glue did set very quickly. I was able to re-melt it when necessary with my embossing heat tool, and the result seems to be more or less secure. I wouldn’t risk leaning on it too hard or the tubes might come off. I shall have to see how well it holds up in use.
I had smoothed enough tubes to cover one side of the unit by the end of yesterday’s session, and managed to finish glueing the tubes to one side of the unit. The result is a bit messy with the hot glue but it’s OK.
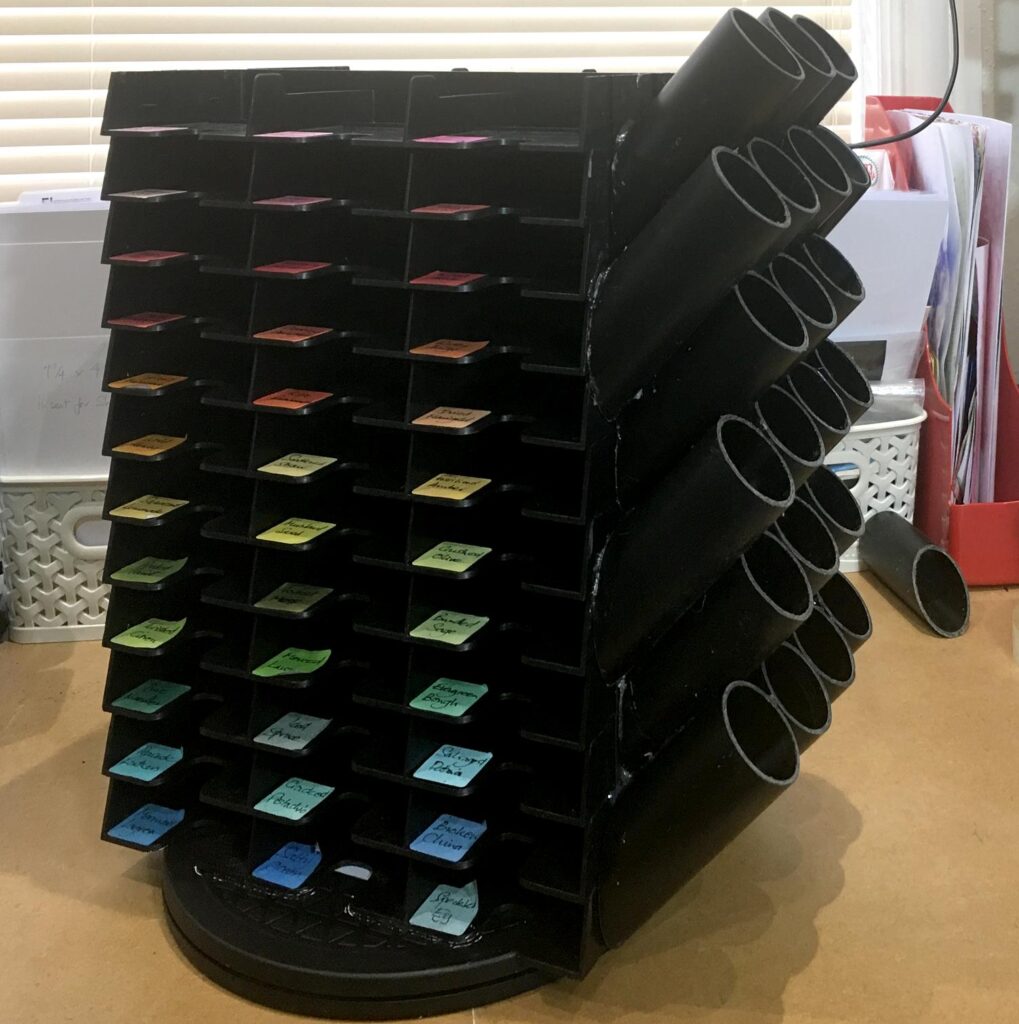
The tubes are stuck together with hot glue, as well as being attached at their sloping ends to the unit. Let’s hope they hold!
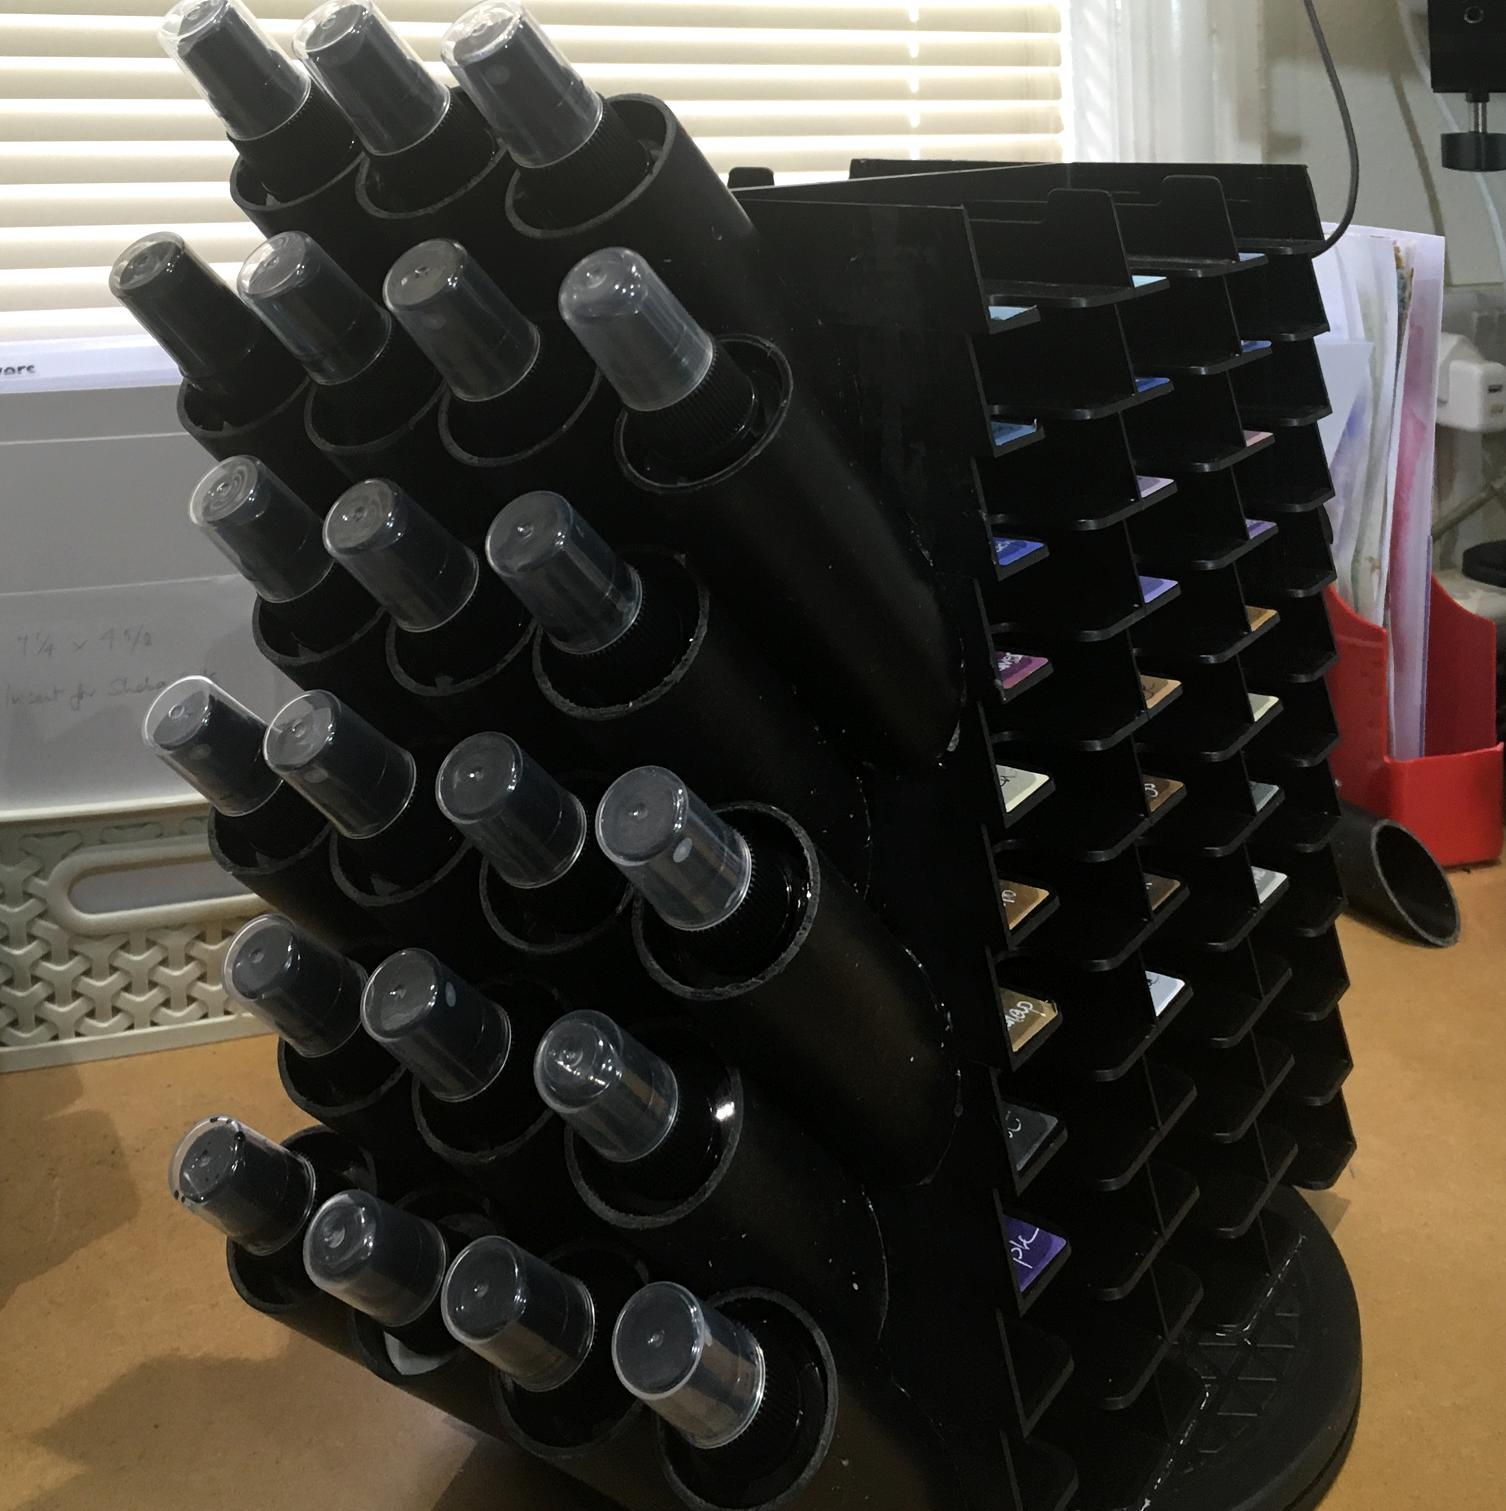
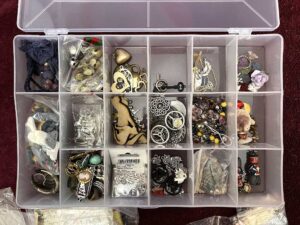
Here’s a mock-up with ink spray bottles in the tubes.
![]()
I picked them at random. Eventually they will have labels on top, and labels inside the tubes, but I wanted to test the system and see how it worked. The weight of the bottles in the tubes is causing the unit to lean slightly and become slightly less stable, but once I get the other side done, this won’t be a problem. The whole thing revolves OK on the base.
Today I finished smoothing the remaining tubes. There are enough to glue onto the other side of the unit, with a few to spare.
I can get 21 bottles on each side as the unit stands at the moment, meaning that I can store a total of 42.. Eventually I will need to get more trays to expand the unit upwards because I can’t quite get all my ink pads in yet – the Distress Oxides are still in a box. Eventually I may make a second unit so that I have one for regular Distress Ink pads and Distress Spray Stains, and the other for Distress Oxide pads and sprays, but I think one will do for now.
There’s still work to be done, attaching the remaining tubes, and labelling the bottles and the insides of the tubes, and then putting everything back in place – I had to remove all the ink pads while I was grinding the sides of the unit, so they are in a heap on the desk at the moment, all muddled up.
Birthday card for my hubby
I have made a birthday card for my hubby (his birthday is next Thursday), taking a recent photo of both of the kitties asking to go in the garden, which we always enjoy seeing – they do make us laugh! They understand the word “garden” and run to the door, waiting to go out. I manipulated the photo to make it more arty, first making a vignette which I desaturated, and then used various effects and filters to give it a more painterly appearance before re-tinting it a little, and adding some text.
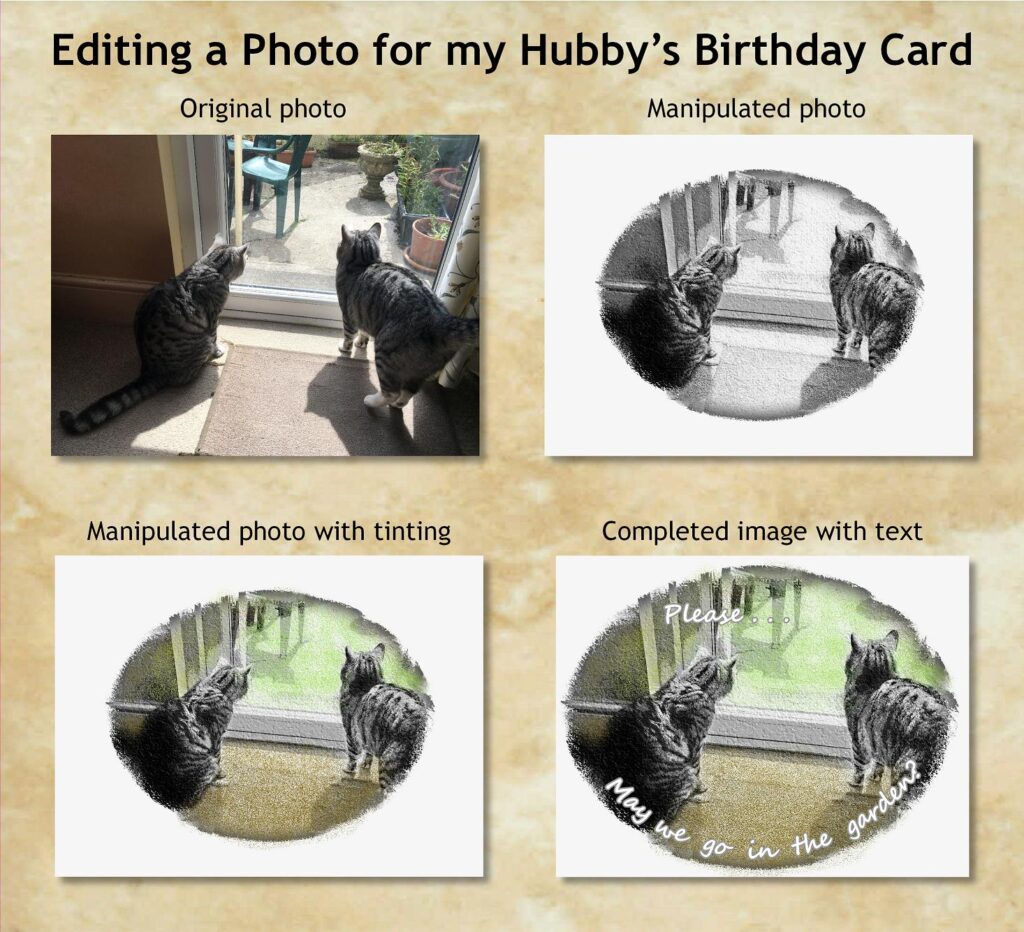
This is the completed card, which unfortunately wasn’t easy to photograph to get the delicate tinting to show properly. I added some Distress Ink to the surround and mounted it on a card base.
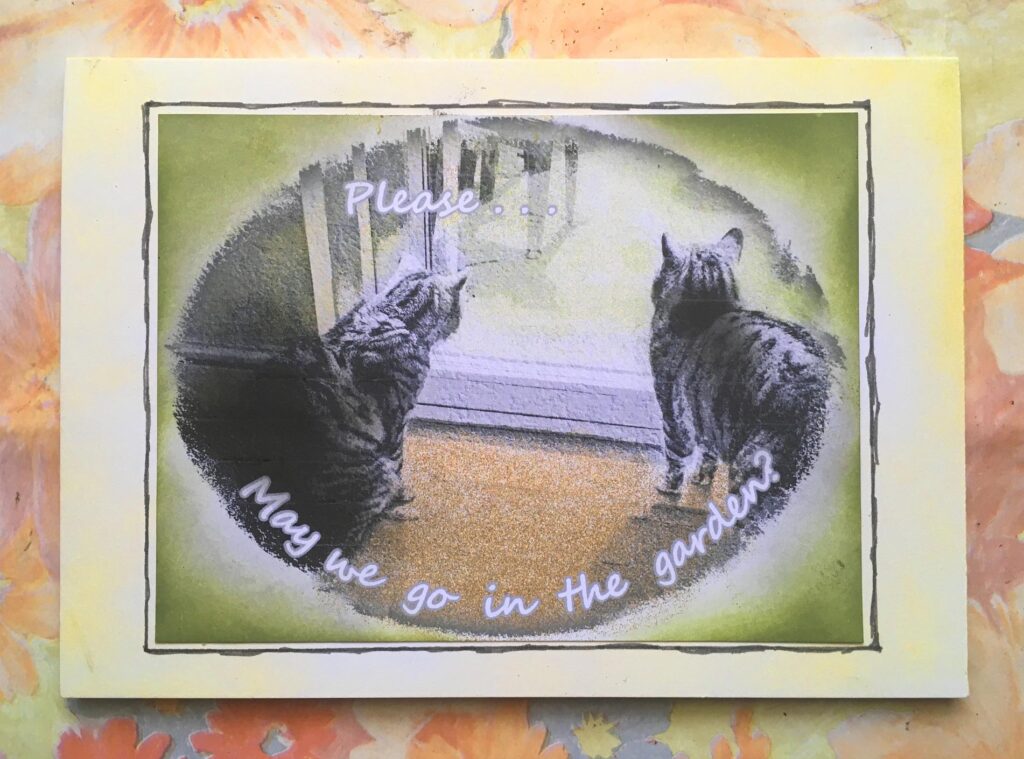
I hope he is going to like it. He recently informed me that he doesn’t really like much of what I do – too arty farty for his taste, I think! He prefers things that look more “realistic.” Last year I made him a card with what I considered a very poor and inadequate watercolour representation of our garden and was reluctant to let it see the light of day, but had to go ahead because there wasn’t time to make another card, and he loved it! Oh well.
Health update
On Saturday night I started experiencing palpitations which lasted the whole weekend. I have had these on and off for years, only lasting a few seconds and then going away – I understand everybody experiences these periodically so it’s never worried me, but to have them continuously certainly warranted investigation. I contacted the GP surgery on Monday and had an appointment in the afternoon. The doctor listened to my heart and took my blood pressure (which was slightly elevated) and he said that there was definitely some irregularity. I have an appointment for an ECG next Tuesday. He said I may need to be referred to the hospital.
My own researches have shown that many cases of palpitations are nothing at all to worry about, but they can be a sign of something a lot more serious. He said that if it got worse, I could contact them at any time and they’d see me again, and if I developed the signs of a heart attack, to take myself off to A&E immediately – I know what to look out for with that, having had a coronary artery spasm back in 2014.
However, today, it does seem to have settled down and it’s feeling a lot better. I am monitoring it carefully, but this may have been something that has come and gone, and the ECG next week may reveal no problems.
I do have Left Bundle Branch Block, which is an electrical fault with a distinctive and diagnostic ECG trace, which tends to mask any other abnormalities, often rendering an ECG useless for diagnosing them. This was the case when I had the vasospasm and the diagnosis was made by a series of blood samples taken at regular intervals, which revealed the presence of troponins in my blood – these proteins are normally present in the heart muscle and should not be present in the bloodstream – if they are, it indicates heart muscle damage so they were able to say for certain that I had had some kind of cardiac event. They carried out an angiogram but all the vessels were completely clear, so they came to the conclusion that I had suffered a coronary artery spasm which had temporarily reduced the supply of blood to my heart. I was issued with a GTN spray to use should it happen again but I have rarely had to use this. I have a new one on order now because the old one is past its use-by date. I used it on Saturday night and early Sunday morning and it did give me some short-term relief from the palpitations and the feeling of tightness in my chest.
Clearly this is worth checking out. It may be nothing – let’s hope so! I really don’t want anything else going wrong with my body at the moment! I seem to be falling apart at the seams…
Kitties
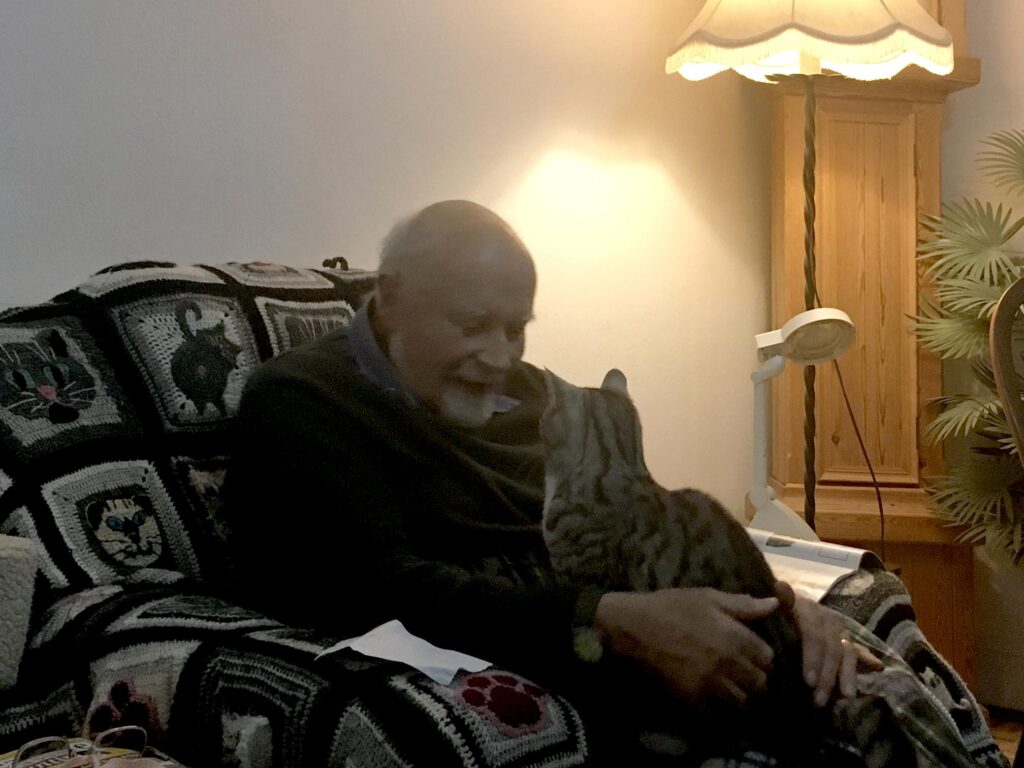
A happier note on which to end this post – a sweet picture of my hubby and Lily having a special moment together. Those two are very close! She won’t give me the time of day most of the time, although she is happy enough to use my legs as a warming platform when they are raised on the recliner. At least Ruby loves me!

I think your distress spray unit is ingenious and really admire your less ‘can do’ spirit, more ‘i ain’t gonna let this beat me in a month of Sundays’ spirit! It looks seriously practical. If the glue holds, fingers crossed, it will offer storage and accessibility in a relatively small footprint.
Birthday card looks so sweet. Hope lovely hubby likes it. I used to print my cats onto Conqueror champagne paper… which I can’t find anywhere these days, with appropriate sentiment and wrap up chocolate bars. The choc was always from the cats themselves… ha ha.
Hope palpitations return to the nothingness they came from. It must be disturbing for you.
My little Gracie mae is getting her pyjamas on… (she’s having that extra long wash that cats do before settling down for a proper good sleep!)
Good luck with that unit, may the bonds be strong and the force be with you!!!