REMAKING A BEAUTIFUL PIECE OF KNITTING
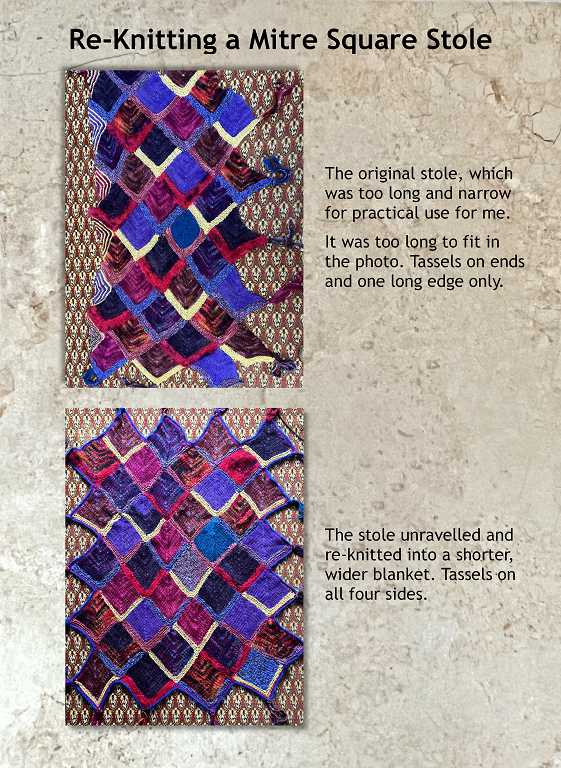
A beautiful and generous gift
A couple of years ago an artist friend gave me a beautiful knitted stole she had made. I was absolutely thrilled to receive this as it was so brightly coloured and very much her style. However, a stole is not something I ever wear; the only time I would be likely to wear one is out of doors, and since I always use my wheelchair when going out, I have to be fairly selective about the kind of clothing I can wear. Anything that restricts my arm movements or is likely to slip and jam up in the wheels is a no-no.
As a result, I decided to use this as a blanket. The problem was, the shape was all wrong – it was far too long and narrow. Every now and then I would get it out and admire it, and wish it was more square in shape and less of a long rectangle. I had never seen this style of knitting before, either, and wasn’t sure how the piece had been constructed.
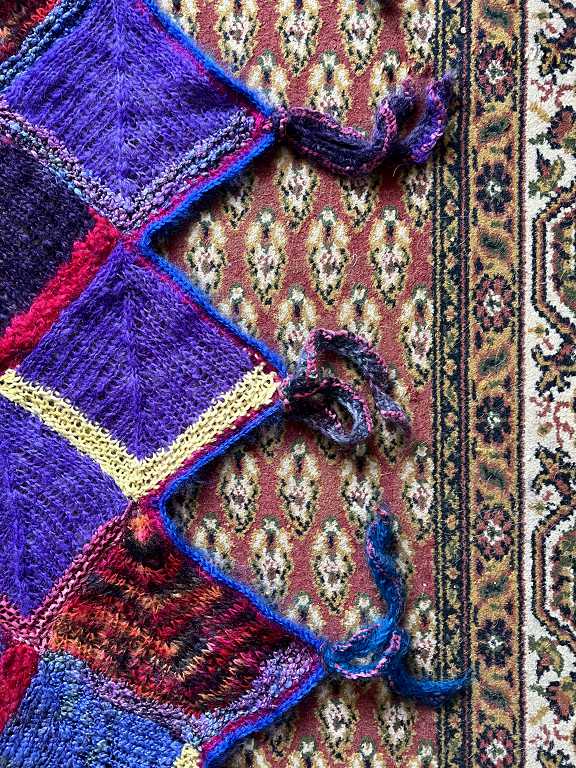
I took a photo of the stole just after I’d started unravelling it, and I am glad that I did, because it showed me how to lay out the squares in a diamond pattern with points on the edges, to which I could re-attach the fringe pieces my friend had made.
Working out the construction
I was able to see a few places where the shapes had been sewn together, notably a row of striped triangles along one edge to fill in the gaps left by the diamond motifs, to make a straight edge to go along the top edge of the stole. However, I couldn’t see any evidence of seams throughout the rest. Every time I looked at it, I ended up putting it back in the bag and not doing anything about it.
Eventually I thought I really should grasp this nettle and get on with it, or I would never be able to make use of this beautiful piece. I undid the seams around the small triangles and that was no problem. The next thing I did was go search online for patterns for fancy knitted squares. I really didn’t know what to look for as I didn’t know the name of this particular diamond-shaped design, but eventually I found images that were similar, and discovered that this is known as mitre knitting. Once I’d discovered this, it was easy to find lots of patterns that showed me how each square had been constructed.
Unravelling the piece
The next step was to try and find an end, from where I could attempt to take this piece apart. What I had hoped was that the squares had been sewn together by hand after they had all been completed, so that I could remove some from the length and sew them to the width, ending up with more of a rectangular blanket shape, but no – nothing so straightforward as that! My friend had knitted each new square onto a previous one, which meant that I had to unravel the whole thing and re-knit it if I was to achieve the desired result.
This meant that the whole project took very much longer than I had hoped.
Another major problem was that most of this piece was made from mohair, and this is extremely difficult to unravel! All that fluffy stuff tangles up with itself and it’s a huge battle to get it undone! Eventually I succeeded, and it was worth the effort.
I knitted all the squares separately, at first randomly after I’d unravelled a few of the originals, but then decided to knit up each one individually after I had unravelled the original, so that I could keep the border and main body yarns of each square the same. In addition to the mohair there were several interesting novelty yarns – slubbed, ribbon-like etc. and nearly all the yarns were variegated which added great interest to the piece.
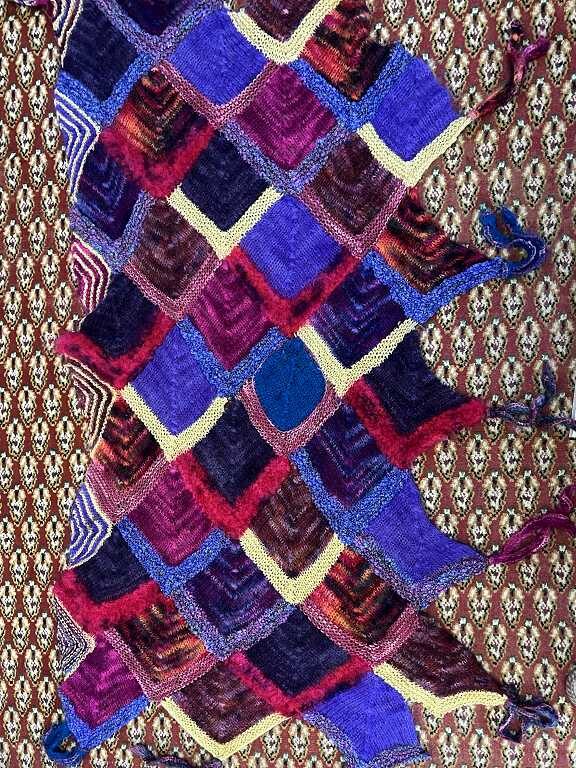
I also made my squares slightly smaller, and used fewer rows for the border part, which you knit first. This meant that I sometimes ran out of yarn for the main part as mine required more rows, but there were plenty of scraps and I was able to complete the whole project without adding any extra yarn, apart for the single turquoise mohair square, to which I had to add a little of my own turquoise mohair which wasn’t quite the same shade, but it didn’t matter.
Layout
I worked out how many rows of squares across, and how many down (4 x 5) in staggered rows to produce the pointed edge, and made a plan of this.
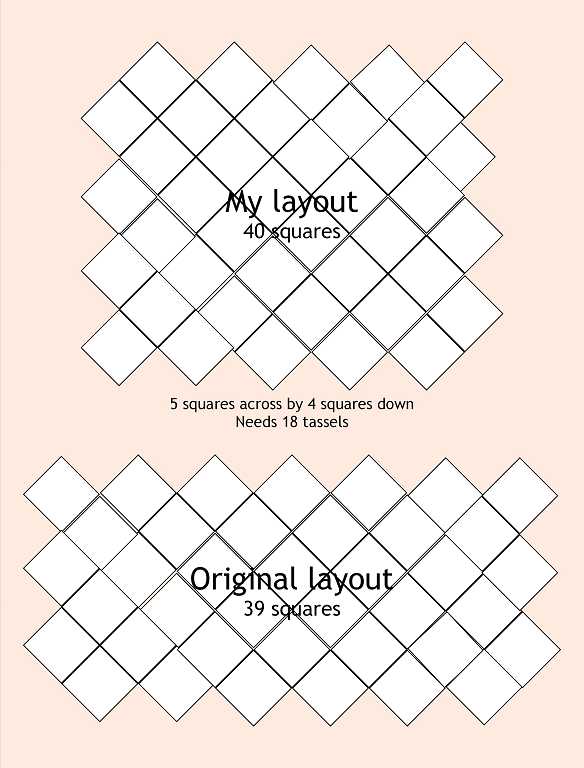
I knew I had to make 40 squares – one more than the original 39. She had not put tassels along the top edge of the stole so I had to make a few extra, to fill all 18 points.
Assembling the blanket
After knitting the squares, I blocked them and then laid them out on the floor to create as random a pattern as possible. I began sewing them together, sitting on the floor, but this proved far too tiring and uncomfortble, so I ended up just sewing the corners together, and then making up the rest from a more comfortable vantage point! At one point I got this seriously wrong as it was impossible to spread out the blanket fully on my lap and see exactly what I was doing, and I ended up creating a weird 3-D structure towards one end! I therefore had another nightmare of a job undoing my mistake, which also involved my unravelling the knitting at the top of one of the squares! I managed to pick up the stitches and re-knit them – the result was a bit lumpy but the whole thing is so fluffy that it really doesn’t show! This mistake took several hours to rectify.
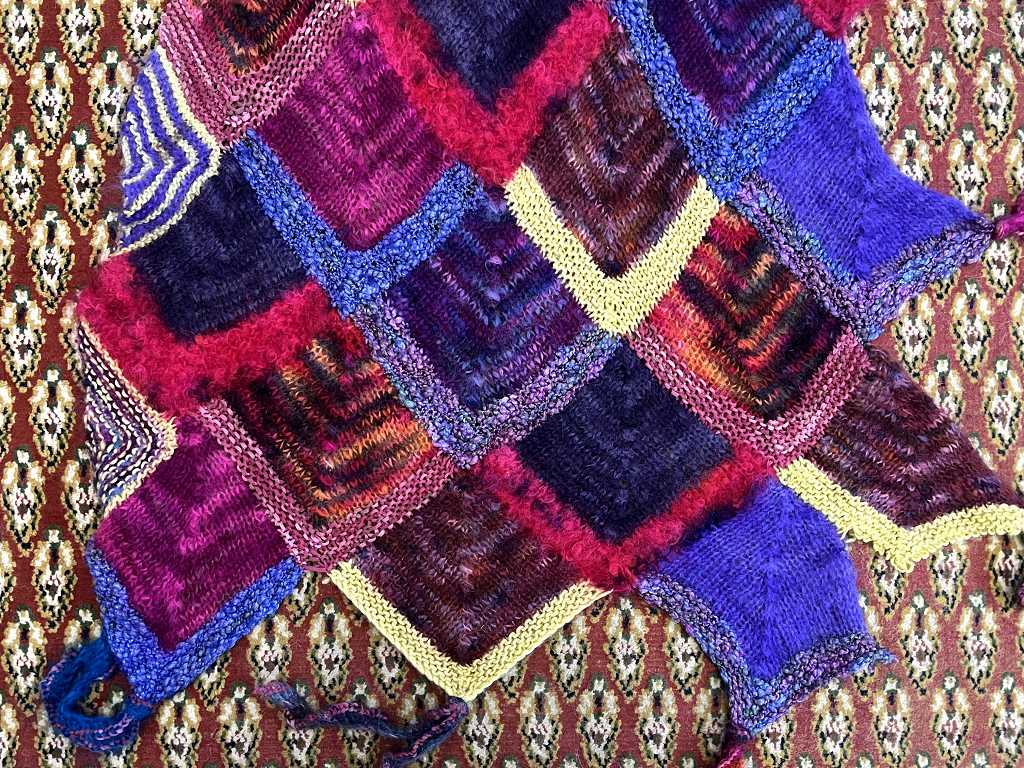
When it was done, I felt that it definitely needed a border to finish off those raw edges. I double-crocheted all round the edge in 3 shades of mohair – a plain and simple border which just finished it off nicely without distracting the eye from the main focus, which was the beautiful coloured squares. At each point, I created a hole by working several chains across the corner on the middle row of double crochets, through which I could insert the tassel.
The whole thing was pretty lumpy and uneven when I’d finished sewing it and working the border, but a quick steam iron sorted that, and I was able to add the tassels, and the project was complete.
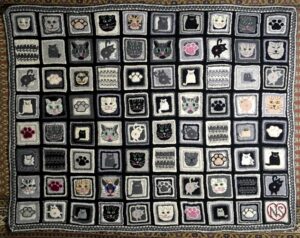
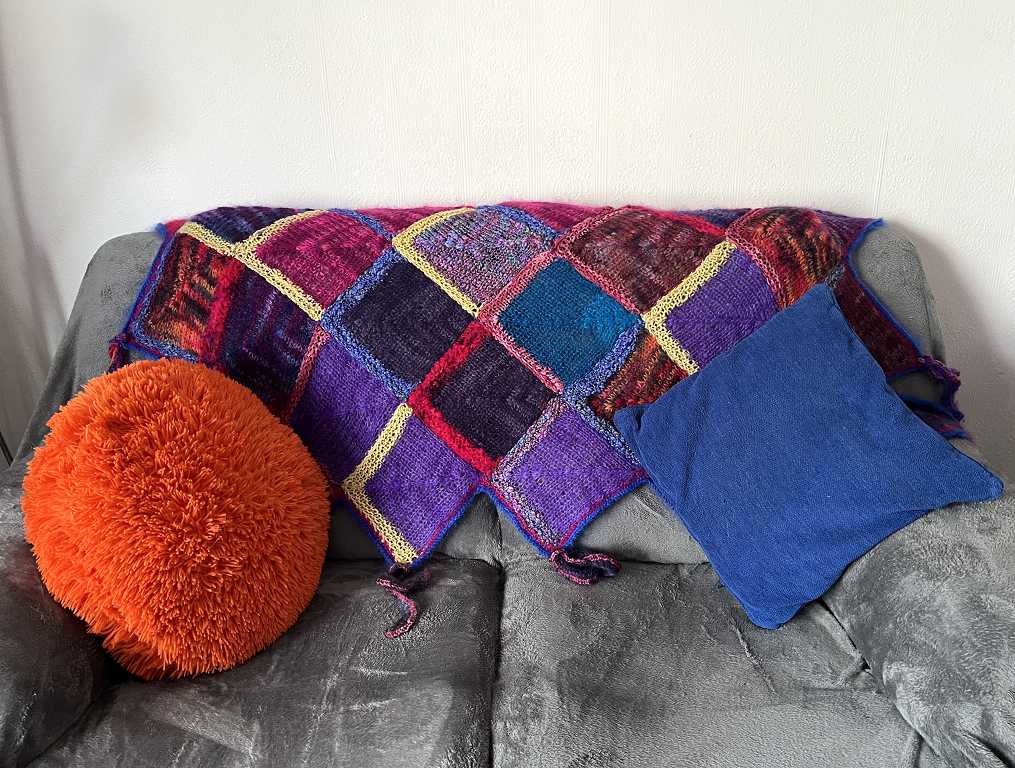
The completed blanket
The blanket is wonderfully lightweight and soft. The only problem with it is that the knitting is so loose (I worked on large needles deliberately, in order to produce the light and fluffy effect from the mohair) and I could see that if I were to use this as a lap rug, it was soon going to get seriously pulled by kitty claws!! I decided to use it as a throw over the back of the settee in place of the patchwork quilt I’ve had on there for a while, and take it upstairs to lay over the bed in cold weather, and use it as a lap rug when I go out.
![]()
![]()
I am super-pleased with the final result. At last, this beautiful piece of knitting has been given a new lease of life in a shape which is far more useful for me. It has emerged from the bag where it was being stored, and is now going to be used and enjoyed, and put on display, as it should have been from the beginning.
I am hoping my friend won’t visit my blog and see this – it’s not likely that she would – because she might feel hurt that her gift had been completely remade because it was unsuitable. I should hate to hurt her feelings in this way. I may have re-knitted the whole thing, but the concept is still her own, as is the colour choice, and the use of yarns – everything she gave me still exists, but just in a slightly different form. I hope that if she does see it, she will understand, and realise that I have kept to her original concept as far as I possibly could. I am so grateful to her for her kindness, and shall think of her as I use and enjoy this beautiful blanket.
Here’s a montage of the original and the redone version, for comparison.
Future plans
I have a large banana box of mohair, with several large cones. The colours are blues, turquoise and purples mostly, and some green. I am thinking of making another blanket to a similar design, and have been interested to discover a lot of variations in the designs of mitre squares online.
The mitre square is much more interesting to knit than a regular square, and is much more attractive and artistic in the end, than those boring garter stitch squares that people make endlessly, to create blankets for charity. Nothing wrong with them but they do have a certain generic look that reminds me of old ladies. This old lady wants to make something a lot more interesting!
You cast on an uneven number of stitches, and on alternate rows you decrease by two stitches in the centre, by slipping two stitches onto the right hand needle, knitting a stitch and passing the two slipped stitches over. As you progress, this has the effect of distorting the knitting, pulling up the initial rows into a diamond shape. As you carry on, the number of stitches decreases until you reach the point at the top, at which point you fasten off. If you begin each square with a few rows of contrasting yarns of different colours for each square, you end up with the effect of overlapping scales when you construct the blanket. However, if you make these rows the same colour for each square, you end up with the effect of a border around the whole square which is not nearly so effective.
There is a way of knitting the squares together as you make them – as my friend had done. I might explore this in future as the result is neater than sewing, but you would have to do more advance planning at the beginning.
Just looking at my friend’s original piece, I could not for the life of me work out how she had constructed it, and it was so frustrating! Another reason it kept being put back into the bag and stored away again! Now I’ve learnt how to do this, the sky’s the limit and I could make any nunber of squares. They are very quick to make, and the interest of the decrease rows makes the knitting process a lot more interesting while not being too complicated. Ideal for knitting while out and about, or while watching TV.
New knitting needles
Some time ago I got rid of my case of long straight knitting needles as I really dislike knitting with these. I much prefer working with a circular needle, for flat work as well as knitting in the round. Some time ago I bought a gorgeous set of interchangeable ones, and these are quite fine.
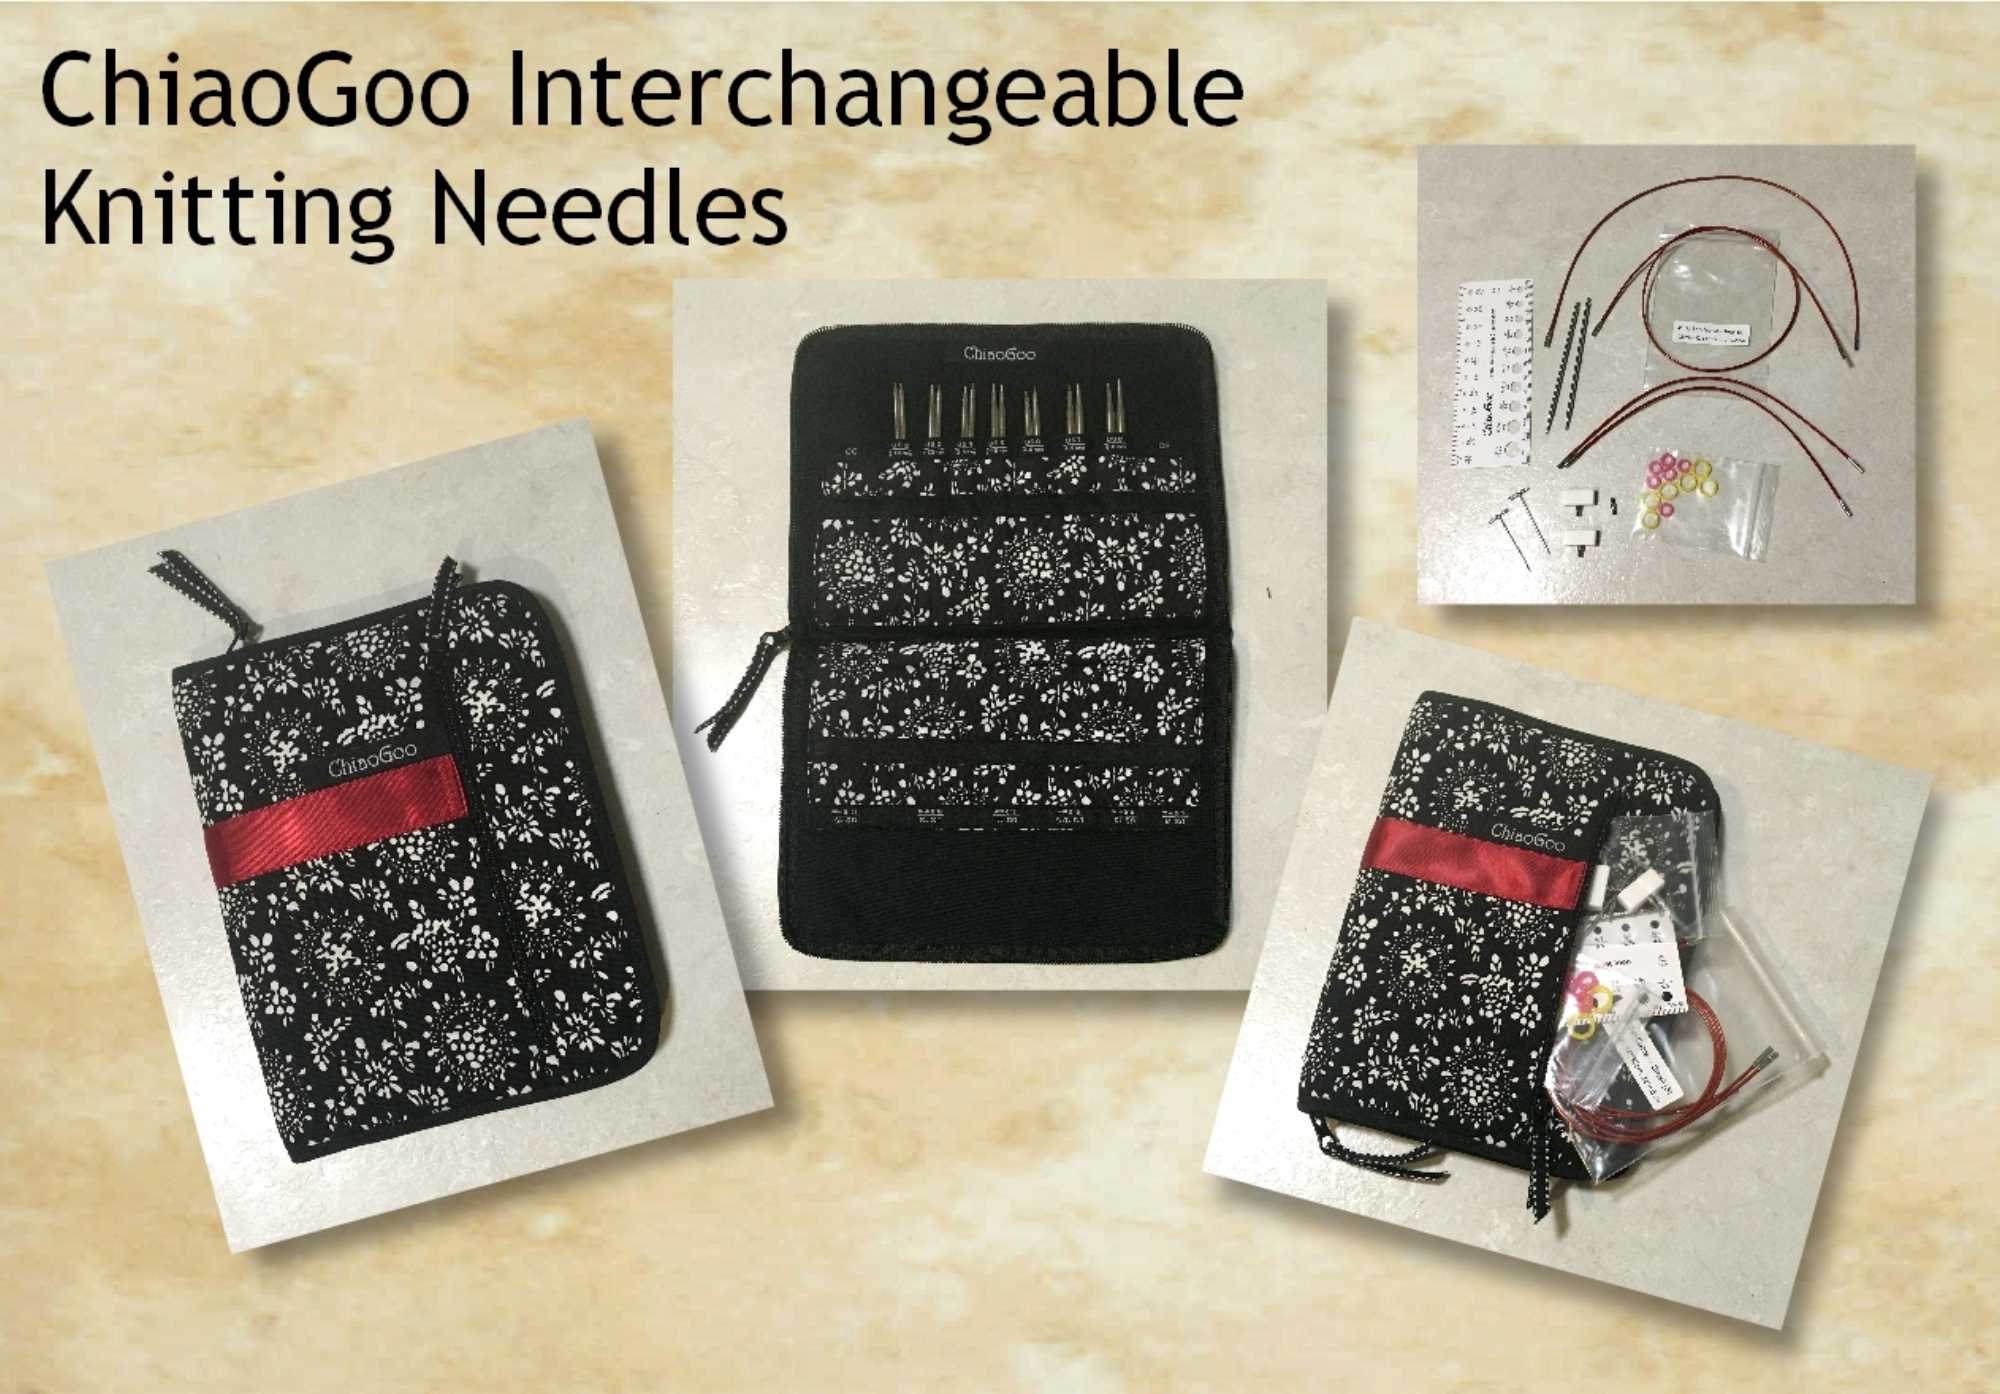
Working with the mohair, I wanted to use really thick needles to create the nice light and airy effect, and had nothing suitable. I found another set of interchangeable needles, this time with much larger ends. I bought this back in January when I started the blanket project, and forgot to post about them at the time.
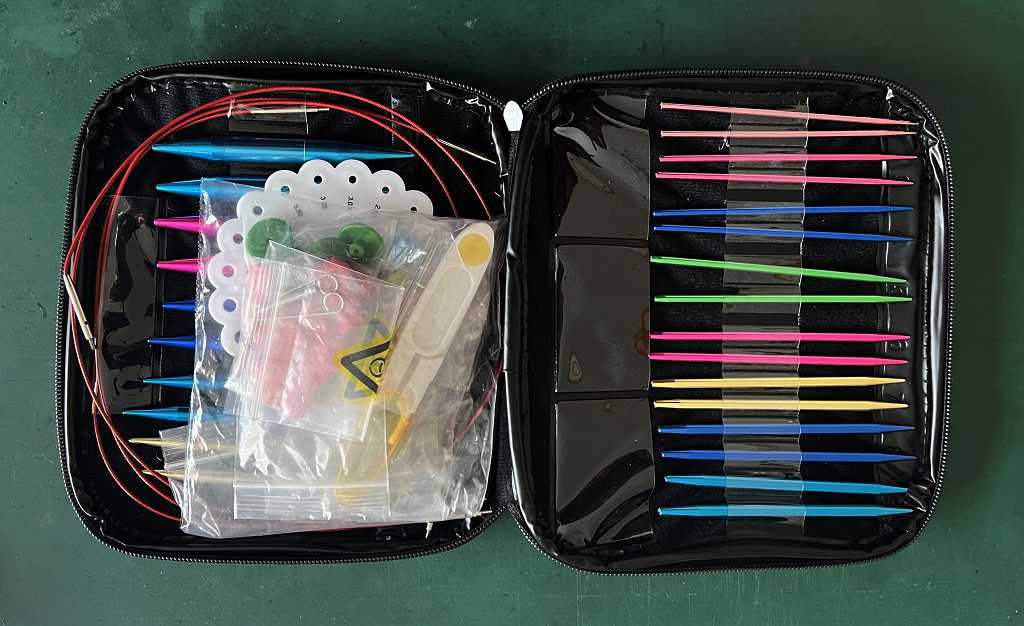
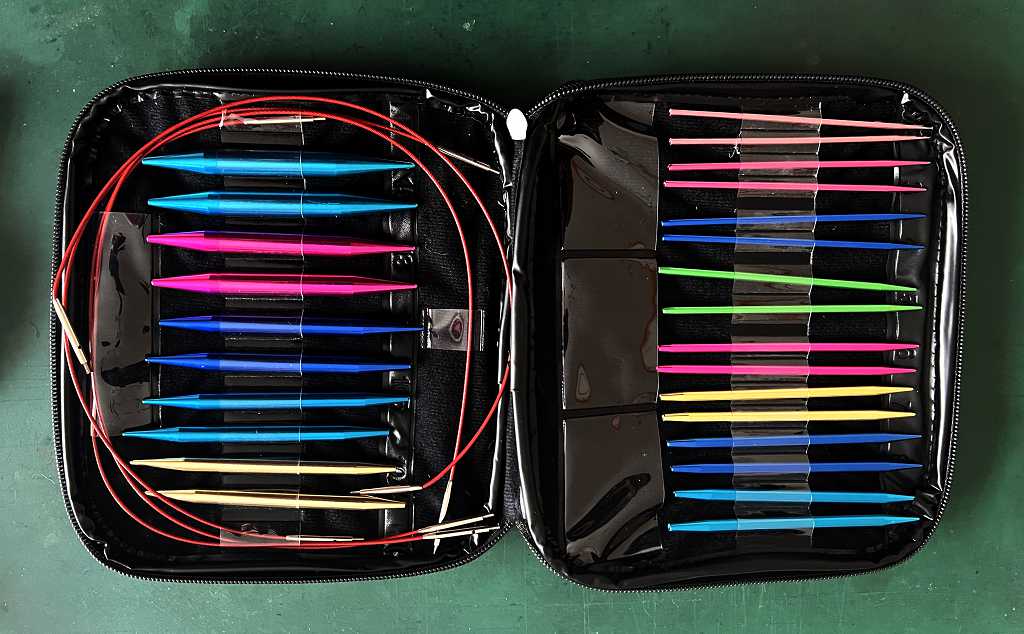
I used the 9 mm ones for this project. When attached to the flexible cord, there is quite a sharp incline between the cord and the thickest part of the needle part, and it was sometimes a bit of a struggle getting the stitches to slide up this in order to work them. The yarn on the needles was also quite slippery and I did drop a few stitches here and there, but as I progressed with the project I got used to working with them and they did the job just fine. I am delighted to have another set of interchangeable needles as I now have a comprehensive set of most sizes.
This set also came with some additional tools.
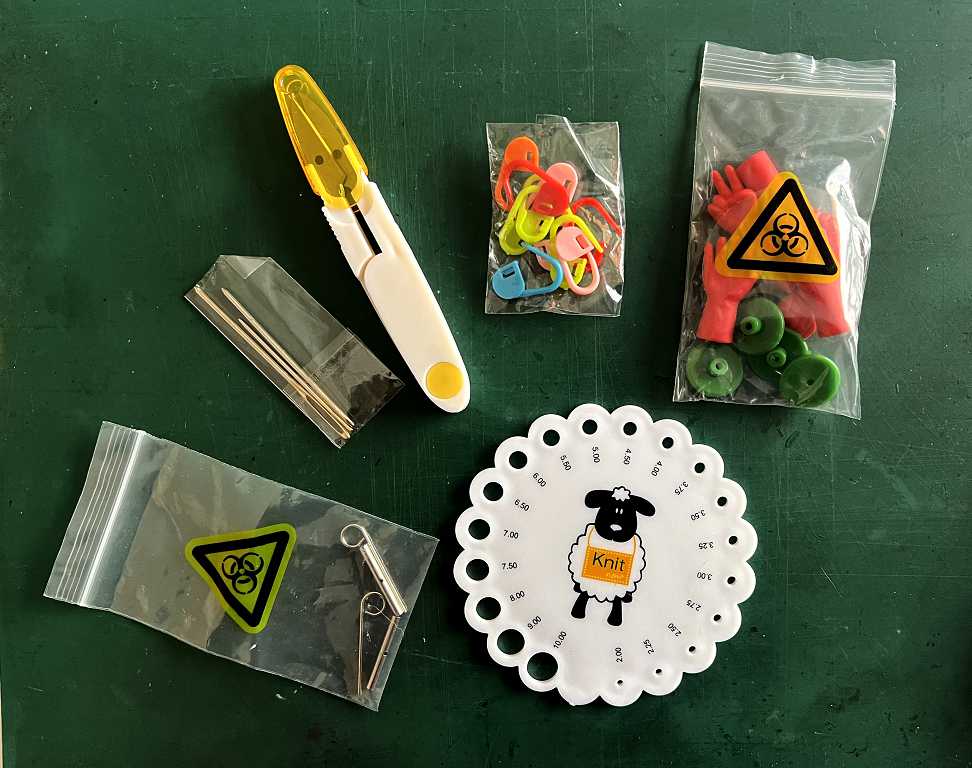
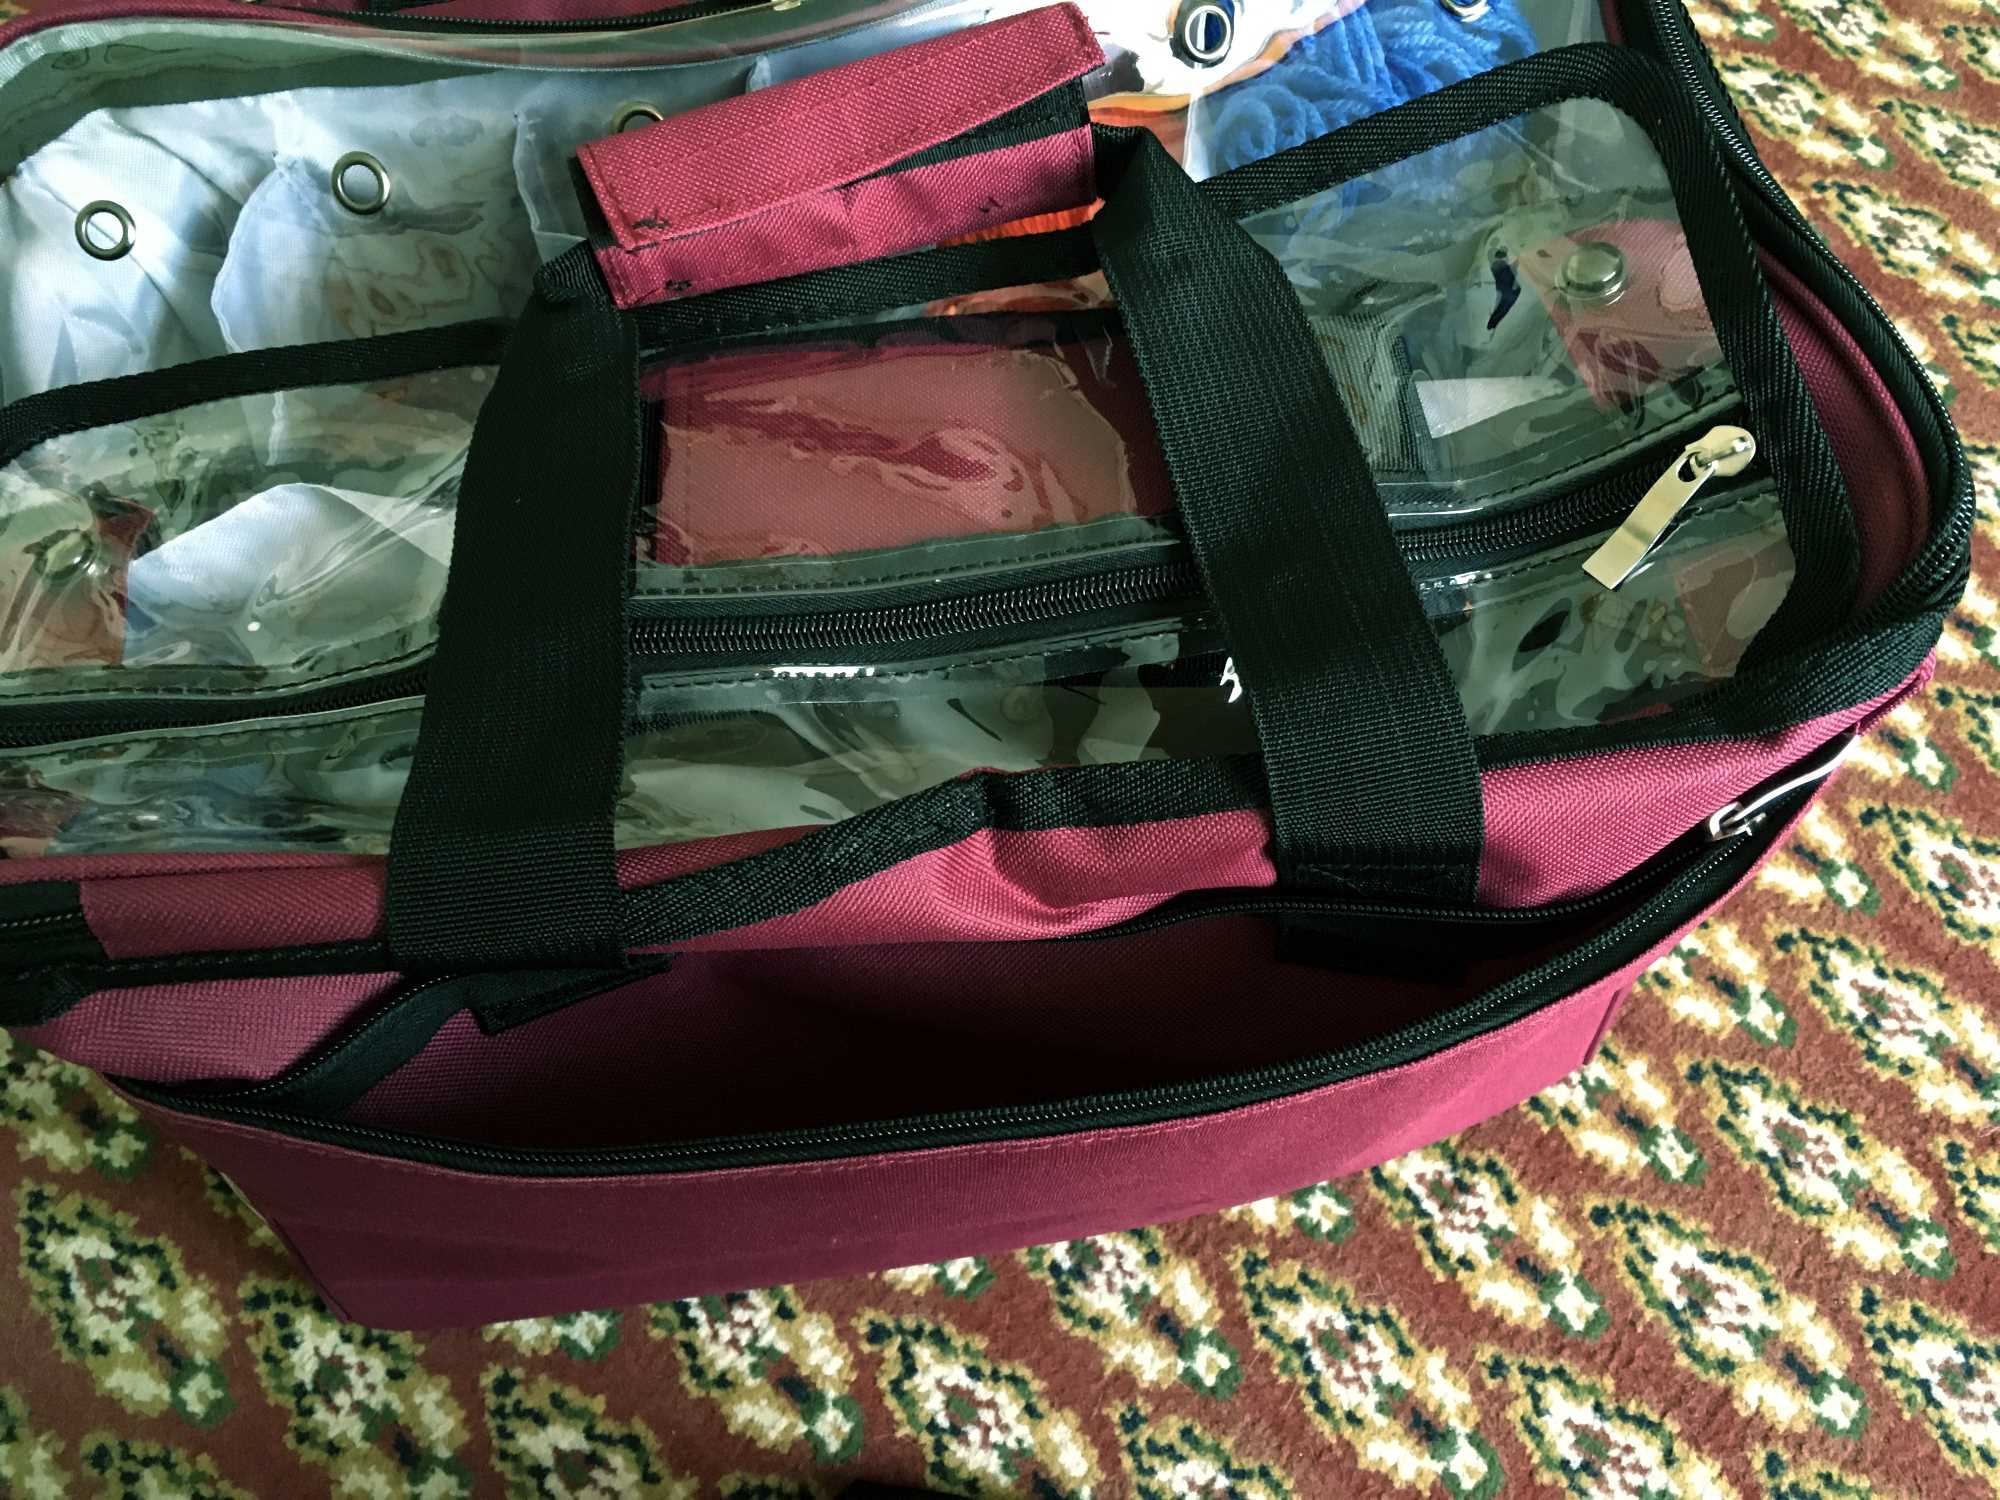
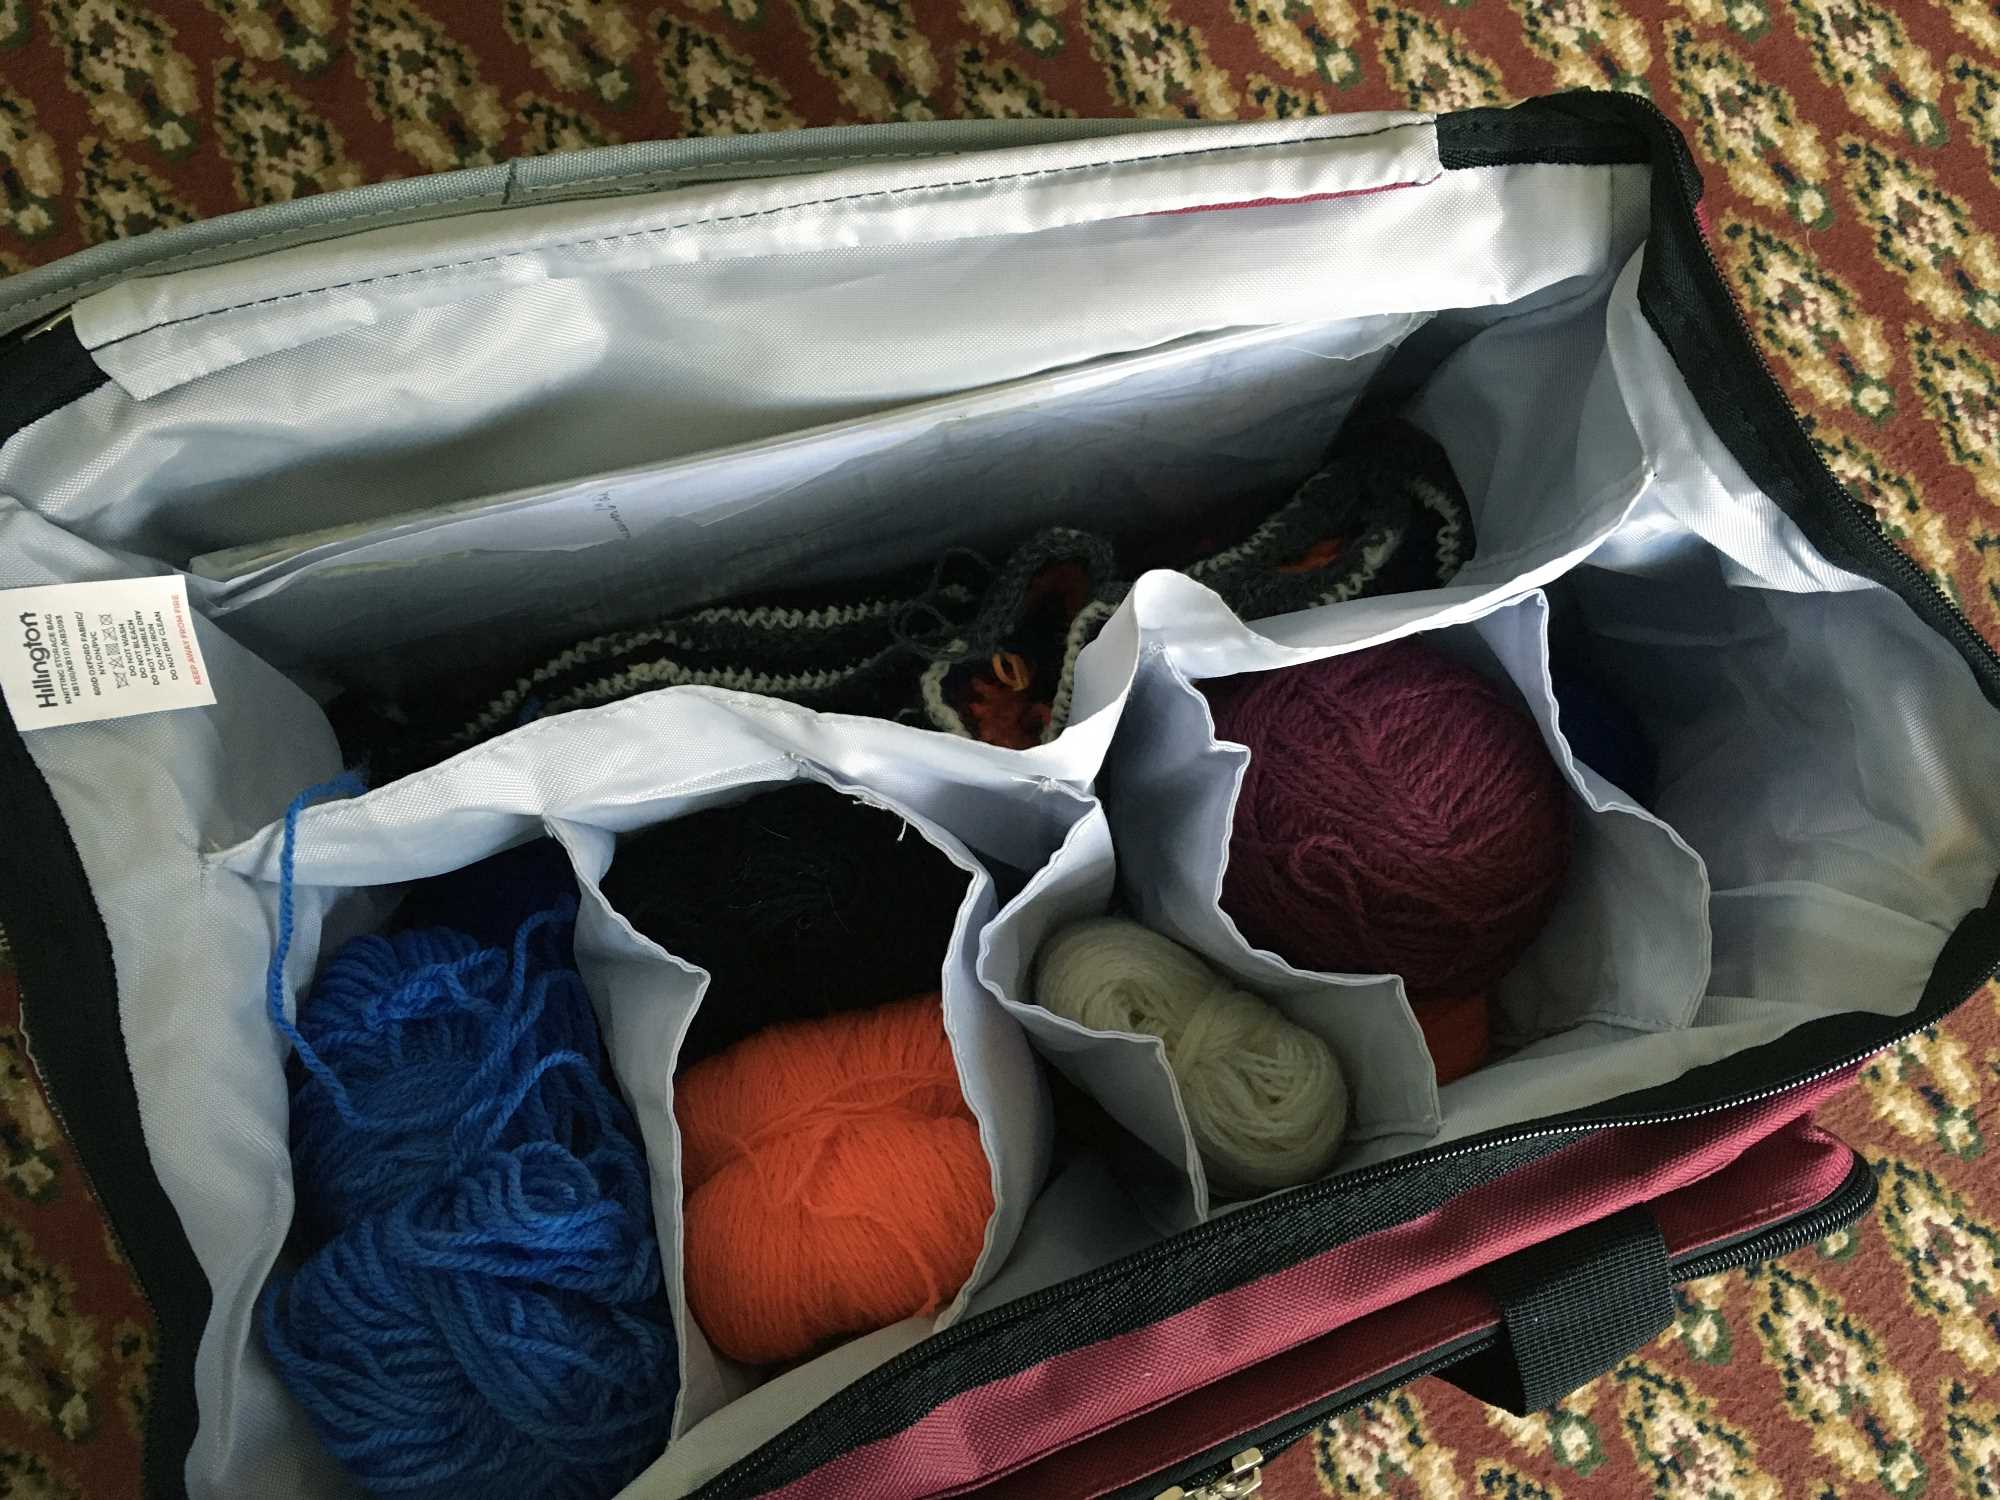
All very useful. This set will be stored along with the other one, and my sets of crochet hooks, in the gorgeous big knitting/crochet bag my hubby gave me for my birthday a few years ago.