Sprouted seeds and microgreens are far more nutrient rich than either the ungerminated seed, or the mature plant. This is because the seed, as it germinates and begins to sprout and grow, releases phytonutrients essential for the growth to maturity of the plant; once the plant is mature, it no longer needs these and their production is shut down. Sprouts and microgreens are therefore rich sources of nutrients for us to eat. The flavour is often more enhanced than in the mature plant as well. These tiny packets of nutritional goodness make delicious additions to salads, or can be used as garnishes or in stir-fries, or as ingredients for smoothies and soups. The limit is your own imagination.
I decided to begin small, and ordered small quantities of seeds to see how I got on initially. If my first attempts prove successful, I can order in bulk.
It is important to buy organic seeds specifically sold for the purpose of sprouting if possible. Many commercial packet seeds for garden sowing are coated with chemicals, either to prevent early germination, or to stave off pests, and we do not want to be consuming these.
The seeds I ordered initially for sprouting were fenugreek, red cabbage, pink kale, alfalfa, and tendril pea. The peas are for growing into microgreens and the seeds for sprouting.
The difference between sprouted seeds and microgreens is that the latter are allowed to grow more than the sprouted seeds. When a seed first germinates, the first to emerge is the root, and then a short stem with two seed leaves or cotyledons (or a single one for monocot plants, for example wheatgrass). These cotyledons begin to photosynthesise, allowing the plant to start producing its own nutrients from sunlight and carbon dioxide, and as it grows, true leaves begin to emerge. The pea also produces little tendrils, which would help the plant climb up a support, if it were allowed to grow to maturity. Tendril pea microgreens are extremely attractive to look at and make wonderful garnishes – anyone who has watched MasterChef on TV will be familiar with them. They are reputed to have the delicious flavour of freshly-shelled garden peas eaten raw. I can’t wait to try them – this will bring back so many happy childhood memories of sitting in the garden in the sunshine with a bowl on my lap, shelling peas. I loved the popping sound the pods made as you squeezed them, and the feel of the little green peas being pushed out of the pod so that they bounced into the bowl. Somehow there just isn’t the same magic when you open a pack of frozen peas!
Obviously, being allowed to grow further, microgreens are going to take longer to develop than sprouted seeds – about a fortnight, as opposed to 5 to 7 days.
There are various ways you can grow both varieties and I have done some research on YouTube. I wanted the simplest method possible so that I wouldn’t have to invest in expensive equipment, or need to free up a lot of space.
Sprouting seeds
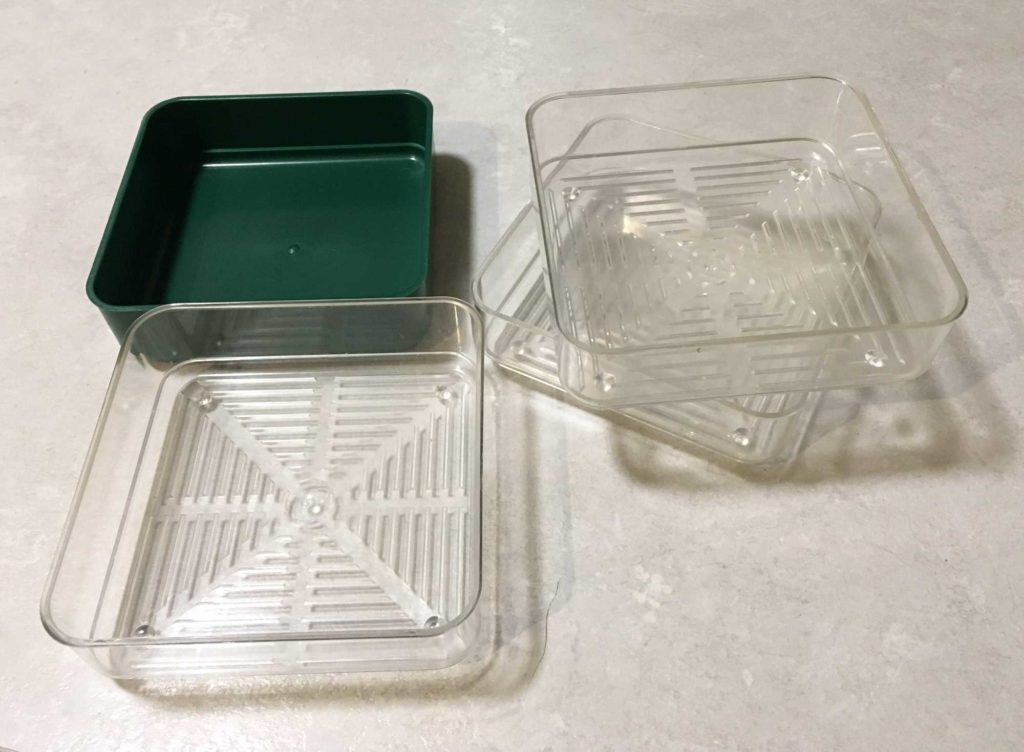
I already have in my possession a plastic sprouter in the form of a water container at the bottom and three stacking trays with drainage holes. I have used this on and off in the past with variable degrees of success, mostly because I never had any instructions with it and didn’t really know what I was doing. I found something equivalent being demonstrated on Youtube and have written out some instructions for myself based on this video.
![]()
On the video and in the comments below, it is suggested that you start either different varieties, or the same variety, two days apart for each tray, so that you do not end up with a huge crop all at once, but a continuous supply, so this is what I am planning to do.
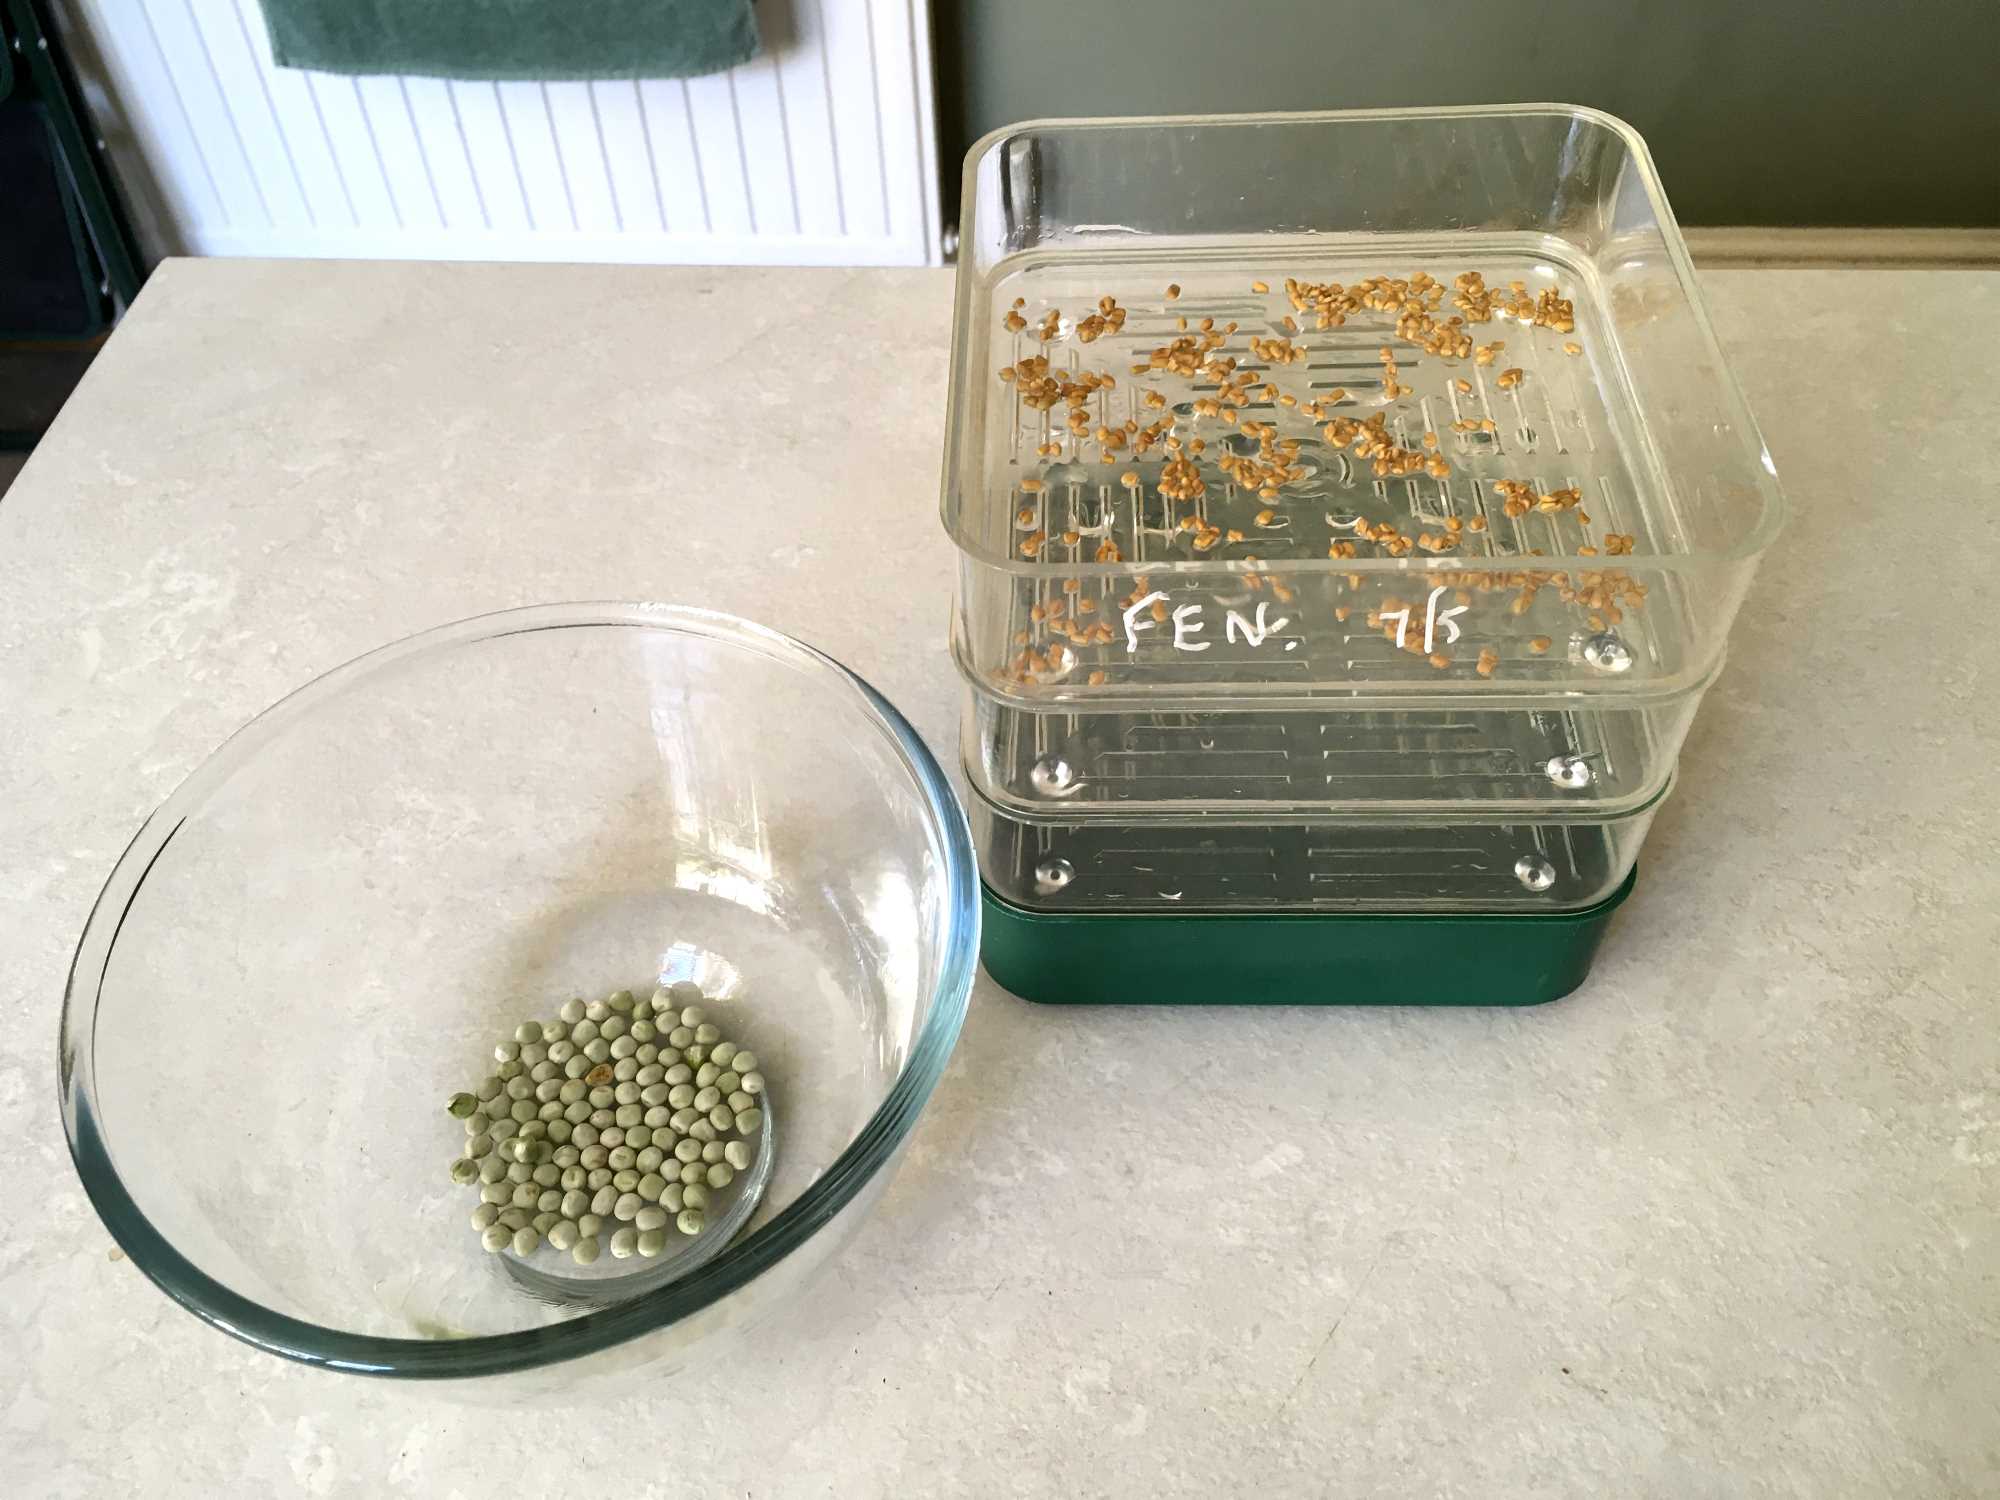
At the time of writing, not all of my seeds have arrived, but I have the fenugreek and red cabbage, so I have started with the fenugreek.
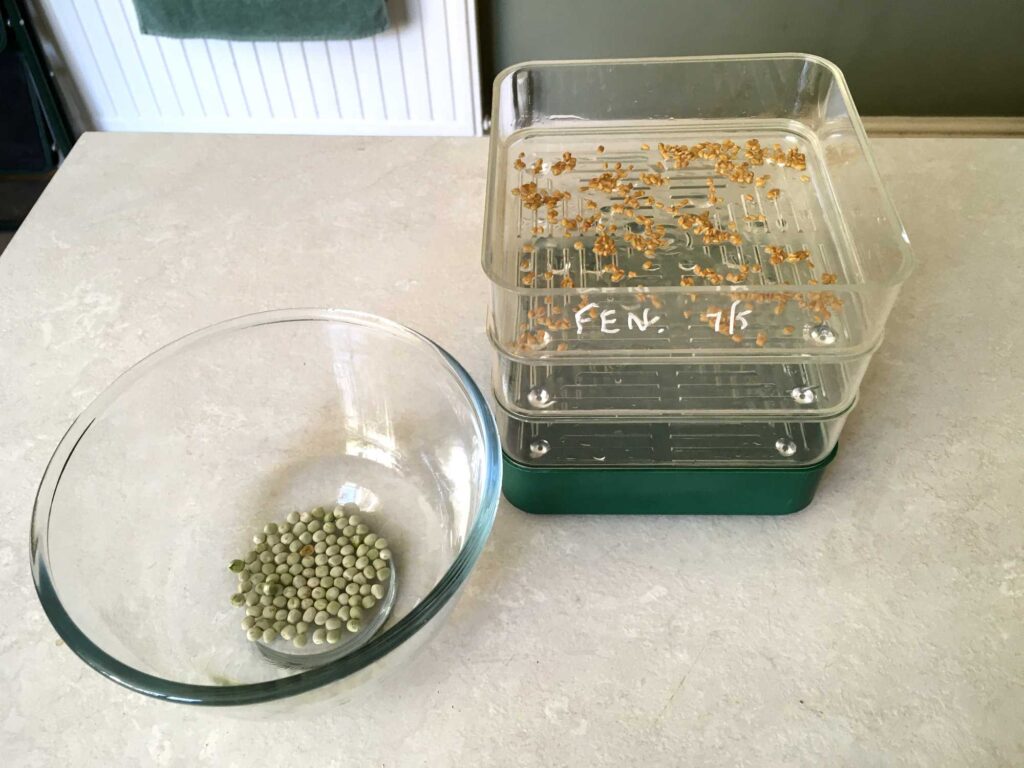
You can see that I have spread about a teaspoonful of fenugreek seeds into the top tray. The instruction is for a maximum of 1 1/2 teaspoons of seeds but I am starting small. I poured 2 cups of filtered water over them which drained into the water container. Since I am going to be sprouting a variety of seeds, starting on different days, I have marked the tray for Fenugreek, with the date I started; this way I shall be able to keep track of how the process is going.
The sprouter was placed in the pantry which is relatively dark. Seeds prefer darkness in order to germinate.
Each day, morning and evening, I shall empty the reservoir and pour fresh water through, and each time, I shall be taking the bottom tray and putting it onto the top, rotating them so that they will germinate evenly. This will take 5-7 days.
Tendril pea microgreens
In the above photo, you can see that I have put about a tablespoon of the peas into a bowl and covered them with filtered water. They need to soak for several hours (or overnight), in order to swell and soften them, but not too long, or they can start to rot. I have deliberately started with a small quantity, to see how it goes. If this first batch is successful, I will feel more confident about growing a larger quantity next time.
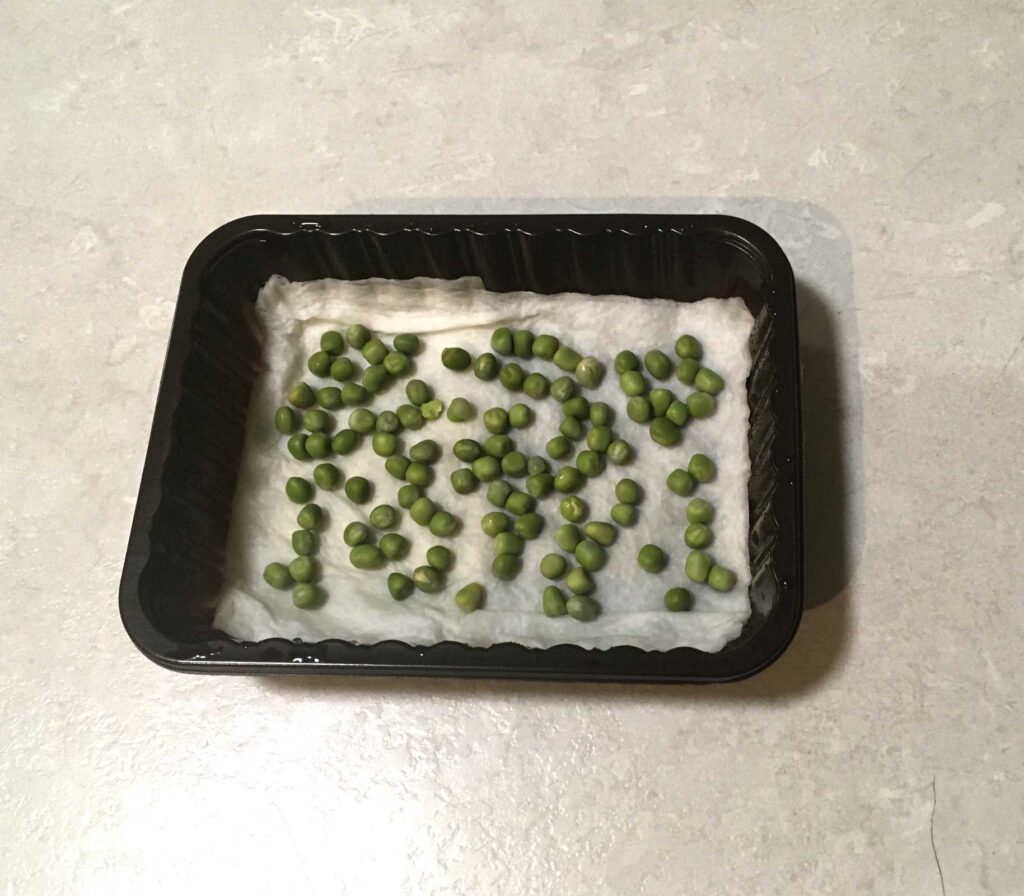
The next step was to set up the tray to begin the germination process. I am keeping this process ultra simple, according to the best YouTube video instructions that I could find; there are plenty of instructions for specialised microgreen growing set-ups, with banks of LED lighting and so on, but it is apparently perfectly possible to grow them with simple water on a moistened kitchen paper substrate without the need for specialist growing media or hydroponic solutions. I am using the small brown plastic trays that the mushrooms come in from the supermarket – these do not have drainage holes, and will fit easily on my kitchen windowsill.
To start the process, I have lined one of the mushroom trays with kitchen paper and spritzed it with water to moisten it. I have spread the soaked peas out on this.
I took another of the mushroom trays and put it on top of the peas so that the bottom of it is pressing them down onto the damp paper, and added a weight to keep it in place.
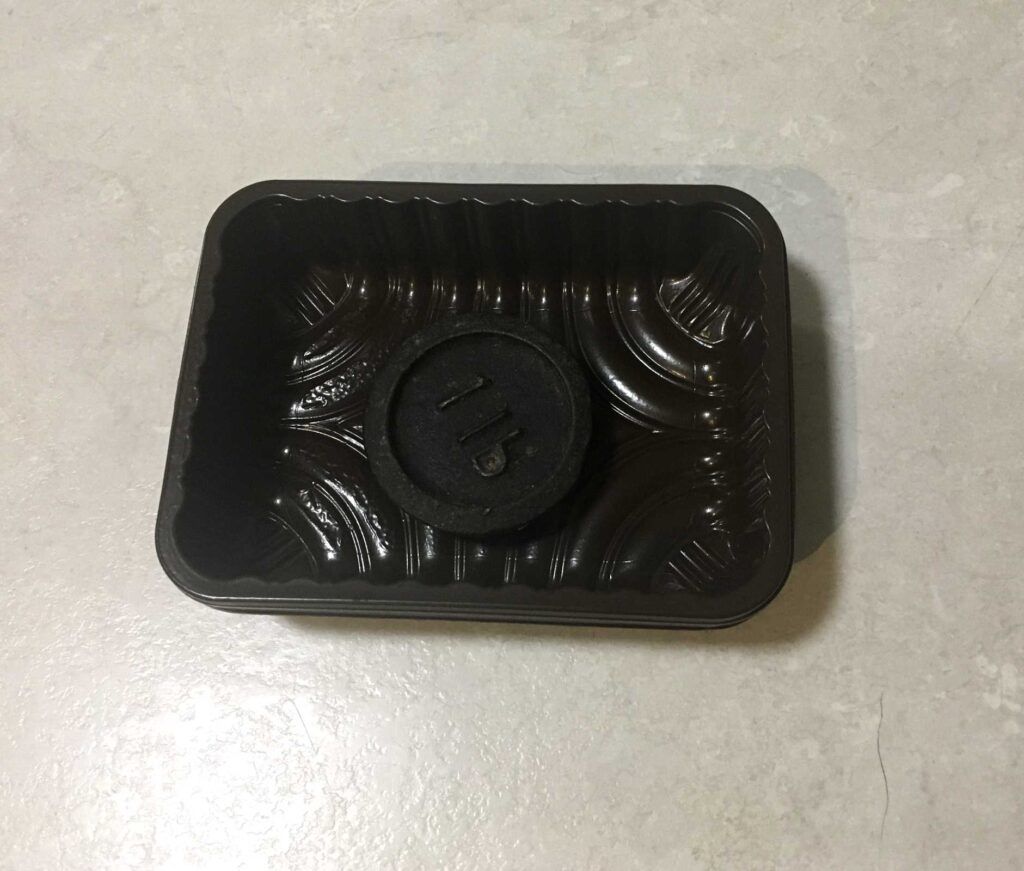
This will keep the peas dark and moist and encourage germination. I have put it in the pantry with the seed sprouter. They have to be left like this for three days.
Watch this space for further progress.