What’s On Your Workdesk this Wednesday?
Well, this week, I’ve been quite productive! …and also not. And messy. From this (Monday evening) (Wow, am I ever this neat?):
to this, in just 24 hours.
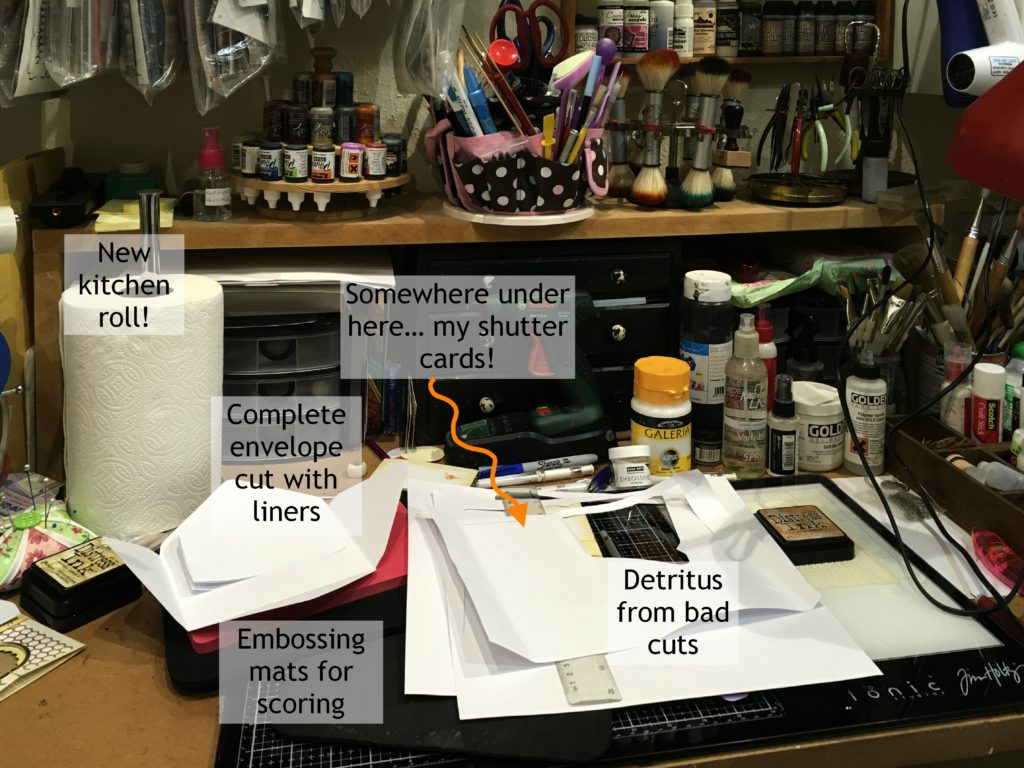
That’s more like it. Back on form – messy. On Monday night I spent an extremely fruitless few hours trying to cut an envelope and some envelope liners. I made lots of mistakes because of not knowing the software that well, and the machine kept getting stuck. In the end, at almost 2 a.m. I admitted defeat and went on the forum, and yesterday morning had a good reply with suggestions as to what might be going wrong. Last night I tried again and all was well.
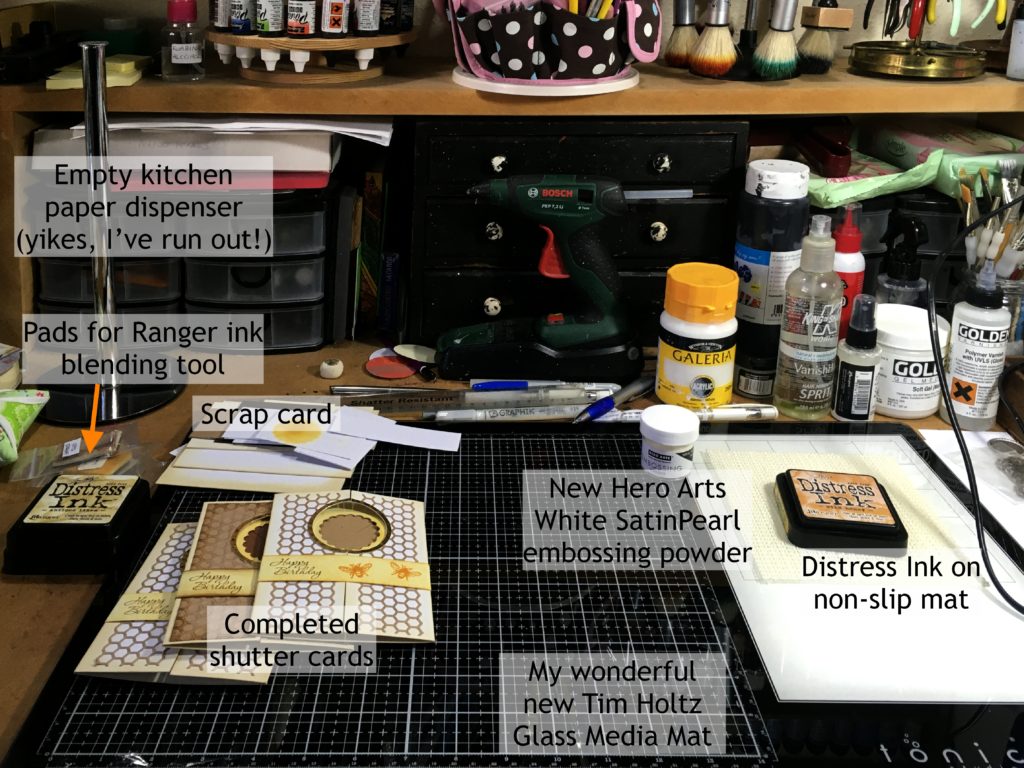
Back to the first photo, last week, someone said they put their ink pad on a non-slip mat on their Glass Media Mat, and I thought, what a good idea. I can’t find whoever it was, so please accept my apologies if you are reading this – anyway, it’s a great idea and it really works! Not only non-slip so the ink pad doesn’t scoot all over the place when you use it, but also it no longer makes that appalling finger-nails-on-the-blackboard sound when it does it!!
Cards
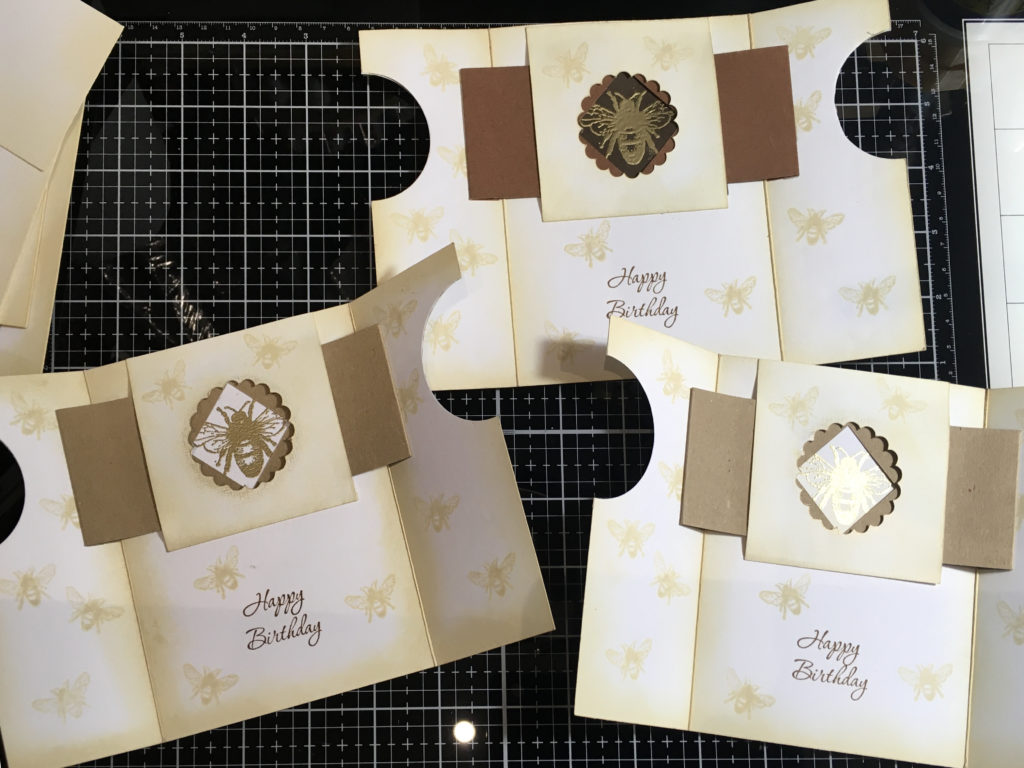
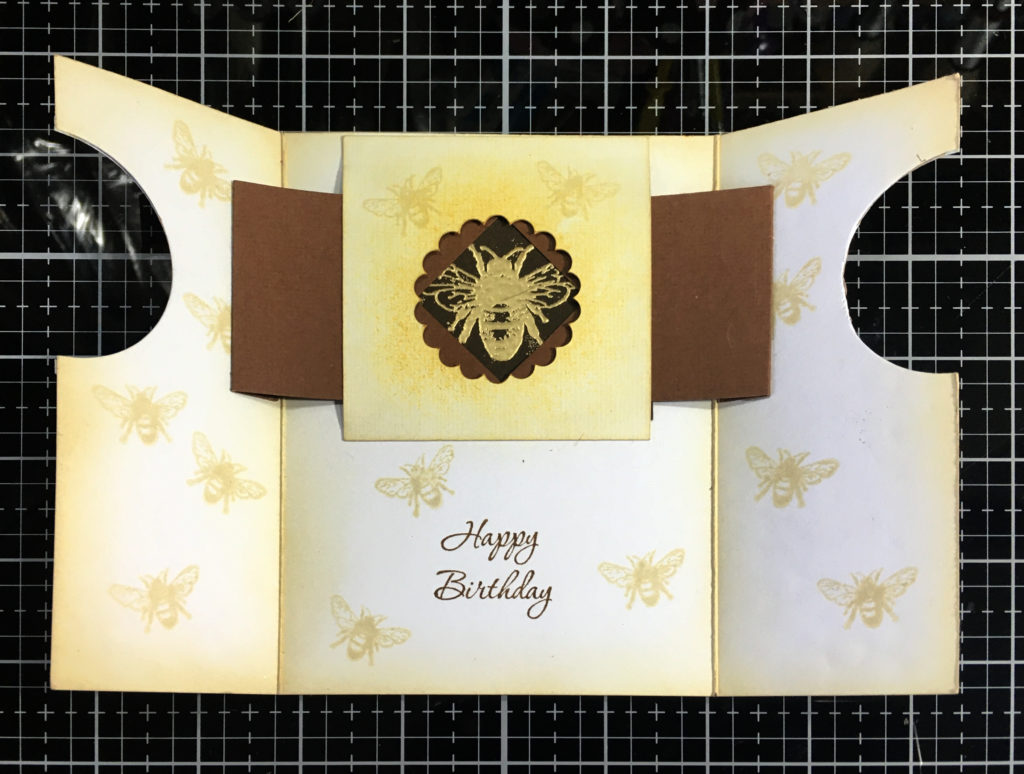
I’ve completed three of my shutter cards. Thanks to Sarah of Sarah’s Craft Shed for giving me a decent name for these! On the video from which I learned the technique, they were called “marquee cards,” but to me, a marquee is a tent for weddings and village fetes, and meant nothing to me in a card-making context! Shutter cards it is, from now on.
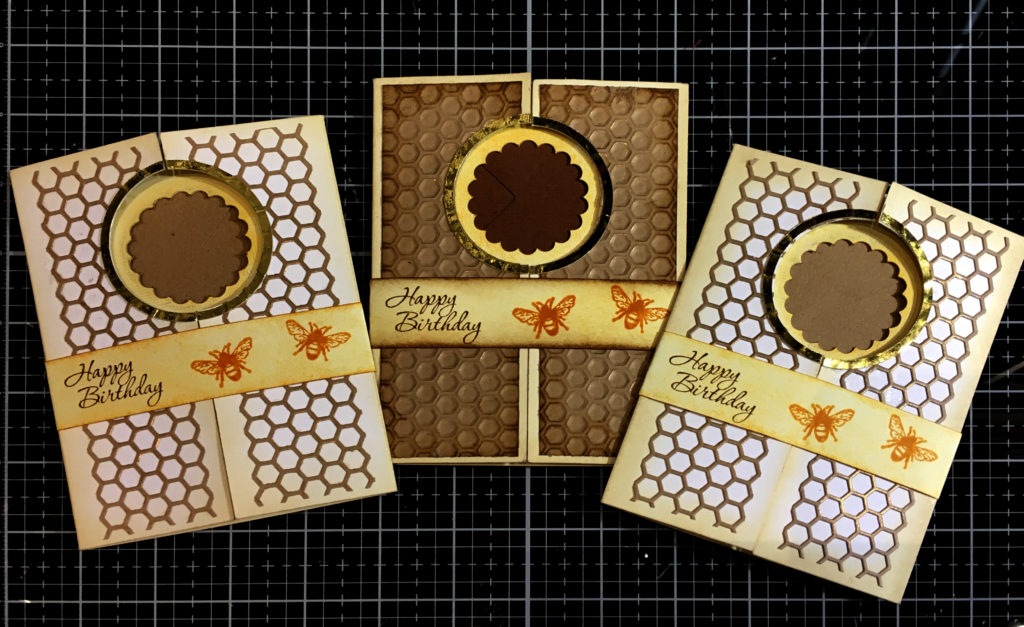
I am also grateful to Sarah for the idea of using a belly band to close the card. I always felt that these designs, with the division vertically down the centre, looked a bit tall and narrow, but the belly band seems to bring them back into proportion, and I am very happy with the result.
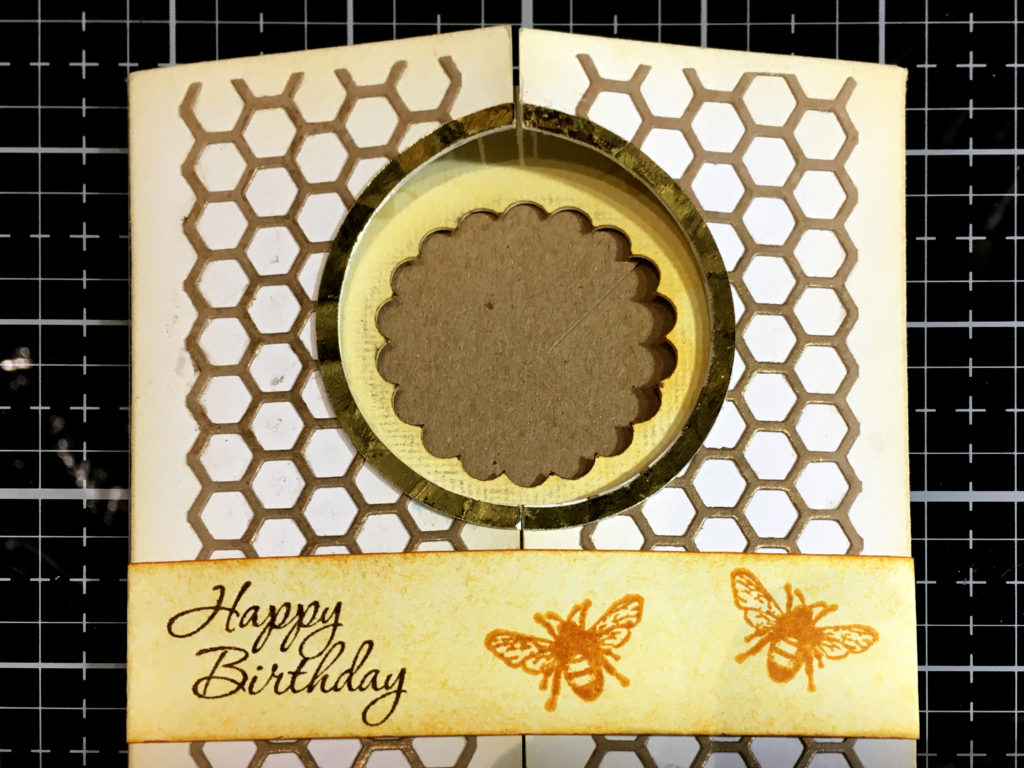
The stamp for the sentiment was part of a Stampin’ Up set that I’ve got. This has always been a total pain… The “Happy” and “Birthday” are separate stamps, so that you can mix and match with the “Anniversary” stamp. However, lining them up is virtually impossible without lots of trial and error, and the border surrounding the text is too wide so you really can’t mount them together on an acrylic block or stamping tool; you have to do the two words separately. Also, being rubber stamps rather than clear ones, you can’t actually see that you are lining them up correctly. I usually have to do three or four dummy runs until I get them right. I’m seriously thinking of not using them any more. I need to get another small script “Happy Birthday” sentiment.
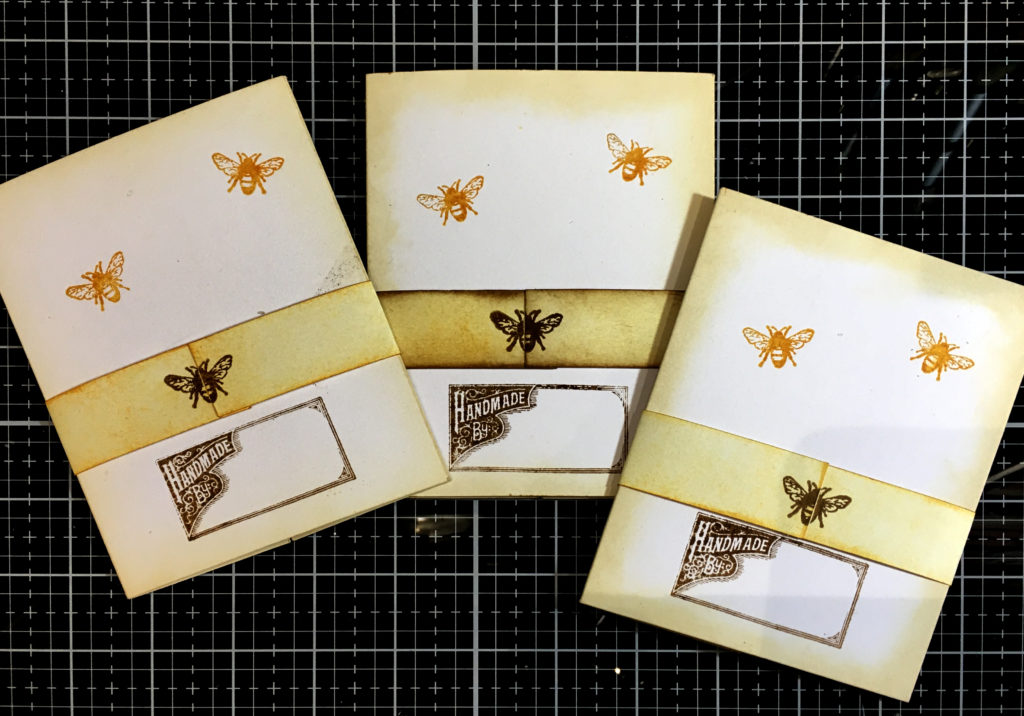
I stamped the sentiment on the belly band, using Gathered Twigs Distress Ink, and was very glad of my Tim Holtz Stamping Platform since I had three cards to do. Then I added a couple of little bees for good measure, stamped with Wild Honey (appropriate!) Distress Ink.
On the back of each card, I stamped a couple of bees with Wild Honey Distress Ink, and another one with Gathered Twigs on the belly band. The “Hand Made By” stamp was also done with Gathered Twigs, and I shall sign it with a sepia pen.
I did them slightly differently from the first one which I sent a friend for her birthday on New Year’s Day:
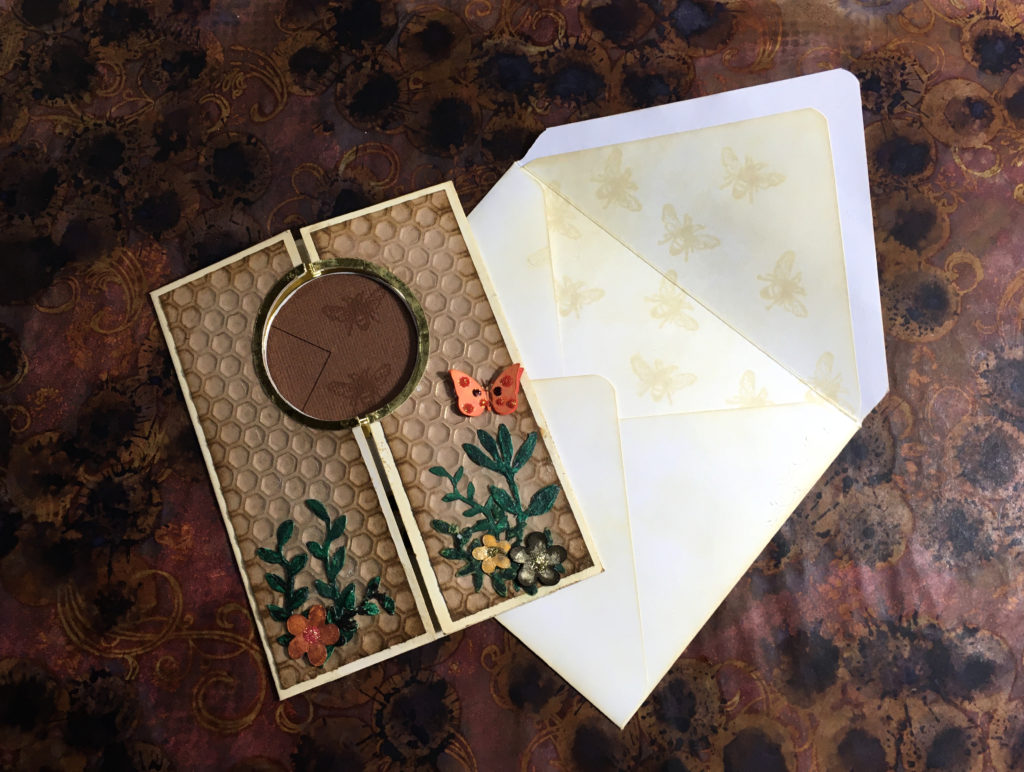
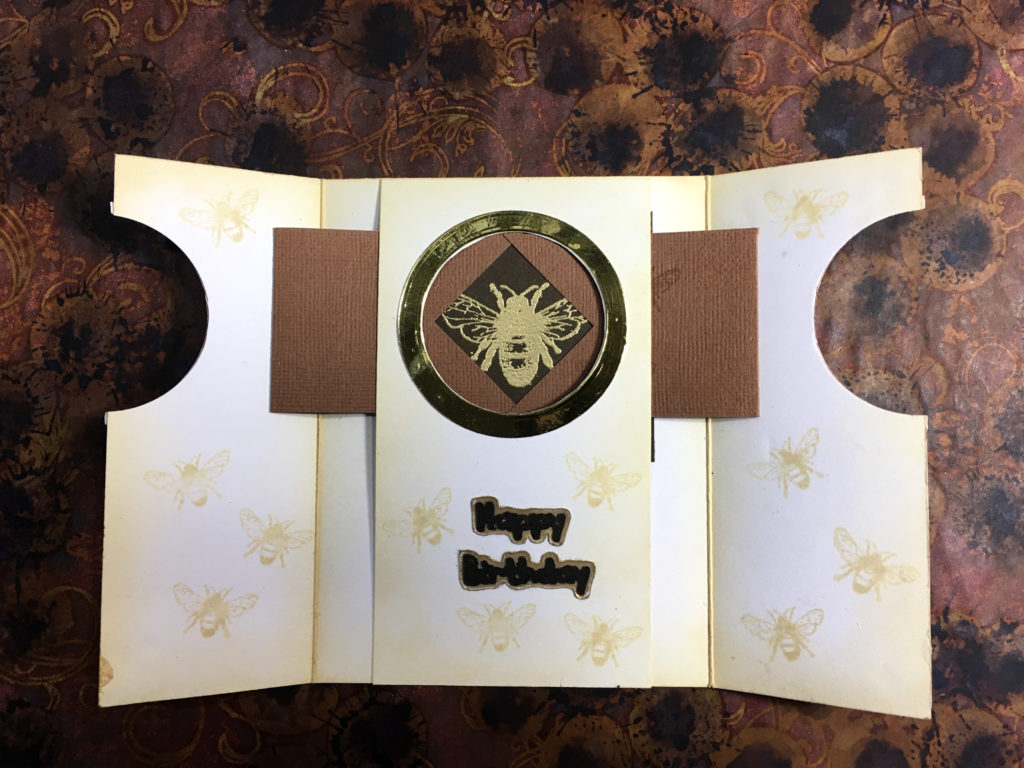
For full details of that card, please see my post on 1st January. When I was working on the insides of the latest ones, I was having a particularly foggy day ME-wise, and it would have been far more sensible not to have gone into the studio at all, but I was getting so frustrated with not getting in there. I ended up stamping bees all over the main part of the card base instead of on the additional central piece with the window in it. Rather than scrap them, I decided to cut the central piece short. This would have been OK if I hadn’t glued the bottom so close to the window – initially the “curtains” wouldn’t work because it was all too tight. I had to take it apart and put some much narrower double-sided tape down. Once it was done, I actually preferred the shorter central piece. I had to fiddle around with the window as well, and gave up on the punch which wasn’t working too well; I cut a new window piece with the scalloped part on the cutting machine. Eventually I shall make a cutting file template of the whole card. Far too much faffing around on this, and if I ever want to do this again, I shall want a more straightforward method which doesn’t allow for so many mistakes.
Here is the final result on this second batch of the shutter cards.
Digital
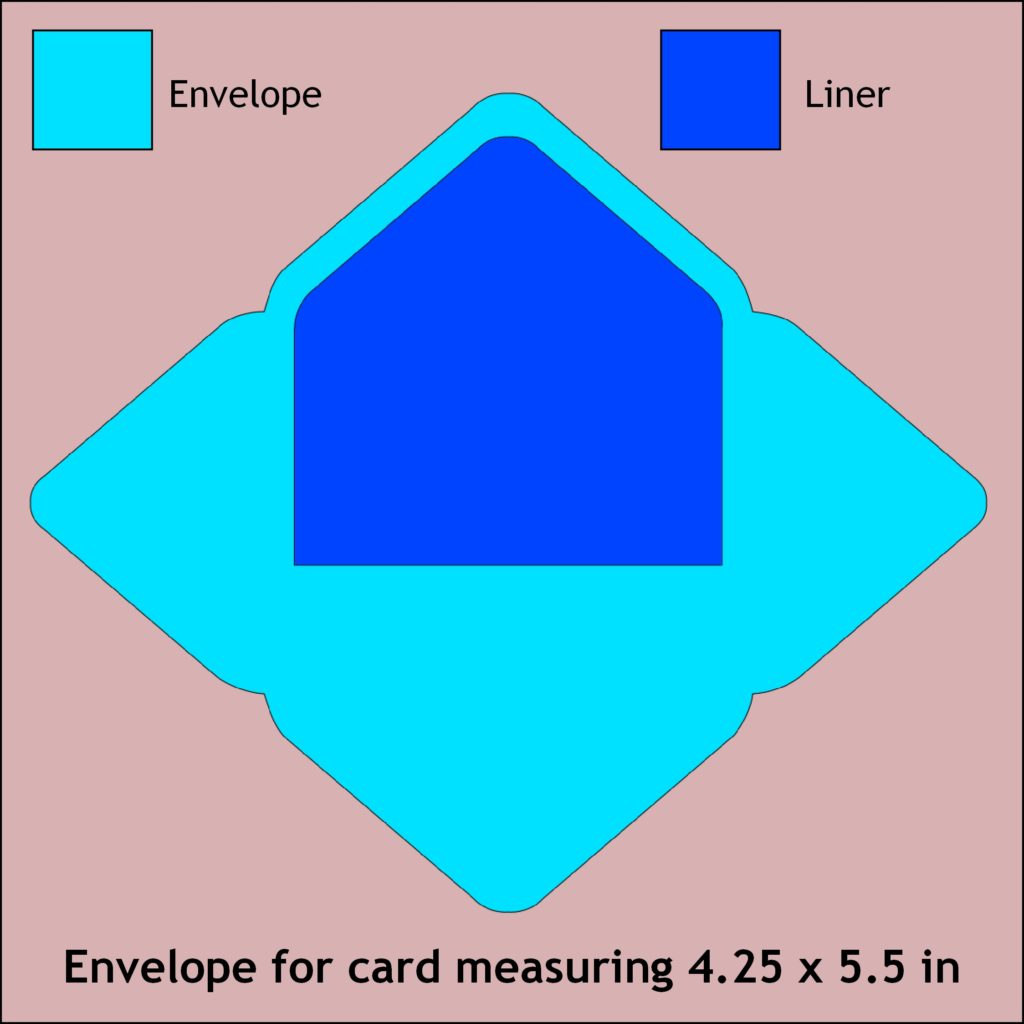
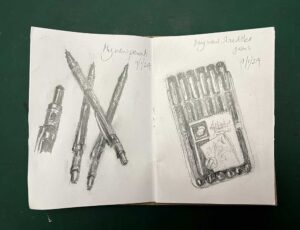
As I mentioned earlier, this week I have been working on a couple of svg (scaleable vector graphics) files to cut envelopes. Here are the bitmap images. The first is for a standard 4 1/4 x 5 1/2 in card.
The second is for a larger card measuring 5 1/2 x 8 1/2 in.
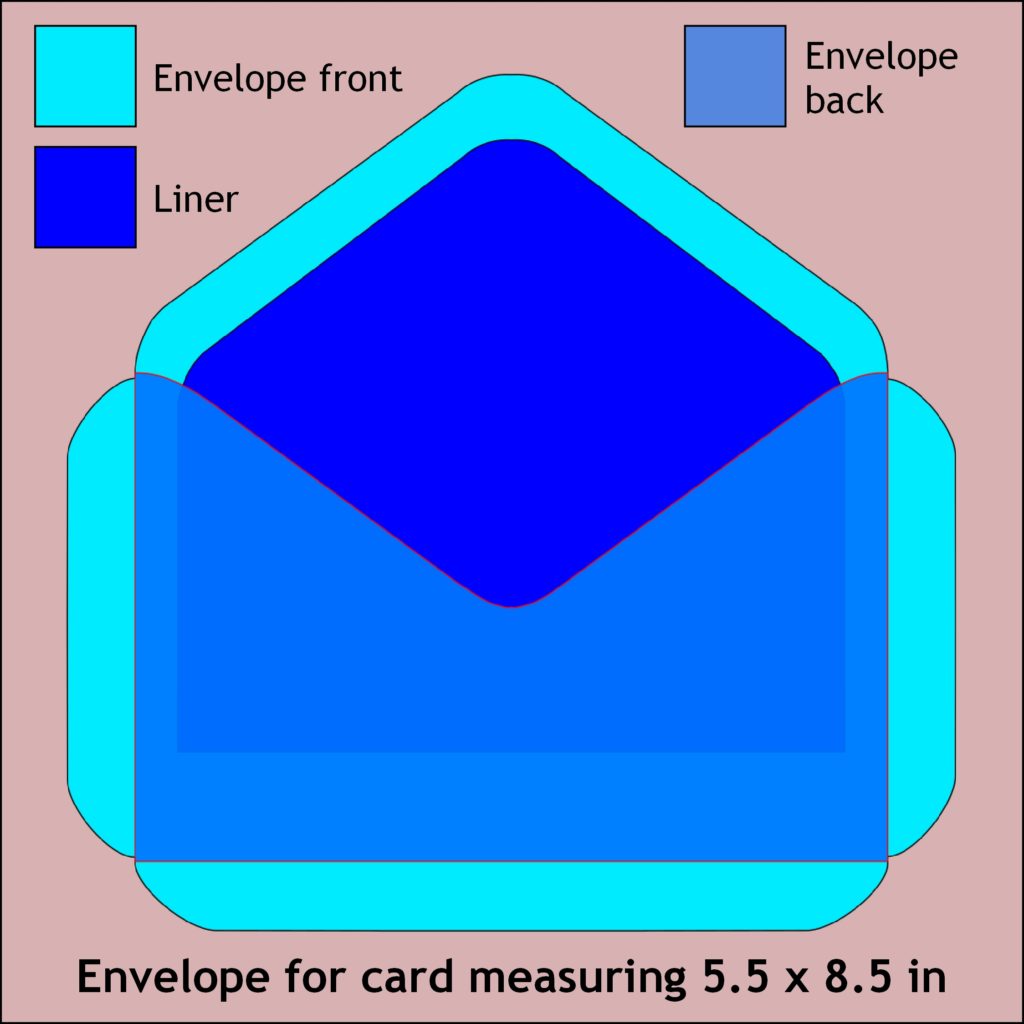
In this illustration, the envelope back is filled with a semi-transparent colour so that you can see the extent of the liner through it. Being a larger envelope, I was not able to get the whole thing from a single sheet, so the file is in two parts – the envelope front, which is the largest piece, and the back and the liner cut from another sheet. Of course, I can cut the liners from a contrasting paper if I want. I do tend to cut a lot of white, which I can then ink and embellish as I choose.
On the envelope front, you can see the flaps which will be scored and folded. The smaller envelope is cut from a single piece, and the points come together in the centre to be glued in place. The larger one, being in two pieces, has flaps on the front piece, to be folded around the back and glued in place.
All these pieces were designed in Inkscape. The envelope for my friend’s birthday card was done on my envelope punch board.
Although I do have this envelope making tool, I thought it would be nice to have some digital cutting files so that when I am cutting out the card templates, it is just a small additional step to cut the envelopes too.
This is a 3 x 3 in envelope I designed in Inkscape way back in 2011. It would be a simple matter to scale this up to a square card of any size that would fit on a single sheet of paper.
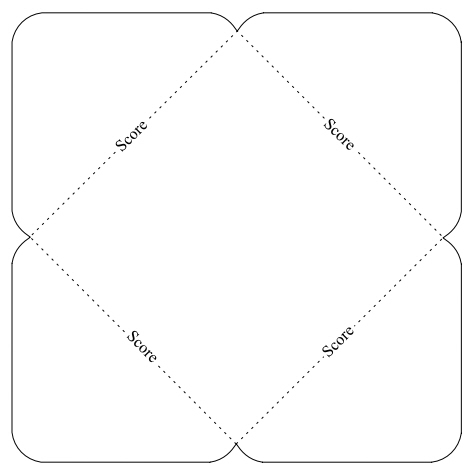
In this case I’ve added the score lines. They would not appear on the cutting file. Some people do cut a perforated line for folding, but I don’t like the look of this because you can see the slits in the paper, and it makes the fold look lumpy. I prefer to have a template with the positions of the score lines indicated if necessary, and these are then removed before the file is sent to the machine for cutting.
Painting
Ages ago, back when I was using my old blog, I won a “Florabunda” book in a draw on someone’s blog, which came as a huge surprise to me as I never win anything!

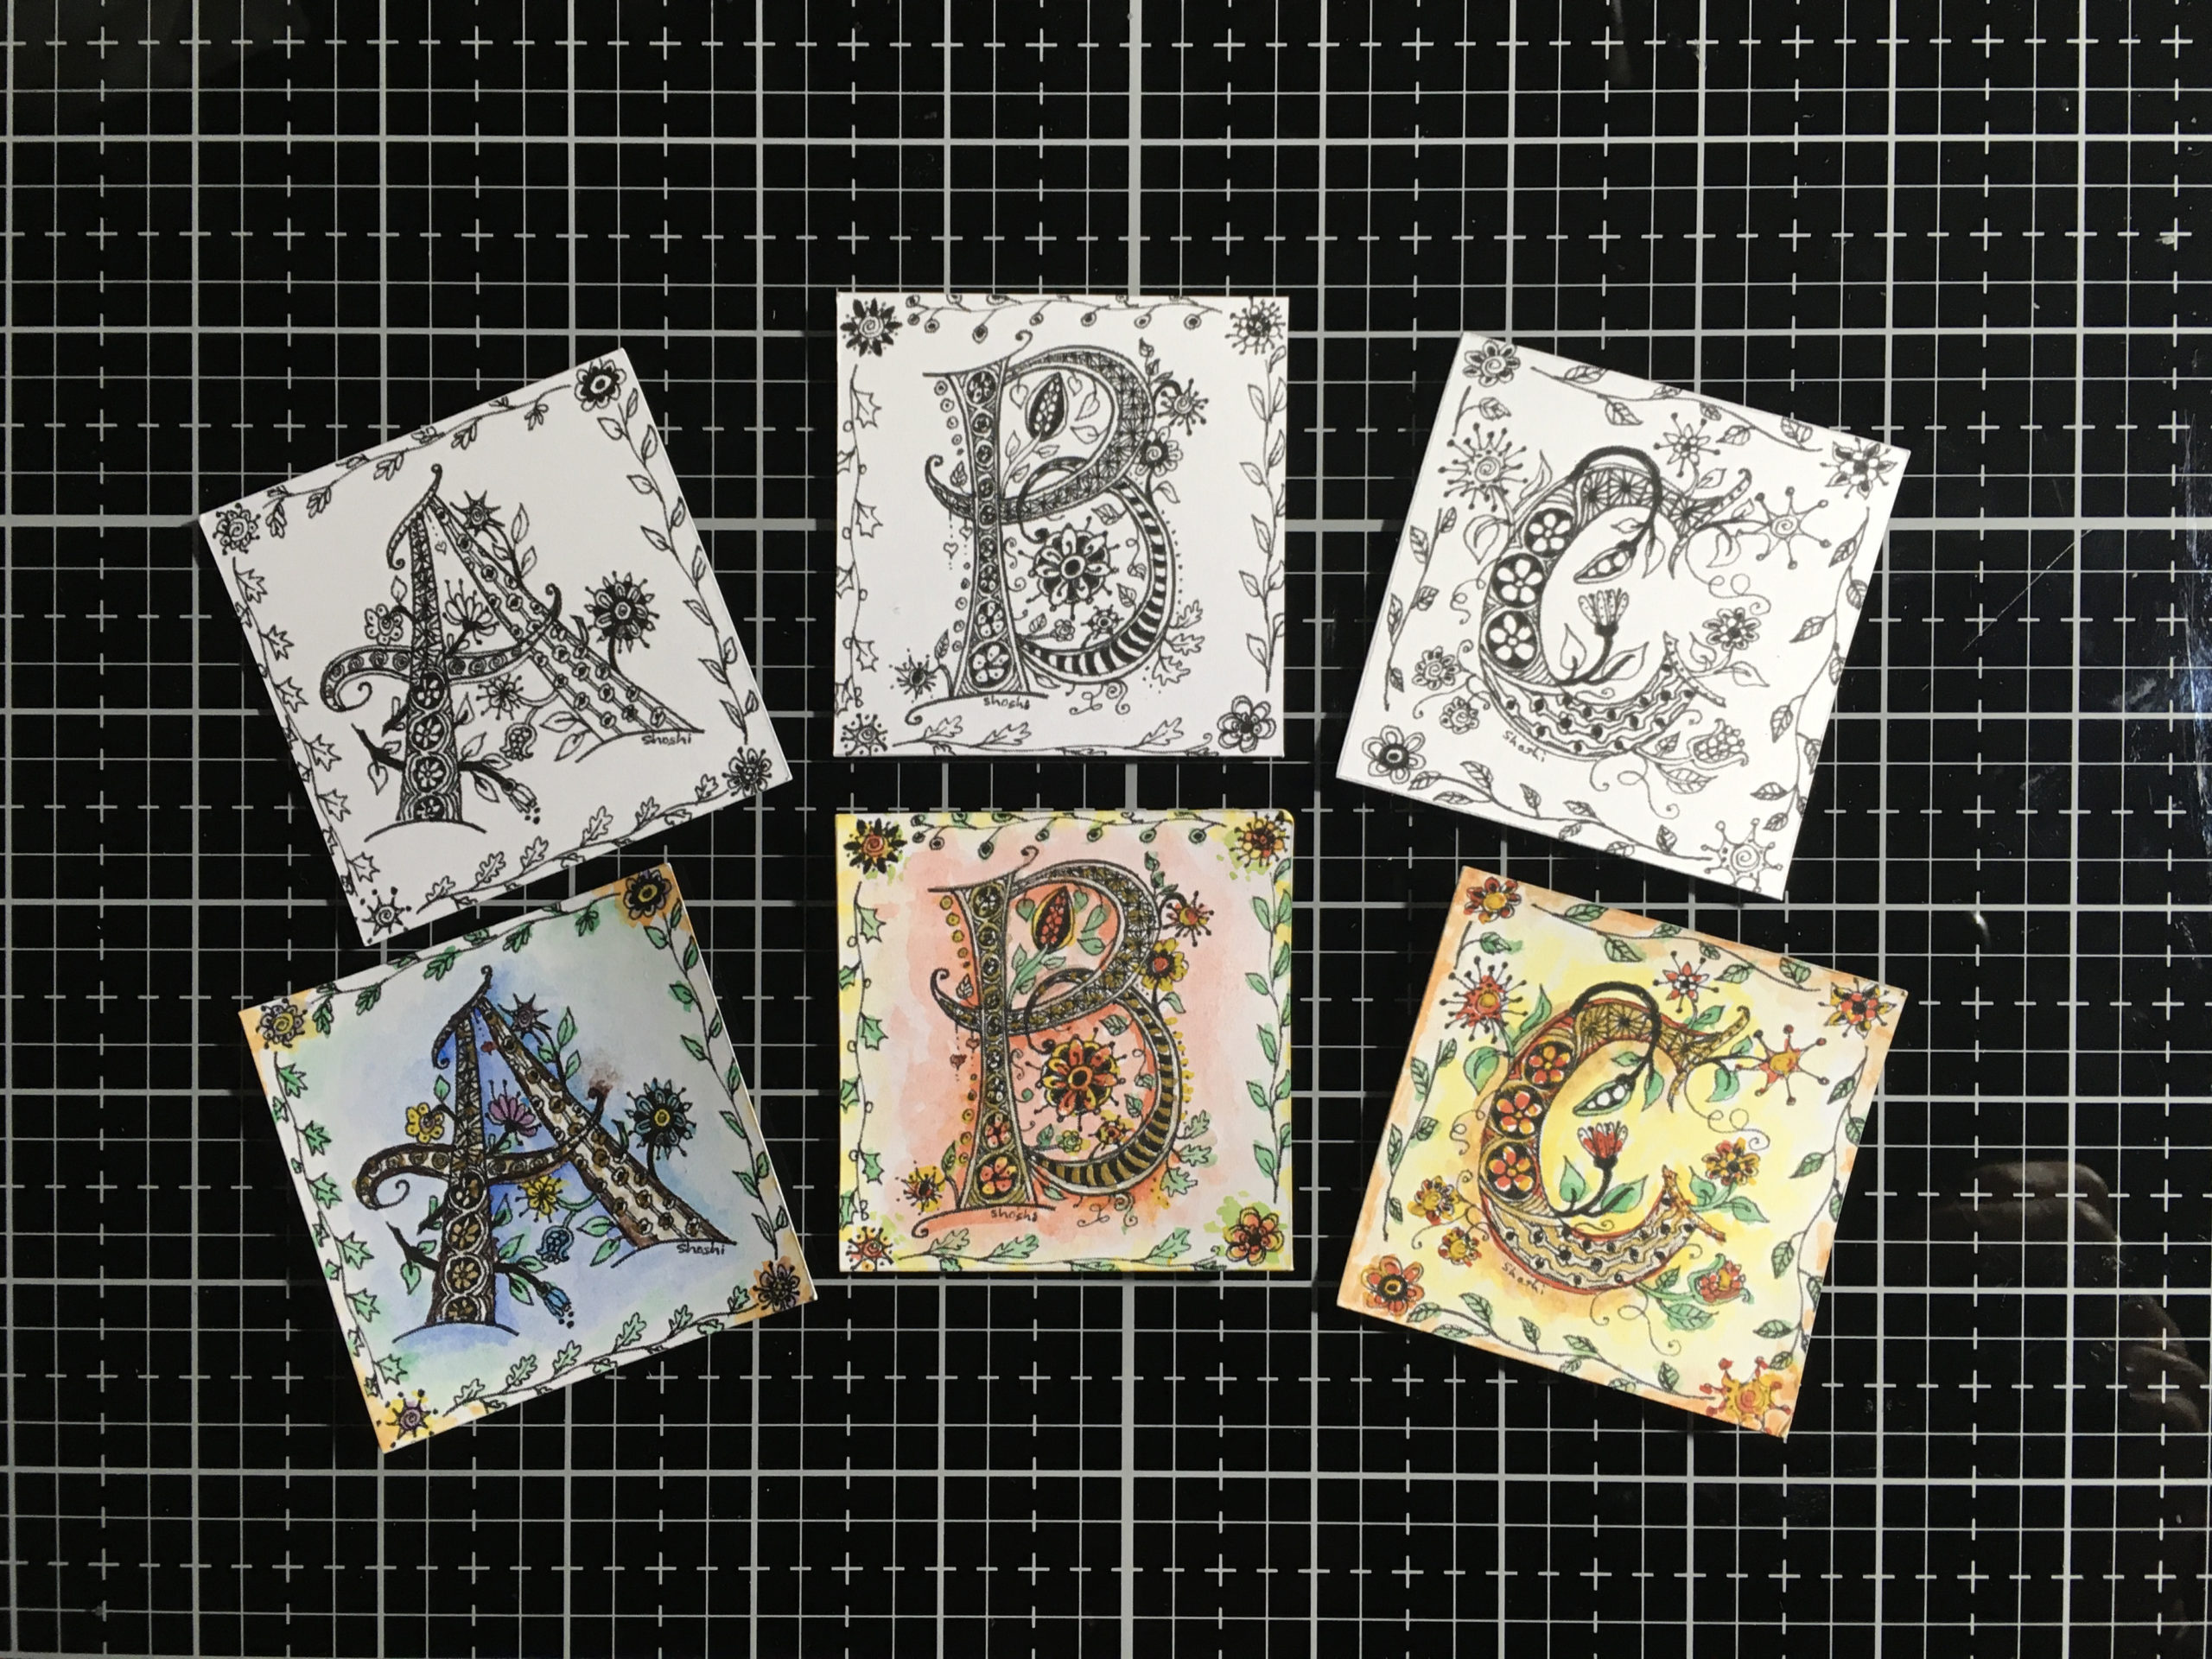
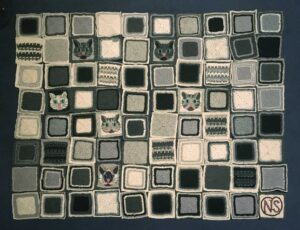
It was written by Suzanne McNeill, who is a CZT (Certified Zentangle Teacher), who invented this spin-off of Zentangle, a form of floral doodling. You build up images from simple shapes, a bit like the floral design book that I showed last week.
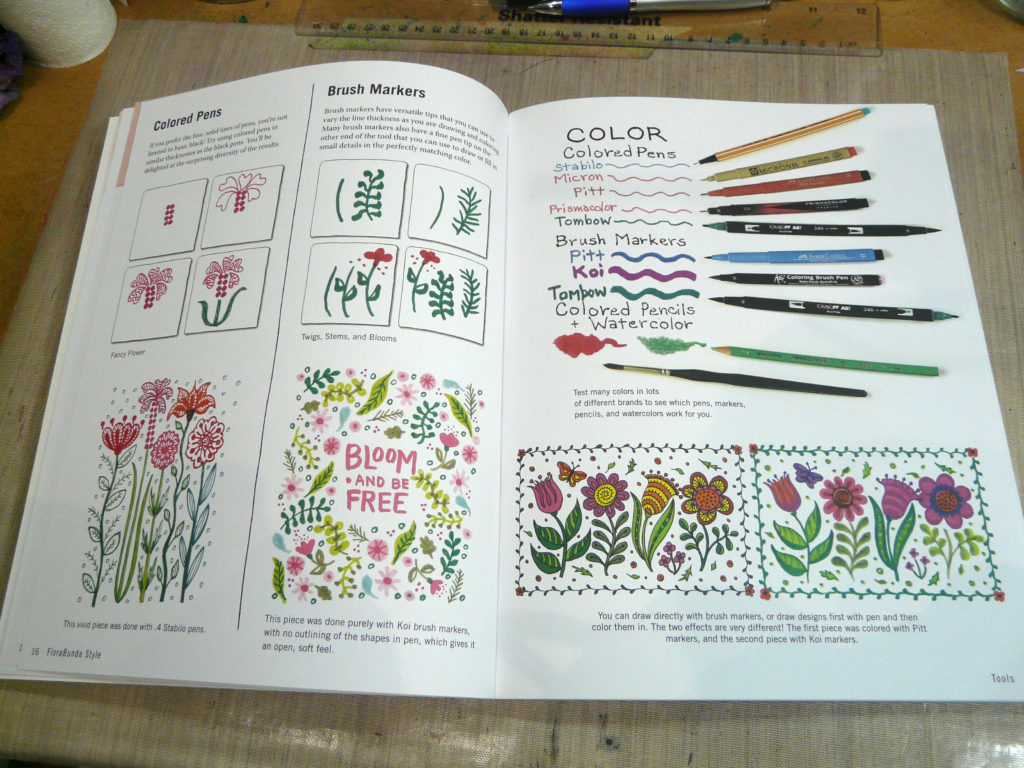
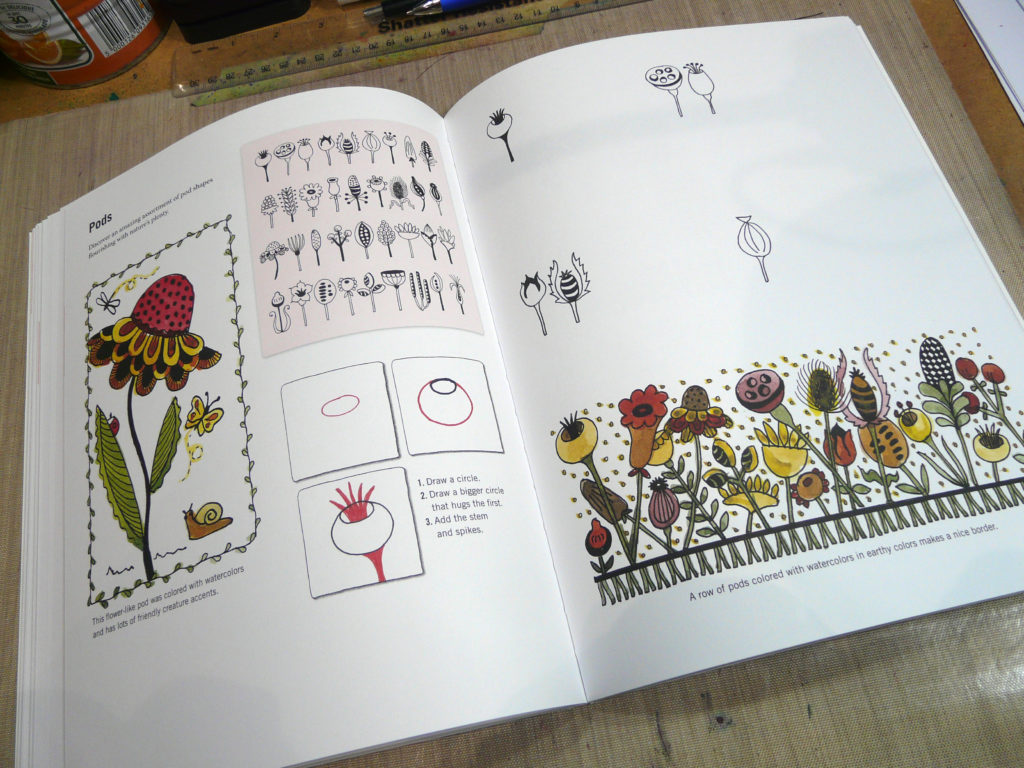
When I first got the book, I made up quite a few designs which I scanned and printed, and then painted in different colours and media, and made them into cards. I also designed a whole alphabet set on small square cards, and likewise printed these out, but never got round to colouring any of them.
This week, while I was resting, I coloured the first three letters with a combination of watercolour and Perfect Pearls (silver and gold) – unfortunately, owing to the problems of photographing shiny and reflective surfaces, I haven’t managed to capture this at all, so you will have to rely on your imagination!


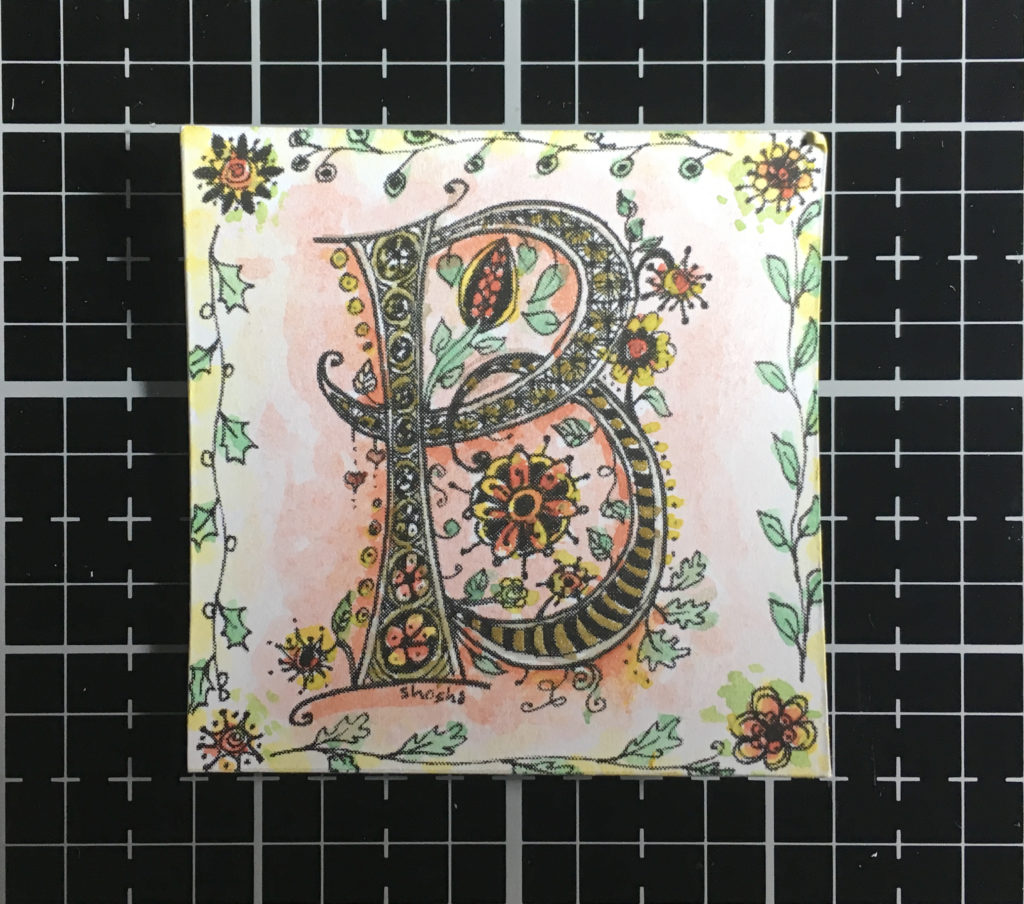
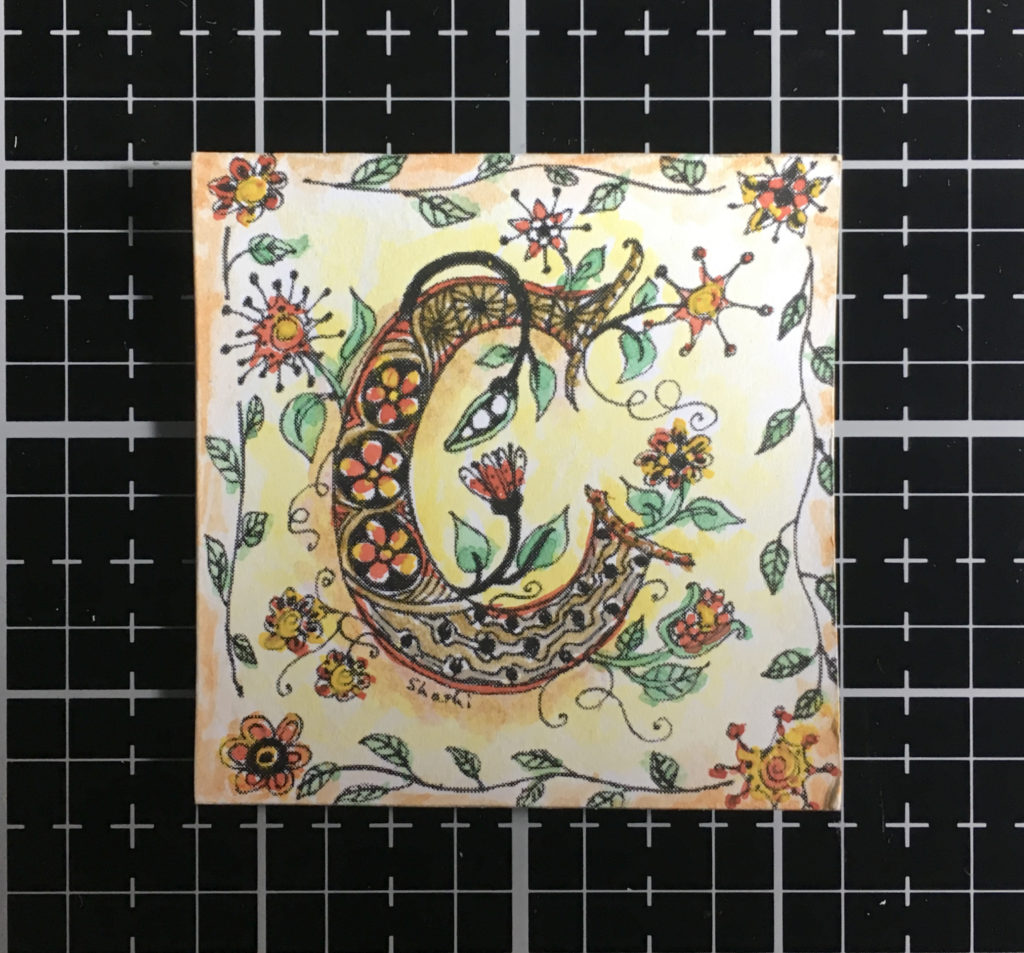
The following pictures are of some of the ones I did when I first got the book. I can’t believe it was as long ago as 2015! Can anyone tell me where the time is going these days? It’s scary that we are already half way through January 2020!
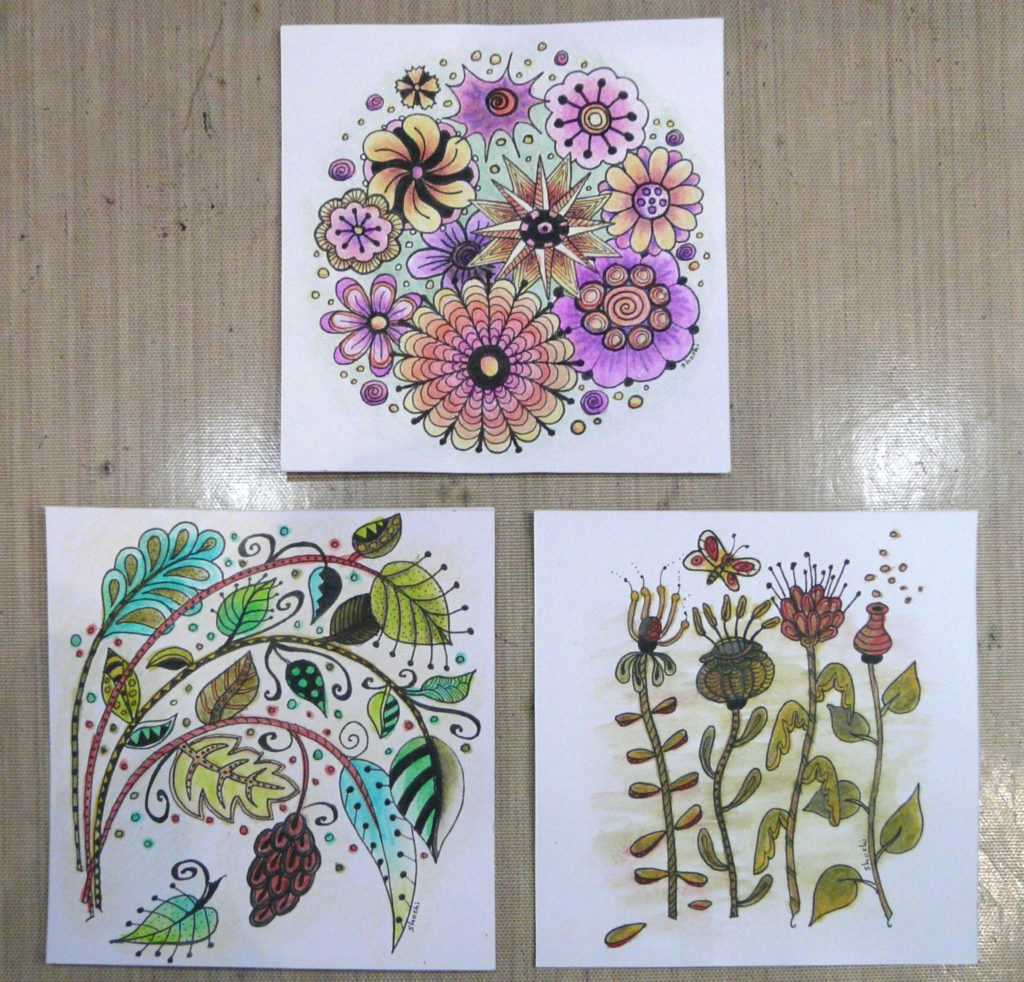
It’s lovely having a stash of printed versions of my original drawings, because it’s really relaxing and not too taxing to colour them. They can be completed quite quickly and don’t need a lot of equipment, so they can be done on a tray on my lap. It’s nice to do some “real” drawing on my lap as well as the digital stuff on the laptop.
I have been watching various YouTube videos people have been putting up from Creativation in the US, and I must say I’m envious of those who can get to this incredible craft show. Amazing to be able to watch Tim Holtz and others demonstrating their products and techniques. I’ve just seen the new Distress Embossing Glazes which are coming out and I’ve turned a Bundled Sage shade of distressed envy… I’ve got to get me some of those! There’s another craft show coming up in Exeter next month which I am hoping to get to, and perhaps they will have some of these new products on sale. Watch this space…
Food
I can always tell if I’ve had a bad week health-wise (as if there weren’t other indications lol!) – my pantry and fridge remain full because I haven’t done enough cooking! Conversely, the freezer starts to empty fast. However, this week, I have managed to do you a Recipe of the Week. This is a dish I cooked for the first time quite a while ago and decided to do again – it’s really delicious and my hubby enjoyed it very much too. Lots of interesting herbs and spices to give it a bit of a kick.
Recipe of the Week
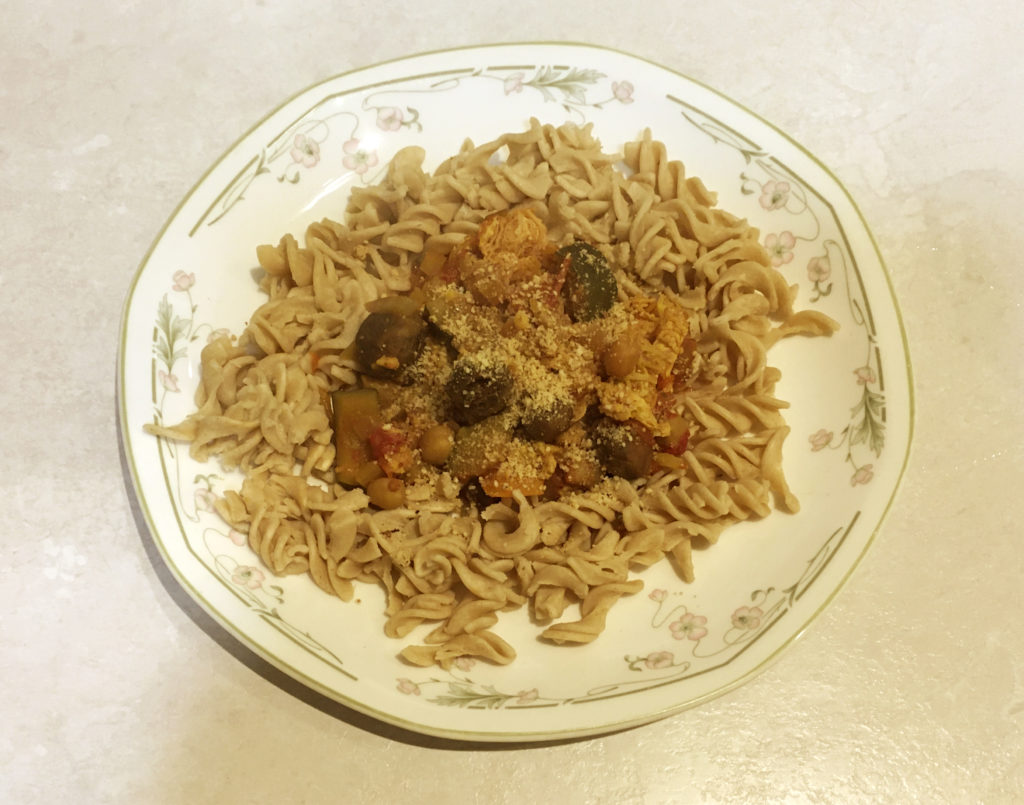
I find it very hard photographing food. The colours always come out all wrong and it doesn’t look nearly as appetising as in real life! This dish was full of vibrant red and green from the veggies. Oh well, you’ll have to take my word for it. It was good nosh.
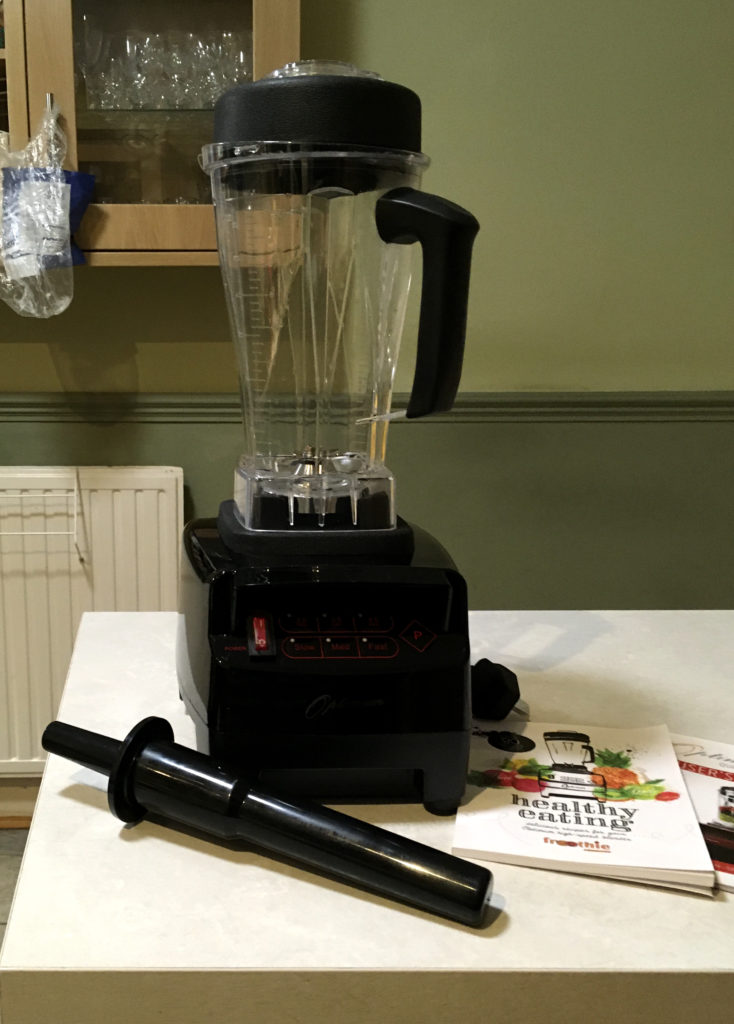
New blender
As arranged with the company, my old blender has gone back and yesterday, my new one arrived. I am mega-delighted with it. It is even faster and more powerful than the original one, and last night I knocked up some delicious vegetable soup in under 10 minutes! I just cut up a couple of carrots and a bit of celeriac, chucked them in the blender with a whole garlic clove (no need to peel it), a handful of cherry tomatoes and a couple of frozen home-made vegetable bouillon cubes and a bit of water. I set the blender on high speed and let it do its thing for 6 or 7 minutes. The friction actually heats and cooks the soup! Amazing. This is something I never tried with the old blender.
Health Update
Last week was bad with my ME. Thank you to everyone who sent good wishes. So far this week it hasn’t been so bad but I’ve had a few off days.
I had an email yesterday from my stoma supplies company that my pants will be arriving today! Given the pants company’s appalling record, I am expecting them to be wrong. Let’s hope I am pleasantly surprised to the contrary. If all is well, they will have sent two pairs, completing my annual allowance of three pairs on prescription. One on, one in the wash, and a spare in case of accidents.
On Sunday, the 19th January, it was the fifth anniversary of my cancer diagnosis. Again, I can’t believe it was five years ago! On that day, I had a colonoscopy to check on the progress of my ulcerative colitis, and as expected, my colon had areas that were much improved and free of ulceration as a result of the medication I was on. However, they “found something they didn’t like the look of” – a large and very aggressive tumour which had grown up in less than 18 months – since the first colonoscopy I had when blood showed in my first bowel cancer screening test after my 60th birthday, when my ulcerative colitis was diagnosed. I was told at the time that with an inflammatory bowel disease, I was more at risk of developing cancer than a normal person, but it never occurred to me that it would actually happen… On the advice of Shaz (Silverwolf) who developed her cancer six months before mine, I started a cancer diary which catalogued my whole journey from diagnosis through surgery and chemo and beyond, and I found it incredibly helpful to get my thoughts down in writing. I was open and honest about everything, including my negative emotions, because I thought it might help others going through a similar experience. Shaz was incredibly supportive and encouraging throughout and I am very grateful for that. When I started this blog, I transferred my cancer diary over from the old one, dividing it into consecutive months rather than it being one huge long post. There’s a tab at the top of my blog.
I am incredibly grateful to our wonderful NHS and all the amazing hospital staff who cared for me throughout that whole year, and who continue to look after me now, with the ongoing complications I live with. I have been made to feel like part of a large family and I know quite a lot of different staff members now, from my colorectal surgeon down. I have been discharged from oncology because my cancer is considered cured. I am one of the fortunate ones. I get incredibly angry when I hear of people throwing away the little poo kit you get sent to do your bowel cancer screening – it’s such a simple thing to do, which takes very little time, and it could save your life. Indirectly, I know it saved mine. I am still here, still smiling, and glad to be here. Despite my various health difficulties, I consider my life to be rich and full.
I am surrounded by friends who have loved me and cared about me and prayed for me over the past five years, and above all, I have the most amazing, supportive hubby, without whom I don’t think I’d have coped at all. Most important of all is my Christian faith which has sustained me throughout. God obviously has stuff for me to do before I’m ready to meet Him face to face!!
Kitties
A couple of sweet kitty photos for you this week. This one was taken on Saturday evening – both on my hubby’s lap! All three trying to keep warm.
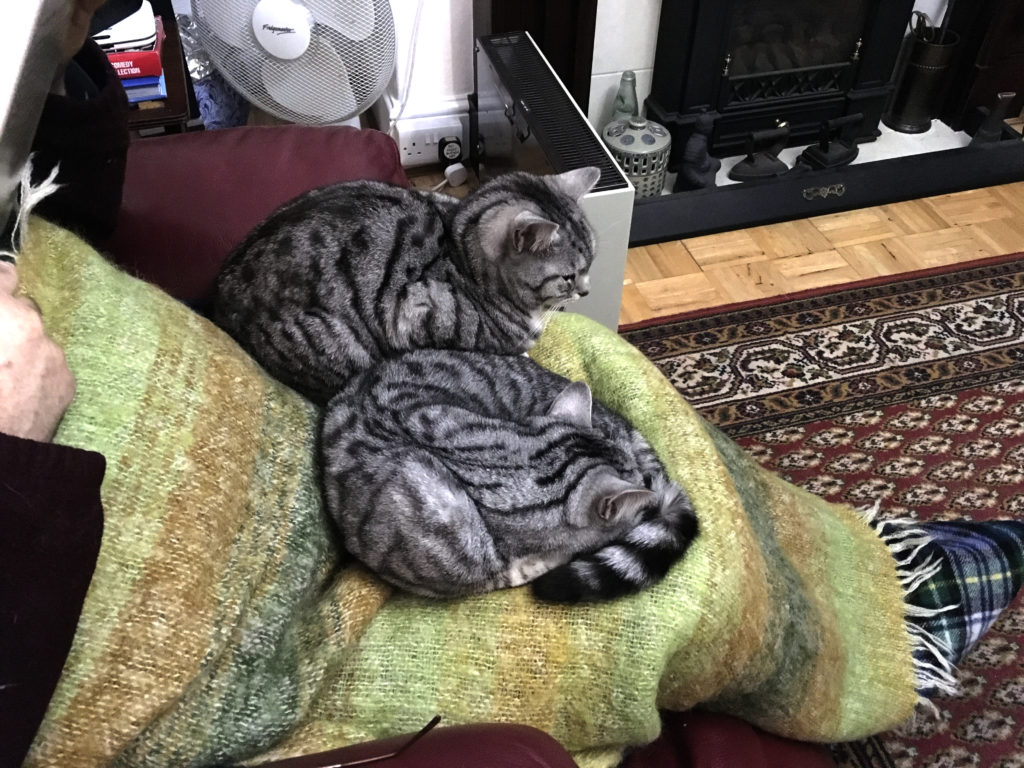
My favourite picture of the week:
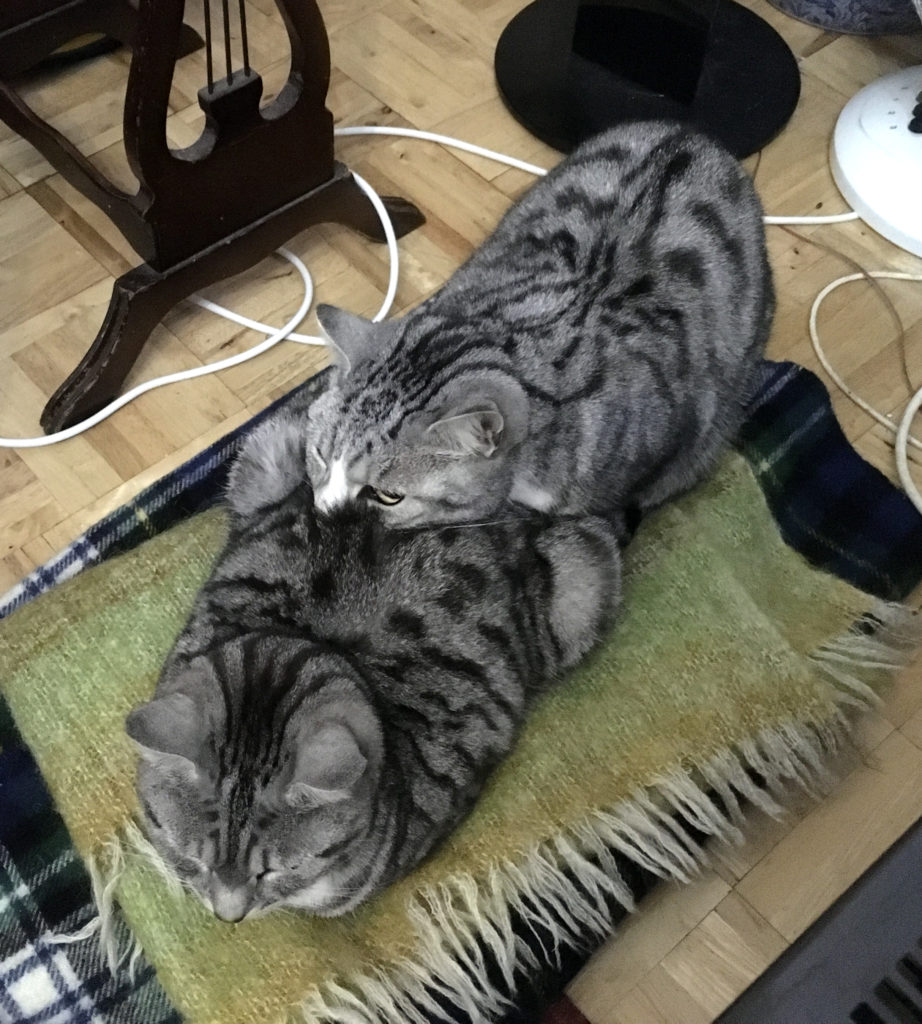
Tandem kitties! Ruby lying on top of Lily, as usual.
Have a great creative week, everybody.

Love those cards! Gonna have to try making those, they are super.
I think you’ve coloured those letters very prettily, there is certainly a big change.
What fabulous art work (old and new) from the inspiration in that book Shoshi. Glad you managed to get some help with sorting out those envelopes and liners in the end. My father suffers with ulcerative colitis too and is always very careful to go for regular full screenings. It seems to run in his side of the family and he was diagnosed late in life compared with many of my cousins / second cousins. Love the kitty photos (meow to Lily and Ruby) and that blender looks a beast! Happy WOYWW. Sarah #2
Ooh I love bees and your shutter cards are absolutely gorgeous (and clever!). Beautiful zentangling too , it’s still on my list of things I want to have a go at!
The kitties are so cute – they almost look line one’s going to fall off your hubby’s lap, they are so big now.
Hope you have some better days this week,
Diana x #9
Hi Shoshi, your shutter cards are super, I love the bottle top aperture. Such an interesting card to receive I hope all that do appreciate the hard work you have put into them. I have an obsession with sentiment stamps and am always on the hint for the perfect one. I need to sort my go to’s all in one place, I always have good intentions but something else always takes precedence.
Your coloured alphabets are so lovely, they would make beautiful personal toppers for cards using the first initial of their name.
There’s so many wonderful and caring people out there we are double blessed when they come out to support us. Take good care of yourself Shoshi & enjoy your creative time.
Happy WoywW Hugs Tracey #10
the shutter cards are lovely, but I adore the letters! so talented. congrats on your 5 year anniversary and I do hope the pants are ok……………… lol I won’t hold my breath! Helen #1
Loving the cards, gorgeous. The kitties look well and certainly know how to get comfy., they have certainly grown too. Sending creative happy woyww, thoughts. Angela x16x
I just love your kittens, I would love to stroke their soft fur 🙂 Your shutter cards look interesting. But complicated! Really like your flower doodles and initial pictures. Happy WOYWW Angela #31
Oh, Lily and Ruby are sooooo cute! Mittsy is here with me looking at your post, and she’s very interested! Now that I’m commenting, she’s gone! Your Shutter cards are lovely, I love the bee theme. The book is fascinating! I actually went straight to Amazon.ca to buy it, but they don’t have it. Amazon.com does, but then I have to pay extra for exchange, and US money is higher than Cdn. Sad. Your letters are absolutely gorgeous!!! Glad you are having good results with your new blender – awesome! Hope the new pants work out – fingers crossed! have a great week, Lindart #27, hugs to Ruby and Lily!
Those shutter cards are absolutely gorgeous and I love the coloured letters, so pretty. I had to laugh at the tandom kitties – so cute! I really hope that the pants are accurate this time… Happy belated WOYWW. Have a lovely week, with love & God Bless, Caro xxx (#8)