
What’s On Your Workdesk this Wednesday?
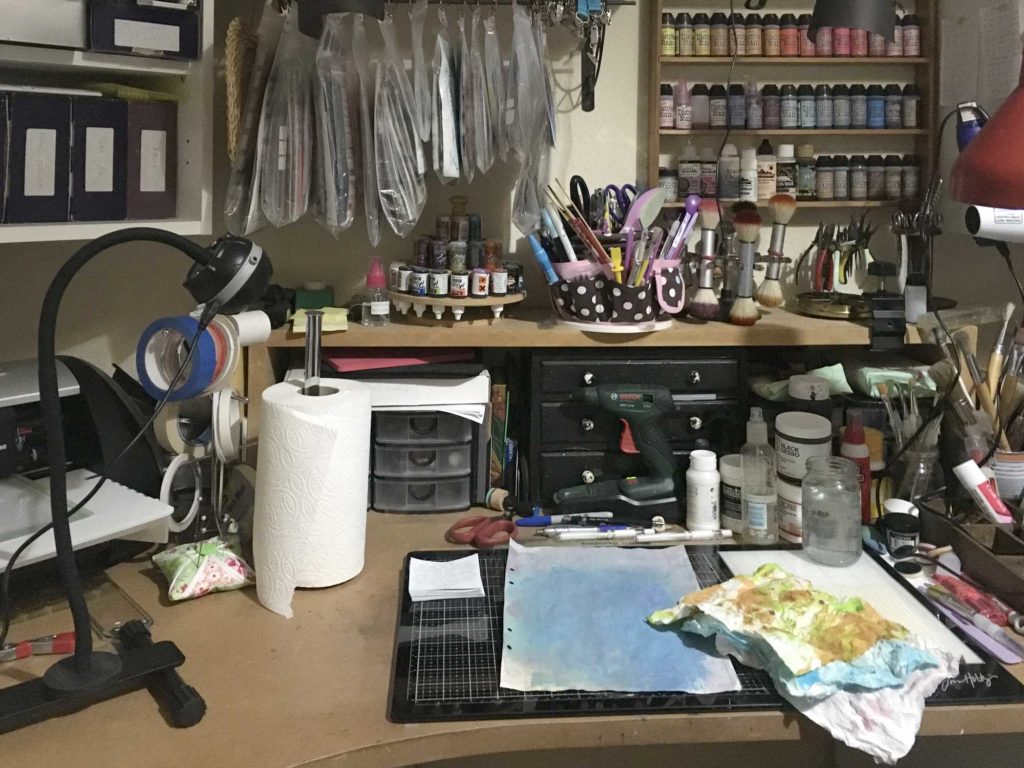
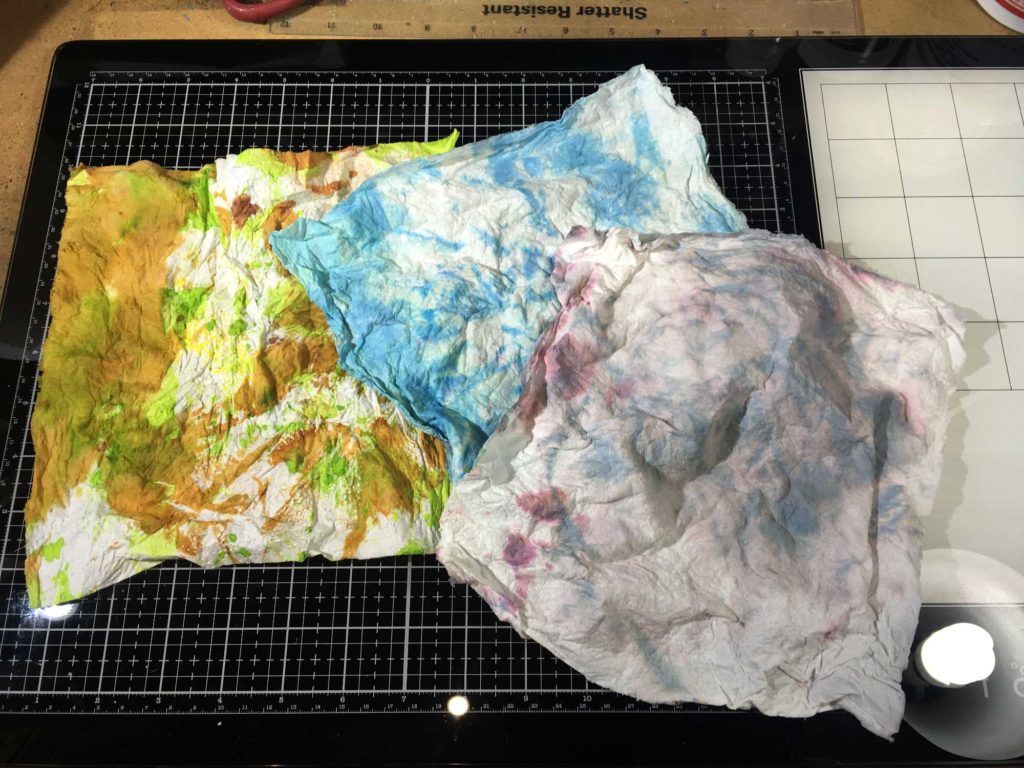
My desk after beginning work on my Celtic Knot Motifs. On the left of the glass media mat is a stack of 3 1/4 inch squares with the printed designs on them. In the centre is a sprayed piece of paper, and on the right, some kitchen paper used for mopping up. Details coming up. On the far left of the picture is my cutting machine across the corner, and in front is my new lamp that I got at the craft show. It all comes apart and you can attach a bracket to hold a phone or tablet as well, and the lamp is battery powered, being charged by USB. On the rest of the desk is the usual Stuff.
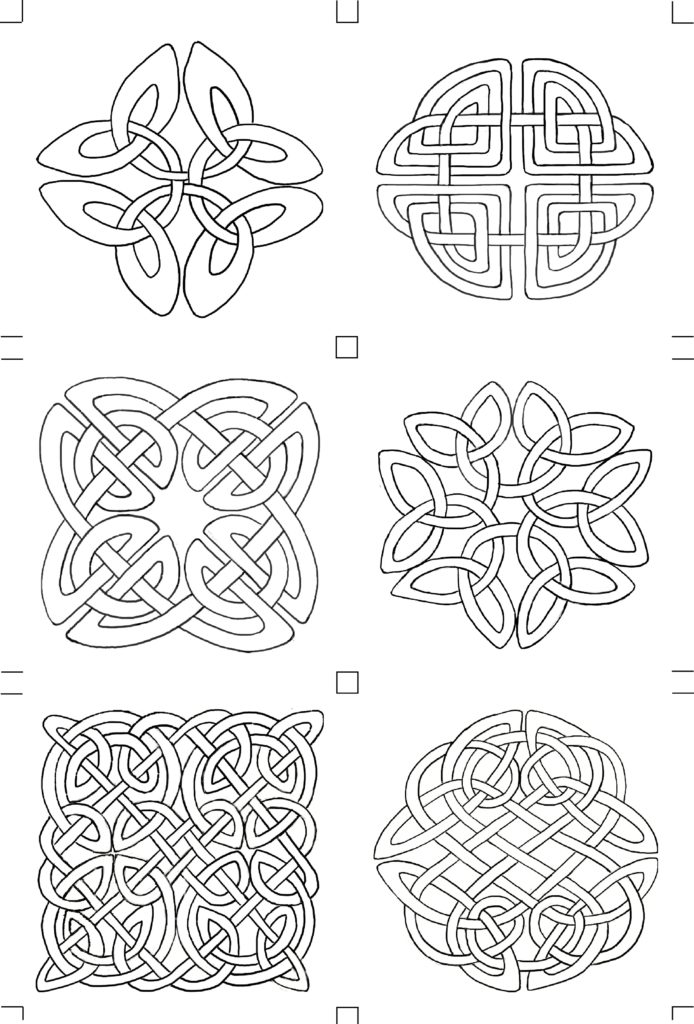
Celtic Knot Motifs
As reported last week, I’ve been doing more drawing. I have on my studio bookshelves a lovely design source book based on Celtic designs. This is in the same series as the floral designs book that I showed you a few weeks ago.
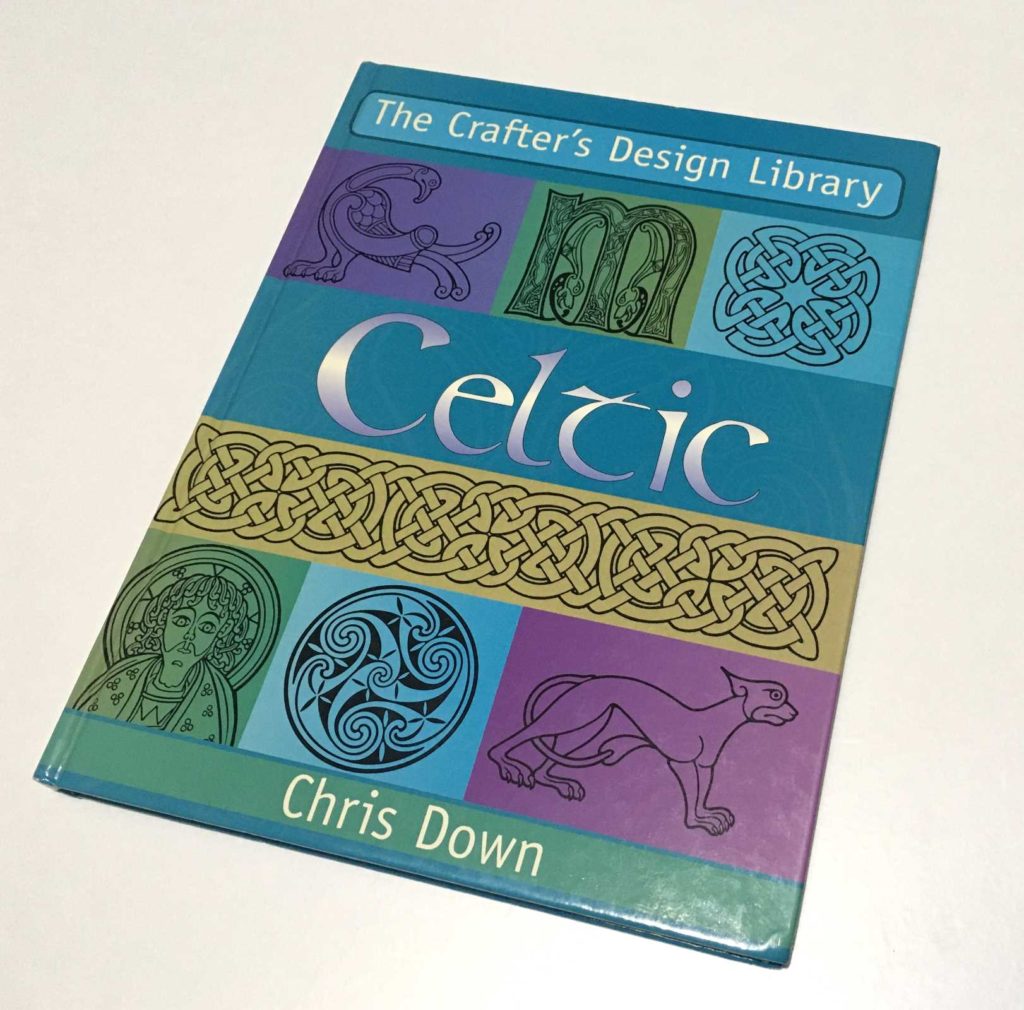
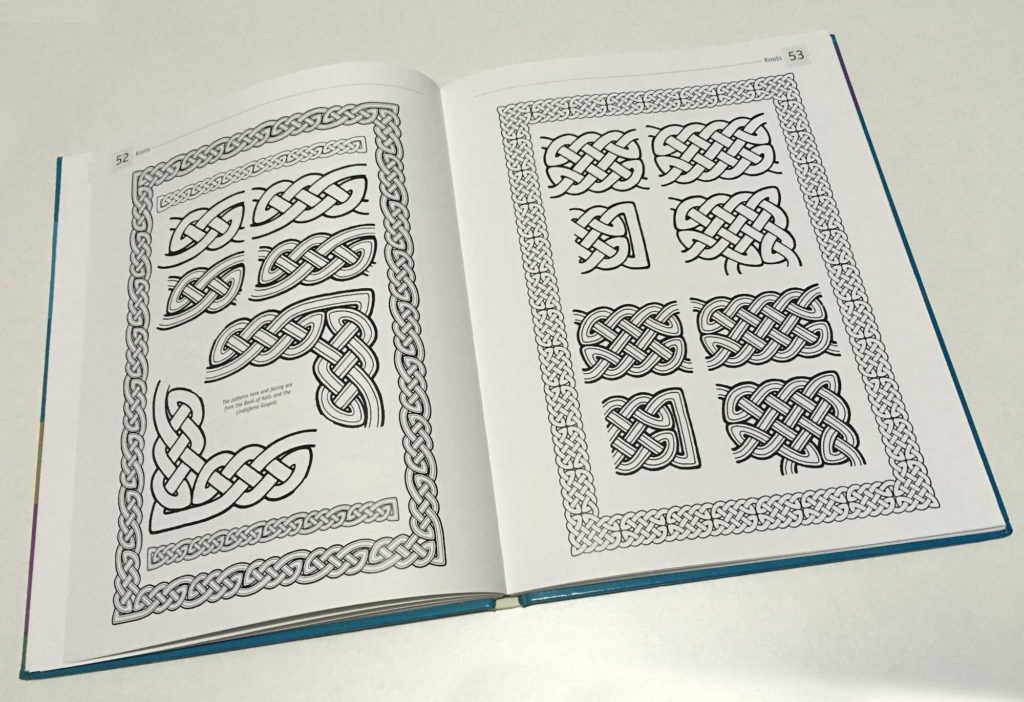
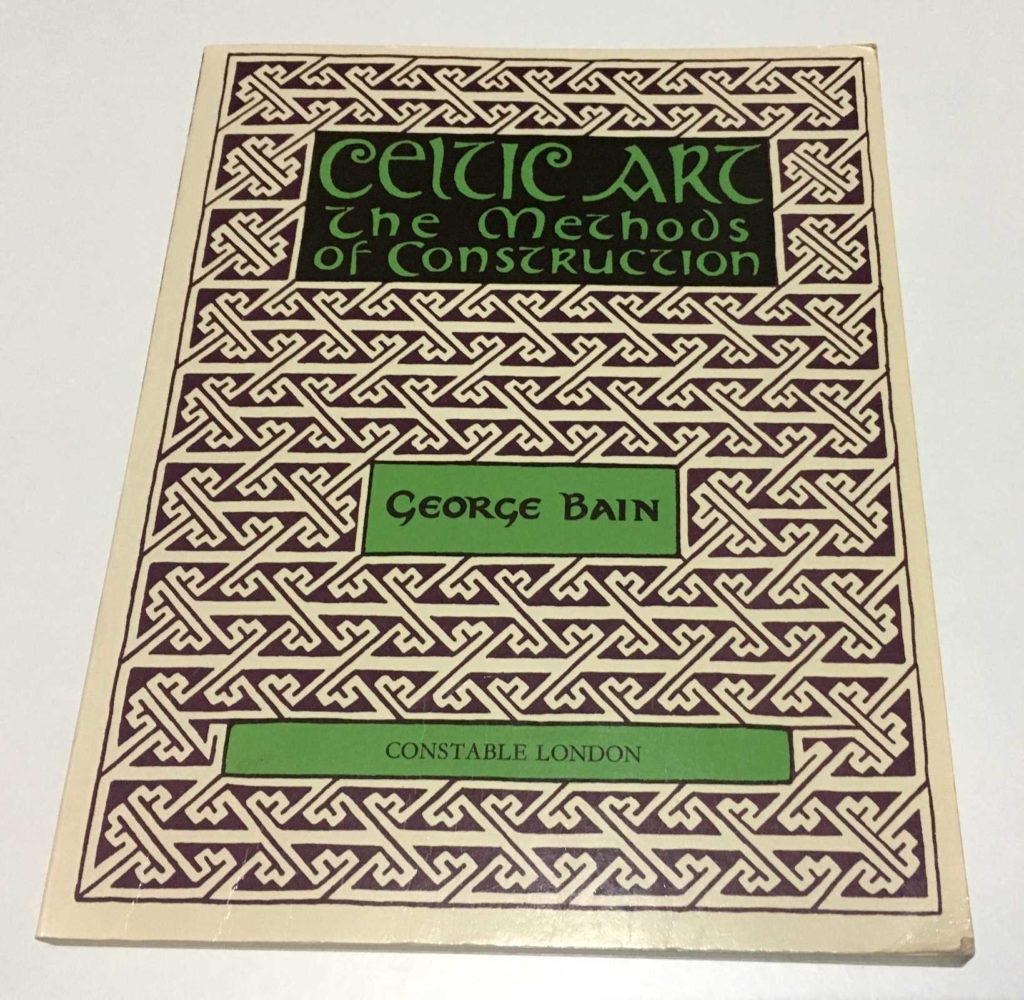
This book contains a lot of different templates derived from some of our great national treasures such as the Book of Kells and the Lindisfarne Gospels. The book doesn’t go into any details about how to construct the designs and I think you are supposed to scan them or copy them (as I have done). I have another book which goes into a lot more depth. This is George Bain’s definitive work on the Celtic art style.

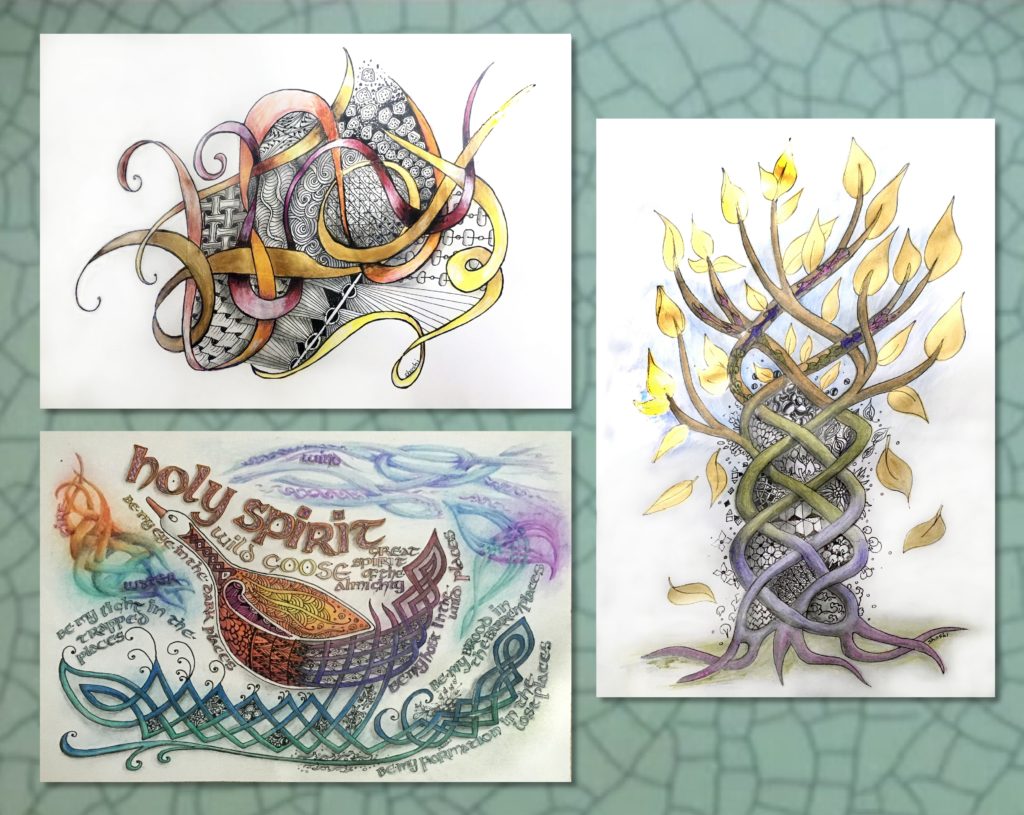
(Looking inside the cover, I saw that I had written “Brittany 1986” – I now remember I bought this book while we were on our honeymoon!!) I need to get going on this again and begin to plan some more ambitious designs. These can be done in the formal way, or adapted for the more fluid style as produced by Mary Fleeson of the Lindisfarne Scriptorium. She was the inspiration for my previous Celtic-style drawings which I have already shared with you.
I love the intricate knot work, the weaving over and under; the first book says that the purest designs are formed from a single “ribbon” which, if you follow it all the way through the design, will bring you back to your starting point again. It is not always possible to do this, however.
Six motifs
Here is the original set of drawings that I did.
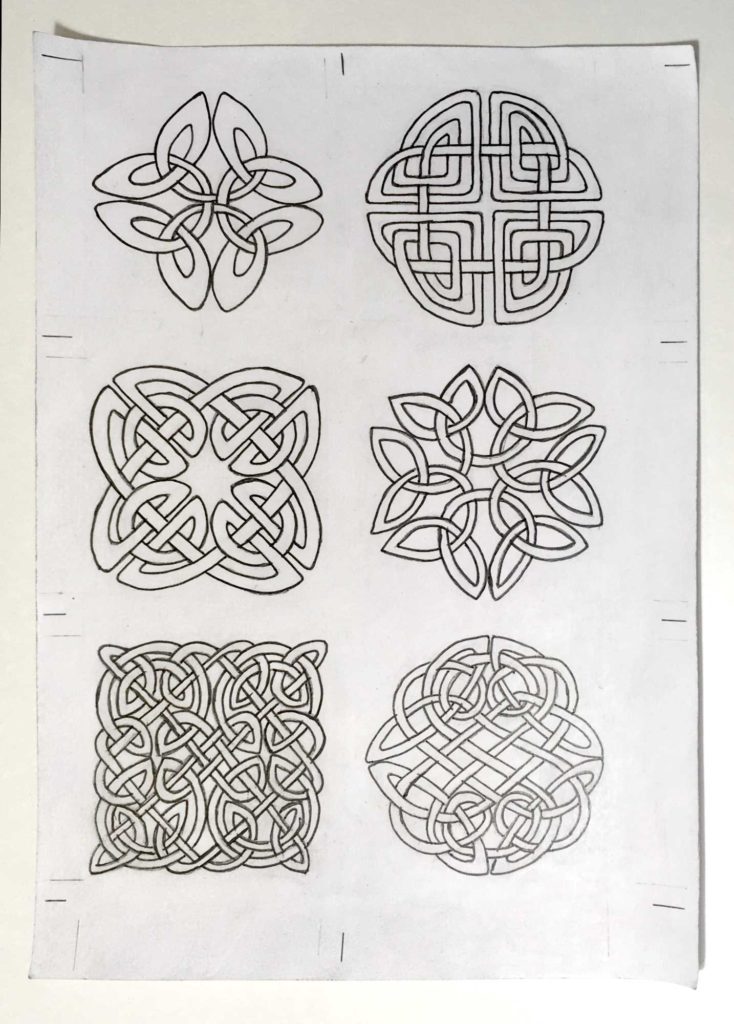
I wasn’t too clever with this because I selected one of my gessoed cards to draw on. Even after sanding, there is a bit of tooth and this was wearing down my pencil very quickly! While correcting errors during the drawing, and after inking over the lines, rubbing out the pencil marks made a huge mess. The card became quite discoloured and grey. There is actually no advantage at all in doing the drawing on a gessoed surface. I wasn’t going to colour these originals anyway, so I would have been much better off using my smooth white card which I use for my Zentangle drawing. Also, after doing the drawings and inking over the lines with a permanent black marker, there were lots of places where the design needed tidying up and correcting.
I did this by scanning the original drawings, correcting the levels in my photo editor on the laptop to reduce the messiness of the background a bit and to increase the contrast a little, and then I sent it to the iPad.
Using the Procreate app and my Apple pencil, I reduced the opacity of the drawing so that the lines were grey, and then created a new layer on top which I called “Tracing.” This is what I should have done with my fish drawing – it would have taken me a lot less time and effort! Using this top layer, I was able to trace over the whole thing with a uniform black pen line. After this I hid the base layer so that I could see my traced lines without any distraction, and went back over the whole thing, correcting any small errors – in some cases, the designs were not drawn completely symmetrically, and there were places where I had extended a line a little too far and it crossed another line. These errors were easy to correct using the pen and eraser tools, and once I was satisfied, I exported it as a new jpg which I sent back to the laptop.
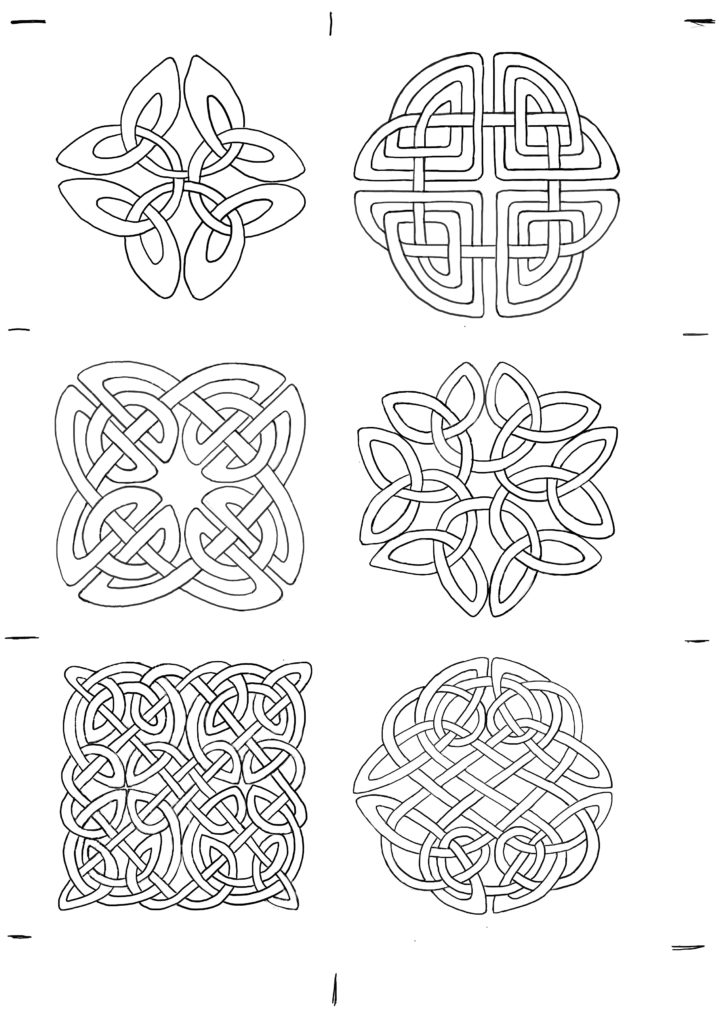
If you compare the two images, you will be able to spot the errors which I corrected.
I wonder if you can spot which ones are not made up of the single ribbon?
I printed this out six times on my cheap printer card. The next step was coating them with gesso as I did with the fish drawing.
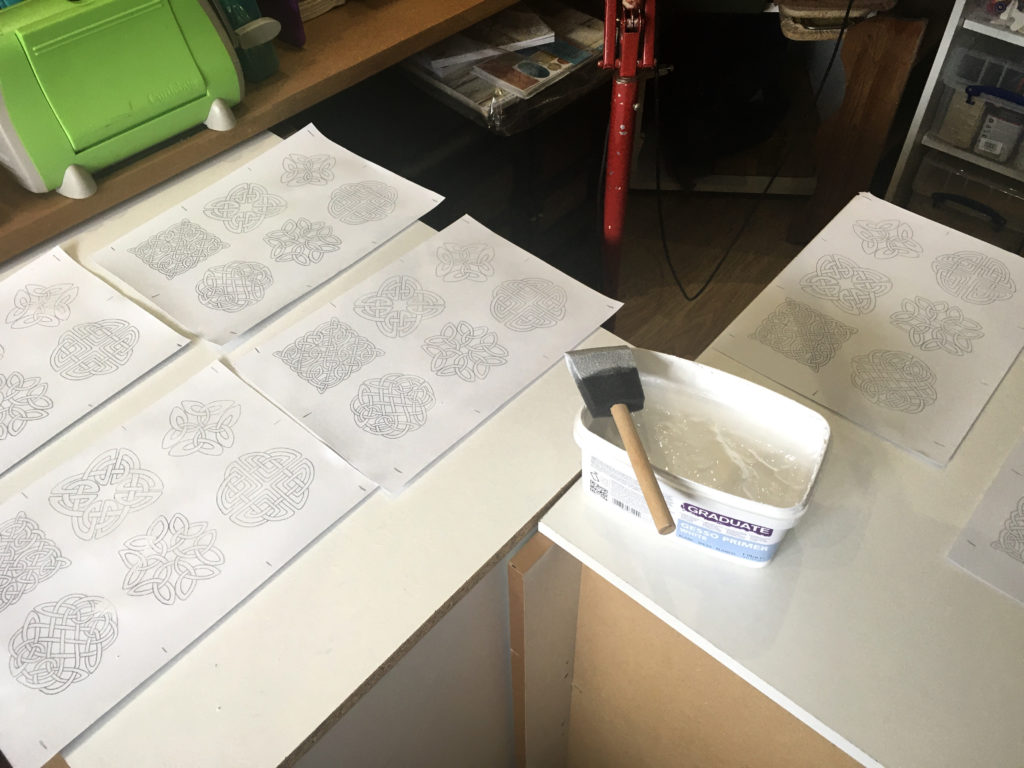
You will notice that I have drawn a few marks around the edges of the sheet. These are just to show approximately where to cut the card so that the motifs can be used as square card toppers etc. I subsequently erased these on the digital version, and remade the grid, adding more accurate guides, because cutting these motifs up proved to be a total pain, getting them centred in the squares, and it took absolutely ages… Again, I was a bit dim about this, because I forgot that I had already created several grids for my Zentangle drawings. This is the revamped version:
Anyway, here they are from the original grid, cut up.
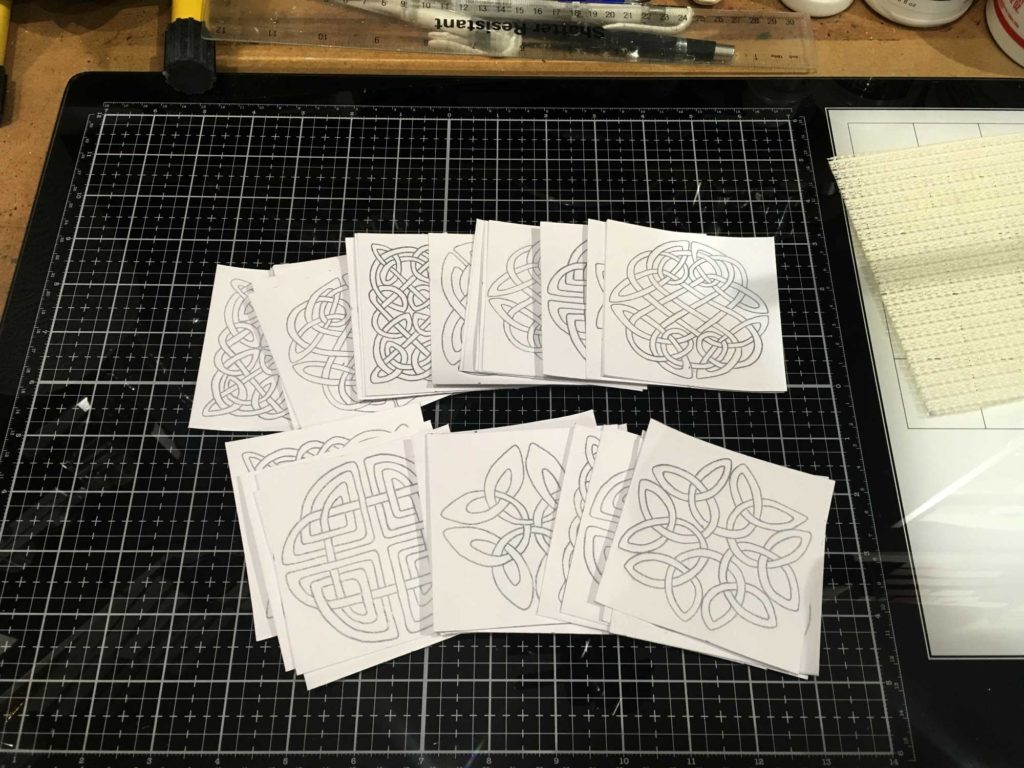
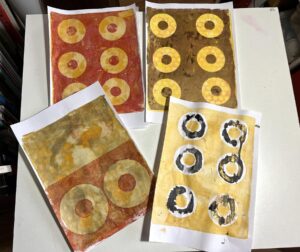
The first batch
Before I began, I tested my new Distress Oxide sprays on a piece of old account book paper.
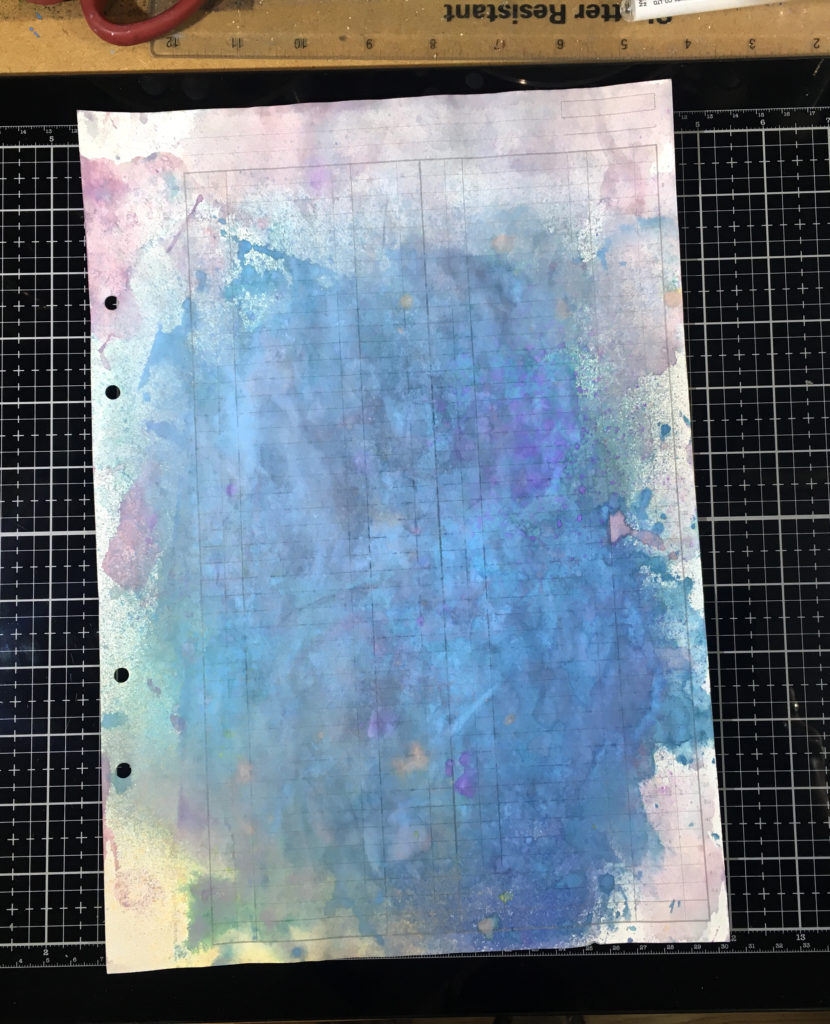
I’d watched a YouTube video where someone had used these on some old book pages and was intrigued that the print on the page seemed to act as a resist to the ink. I can see the same effect on this sheet. This paper is pretty thin but I thought I could use it for something.
The backgrounds for half of the motifs were done with the Distress Oxide sprays (top row), and Dylusions spray inks for the remainder (bottom row).
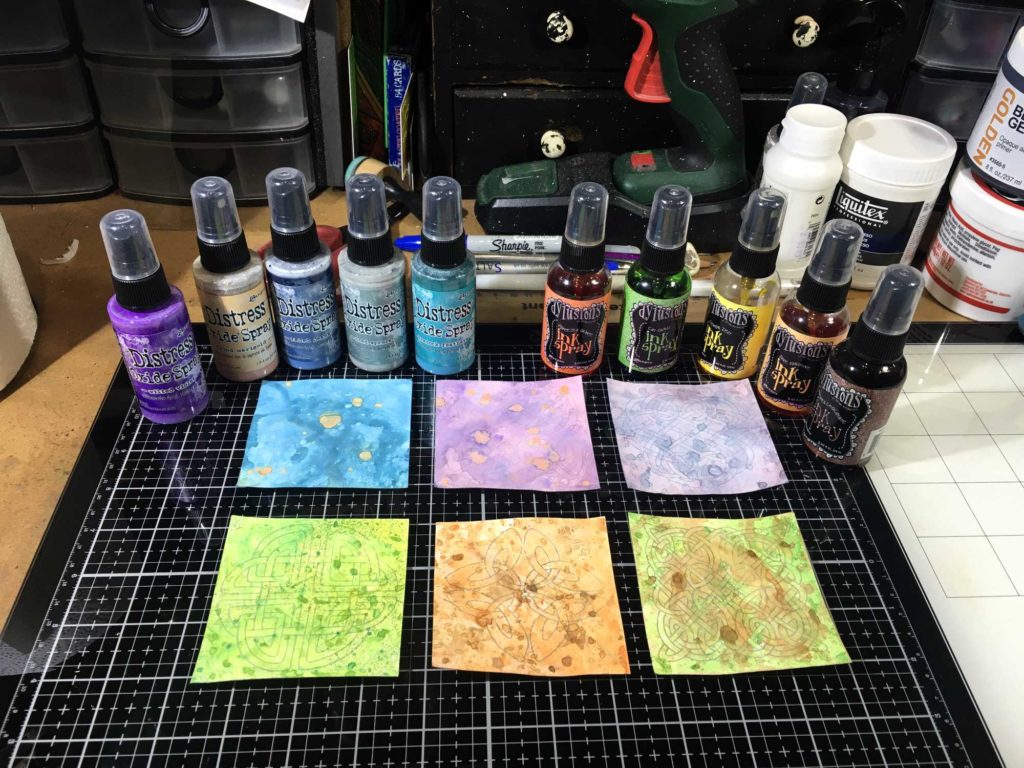
In some cases the colour partially obscured the design. I lifted this with a damp brush and blotted the piece with a piece of kitchen paper, and also where there were obvious blotches covering the design. After I’d worked on the first one, I decided that where the design was covered, I would leave it, to appear as if the motif was emerging from the background in a more subtle way than just sitting on top of it.
During the inking process I occasionally blotted the piece with a piece of kitchen paper, and then used this to clean my glass media mat. When I’d finished, the pieces of kitchen paper looked really nice, so once they are a bit more covered with the selected colours, they will go in the box with the rest, ready for use in projects. I’ve got quite a collection now and the colours are glorious!
First completed motifs
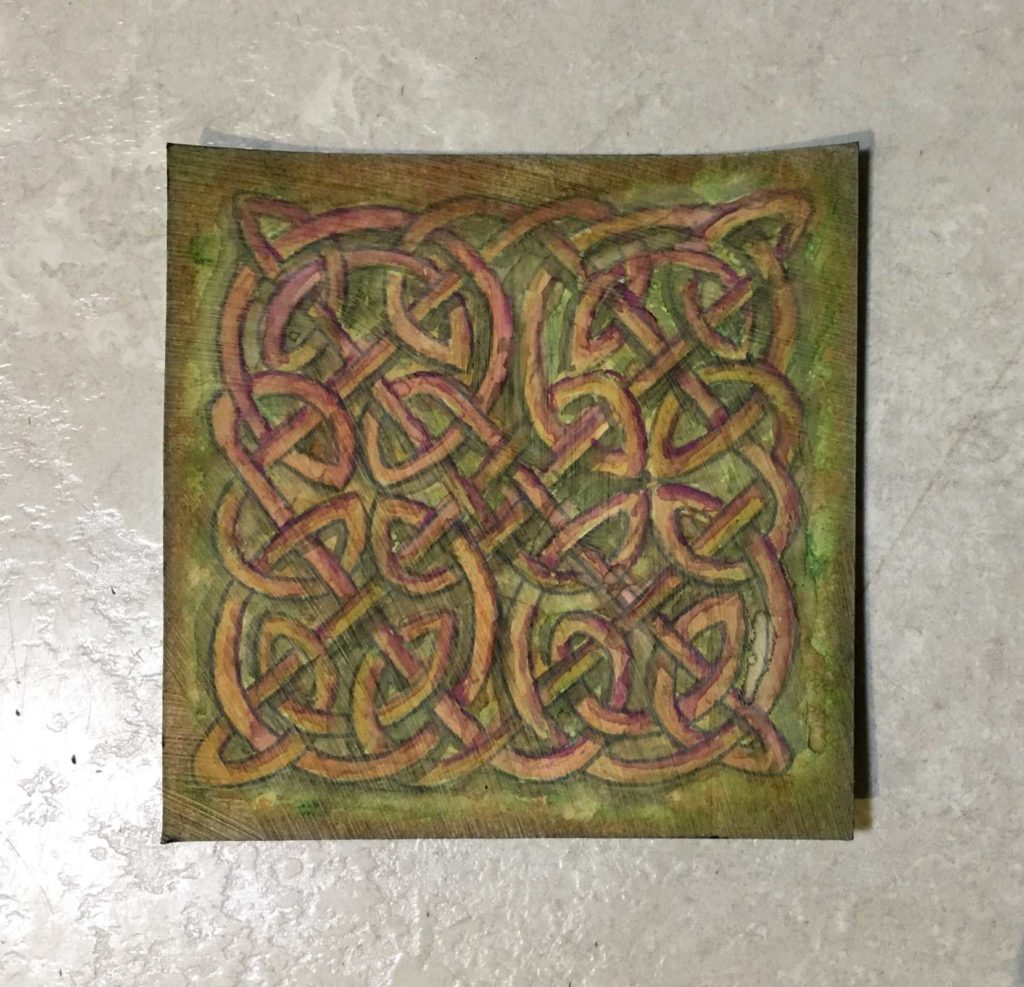
When most of these were completed, I inked the edges with Distress Inks. I also added a little highlighting with my white Derwent Graphik Line Painter. On the final one, before doing this, I rubbed on some Distress Glaze.
Here is the first motif with Tombow colouring added. This was one of the Distress Oxide sprays ones. It’s interesting that you can see the brush marks in the gesso. I don’t really mind this because it adds a bit of texture.

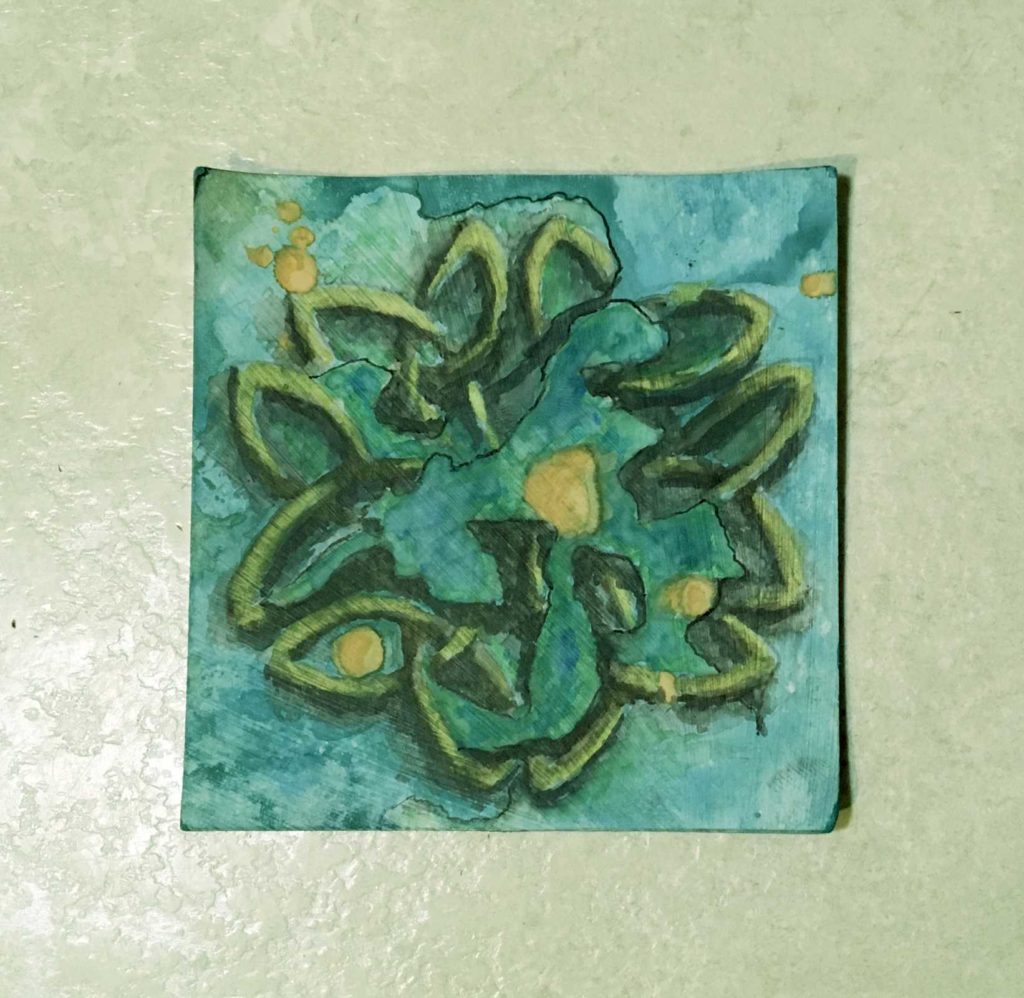
The second motif was done with Dylusions sprays.
I really didn’t like this one very much. In real life it is slightly brighter but I don’t really like the colour. Also, for pieces this small (just over 3 inches square) I think the pattern is a bit too busy. The simpler ones seem to work the best.
The third motif. Another Distress Oxide spray one.
This was one of the motifs where the inking had obscured quite a bit of the drawing, so I coloured it as if it was emerging from the background. However, I really wasn’t happy with the result so I decided to define the edges of the overlapping background and adding some shadows, but I still didn’t like it. I kept messing around with it to try and improve it, without success, and in the end it was overworked. You can’t win ’em all!
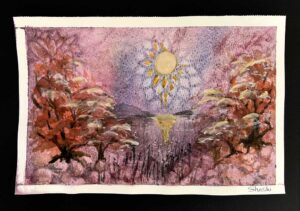
For the final one, I took a slightly different approach. This was another Distress Oxide spray one. I removed the ink from most of the drawing with a wet brush and blotted it with kitchen paper, but I left the few places where it was completely obscured, and also the blobs of orange. The design was brought forward by emphasising the shadows, and I also added shadows to the blobs. Highlights with the white pen gave it an even more 3-D look. This is my favourite one, closely followed by the first one.

That’s all I had time to do before completing this blog post. There are two remaining from the first batch.
Kitties
The usual amount of sleeping and cuddling up together this week!
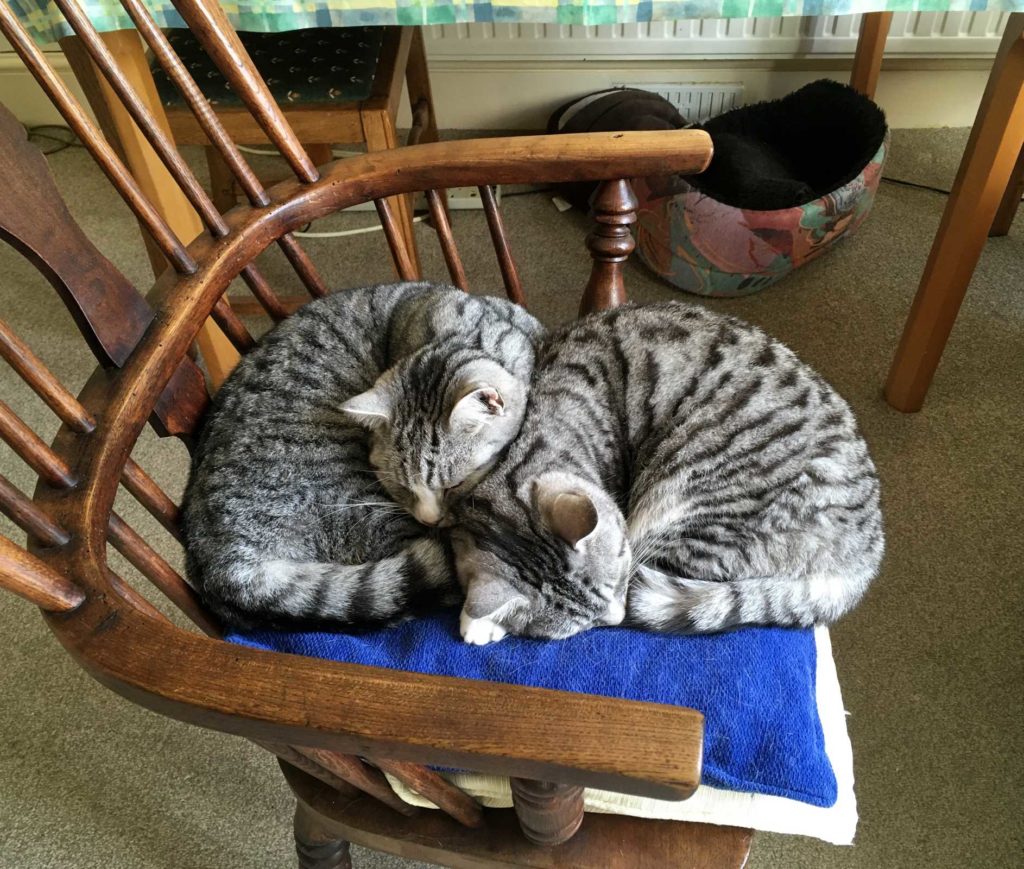
Guess who’s on top!
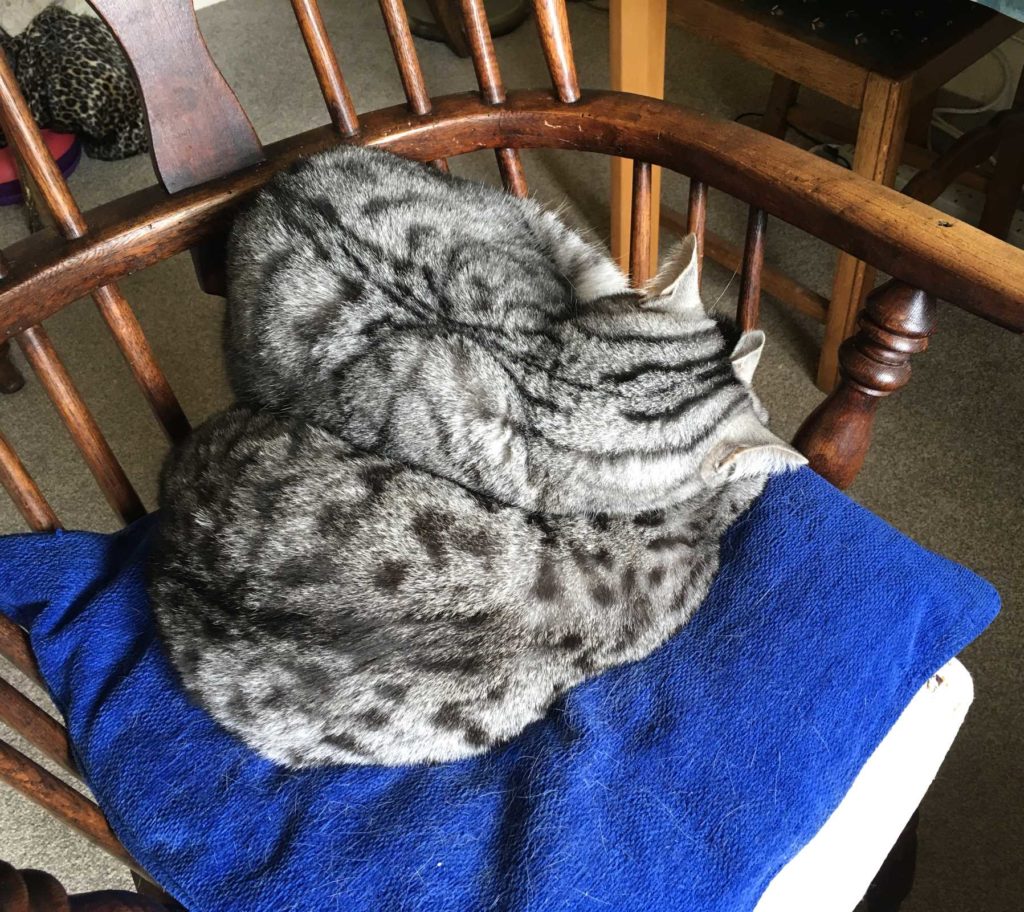
I can’t imagine why Lily hasn’t suffocated.
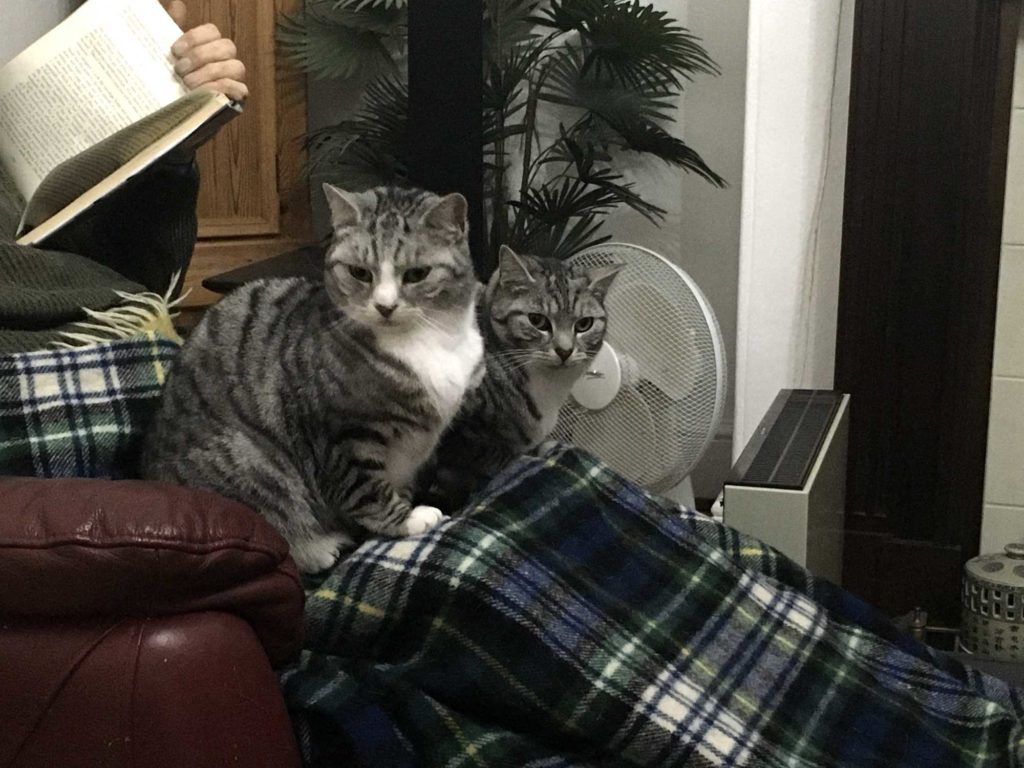
Here they are on my hubby’s lap.
Ruby washing Lily.
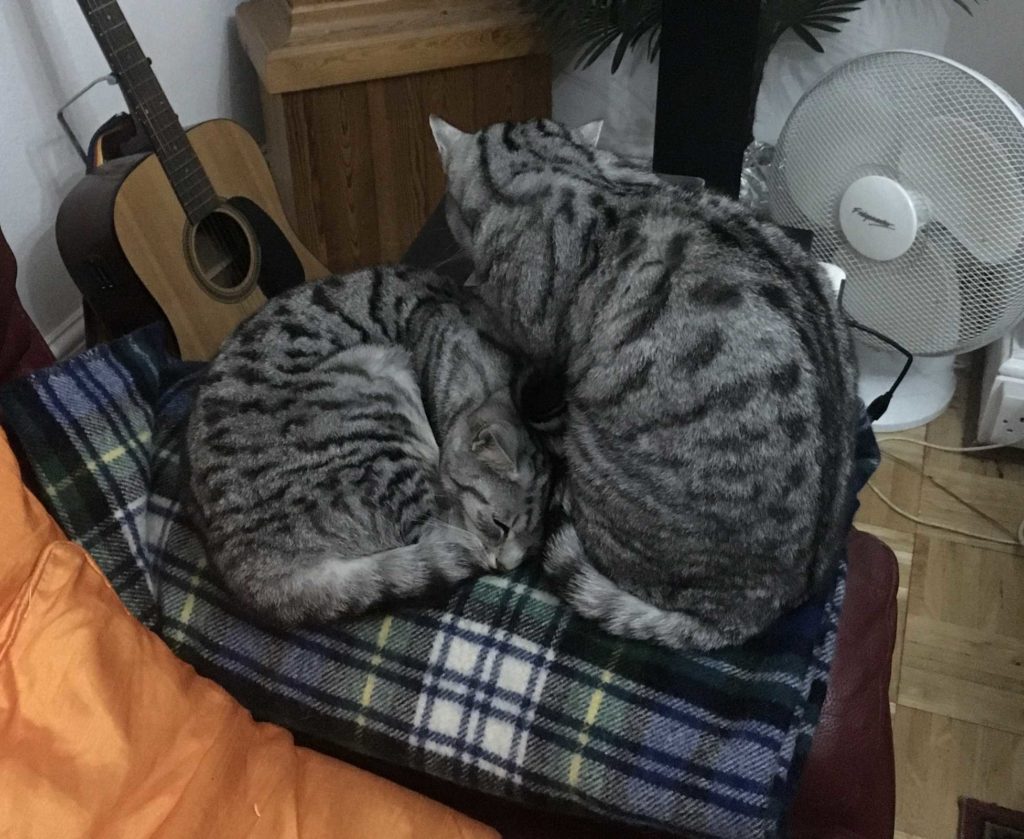
It’s interesting that Ruby washes Lily a lot more often than vice versa. Apparently this indicates that Lily is #1 in the kitty pecking order. They do sometimes wash each other at the same time but Lily usually just lies back and lets her sister do all the work. Every now and again Ruby gets fed up with being the subservient one and has a go at Lily, resulting in growling and hissing, fur flying and thunder-paws all over the house! They always kiss and make up, though, and end up cuddling up together again, and domestic harmony is restored.
Food
Clancy erupts!
It is now over 18 months since I have been making Kombucha on a weekly basis. The jar sits in the airing cupboard and each Friday, I bottle it up and make fresh. You can see my original post about it here. (This was on my old blog, and although I replaced the photos on this post, there is no guarantee they will be visible, unfortunately! I no longer bother with the second fermentation.)
Many of you may remember the wonderful TV series “All Creatures Great and Small” back in the 80s, about a Yorkshire veterinary practice. One of their patients was a dog called Clancy, who belonged to an eccentric Irishman called Mr. Mulligan. This dog was always “womitting” and none of the vets ever wanted to treat him! When they asked Mr. Mulligan how he was, the reply was always “Lively.” It is because of this that I called my kombucha plant “Clancy” – sometimes it can be a tad lively when I stir it before straining and bottling it. This week it was the liveliest it’s ever been and I had to get a photo of this kombucha eruption!!
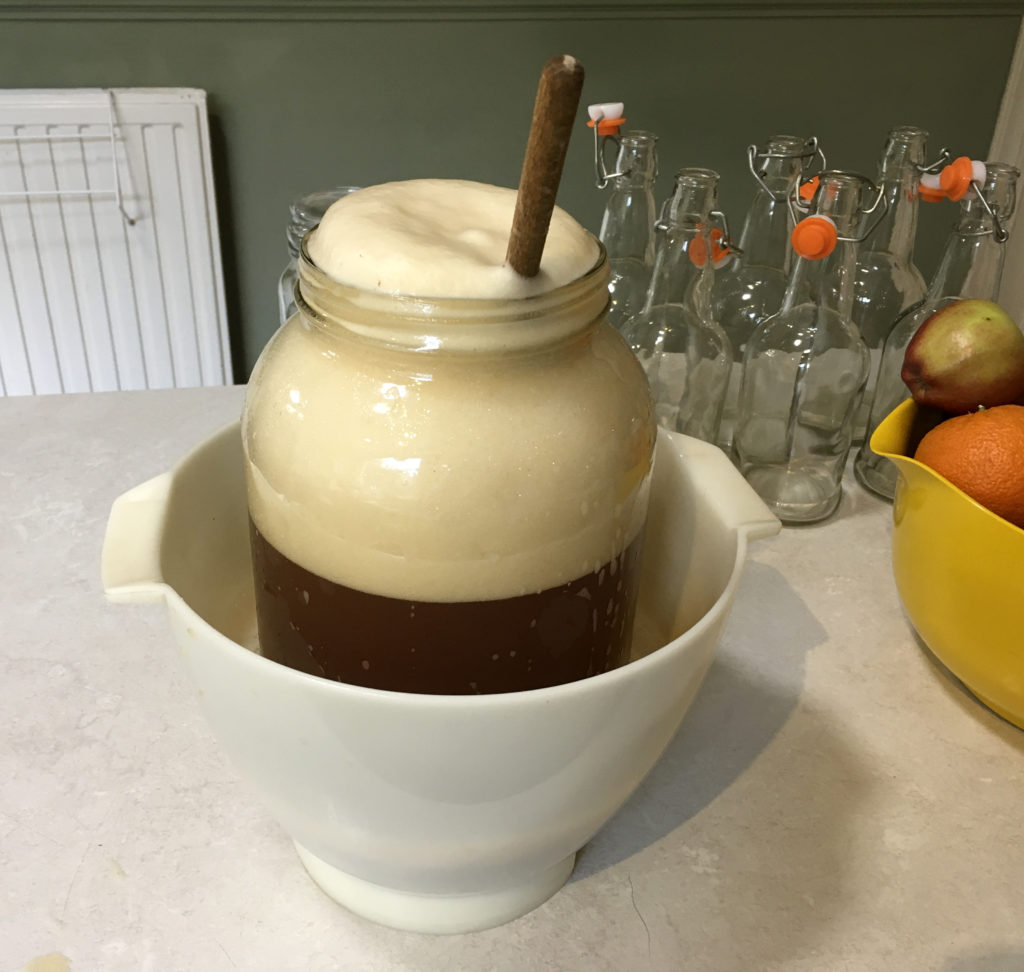
After the first time it erupted, I would always put the jar on a plate before stirring, but after this proved inadequate, the jar is always put in the bowl I use to strain it into. This time, I had to lift the jar up, or it would have erupted over the top!
Here is the kombucha bottled and ready for drinking, together with the next batch ready to go in the airing cupboard.
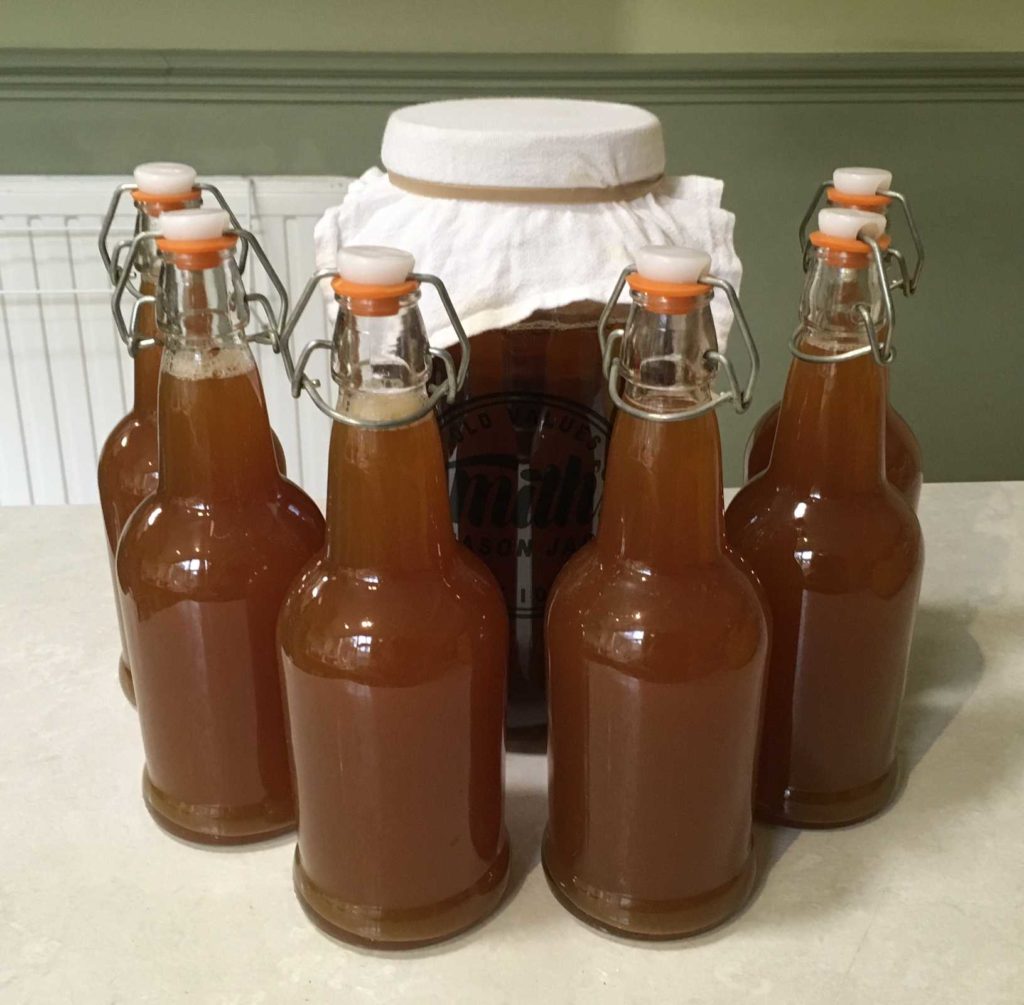
Deelicious. Full of healthy probiotic bacteria and yeasts.
Recipe of the Week
Brown Rice and Green Bean Miso Salad

A delicious and sustaining salad. I used some green and yellow pepper and a handful of halved cherry tomatoes because that was what I had in the fridge. I used frozen green beans which I cut into shorter lengths and cooked till they were al dente. Whole grains have lots of fibre and good unrefined carbohydrates that do not give you the “insulin spike” that refined carbohydrates do. Bulky foods fill your stomach (satiety) and aid in weight loss. Healthy all round, win-win! I also made a green salad with chopped romaine lettuce and baby spinach, diced avocado which I sprinkled with lemon juice to prevent browning, a diced kiwi fruit and a handful of pumpkin seeds, dressed with a little home-made raspberry vinegar.
Health Update
I had a letter from the hospital on Friday with a further appointment to see the bladder lady in April. No doubt she will want to go through my bladder diary, and then decide whether she needs to refer me on. She mentioned that I might need to see a gynaecologist; I was a bit surprised at this, thinking that it would be a urologist that I would see, but apparently women’s bladder problems come under the purview of a gynaecologist. There’s not much left down there gynae-wise that they would be interested in, actually, because I had a hysterectomy 25 years ago!
Have a great week, everybody.
I have so many Celtic knot pattern books too including the George Bain one (from the same era too!) I knitted G an Aran sweater with a celtic knot across the chest that I worked out on graph paper – it was the Olden Days after all, lol! Your knots have turned out beautifully.
Hugs LLJ 7 xxx
Ohhh those celtic designs look stunning. But the 2 that made me smile are those kitties so sweet together.
Sandra de @16
It’s a bit like the Turkish carpets that have deliberate mistakes in them because only God is perfect…if you can make a knot pattern from a single string, that’s the highest form because its so difficult. Your patterns are wonderful and endlesssly fascinating and I like the one you think is overworked the most!! It really rises from the paper for me! Thanks for your comments about our kitchen. The new kitchen is being built in one end of a new extension at the back of the house, and the original kitchen is very much intact and in use at the front of the house. That’s why the time frame of the new one is so erm…fluid. It’s had to fit round a lot of contract ‘roof over our head’ type work and so takes a back seat for prolonged periods! I think if I’d had to live out of something temporary over the time it’s taken I would have gone completely out of my mind!
Hi Shoshi, I have that Celtic book too, hasn’t seen the light of day for I don’t know how many years. Great job on what you’ve done with the motifs. Love the kitty pics as always. tiny little knitted things for them to wear.
Your Celtic knots are stunning. I love how you took us through the process to the finished colouring ones – which I must say look almost three dimensional. Very nice indeed What are you going to do with them all? Such a lot of work has gone into them, they must not be hidden away. I certainly remember the previous drawings you did, nice to have them here again to look at.
Kombucha looks very lively and it is nice to see your cooking again on here. The salad is interesting too, I love different salads and remember someone once catering for us all at school (a Pad day) and she made lots of different salads, it was heaven on a plate.
Obviously I got great joy from seeing the kitties, they are such beautiful felines and bring me such pleasure seeing and hearing about their latest antics.
It will be interesting to know how you go on in April with your next appointment.
Take care Shoshi
Hugs, Neet 8 xx
I love the knots and as always it’s an interesting post
Such a interesting post, Shoshi, as always. Your Celtic knots are beautiful. They always look fascinating and so complicated.
Had to smile at your kitties sat on your hubby’s knee. I bet they keep him warm.
Have a good week
Hugs Lisax #23
Your final celtic knot images are stunning – I think the first one is my favourite. The kitties made me laugh so thanks for sharing the photos of them. Have a good week. Happy WOYWW. Caro x (#15)
Hi Shoshi, I like the Celtic knots. I would put them in exactly the same order, the last was most definitely my favourite. I now have some Oxide sprays, so I may well have a play about with them in one of my scrapbooks. I seem to be in a scrapbooking phase at the moment, although I do need to get back into a quilting phase soon. If we ever have a Chinese takeaway, I repurpose those boxes too. My grandchildren are all quite keen on recycling and repurposing. Last week must have been the week to post appointment letters, as I have also got my hospital appointment through to have one of my wisdom teeth removed, and a biopsy on my tongue and cheek (I am dreading those as they were extremely painful last time I had them!). Have a lovely week Heather xx #6
Your kitties are so beautiful! Your favourite celtic design is my favourite also. The 2nd one has a more 3D effect which is great. Angela #28
Hi Shoshi, I ‘m sure I have that first book somewhere if only I could find it. Hopefully these lost things will turn up when I start moving stuff into the new cabins. Big hugs for the kitties and happy woyww for you, Angela x14x
I tried commenting yesterday but Iwas blocked. Hopefully this will work. Love the knots and meow to Lily and Ruby. Happy WOYWW. Sarah #1
I enjoyed reading through your experience, trial and errors of the celtic knots! But I DO like the one green tinged one that you didn’t like! I think it’s beautiful and has that green I think of when I think Irish. I do love the 3-D effect you are getting with the shadowing, and the droplets on the last one are very cool.
The kitties look so comfy sleeping together, Lily must be so warm and toasty with Ruby’s fur coat blanket! I’ve never had kambucha, what is the flavour like? Good luck with your doctor’s appointment in April. My DH is having double knee replacements at the end of April, I’m both looking forward to it and dreading it at the same time. Have a great week, Lindart #22
Hi Shoshi. Really interested, again, to see the experimentation process you went through, and the way you played with the accidental/random elements (where the design was obscured, etc). I think your ideas really came together in the last one, but I wonder if you would have arrived at those delicate 3D droplets without first diving into that blue-green puddle in the third, which is actually my favourite! It makes me think of koi carp and knot gardens and rain. It’s lovely.
Amelia