
What’s On Your Workdesk this Wednesday?
What fun I have had this week!
Mosaics
All last week, there was a craft festival at one of our neighbouring churches, with an exhibition and daily workshops each afternoon. I wasn’t able to get to them all, but I went for the Thursday workshop, which was mosaics, something I have never tried before, and the card making on Saturday.
The mosaics teacher provided each one of us with a tile, and boxes of broken up bits of china – old plates etc. She said it was a lovely way to reinvent favourite old china that had got chipped or broken. One of the boxes had fragments of willow pattern, with pretty little fragments of blue on white, and I decided to go for that, with a white background.
On the day, I was wearing my chambered nautilus necklace, which is a fantastic example of a “”Golden Spiral” in nature, associated with the Mediaeval Italian mathematician Fibonacci’s famous sequence of numbers – God is indeed the supreme mathematician and you see these patterns everywhere in Creation. I have long been fascinated by them, and couldn’t resist buying this pendant when I spotted it several years ago at the County Show. It’s a slice through the shell, showing the polished outer surface on one side, and the chambers on the other, so the pendant is reversible. The piece is mounted in silver.
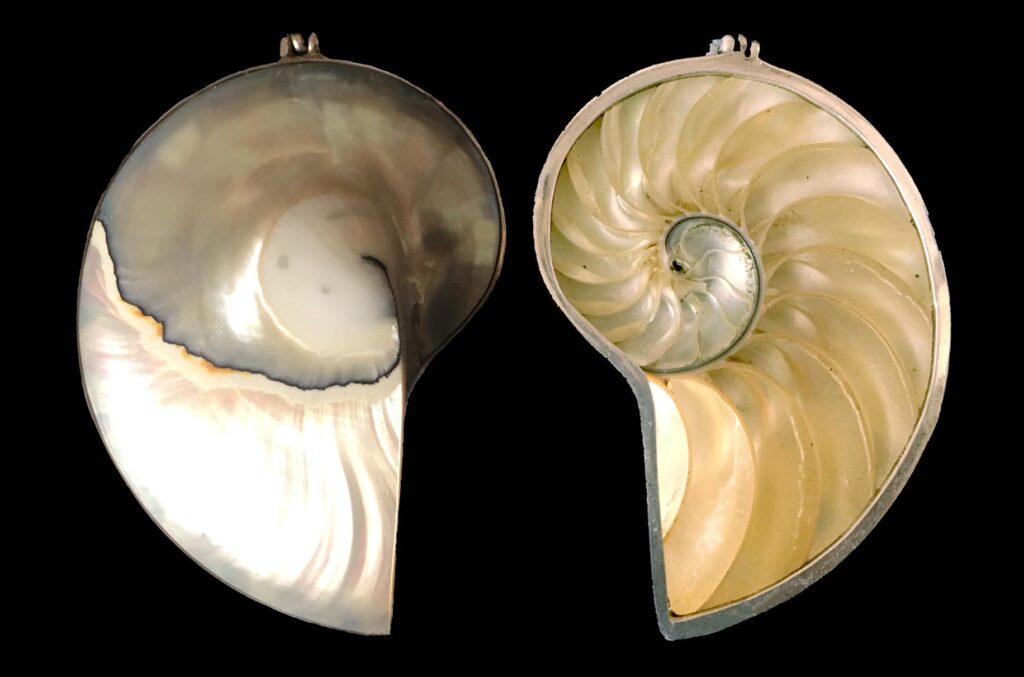
I decided to base my mosaic tile on this spiral.
She started us off by getting us to draw a simple outline on our tiles, of the shape of our choice. Several people did hearts, and someone did a cat’s face. I drew my Fibonacci spiral as best I could – not a true representation because I couldn’t plot it accurately, but an approximation!
to start the mosaic process, she got us to choose fragments of china with straight edges and line them up around the edge of the tile.
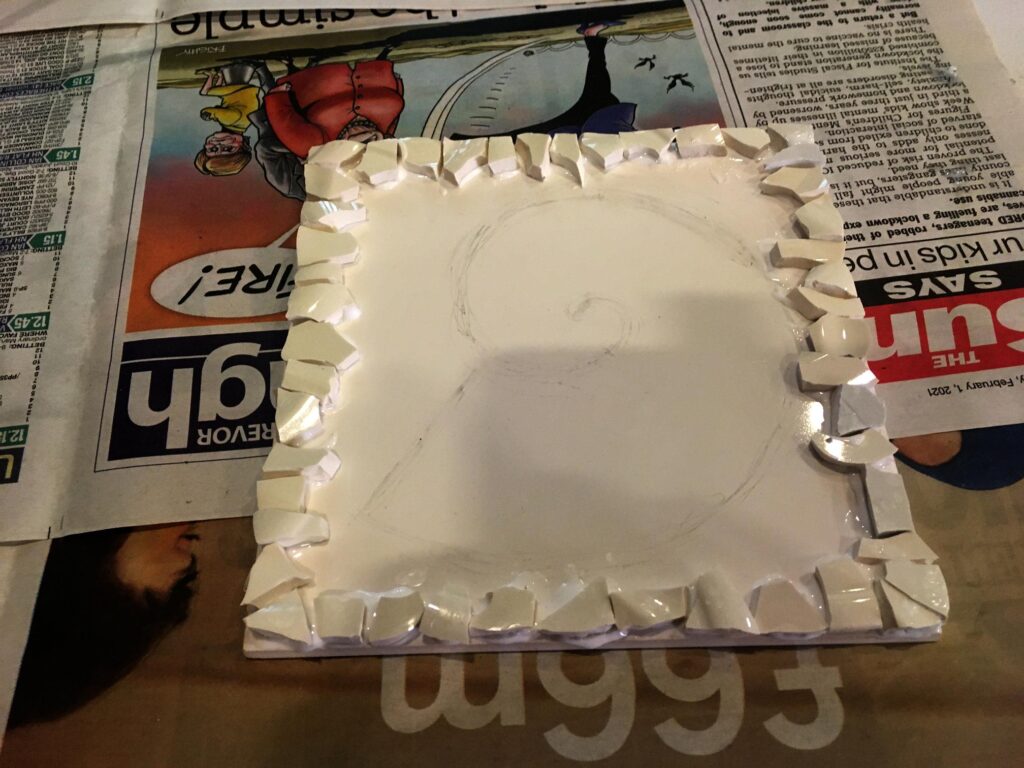
Once they were in place, we glued them down with a generous amount of PVA glue (a very sticky business!) and then we were ready to start adding fragments for the motif.
I forgot to take any photos after this initial one.
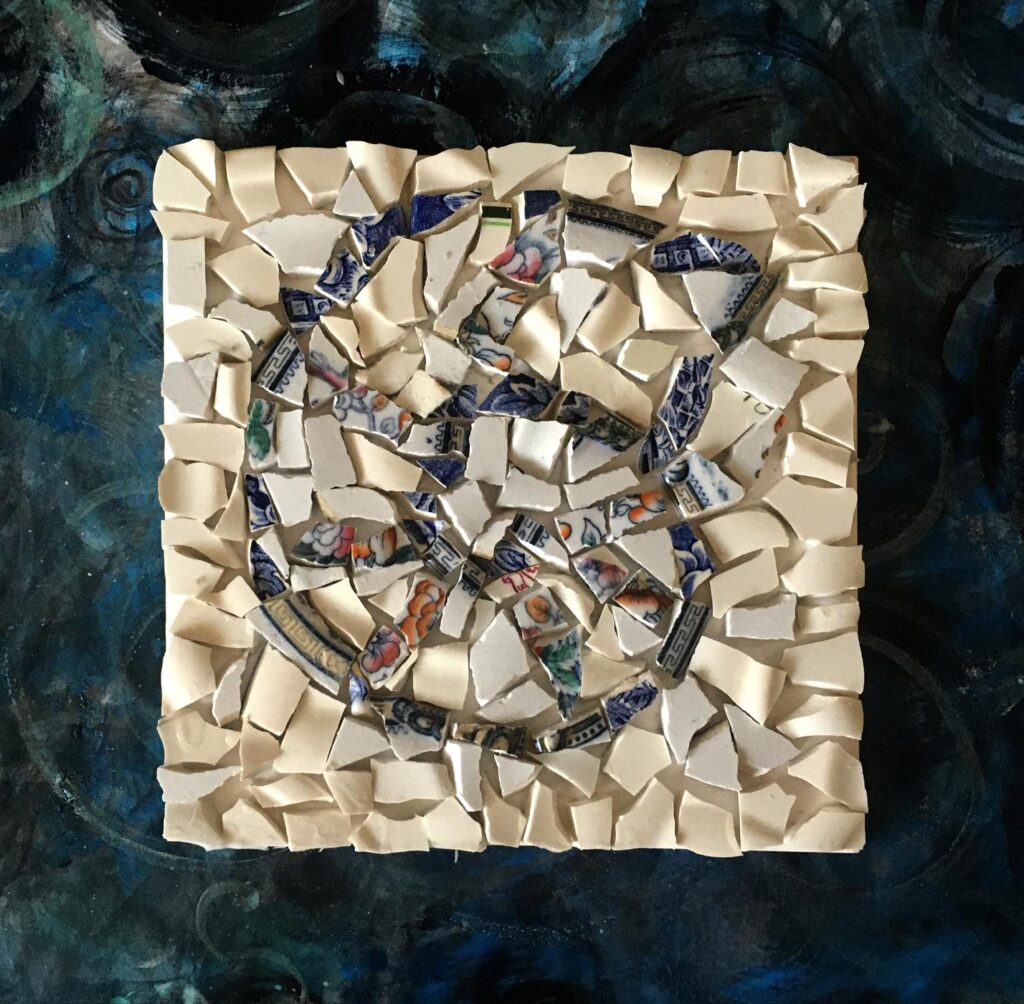
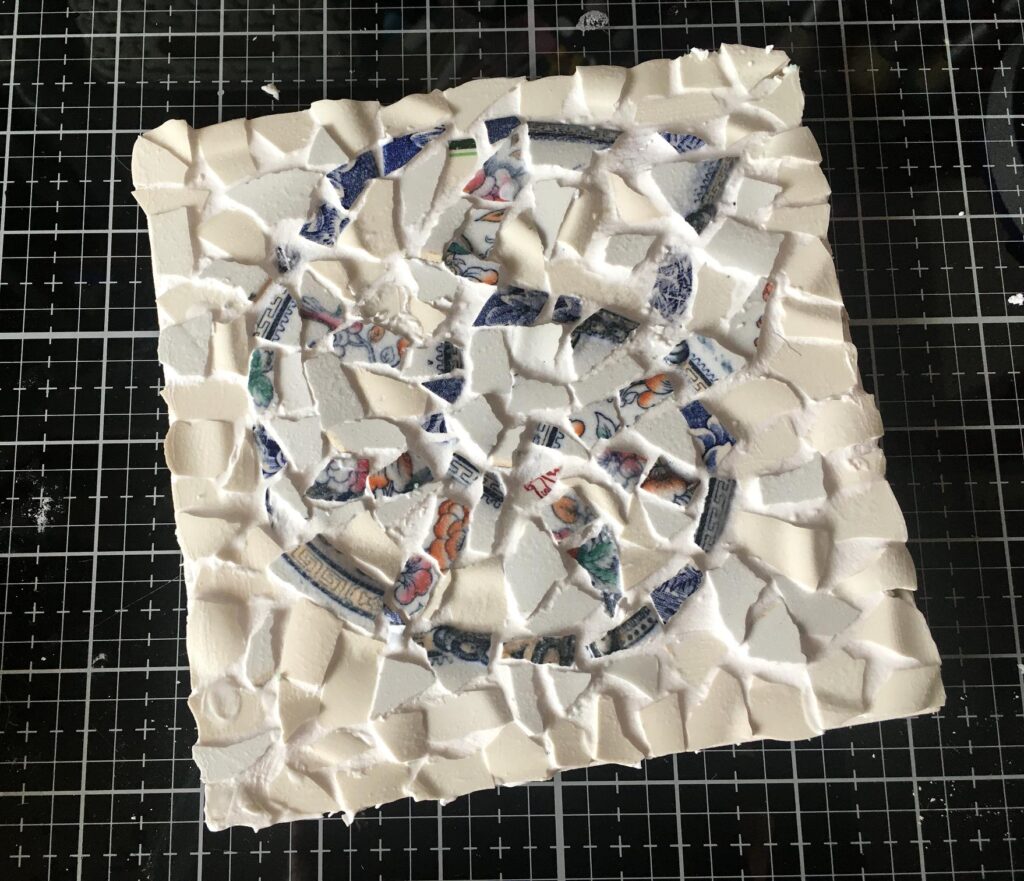
To draw the spiral, I chose fragments with a narrow band of blue pattern on them and lined this pattern up with the pencil line I’d drawn. After this, I added the suggestion of the nautilus chambers with fragments with other colours on them, and finally filled in all the gaps with white pieces. This is the result once I got it home.
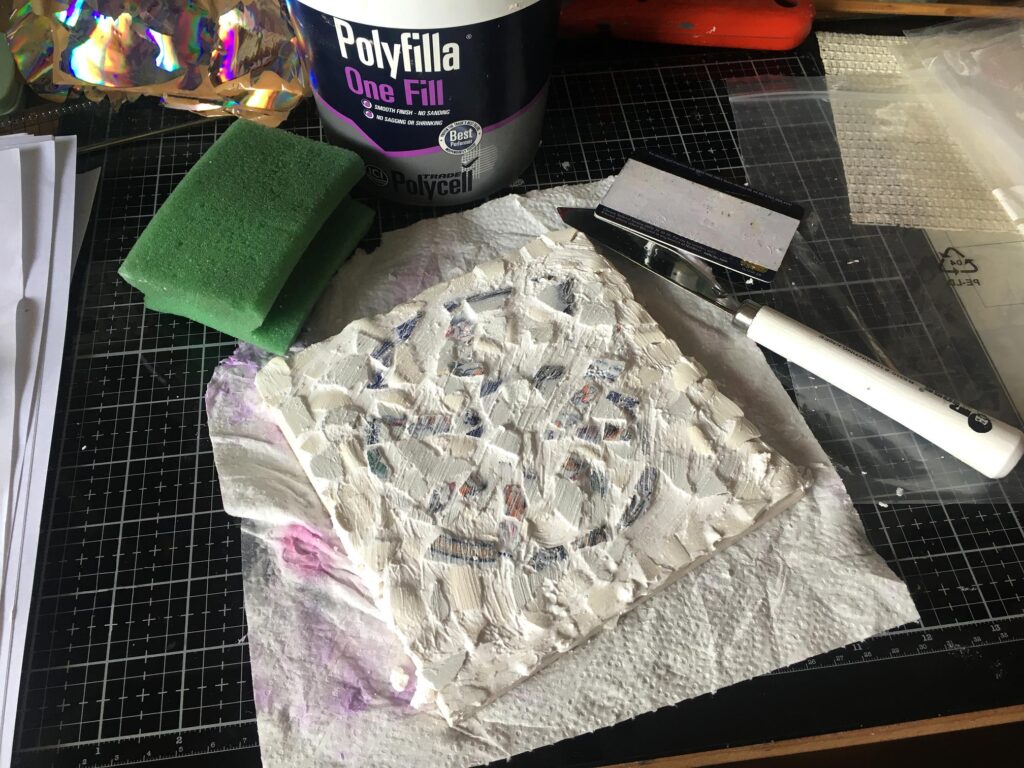
We had to carry it carefully because some of the glue was still not dry. I left it on my work desk overnight to set fully, and then proceeded to grout it. She had recommended ordinary grout, but I didn’t have this, and asked if my Polyfilla One Fill would do. This is a fine ready-mixed filler (known a joint compound in the USA). She said if I was happy with it and knew how to use it, and it set nice and hard, that shouldn’t be a problem.
She told us to apply the grout with a spatula or spreader and get it as flat as we could, and when a skin had formed as it was beginning to set, to smooth over it gently with a cloth. Once it was dry, it could be fully buffed to remove any traces from the pottery fragments.
Not too bad for a first attempt, I suppose, but I wasn’t over-thrilled with it. Also, I wasn’t very keen on using the bits of broken china because they are quite difficult to handle as most of them are curved and different thicknesses, and you do end up with sharp bits exposed. Perhaps I need more grout.
She said she usually prefers to work in glass. I thought that if I decided to do more of this, I might invest in some of those glass tesserae. She said it was a lot easier to cut with the special snips, and to “nibble” away to make the pieces the shape and size you wanted. Cutting the pieces did look pretty hard on one’s hands and I don’t think I’d have the energy or strength to do a lot of that.
She showed us some pictures of the lovely projects she has done; some in public places locally, and quite a few in her garden, which must be beautiful with her various art pieces adorning the walls and the risers of her garden steps – these last ones were particularly gorgeous.
This is a very interesting art form. For those of us who paint or draw, she said one has to set that aside as it is a lot more impressionistic, and difficult to get the level of detail one might strive for. If you were doing a large piece, it would be a lot easier to get more detail, a bit like the pixels in a photo.
Has anybody else tried this? Off to visit Pinterest and see what other people are doing! Do I really, really, really need to start a new craft…..?
Later…
Upcycled CDs/DVDs
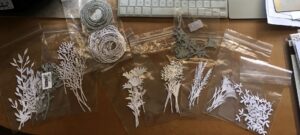
As a result of my researches online, I discovered some simply amazing YouTube videos where people had recycled old CDs and DVDs and made absolutely beautiful glass-like tesserae for their mosaic work, and for making jewellery and embellishments. I decided I simply had to try this, especially as I am in the process of digitising all my old DVDs and although I’ve passed a lot of them on to my hubby, I’ve still got masses of them and had been hoarding them because I didn’t want to throw them away, and wasn’t sure how to recycle them. Most CD/DVD upcycling is pretty naff, in my opinion, as most of it still looks like old discs, only tarted up! Looking at these tesserae, nobody would guess what they were made from.
Preparing the DVDs to make mosaic tessserae
There was a fair amount of trial and error involved in this, and following various videos online. CDs and DVDs are structured differently and have to be treated accordingly. While CDs are made as a single layer, DVDs are constructed of two layers which have to be separated. I discovered, after a lot of messing around and being careful not to cut myself, that the best way to separate the layers is from the centre, and not from the outer edge. If you can get the point of the knife between the layers in the centre, you can start working it around the hole and then gradually push the knife further out towards the edge until the layers begin to separate. You can then pull them apart easily with your hands.
To get the foil layer off, you use tape such as duck tape. I didn’t have any so I used parcel tape (which is an absolute pain to use – too thin, and it has a life of its own and sticks to itself for a pastime, and if you let the end fall back onto the roll, it’s difficult to get it started again). One of the videos said that people use these pieces of tape with the foil attached, and either cut them up or punch them, or die-cut them, and you can put them in junk journals etc. Here are some of my strips.
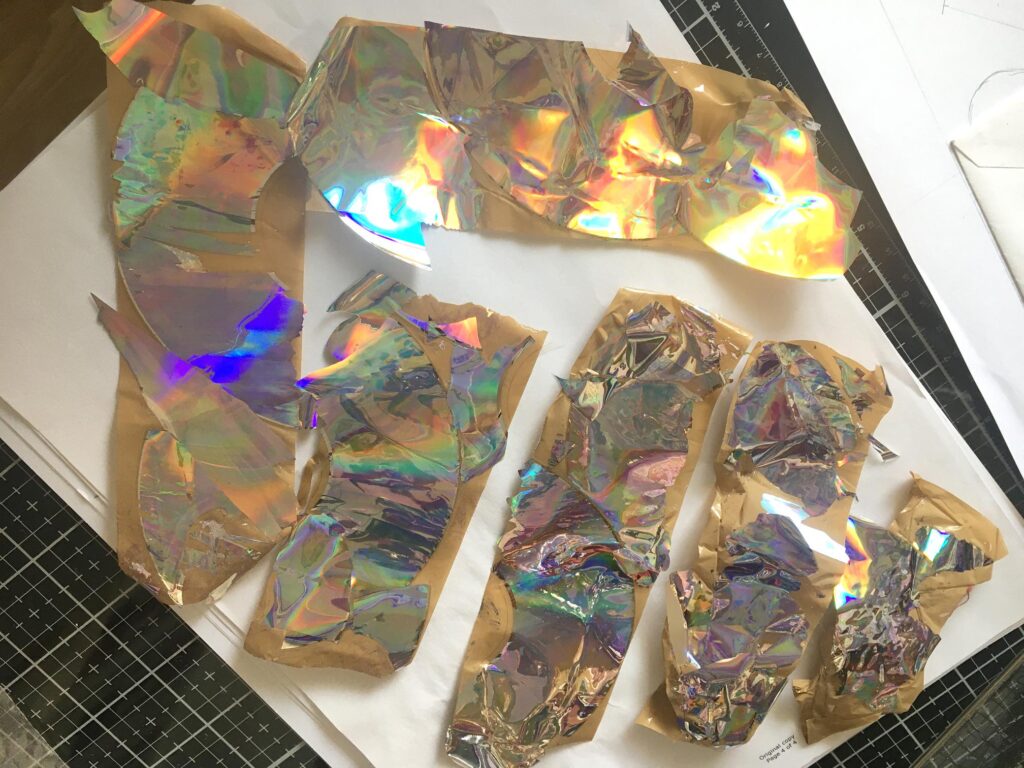
Much of this project was really difficult to photograph because of the extreme shininess of a lot of it. In the picture above, there’s so much reflection from the foil that it doesn’t look as silvery as it does in real life. You can pick out the arc shape of some of the strips as they came off the disc. To get it started, you need to make a light score line on the disc, or scrape away a little at the edge, to give the tape a starting point. Then you smooth a piece of tape over the disc so that this scratch is covered, and burnish it well before pulling it away, and the foil should come with it. Any little bits left, you can either continue to pick up with tape, or leave them, as they can produce interesting effects in the finished project. It’s really fun and satisfying to see the foil come away.
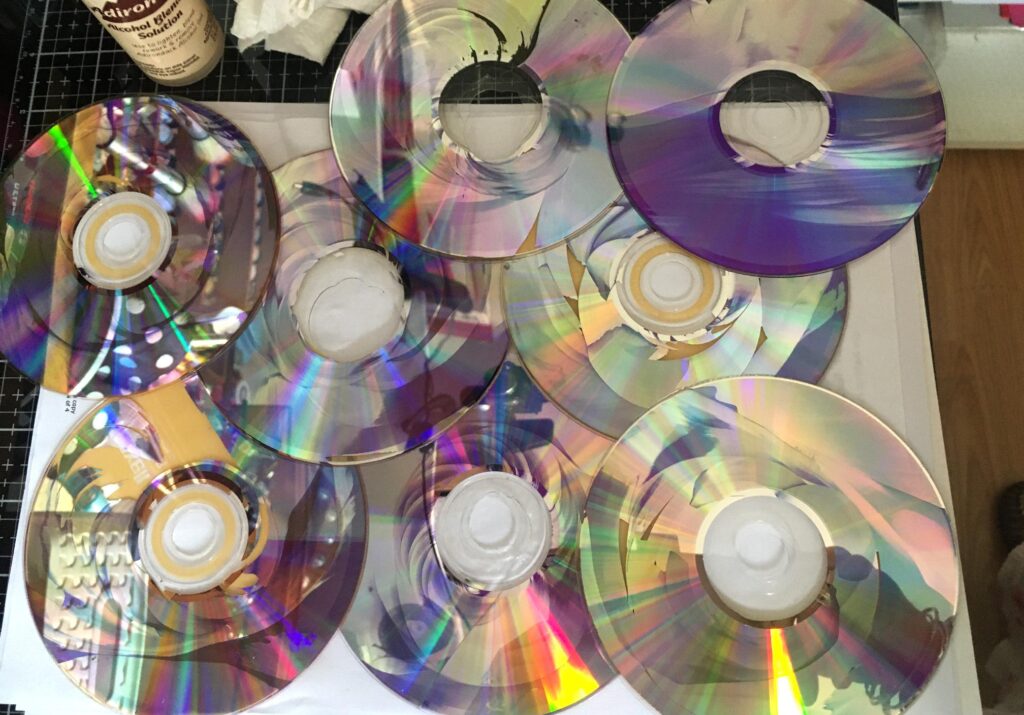
Here’s one of the discs, partially stripped. Again, it’s hard to make out the detail because of the reflections.
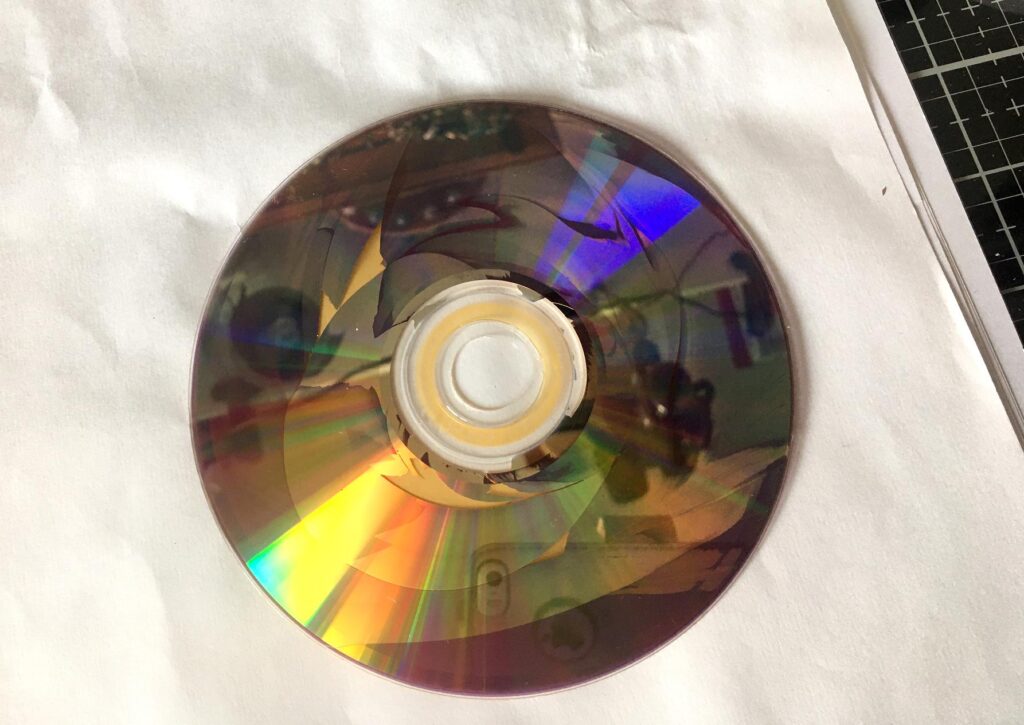
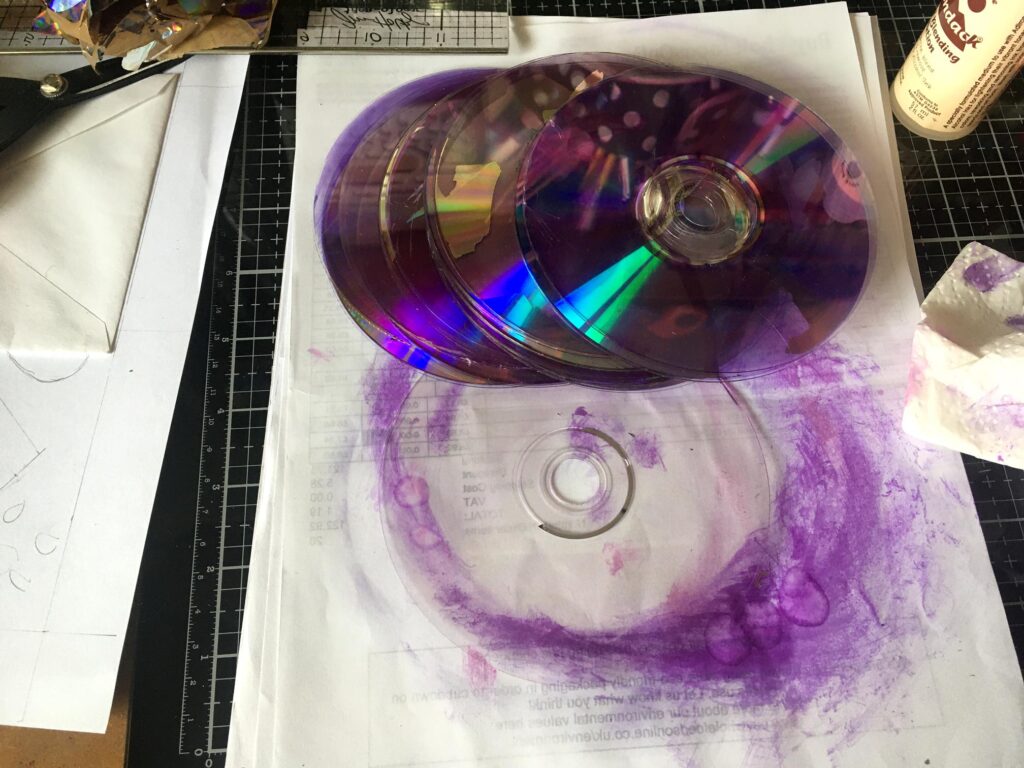
Once you’ve got the foil off, you discover that the plastic has a curious purple dye on it. If you want clear, colourless plastic, this has to be removed with alcohol. The best result was achieved with Ranger Alcohol Blending Solution which seems to be stronger than regular alcohol, although this will work if you let it sit a bit. As I dropped it on, I got those characteristic patches that you get when working with alcohol inks.
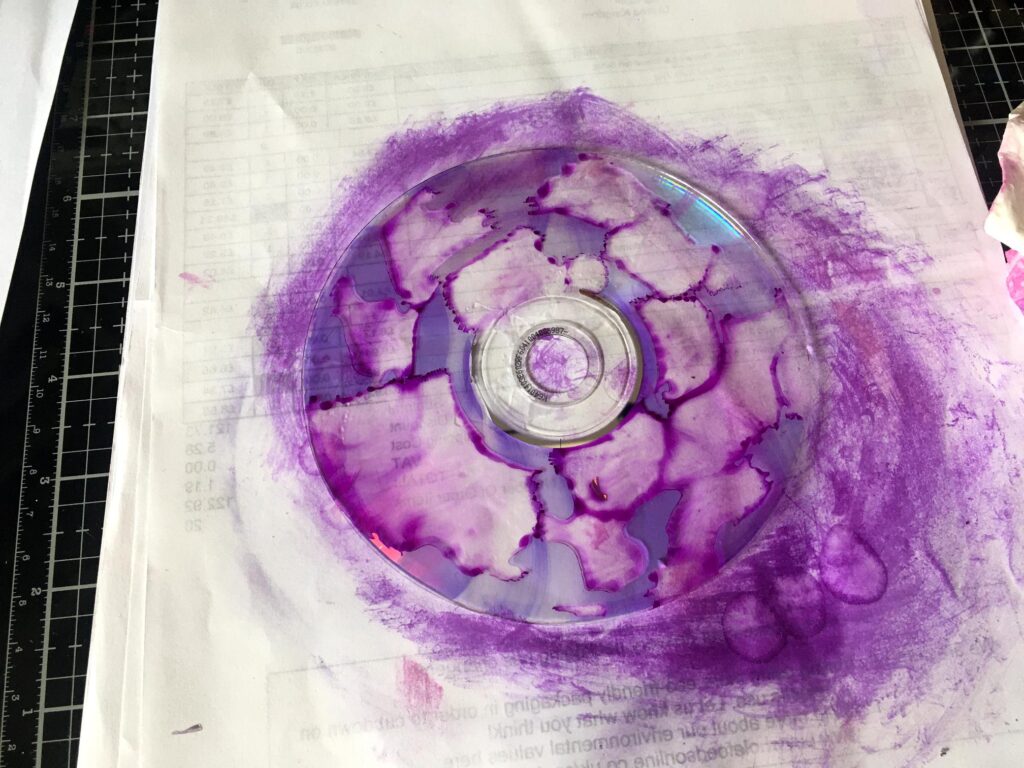
I wiped away the dye very successfully with two or three applications of the solution, until I thought it was a shame to waste all that lovely colour, and wondered if I could mono-print it off onto some card. This was the result and I love it! This print is made up of several layers.
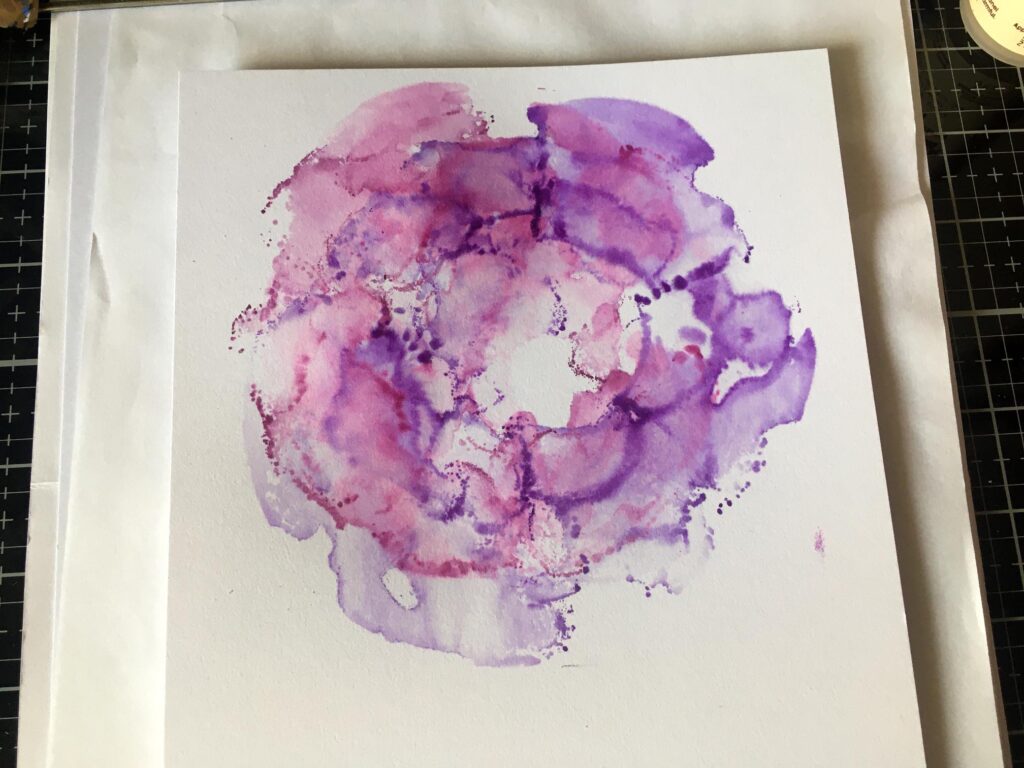
You can see that the dye varies slightly in colour from pink to purple, as it reacts with the alcohol. I think this is gorgeous, and definitely has some potential!
I continued to rub the discs with blending solution and kitchen paper.
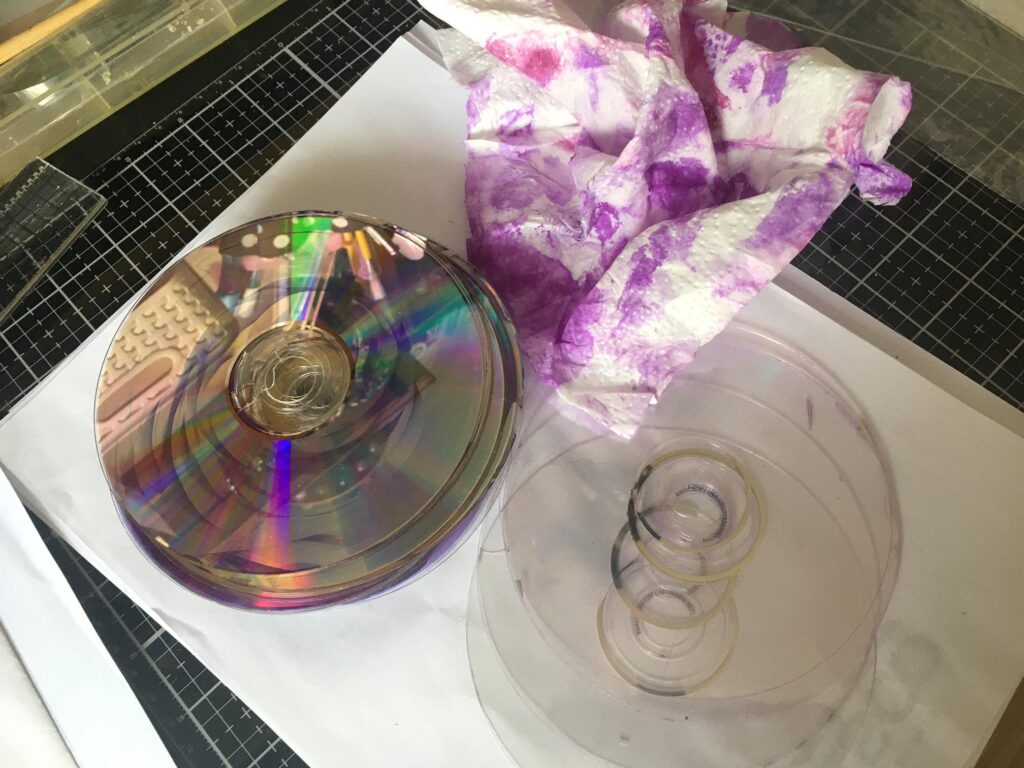
The dye is building up nicely on the kitchen paper. Once the sheet is fully covered with inks of the same colour scheme, it will go in the pizza box with the rest of my gorgeous inked kitchen papers, to use in projects.
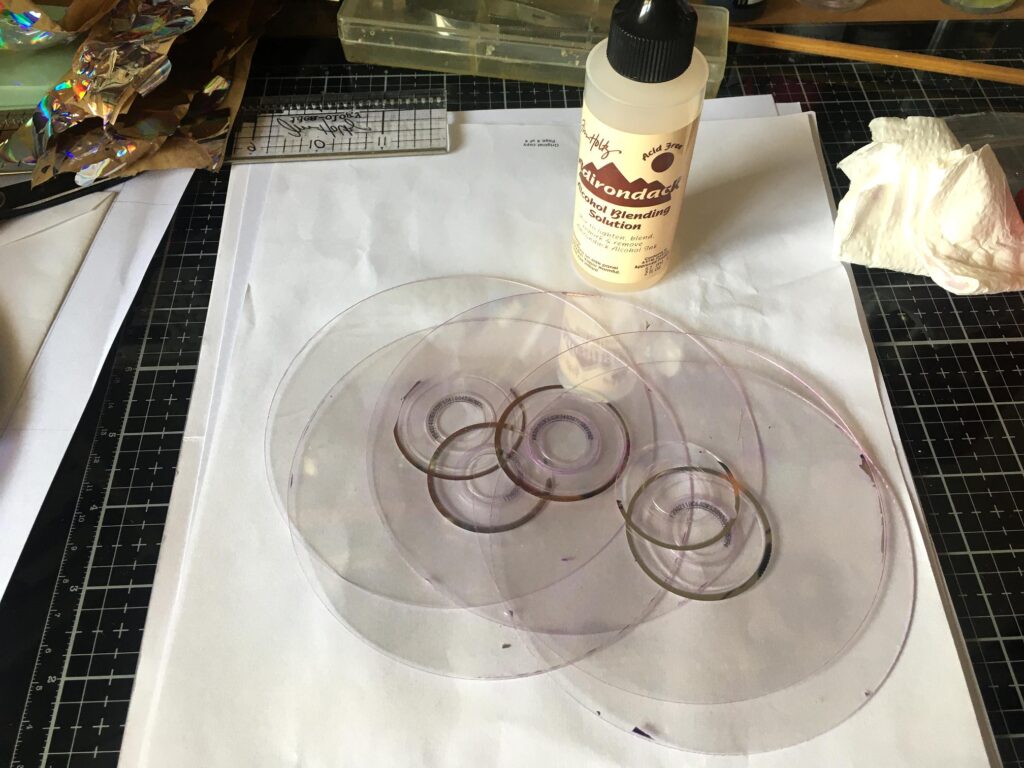
There’s still a bit of a purple tinge on the discs, especially when you see the light through several of them at once, but I don’t think it’s going to show once the tesserae are made.
I decided not to clean them all, because on some of them, where I pushed the knife between the layers to separate them, some gorgeous patterns were generated, and it seemed a shame to destroy these. They will probably be used for larger pieces because the detail would be lost on a small tile.
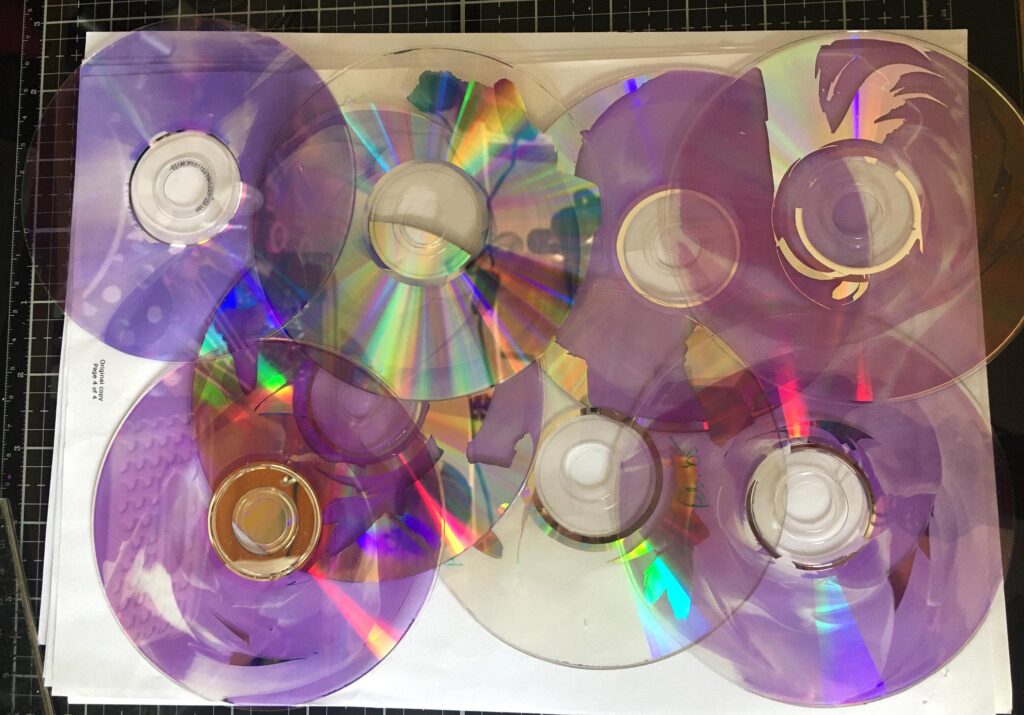
Again, rather too much reflection to see what they are truly like, but believe me, they are gorgeous.
I’m not able to use the top layer because I can’t get the labels off these DVDs. Some of them have nice foil patterns on the back and I may be able to cut them up and do something useful with them.
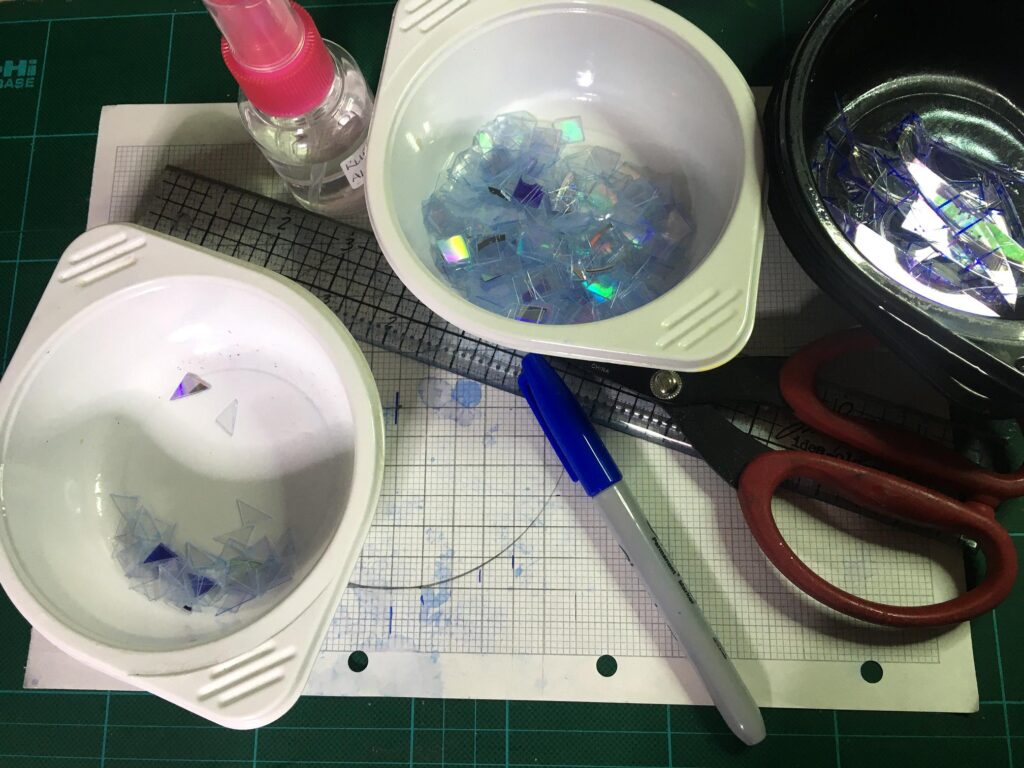
The next step was to cut up the cleaned discs. One of the videos recommened making a loop of low-tack tape to anchor the disc in place over some graph paper, and to use a Sharpie pen to rule the lines following the grid lines of the graph paper. I also cut some trianges from the ends of the strips. These will be useful for creating diagonals and curves, and for filling in spaces. I had been warned that cutting them with scissors was hard work, but I found it easy with my Tim Holtz scissors. A CD is thicker than a single layer of DVD, and that might make a difference.
I needed to clean them up on kitchen paper with alcohol to remove the Sharpie ink from the edges, and any residual purple dye. I did this by tipping a quantity of squares at a time onto the kitchen paper and spritzing it with alcohol and rubbing them around, which didn’t take long. For the next batch, instead of using the rather thick Sharpie, I used an alcohol-based fine-liner so there isn’t so much cleaning up to do.
These small pieces are now all in bowls and ready for making up into tesserae. The scraps went in the recycling bin.
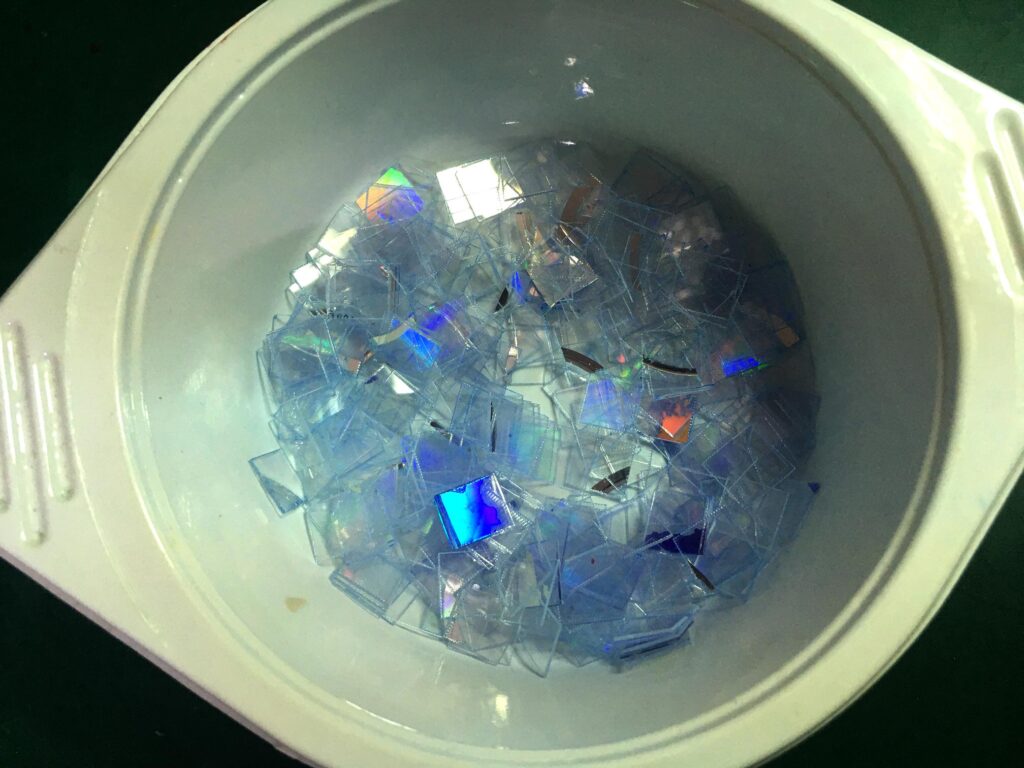
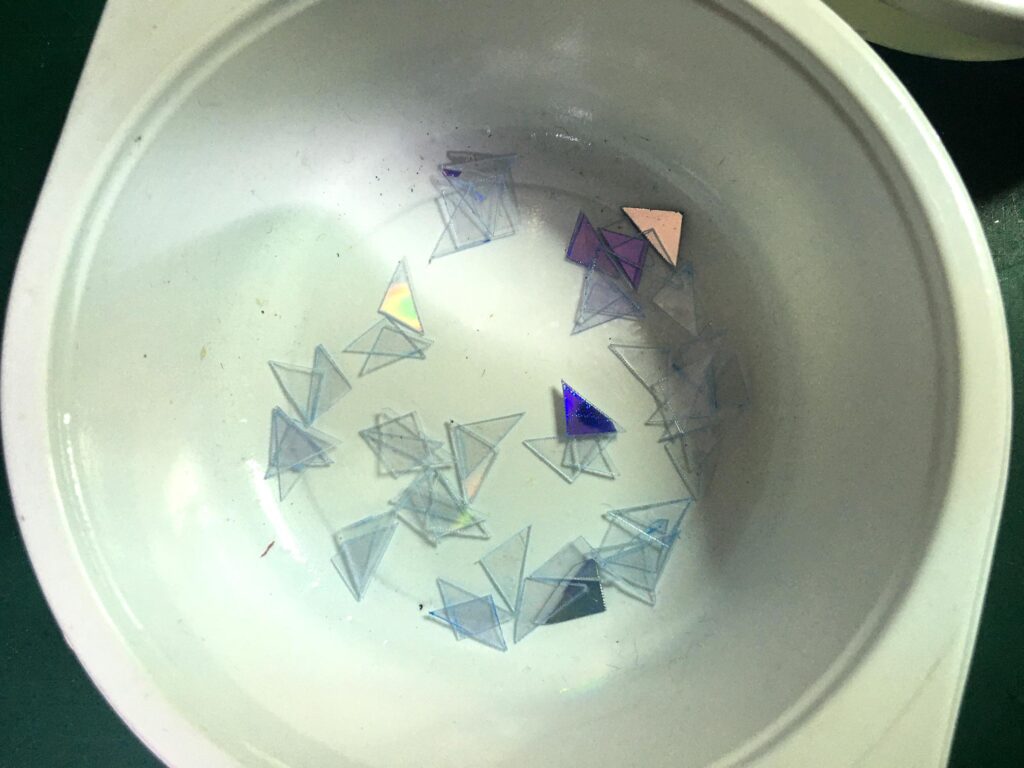
As you can see, I have left the foil on some of them. There is a slight blue tinge when they are overlapping but this isn’t visible when they are placed singly. Also, the reverse side of the foiled ones still has the dye on it underneath the foil, and this won’t be visible once they are made up, unless I choose to use that side.
This quantity was what I got from three DVDs. You get about 84 squares measuring 1 cm from each disc, with some triangles. This will yield 48 tesserae per disc which isn’t bad going. You can, of course, make the tesserae whatever size you want, or all different sizes! Since taking these photos, I’ve completed another two discs.
What I think is brilliant about all this is that every stage seems to yield something useful – the foil, the dye, the disc itself. Everything can be repurposed into something beautiful, and nothing is wasted.
Watch this space for Stage Two of this project!
Simple card-making workshop
On Saturday I was back at the church for the final workshop of the week, this time on simple card-making.
It was really a class for beginners and children. The teacher and I had had a lovely chat the previous Saturday when we first met and she told me about the craft festival. She said it was lovely to share the afternoon with a fellow-crafter! The funny thing is, I never really made cards like this when I first started many years ago. I worked alone with no Internet to help, and I didn’t have craft magazines or much equipment, and just developed my own way of doing things with limited resources, making ad-hoc cards for various birthdays etc. When I first got ill with ME in 2007 and got my first laptop, I discovered a whole wealth of inspiration and tutorials online as the whole art/crafting world opened up to me. By this time I was really doing my own thing and learnt a lot and got loads of ideas from others online. I more or less missed out the traditional “card making for beginners” stage.
Attending Saturday’s workshop was therefore a very interesting experience for me. She had made up little packs of card bases, mat layers and die cuts and embellishments for people to assemble as they liked, and she showed them how to use double-sided tape and foam squares etc. She didn’t bring any inks or stamps, but had a selection of punches for the motifs which included stars, Christmas trees, leaves and birds, and peel-offs for the sentiments. She asked if I wanted to do a kit, or would I prefer to rummage in the box and do my own thing. I think you can guess which option I chose! I love a good rummage! I picked out several different papers and mixed and matched till I found a combination I liked, and used one of her punches which was a bird, its wing and a little leafy branch, and made a sentiment strip with a peel-off. She had brought very little equipment with her because she wanted to keep it easy and simple for people and not over-complicate the process for beginners, and also, she said that it wouldn’t be safe to have a guillotine there with a lot of kids running around – she would not have been able to supervise it properly. It was actually quite an interesting discipline, making do with very little, and proving that you can make simple cards with very few resources. It was fun watching one man making a couple of Christmas cards and enjoying doing something he’d never even considered doing before! He was quite chuffed with his results!
I completed my card topper but didn’t stick it down onto the card base till I got home, as I needed to trim a little off the bottom of the card base to make it fit correctly. I also wanted to ink it a little because the white card base was a bit stark against the more subtle colours of the card.
Here’s the result.
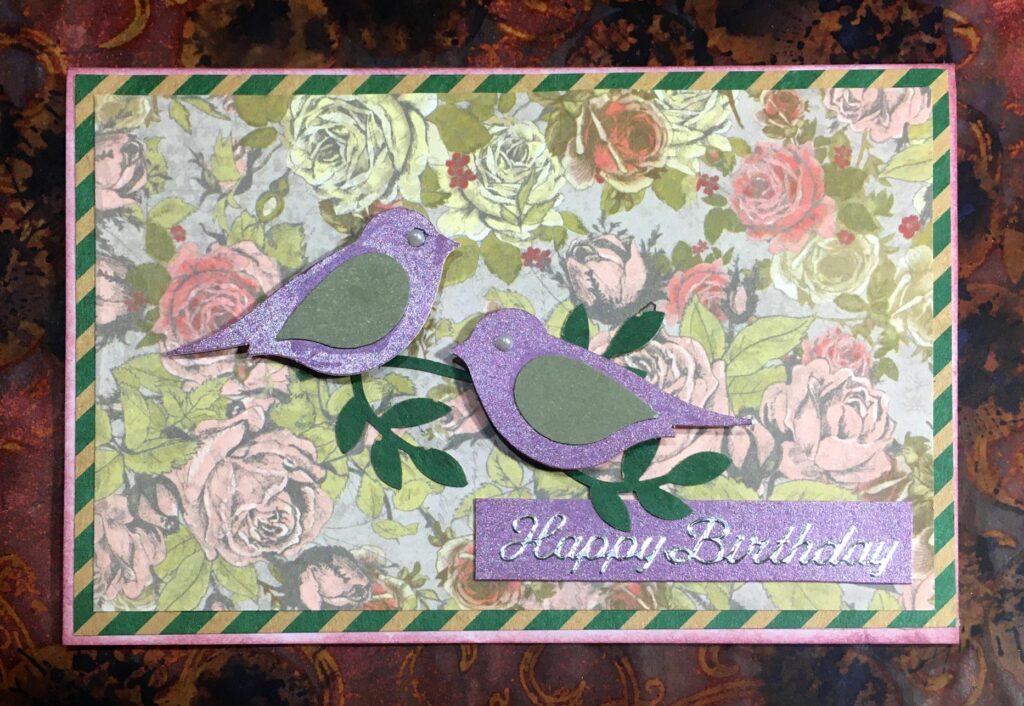
The little birds are raised up on foam squares and they have tiny pearls for eyes. Our teacher was very pleased with what I’d done and said the composition was well balanced.
I thoroughly enjoyed my card making beginners’ class! It has also made me appreciate even more that my recent plan to prepare lots of card bases and die cuts etc. to make cards more quickly and efficiently, is a good one.
Gyrocut
Shoshi’s been gyrating!
Has anybody else got a Gyrocut, and are they successful with it?
I bought this little cutting tool several years ago at a craft show and after a few attempts at using it, more or less gave up with it because it seemed quite impossible to control. There is a small blade which rotates freely, and you are supposed to be able to “draw” with it like a pencil, and it will fussy-cut easily.
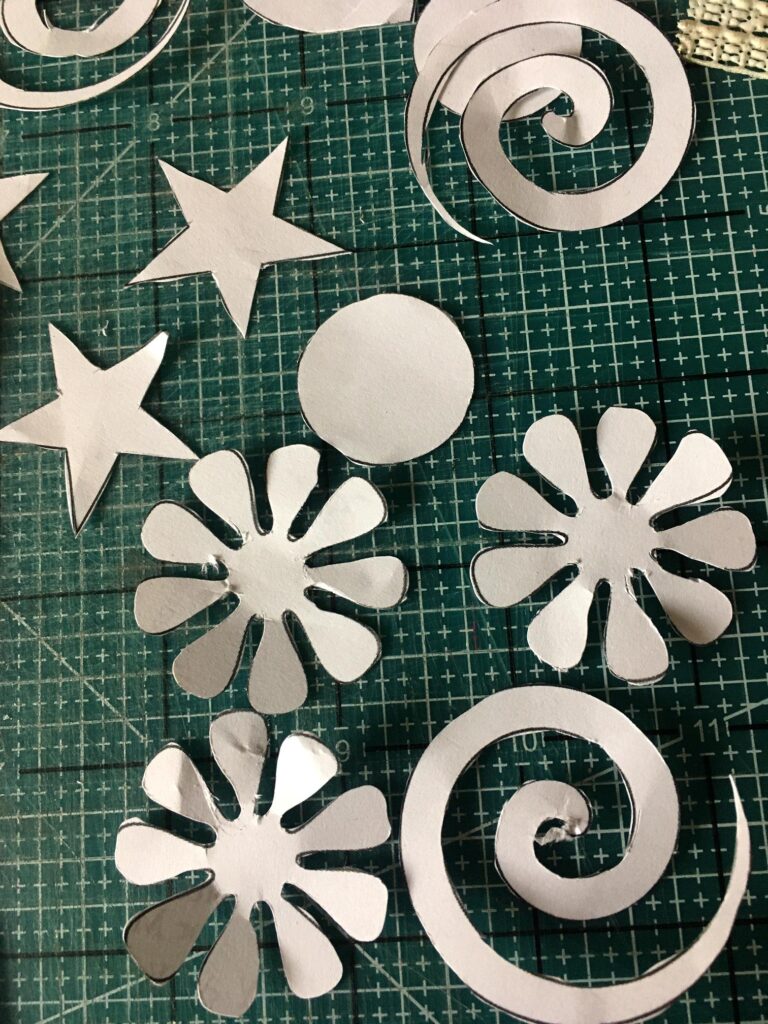
This week, a video came up on my YouTube feed with someone showing how to use it, and I thought this tool was definitely worth revisiting. I watched a Hochanda video where the manufacturer was demonstrating it and I thought “straight from the horse’s mouth” might be the best instruction, and decided to give it a go. I printed out some practice sheets on scrap copy paper, using basic shapes from my desktop publishing software. (In case anyone is wondering, the pot wth the rubber bands on it is my face cream – the outer lid cracked and broke so it’s being glued together again!)
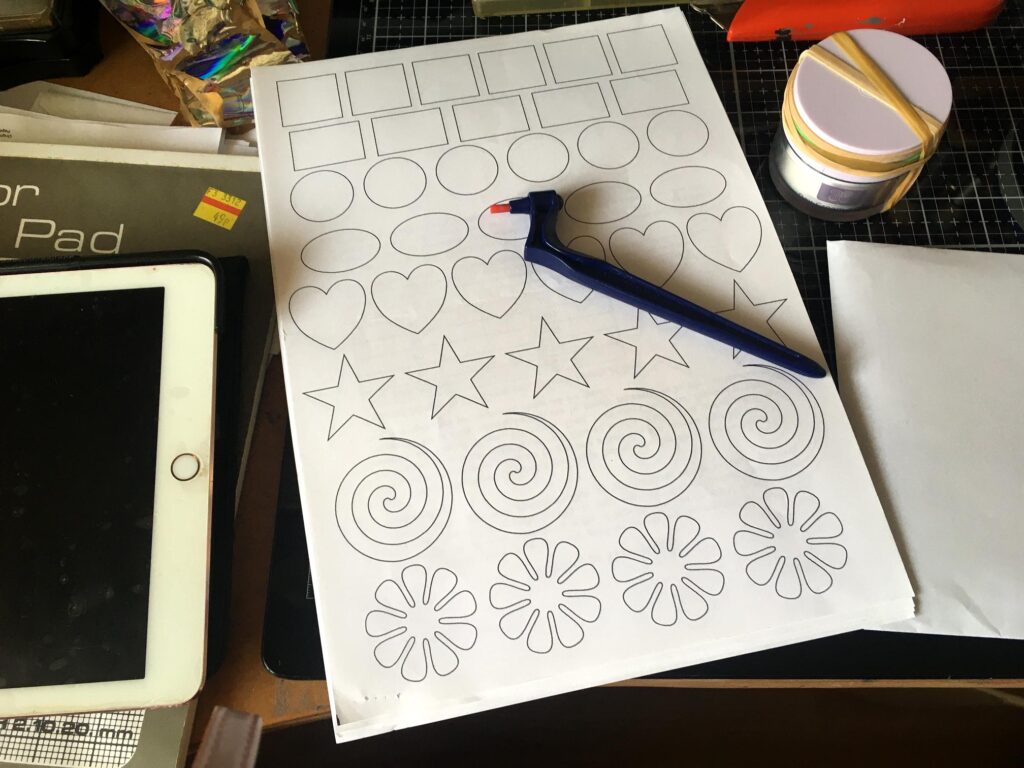
As you can see, I started with very simple shapes at the top of the sheet, and gradually made them more complicated towards the bottom.
Cutting sheet 1. Definitely room for improvement. For much of this, I rotated the paper, which I then discovered is not the correct way to do it.
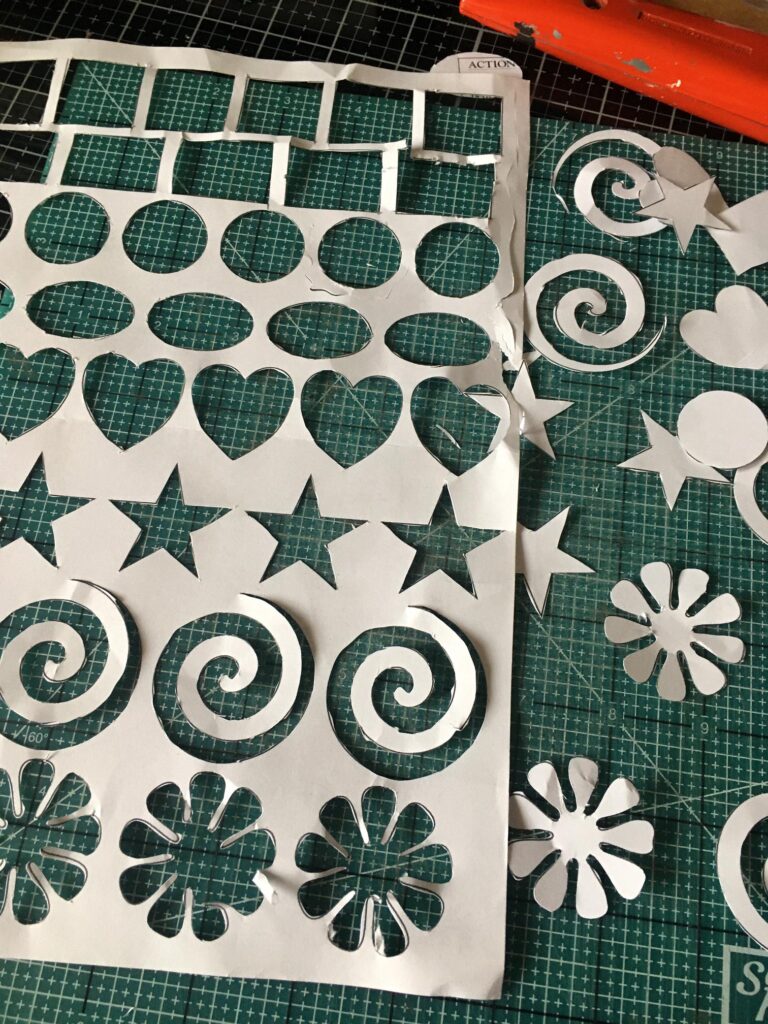
Sheet 2. Definitely improving.
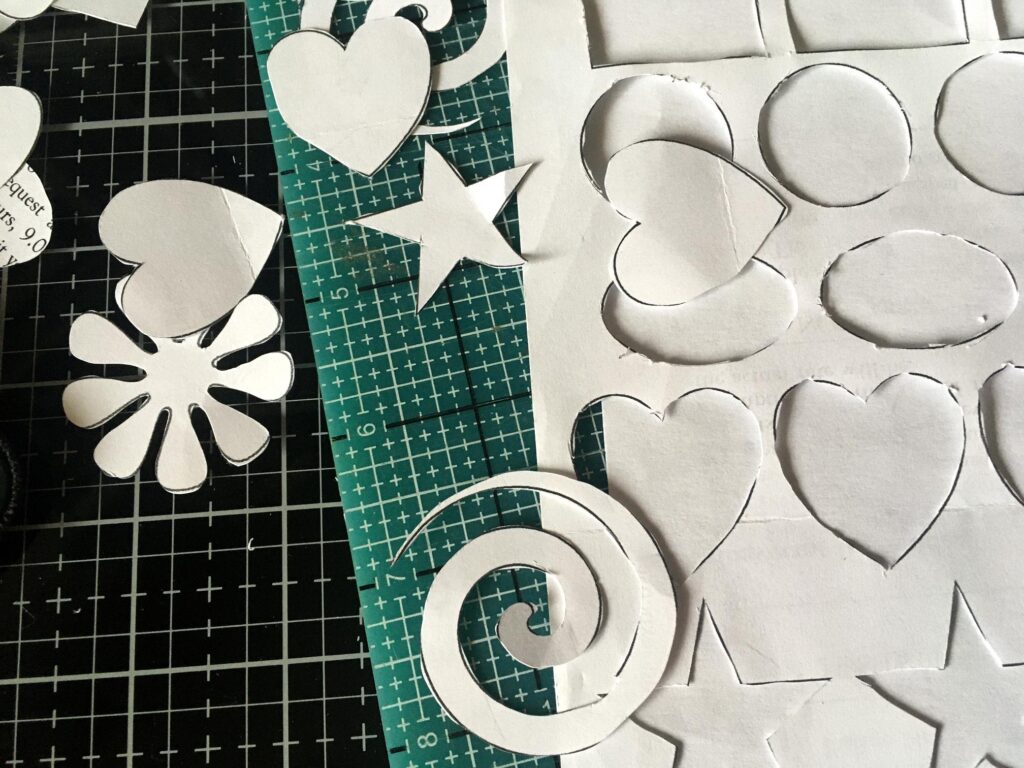
This did make me think that I could perhaps make use of the “shapes” tool in my DTP to cut flowers and hearts for crafting. The auto shapes have nodes on them which you can move to tweak the shapes, e.g. add petals to the flower, make the centre larger, etc. I’ve had this software for years and never even thought of it. Duh.
The correct way to use the Gyrocut is to stick the paper down onto a self-healing cutting mat. The manufacturer of the Gyrocut supplies a brilliant glue (which I also bought at the time, mostly with my electronic cutting machine in mind – this low-tack glue is designed to make sticky mats, and also to use as a stencil glue). Once the paper is anchored, you can draw freely with the Gyrocut without the paper moving. I managed to hold it in place pretty well, though. As you can see, I haven’t stuck to the outlines of the shapes 100 percent, but with practice, I’m definitely getting better.
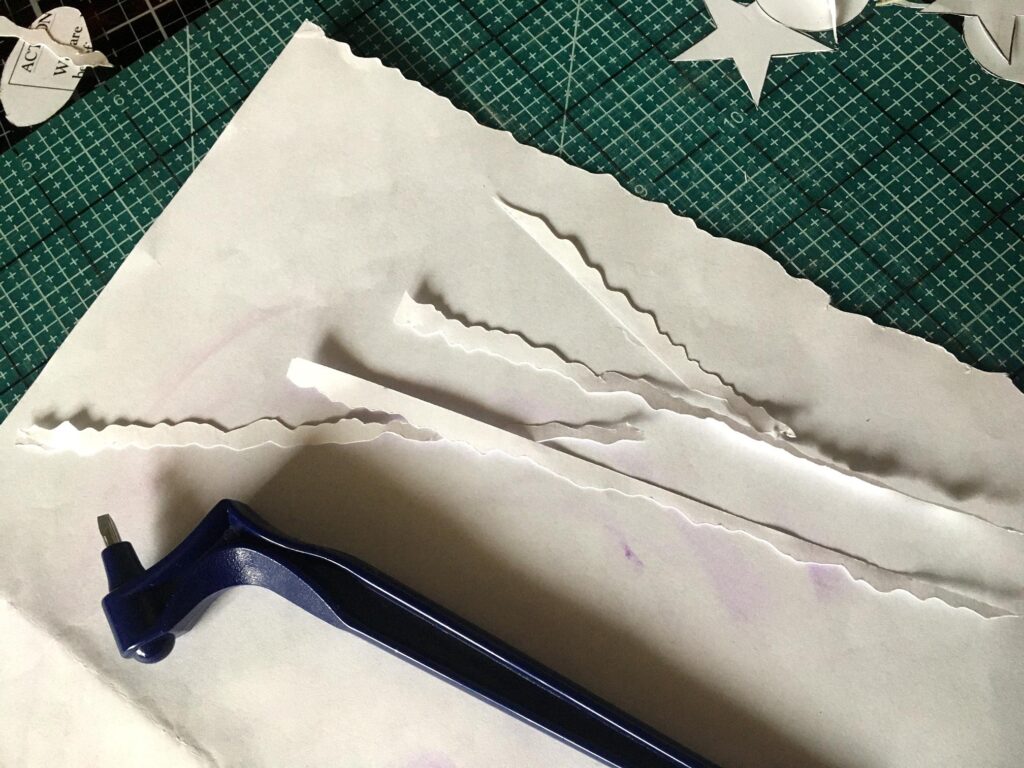
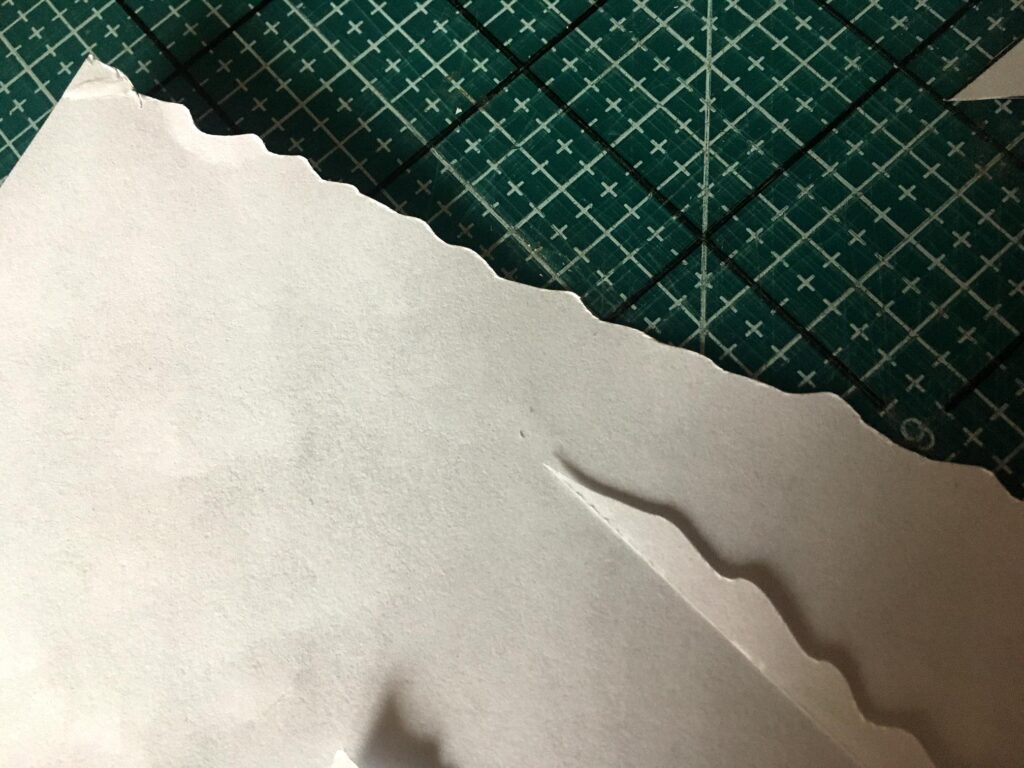
I had a brainwave that this little cutter would be brilliant for creating instant, fully randomised deckle edges on card or paper. Just run the blade along a straight line, wiggling it randomly. Voila! You could use the offcuts as well.
I’d be very interested to hear other people’s experience of the Gyrocut if you’ve got one and use it.
Kitties
Welcome to Kitty Central (thanks Felicia for this fun expression)! Here is Lily doing her Shameless Hussy impression again, and exposing her (im)modesty in the most unladylike fashion. This is known as a mega-gloop.
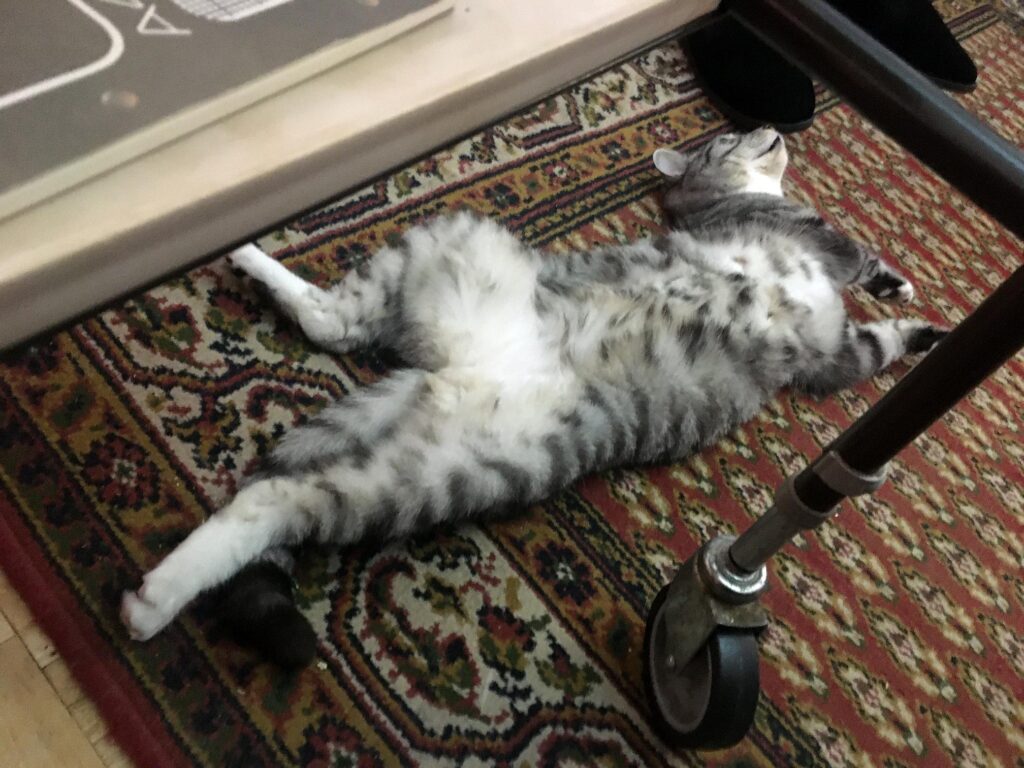
I told her that the Queen would never sit with her knees apart like this, exposing her knickers to the world.
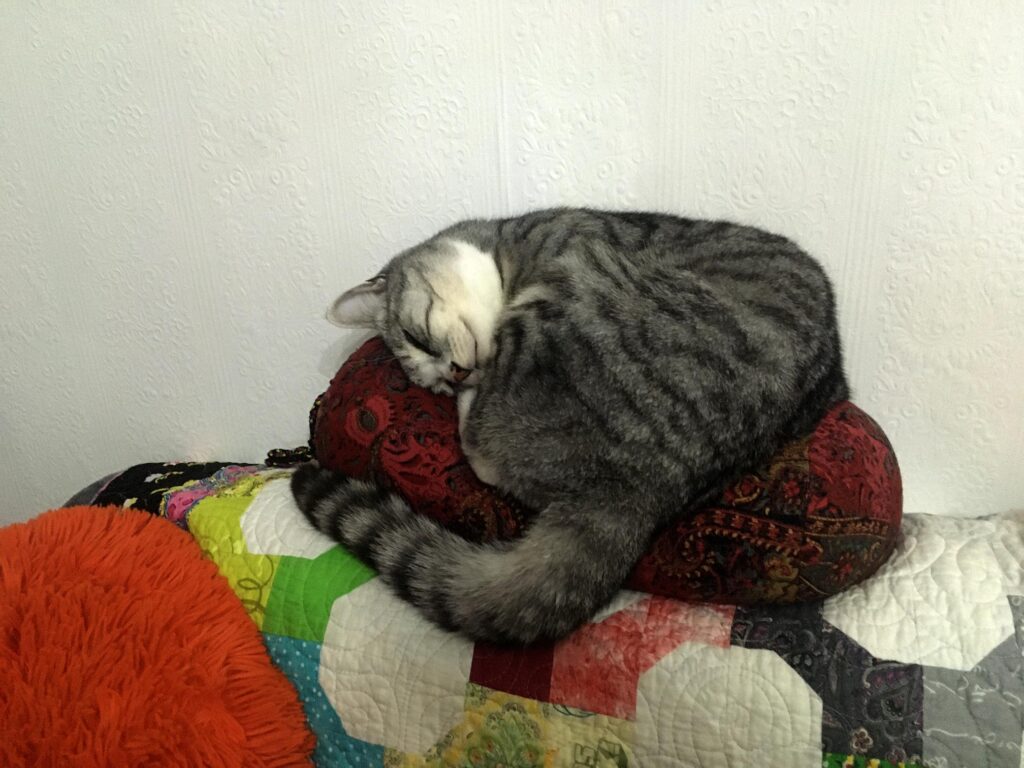
Lily does seem to spend quite a bit of time the wrong way up, but Ruby hardly ever does. She prefers more conventional positions which preserve her modesty. She has been spending quite a bit of time on my neck pillow this week. Definitely her latest favourite place.
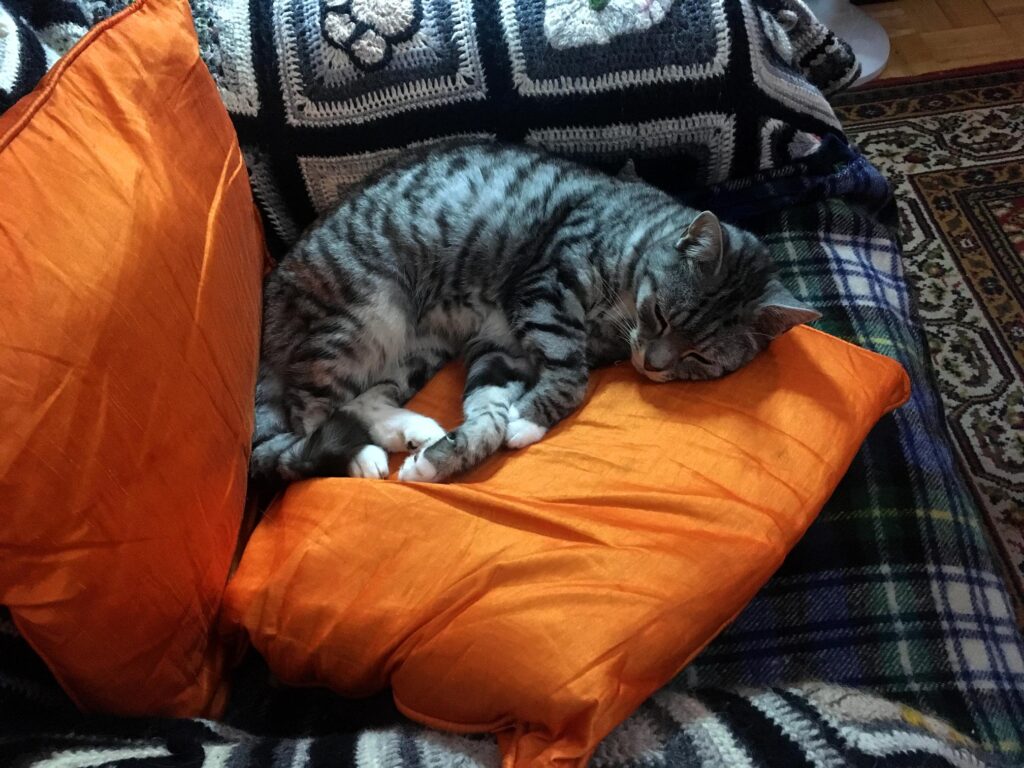
Lily luxuriating again. The lazy lump.
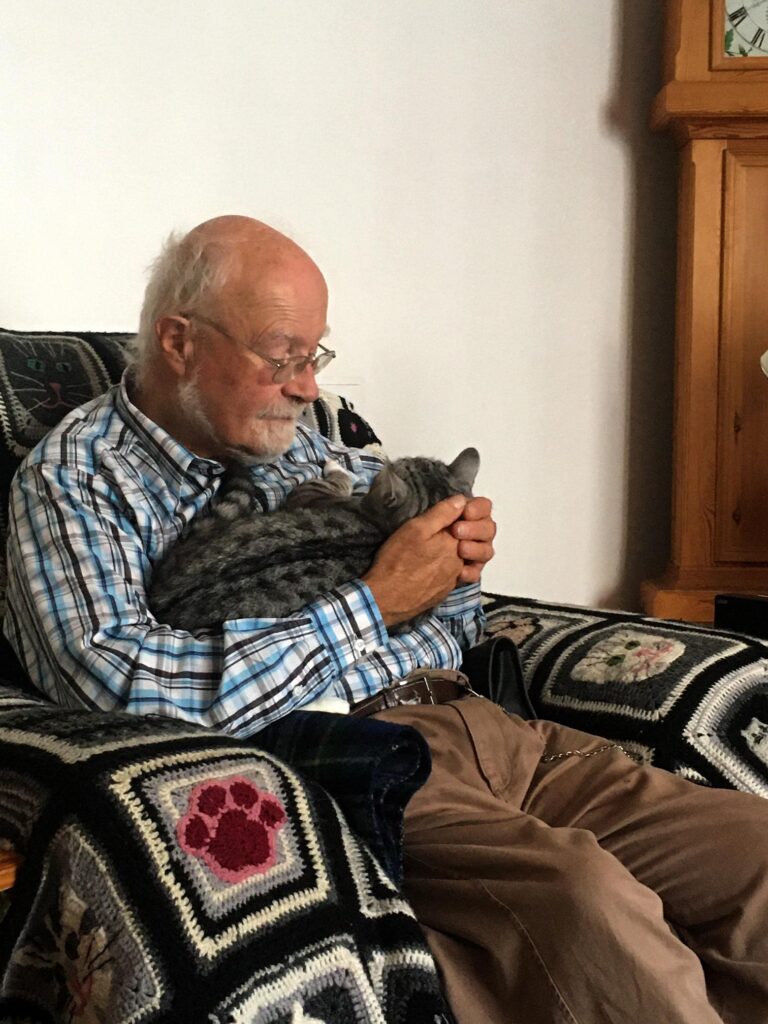
My hubby took them to the vet yesterday for their annual boosters and as usual everyone admired them and said how pretty they were. They were extremely well behaved, and there was no yowling in the car. Ruby in particular was very affectionate with my hubby when they got home! They don’t bear grudges.
Lily now weighs 3.28 kg (7.23 lb) and Ruby 3.68 kg (8.11 lb), combined weight of 6.96 kg (15.34 lb, well over 1 stone)! No wonder I feel as if I’ve got a sack of potatoes on me when they are both on top of me! The vet gave them both a clean bill of health. She said there was nothing wrong with Ruby’s stomach and not to worry about her being sick after meals. She’s been better with the raised bowls, only being sick once so far, since we bought them.
Have a great week, everybody.

SO glad you enjoyed your craft sessions at the church Shoshi. The card is lovely and goes to show what can be done with minimal resources. Love your step by step with the DVDs/CDs. Very useful all round. Look forward to seeing the projects progress. Meow to Miss Modesty and Miss Hussy. Stay safe and Happy WOYWW> Sarah #?
Firstly, I love your pendant , it is gorgeous and I can see why you had to buy it – I agree that the fact that the Fibonacci sequence occurs so much in nature is quite astounding. I liked the shell mosaic, maybe a darker grout would have made things stand out a little more but hey, you work with what you’ve got! The CD transformations were amazing, you have way more patience than me to do that though!
Hugs LLJ 1 xxx
What an interesting time you have had. Love the blue tile, I tried it once but doesn’t ‘do’ quick enough for me.
The Disc info was very interesting, love all the details.
I just lurve that photo of Hubby with Ruby . . . . . beautiful.
Have a good week
Sending blessing to you both
Christine #19
Oh my goodness what a busy bunny you’ve been. Adore you necklace the patterns in nature are amazing aren’t they. Couldn’t believe the lengths you went to with the CD/DVDs!!! Pretty card and the Gyrocut, not something I’ve heard of before, think I’ll stick to diecutting – LOL BJ#18
Wow you have had a busy week, I don’t think I have the patience for workshops anymore. Love everything you have made you should be proud. Your kitties are beautiful. My QC is just one lazy cat now but she is nearly 17yrs old and it has been one long very hot summer. Ani
Gosh Shoshi, you have been busy trying new things! I have not seen a gyro cutter before. The CD thing looks like a lot of work. Good to know your cats are healthy and looking gorgeous! Have a great week Angela #10
I do like your pendant and it’s great that you were inspired by that spiral shape. I did a small mosaic coaster once with my son as a school project (they were learning about ancient Rome) – I remember it being fun. You might find it easier to work with pre-cut mosaic squares – I think you did a good job with the supplies you were given – good to know it works with Polyfilla too. I used to know someone who made huge mosaic murals – the ones you need a ladder for! Interesting what you’re doing with the DVDs – I must look that up! I quite like the purple state! Never heard of a gyrocut and I doubt I would be good using it – I know some people can use even a simple craft knife to cut intricate shapes, but I’m not ashamed to admit that I’m not one of them. I know where I am with a pair of scissors LOL! The kitties continue to be adorable – after all that’s their main job. They always look so cushy and if you feel stressed, all you have to do is cuddle them. We always say Oreo is so good at being a cat – that’s the only thing he does but he does it so well! Have a lovely week, Shoshi! xx zsuzsa #20
Hi Shoshi, glad you’ve had a good week in craft workshops and follow on experimenting.
Thanks for the tip on tilted bowls, they seem to have helped our Bella as well.
Have a good week
Hugs
Lynnecrafts 9
Well, you’ve had a fun week all round – I love the recycled cd’s and the colours are fab! I love the card you made too. Happy WOYWW Helen #3
I am so glad that. Ruby was diagnosed as being ok with her tummy. Good to know that the kitties got a clean bill of health – love Lily and her shameless hussy act whilst her sister is very ladylike.
I’ve heard of the Gyrocutter but never actually used one, I have something similar but it just cuts out circles, not any shape.
Love your pendant, what a beautiful piece you have there. Great fun trying to recreate it with those pieces of broken china, I guess the secret would be to have a wide choice of china to choose from. That way you could choose things that were more or less flat so you didn’t get an uneven surface.
Great card – so glad you went and had a good tie.
Hugs, Neet 12 xx
It was fascinating to learn about Christopher Smart! I’m not sure I understood all the references in the poem – when he says “For he camels his back to bear the first notion of business” does he mean poo LOL?
Lots of interesting projects on the go again and nice to see the kitties enjoying life too. I’m a bit late today as I popped out to see some friends and now I’m on catch-up. Have a lovely belated woyww, Angela x6x
Goodness Shoshi, you have been busy! The mosaic is looking great – I taught a few classes on mosaics when I worked for our local college – I have a bowl of broken china pieces, that gets added to no and again over the years but have never got round to using them. I find it a bit ‘bulky’ for my way of working – perhaps I could scale it all down to teabag size!!
I love the card too, and as for the Gyrocut mine went in a drawer and hasn’t seen the light of day since I purchased it – it was a disaster – I’m not the most patient person and spending time practising to become perfect doesn’t come naturally to me!
Love the pics of the kitties, that is such a lovely photos of your hubby with Ruby.
Hope you have a lovely week,
Diana xx #8
oh my goodness you have been so busy! And i’m so glad I managed to link this week! I’ve never thought of de-slicing DVD’s! Will try that! love your mozaic framed picture, great from a first go! never done that, well, I have but not quite that way. Super pictures of kitties. Mr Jinx is nearly back to his old self…dreading the vets bill! I’ll have to come back to read some more as on Hubbies laptop, and the battery is very low! Happy WOYWW! Lyn #22
you have been so busy, I love the card and I am on the fence on the pottery piece. I have saved a box full of chipped pieces of mine to use as an out door table top someday. but, I have not broken it up to actually do this. and Yes, I have one of those Gyro cutters and I use mine mainly to do like the insides of something. say, if I have a person image that I can cut the outside with scissors but, they have a bent elbow or something on the inside I use that for that. I have not done lots of shapes or anything with it, just little interior cuts. and I do like it for that. ~Stacy #22
Hi Shoshi
Finally caught up! How lovely to be out at a craft festival! I love mosaic, I have quite a lot of tiles that I bought once on a visit to Bath, must have been all those Roman baths that made me do it lol. Do you need to start a new craft? Yes of course you do, why not!
I am very interested in your upcycled CD/DVD experiments, I would never give up my DVDs though, digitising them is fine so long as all your equipment is functioning and everything is backed up but I find I still prefer my DVDs. However, I do have some old CD-ROMs that I have saved for crafting purposes and I might try it with a couple of those, not that I need more tiles but well, why not lol.
The gyrocut looks interesting, I’ve never seen one before I don’t think. I like how you made deckle edges with it though.
How nice to have well behaved kitties in the car and no yowling, I will spare you the details of what happened the last time I took one of mine to the vet! You do have two dainty little girls at just over 3kg each, they look much bigger in the photos. My Lily is a petit 4kg, but her brother is nearly 8kg !!! and my other cat is over 6kg lol There are no words haha Happy WOYWW! Elle #11, EOTC
Wow, that’s quite a long blogpost and what a lovely things you share… love the mosaic!!! I think I once made a mosaic back in kindergarten… yep, we did that back then in the sixties! And I remember my ex-neighbour mosaiced (is that a word?) a garden table, it was so nice but the cups and glasses of wine stood a bit wobbly – or maybe we were… 😉 Enjoy your weekend, I hope the weather is as nice and sunny as it is here at the moment (finally!) Hug from Holland, Marit #4
How resourceful you are!
I have never actually tried mosaic. Men skulle nog vilja. 🙂
Your cats are having a cozy time om your blankets and I fully
understand when he sits on the floor instead of waking up the angels sleeping –
as we say in Sweden.
Have wonderful weekend!
Sussie nr 23
OOOPS!
“Men skulle nog vilja” means I´d love to try!
Ah, there’s always something to be learned from a workshop isn’t there! The lady doing the card workshop was in my opinion, quite right not to bring too much stuff or include inks and stamps, they are ruined very quickly by people not listening to instructions, believe me. The mosaic looks fab, I could totally get into that, I’ve done a couple of commercial kits which you almost embed the pieces in a cement stuff and then add a thin grout to the final dry piece, helped to keep all the pieces of equal height. Interesting that there are like in every other craft, so many variants! I totally admire your work with the DVDs and that purple ink made me swoon – I see a fabulous wreath card in the making.
Oh my but you have been busy! Interesting working with DVDs and CDs that way! Can’t wait to see what you do. Love your kitties.
Hope you have a wonderful weekend!
Carol N #21
That first project is amazing!
I bought the gyrocut but I have not had much success with it as yet. Maybe I should watch the videos…
Plus I tried my Todo yesterday ( not used it since we were in the UK) and it wouldn’t heat up! Disaster!
Happy WOYWW!
Stay safe and keep well!
Susan #7
Calling All Crafters! – My Blog!