INFUSIONS MINI-ALBUM – A VERY TRYING TIME
Ever since I discovered that glueing the mini-books inside the back cover was not going to work, I have struggled with this project. Everything I try seems to fall flat on its face. It is extremely frustrating.
My first plan
My first idea was to make three belly bands through which I could slide the back page of each book, holding it in place on the back cover, ready to be removed when needed.
My second plan
Magnets! I have some pretty strong small magnets and thought I could probably use those, but if they were going to be hidden behind paper, they would lose some of their strength. I wondered whether they would be up to the job.
Thinking about it further, I came up with:
My third plan
Velcro dots. I have quite a few strips of these in my stash. I decided to run with this plan.
Preparation
Originally, the mini-books were going to be glued in place, so there was no need to make the backs of them pretty. Now that they were going to be removable, the backs would be visible. Two of them were backed with flattened toilet paper rolls and were pretty sturdy, but the third was just fairly thin cardstock, so I glued on a piece of black cardstock cut to size to make it more robust. I painted the other two with black acrylic paint.
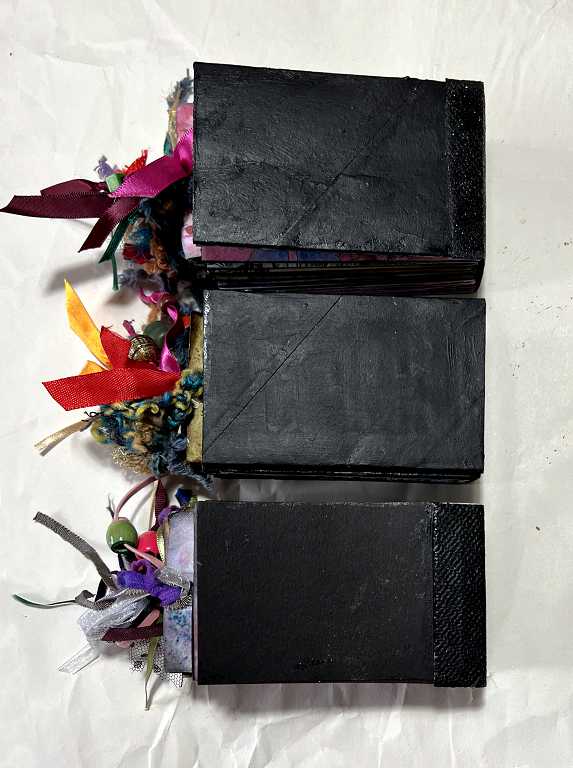
Making a feature of the attachment rather than hiding it
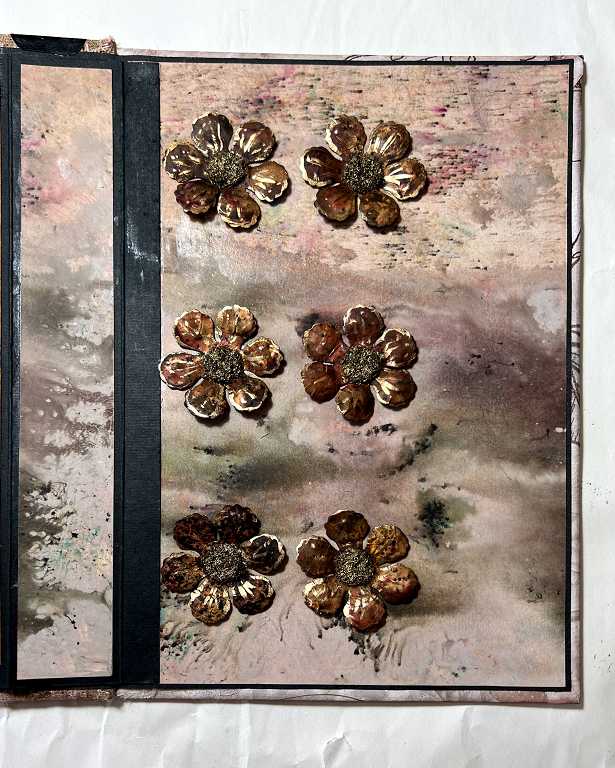
I thought the back cover would look really pretty with some of the flowers I made in yesterday’s Mask and Spray session. One half of each Velcro dot would serve as the flower centre. I had added some gold painted veins and stuck the flowers in place on the back cover.
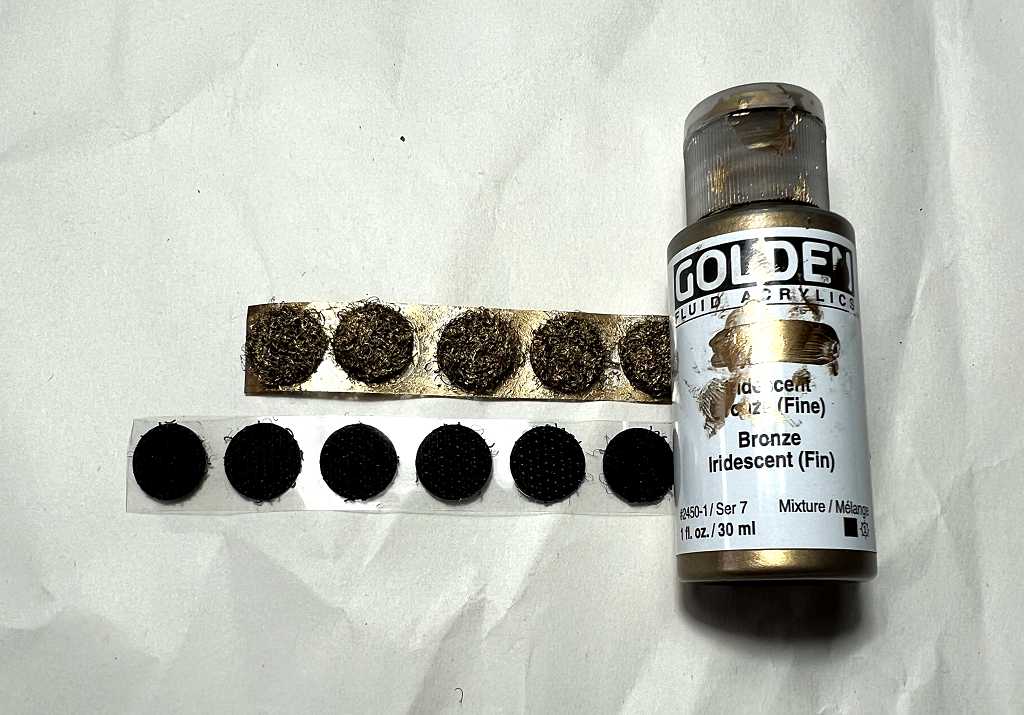
The gold Velcro dots looked really cool. The photo doesn’t do them justice. I painted them with my favourite gold acrylic paint, giving them two coats, and pushing the paint well down into the texture and leaving them plenty of time to dry. The texture felt fine. Stuck into the flower centres, they looked really good.
However, this did not work.
The Velcro wouldn’t stick sufficiently to hold the books. It stuck a bit, but not enough. I poked at it with a pointed tool to try and free up any Velcro loops that might be stuck together with the paint, but it didn’t work.
Back to the drawing board
I tried to remove the Velcro dots from the flower centres but it wasn’t possible. I ended up pulling all the flowers off, gently prising them away with the help of a blade. This left a mess on the back cover, of course, but I wasn’t going to worry about that, because all being well, a revised version of the flowers would go down to cover it up.
Some of the flowers tore a bit when I pulled them off. I decided to cut out the centres. The Velcro dots measure 1/2 inch in diameter, which was pretty much the size of the centres of the flowers. I selected six more Velcro dots, this time the hooked ones (not deliberate – I’d glued them down before I realised) and glued them over the messed up background on the back cover. Then I glued the flowers back, minus their centres, wrapping them around the new Velcro dots as closely as possible, and it didn’t look too bad. This time the glue dots had no paint so the flower centres were black.
I pulled the other halves off their backing strips and stuck them to the Velcro dots already in place on the flowers. The surface was extremely tacky. I wanted to be sure of the placement on the backs of the mini-books before sticking them down permanently, so I borrowed a trick many people use with double-sided tape. This is a contact adhesive with no wiggle room. You can run a glue stick along the double sided tape and this will allow you to move things a little, and it doesn’t interfere with the adhesive on the tape – many people say it actually improves it. I therefore put a little glue stick on the sticky surface and marked it with a white acrylic marker, and placed the mini-book down on top where I wanted it to be. The white marker transferred to the back of the book, showing where to put the glue to attach the second half of the Velcro dots.
So far, so good. It worked a treat. To be sure of good adhesion, I added some Fabritac adhesive to the back of the Velcro dots.
However, it still did not work.
When the glue was dry, I placed the mini-book onto the back cover so that the Velcro dots lined up. The new unpainted ones stuck just fine, and I thought we were onto a winner, but when I attempted to pull the mini-book away, the Velcro dots on it also pulled away and remained attached to their partners on the back cover.
This was clearly not going to work.
Back to the drawing board… again
Perhaps magnets were the answer after all. Rather than removing the Velcro dots and simply ploughing ahead with them, I thought it would be worth doing a little test first.
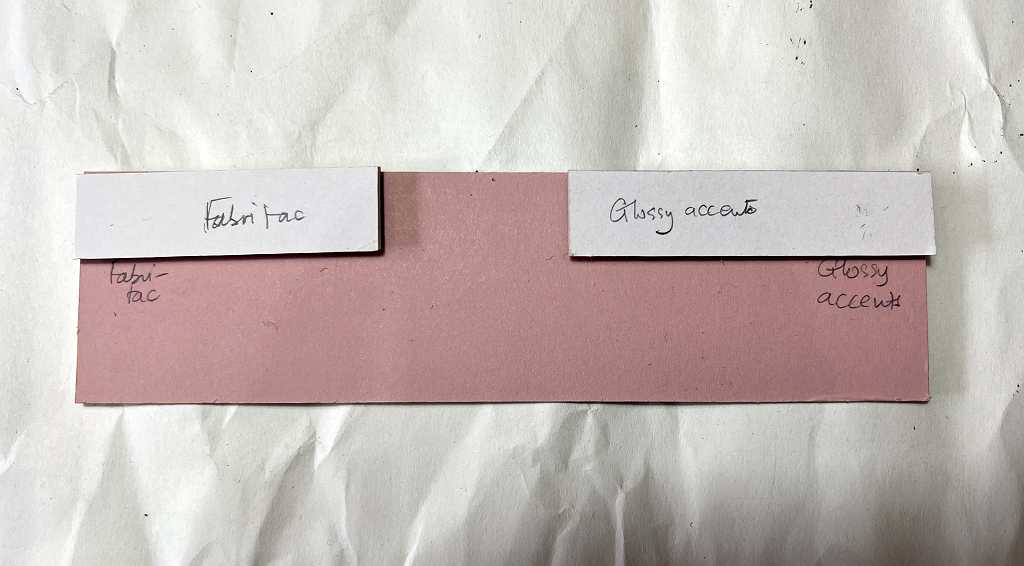
I took two small scraps of mountboard which is pretty rigid, and attached a magnet on either end, using Fabritac for one, and Ranger Glossy Accents for the other. This is mainly for adding glossy accents to projects (surprse, surprise) but it also acts as a strong adhesive and is one of the few that actually works when you want to stick metal to your paper projects.
I then put a second magnet on each of the glued-down ones, and a spot of the respective glue on the top, and pressed the second scrap of mountboard down on top.
Magnets can work well on paper projects when you simply pull the two elements apart vertically, but they can also be slid apart. In fact, this is how you separate the individual magnets from the stack when you buy them. When they are stacked up, the magnetic attraction is extremely strong, and it’s almost impossible to prise them apart, but you can more easily slide the top one off the stack. It may be that if the magnets do stay in place with my chosen glue, the best approach for removing the mini-books from the cover will be to slid them off, away from the spine.
In my experiment, the magnets are close to the corner of the base board so that the smaller pieces have quite a large overhang. I did this deliberately so I could test the strength of the glue with a lever action, lifting the smaller pieces up. There will be quite a lot of tension on the glue this way, which would be a good test. If I were to remove the mini-books from the back cover in this way, this would be the scenario. I shall do the slide test first, though, as that is going to put less tension on the glue.
I went away and left it to dry. I wasn’t going to risk testing it until I was sure everything was absolutely secure. To be absolutely sure, I left them overnight.
If my test is successful, the next step will be to remove the Velcro dots from the centres of the flowers. Again, this is going to make a bit of a mess but I shall go carefully, prising them off gently with the tip of a blade, working my way around the Velcro dot until it is released. The magnets will be the new flower centres. They are silver, which isn’t great. I don’t think it would be a good idea to paint them because the paint may wear off. Again, I could do some tests. The magnets will obviously be most successful without any paper in between them. On the back of the mini-books, they will be fully visible, and I don’t want to add any further bulk by embellishing them.
Since removing the flowers and cutting out their centres and replacing them on the back cover, they are lying flatter than before, which is probably all to the good.
Completing the back cover embellishments
In the meantime, to stave off my impatience to try the magnets, I worked on some further embellishment for the back cover. The rows of flowers that will hopefully work as the attachment for the mini-books made the cover look a bit unbalanced, so I decided to add a strip of smaller flowers down the right-hand edge.
I have this fancy yarn in my stash, and I noticed that the colours co-ordinated perfectly with the project.
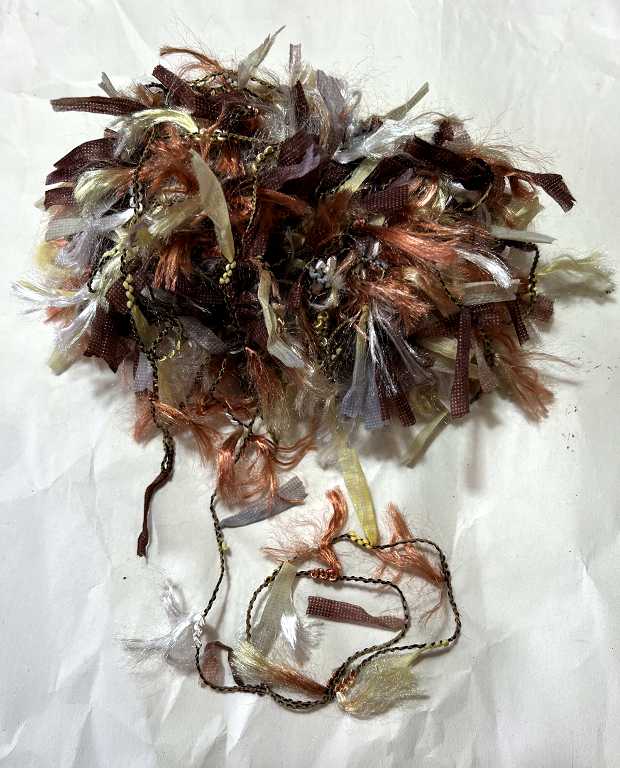
I cut several lengths, and stuck them down the edge of the cover, using plenty of Fabritac glue. It was a pretty messy, sticky job but in the end it worked! I arranged the tassels and ribbons on the yarn so that they were as random-looking as possible, and using several strands made them more concentrated.

I also selected some more of the Mask and Spray flowers and assembled them as double-layered flowers. I added gold paint to them as before.
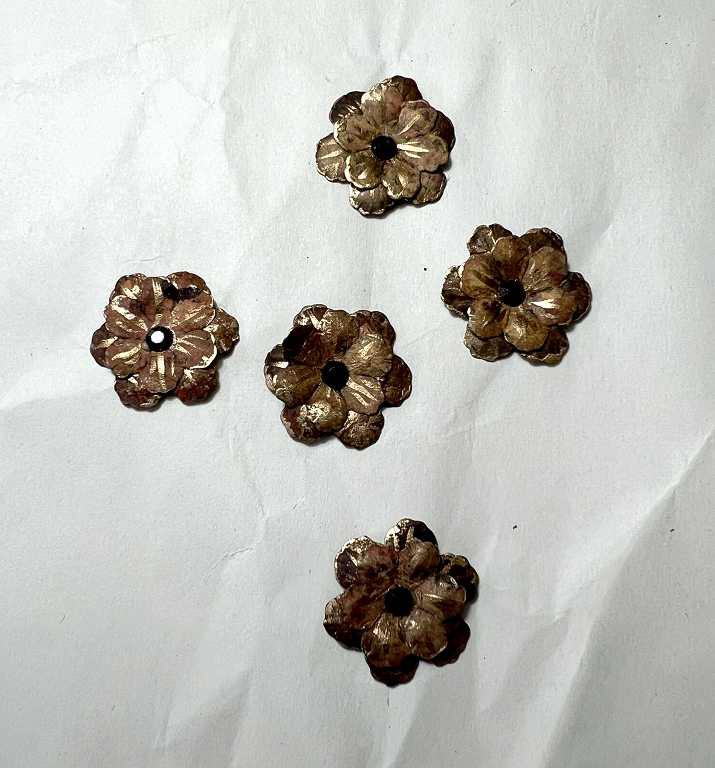
They will be spaced vertically down the strip of yarns. I did not glue them on at this stage because I didn’t want anything interfering with work on attaching the mini-books. Each flower has a small black gem glued into the centre, matching the current black centres of the bigger flowers, but if the magnet experiment is a success, I may remove these and replace them with silver ones. That should also make the silver magnet flower centres look more intentional and not an unavoidable problem! I’ve tried laying the flowers in place on the yarn and it looks great.
Like the attachment flowers, this extra embellishment is not visible when the mini-books are in place. It will be an extra surprise element when the mini-books are removed.
I had hoped to have finished this entire project way before this. Attaching the mini-books seemed like the final easy step, with only the spine embellishment to make. How wrong I was. I am not out of the woods yet, but really hope the magnets are going to work!
If I can get this attachment problem sorted, the entire mini-album should be better than how I originally planned it, because it will have more interactive elements.