JUNK JOURNAL – MAKE A JOYFUL NOISE PART 17
Continuing to work on the second signature of the album.
The third folio
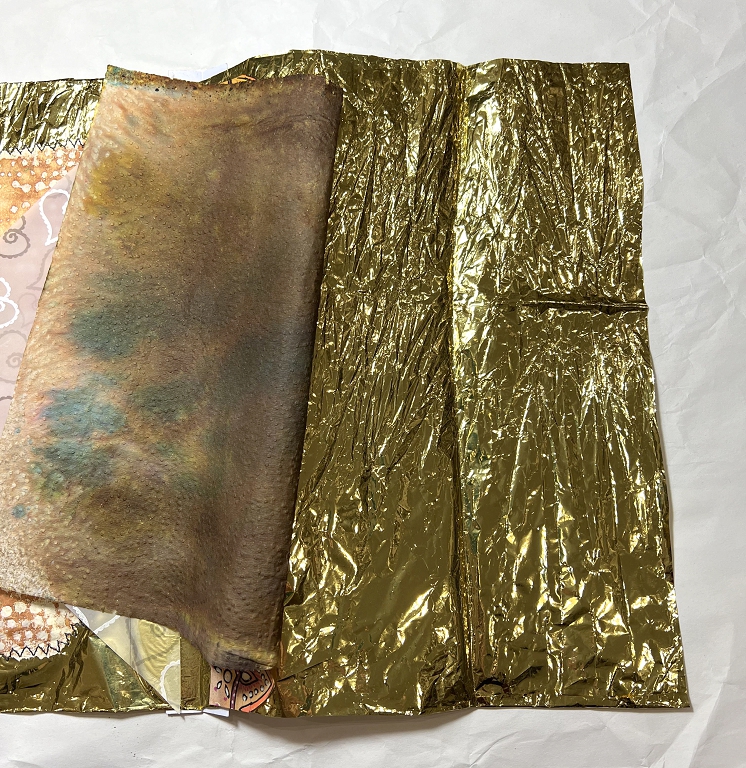
This is very rich, consisting of a large piece of thin gold foil forming the basis of the folio. As it is so thin, it has required some reinforcement at the hinge, and the pages do not turn that easily due to the weight of the additions on its thin flimsiness. However, this all adds to the tactile experience of handling this book.
The outside of the folio – pages 4 and 1:
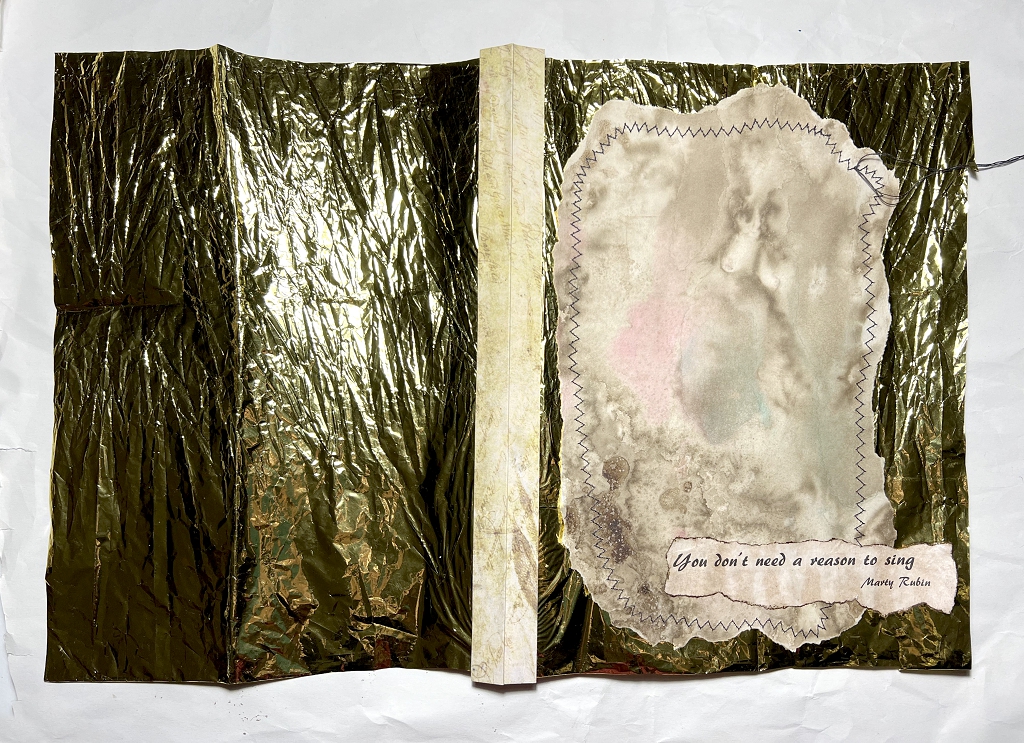
The hinge is reinforced by a strip of some quite stiff printed card. Unfortunately in this photo, the gold foil looks really dull, but the next photo is a better approximation of its real-life appearance, which is very shiny and bright. It is amazingly crinkly and makes a gorgeous rustling sound when handled. This is why I didn’t want to back it with anything, despite its thin flimsiness.
The inside of the folio, forming pages 2 and 3:
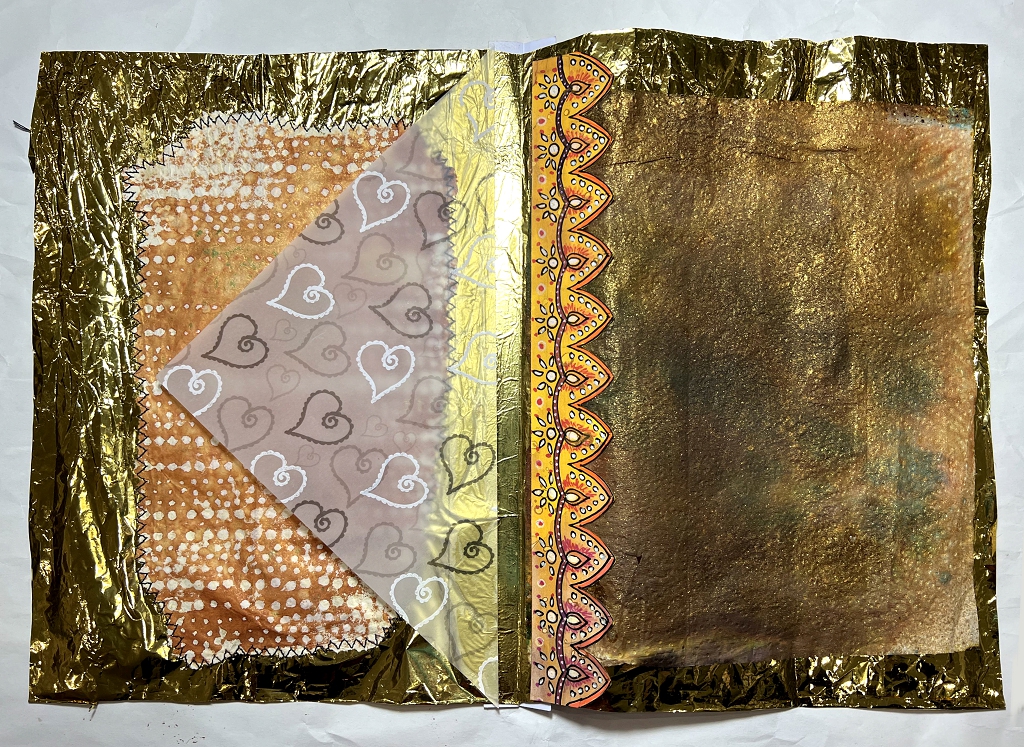
I love the richness of this, and could almost wish it was the centrefold but things didn’t work out like that!
This is where some of the smaller pieces were added in, which were not large enough to form a complete folio.
In addition to the hinge reinforcement on the outside, the inner side of the hinge is further reinfored by the triangular piece of vellum on the left, and the card strip on the right. The vellum is glued along the vertical edge onto the foil itself and stabilises it. You can see the gold showing throught its translucency.
The first page
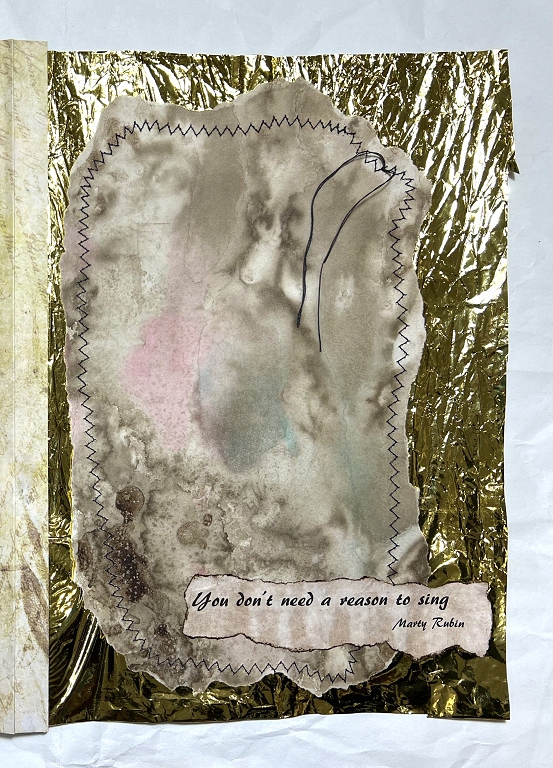
You can see from the previous photo that I had stitched down some paper on the second page, and on this first page of the folio, you can see the other side of that stitching. I was careful to choose a slightly larger piece of paper for the first page, to ensure that the stitching would all be inside its edges. It was too large, so I tore it back so it was closer to the stitching. I left the ends of the machine stitching thread, as I may add some embellishments to them. This piece is taken from a large sheet of coffee-dyed paper with some coloured inks added while it was still very wet. It has some gorgeous textures on it – think the bottom portion may have had salt added while it was wet. These dyed papers are very unpredictable and you get some beautiful patterns. The text was done as before. You can see the reinforcing strip on the left.
The second page
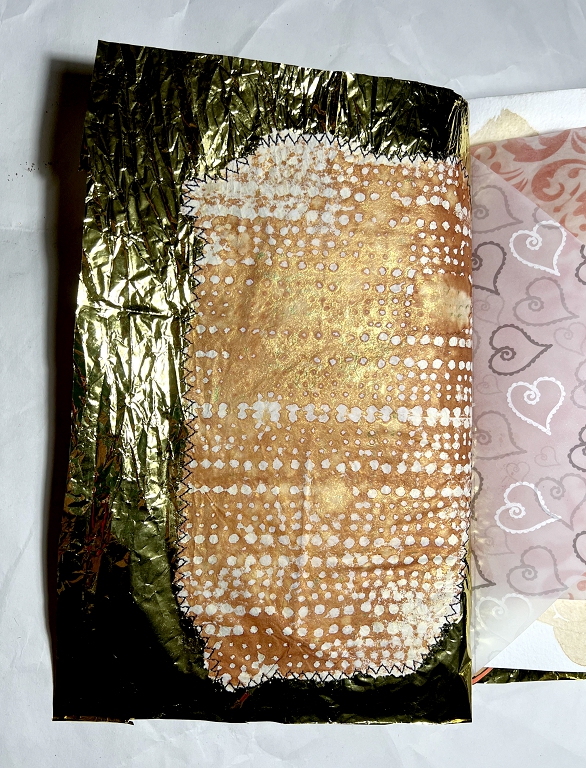
In this photo, the vellum has been peeled back to reveal the whole of the underlying page.
The orange piece stitched down is an example of what can be done with my medication leaflet papers. For those unfamiliar with this technique (I think I have invented this!), I take the accordion-folded leaflets from the packs of medication, and before unflolding them, I punch holes with the two different sized hole punches on my Crop-a-Dile, a tool used for setting eyelets. Although I do my best to keep the lines of punched holes as regular as possible, no measuring is involved, and the result has a delightful irregular regularity about it!
Once punched, I unfold the paper and lay it on top of another piece of paper. I then spray it with ink and the punched piece acts as a stencil. The paper in this case was a piece of tissue paper which I laid down to mop up after stencilling, hence the positive/negative being reversed from what you’d expect from a stencilled piece. The inks used for this were both Seth Apter’s spray Izinks, in Honey and Goldmine. This gold is incredibly intense and bright, but it does tend to rub off once dry. I therefore usually spray it with fixative.
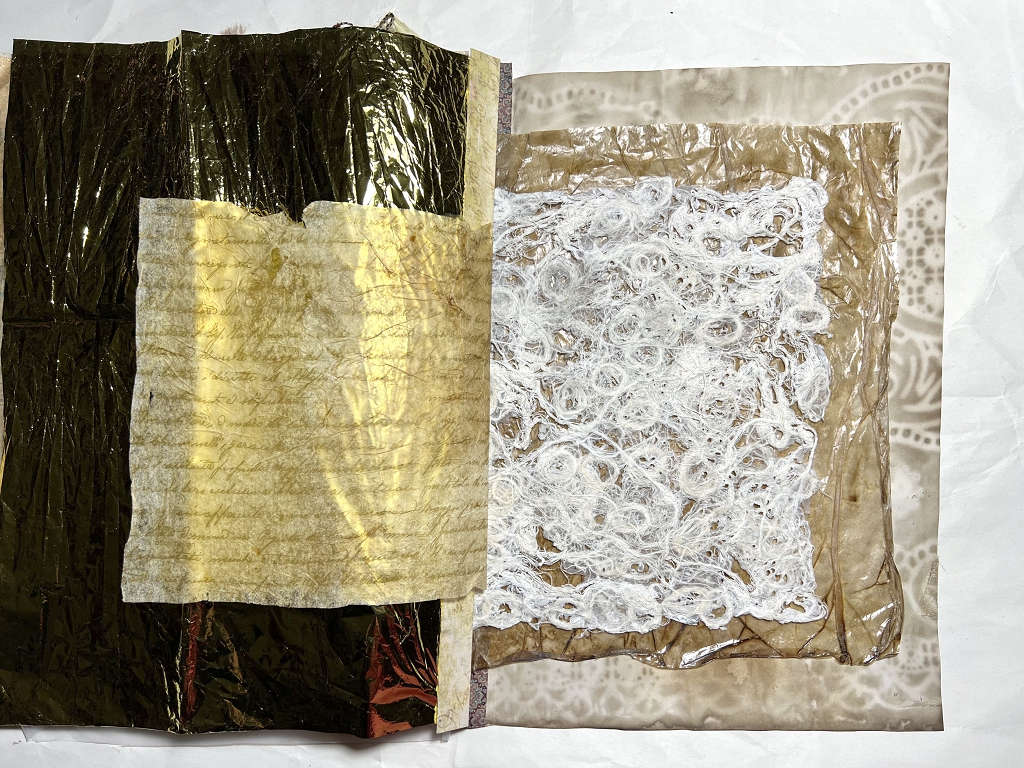
The third page
Gold foil with splat box paper overlay. Again, the photo doesn’t do it justice – the overlay sheet is very sparkly and gold.
Peeled back, it reveals the gold foil page underneath. There is no further embellishment on this.
Again, this foil is too flimsy on its own. I reinforced the hinge edge with one of the decorative strips I made from some coloured card scraps, a selection of which you can see here.

I glued this onto a piece of splat box kitchen paper and then attached the whole thing to the gold foil page beneath. My splat box is a cardboard box where I place things I want to spray, so the spray doesn’t go all over the studio and ruin things. The box has sheets of kitchen paper inside, which absorb the excess spray, and once they are fully covered, I remove them to use in projects. This one is particularly rich, involving a lot of gold spray ink.

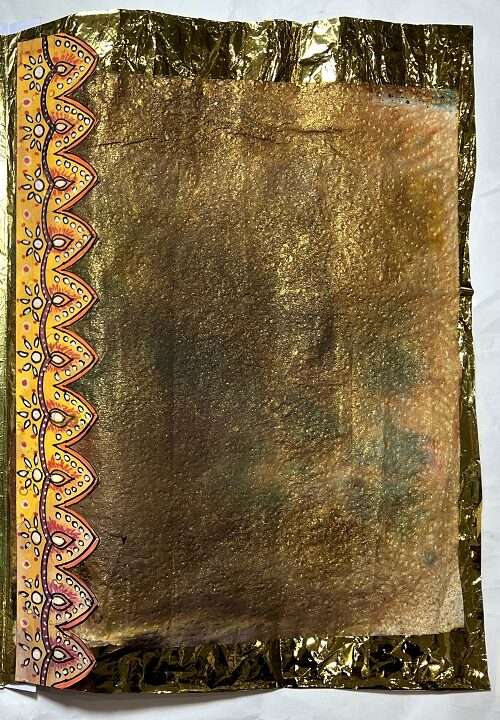
The fourth page
This photo shows the final page of the folio, which is just the plain gold foil. It is much brighter in reality. The piece of napkin treated with starch is laid over the top and you can see how the gold of the foil underneath shows through its translucency.