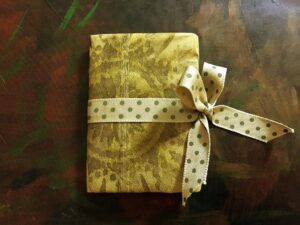
OVAL WINDOW POCKET WITH PULL-OUT TAG
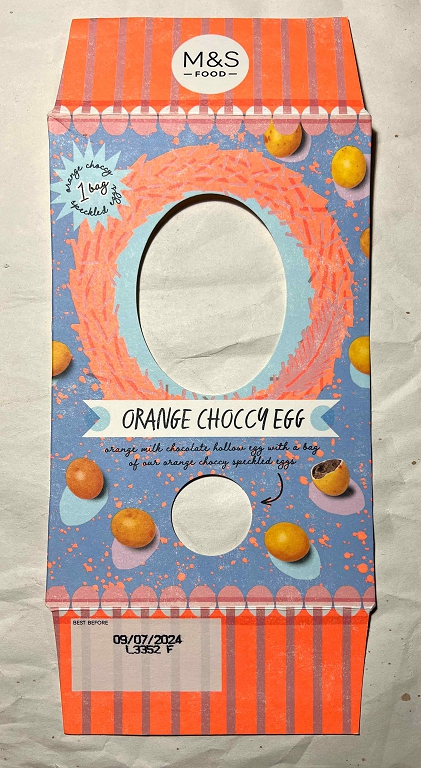
This is the album element I made this afternoon from some Easter egg packaging. This interesting piece has been in my stash for ages and I wanted to do something which would feature both windows – the oval one and the small round one.
Folding and trimming
I spent some time trimming bits off and folding various parts of it until I was happy. It ended up narrower, and I cut off most of the flap at the top, just leaving a half-inch folded piece. If I decide to make this element a flip-up on a page, this will serve as an attachment point.
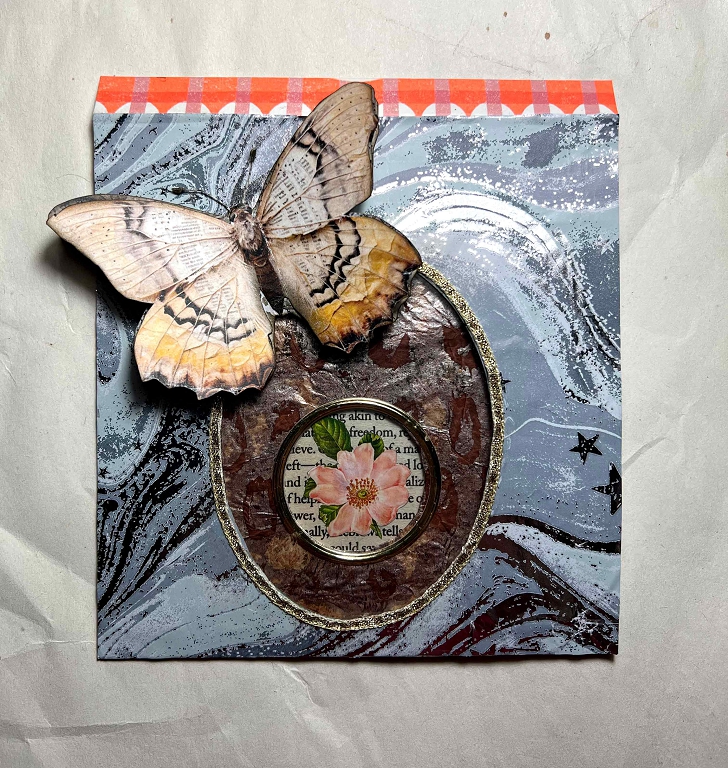
I covered both windows with scraps of acetate from behind, and decided on images to put behind them. For the smaller one, I chose a fragment of book page to which I glued a small fussy-cut flower. The image in the top window would be on a removable tag, so I would also have to line the back of the element as it would show through once the tag was removed. From some printable digital downloads I chose a vintage photo portrait of a lady who looks remarkably like my Mum in her younger days!
I got myself in a bit of a muddle with the pictures and the acetate pieces, glueing bits on the wrong side of the element etc., and cutting off backing pieces too small… it was all rather frustrating. I have moments when my spatial ability lets me down a bit and I’m likely to get things the wrong way round or inside out!! I had to keep reminding myself what was the front of this piece and what would be revealed and what hidden.
Getting the image of the lady exactly in the right place on the tag so that it would be centred in the oval window was quite difficult and involved some trial and error. Fortunately my glue doesn’t dry instantly and there’s a bit of wiggle room to enable one to get things correctly positioned.
I originally planned to have a second, smaller tag which would pull out, revealing something else under the small round window, but as I progressed with the work, I forgot to do this! I don’t think there’s anything I can do about it now.
Cutting the covering papers to reveal the window apertures left a slightly rough edge. For the small window, I die-cut a narrow circular frame from a scrap of gold card, using two circular dies of adjacent sizes to form a ring. For the larger, oval window, I covered the edge with a length of narrow cream and gold braid.
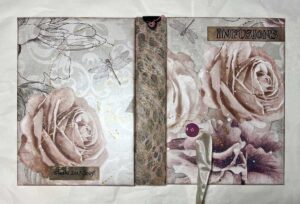
Here is the finished piece with the tag in place.
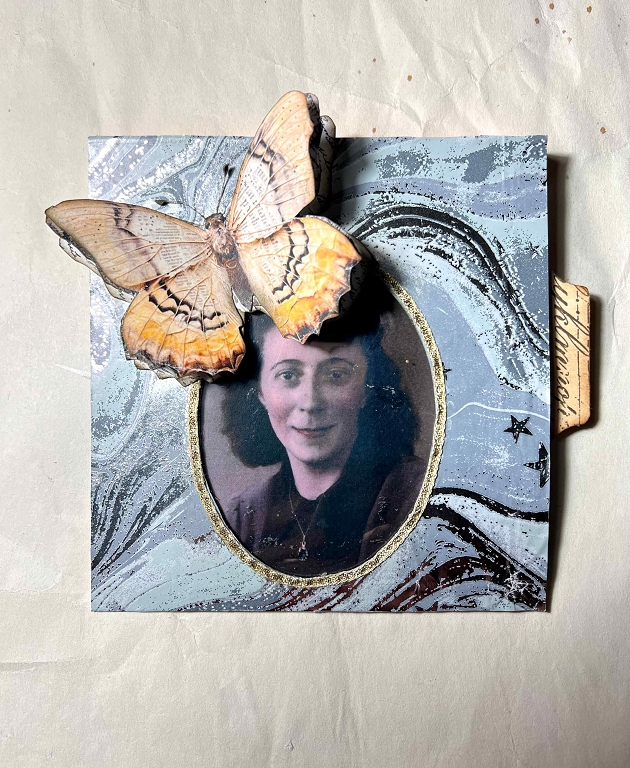
I used one of Luise Heinzl’s 3-D butterflies but I think it is too big for this piece. I have now got a new supply of 160 gsm card and have printed out some smaller ones, and once I can cut them out and assemble them, I may replace this butterfly with a smaller one.
The covering paper for the front was some grey and silver wrapping paper which came around a Christmas present. Unfortunately the silver doesn’t show up very well in the photos.
The tag removed.
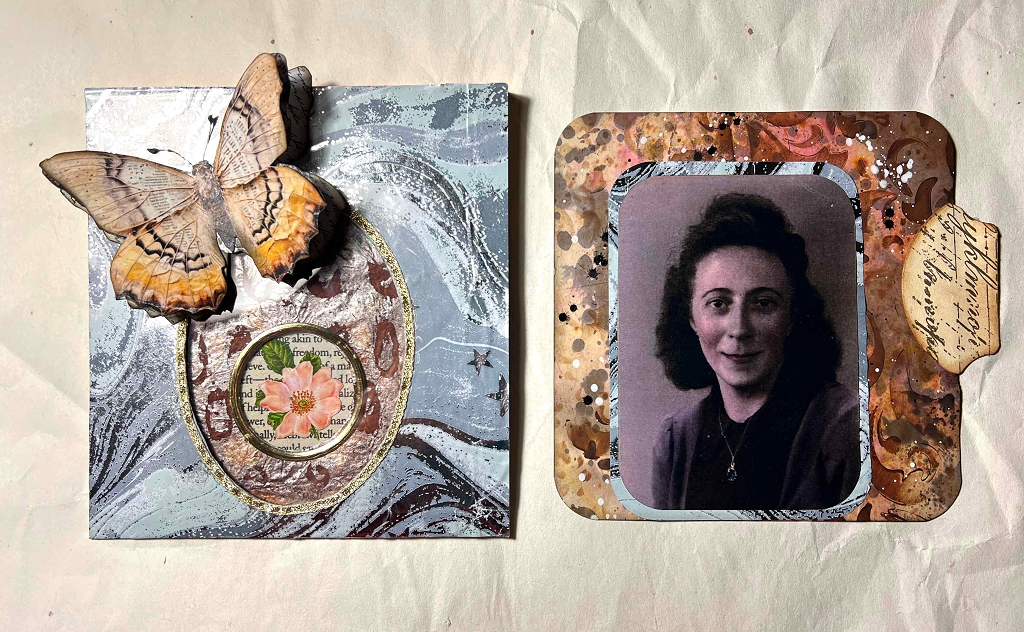
I rounded the corners of the photo and mounted it onto another piece of the wrapping paper, whose corners I also rounded. The tag was cut from a piece of scrap card and covered with one of my recently-made mixed media papers. I added a whale-tail tab from my stash which I’d also made some time ago.
When the tag is removed, the smaller window is revealed. I covered the background with a piece of gel-printed tissue paper in brown and gold. There is acetate over both windows.
In this photo you can see the half-inch flap at the top which I didn’t cut off.
A closer shot of the windows.

This is the back of the element. The bottom flap, folded up, doesn’t reach the top, but it doesn’t matter. If I decide to make this into a flip-up on a page, I will obviously have to cover the back, but if not, I shall trim off the 1/2 inch tab at the top and glue the whole thing down onto a page. The piece of book paper is what covers the back of the circular window.
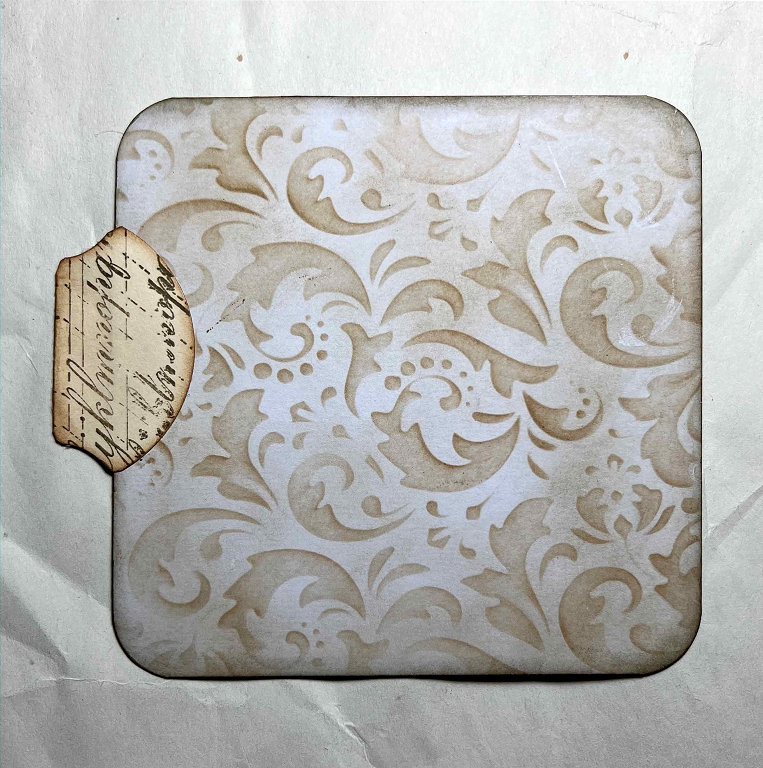
The back of the tag. I inked the white card and then inked it again through a stencil, and finally inked the edges after rounding the corners.
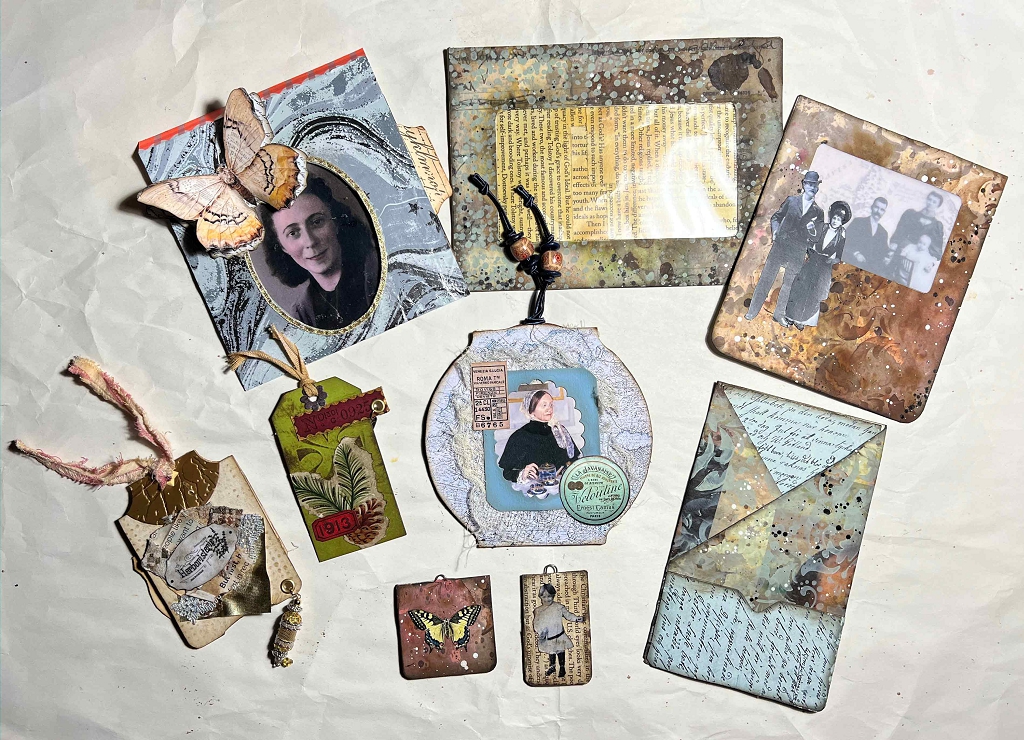
The collection of elements to date. I see I have now made nine! The collection is growing.