ALBUM ELEMENTS FROM CHRISTMAS TRASH
I’m slipping. I’m definitely slipping. I actually threw something in the bin before I looked at it to see if I could make art out of it!
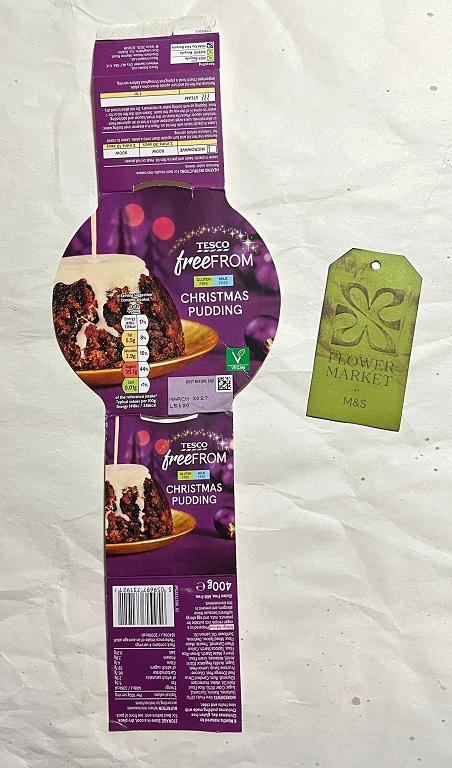
It was the cardboard wrapper which had been round the Christmas pudding I’d bought. On examination I decided it definitely had potential.
We were given a lovely vase of flowers and I knew the tag would be good for altering. It was tied on with a piece of dark green gros-grain ribbon which has already gone in my ribbon stash for future use.
The little tag had printing at the bottom, and a stylised flower embossed into the card at the top. I ran my ink pad over this to emphasise the raised part, and on the back of the tag, I applied ink lightly with a blending pad.
Working on the tag
I obviously didn’t want to cover up that nice little bit of embossing so I just concentrated on the bottom half, front and back. In the next photo the front of the tag is on the left, and the back is on the right.
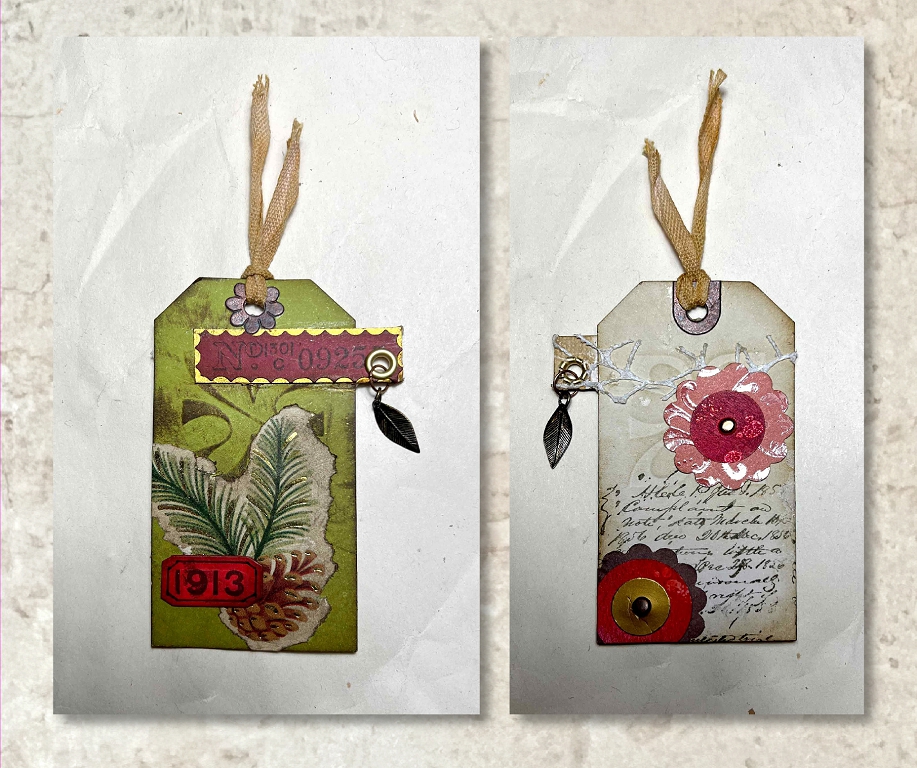
I tore out a portion of wrapping paper and inked it, and stuck it down onto the tag. I found a couple of labels in my stash and mounted one onto a scrap of gold card, and stuck them down. I set an eyelet in the projecting part of the top one and added a leaf charm. On the back, I stamped some script with brown ink, and attached a scrap of plastic mesh across the top with spray adhesive. I found some flower and circle shapes in my die-cuts box, and after glueing together the layers, I added a brad in the centre of each, and stuck them down, trimming off the overhang from the bottom one.
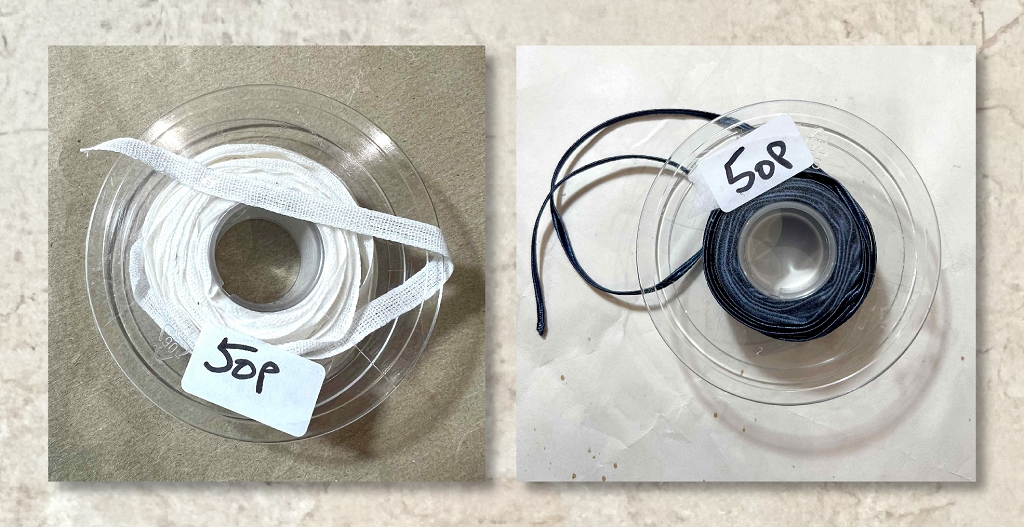
Cheap trims from the haberdashery shop
Along with all the other bits and pieces I bought at the haberdashery shop in Newton Abbot recently, I bought two spools of useful stuff, for 50p each. There’s plenty on each to last a good long time. The one on the left is an open-weave cotton tape, and the one on the right is a slightly shiny dark blue braid.
I got out two of the paper hole reinforcements I made recently from the die cut set, and stuck a floral one on the front, and a plainer one on the back of the tag around the hole at the top. I cut off a length of the white tape for the top of the tag. I rubbed a brown ink pad onto my glass craft mat and spritzed it with water, and then smooshed the piece of tape in it until I was happy with the result. After drying it, I attached it to the top of the tag.
I am pleased with the transformation of this little tag because I was able to retain the attractive embossed design on it, and enhance it with my own elements.
The Christmas pudding wrapper
The large hidden paperclip
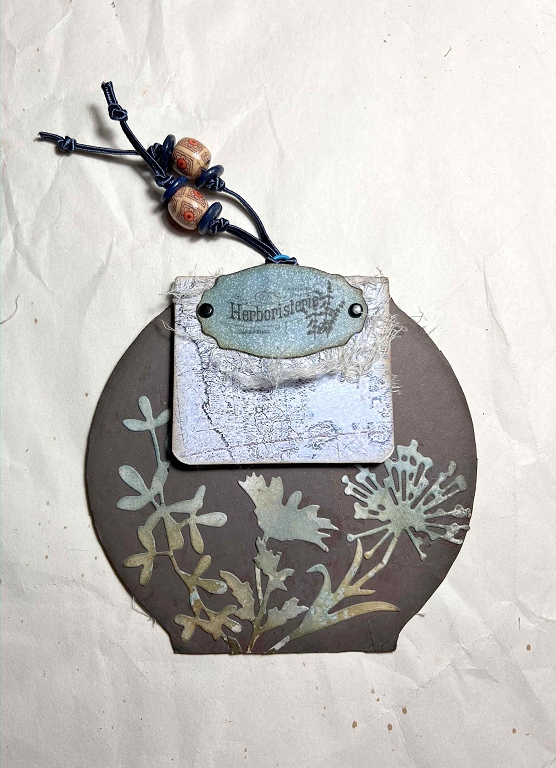
I decided to make a large hidden paperclip from the circular centre part and the rectangular extension above, putting the paperclip into the fold.
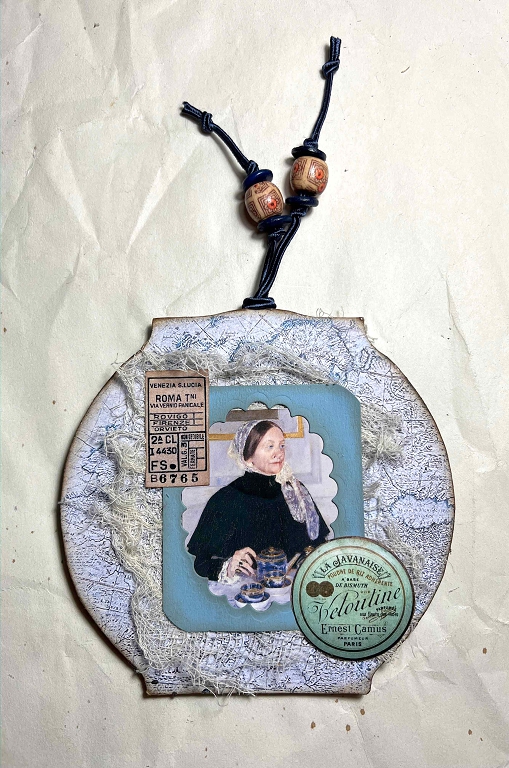
I covered both the large circular part and this flap with a downloaded printable of an old map. I found the photo of the lady having a cup of tea in my folder full of such things – I think this was cut from an art catalogue. The little frame was the negative space left from die-cutting a scalloped oval. The card was a horrendous vibrant bright pink on one side and a nauseous lime green on the other side – whatever possessed me to buy a pack of such lurid papers in my early days?!! I would never use such stuff nowadays, but the card itself is very good quality, and all it needs is to be painted or gessoed to be useful. I painted this with some blue chalk acrylic paint and inked the edges. I stuck the picture and the frame down on top of a scrap of grout cleaning cloth and finally added the ticket and the label. The large paperclip inside is blue, and I left the top of it exposed through a slit at the top of the piece, through which I threaded a length of the blue braid from the haberdashery shop. I knotted on some beads for embellishment. I have very few blue beads in my big bead box, and most of the beads in there have holes that are too small for this sort of thing. I made use of what I’d got.
Turning the piece over, this is what I did to decorate the small rectangular flap which is the other side of the hidden paperclip.
The flap was covered with more of the map paper, some more of the grout cleaning cloth, an an inked label which I attached with glue and two tiny black brads. This was to cover the hole at the top where the back of the curved cut-out on the packaging showed. I covered the back of the Christmas pudding wrapper with dark brown wrapping paper and added some inked die-cuts from my stash. You can just see the top of the blue paperclip in this photo. When the paperclip is attached to a page, obviously all you will see on this side is the small rectangle at the top.
The small hidden paperclip
I made this from the longer flap at the bottom of the Christmas pudding wrapper which I cut off. It had two folds in it so I cut off the bottom part at this fold, and used the remaining part. I liked the curved cut-away part at the bottom so I retained that, and added an eyelet and a sparkly ribbon bead as an embellishment. There is stencilling front and back – tiny random spots just to break up the plain background a little.
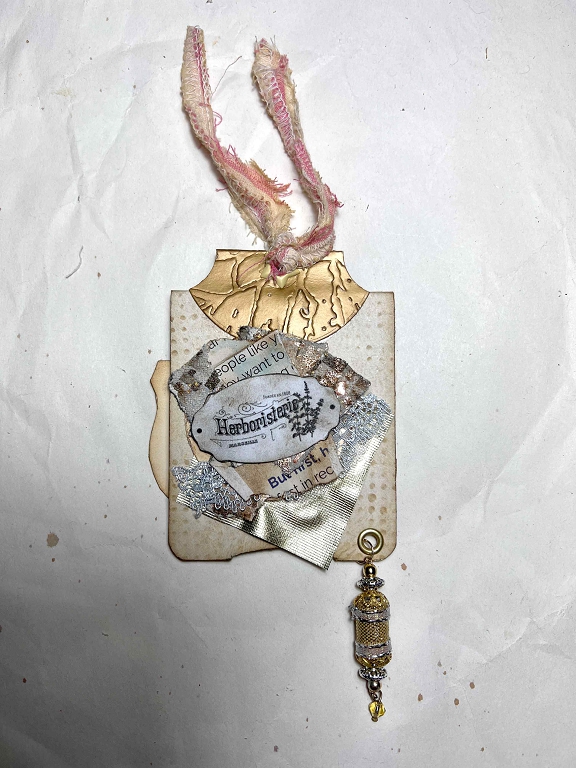
On the front of the paperclip I added one of the clusters I made recently. Rather than having the top of the paperclip protruding above the piece, I added a whale tail tab instead – this one was made from some gold embossed card. I set an eyelet in the top and through it I threaded a length of seam cut from the pink striped pyjama bottoms I bought in a charity shop on that same shopping trip, which I had tea-dyed.
Turning the piece over:
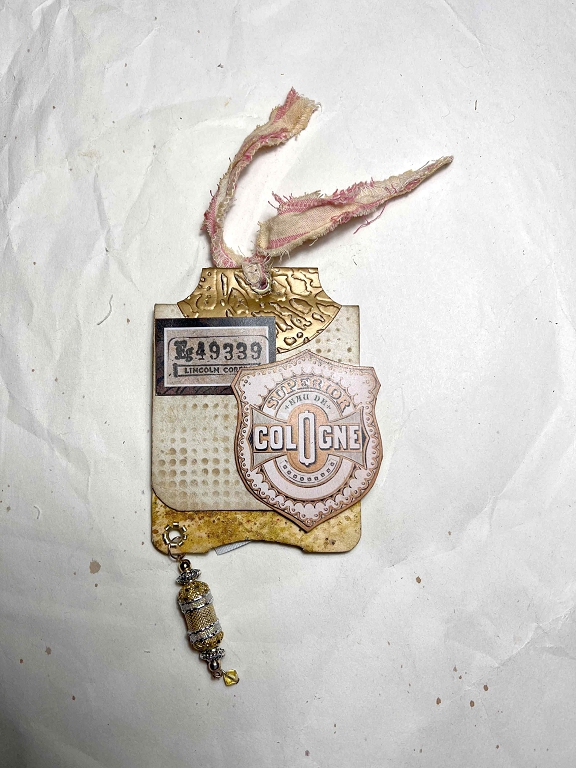
More of the same stencilling, and I found a scrap of gorgeous paper I’d coloured with browns and gold (possibly on the gel plate) which I glued onto the part which extends below the flap. The embellishment was just a couple of labels from my stash. The pink of the top fabric nicely complements the pink and brown label at the bottom of the piece.
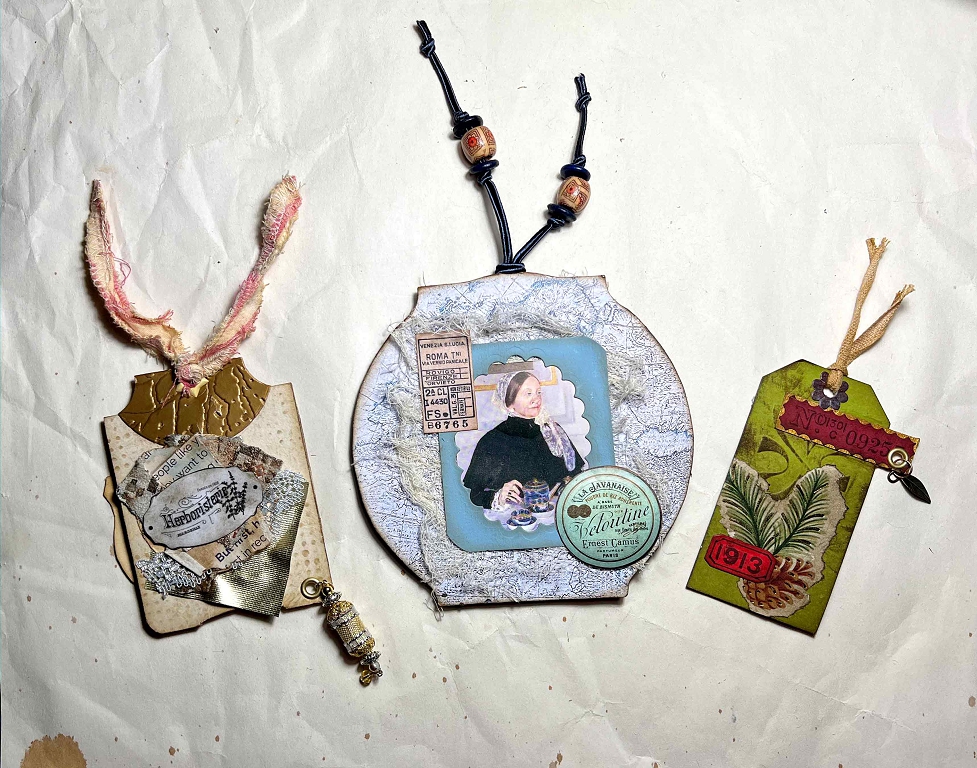
Today’s work
Here are all three pieces I made in this session.
The growing collection of album elements
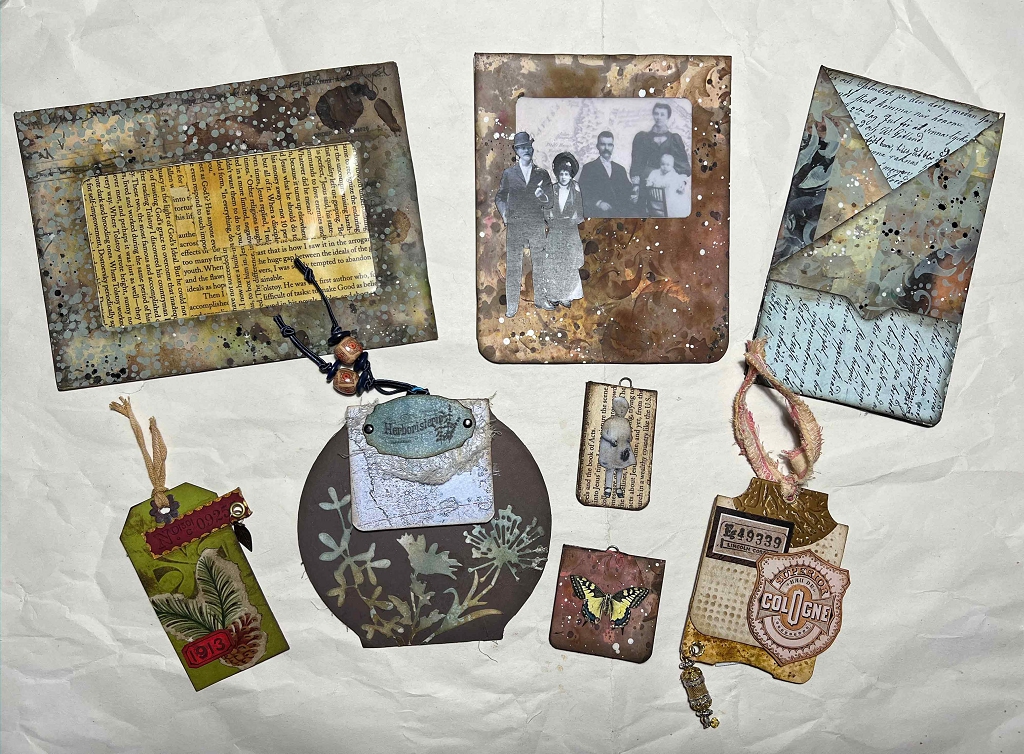
I am very much enjoying making these small elements from trash and from bits and pieces in my stash. It’s definitely a good way to use up scraps and there’s plenty of opportunity for embellishment on pieces like this. I like the muted colours I have chosen, and I am enjoying choosing different elements from bits I’ve already made, and stuff from shopping trips. I have a large box of card scraps, mostly strips trimmed off things, and also a poly-wallet stuffed with scraps of interesting bits of paper which is a wonderful source of collage fodder. I will never finish these supplies because they are always being added to as I continue to make projects.
When away from the studio in the comfort of the sitting room, I have been fussy-cutting some absolutely gorgeous multi-layered butterflies in muted browns and cream from Luise Heinzl, the Austrian junk journal artist I follow on YouTube – I recently purchased a few digital downloads from her, including some gorgeous grungey letters and numbers which I am looking forward to printing and cutting out once my new supply of 160 gsm white card arrives. I have already made quite a collection of the butterflies from several of the pages, glueing the layers together and adding antennae made from stamens for paper flower making.
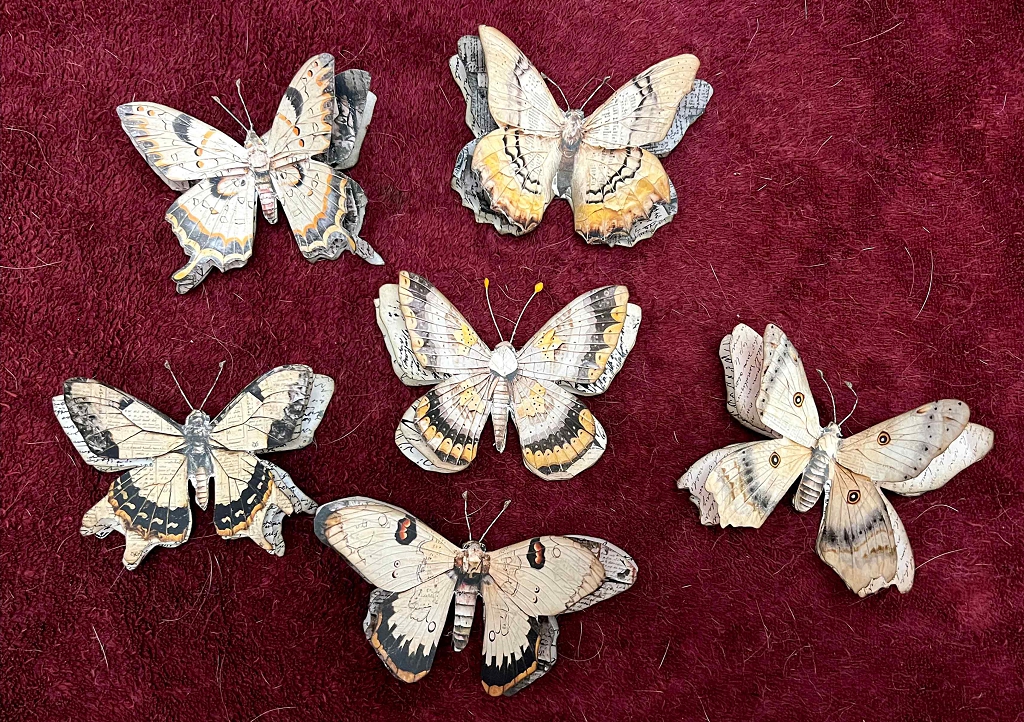

Wow! They are all truly delightful – what a wonderful and redemptive thing to do with trash – make it into something unique and beautiful! Very well done, abdn the butterflies are stunning!