HIDDEN PAPERCLIPS FROM EMBOSSED TOILET PAPER ROLLS – ADDING THE EMBELLISHMENTS
I have completed the embossed toilet paper rolls project for now – although I may come back to it and make some tags. For the moment I am setting aside the making of elements for albums and doing something different – I have amassed quite a collection of useful bits and pieces and will add some photos at the end of this post.
Hidden paperclips
When I was learning how to make the pouches from the embossed loo rolls, it occurred to me that I might also be able to make hidden paperclips. The rolls are pretty thick when folded over and I had my doubts whether this would work, but I gave it a try and am very pleased with the result. They are a bit bulky but they will work OK. I made a collection of six, and each one is double-sided.
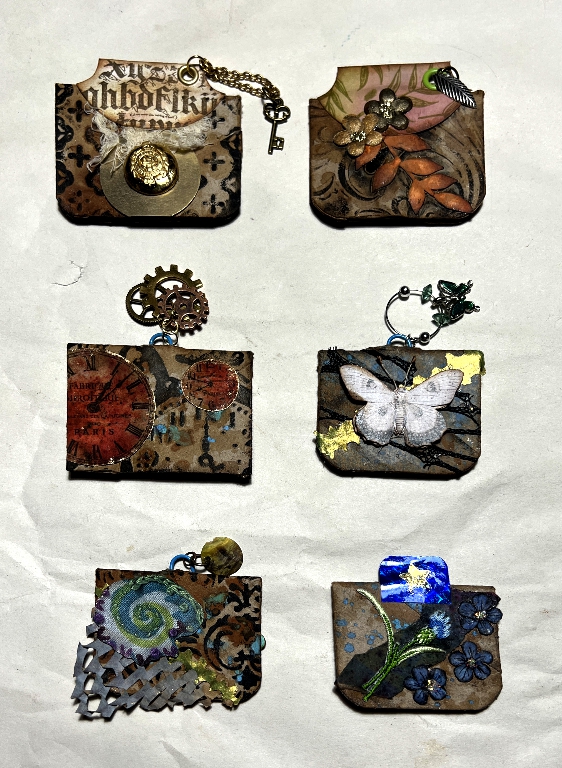
These are the backs.
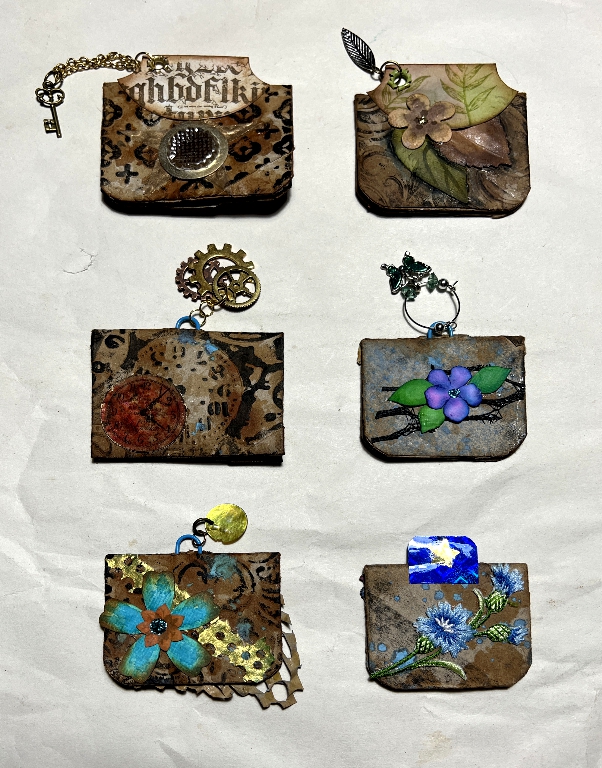
Looking at each one in turn:
Mediaeval paperclip
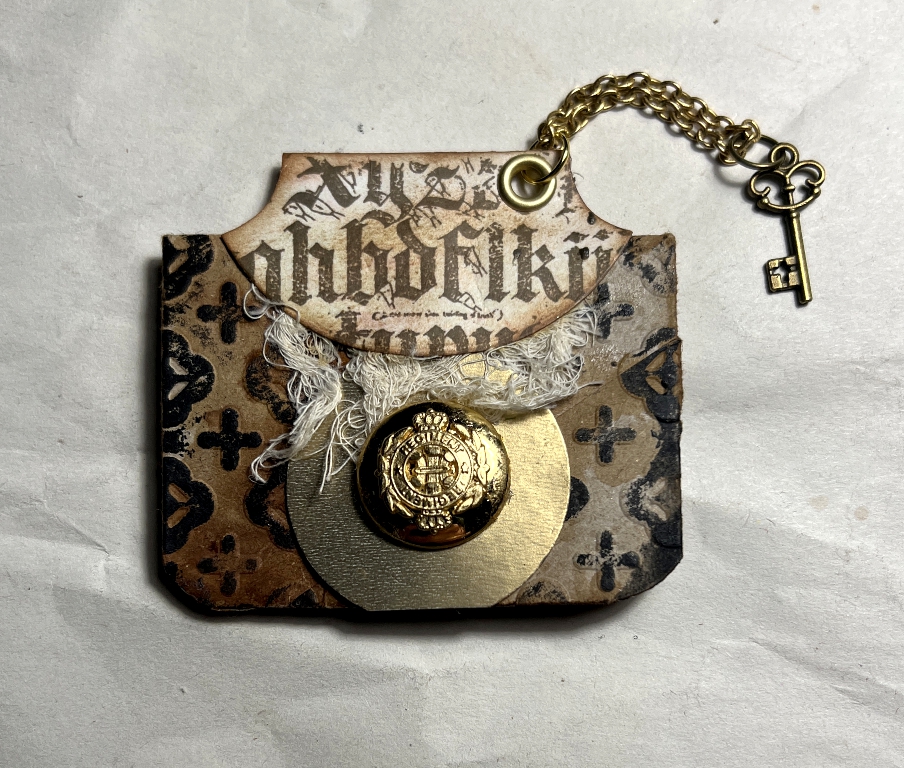
The Gothic style embossing and the blackletter script tab lend themselves well to this theme. I cut a ring of gold card using two different sized paper punches and stuck down a brass button with gel glue, having snipped off the shank. There is a scrap of grout cleaning cloth glued under the tab. I added a small metal key charm with a bit of chain threaded through a jump ring in an eyelet.
The back:
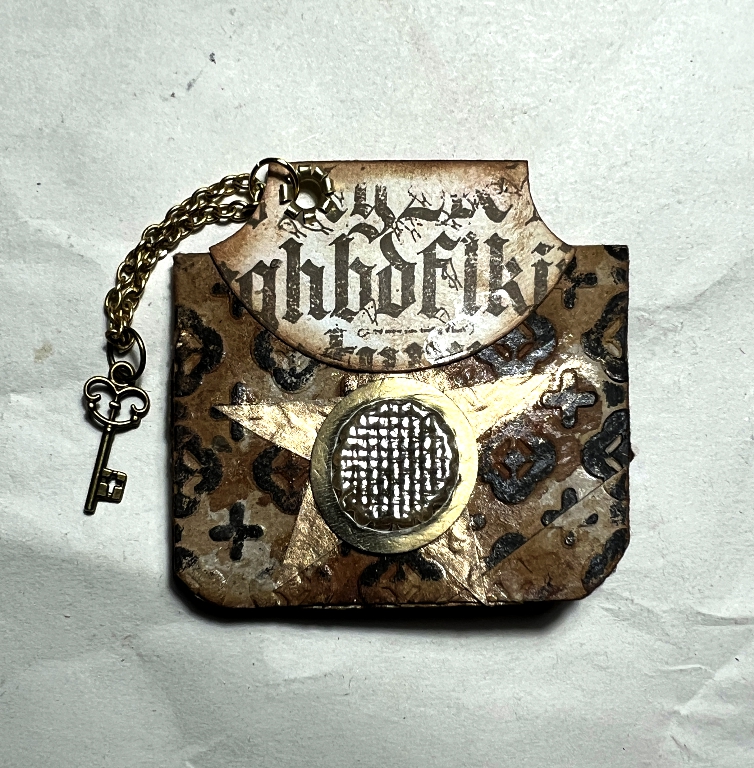
Another ring of gold card, glued down over a die-cut vellum star that I found in my sash. I coloured this with some gold gilding wax. The centre of this “seal” will surprise you – I am sure you cannot guess what it is made from!
It is the circular base from a plastic insert out of a chocolate box! I cut off the cylindrical sides and glued it down. The hole in the gold card ring was very slightly smaller, and I was able to press the edge upwards which helped to hold the “seal” in place. It is quite gold on the outside, but the inner surface of that chocolate box insert was duller and not so interesting.
Leaf paperclip
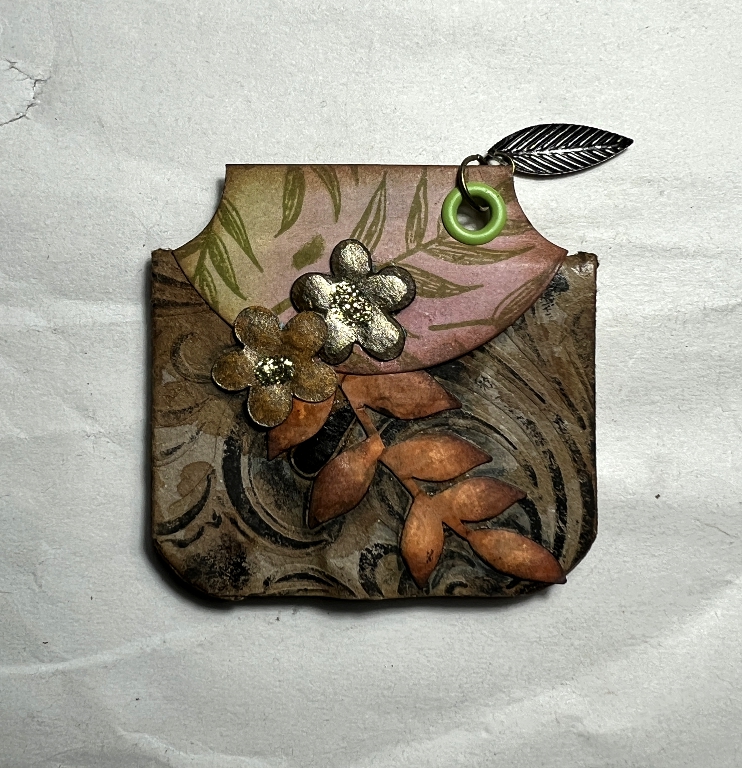
Another page tab stuck down over a swirly embossed toilet roll. The leaves and flowers were from my stash, and the tiny flowers have glitter glue centres. I attached a small metal leaf charm through an eyelet, using a couple of jump rings.
The back:
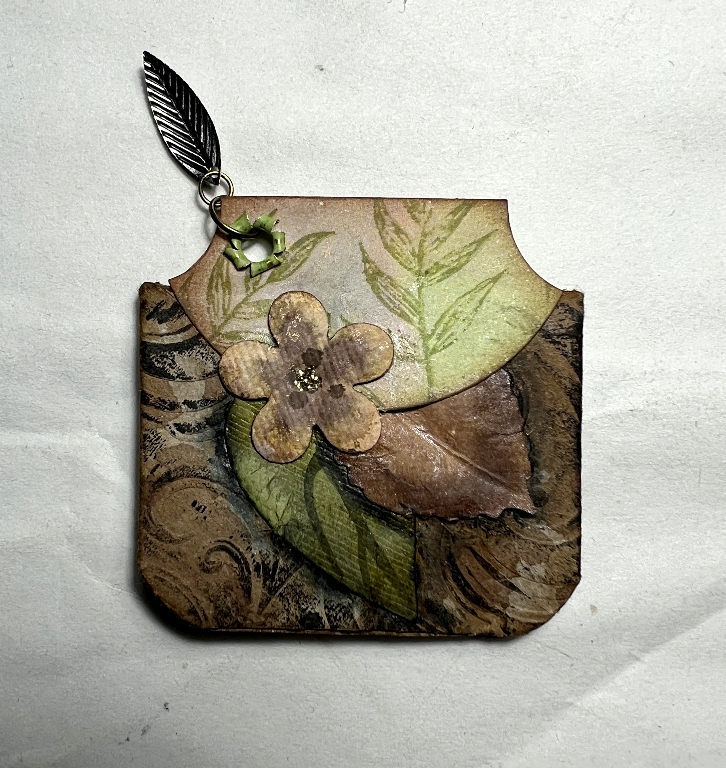
Very similar to the front, with a single flower and two leaves.
I have rounded the bottom corners on most of these paperclip pieces.
Clocks paperclip
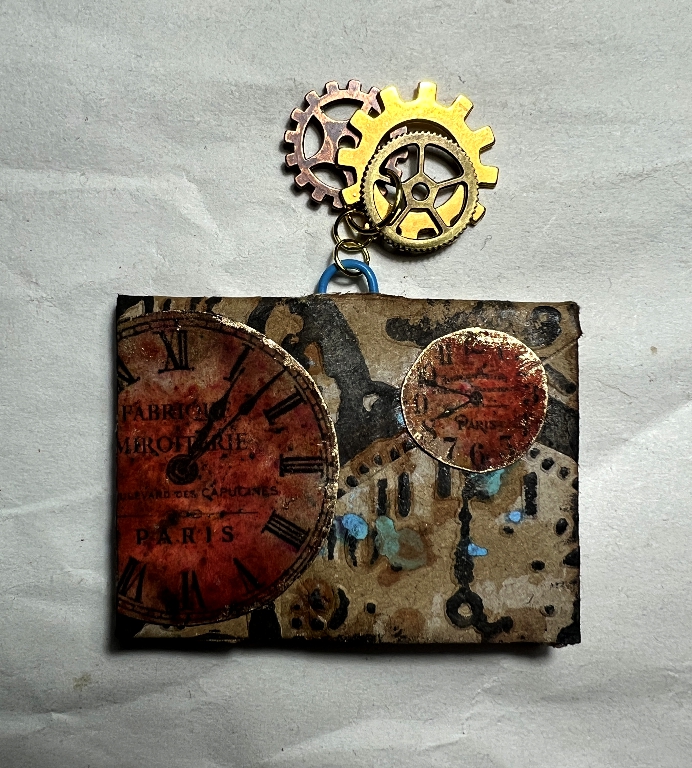
I cut out a couple of clock faces from some digital print-outs in my stash. They began life as black print on white paper but I darkened them with ink and some Infusions by PaperArtsy – a while back, I made an album about how to use these powder pigments. They give a nice aged look. I edged the clock faces with a touch of gilding wax.
The top of the paperclip projects through the slit in the top. I chose a turquoise paperclip to co-ordinate with the turquoise ink spatters on the piece. Using a couple of jump rings, I attached three metal gearwheels as an embellishment.
The back:
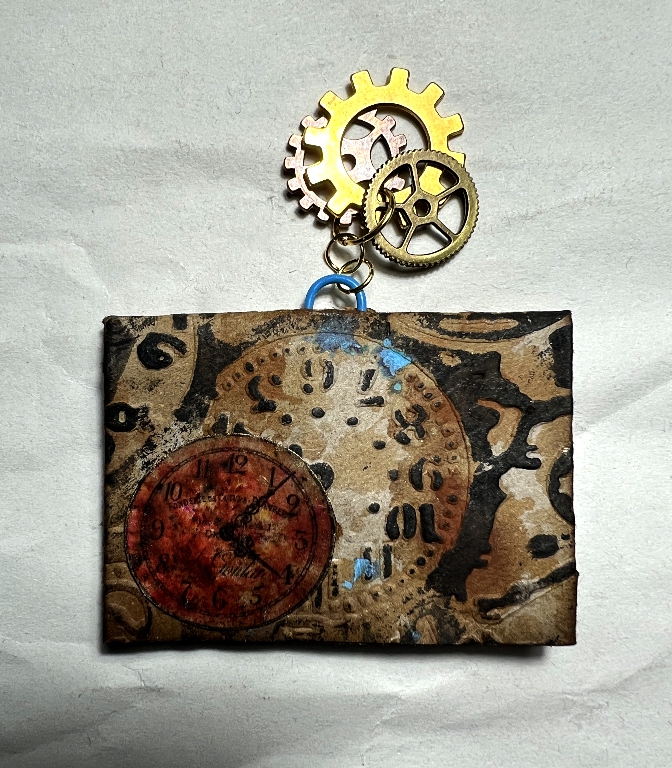
Unfortunately, because of the way these elements are constructed, being folded in half, the big embossed clock face on the back of this one is upside down! I added another cut-out clock face like those on the front.
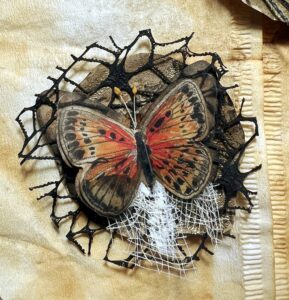
Butterfly paperclip
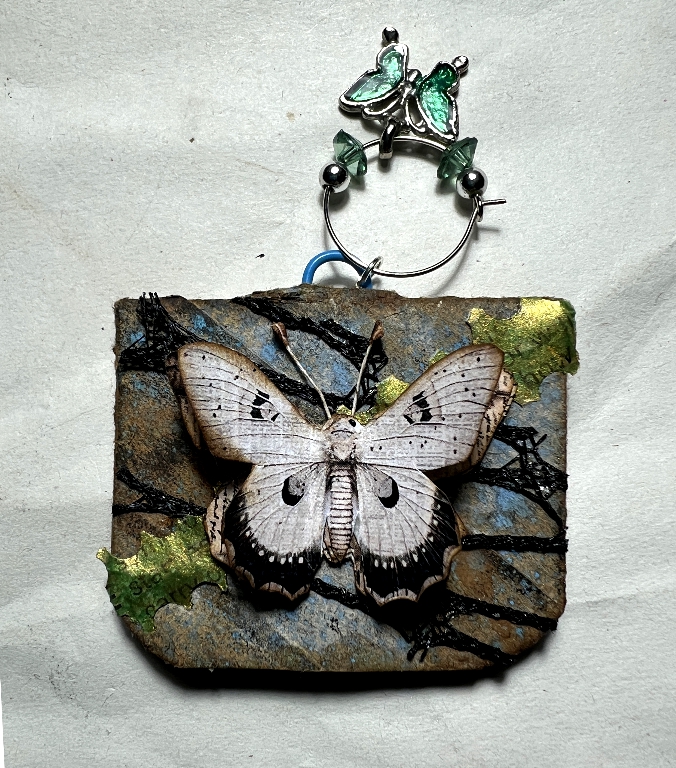
One of Luise Heinzl’s 3-D butterflies embellishes the front of this paperclip. First of all I glued down a strip of punched medication leaflet diagonally across. In case you haven’t seen me using these elsewhere, I take the accordion-folded leaflets out of medication packs, and without unfolding them, I punch holes in them. I then unfold them and spray them to colour them, and they act as a stencil in the process, producing a pattern on the paper underneath. The printed text on the leaflet usually shows through a bit, which adds interesting texture. They can easily be torn along the perforations, and I particularly like these tiny narrow strips where two adjacent rolls of holes are torn. This piece was sprayed with gold.
Over the top of this, I attached a scrap of plastic mesh, glueing it down with spray adhesive, and then glueing the butterfly on top. This paperclip was made from a folded toilet roll core which had not been embossed but merely inked.
The back:
No butterfly, but some flowers, again from my stash, glued down over a tiny scrap of the plastic mesh.
The charm embellishment on this one is again attached to the blue projecting tip of the paperclip, using a jump ring. Without the jump ring, the ring of the charm would not lie flat. This charm is actually one of those wine glass charms and has an enamelled butterfly on it, and some little beads. You can see how it opens.
Swirls paperclip
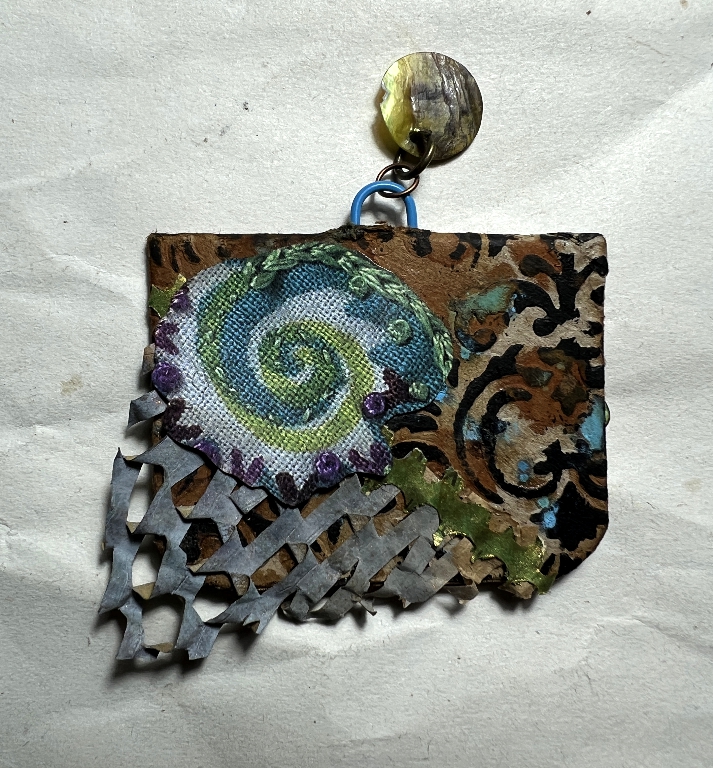
The swirl pattern on this one was cut from a magazine image. It is a photo of an embroidered piece. Again, there is a narrow strip of gold punched medication leaflet running diagonally across the piece, and also a fragment of paper mesh packaging material. This was in my stash and had been inked when I stretched it out and used it as a stencil. I love the colour it came out, and you can see some uncoloured bits underneath.
Through the projecting tip of the paperclip, I have attached a circular shell fragment charm with a jump ring. It’s quite gold and shimmery.
The back:
More gold medication leaflet glued down – this time a slightly wider piece, showing a row of holes down the centre. Another paper flower from my stash of cutting machine flowers, this time a double-layered one with a glitter glue centre.
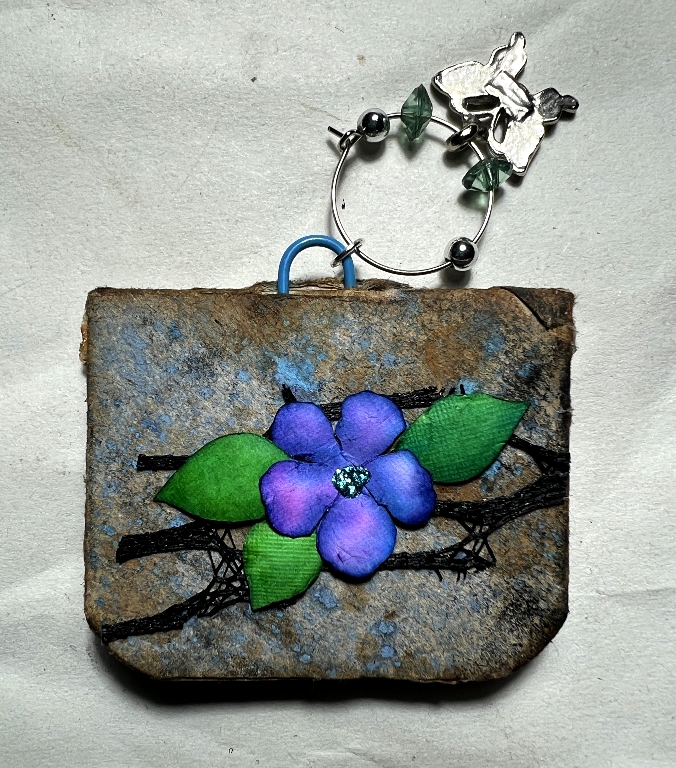
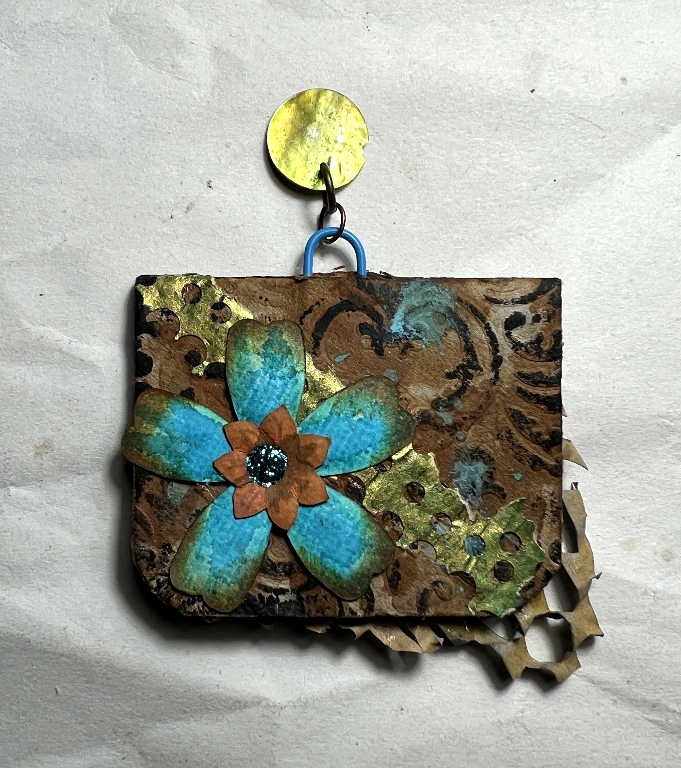
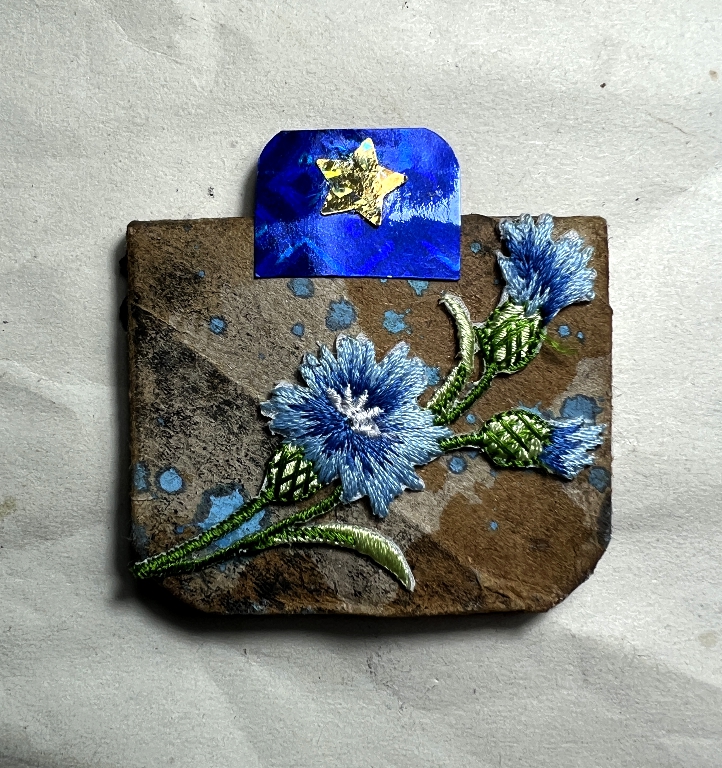
Floral paperclip
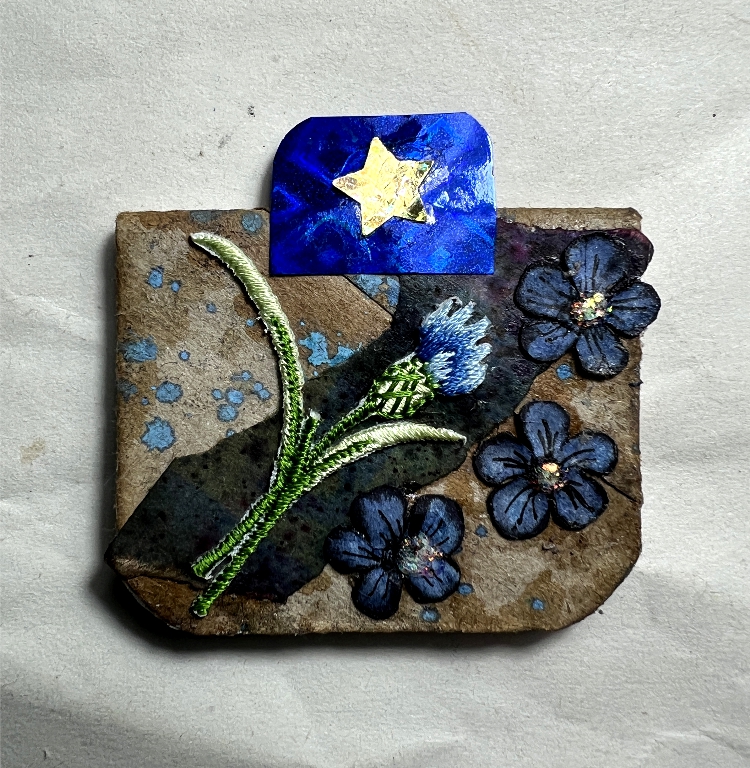
For this final one, I used a small blue floral fabric embellishment. I was given a little pack of these and have never used them. They were too long for these tiny pieces so I cut part off to add to the front of the paperclip, and used the larger piece on the back. Small blue flowers with glitter glue centres from my stash. I love how the blue ink spatters on this one have reacted with the rust water around their edges, turning quite dark.
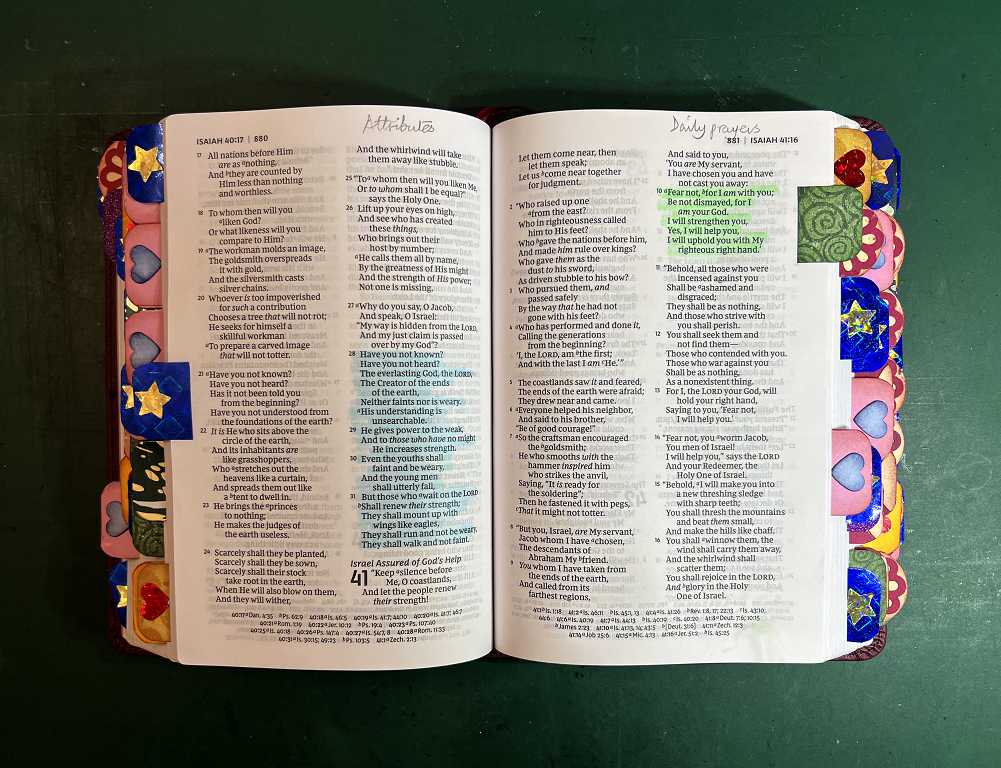
The tab at the top was one of quite a few left over from my prayer Bible project which I did a couple of years ago. The little tabs were cut from shiny gift carrier bags in different colours, with small embellishments added. Each variety indicated a particular subject matter and I made a key to indicate what they were, and they were glued down the page edges.
The back:
Just the larger portion of the fabric embellishment on he back, and nothing else. I didn’t want to cover up those delicious dark-outlined spatters! Again, this toilet roll core was not embossed.
That completes the loo roll hidden paperclips.
All the embellishmens I have made so far
Hidden paperclips
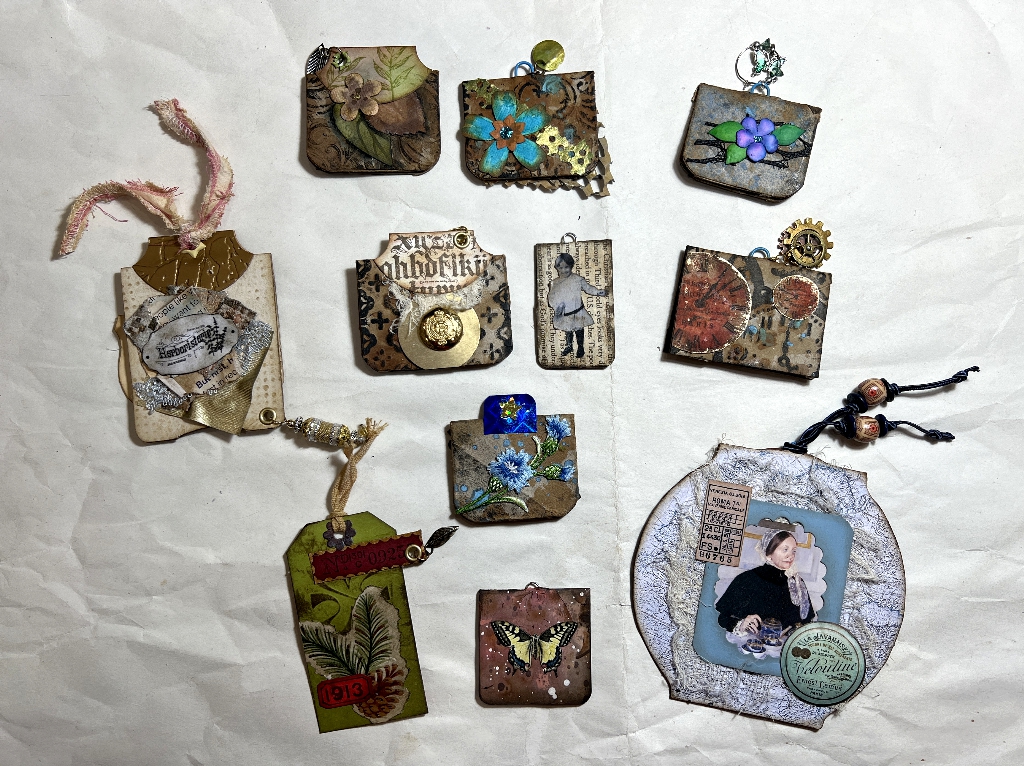
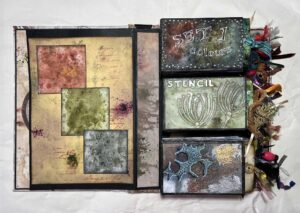
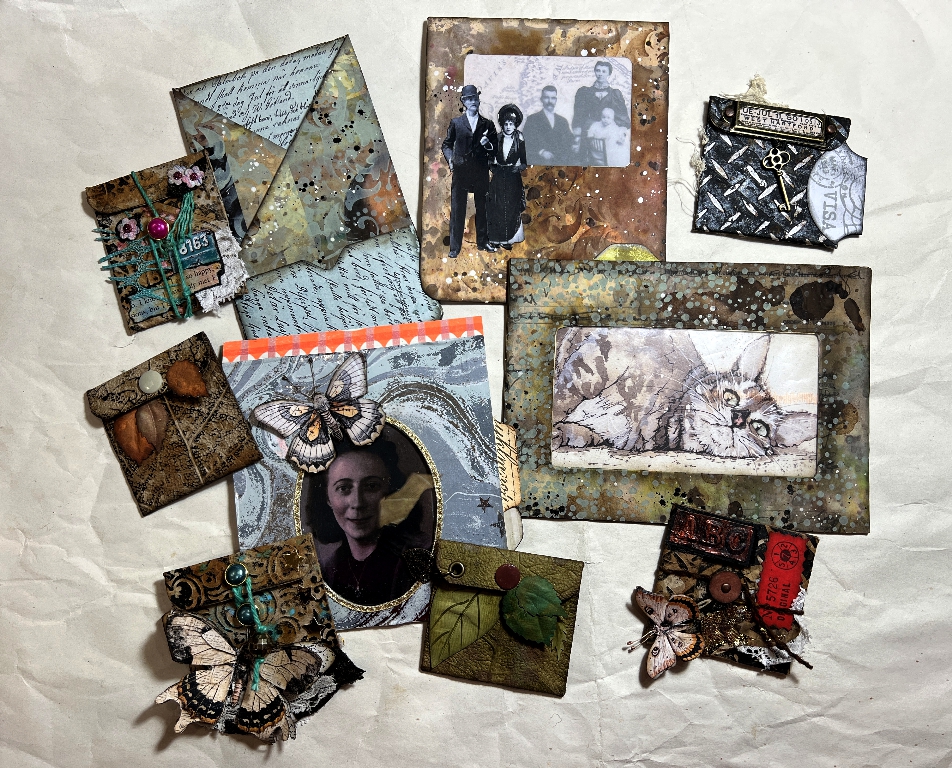
All the pockets, pouches and tags
All the clusters, including the Luise Heinzl butterfly ones.
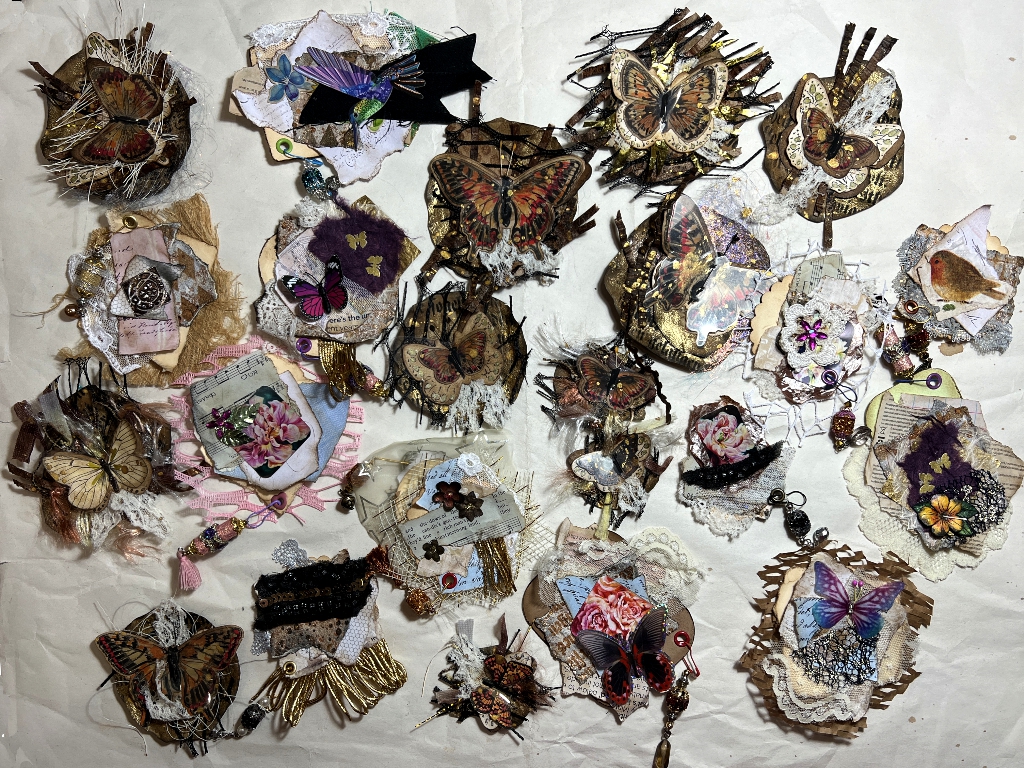
Quite a collection. More to come in future but for now I am working on other things.
Computer
I have done this entire post on my new Linux setup, and edited all the photos in the GIMP photo editor. Although I still have some work to do to get the Linux computer entirely independent, I have enough stuff on board now, and enough experience, for it to be a working computer. So far I am very pleased with the result, especially since my decision to abandon all things Windows on it apart from my favourite file manager, which I am running alongside the native Linux one. The setup is streamlined, efficient and simple to operate, and very fast to boot up and close down. The Internet runs as normal, and I’ve managed, with a bit of tinkering, to get my VPN working well too. One final task: to transfer my various Word and desktop publisher templates into Linux’s Libre Office and I think it will be done. I also have two alternative methods of transferring photos easily from the iPhone and have learnt from a Linux forum member how to save photos on the iPhone as jpgs rather than Apple’s native HEIC which removes the need to convert them. In case anyone is interested, the Distro (Distribution version of Linux) I have chosen is Zorin OS. It’s a very good one for those transferring from Windows.