RECYCLED PAPER-GLASSINE BAGS ALBUM – COMPLETING THE SECOND FOLIO, AND FINISHING MY LABELS
Finishing the centrefold
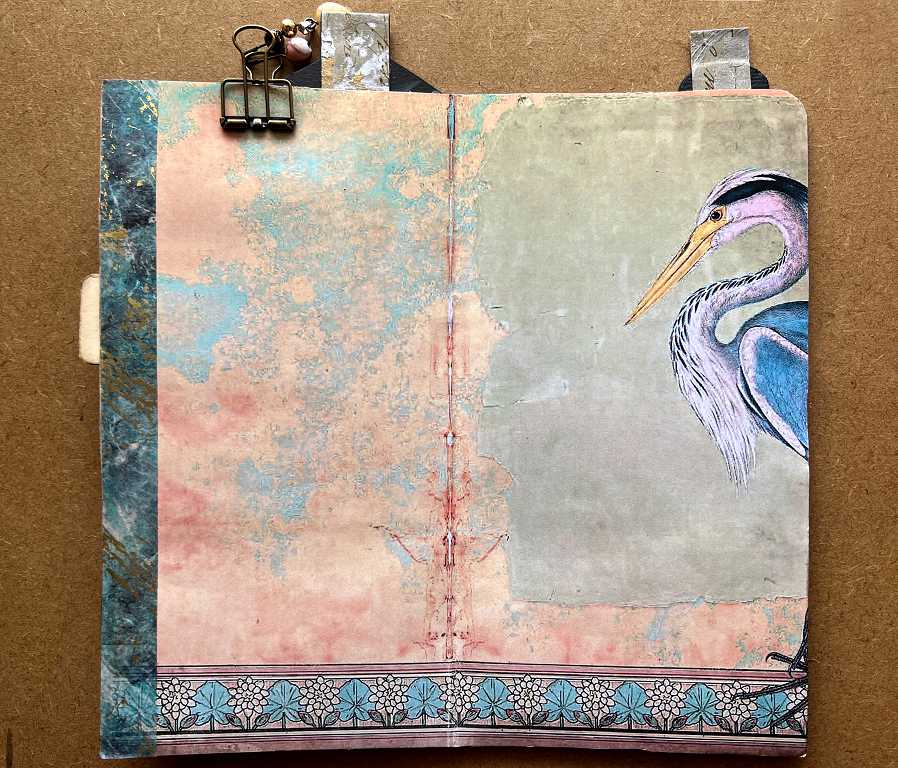
This is where I left the centrefold of the second folio of this recycled bag album.
I was mulling over what else to add to this page, and remembered that I had seen a video recently where someone was making a lot of tags, and she made some simply gorgeous transparent ones, with something trapped between two layers of acetate. For the life of me, I could not find this video! After I had completed the work on the page, I did manage to find it; the tags in question were embedded in the midst of a huge amount of brilliant material for inspiration.
Not managing to find it in time, I did my own thing, and am quite pleased with the result.
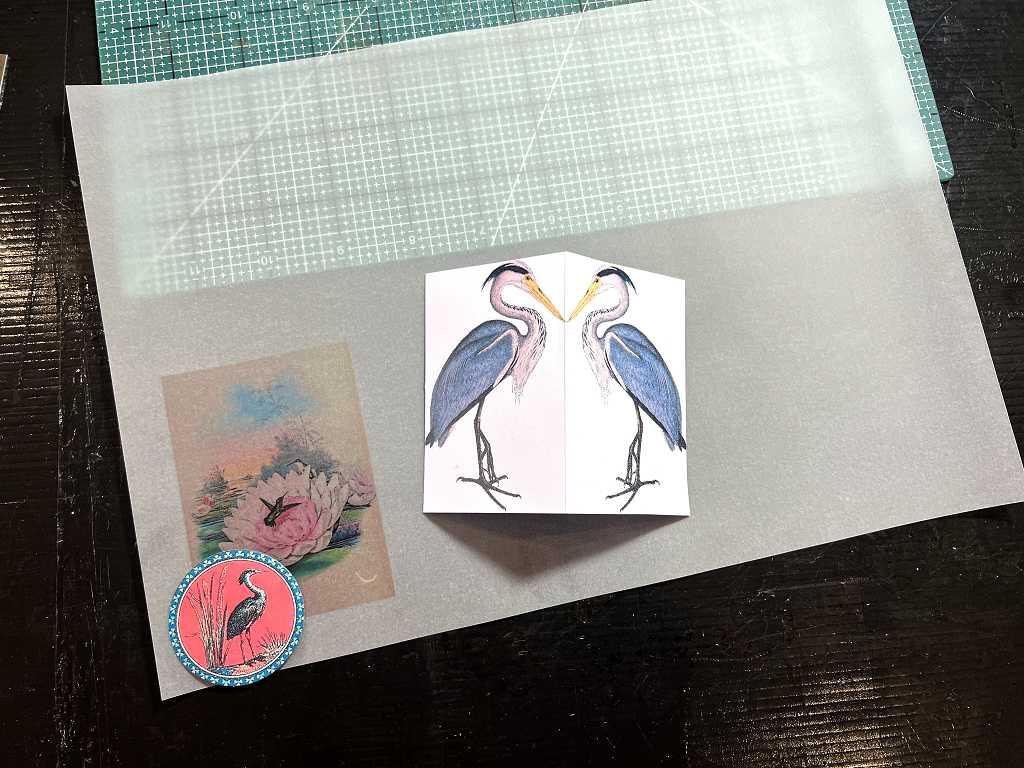
I began by selecting some images from the Graphics Fairy Premium Membership site – two from the same bundle as the background, and one from another bundle. I worked out what I wanted to do and opened the images in my desktop publisher where I was able to resize them to the exact size required, and print them out.
Another first for my new laser printer
I’m always a bit nervous of trying different media to print on, in case something goes drastically wrong and everything jams up in the printer! However, this HP laserjet printer has a good selection of settings for different types of paper, one of which is “opaque film.” This seemed to be the closest thing to vellum so I gave it a try, and it printed like a dream.
This image was a journaling card that I reduced in size, and printed out to form the pocket for the tag. I wanted the whole thing to be translucent and somewhat ghostly.
Double-sided images
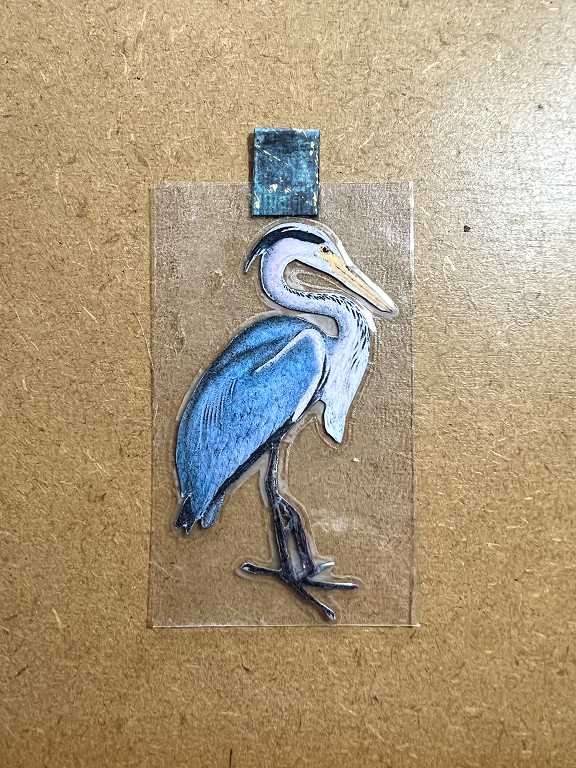
I came across someone recently who was selling double-sided butterflies on her Etsy shop – each image was attached to a mirror image of itself, so after you print it out, you fold it in half and then fussy cut it. I’ve got the software for doing just this, and it was a great time to try it out, using a reduced sized version of the large heron which is part of the printable pdf background that I used for this centrefold.
I decided on the size I wanted, and then copied the image and pasted the copy. I reversed this horizontally, and lined the two up together so that the beaks of the two herons were touching. I then drew a frame with a very thin line around the paired images so that it touched the images, and printed it out. Using a craft knife and metal ruler, I carefully cut around the frame, and folded the resulting rectangle in half so that the images were on the outside. I applied glue and made sure that everything was stuck together really well, and left it to dry completely. Once it was ready, I fussy-cut around the image and hey presto, a double-sided heron! The legs were a nightmare to cut but I needed the small spaces between them to be removed; I used fine curved scissors for the outside, and my finger blade to remove the small pieces. The application of a little Black Soot Distress Ink with a soft blending brush sorted out any irregularities and I was pleased with the result. I had to handle it very carefully until it was secured in the tag.
The third element I cut was a resized circle motif die-cut from the centre of a larger design. This came from a different bundle, and would make a nice little focal point.
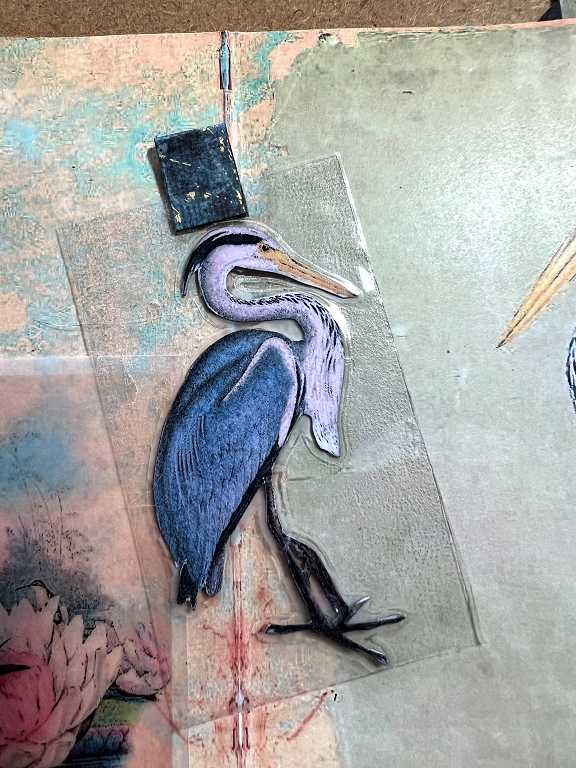
Here are the pieces after I’d printed them out. The image with the lotus flower is printed on vellum, and the other two on 160 gsm white card. The double-heron is folded, ready to be glued.
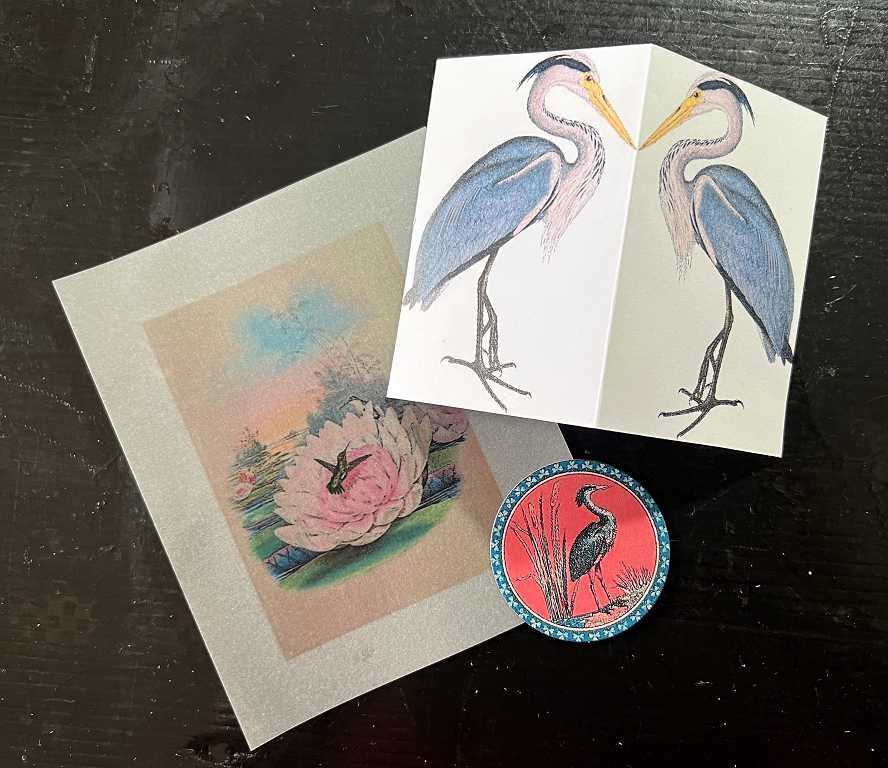
The images after I’d trimmed down the vellum and die cut the circle.
I trimmed the vellum piece further, so that it had a narrow unprinted border all around, and applied a very thin bead of Collal All-Purpose glue along the sides and bottom. This glue is great because it is clear, and it doesn’t seem to show through the vellum, unlike most glues. It is often difficult to stick this translucent, rather slippery paper down without it showing. It does take a little longer to dry than regular paper, so I was careful not to interfere with it until I was sure it was thoroughly dry.
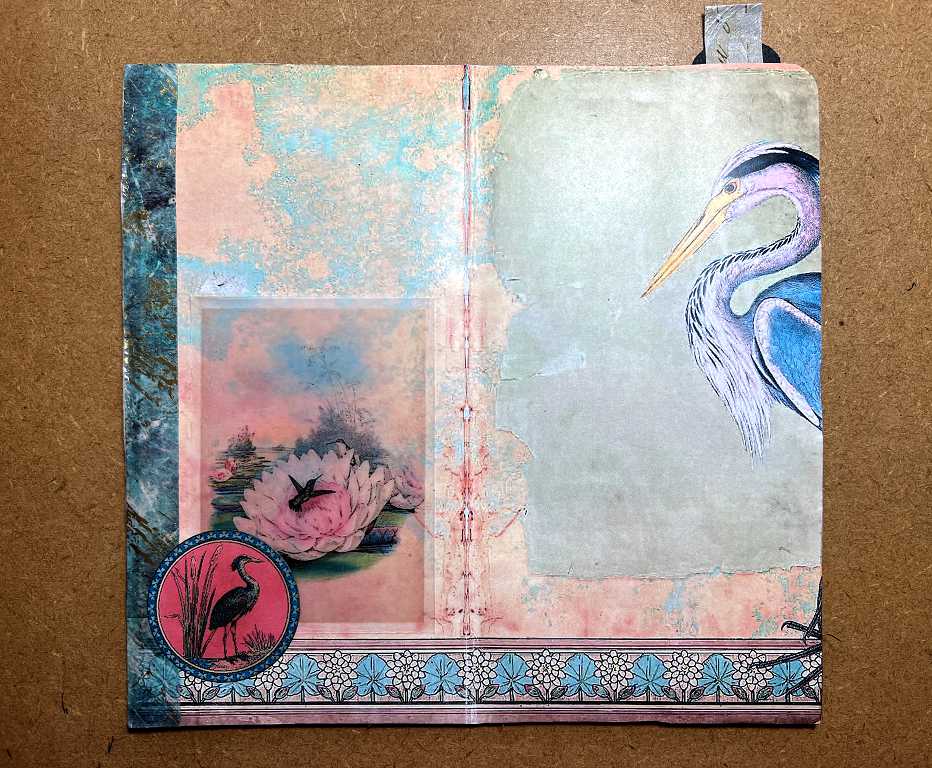
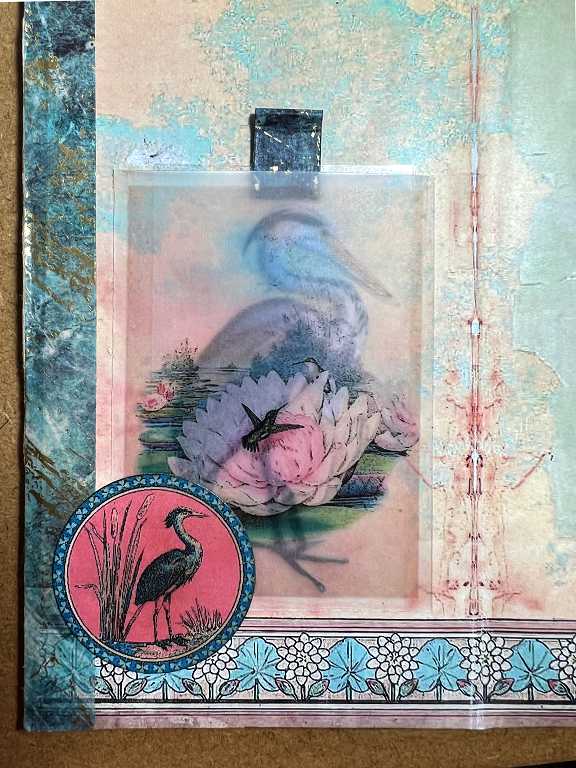
I added the piece to the bottom left-hand corner of the page and attached the circle on top. You can see the background through the pocket.
I laminated the double-sided heron inside an A5 glossy laminating folder and trimmed it down to size. It was a bit wrinkled so I pressed it with my craft iron under some baking parchment which improved things a bit. I made a tab for the top from a scrap of black card covered with the same washi tape that I used for the left-hand border of the page
The transparent tag laid on top of the page, showing its transparency.
The completed centrefold showing the tag in place in the pocket. It has an ethereal look.

Two completed folios
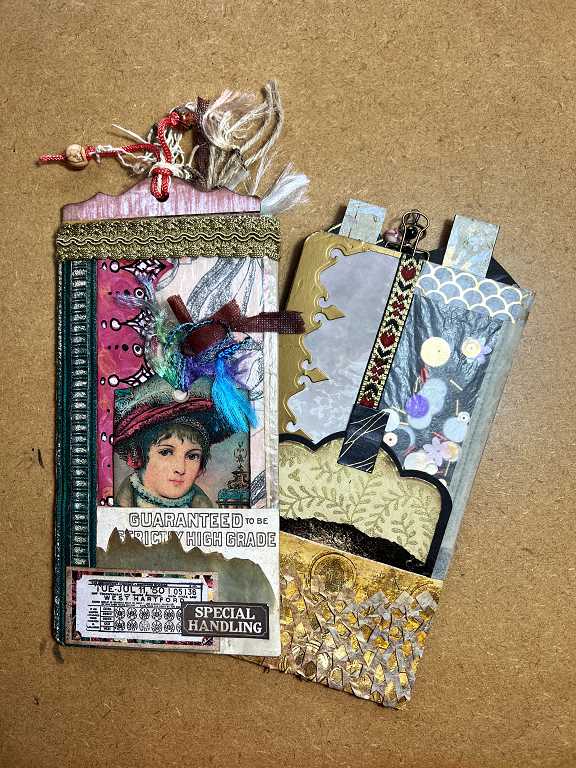
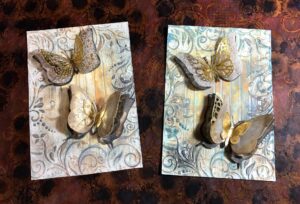
The front pages, complete with all their tags.

Two centrefolds.

The back pages.
I have decided to use each folio as a single signature when I come to bind the book. It was just too complicated trying to think ahead and deciding which pages would face each other, and there is some cohesion in the centrefolds I’ve made so far, so I thought I’d retain that.
My new corner rounder
My Crop-A-Dile Corner Chomper arrived a couple of days ago and it’s brilliant. It feels good and solid and “chomps” with a very satisfying feel! So far so good. I shall probably get rid of my cheap corner punch and consign it to the bin after all the grief it’s caused me!
After taking the photos of the folios above, I rounded all the outer corners of each page, and it looks great now. I was a bit concerned about the fairly thick fabric trim on the top of the back page of the first one, but the Corner Chomper simply chomped right through with no problem at all!
Finishing my scrap-busting labels
At the end of my scrap-busting session the other day, I had several small labels which I had stamped, which needed further attention.
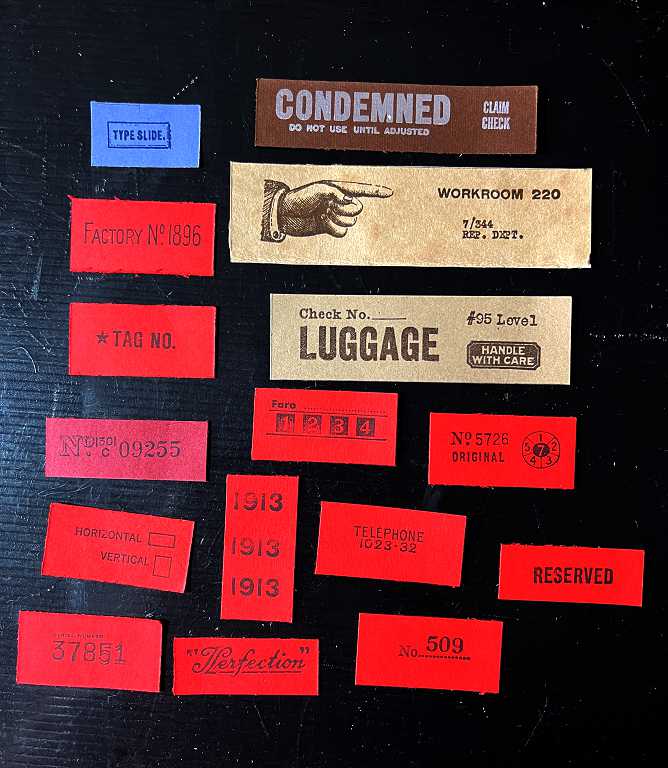
I needed to die cut some, and trim others, and add some decorative edgings.
To make it easier to hold these little pieces of card in place while I ruled lines on them, I used my sticky mat. This is getting a bit unsticky these days and probably needs another coat of mat glue, but it served its purpose for now. I was able to line them up on the grid, and in somc cases I was careful to line up the text, rather than the edge of the scrap, as some of them had not printed quite straight.
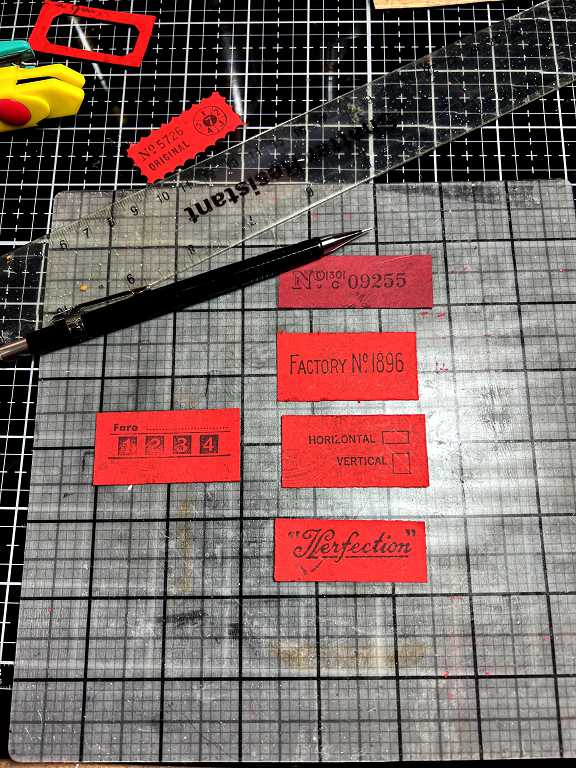
Here they all are, together with the various materials and equipment I used.
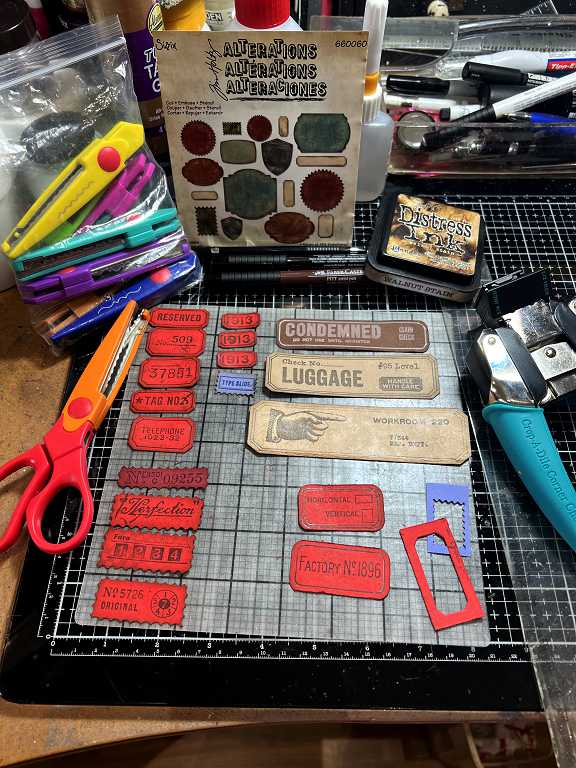
At centre back is the original packaging from the die set that I used to cut as many of them as possible. Some of the dies were not the right size so I cut these labels by hand.
In front of this packaging are a pencil and two archival markers, in black and sepia, for drawing the borders on the labels. (I also used a white pen for the dark brown one.)
To the left is my interchangeable scissor set. I got this on Ebay and it was primarily designed for children but I thought it was a really cool idea! You pull off the handles and push on the blade set of your choice. There are eight different ones, so plenty to choose from – some are zig-zags and wavy lines, some for postage stamp edging, and others are fancy.
On the right is Walnut Stain Distress Ink for inking the edges, and my new Corner Chomper and a ruler. At the bottom right on the sticky mat are a couple of the negative spaces left from the die-cutting; these were the only ones that survived, and they could come in useful sometime as little frames so they’ve gone in my miscellaneous die cuts box for now.
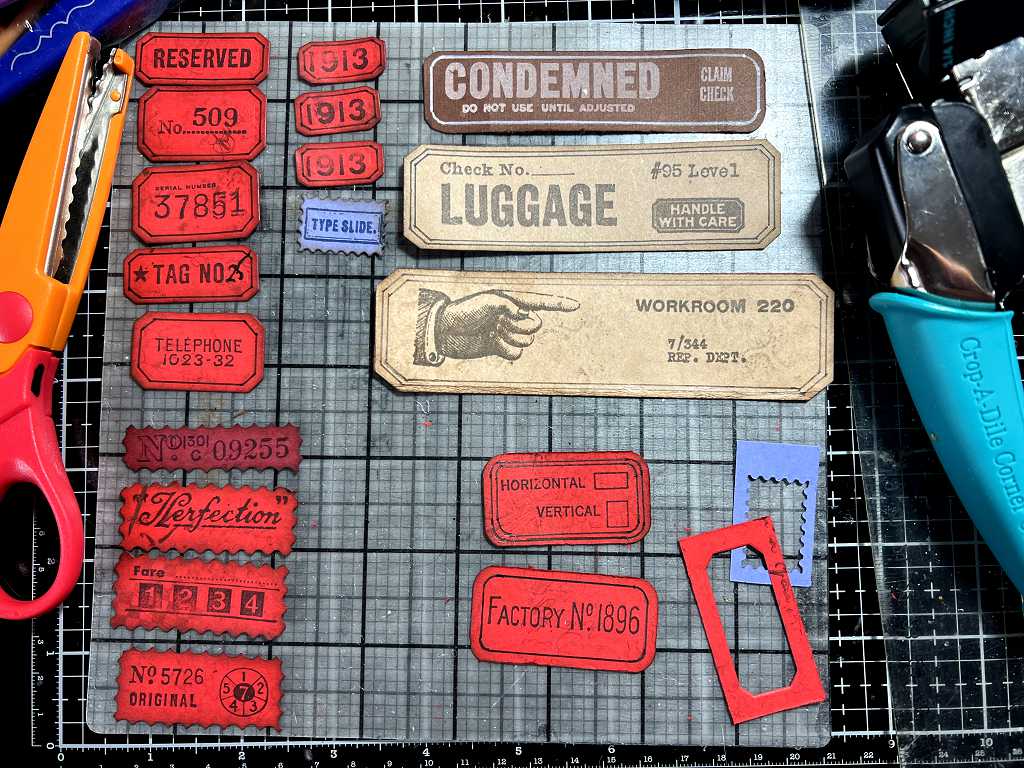
Now for some close-ups of the labels so you can see how I treated them differently.
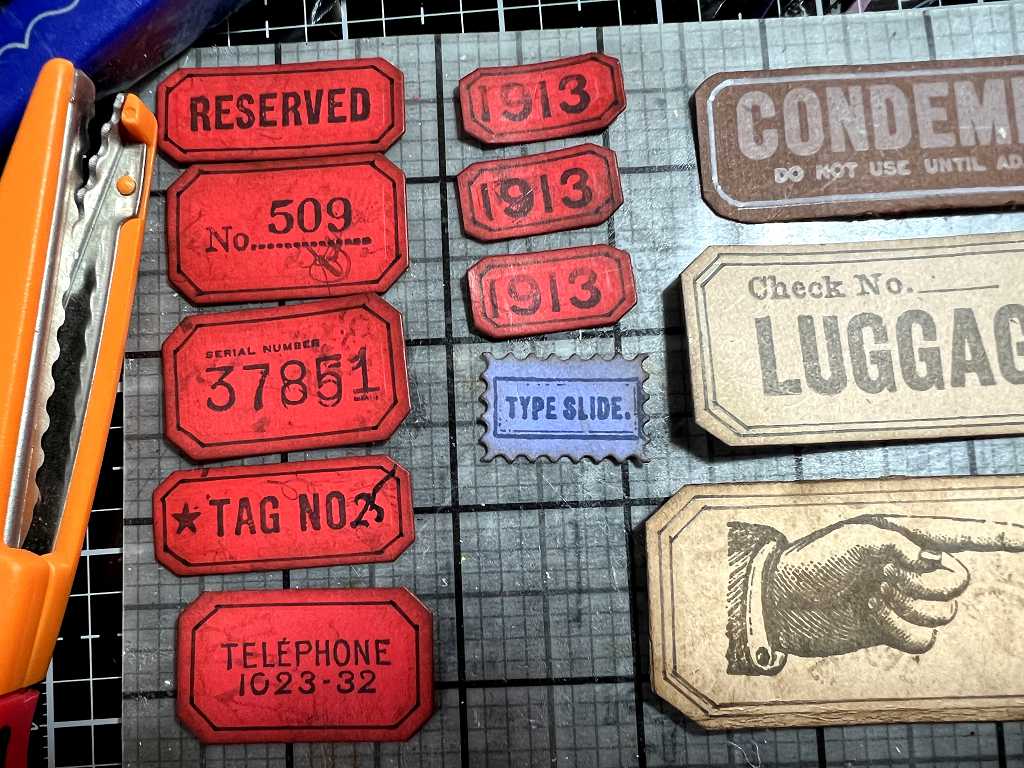
The ones on the left are all die-cut. I added a number to the “Tag No.” one, and ruled a black border line around each one. The sticky mat helped with this. The larger ones on the right were too big for any of my dies, so I simply cut off the corners and ruled in a border. I used the Corner Chomper on the dark brown one at the top and a white pen for the border.
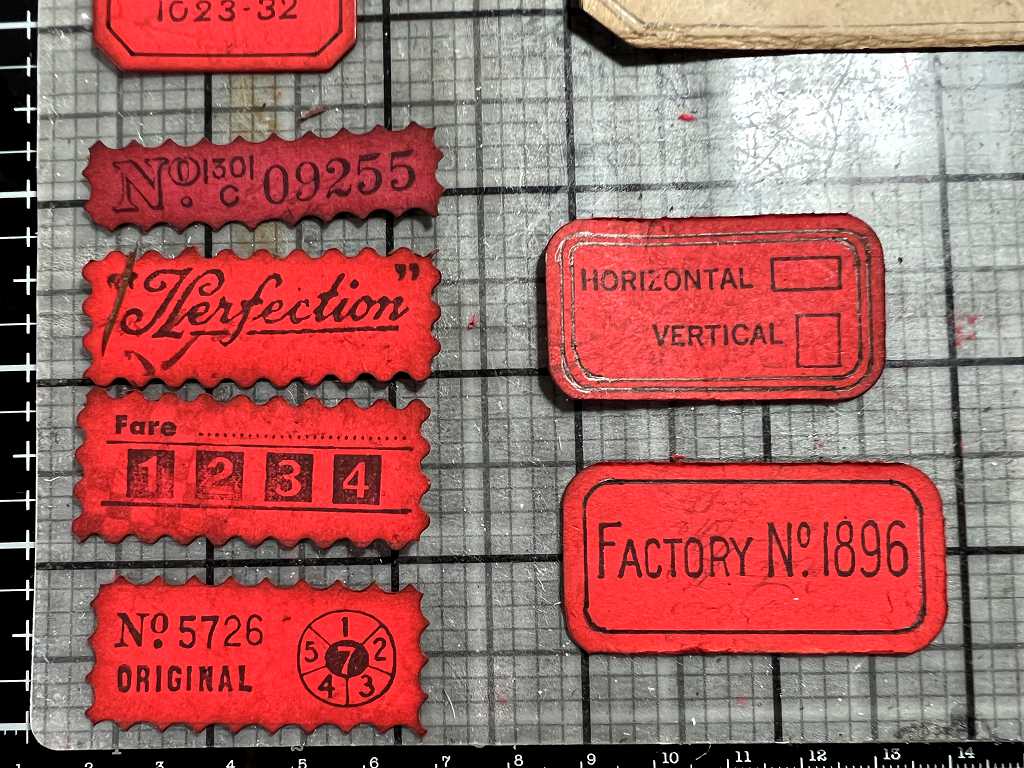
The ones on the left were trimmed down with the interchangeable scissors, and the ones on the right got the corner-chomping treatment and added border lines. Everything was inked around the edges with Walnut Stain Distress Ink.
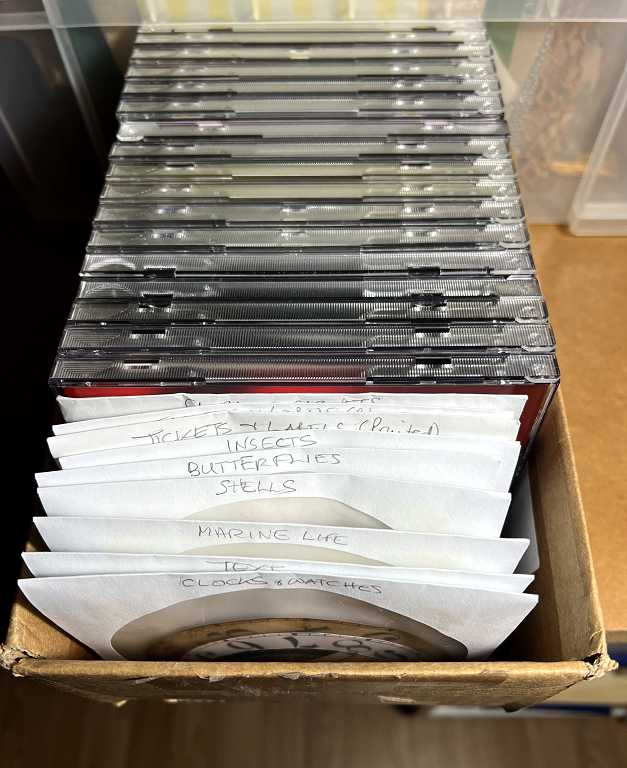
They have all now gone into my new small ephemera storage system, ready for use. I am pleased with how these turned out. No scrap of card is too small to throw away, it seems!
Cuttlebug cutting plate
My old Cuttlebug die cutting and embossing machine has done sterling service over the years. I love this little fellow as he’s so small and compact, and mostly I don’t use large dies anyway. The “B” plate for cutting was getting extremely warped and roughened on the surface so I decided to try and flatten it. I’d heard that some people had had success by immersing it in a baking tray with boiling water and putting weights on top. I tried this, and it didn’t work.
I put it in the oven on a low heat (50 deg. C) for 30 minutes, and it may have flattened a bit, but not appreciably. I turned the oven up to 100 degrees and put it back for a further 30 minutes. It came out curved!! I turned it over and put it back again for another 10 minutes in the hope it would flatten out. No diffence. Back in again for a further 20 minutes. No good.

One ruined Cuttlebug plate. Duh. (The mess around it is the label that burnt off in the oven!).
I have now ordered a pair of compatible plates from Ebay. I have one spare cutting plate that I can use but that is getting pretty warped now too. I shall do a bit more research and see if there is a way of flattening them out.

Wow these are all amazing Shoshi – looking forward to seeing them “in the flesh” so to speak hopefully soon! I love them all!