TISSUE BOX FOLIOS PART 1
Following along with the tutorial on the YouTube channel Chasing Paper, I am making two folios from empty tissue boxes. I am made them as a production line, working on them together for each stage.
The owner of the channel has done two videos on this subject. The one I am doing is from the standard rectangular tissue box with the long oval opening in the top. The other one is a folio made from a cube-shaped box. If I find any tissues in a box like that I shall probably buy them, just for the box!

I have made cards in the past from these tissue boxes.
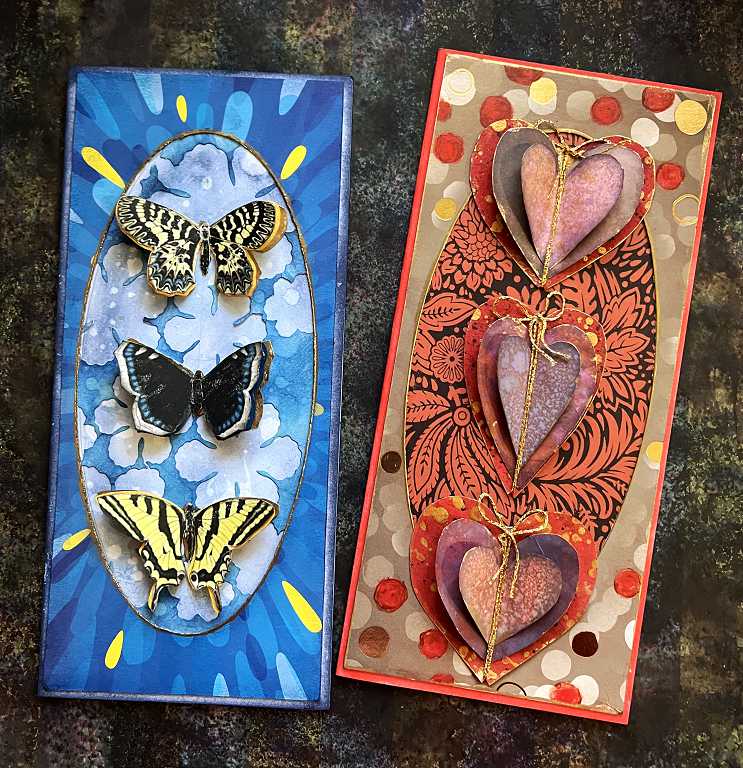
In that case I made use of the existing printed design on the box tops and added further embellishment. The oval window in the top of the box is just crying out to be made into a recycled art piece!
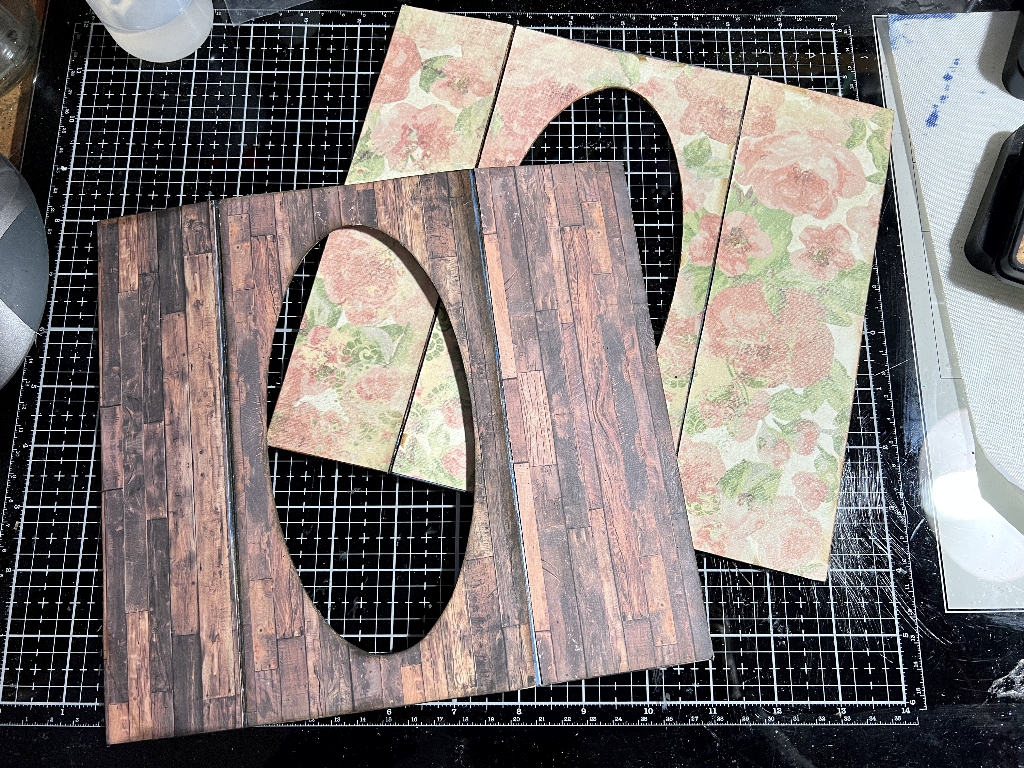
When making the folios, after cutting off the unnecessary bits, every part of the box is covered with papers.
Opening out the boxes
The first thing to do is to open up the box and remove the parts that are not needed.
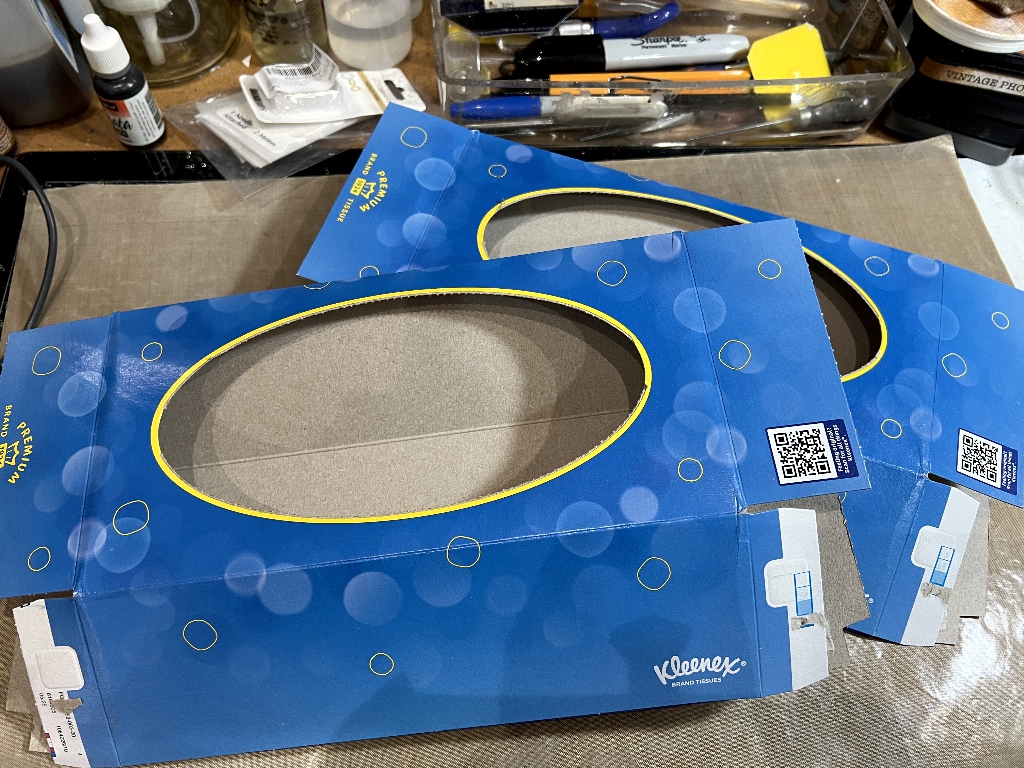
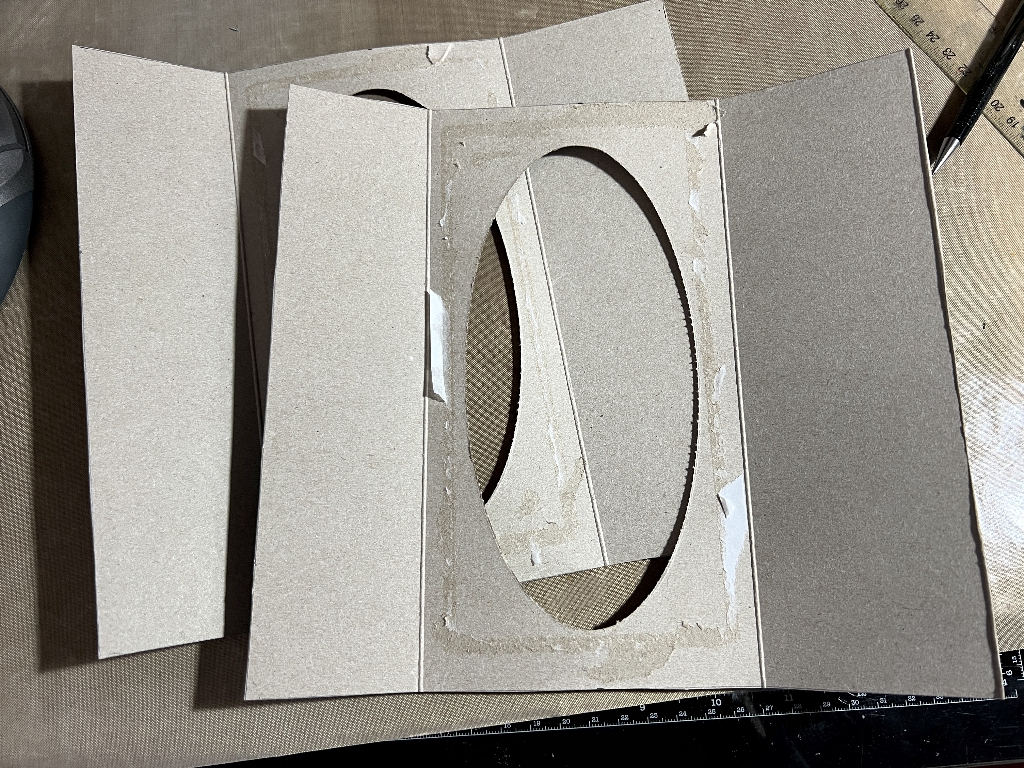
Once the flaps are removed and the box is opened out and flattened, this is what is needed for the basis of the folio.
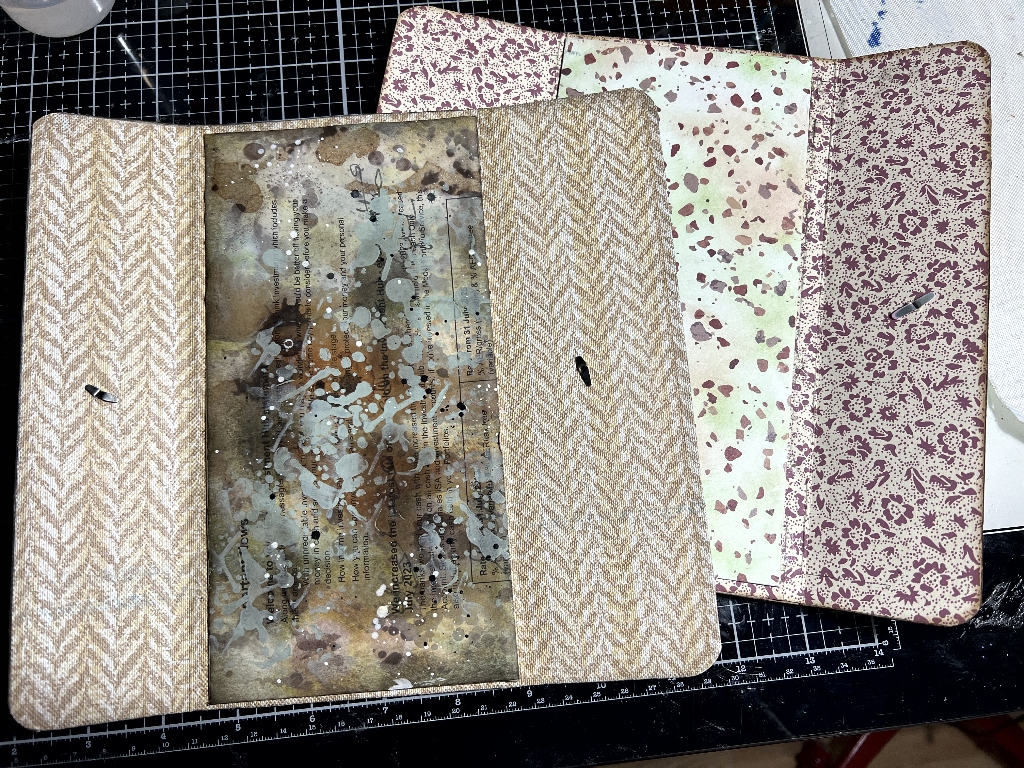
I am making the two folios in different styles. One is more grungey and the other is floral.
Covering the panel with the oval window
For the grungey one I chose a paper from a 12 x 12 paper pack I bought recently at The Range, and for the floral one, I broke into a paper pack I’ve had for many years. I bought this at a craft show and have never used it. Since then my tastes have changed. Most of the pages are embossed, so they aren’t very amenable to altering! I thought it would be good to start using up some of this stash that’s been hanging around for years gathering dust.
I cut the pieces slightly larger than the panel, and stuck them down. When the glue was dry, I trimmed off the edges and then from the inside, cut out the piece covering the oval aperture, using an Xacto knife. All the edges were sanded and inked.
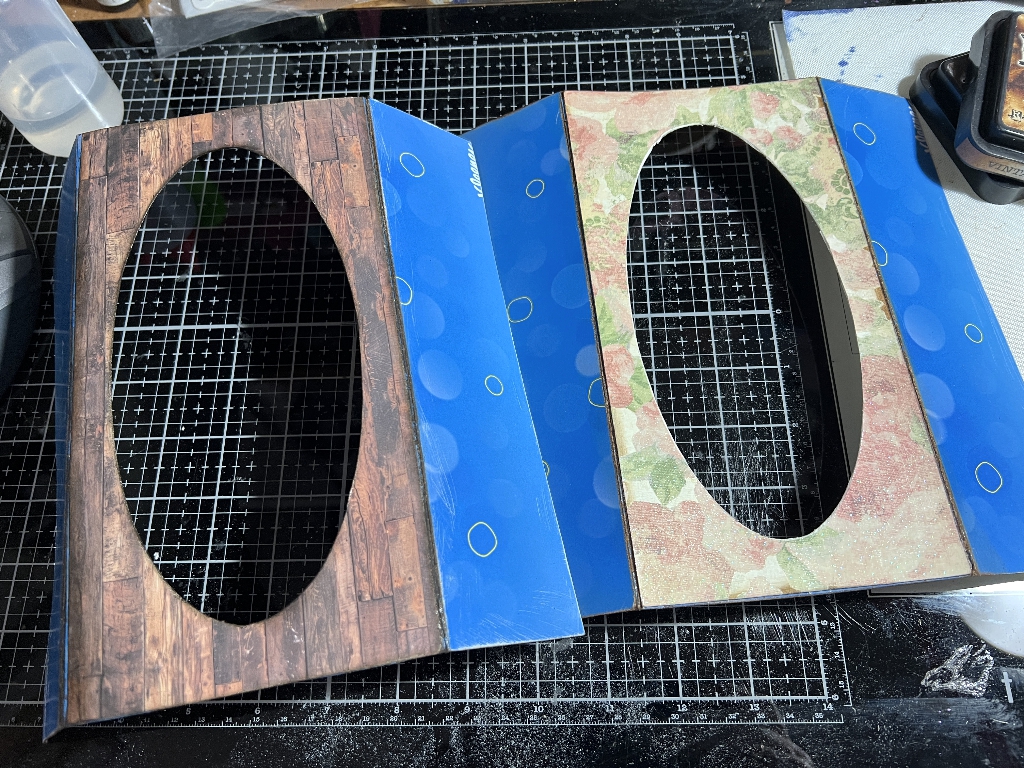
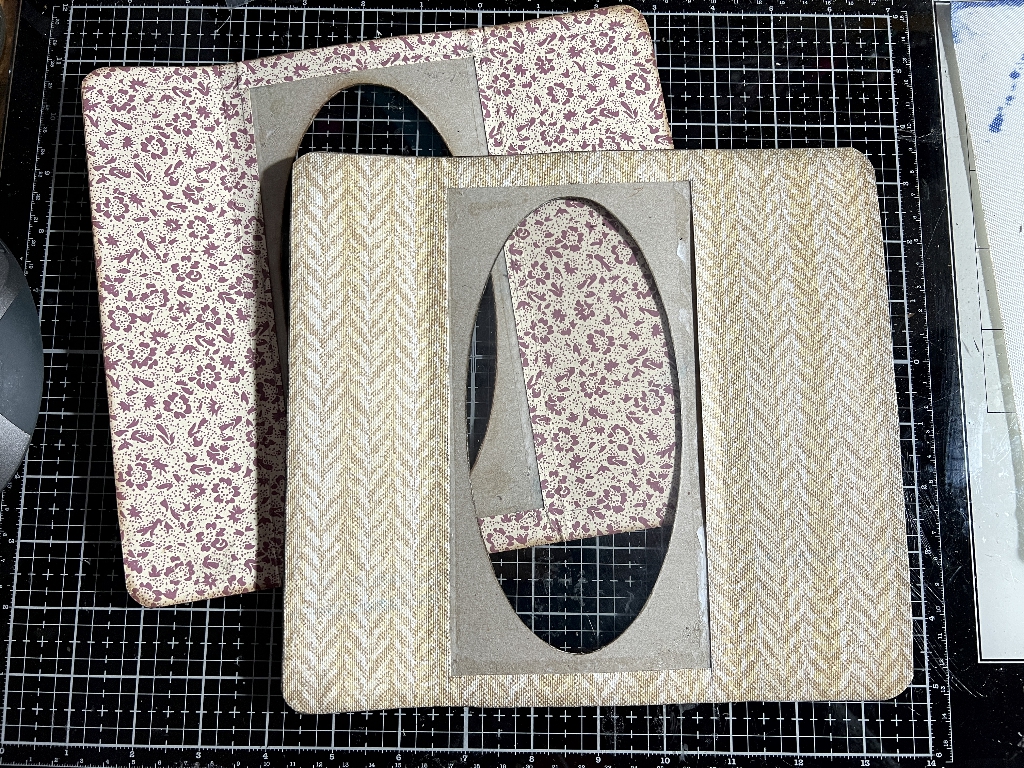
Covering the side flaps
I used the same papers for this. On the tutorial she said it was best to cover each panel separately rather than doing the whole thing with a single piece, because the paper over the folds would be likely to crack with repeated opening and closing, especially if the papers were quite thick. You have to line up the edge of the paper just short of the fold. In her case this wasn’t a problem because the box was green and it coordinated with the papers she had chosen, but my boxes were very bright blue, and this did show quite a bit. I sanded the edges and inked them well, but some of the blue was still visible. What I should have done was either to paint the folds before adding the papers, or covered them with washi tape or strips of scrap paper. The blue didn’t show up so much on the floral one but on the grungey one it was more of a problem. I gave it more sanding and inking.
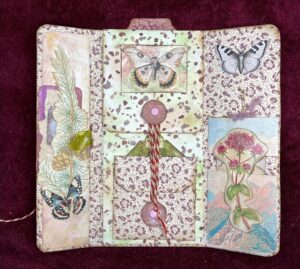
Beginning work on the inside
The papers for the inside of both folios was some ancient wallpaper in my stash. The floral one is some pink Laura Ashley tiny floral print wallpaper I had in my bedroom in my cottage before I got married. This paper is definitely more than 40 years old now, since we are about to celebrate our ruby anniversary!! The story is similar for the other paper. This is a rather thick vinyl one which I had in my cottage kitchen as far as I remember. It is a bit difficult to work with because it is designed to be a waterproof paper. I was able to make it take a bit of ink around the edges after I’d sanded it, though.
Before sticking down the paper, I cut a rectangular window in it to surround the oval aperture. Once stuck down, I trimmed the edges, rounded the corners and inked the edges of the paper. The next step was to cut a rectangle of acetate and stick it down inside the rectangular window so that it covered the oval aperture from the inside. I did this with double sided tape. Not easy to see on a photo so I didn’t bother to photograph this stage.
Adding the closure
I trimmed one of the flaps as instructed, but discovered that the result was not the same as on the tutorial. The idea is that when closed, the shorter one would overlap the longer one, and its edge would lie exactly in the centre of the folio. In this photo, you can see that on the floral one, the shorter flap is too short and the edge is to the left of the centre. On the grungey one in this photo, I have photographed it with the larger flap on top. The problem is again clear – the tissue box in the tutorial is not the same size as mine! I’ve had to make one or two adjustments because of this, but I wasn’t able to do anything about this current problem. I made sure I set the closures an equal distance from the outer edges of the folio rather than measuring from the edges of the flaps, so that it would look better. It’s a small detail, but if I make this project again, I shall make sure I do my own measurements and not follow the video.
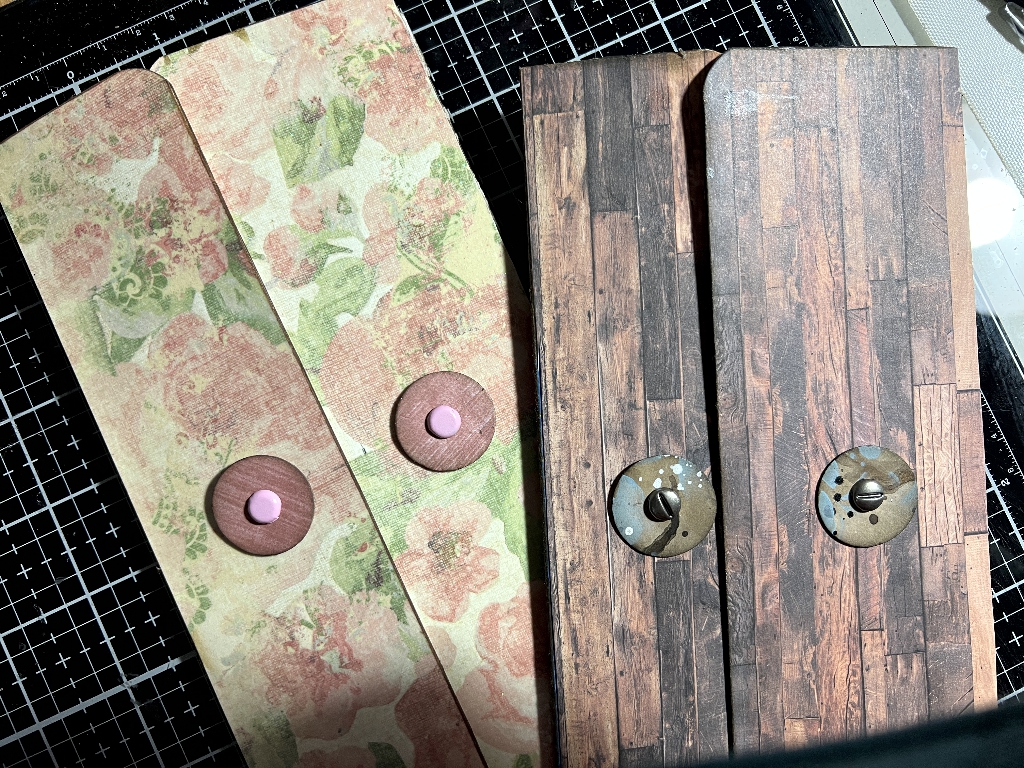
It was important to add the elements for the closure at this stage, because they were attached with brads, and the legs of the brads were on the inside of the flaps and would subsequently be covered. On second thoughts, if I make this project again, I shall add these closure elements before covering the inside, so the brad legs will be invisible at an earlier stage, which will be better. In the tutorial, they are covered with a pocket, and they could easily catch on whatever you slide into that pocket.
To make the attachments for the closure, I stuck some small pieces of decorative paper onto some of the tissue box offcuts and cut out four of each with a 1 inch circle punch. Two of the discs would be for the outside of the folio, and the remaining two would be added later on the inside. I pierced holes in the flaps and in the centre of the discs with an awl, inked the edges of the discs and attached them with the brads.
The large internal pockets

On the tutorial the instruction was to use double-sided paper for this, but the only paper I had that qualified was from another recent purchase from The Range, which was this random speckled paper. The design is similar throughout the collection but there are various colours. The brownish one looked best for the floral folio, and I added some pink and green inks to coordinate them further with the paper I’d chosen for the outside of the folio. You can see the “before and after” in the above photo. The inking gives the paper an added dimension and a bit more depth and interest, I think.
The large internal pocket is stuck down inside the large panel so that it is visible through the acetate window. The flaps for attaching it are folded in on three sides of the pocket piece and stuck to the inside of the panel. This proved the most problematic part of the whole project. I followed the directions and measurements given on the tutorial but the pocket would not fit – the folded flaps showed through the window from the outside. The tissue box used in the tutorial was obviously not the same size as mine. I had to fiddle around, refold the flaps, cut bits off and generally adjust things in order to make this piece fit, and its attachments remain invisible! This was the result.
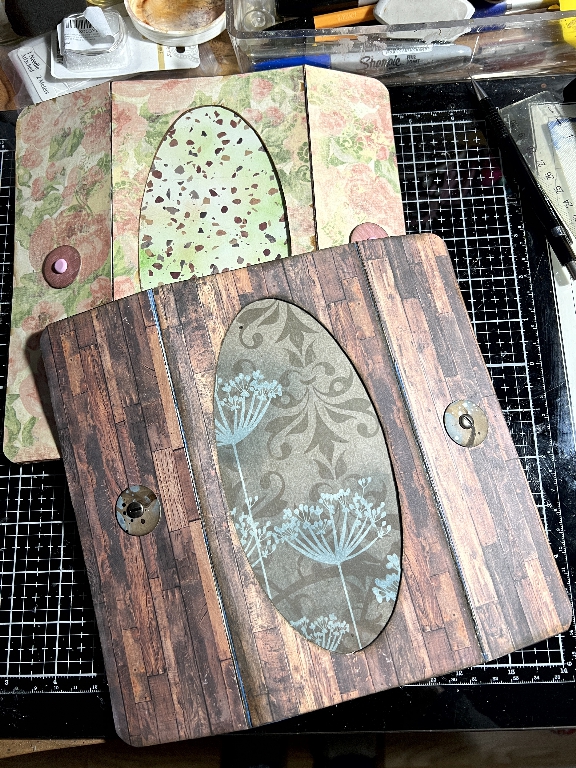
The paper for the large pocket in the grungey folio was from a paper pad I have had for many years which was sent to me as a freebie. I have just started using this in projects and the papers are lovely. I coloured the flowers on this piece with some pale blue ink which dulled the stark white, and would also help with any still-visible blue along the creases in the folio. I also deliberately chose some of my mixed media collage paper to cut the discs for the closure which incorporated some flecks of pale blue. If you can’t deal with a problem, make a feature of it!
These are the pockets stuck inside the folios, covering the acetate window.
You can see that the reverse side of the pocket on the floral one is the same as the front, being double-sided paper. For the grungey folio, the back of the paper was white, so I cut down a piece of my mixed media collage paper and stuck this down to cover the white. I think this is a better idea because it gives one more freedom, although any further layers will obviously add to the general bulk of the project. You can see the legs of the brads on the inside of the flaps. These will be covered later.
Watching on in the video, I realised that I had not cut the top of these large pockets down enough. I needed to leave about half an inch exposed at the top to incorporate the attachment for a flap which will come down over the pocket on the inside of the folio. I managed to peel back the tops of these pockets and trim them down a bit, being careful to leave enough that the acetate window would still be covered.
This was as far as I got on day 1. Already they are looking very different from the original tissue boxes!
Incredible Shoshi – such creativity and ingenuity with an item that most of us would throw away! I love seeing your creations with “rubbish” – what transformations you are able to perform, Bravo! and very well done. Gorgeous work.