COLLAGE STRIPS, MIXED MEDIA PIECE, AND SUCCSSFUL COFFEE STAINING
Collage strips
Our neighbour Margaret, who recently gave me another box of crafty stuff she no longer wants, included a lot of old Christmas cards. After I had ripped them up and sorted them into colours:
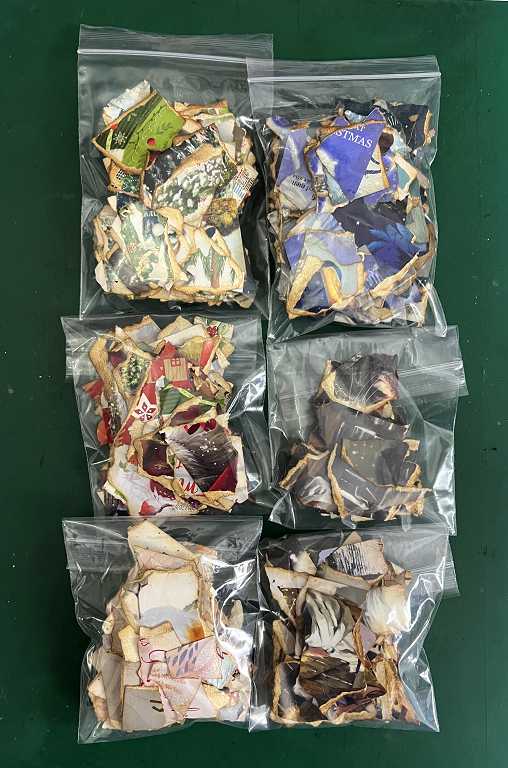
I made several collage strips. I used PVA adhesive (and ended up with loads all over my fingers! – but oh what fun peeling it all off!) and stuck the fragments down randomly onto some scrap card strips.

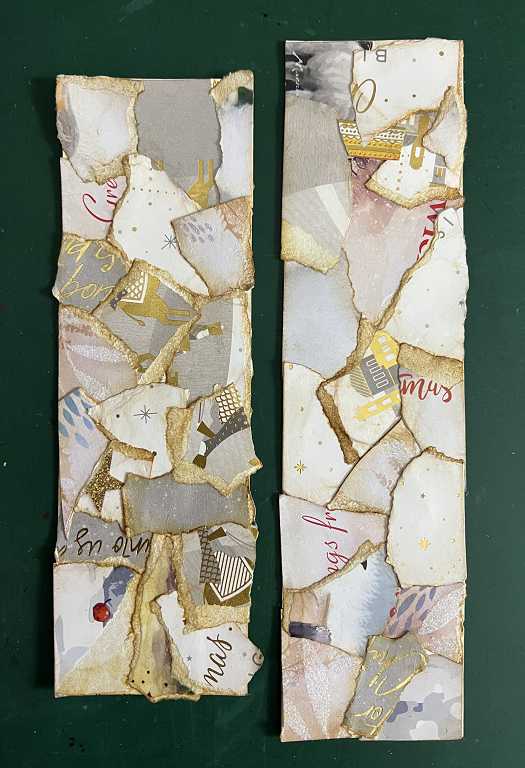
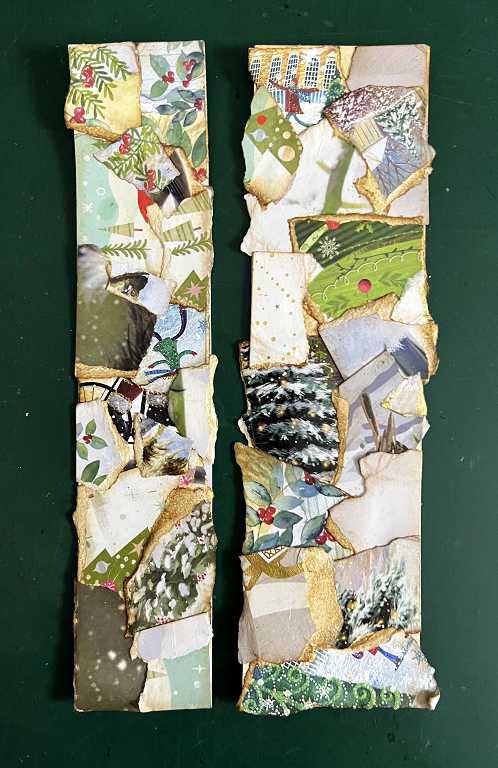
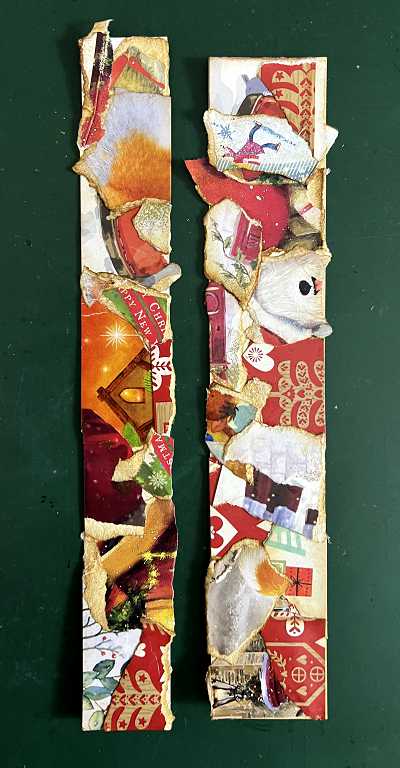
Some closer shots.
Mixed media piece for Margaret
Continuing to work on the mixed media hanging panel for Margaret, using (as far as possible) only the materials she gave me. I used my leaf background stamp and some Distress Ink to add another layer to the background, most of which would be covered up.
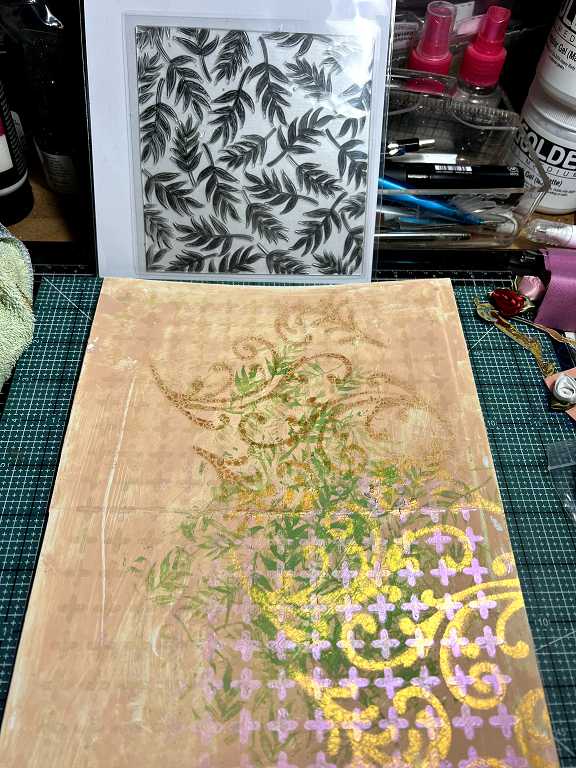
I wasn’t very happy with the result, and slept on it, and today, spritzed it with a bit of water and mopped up quite a bit of it, which has made it look a bit less messy.
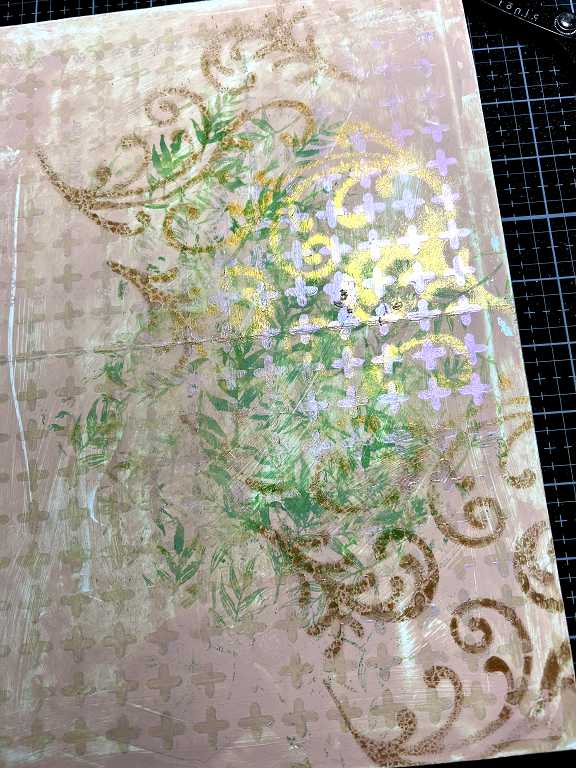
I’m still not very happy with it, but most of it will get covered, and what will show will just be some added texture. These things never look brilliant at the half-way stage, anyway!
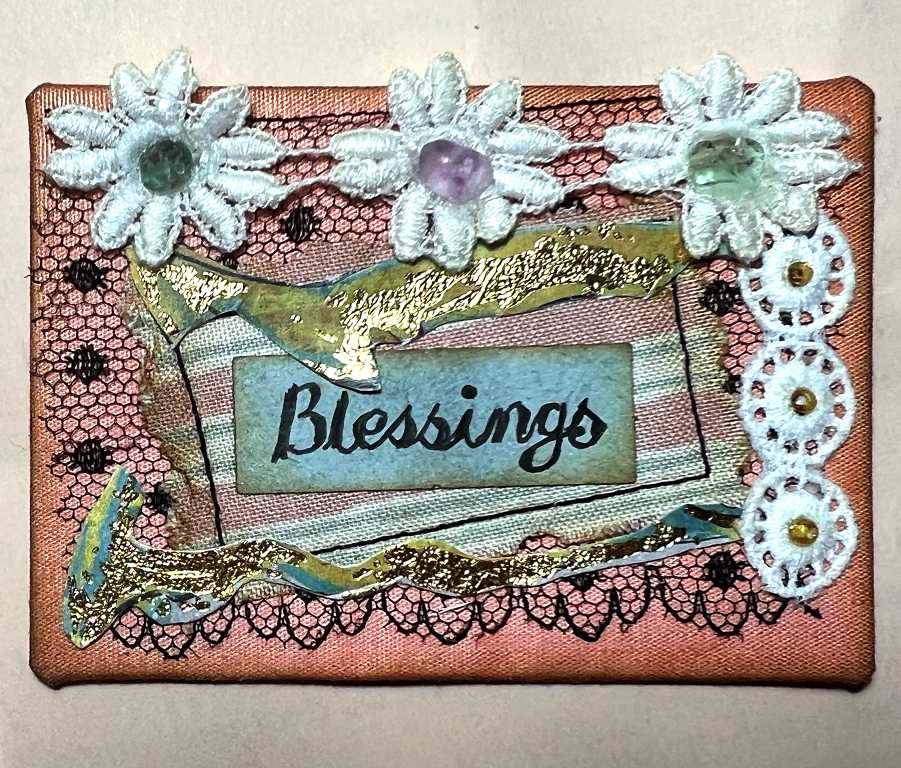
The text embellishment
I wasn’t really sure what to call this! I am grateful for Natasha of Treasure Books on YouTube for her lovely video on making book plates for journals, which gave me the idea for this, but I can hardly call it a book plate when it’s not on a book…
I cut a small rectangle from the back of one of the recycled Christmas cards and covered it with a small piece of pink fabric which Margaret also gave me. I inked the edges with Vintage Photo Distress Ink.
This is a mock-up. All the fragments of lace and fabric were in the box Margaret gave me.
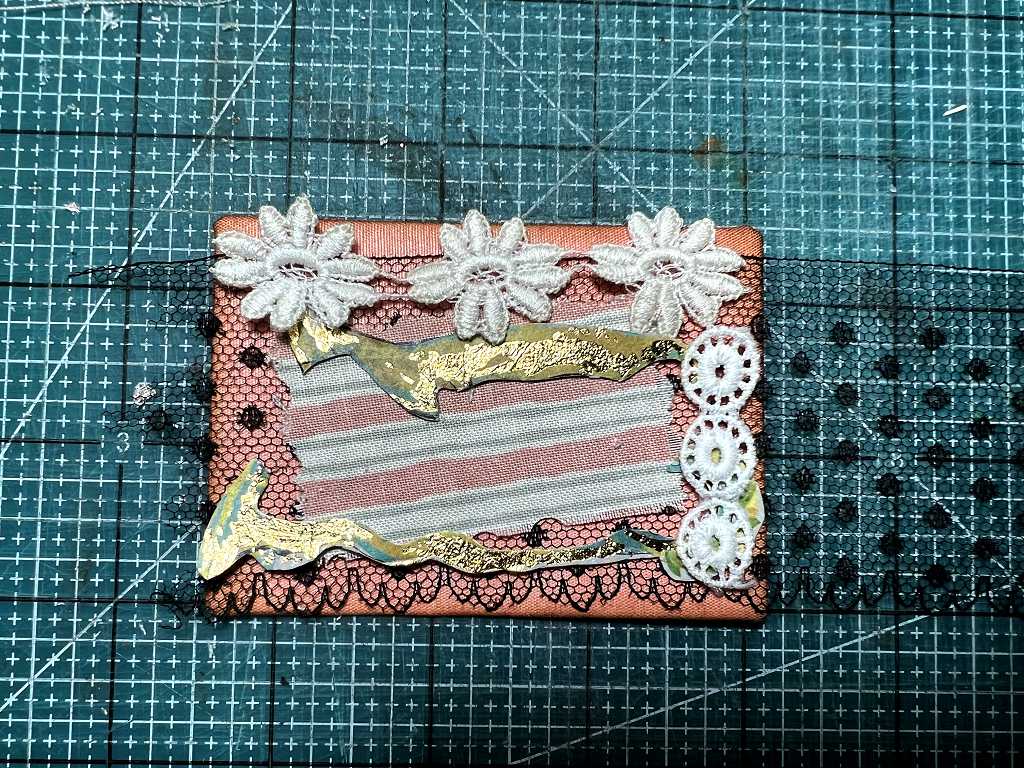
I cut the striped fabric using my fancy scissors, being careful to make it as random and irregular as possible. The scraps of card with the gold on them were cut from a Christmas card – part of the Virgin Mary’s robe! I thought the shapes were lovely, and the gold with the green was just right for this project. I trimmed the black lace to size with my pinking shears.
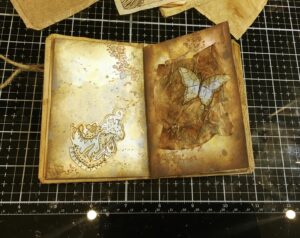
The finished piece. In the photo you can see two small baggies containing little gold beads, and some seaglass fragments. I stuck these in the centres of the lace pieces.
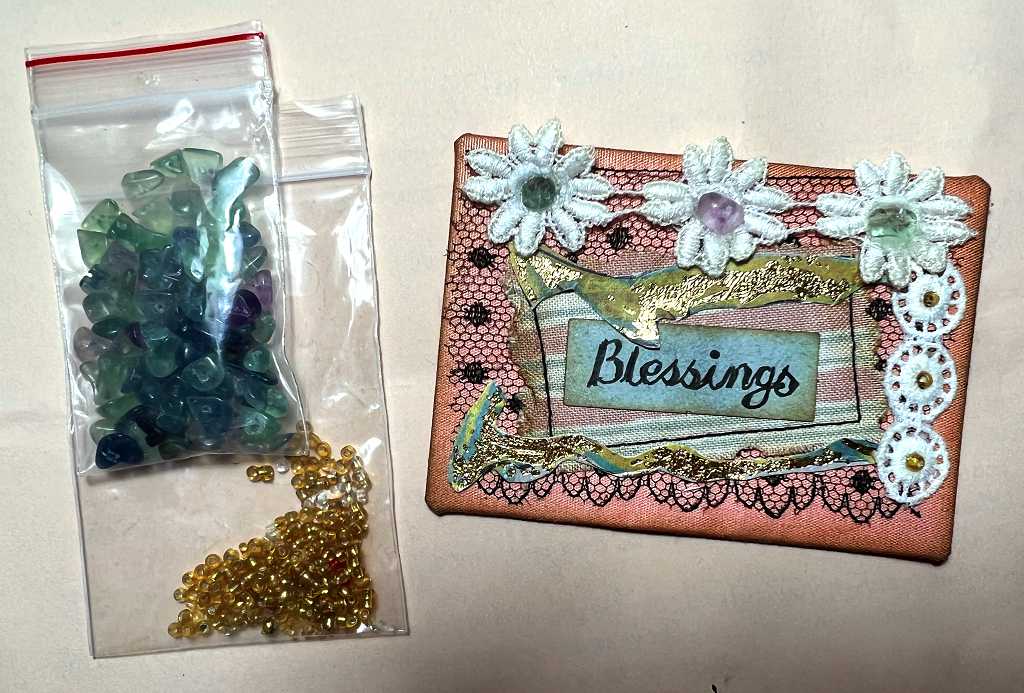
I stitched around the striped fabric, right through the card, on my sewing machine. This also held the black lace piece in position. Everything else was glued down. I wrote the word with a fineliner on a small fragment of card which I inked with Iced Spruce Distress Ink and edged with Vintage Photo, and glued it into place.
Coffee staining with a plastic table runner – second attempt
In the small hours of this morning, I made a second attempt with another of the three table runners I got recently on Ebay.
This time I worked on my pull-out units, on my “wet board” and it made a lot less mess. I laid a thinner sheet of plastic on top of the board as an extra precaution and there was very little run-off of coffee, and the surface was a lot flatter than my previous attempt, too. This is important, because if the plastic sheet is too thick and has been folded, you can’t get it to lie flat and the coffee will pool in places, making the paper darker.
For this experiment I just used two sheets of A3, to cover one end and the middle of the table runner. I could just fit three sheets on the whole thing onto my wet board but there would be very little margin at the ends.
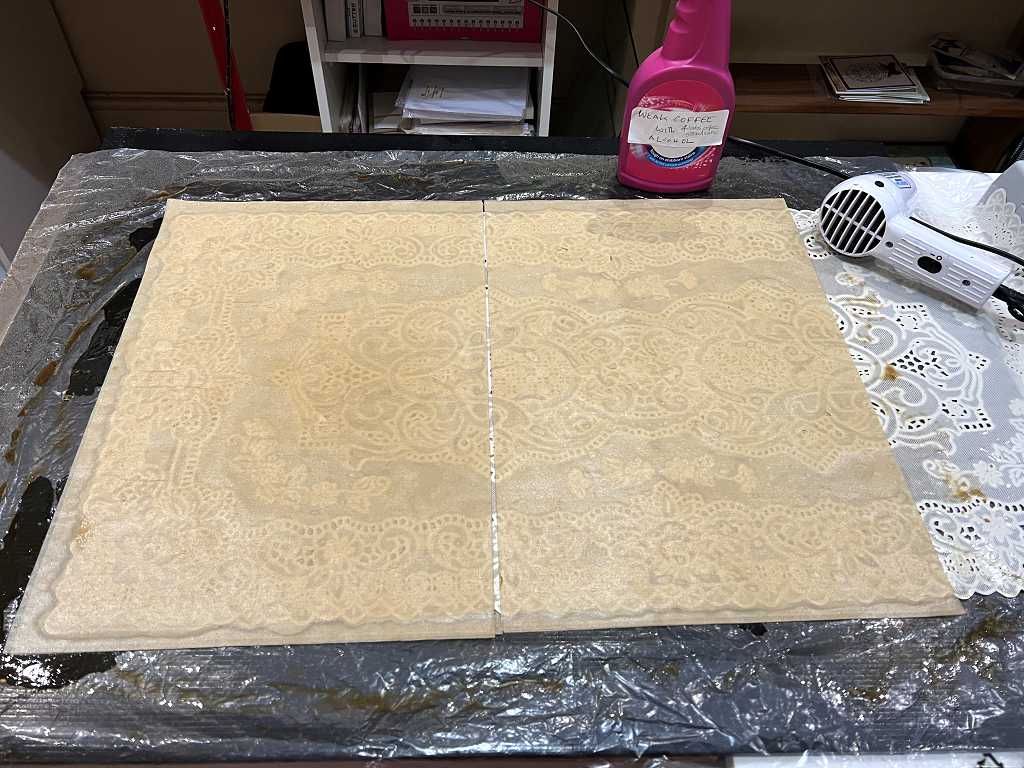
The above photo shows the completed set up. First of all I laid down two sheets of A3 printer paper, liberally sprayed with coffee, onto the plastic sheet, and put the table runner face down onto them. The top surface of the table runner has more of a raised pattern than the back, and I thought this would give a better impression. I sprayed some more coffee on, and pressed the table runner down well onto the paper. Not wanting to waste that layer of coffee, I laid down another couple of sheets on top, which were also liberally sprayed with coffee on the top surface. I spent a little time gently rubbing this to remove as many air bubbles as possible, to give good contact between the papers and the table runner.
Then I had to leave it to dry. Someone on YouTube said that the quicker you dry this, the better the impression you get, so I gave it a good run over with my heat tool. This got rid of the sodden pools of coffee.
I was pleased to see that the pattern was already quite visible, even on the top layer.

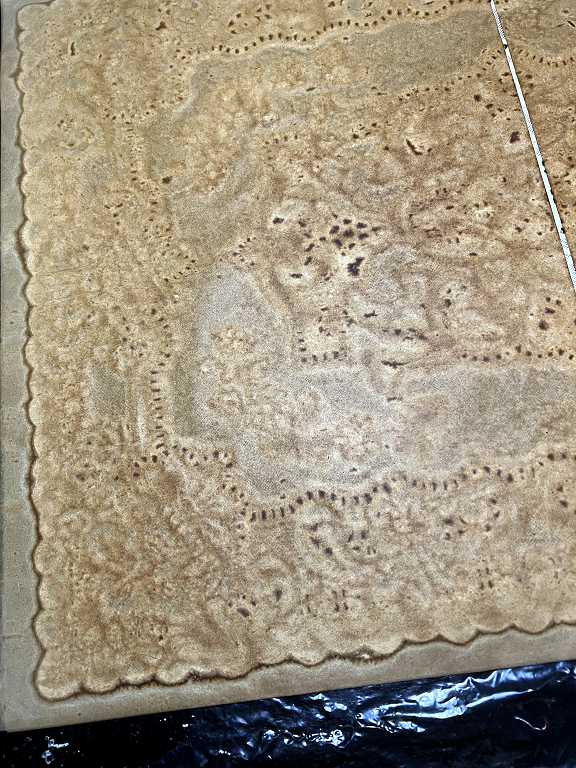
Here is a detail of one of the corners.
In the morning when I got up, I checked it again and it was still pretty damp. I had to leave it because there were other things I had to do in the morning, and in the afternoon I suddenly thought of running the dehumidifier in the room to speed things up. We live in quite a damp area, not far from the sea, and the house is quite old, and we soon after we moved, we noticed some condensation problems in the house, so we invested in a couple of dehumidifiers. The downstairs one is very powerful and lives in the utility room, and has completely sorted the problem of mildew growing on the downstairs loo walls – we had consulted a builder and he said it was condensation and not any leakage from anywhere. Being just off the kitchen, there is a lot of condensation from the cooking, and also I dry the laundry on the overhead airer there. The dehumidifier works wonders for drying the washing! Much better than the tumble drier which always leaves everything very creased, and pretty quick too.
Anyway, the upstairs one which is on the landing is smaller, and I carried it through into the studio and got it running. It certainly seemed to speed things up, and I was soon able to peel back the papers after checking that the table runner had made a good impression. They were still a bit damp but the results were impressive!
This is the top surface of the secondary papers laid on top of the table runner, before I peeled them off.
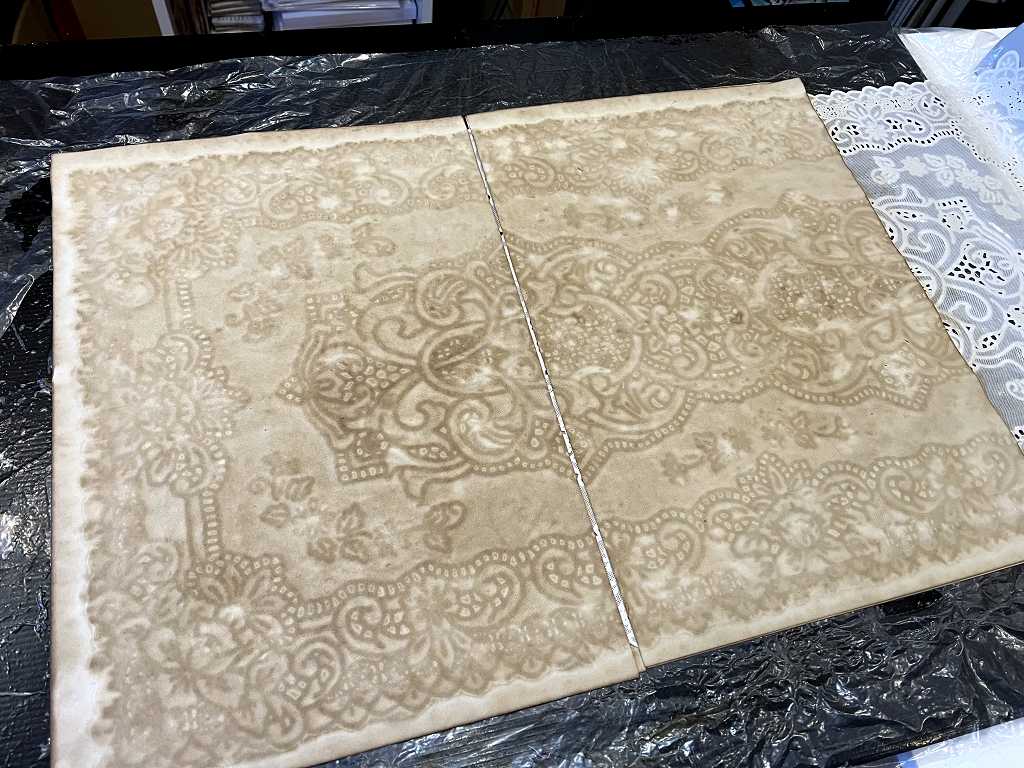
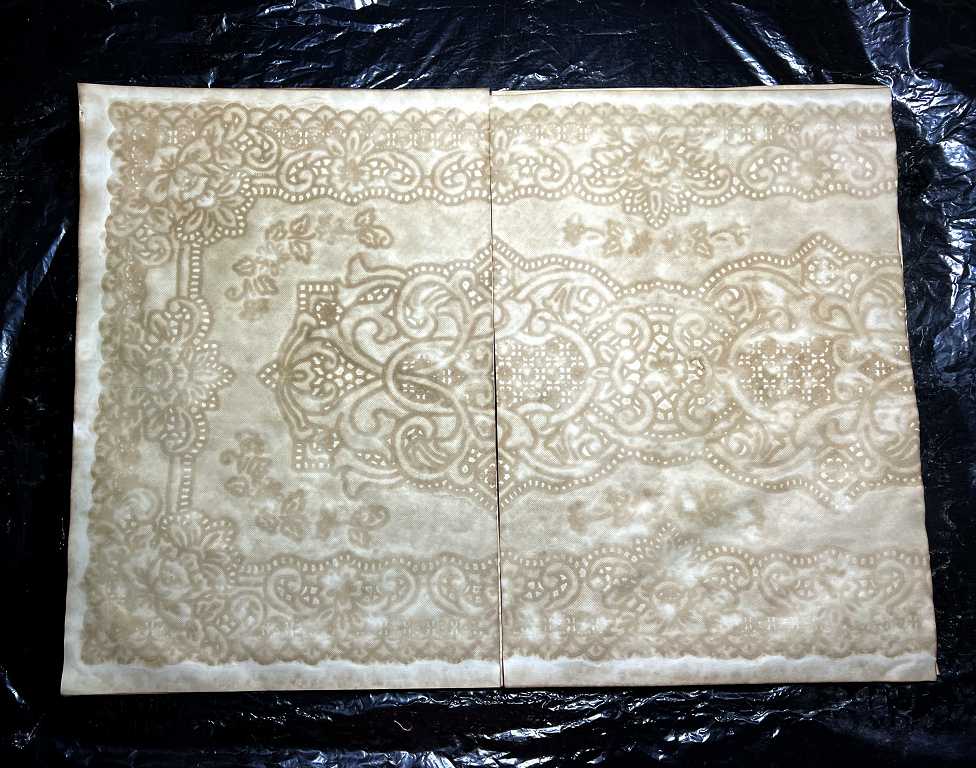
This is the top surface of the main sheets which had had the table runner laid face down on top of them.
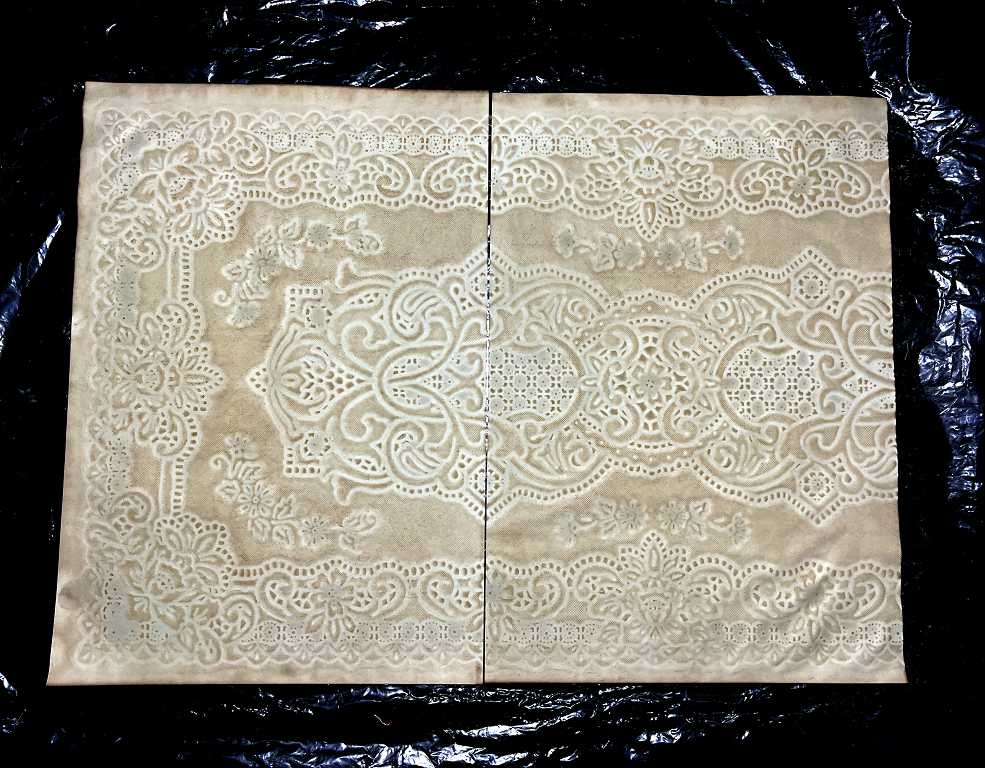
I was fascinated to see that the design on the main sheets was in the lighter colour against a darker background, but the image on the secondary sheets on top, was the reverse – dark against light! Most interesting.
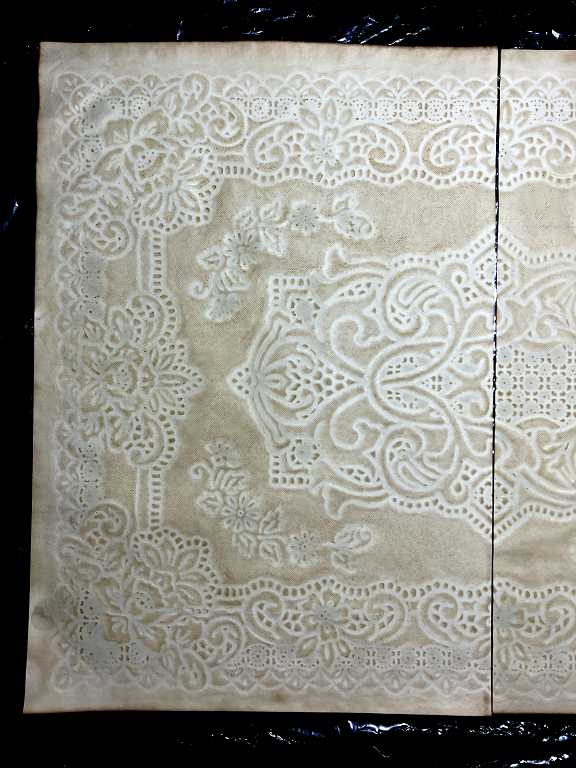
This is the left-hand main sheet:
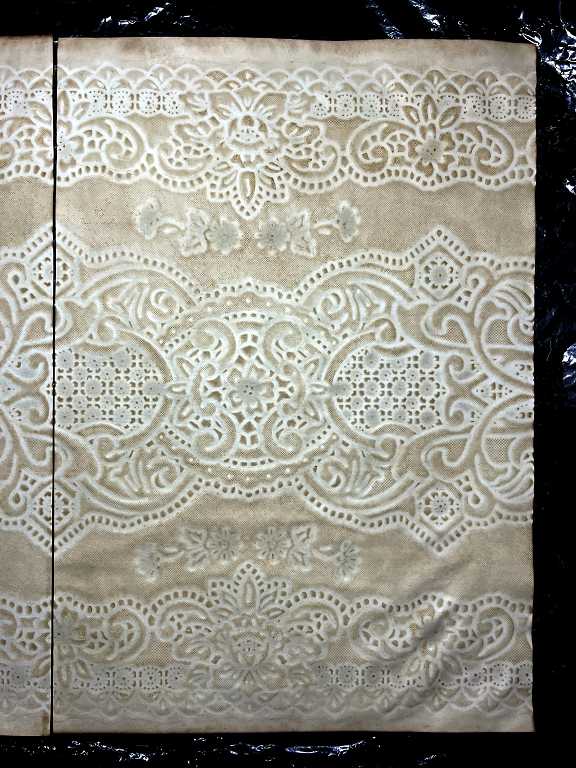
and the right-hand sheet:
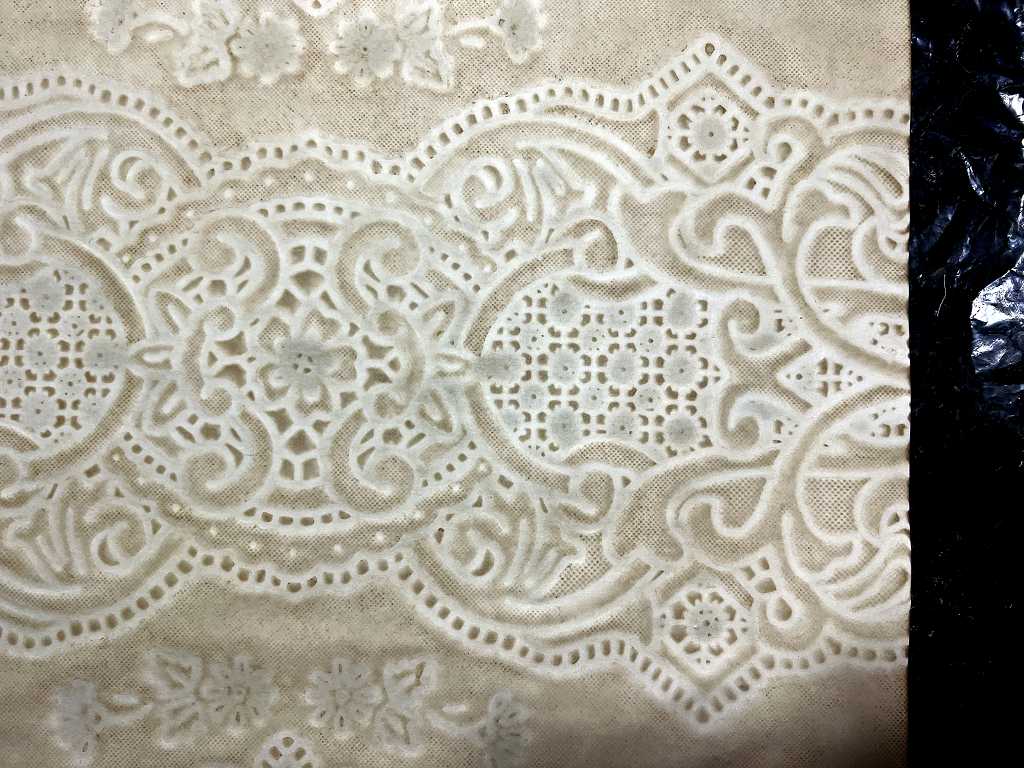
A detail of the centre of the main sheets, showing the pattern continuing across the gap between the two sheets.

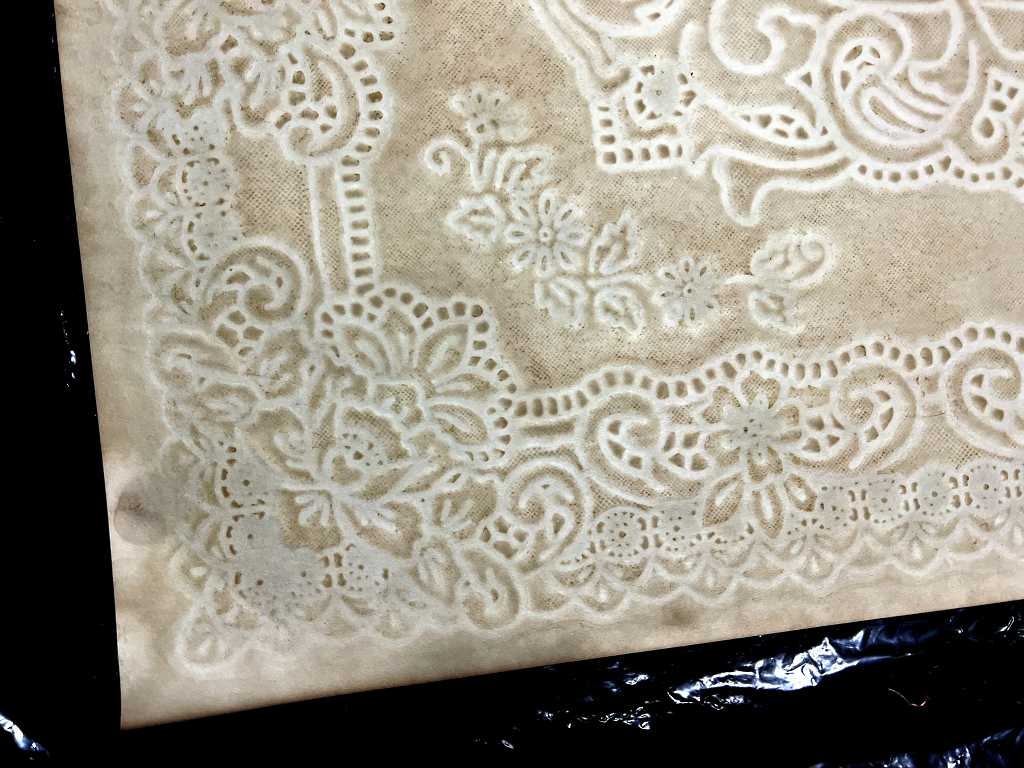
One of the corners.
The further edge of the right-hand sheet.
The secondary sheets, showing the negative image.
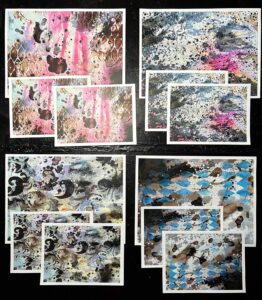
Finally, all four sheets. The first photo shows the top surface.

This photo shows the bottom surface of the sheets. There is very little difference between them; the image isn’t quite so sharp, but it is still perfectly acceptable, and the main sheets are a bit lighter on the back than on the front, and quite a bit lighter than the secondary sheets.
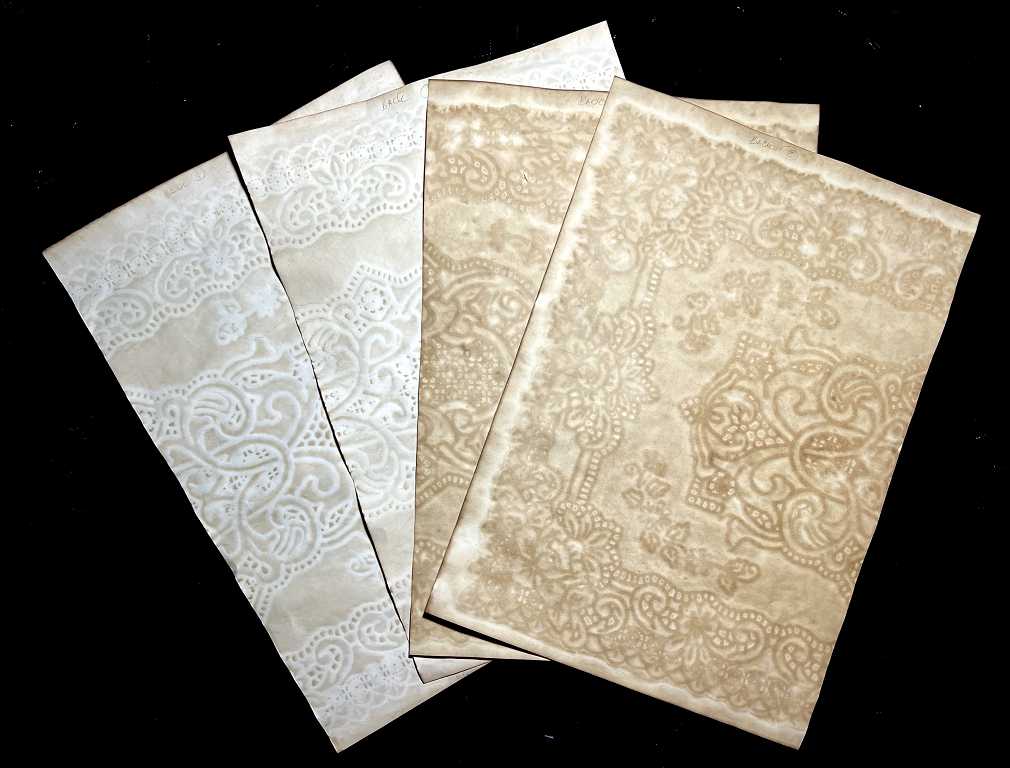
All these papers will make very nice journal pages, folded in half to bind into signatures.
This is the result I was hoping for! My first attempt being such a failure, I thought the table runners were the problem. In the meantime, I watched a few nore videos and saw that a lot of them were pretty solid looking without a lot of large holes. One person pointed out that the more solid areas of the table runner or doily were actually pierced with hundreds of minute holes, and on closer examination of my table runners and testing them with my pokey tool, I could see that they also had these minute perforations.
Looking closely at the impressions on the papers, this has created a very nice fine texture.

It is quite amazing the detail that is picked up by the coffee staining. I am very thrilled with the results of my second test of this technique, and I am keen to do more, testing the other two table runners, and also some stencils. I shall also be staining some paper doilies between sheets – this will give me the stained doilies to use, as well as some more patterned papers.
I have started saving avocado skins and pits in a bag in the freezer. Once I’ve got enough (about 8, according to one video) I shall be making a dye solution with that. It comes out pink, and with the addition of some sodium bicarbonate, a deep rich red. Apparently if you add vinegar instead, you get a more orangey-red. There are many other things to use as well, such as tea, which gives a different shade of brown from the coffee, and onion skins, and beetroot juice. Some people also splash on some watercolour when staining their papers with coffee or tea – you can add any kind of stain or paint with a wide brush, and add spatters of different colours etc. The possibilities are endless, and people are getting some absolutely stunning results – really organic and very exciting. I can’t wait to do more of this!
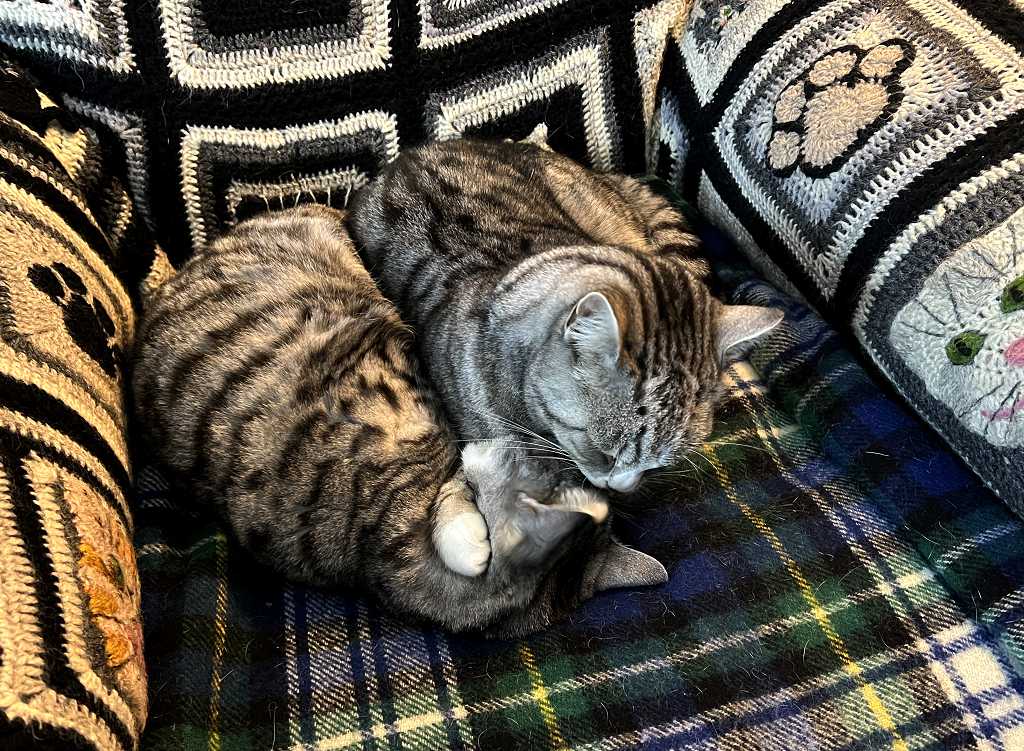
Kitties
A sweet picture captured this evening, of Ruby holding her sister Lily down, in order to give her a good wash!