COMPLETION OF MIXED MEDIA PIECE FOR MARGARET
A final session in the studio to bring this project to completion.
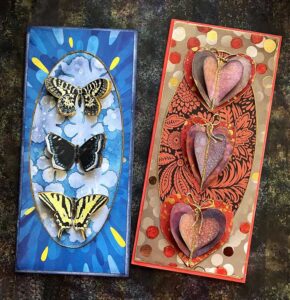
The completed mixed media hanging
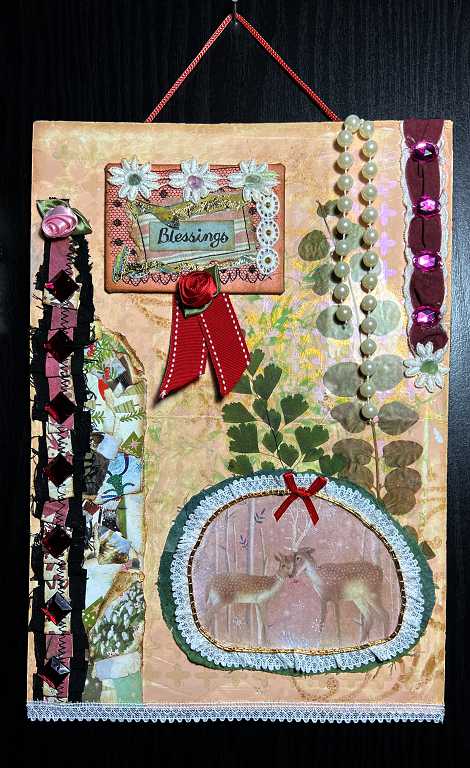
Once I had completed the various collage elements, it was a relatively quick process to apply them all. Some bits were more of a fiddle than others, and it was definitely slower than regular collage.
The only thing on this project not provided by Margaret in her generous box of goodies was the two fern stick-ons from my recent Taperlogy order, and various inks, paints and glues, and a bit of sewing thread.
The glues I used were: PVA, fabric adhesive, hot glue, tacky glue, double-sided tape (both normal and extra-strong), and superglue.
Materials used: recycled Christmas cards (for project base, pleated card/fabric piece, focal image, text embellishment and collage strip), gesso, acrylic paint, Posca black acrylic markers (for edging), Seth Apter Goldmine mica spray (stencilled), Distress Inks, Taperlogy botanical stick-ons, fabric scraps, plastic gems, seaglass fragments, various sewing threads, gold thread, various laces, fabric roses, red cord, ribbon, pearl beads, green felt (for backing).
Techniques: painting, stencilling, stamping, hand and machine sewing, gold thread embroidery, calligraphy, cutting, sticking.
Also: a bit of imagination, stretching myself to think outside the box (or inside the box actually – limiting myself as far as possible to use only materials that Margaret had given me), colour co-ordination and composition. Most of all, fun, and gratitude for lots of new stuff to play with!
Now for some more detailed shots, and more information as to how I did the various parts.
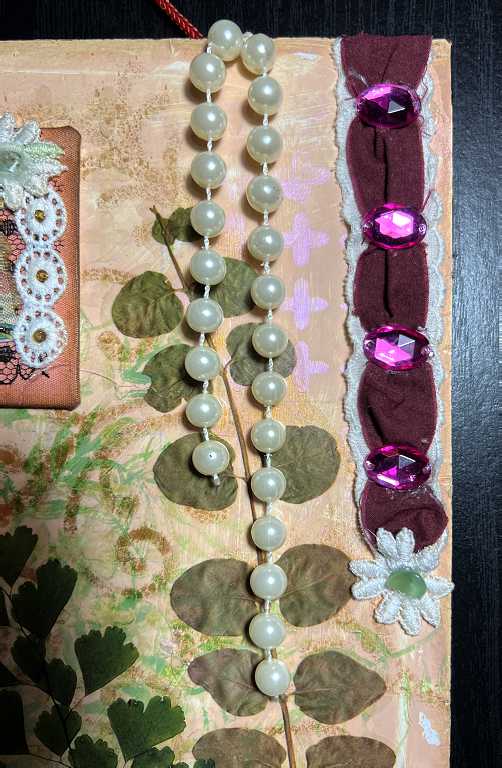
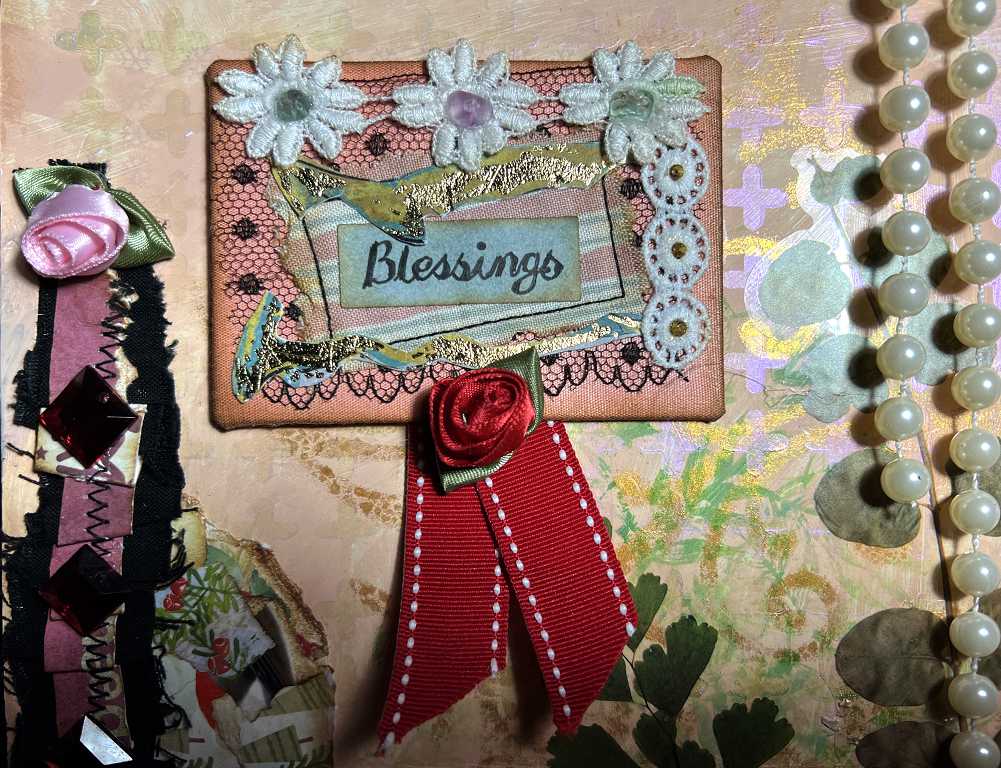
I have already covered the construction of the text element in my previous post, and I simply added a piece of red folded ribbon and a little red ribbon rose as further embellishment. Most of the other elements were also covered in other posts. The embellishment on the right-hand side was created by threading a strip of dark red fabric through some eyelet lace and stitching it down to keep the fabric puffed up, as it had a tendency to fold over and go flat. This stitching was covered up by the pink gems which I subsequently stuck down using hot glue. The little lace flower at the bottom matches those on the text embellishment, and has its own fragment of seaglass stuck down with hot glue. This embellishment covers the gathered end of the eyelet lace.
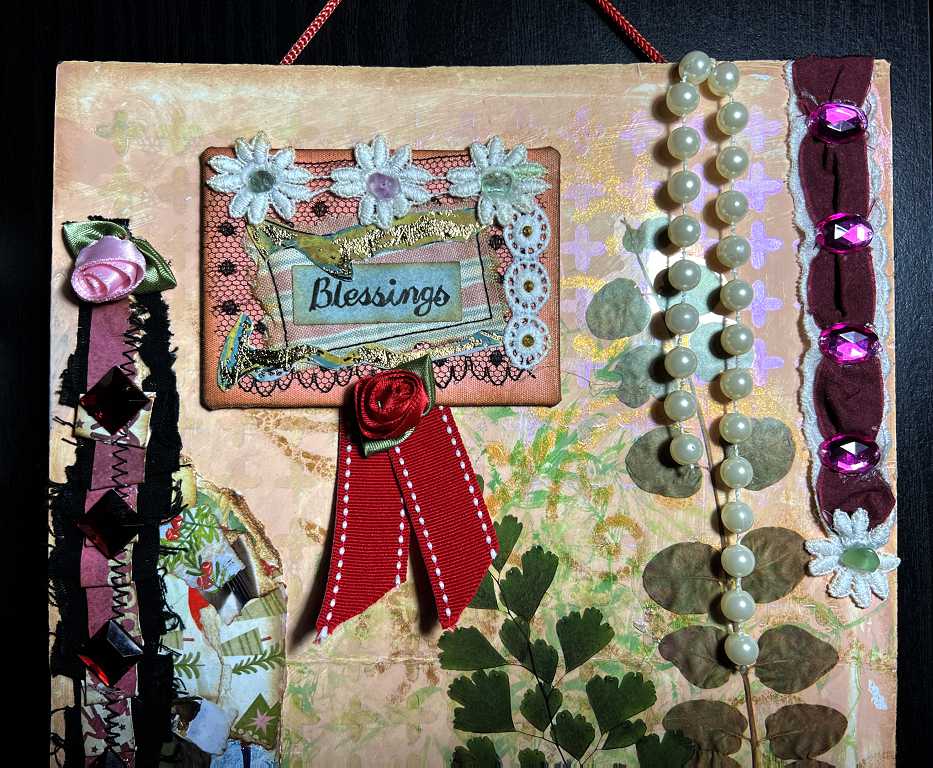
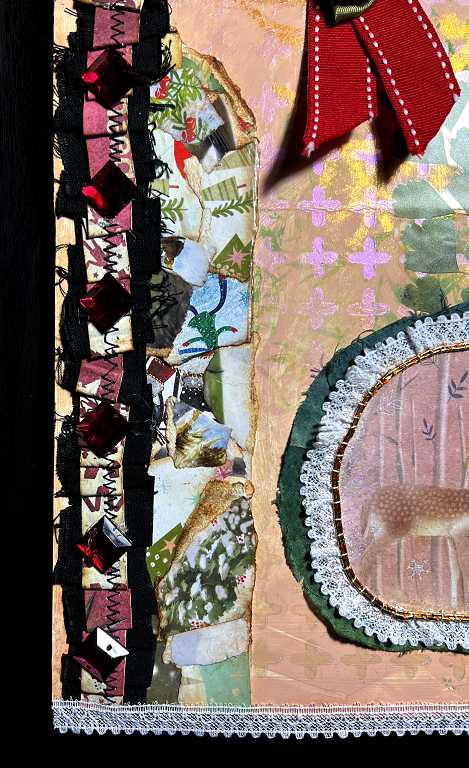
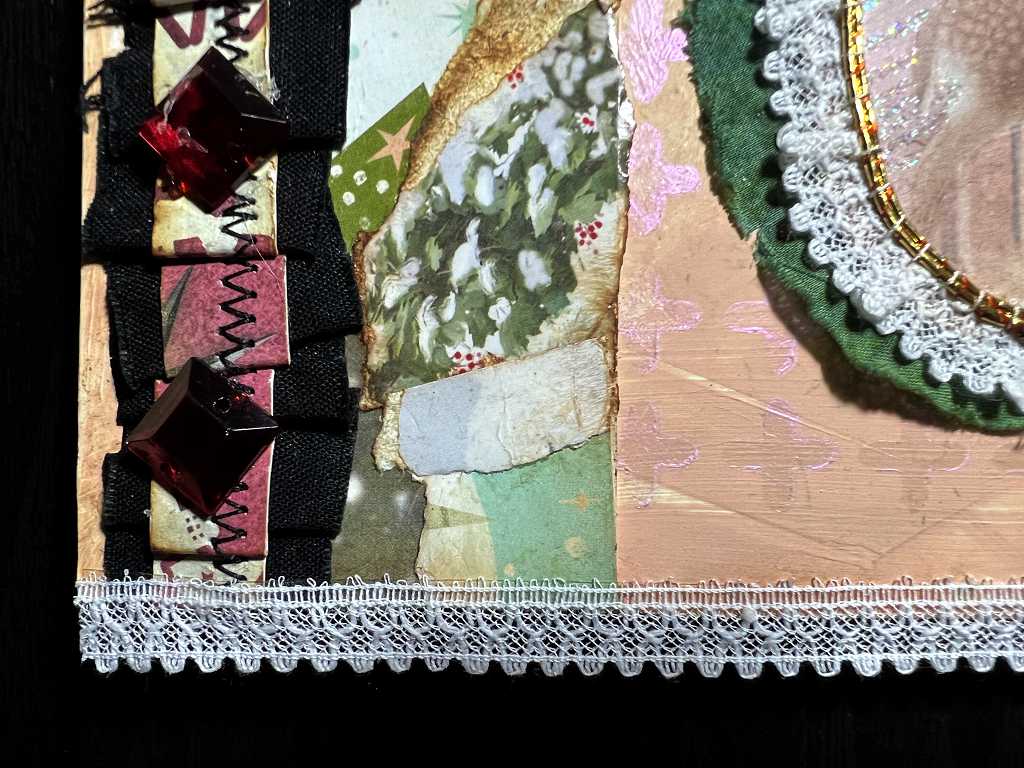
I attached the short string of pearl beads by looping some thread between two beads and taping the ends onto the back of the piece using masking tape. The bead strings hang down loose. The hanging cord was also attached to the back of the piece using masking tape, and then the whole of the back was covered with a piece of green felt which was large enough to cover the piece with very little wastage – once it was glued down (with extra-strong double-sided tape around the edges, and regular double-sided tape across the back), I was able to trim away the excess with scissors. The edges of the piece were coloured black using Posca black acrylic markers. The green collage strip was ripped diagonally at the top to remove the sharp corner, and the edges were inked with Vintage Photo Distress Ink. I stuck red plastic gems at intervals down the pleated card and black fabric piece and trimmed away the excessive fraying which was making untidy ends everywhere!
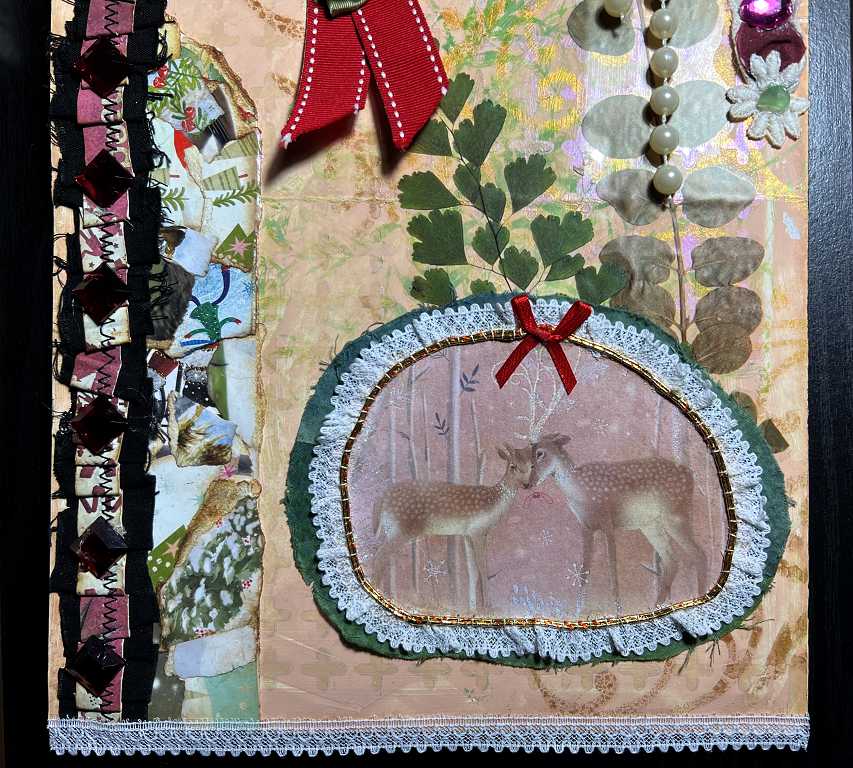
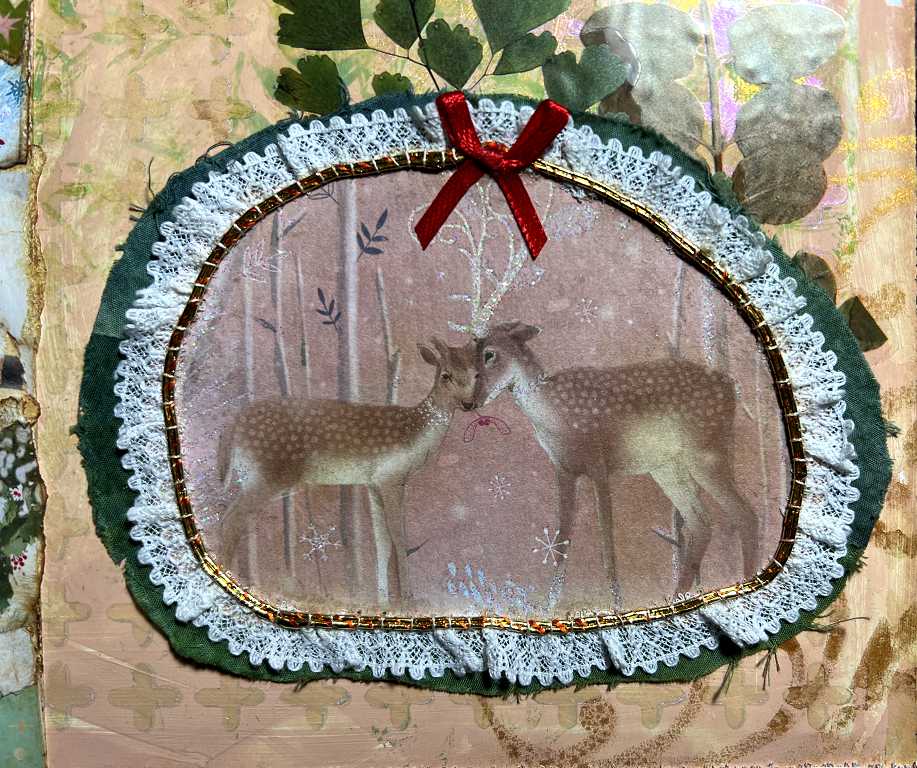
I’ve already covered the construction of the focal image of the two deer on a previous post. The Taperlogy botanical stick-ons are gorgeous – they are exactly like real pressed flowers. I chose two foliage ones. They do have a slight sheen but the base piece of this project is also slightly shiny with pearlescent acrylic paint and gold stencilling. The messy green stamping that I hadn’t been too pleased with, now merges nicely into the background and gives an extra layer of dimension, as I had hoped it would. The collage strip and pleated card/fabric piece were cut off level with the bottom edge of the piece, and I stuck a piece of lace (the same lace as I gathered around the deer picture) onto the edge with extra-strong double-sided tape.
 Some close-up shots to show the detail.
A final look at the finished project once more.
I had my doubts at various stages of the project, whether I actually liked it, as it seemed to be getting rather bitty and unfocused, but I think it has come together pretty well in the end, and I like the composition and colour selections.
We are hoping to visit Margaret and her husband sometime over the weekend so that I can give it to her in person, and thank her properly for her generosity in giving me so many interesting bits and pieces, and for giving me the opportunity to push the boundaries of my creativity a bit! It’s been fun trying some new things. I have never made a project quite like this before, and can see myself doing more like it in the future. There are many elements that would translate well for journal-making, too. I have not combined paper and fabric before, and am just beginning to explore the use of my sewing machine in mixed media work.
It’s amazing what you can do with quite small fragments – tiny scraps of lace such as went onto the text embellishment, and little scraps of paper and card. Nothing needs to be thrown away! I am now regretting throwing away so many of the Christmas card backs, as I could have used those to make more embellishments to put in my stash. However, I have quite a large collection of old greetings cards of my own to draw upon!
Pink Period
Looking at some of my recent work, I think I am now entering my Pink Period. Haha. Sounds a bit pretentious and Picasso-esque! I have recently been doing a lot of grungey brown stuff, working on my Organic Journal, and I have also been drawn very much to the colours favoured by Robyn McClendon on YouTube. She uses a lot of subtle monochrome creams, black, gold, brown and grey, but she also uses pink, which is definitely sophisticated, adult and not a bit girlie when combined with these other colours. I have never thought of myself as being a particularly “pink” person but am actually starting to love it! My recent French-themed page in my album “The Journey” reflects this.
Going pink wasn’t planned – it just seemed to happen! Shoshi’s defiinitely “in the pink” these days!

A lovely composition – beautiful colours, and I love all the variety of different textures! A truly unique work of art.