A couple of fruitful hours in the studio this afternoon. Well, mostly…
Paper Mesh
Thinking about my paper mesh experiments recently and how generally unsatisfactory the results were, I thought a bit more about it and decided that the sprayed pieces might work best photographed and used as printables. In their “real” state, the paper is very crinkly and springy and even when I tried ironing it, it wouldn’t lie flat in its expanded state. This, of course, makes it an ideal packing material, but not so useful for collage! (Perhaps I should write to the manufacturers and complain…) Spraying it produces interesting results, and if you do it over a piece of paper, it acts as a stencil in the process. There’s nothing like a good twofer!
Today I tried this technique using black paper and Distress Oxide Spray Stains – these sprays, containing pigment, work well on black or dark coloured papers.
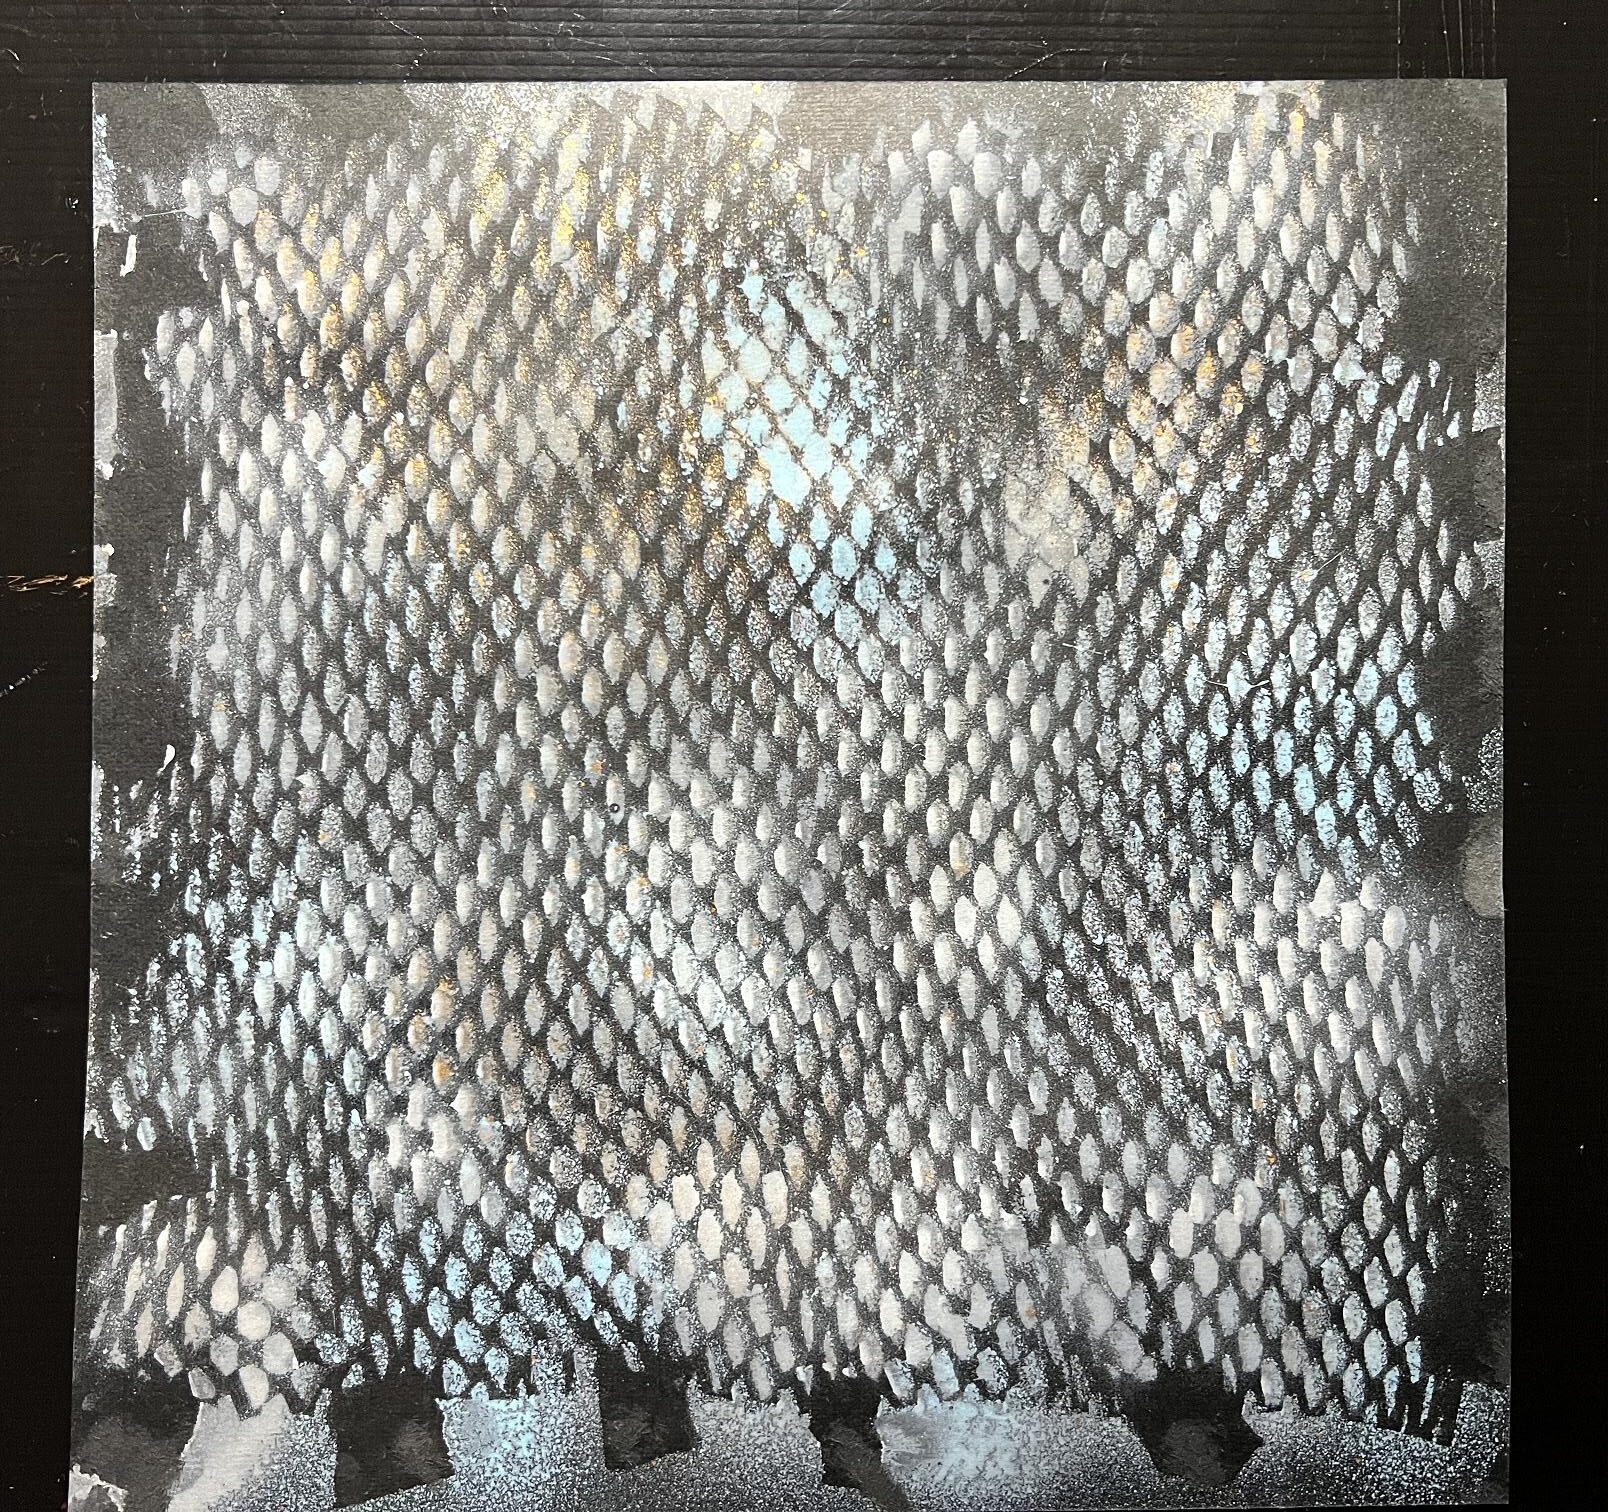
Here is my original sprayed piece, taped down over a piece of 12 x 12 in cardstock, on my black wet board, which is somewhat reflective. I did this in order to photograph it, ready to be edited as a printable.

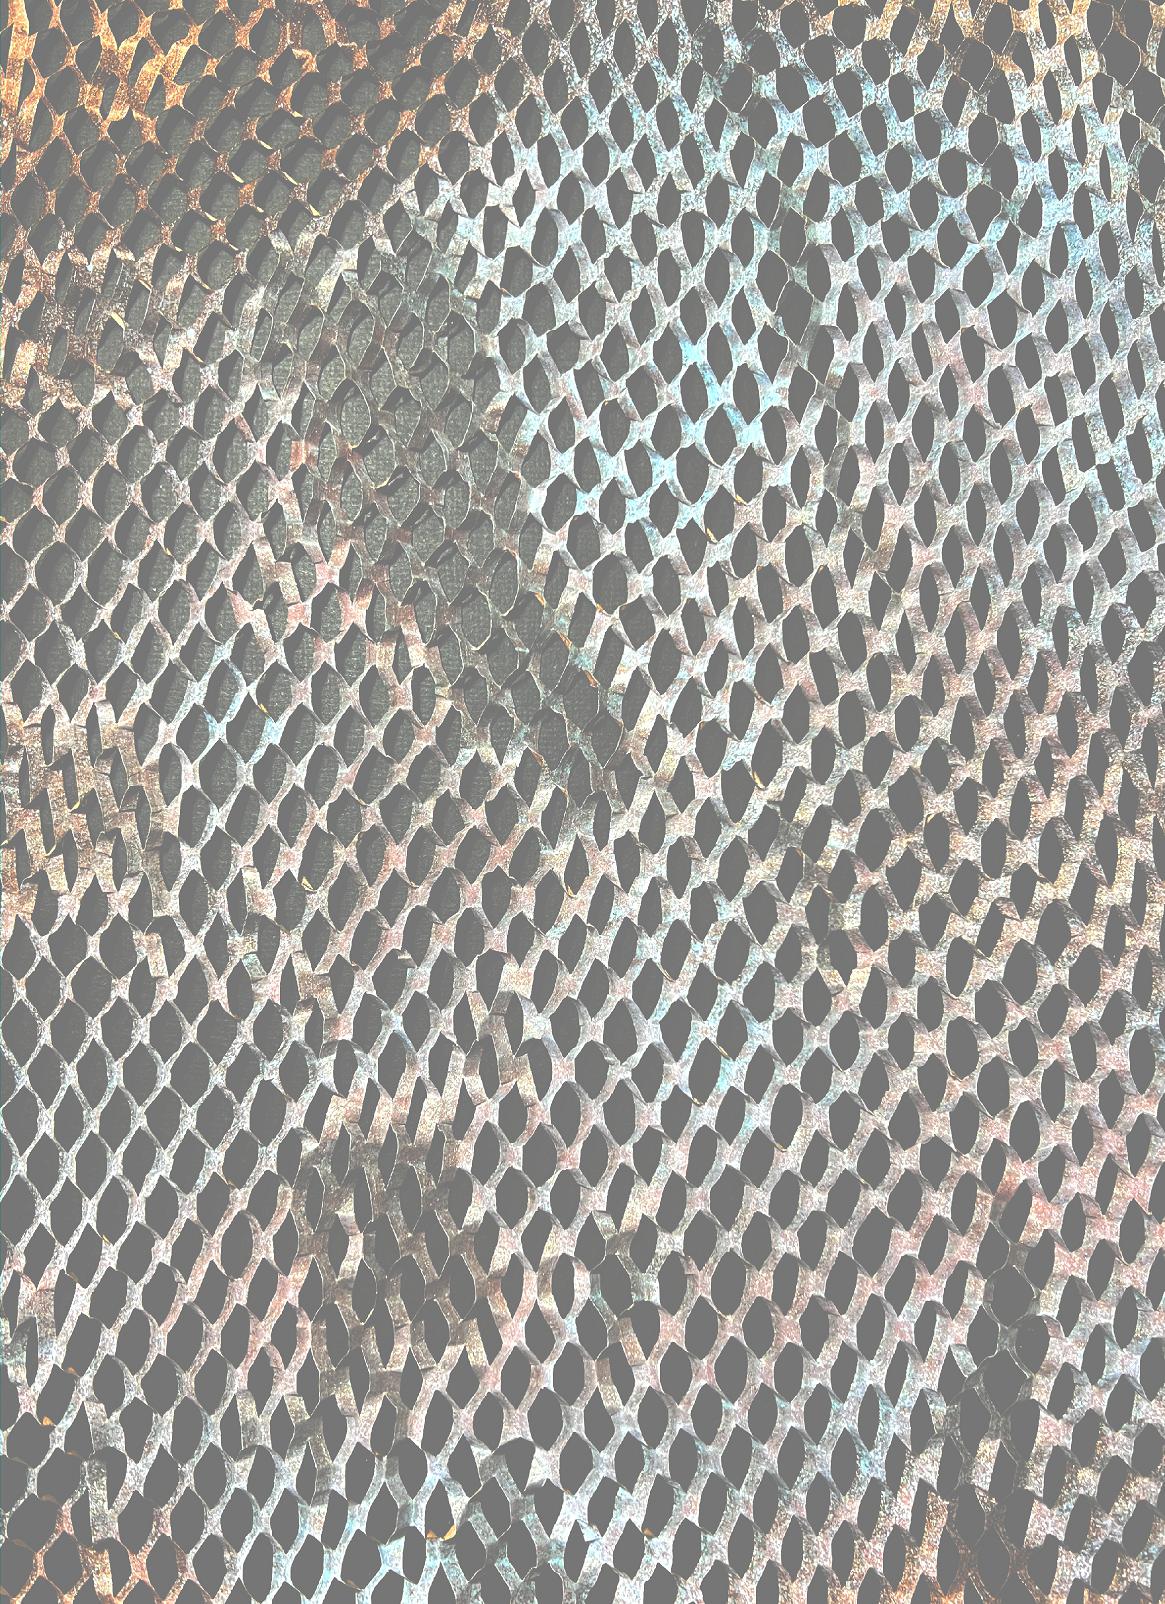
Here is the photo, cropped and stretched to A4 size, and edited in my photo editing software to increase the contrast and saturation a bit.

I also created a lighter version.
When I get round to it, these will go with the other printables I am creating, and be uploaded to my OneDrive as freebies for anyone who wants them.
Here is a fresh piece of paper mesh stretched and taped down onto a 12 x 12 in sheet of black cardstock, ready to be sprayed. I had to attach the cardstock to the board with tape as well, because the paper mesh wanted to shrink back, and was causing the cardstock to curl. This meant that the paper mesh was no longer in contact with it in the centre, and would not have produced a good stencilled result.

Unfortunately it was too big to go in my splat box, but taped down in the middle of my wet board I was able to avoid spraying ink all over the floor!
Here it is sprayed, and drying. You can see the Distress Oxide sprays I used: Iced Spruce, Weathered Wood and Frayed Burlap.

I finished it by spraying some Seth Apter Izink in Goldmine, but halfway through, the nozzle clogged. This is NOT supposed to happen with these inks!! I spent ages trying to unclog it, and eventually left the nozzle assembly soaking in water, and hoped it could be revived. These sprays are very fine. I finished the piece with some Distress Mica Spray in Tarnished Brass, which is a lighter gold than the Goldmine.
I left the whole thing in situ to dry. I didn’t want to use the heat tool to speed things up, because I thought the strips of masking tape might pop off and cause the paper mesh to shrink back before it was dry.
Later:
The spray was dry, and I was able to pull off all the masking tape.

Yummy stencilled background!!
Here’s the piece of sprayed paper mesh.


Now for the stencilled piece. Zooming in, step by step, for the details.


Zooming back out again, and taken from a different angle to show the shimmering gold.
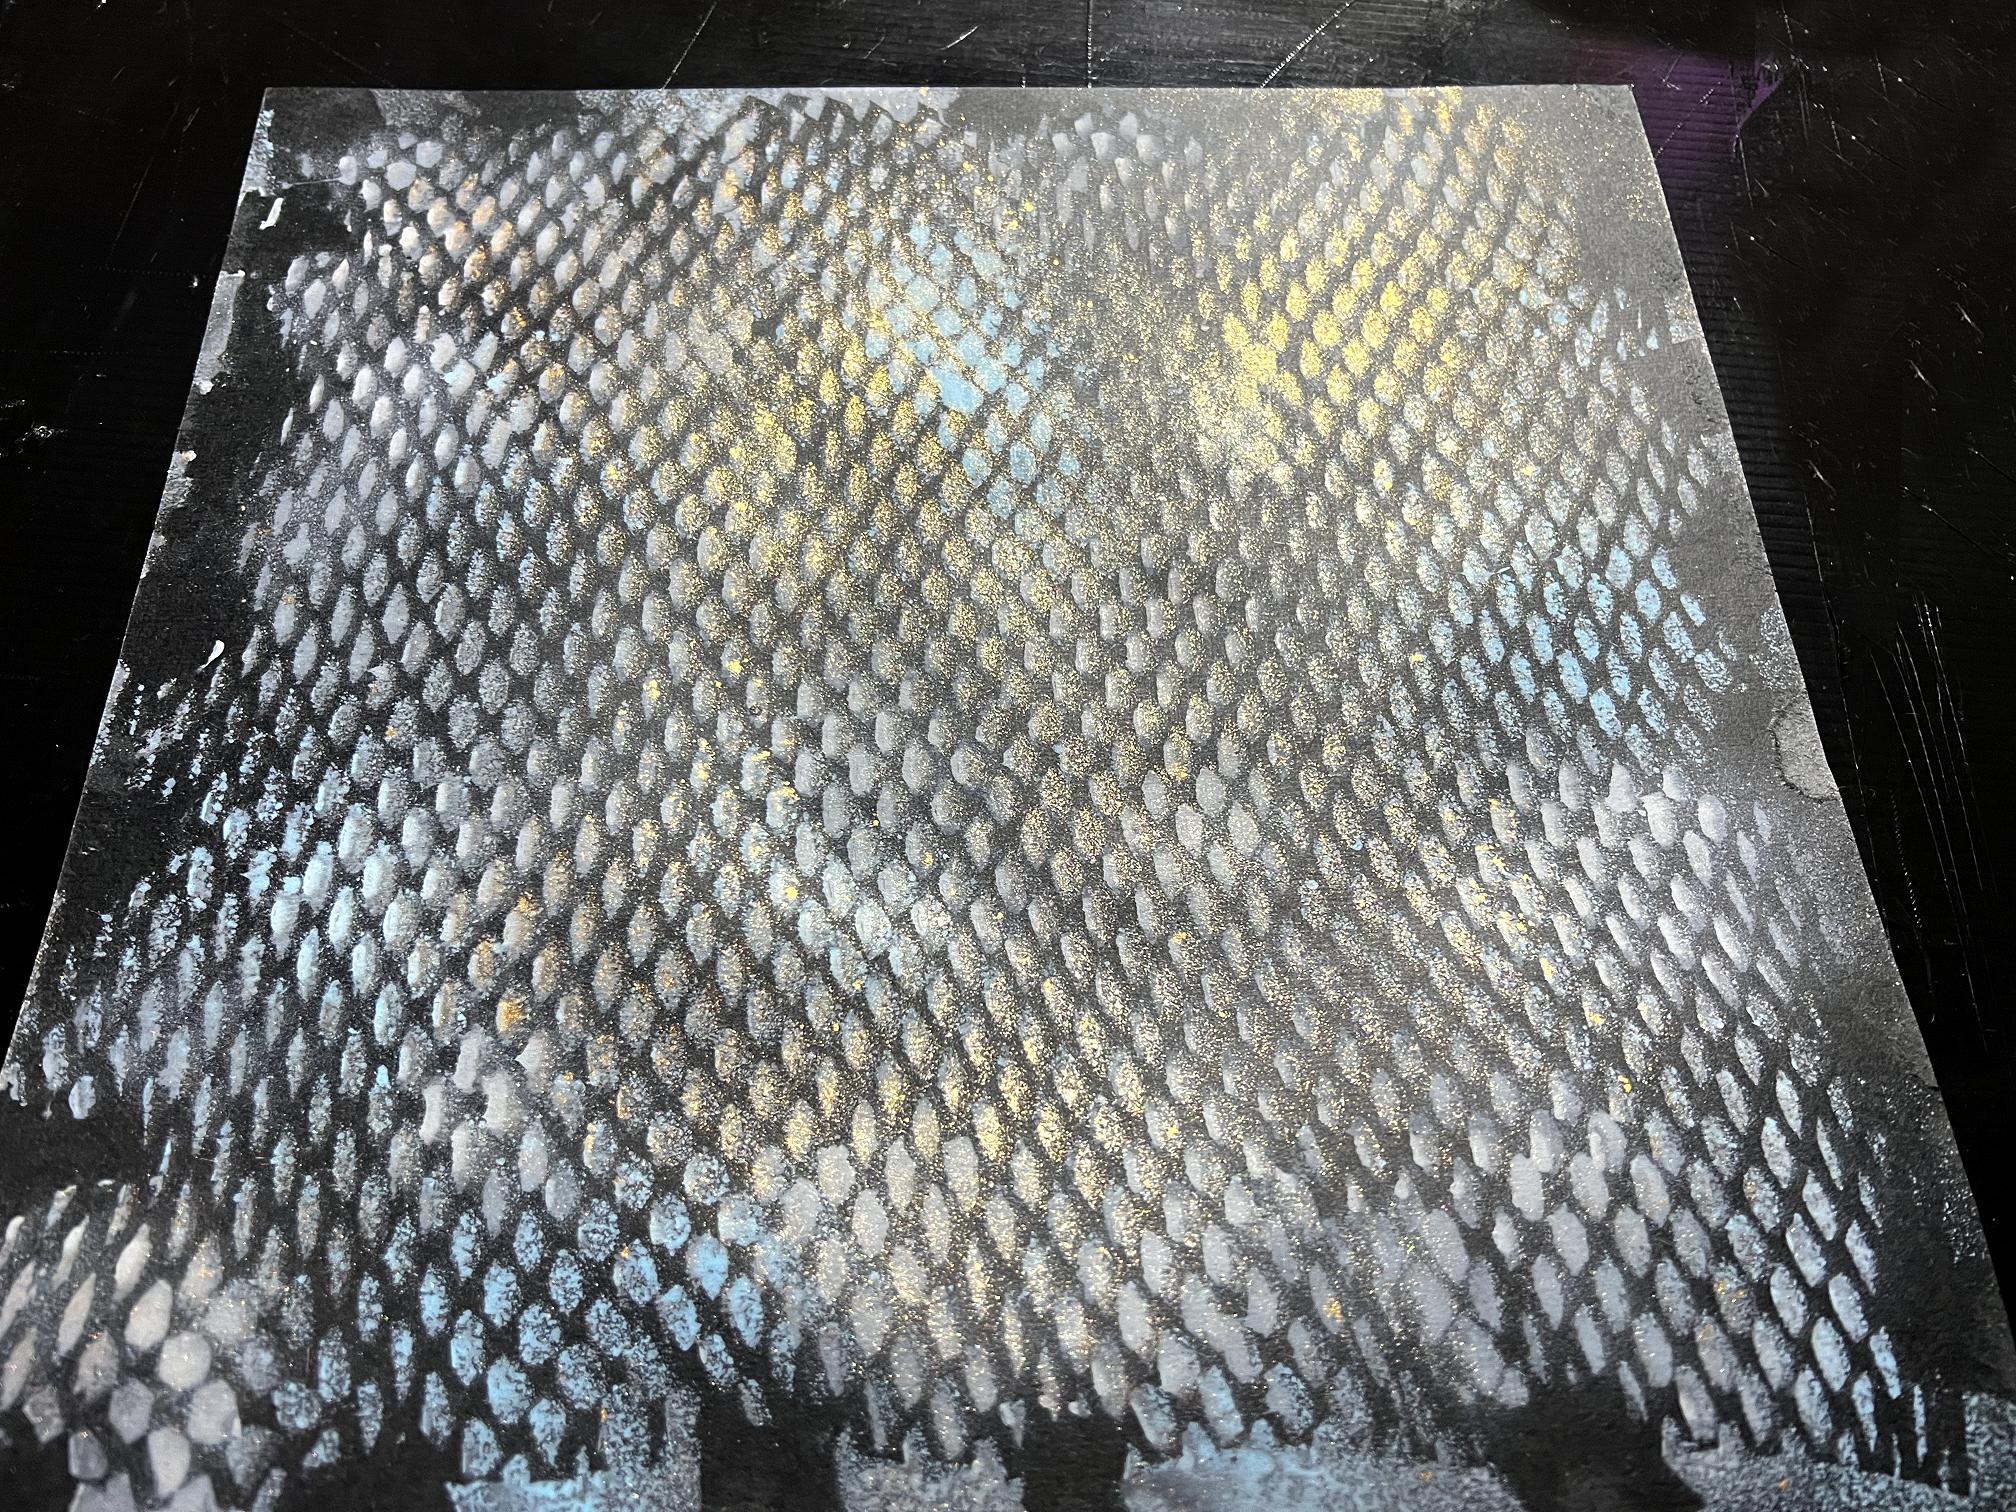
I just love this stencilled onto black. I must try one using mixed metallic sprays. It’s time I got out my Perfect Pearls again too, and made up some DIY shimmer sprays… these are awesome on black.
This experiment was a definite success.
Venetian Plaster on the Gel Plate
Over the past few days, since my first successful experiment using the Seth Apter Izinks, I have been mulling over in my mind how I might create an equivalent to the Patti Pocket Stainz that Robyn McClendon has been using (not possible to get this in the UK unless you are prepared to pay silly money to get it here).
I love thinking outside the box! Some background info which led to a successful conclusion: WARNING – this may gross some of you out! Skip to the next para if you don’t want to read about poo lol!! I recently I discovered that I had one bottle left of some lubricating deodorant for my stoma bags – I’d forgotten about this product and have been using it again to try and prevent the problems I’ve been experiencing with my still unrepaired parastomal hernia. My stoma output is thick, and tends to “pancake” around the stoma and doesn’t drop down into the bag, causing leaks. This product has certainly helped and I haven’t been getting so many leaks, but I’ve nearly run out and it won’t last until I place my next order for supplies at the beginning of next month. I did a bit of research online to see what other people were doing, and whether there was a DIY alternative, and discovered that some people use a few drops of baby oil. I’ve tried it, and it is working brilliantly so far. One person made her own version of a lubricant using a mixture of methylcellulose, xanthan gum, and polyethelene oxide (PEO), which is a powder that you mix with water to produce a very slippery and gloopy liquid polymer. I didn’t think I could be bothered to source all these materials and make my own, so resorted to the baby oil which works fine without the hassle – other people even use cooking spray!! I did wonder about glycerine, which is safe to put on your body and even to consume, but couldn’t find that anyone had used that. Anyway, long story short after this somewhat outre digression (sorry if it’s TMI), it got me thinking about how the Stainz also had a gloopy sort of consistency and I made the connection with glycerine.
I had already wondered if I had anything in the house which was water-based and which would have a similar consistency but hadn’t thought about glycerine. I even tried vanilla paste lol! – gloopy stuff but it didn’t work at all – all it did was make the paper smell lovely!! Funny how thinking about my ileostomy was the thing that sparked a thought about my art. Is my brain wired weird, or what?!!
I poured a small amount of glycerine into a dish and added some Distress Re-Inker to it. I thought this might work better than the Distress Spray Stains as it is thicker, being designed to re-ink dried up ink pads. I mixed it together with a paintbrush and painted it onto the gel plate, and brayered it out as before.
It worked!! It actually worked! Yay! Happy dance! I am sure the main ingredient in the Stainz is glycerine…
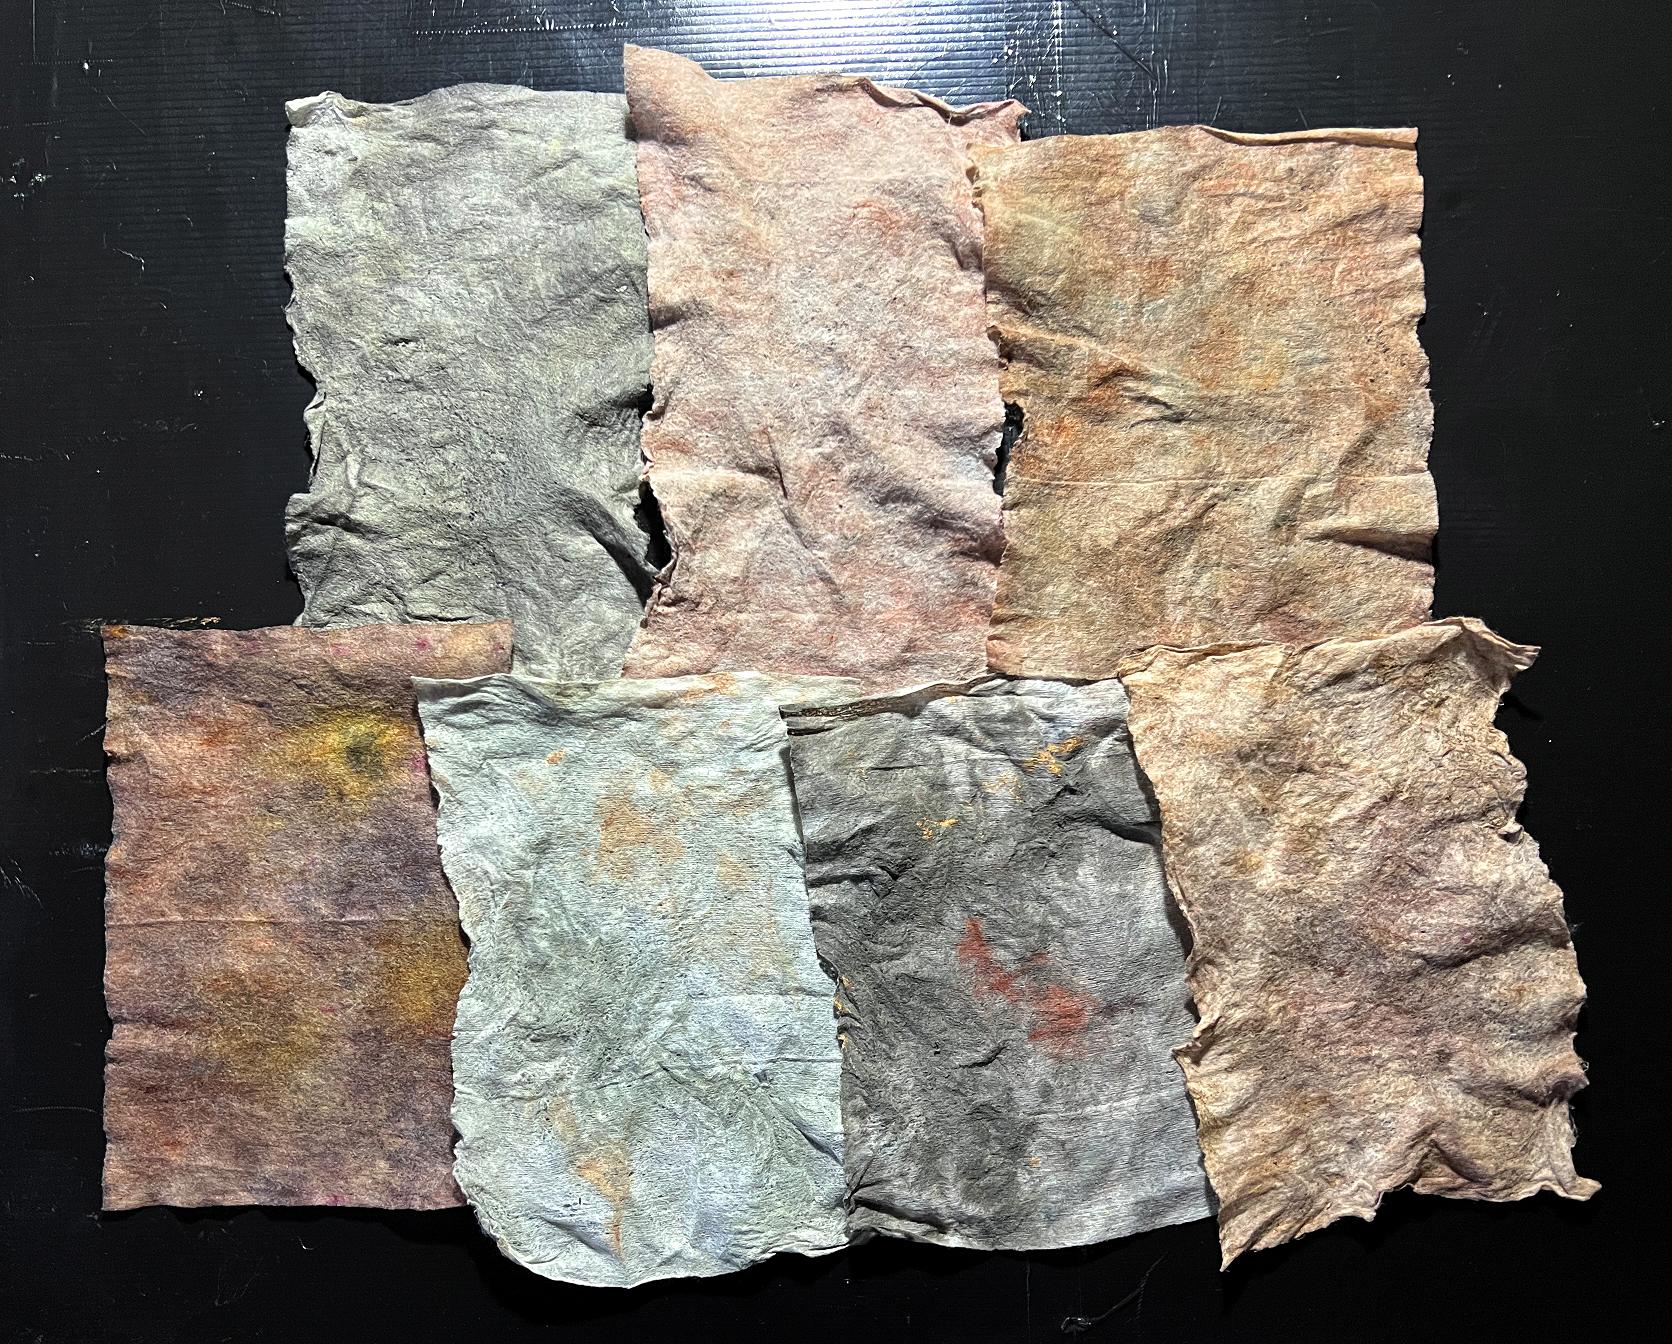
The following photo shows the various experimental pieces I made. I made six backgrounds on the gel plate, using the PaperArtsy Fresco paints (matte acrylics) as before, two of each of the three neutral colours I have, i.e. Concrete, Stone and Vintage Lace. The bottom row were done with the glycerine and ink only, and the top row with some added water – after simply washing out the dish the first time, I spritzed some water into the dish in order to clean the brush rather than wasting it, and only afterwards did I wipe the residue out with a baby wipe (I’m still trying to add interesting colour to my used baby wipes!).

The pieces, in the order in which I did them:
- Bottom right: Concrete background, glycerine with Tea Dye Distress Re-Inker. This print pulled some residual gold from the plate.
- Bottom left: Concrete background, glycerine with Walnut Stain Distress Re-Inker.
- Top left: Vintage Lace background, glycerine and Walnut Stain Distress Re-Inker, with added water.
- Bottom centre: Stone background, glycerine and Coffee Izink.
- Top right: Stone background, glycerine and Tea Izink, with added water.
It is interesting that the Distress Re-Inkers worked better with the glycerine than the Izinks, which I have already discovered work perfectly well without any additions. The Izinks with glycerine produced larger patches. Still definitely useable, but a different effect. I think in all cases, the effect was enhanced by the addition of a little water to the mix – a few sprays from my water spritzer was sufficient.
For the remaining background sheet that I created, I decided to complete my initial experiment, by combining the Izink with a Distress Spray Stain, as Robyn McClendon had done. I didn’t do this before, because I didn’t want to muddy the waters with a combination until I had established that the Izinks would actually work on their own, to produce the desired effect.
For this test, I used the remaining Vintage Lace background, with Coffee Izink, and Frayed Burlap Distress Spray Stain, and no added glycerine. The result was great.

The piece on the right is the blotting off sheet. I cleaned off the brayer on this between each background colour and also the inks on the brayer, and blotted off any inks remaining on the plate between print pulls. This is definitely a useable background! Look at all those gorgeous layers…
I am very pleased to have discovered a way to create the effect without using the Izinks, of which I have only five (2 browns and a honey, black, and gold). I have yet to try Distress Spray Stains with the glycerine, having established that the Re-Inkers work fine. The main advantage to all this is that I have numerous colours in the Distress range, and will not be limited to the few Izinks that I have. I doubt if I shall be ordering any different colours in the Izinks, unless I come across a technique for which they are essential, which I simply can’t live without! The colours I have do work brilliantly to create the Venetian Plaster effect on the gel plate.
Baby wipes
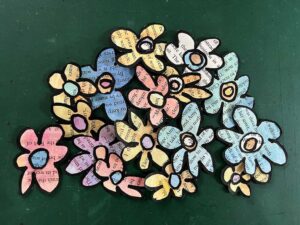
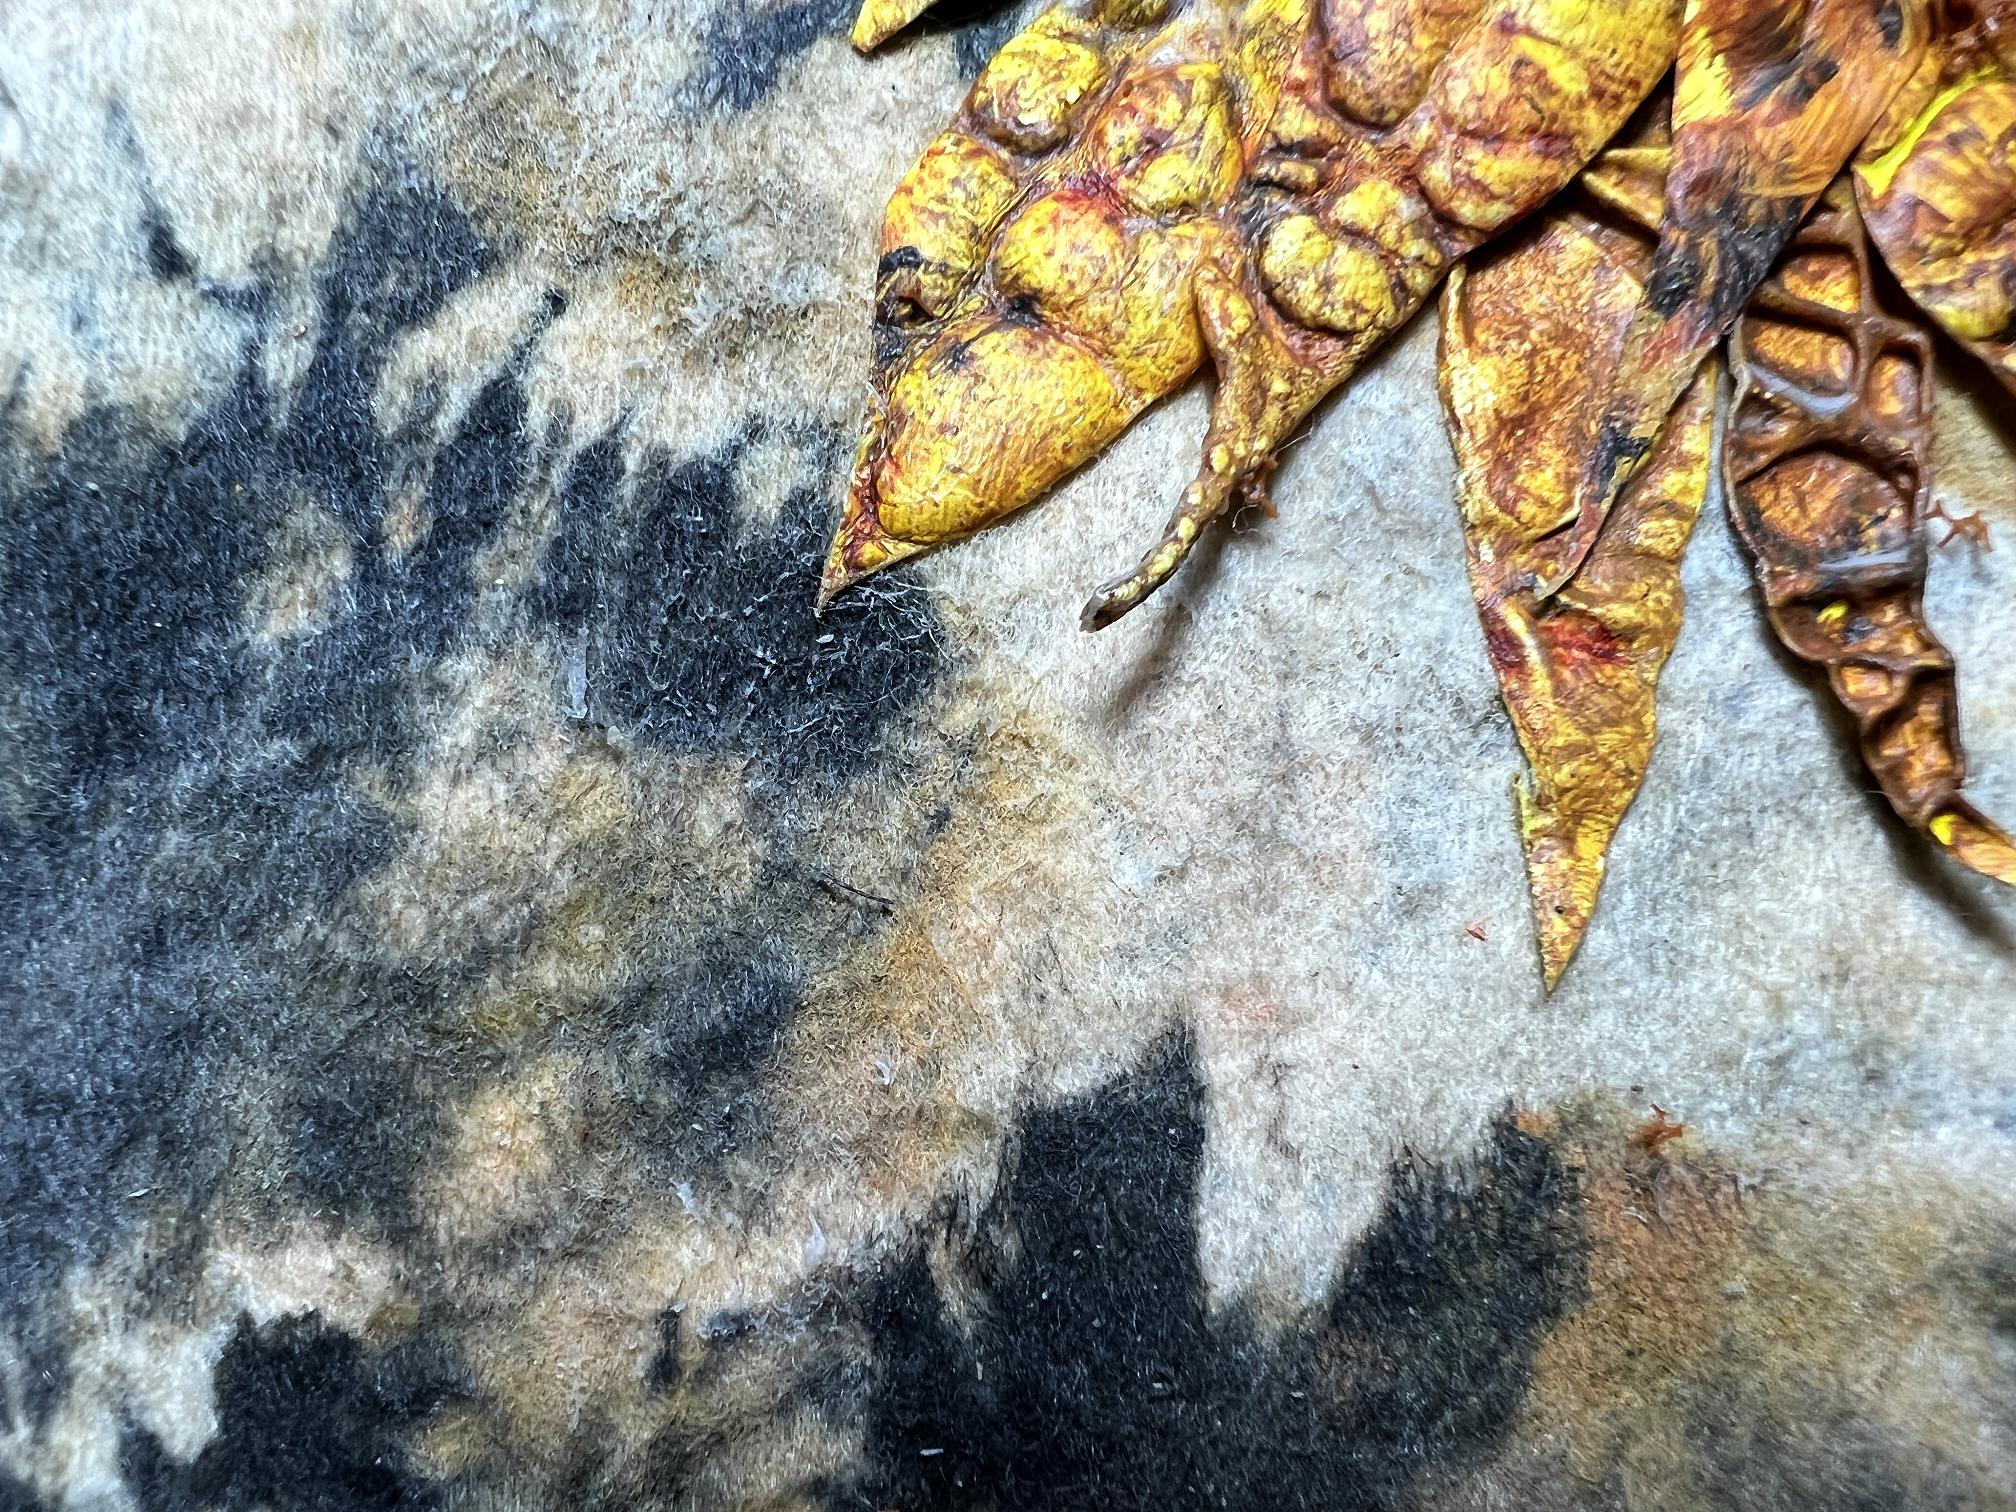
I don’t throw away kitchen paper or baby wipes after I’ve used them to clean up, but tend to keep using them until they are well covered with pigment, so I can use them as collage elements. I try to keep colour groups separate to avoid creating mud. I have discovered that you can moisten baby wipes again when they are dry and they continue to work. As collage elements, they produce a fabulous soft texture that feels like felt.
I have recently generated quite a few baby wipes and they haven’t been very exciting, so I’m trying to jazz them up a bit by using them to mop up different colours. Here is the collection at the end of today’s session.
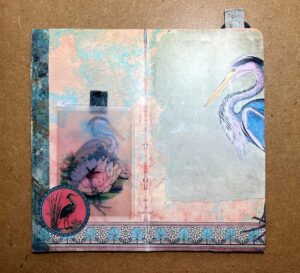
Not desperately exciting yet but I’m working on them. I used one on the Sunflowers page in my Organic Journal a few weeks ago and love the effect.
Unclogging spray bottles
The only blemish on a very satisfying studio session was the fact that the Goldmine Izink nozzle had clogged. Later in the evening I searched online to see if anyone else has had this problem and what they did about it, and most people recommended taking the spray unit apart and soaking it all in hot water. One person recommended holding a fine needle in a pair of pliers and poking the tip into the spray hole but there was a risk of breaking the needle and leaving the tip in the hole and impossible to remove, so I was reluctant to try this method except as a last resort. Leaving mine to soak in cold water for several hours without taking it apart didn’t work.
I tried soaking it in hot water. It didn’t work. I soaked it again in very hot water with a drop of washing up liquid but still no success. Then I tried the needle method and it was still clogged. The hole is very tiny indeed, and I needed an illuminated magnifier to see what I was doing. I left it to soak in the hot soapy water overnight in the hope that it would work after a few more hours.
There is bound to be a risk of blockage with any spray containing mica flakes or powder. Some people recommend removing the spray top and washing it in warm water after every use but who is going to bother with that, when you’re on a roll in the middle of a project? I have seen people recommending spraying pressurised cans of paint or varnish upside down after use, to empty the nozzle, so this might be worth a try as a preventative measure. It is a pest when it happens mid-project because you don’t want to have to stop and wait for hours while the blessed thing is soaking, so prevention is always going to be better than cure.
Update: When nothing worked, I tried soaking it in isopropyl alcohol but that didn’t work either. In the end, I contacted the seller and reported the problem, and I have got a refund from them. I have another bottle on order. The one with the faulty spray nozzle can serve as a refill.