GEL PRINTING AND INK SPRAYING, USING PIERCED PAPER AND UNSATISFACORY PRINTS, AND A RED LETTER DAY
When I was going through my various papers and backgrounds yesterday, I pulled out quite a few not very good or incomplete gel prints ready for further treatment. This morning I spent a bit of time working on these, in conjunction with some of my pierced papers, and also trying out my new paints that arrived yesterday. I also did a bit of ink spraying.
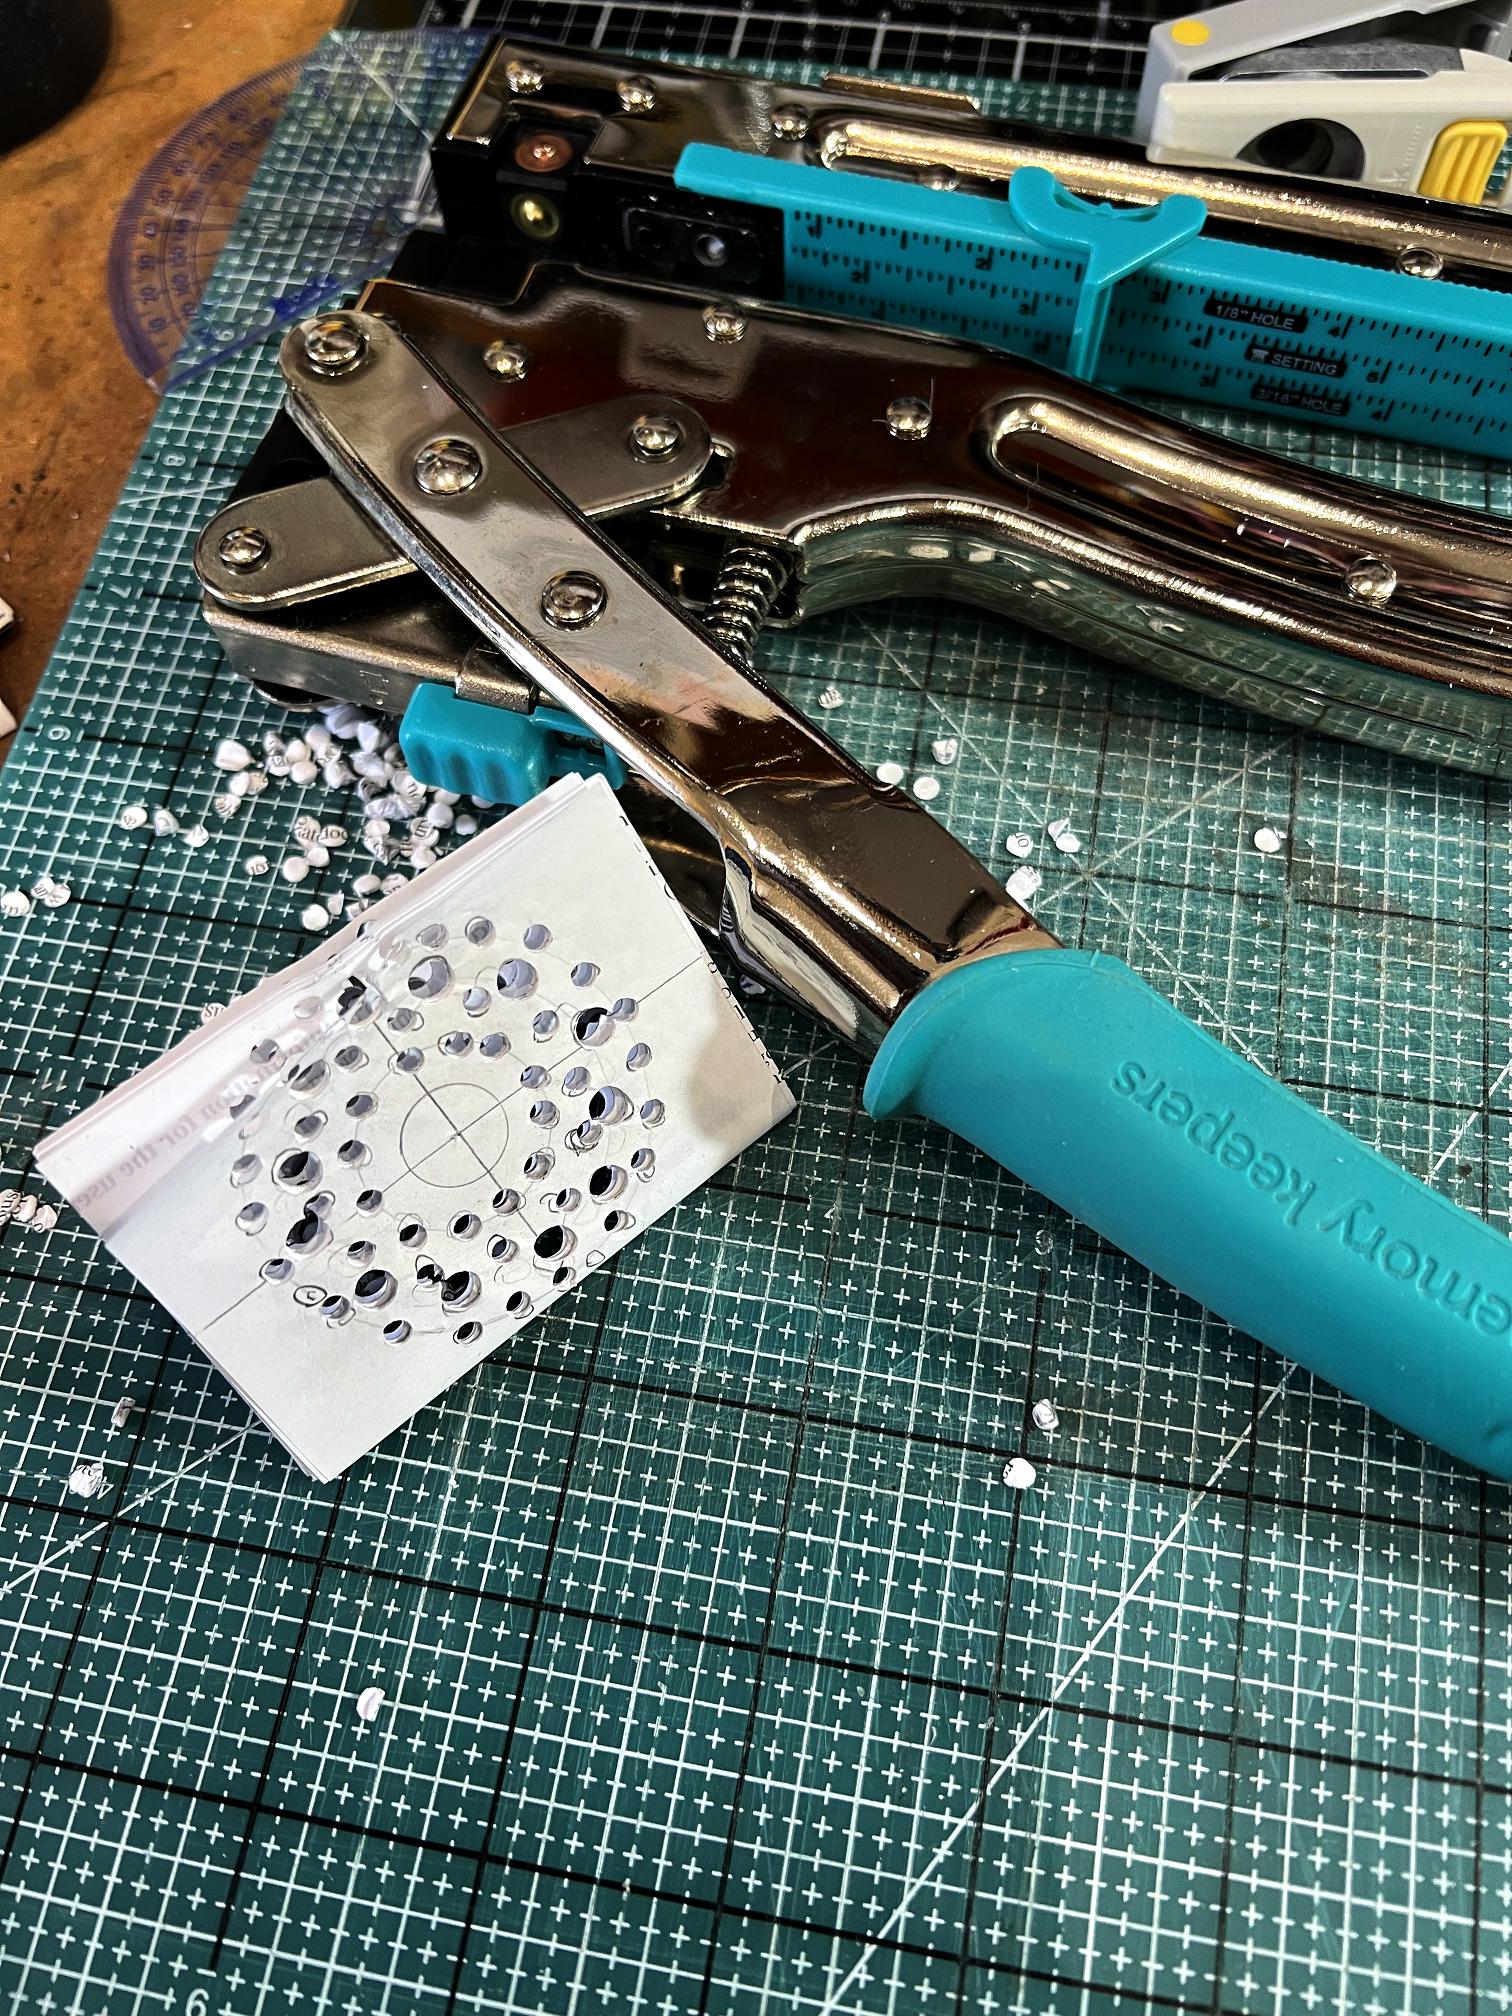
Gel Prints using Pierced Paper
My pierced papers are made from the leaflets that come in packs of medication. They are already accordion-folded, and all I need to do is punch rows of holes right through, using my Cropadile, which has two sizes of hole punches. When they are unfolded, you get a gorgeous pattern of fairly regularly spaced holes – what I particularly like is that the rows of holes are only as accurate as I can make them by eye, which gives a much more pleasing result than would happen if they were machine-made. Another celebration of wabi-sabi!


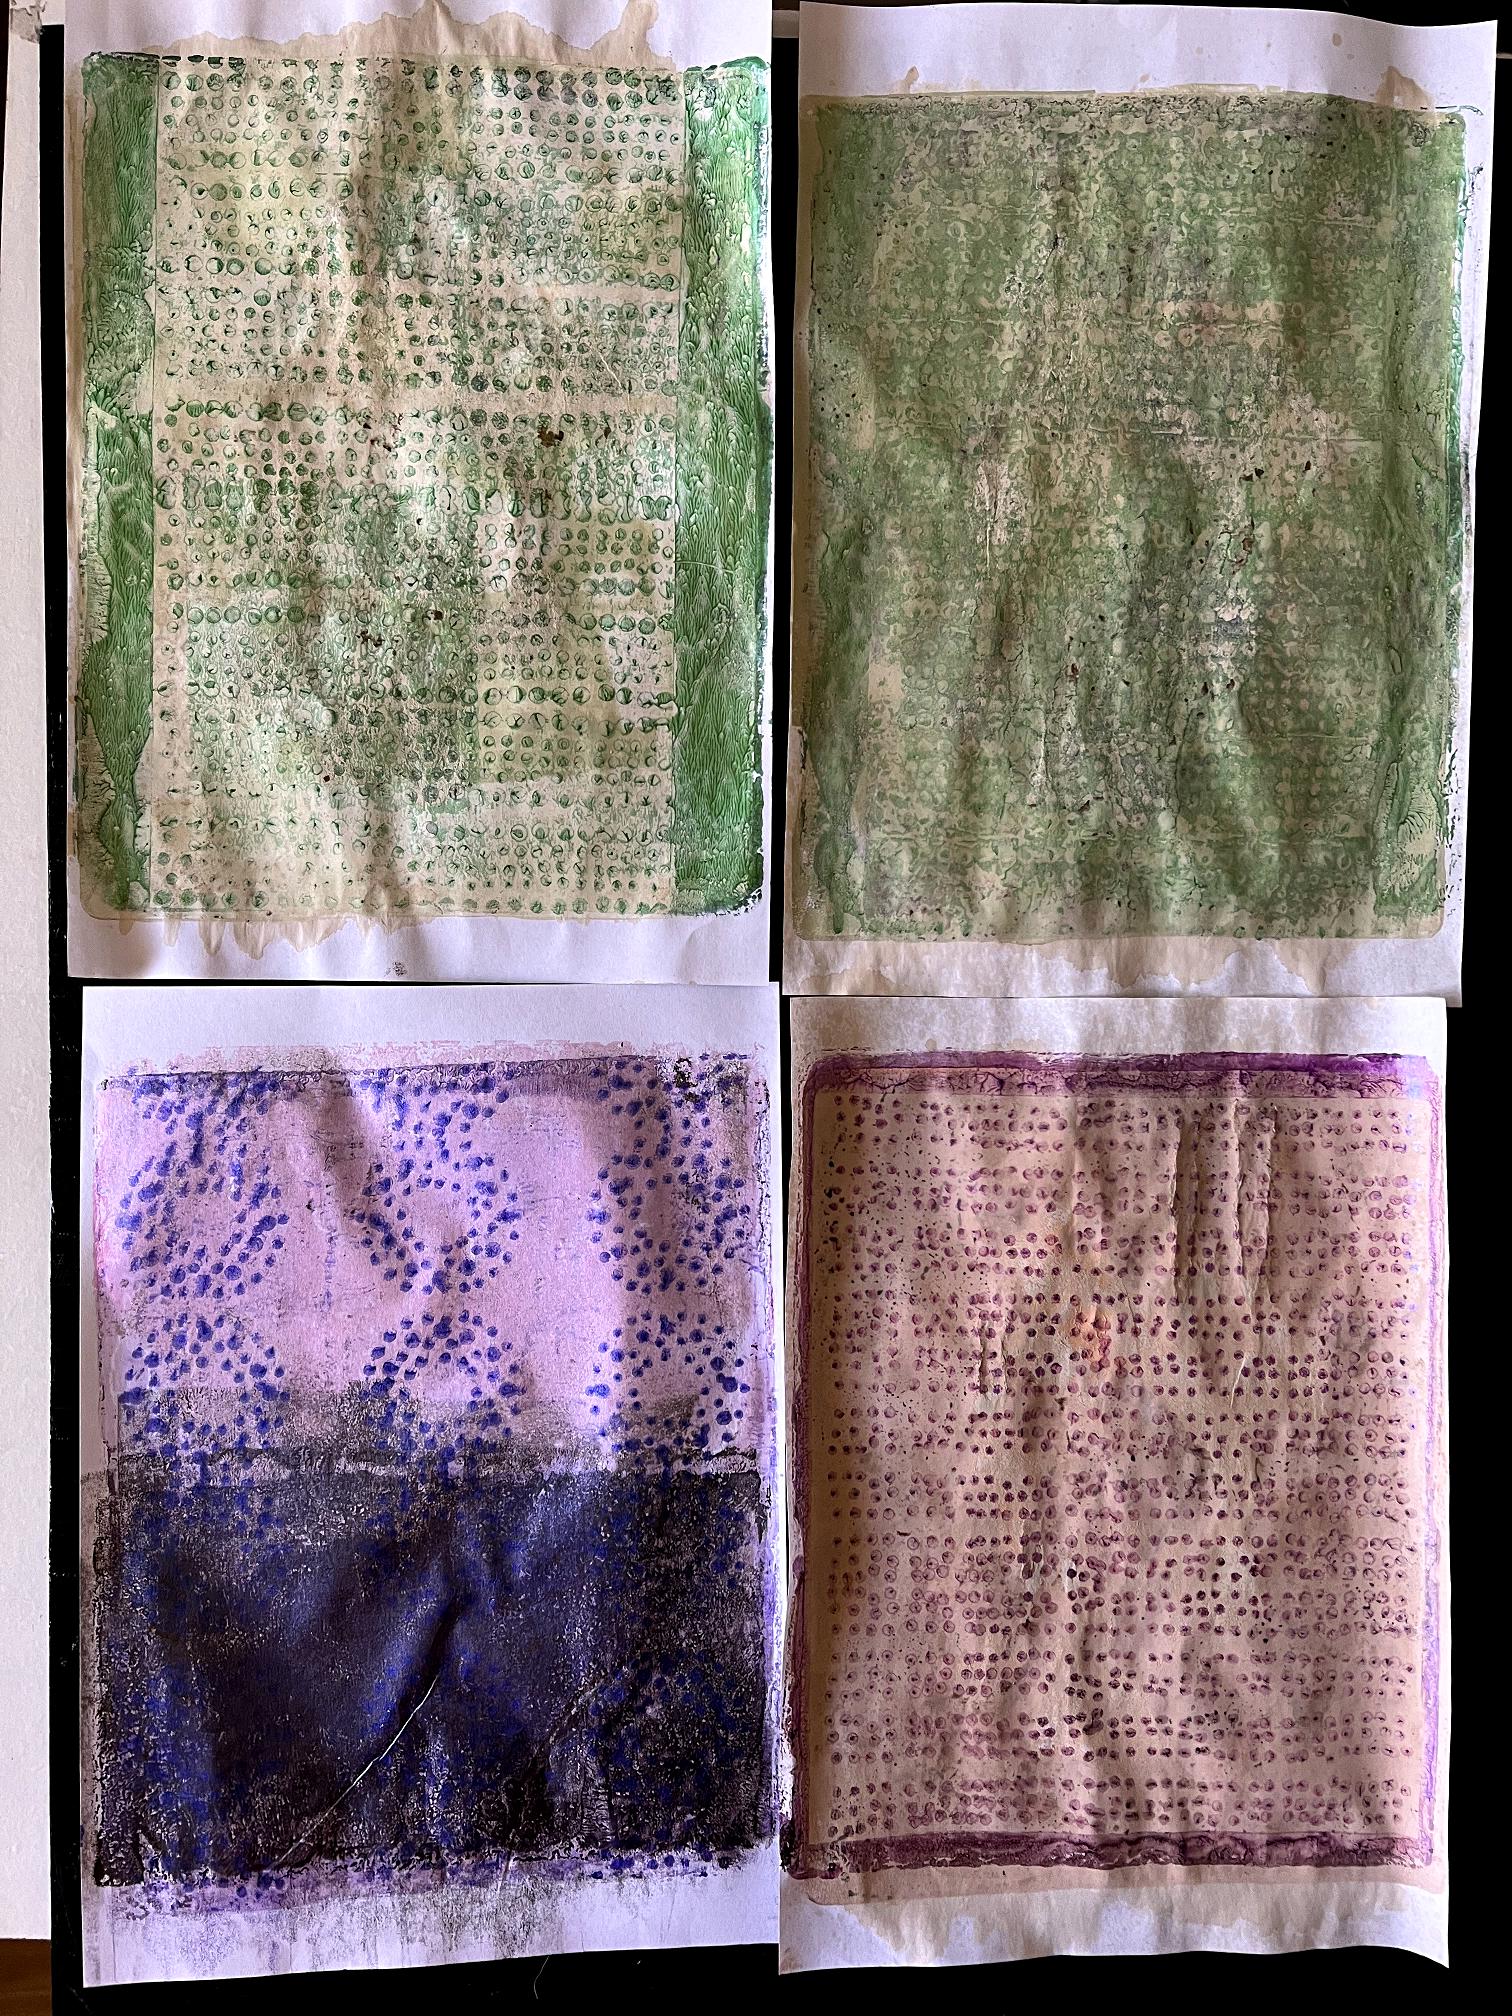
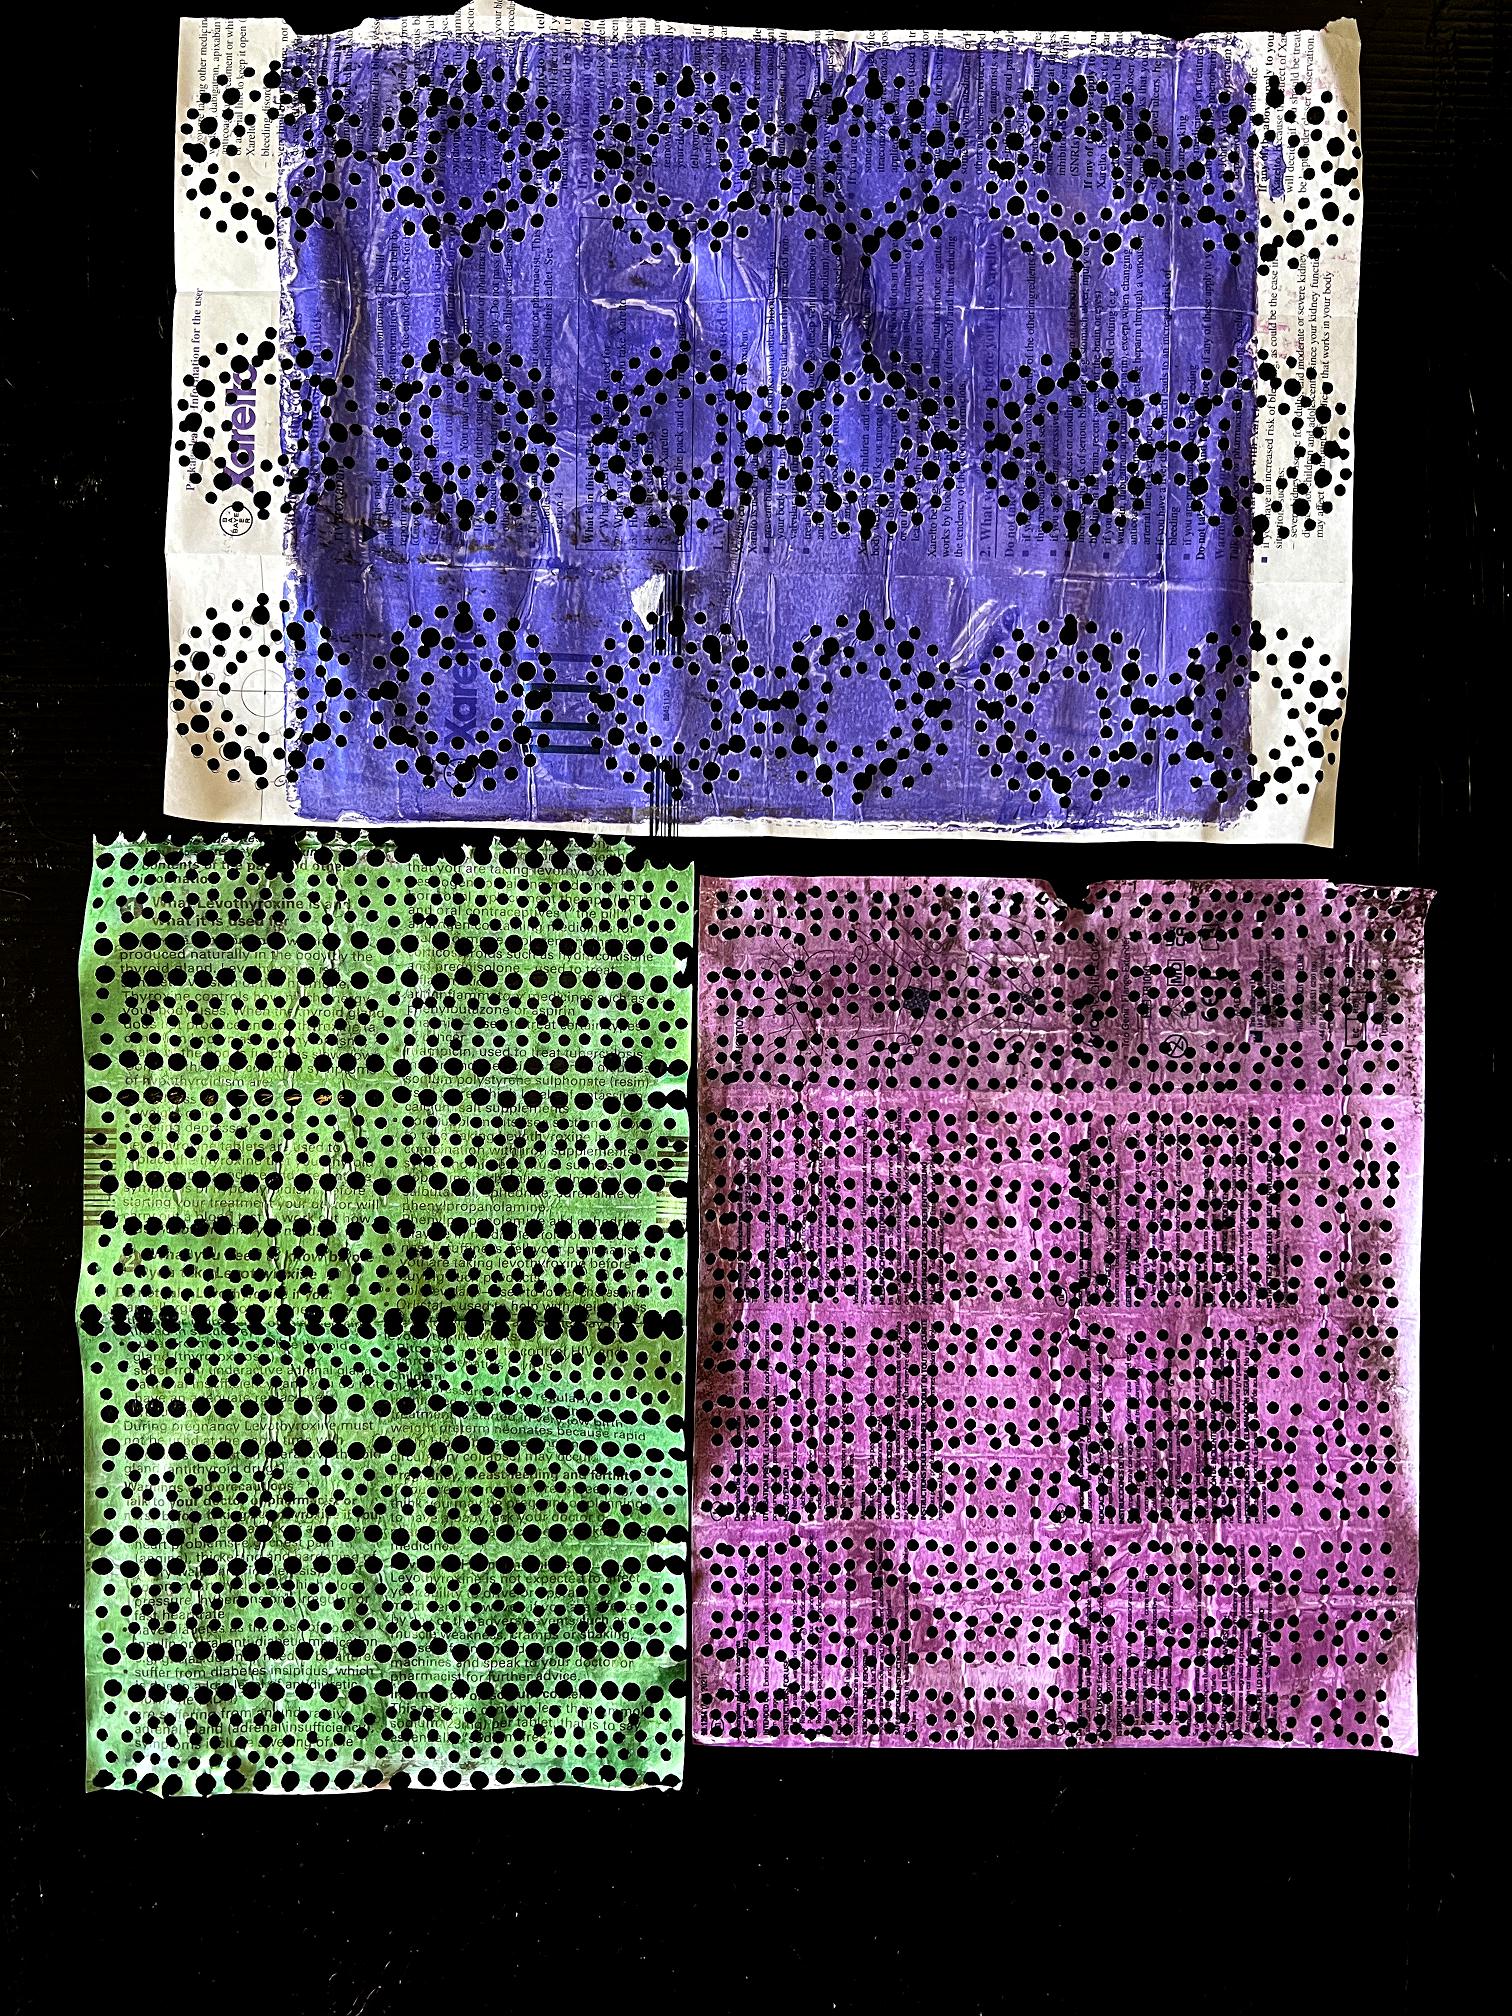
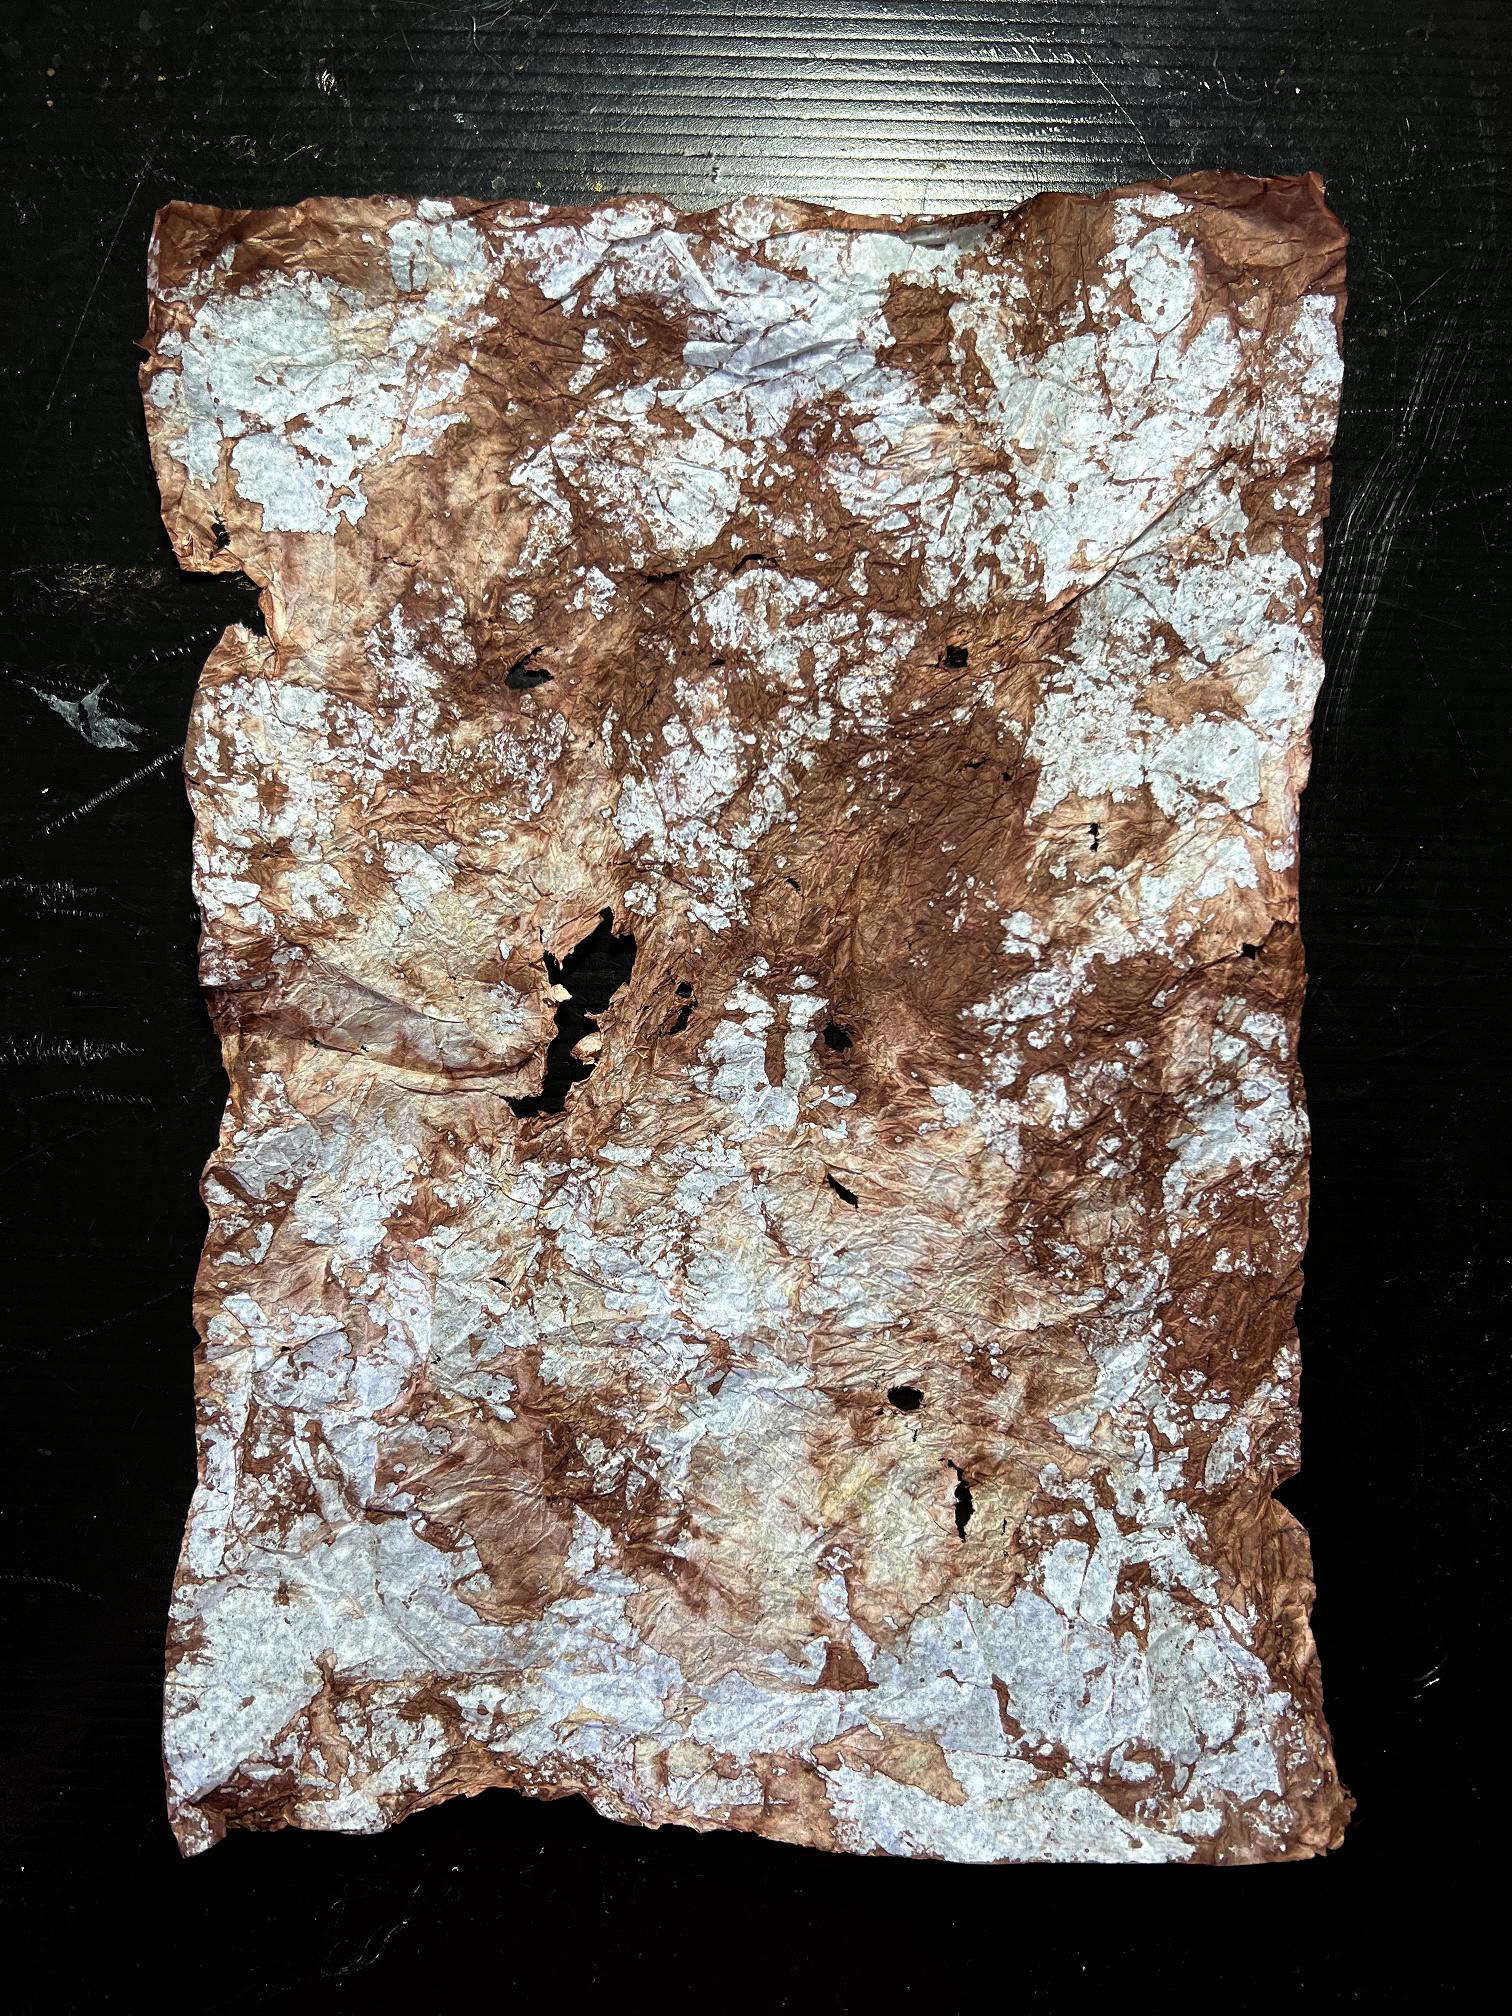
Here are four prints I made by brayering paint onto the plate, pressing down the pierced paper, removing it and pulling a print with copy paper, using less than satisfactory existing prints. They all require further work but you can see how the pierced paper has created an interesting texture on the prints.
The new paints:
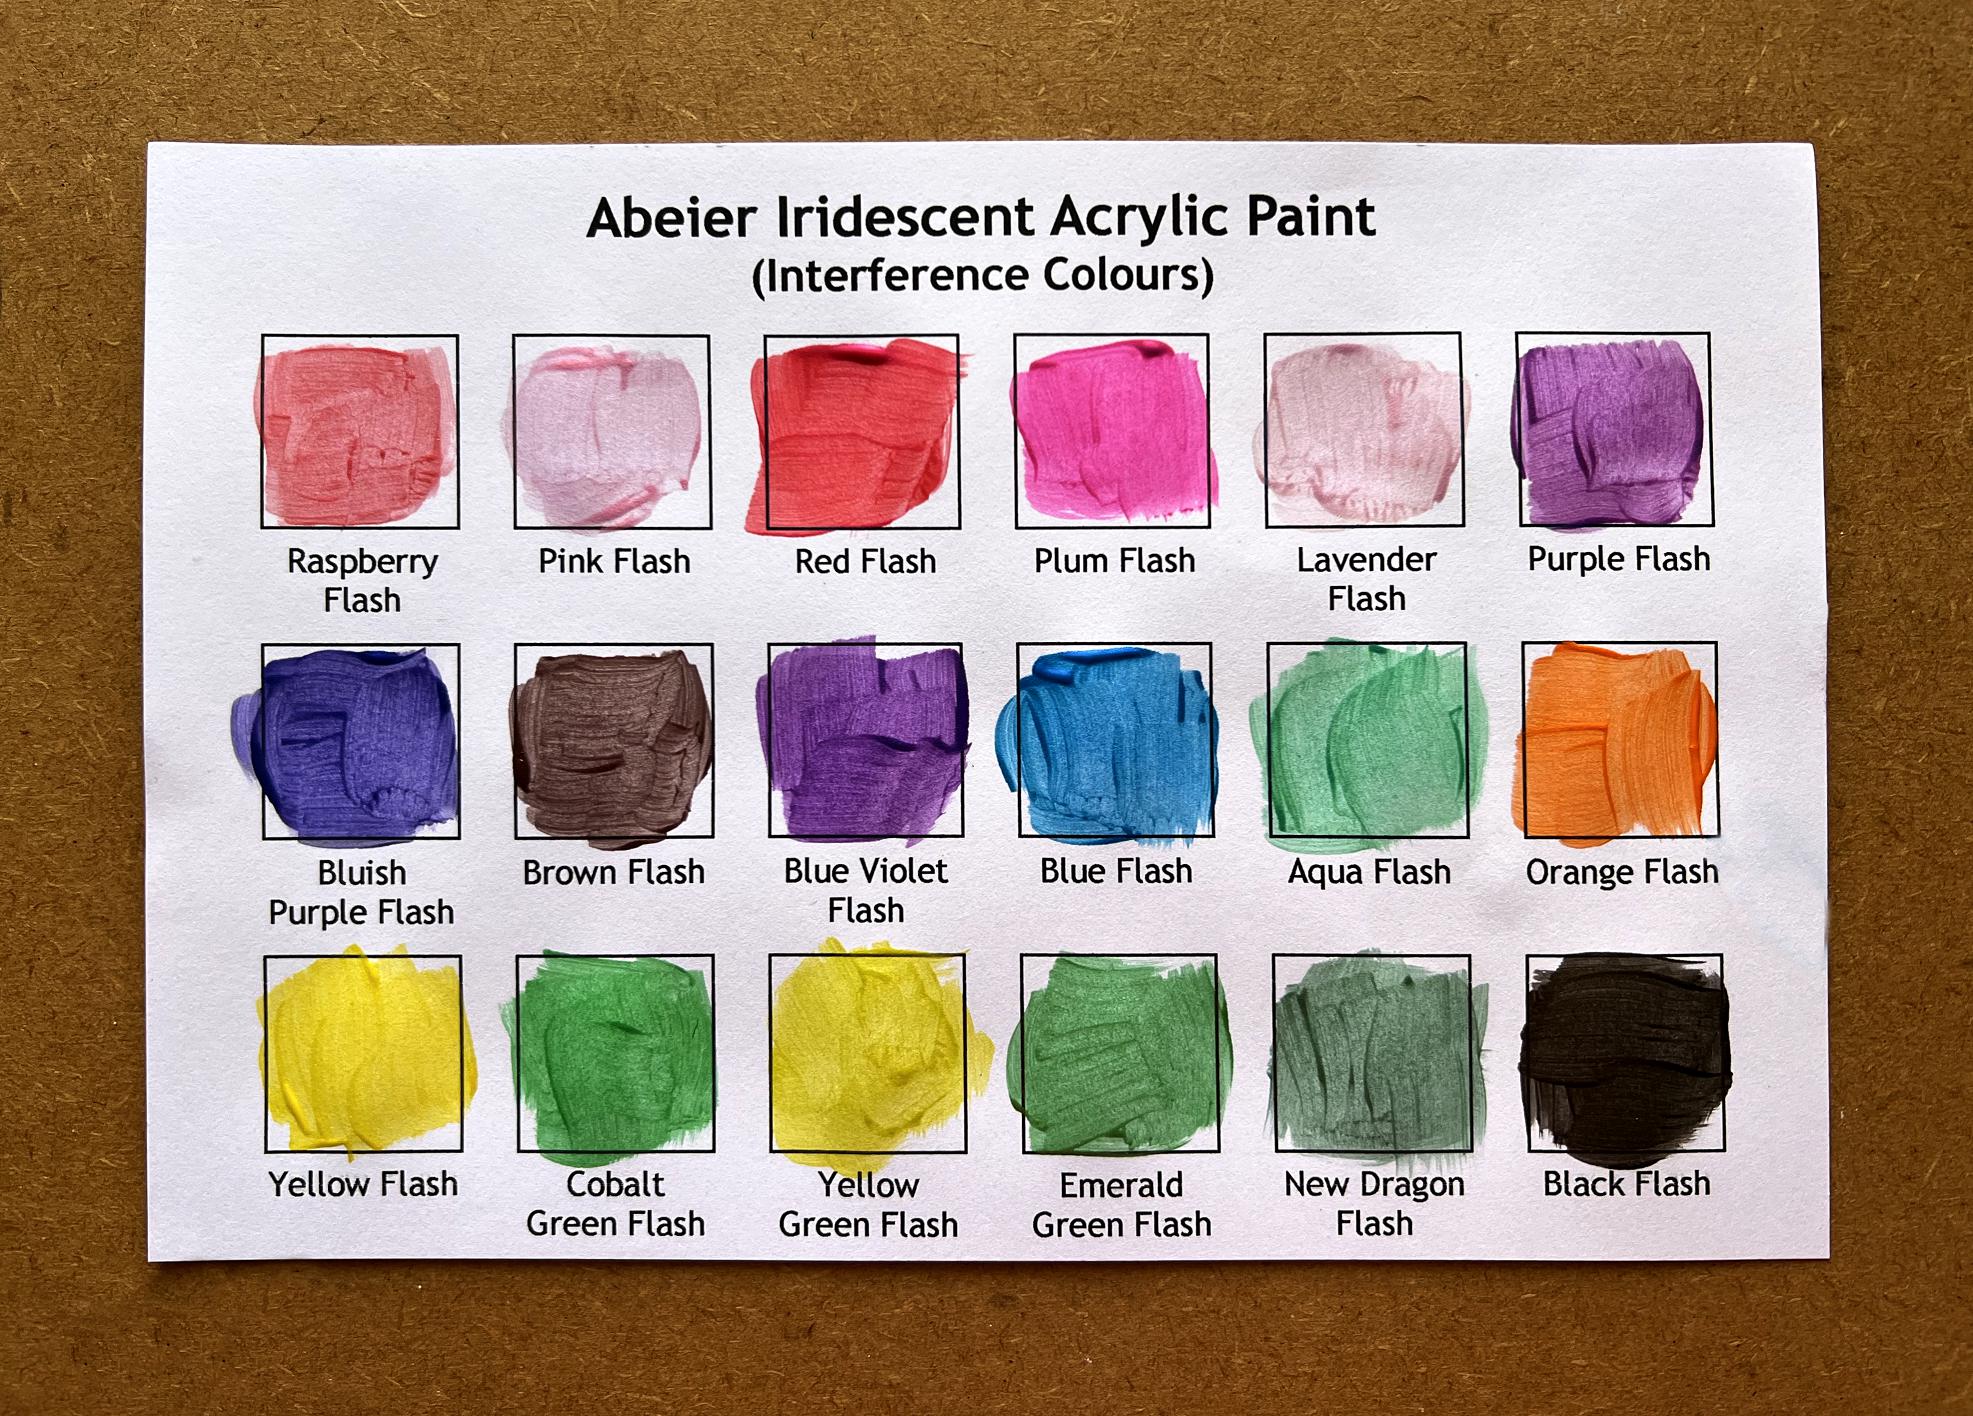
although cheap and cheerful and pretty thin, work very well on the gel plate, as I suspected they would. Spread thinly, they produce a glazing layer, and a bit more thickly, they are coming out quite rich. I’m not too worried that most of them don’t display the claimed colour shifting – I shall definitely invest in a better set in due course. Meantime, these are great gel plate fodder! They produce a nice pearlised finish.
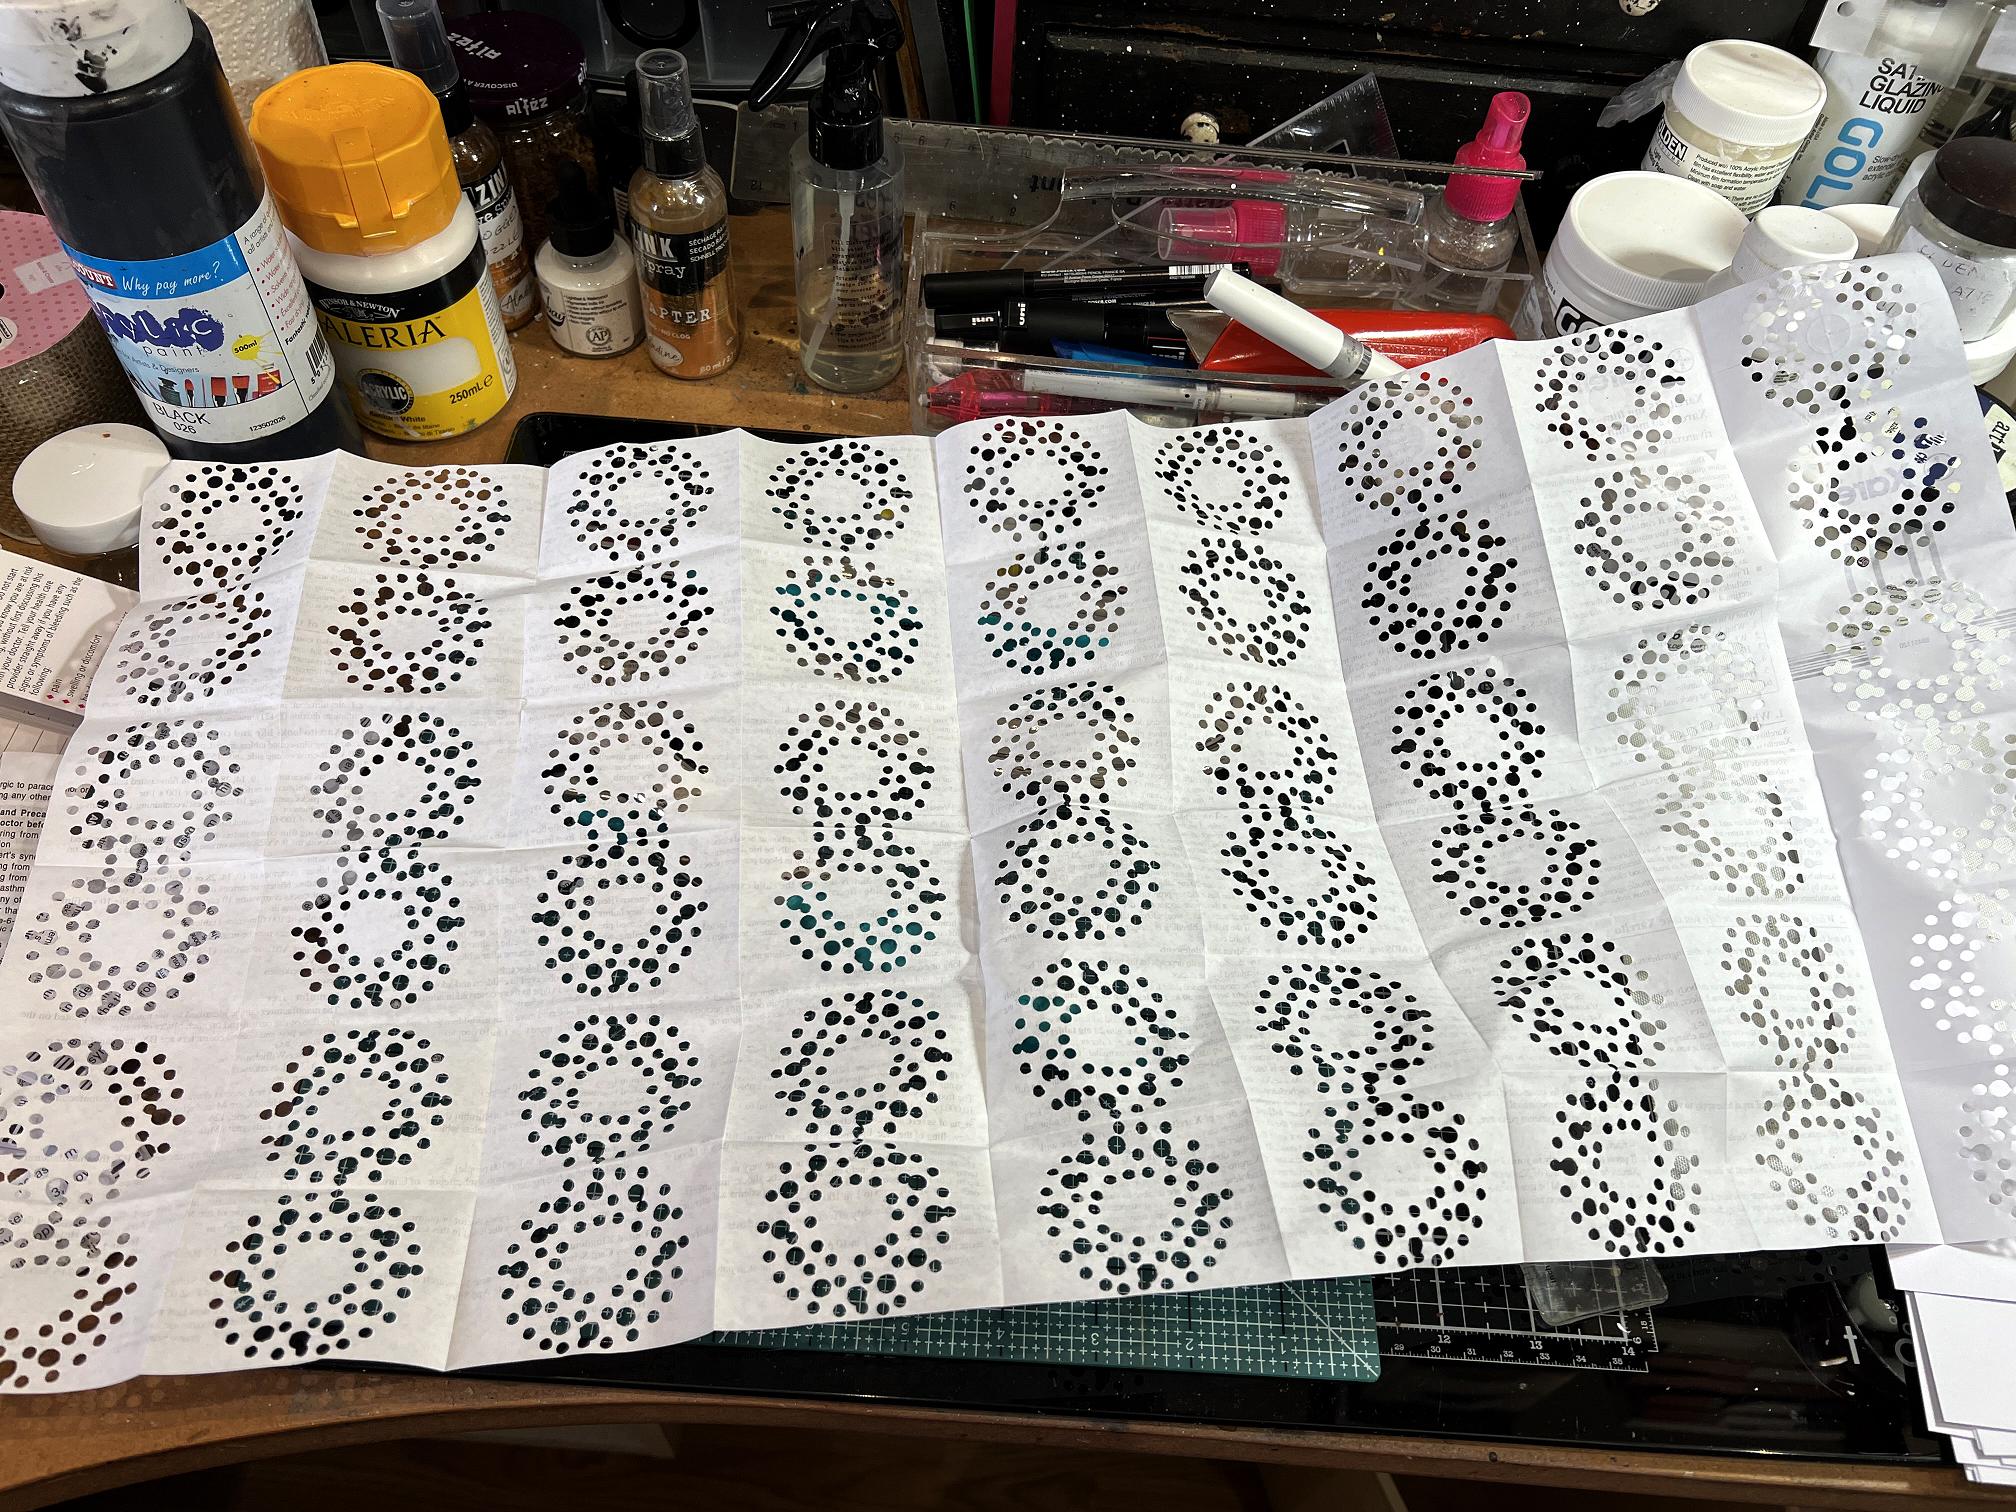
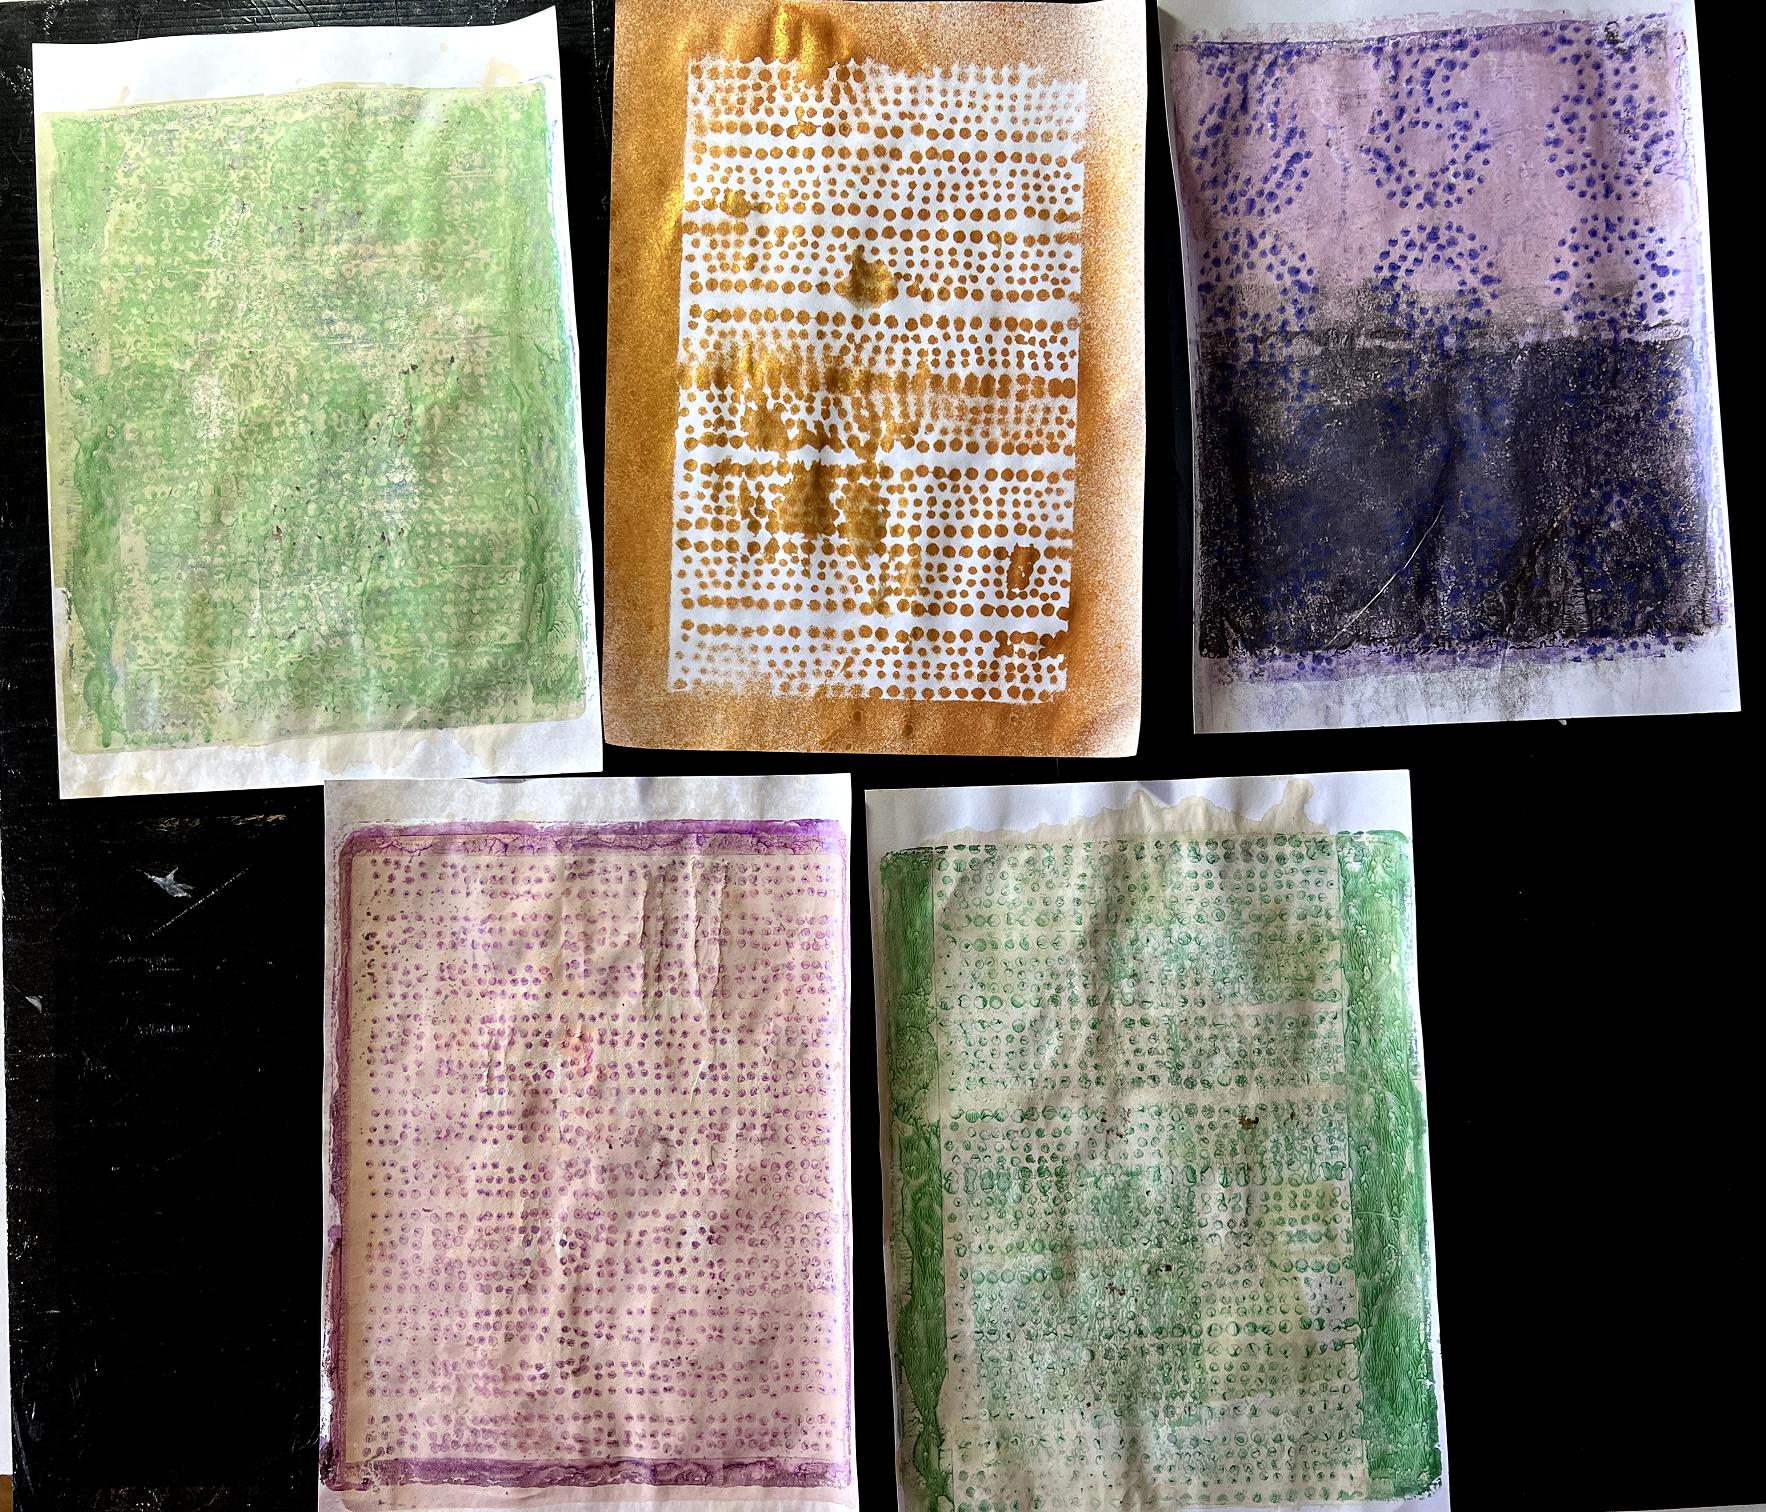
Here are the pierced papers after being pulled off the gel plate. They also can receive further treatment, and be used for collaging.
Spraying the pierced paper
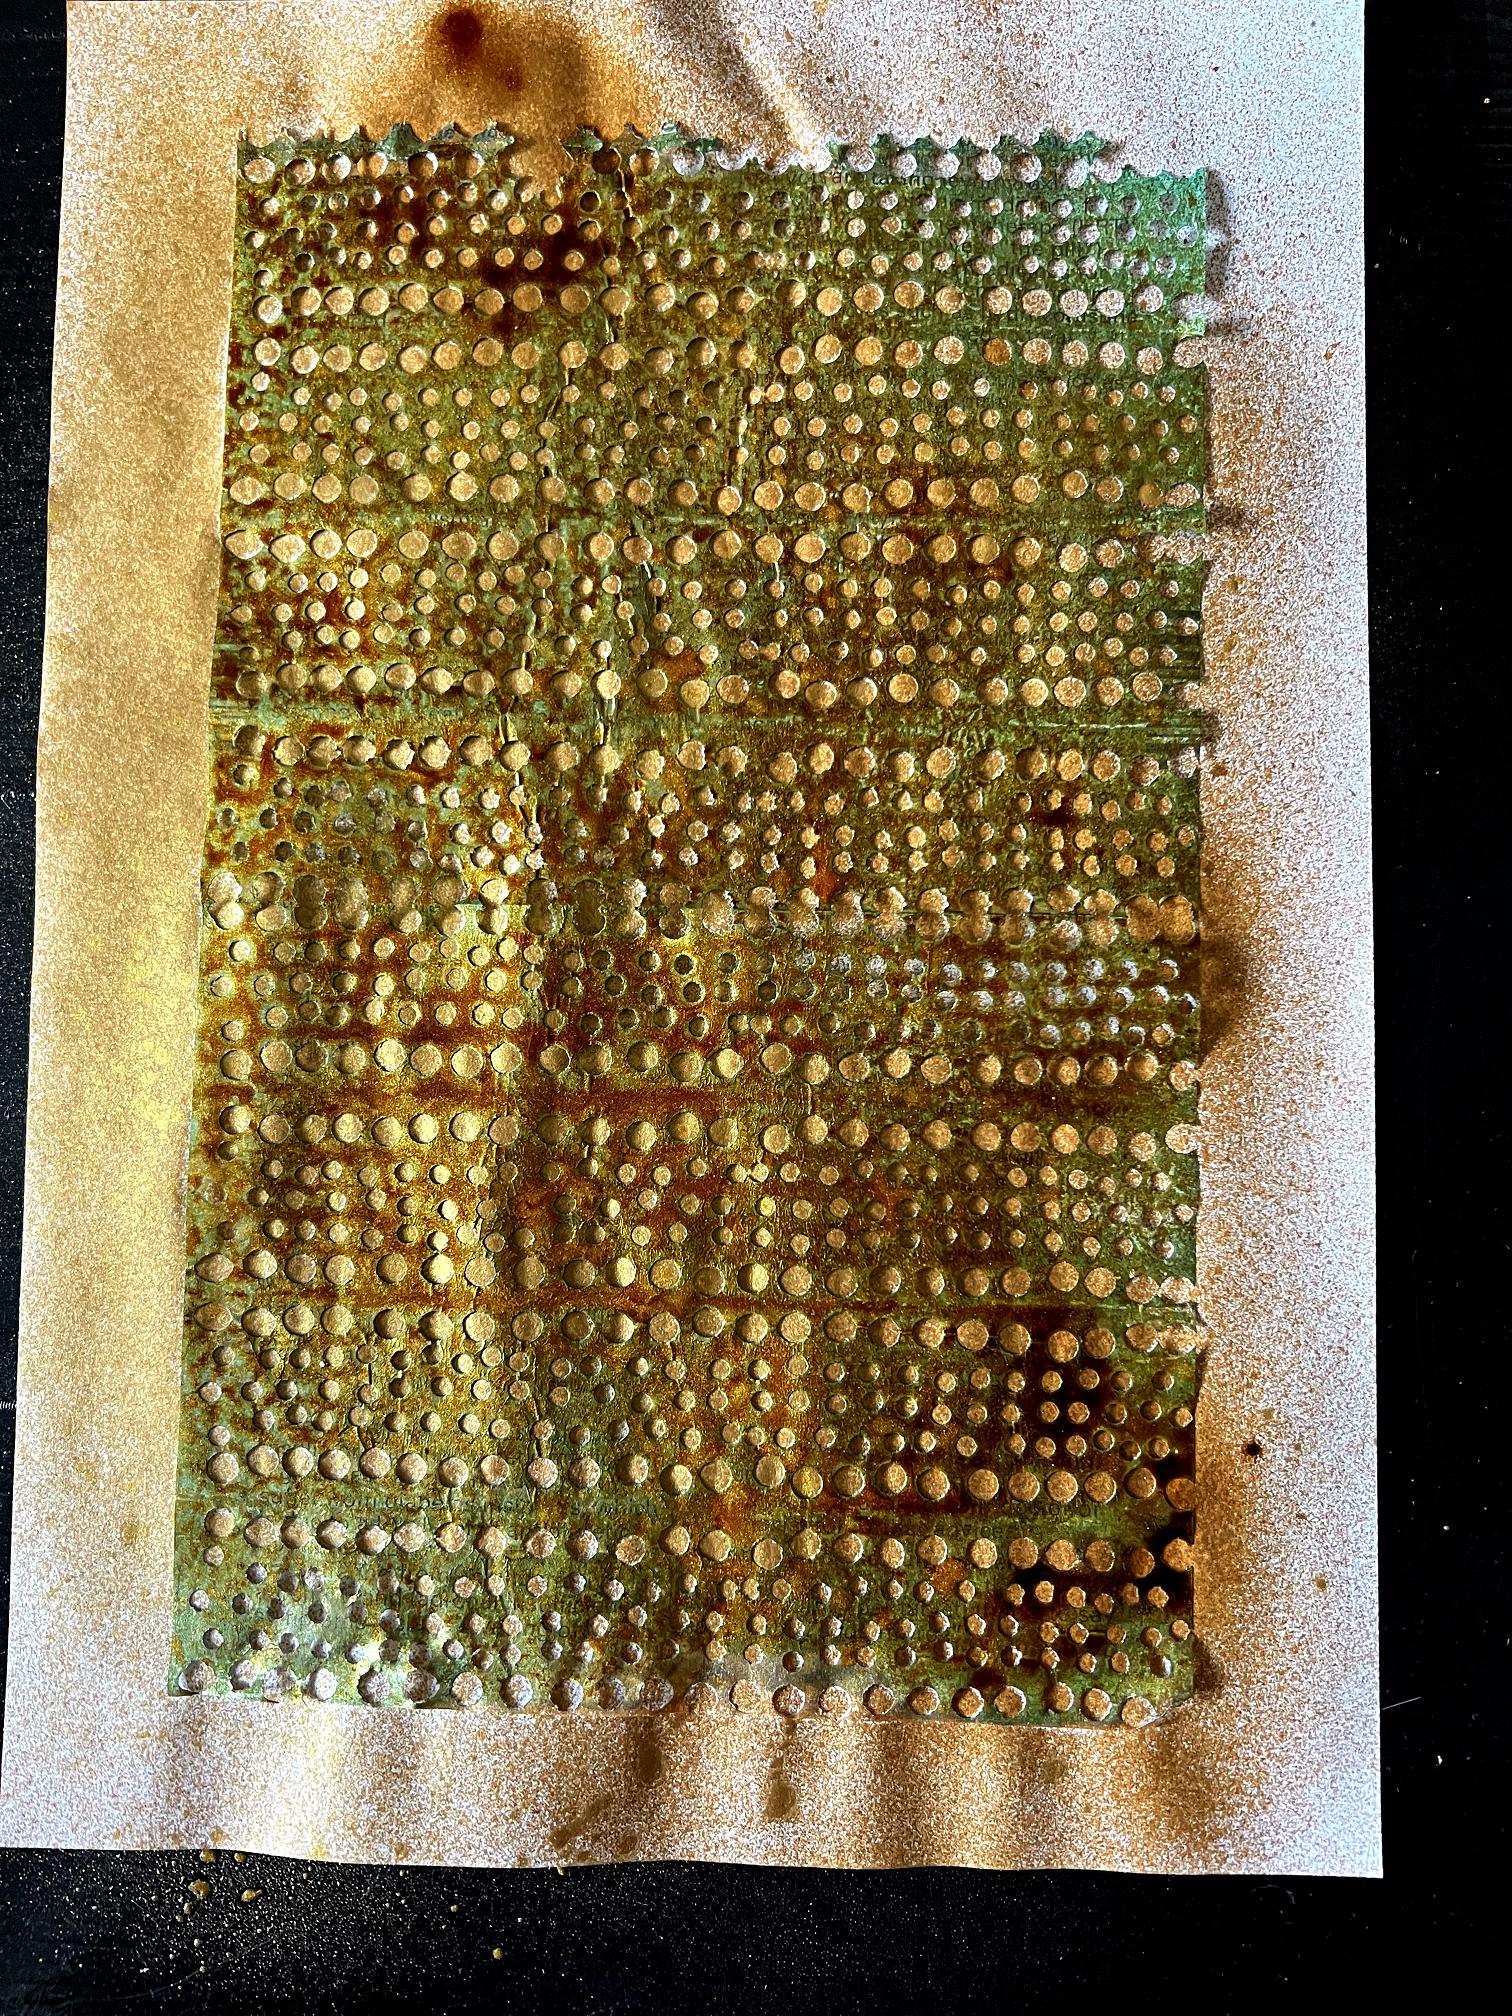
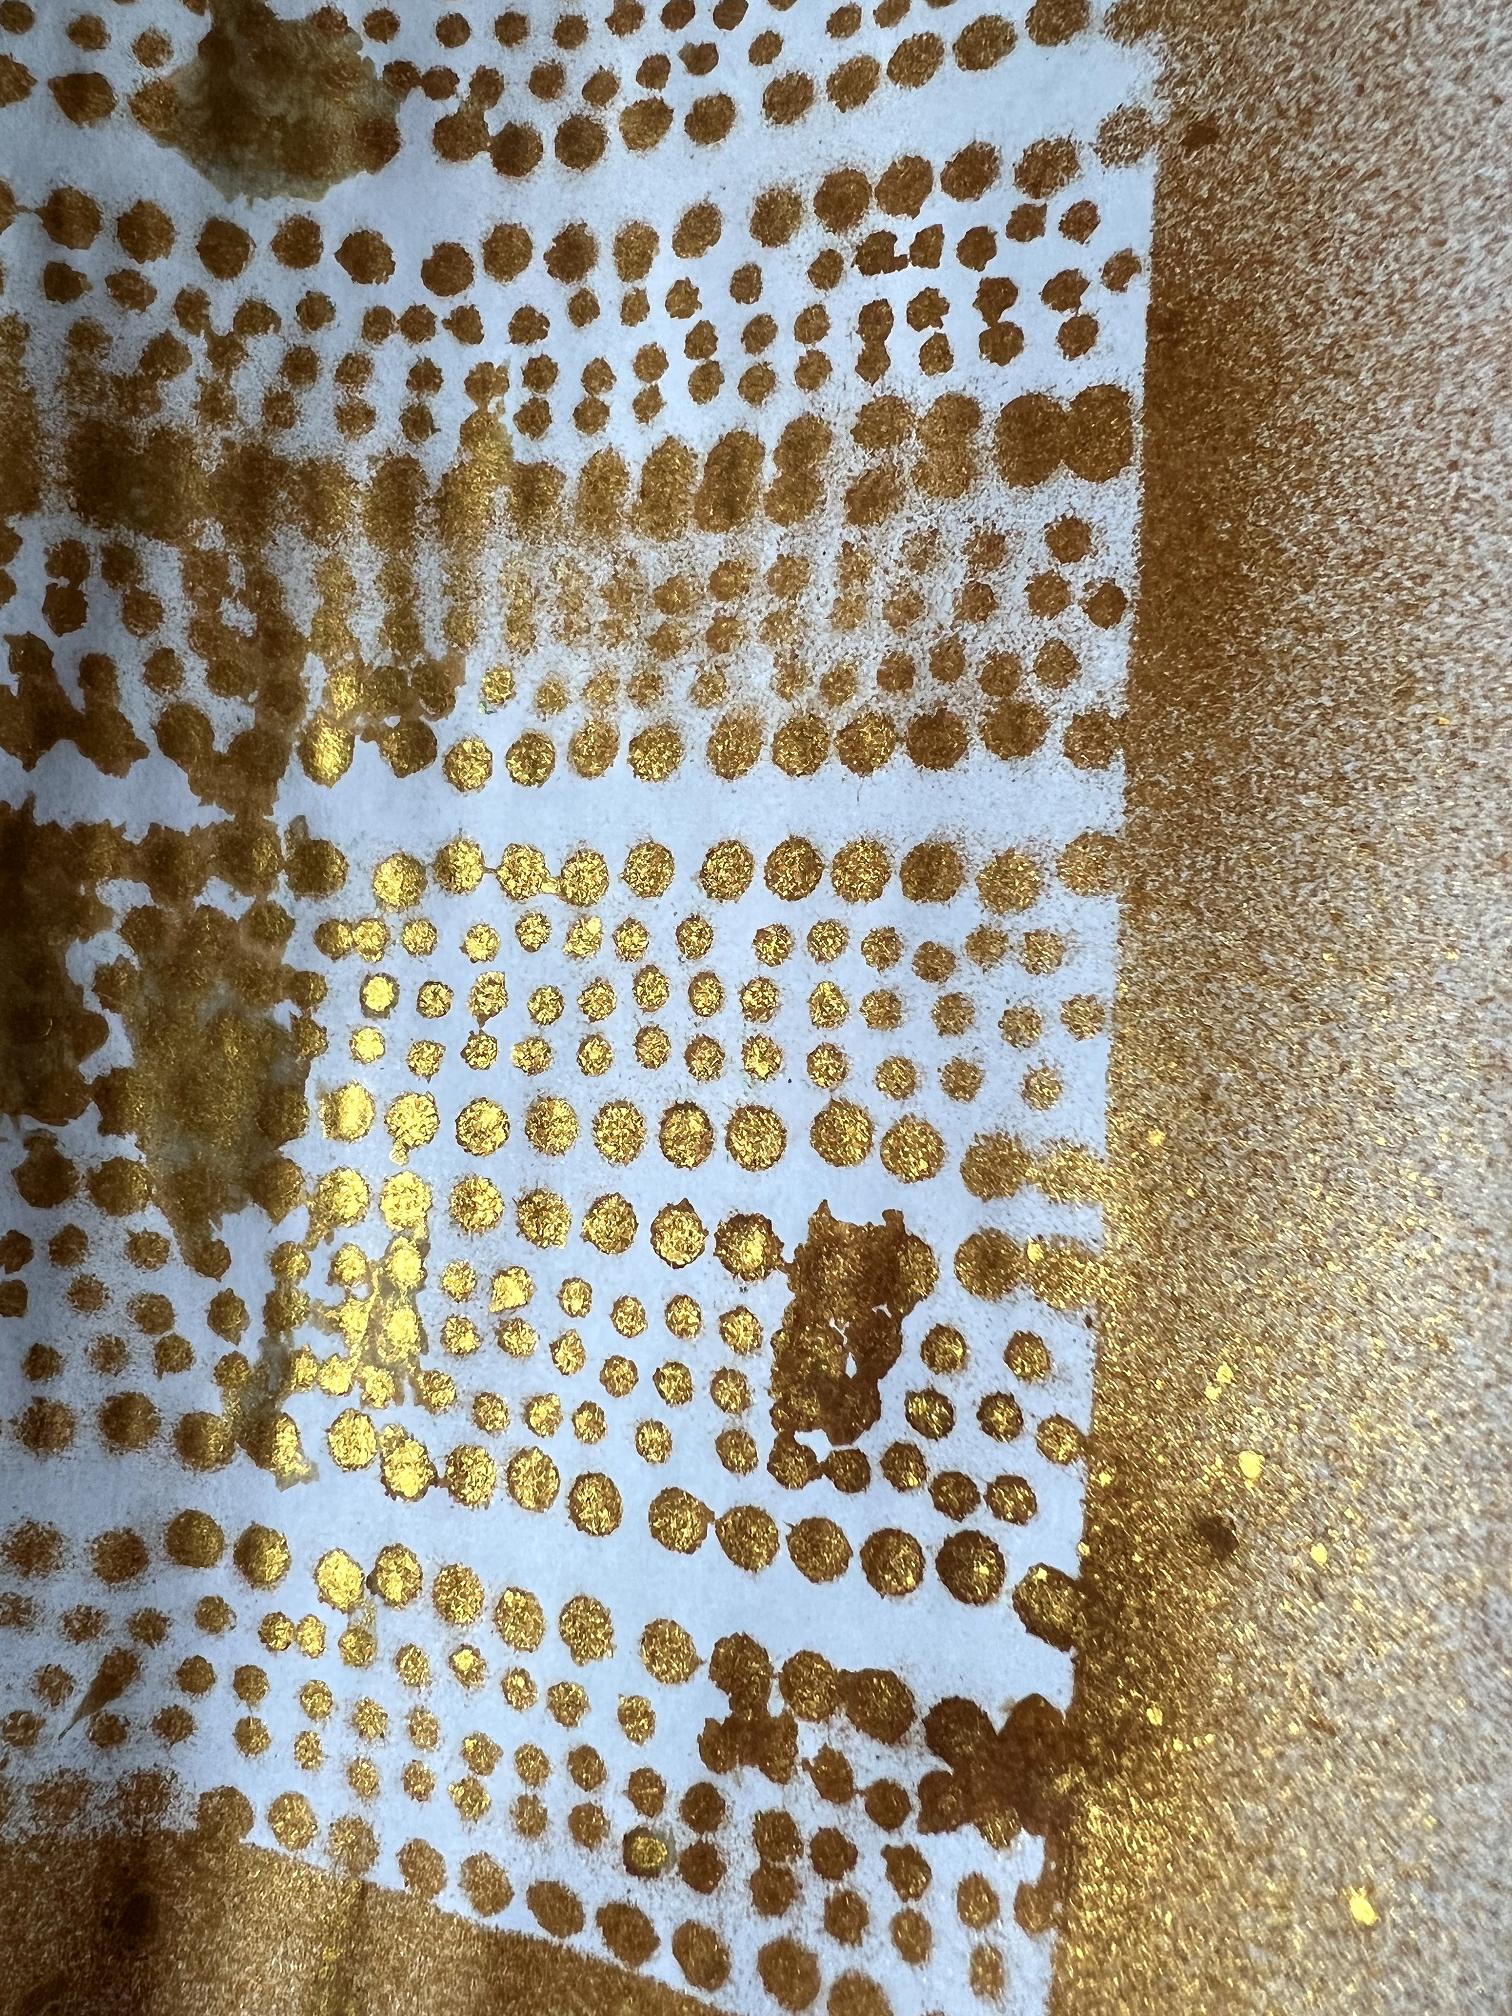
I laid each piece of pierced paper down onto a sheet of copy paper and sprayed them with Seth Apter Izinks in Honey and Goldmine. I really like how this first one has retained the existing green.
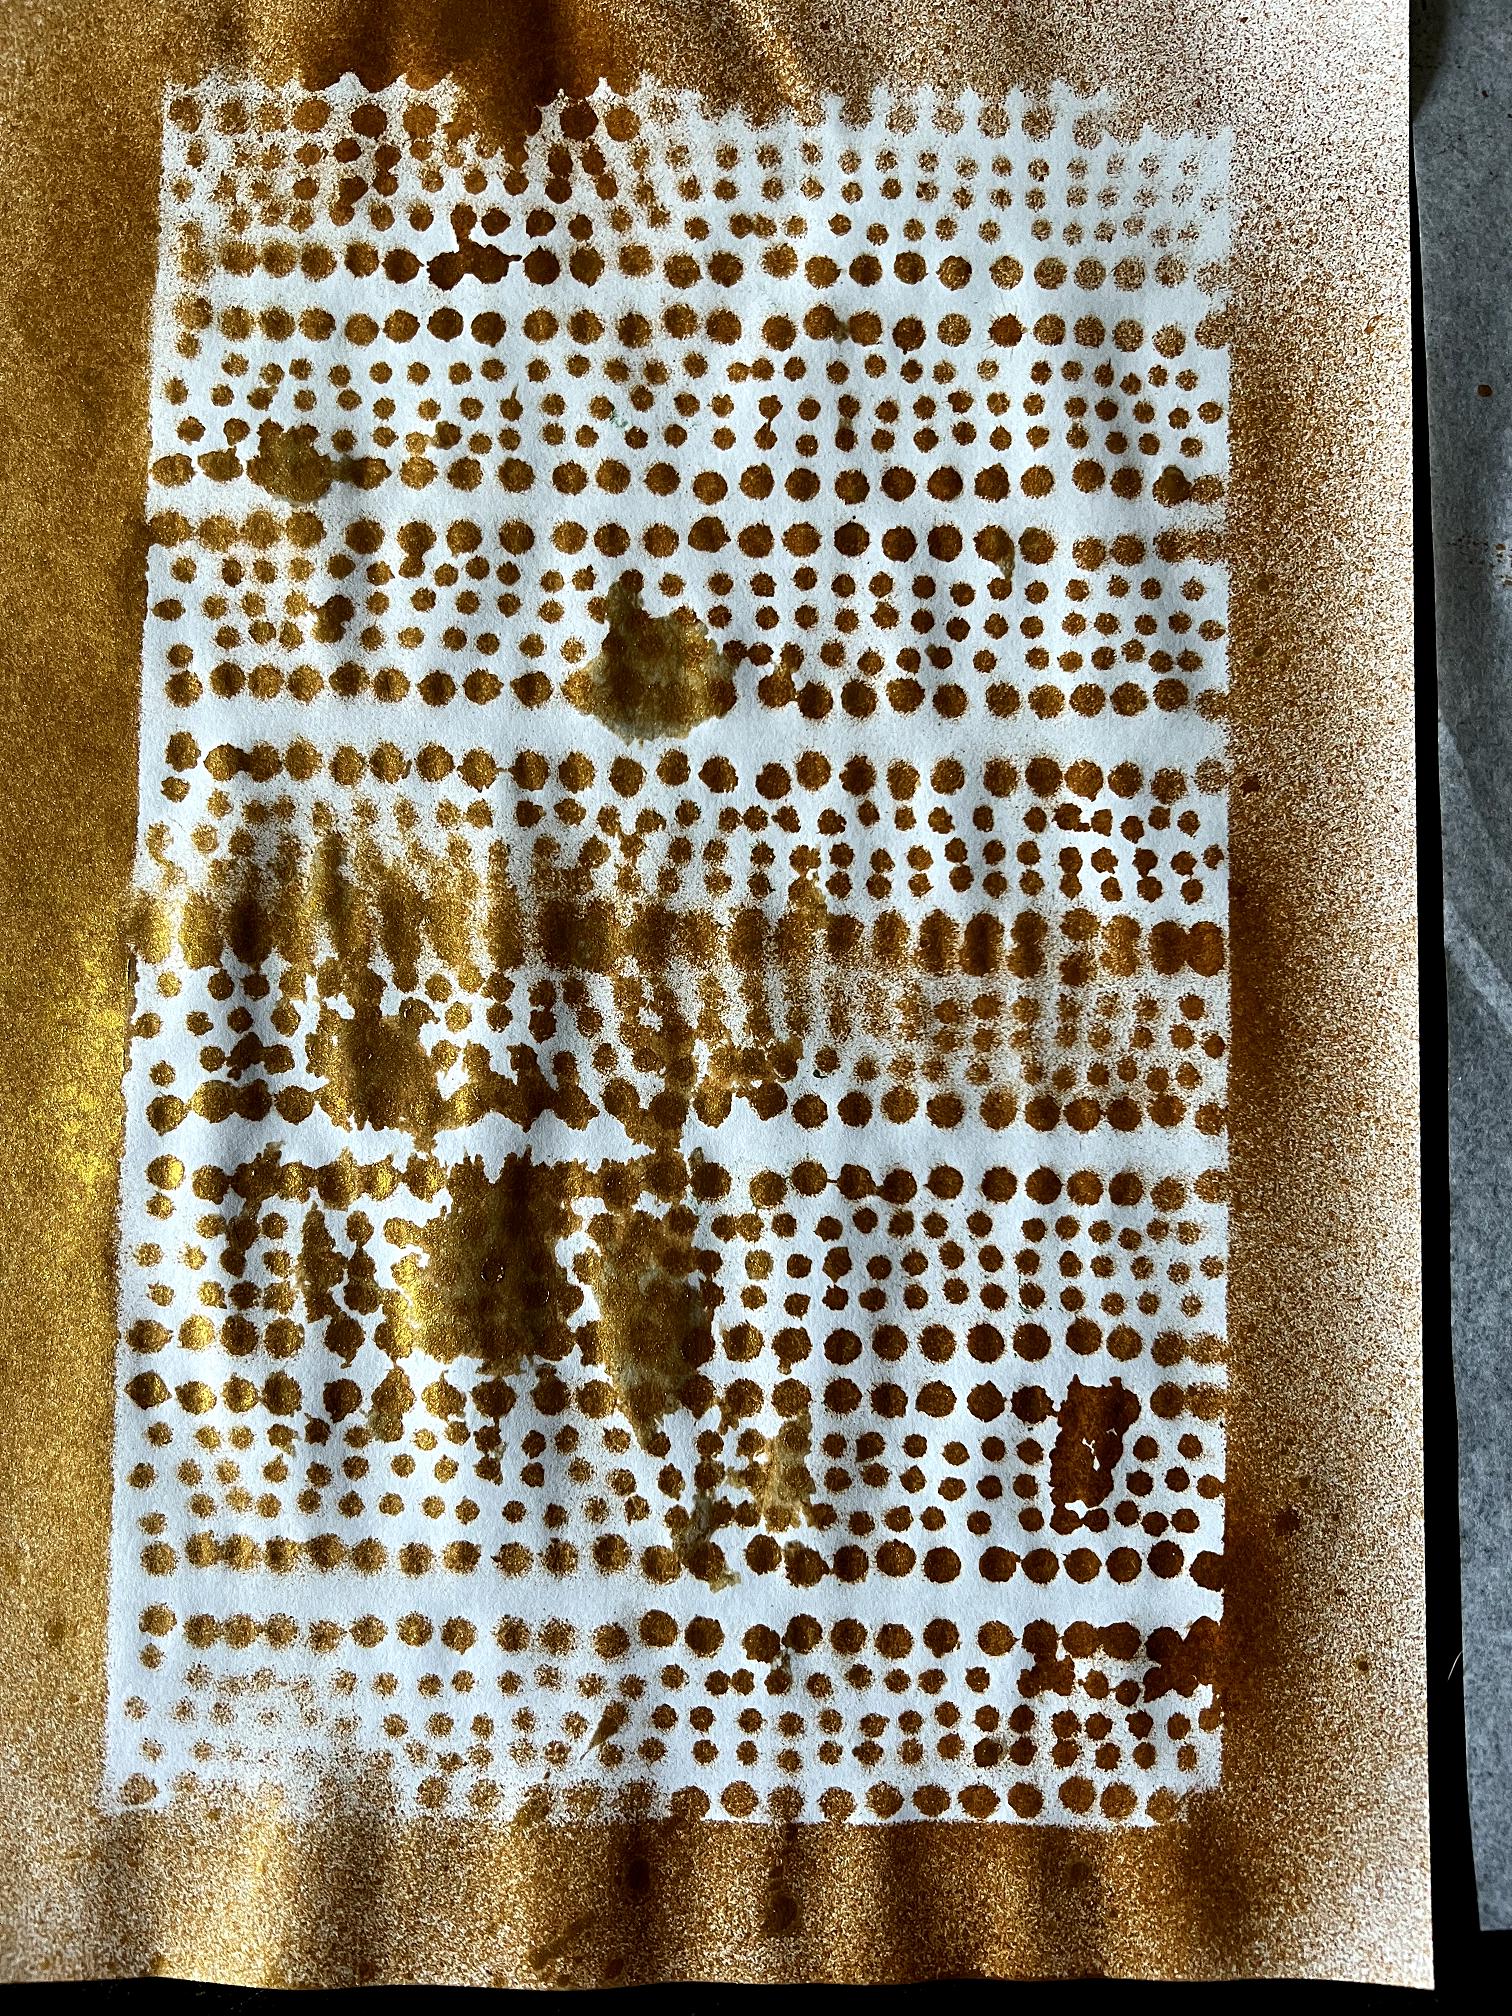
This is the backing sheet after removing the pierced paper. You can see that there has been some bleeding of the ink underneath the sheet.
I took a piece of tissue paper and blotted the ink off the pierced paper by laying it down flat on top and pressing gently.

The sprayed piece of pierced paper, ready for use.
One of the things I love about working with these pierced papers is that they tear so easily through the perforations, like postage stamps. This produces a lovely irregular edge, perfect for collage. The holes show the underlying layers.
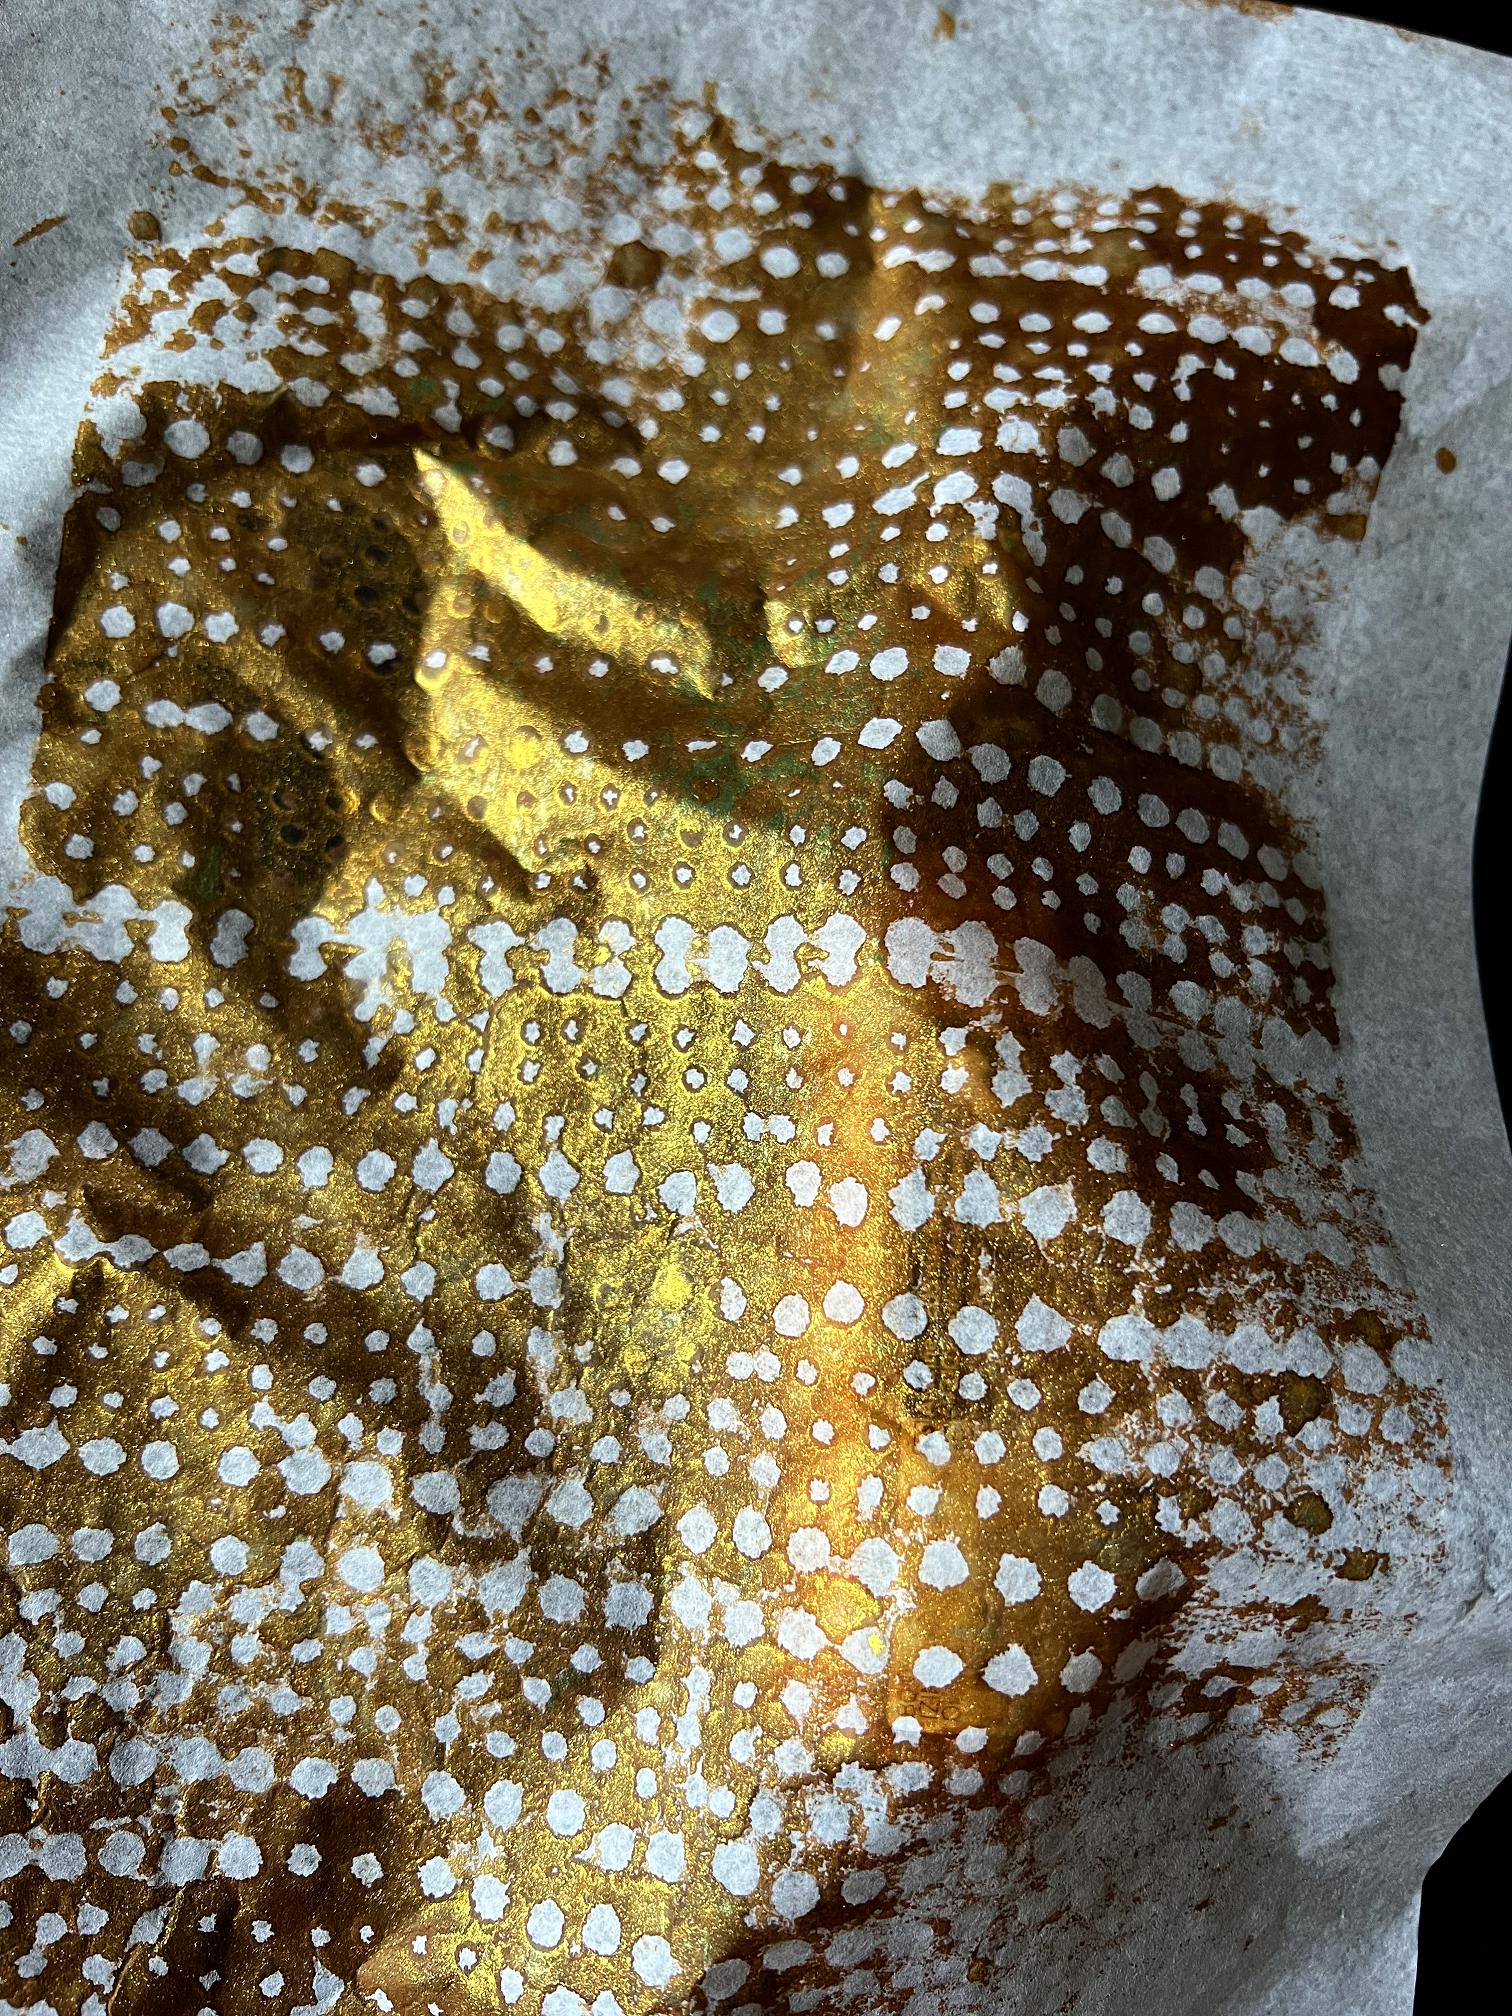
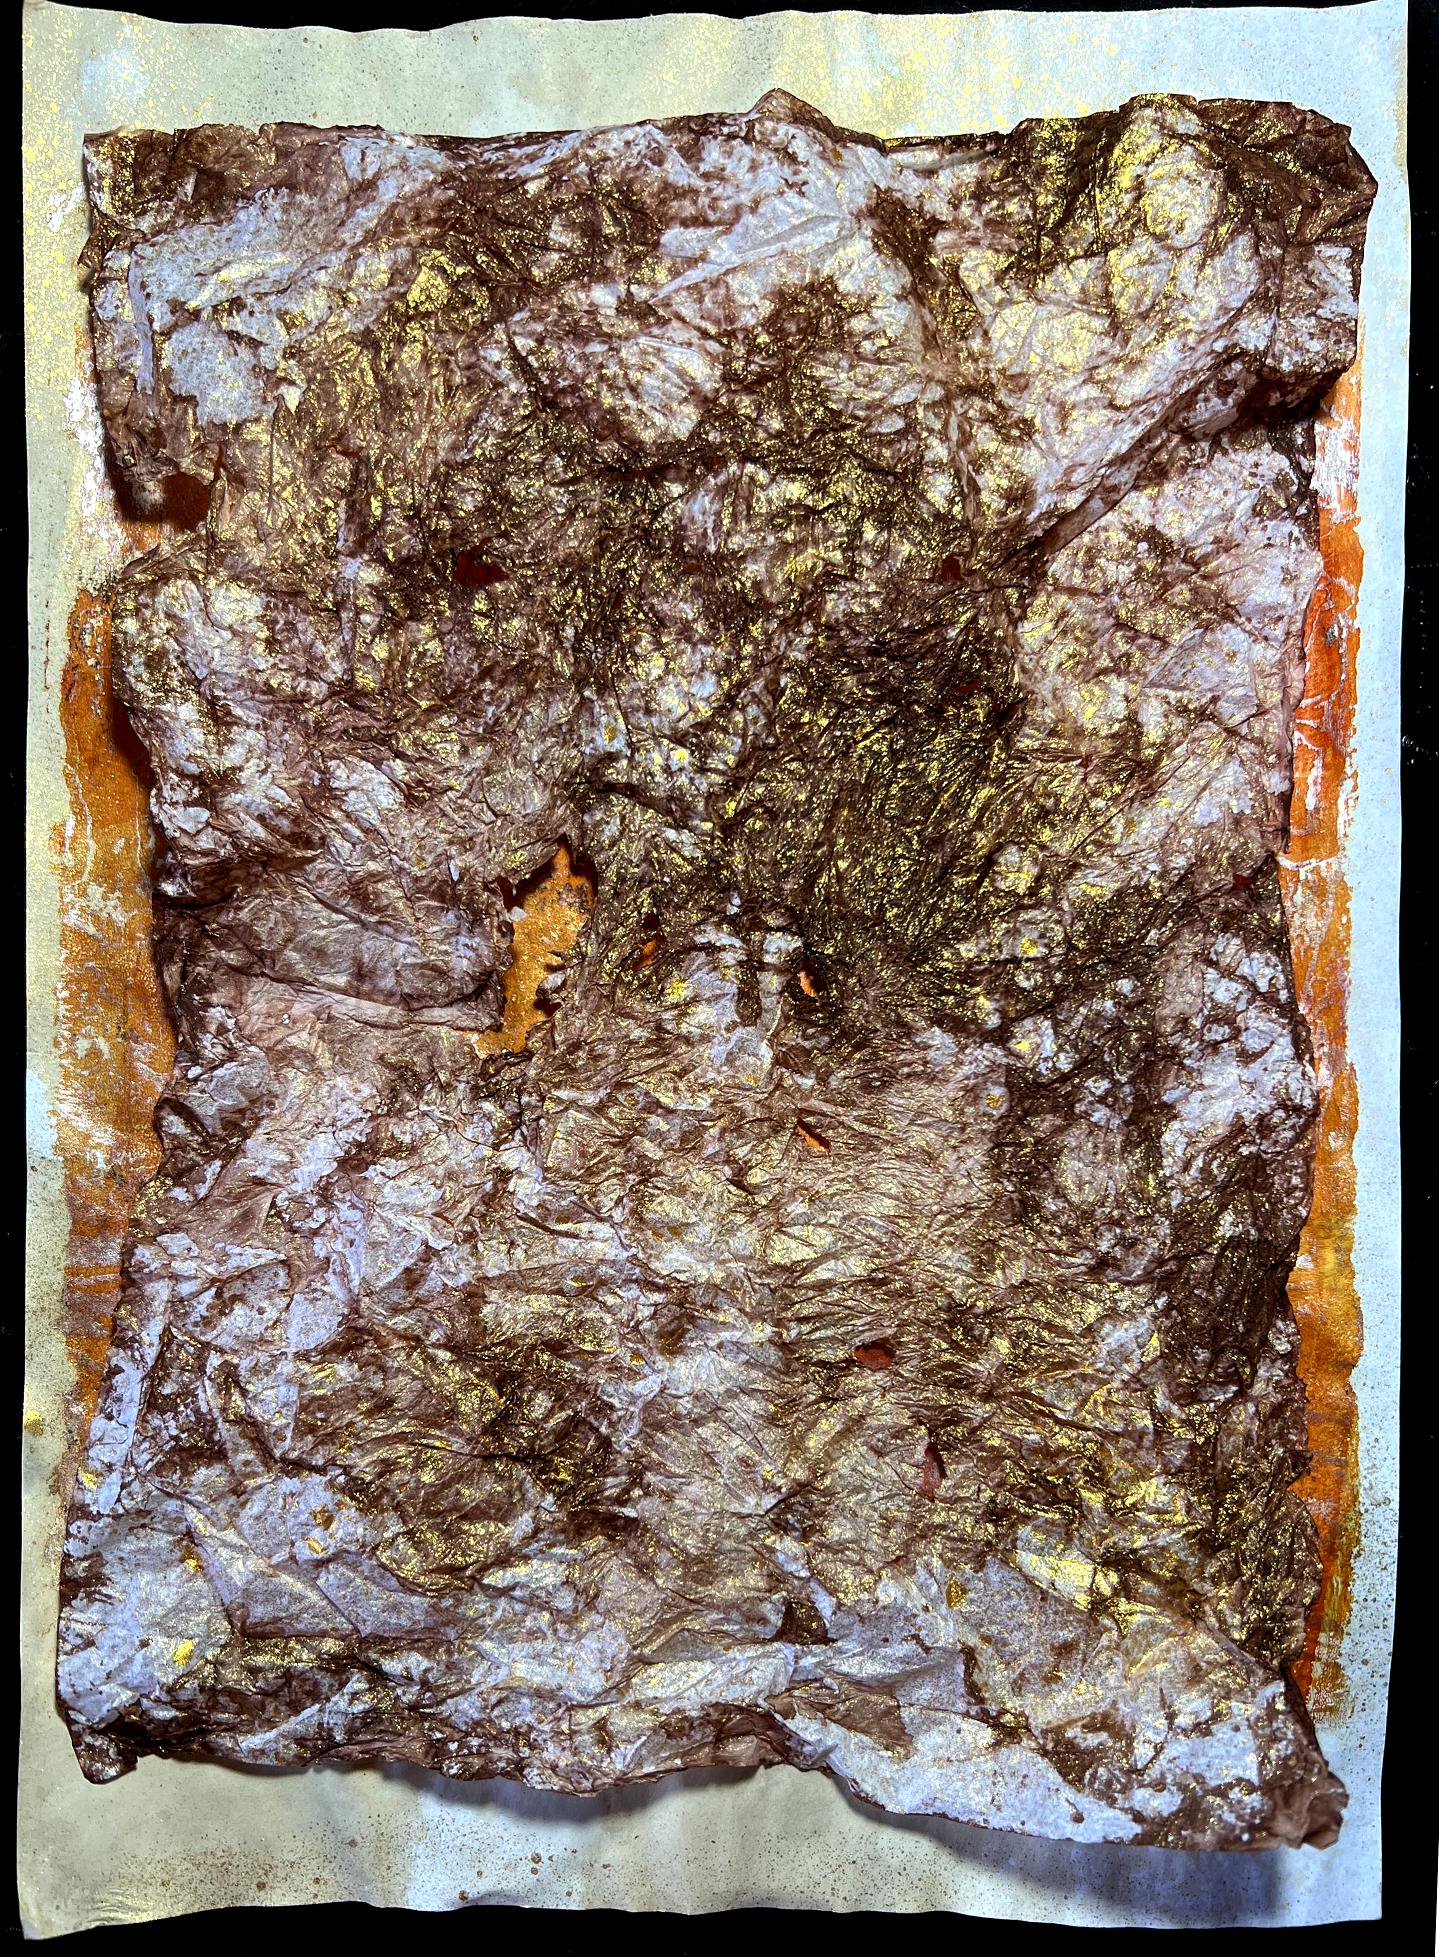
When I photographed all these results with the papers lying flat, it was impossible to see the gorgeous sheen of the gold of the Goldmine Izink. I propped the papers up over a bottle of the ink so that they would catch the light. Here’s the backing sheet.
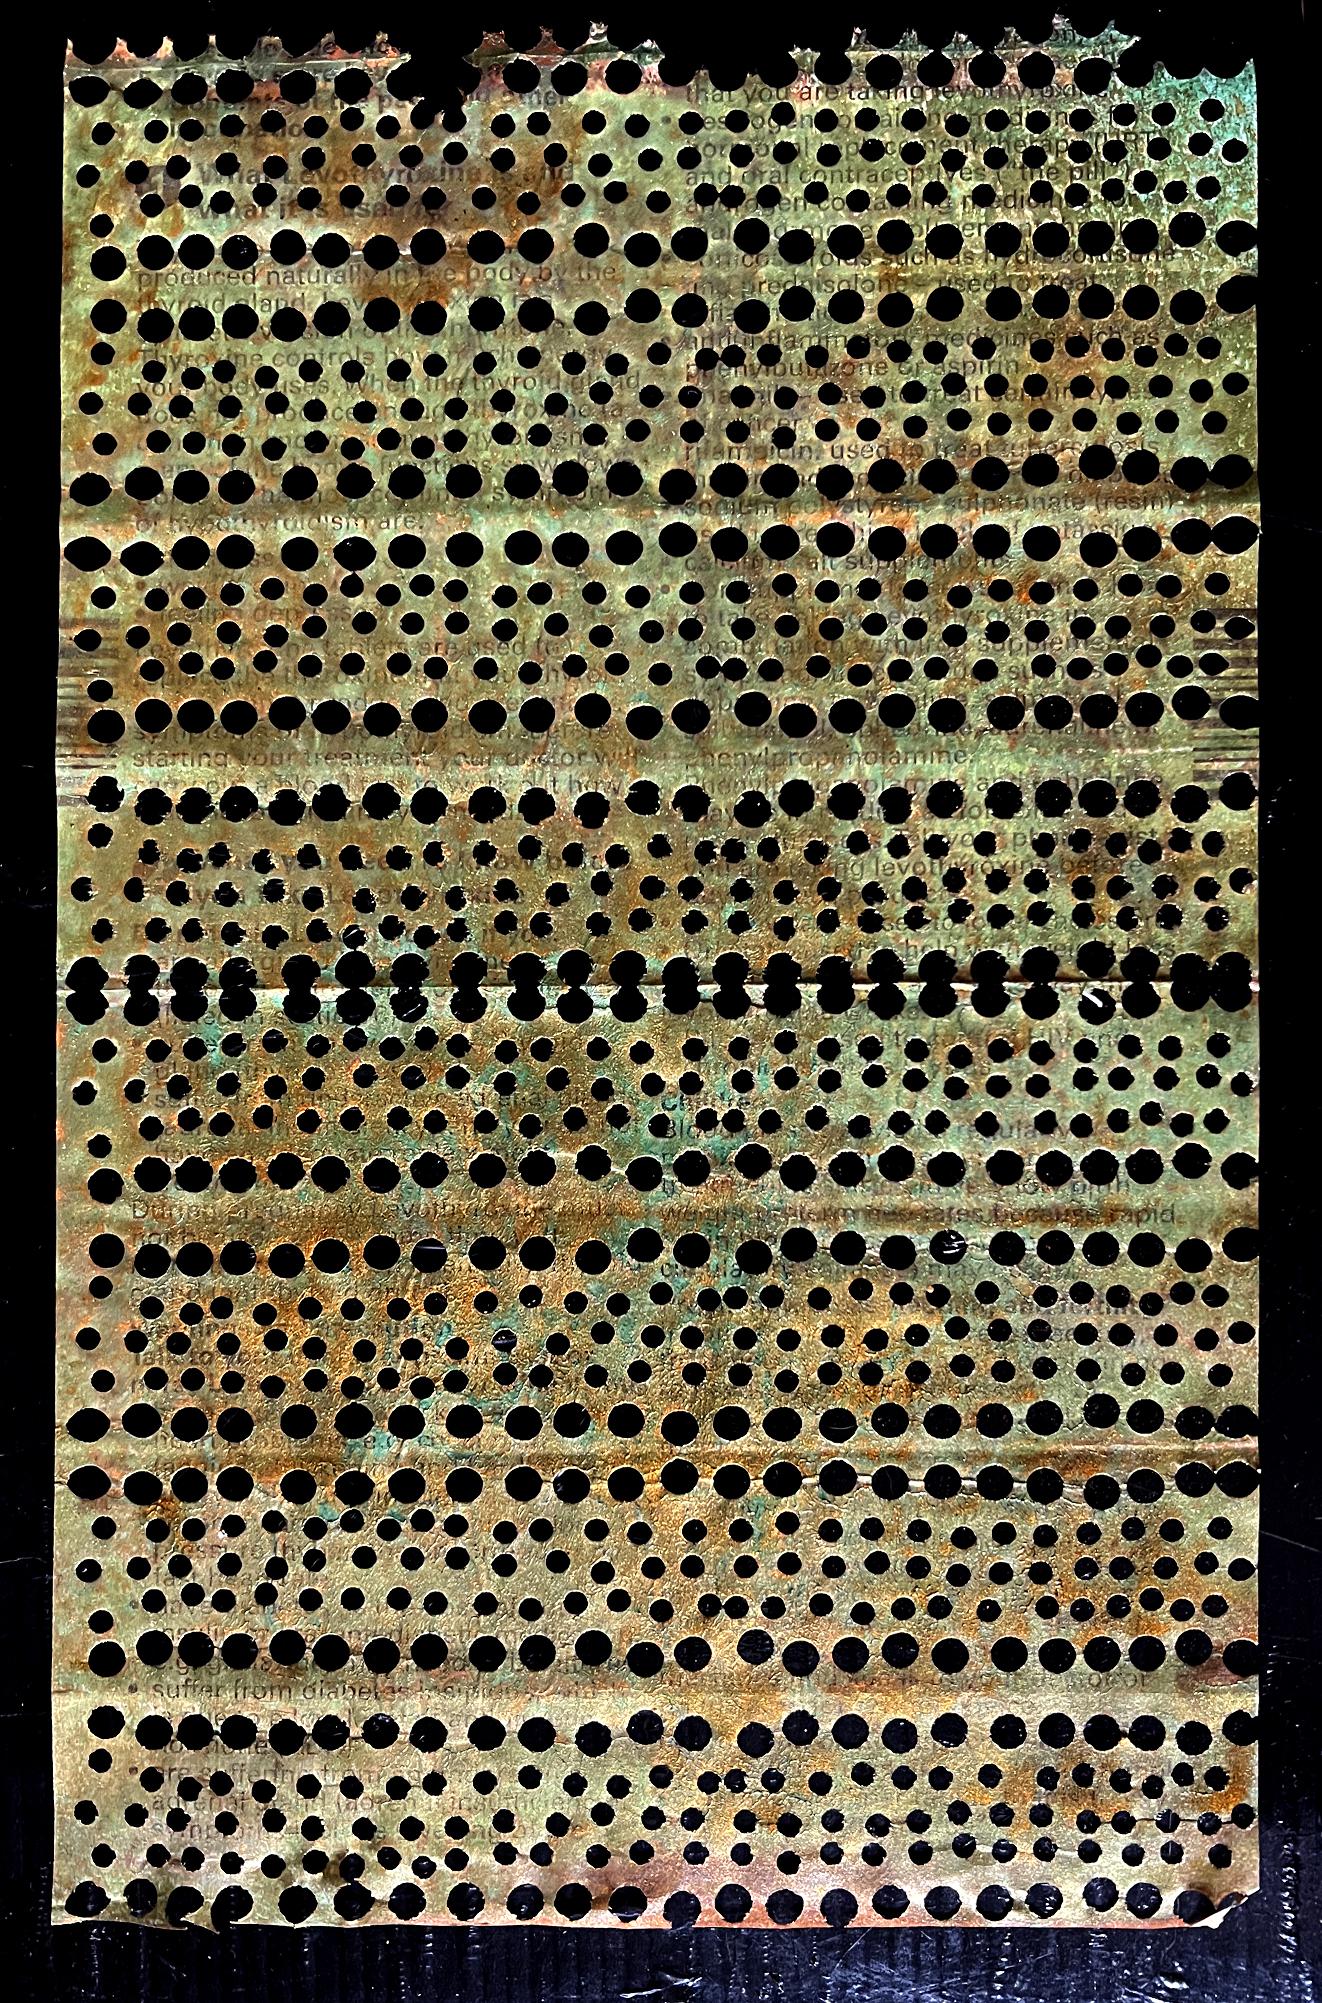
This green and gold one is absolutely yummy!

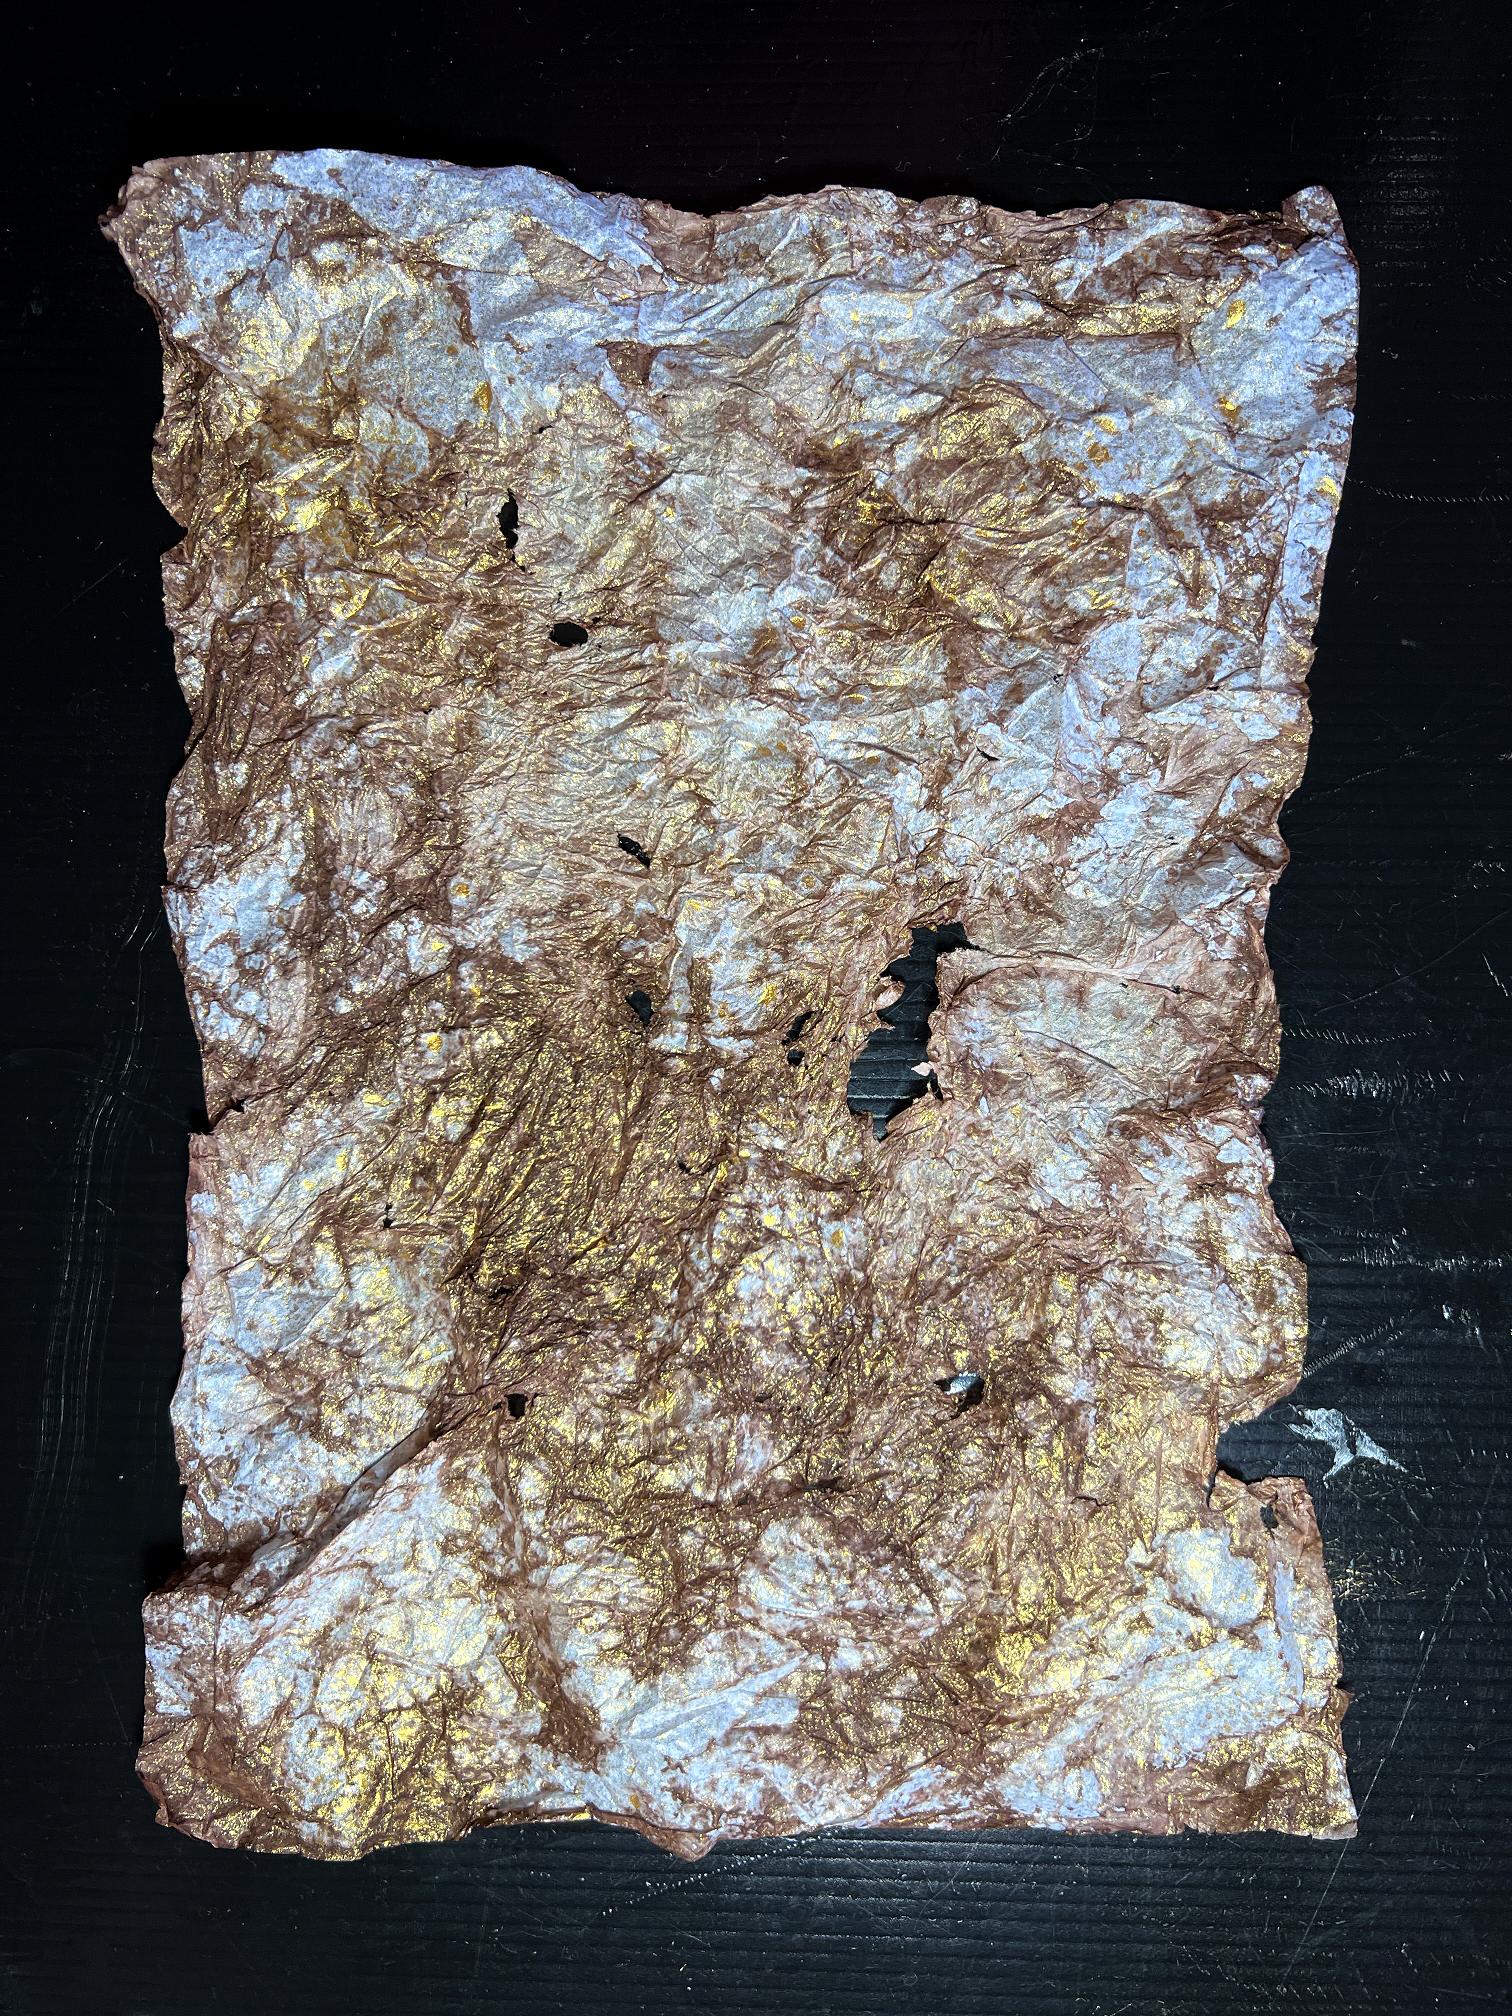
Finally, the tissue paper blot-off sheet. That gold spray is really gold!
Seth Apter’s Izinks are dye based, so they are permanent when dry. This means you can add further water-based media and they won’t reactivate what is already there. I suspect that they would be resisted by the gold, but I have yet to try this.
Back to gel printing
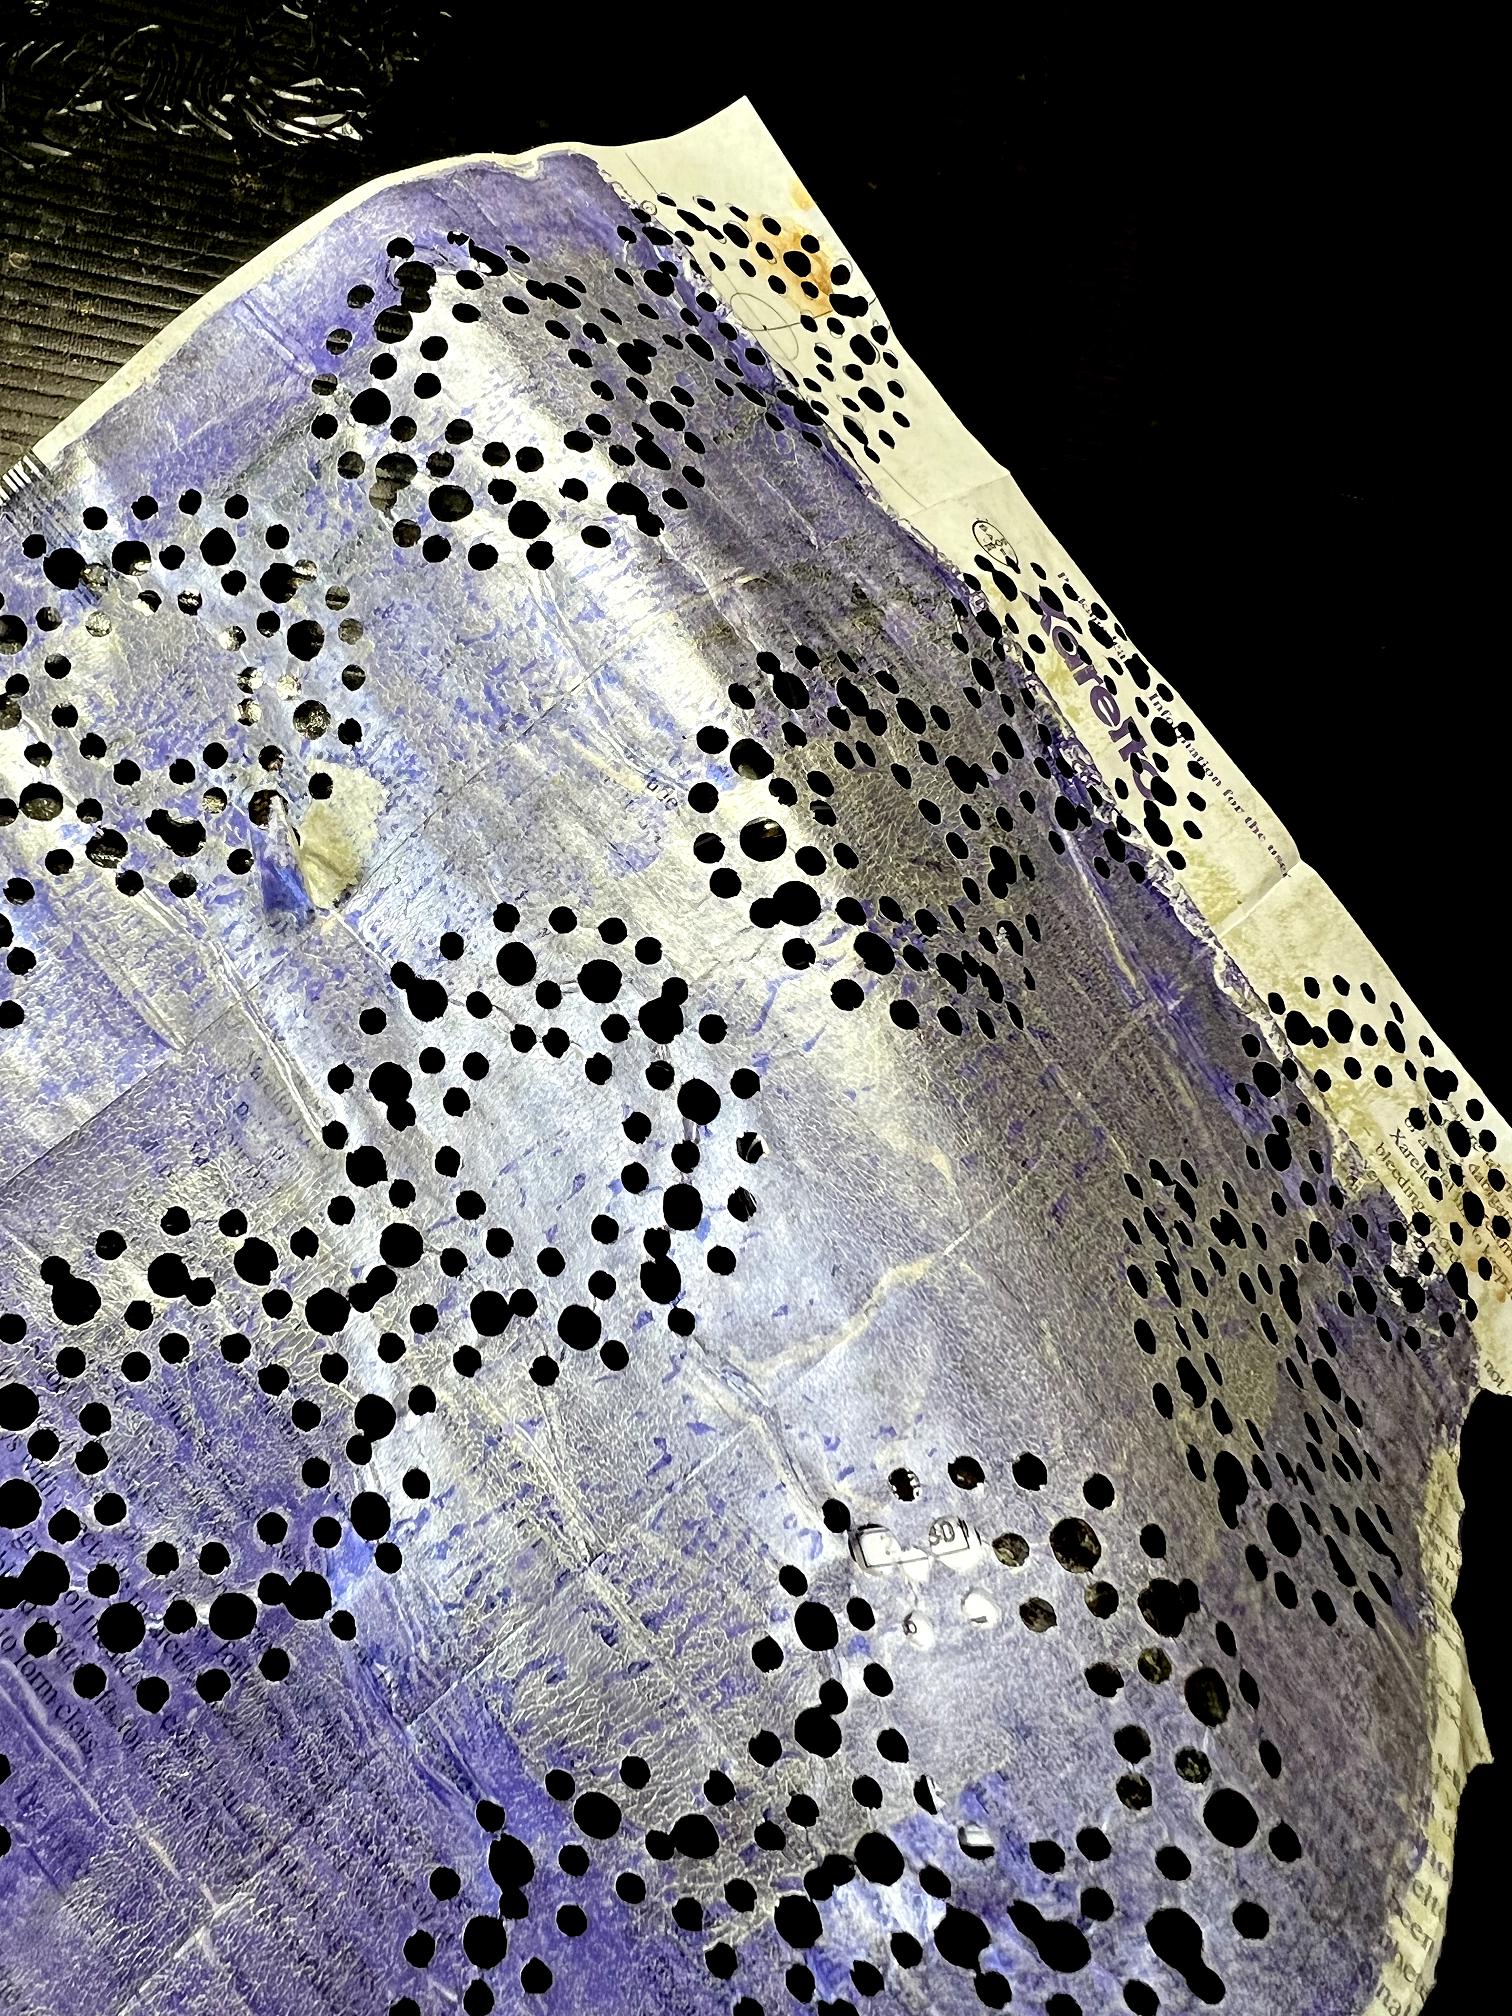
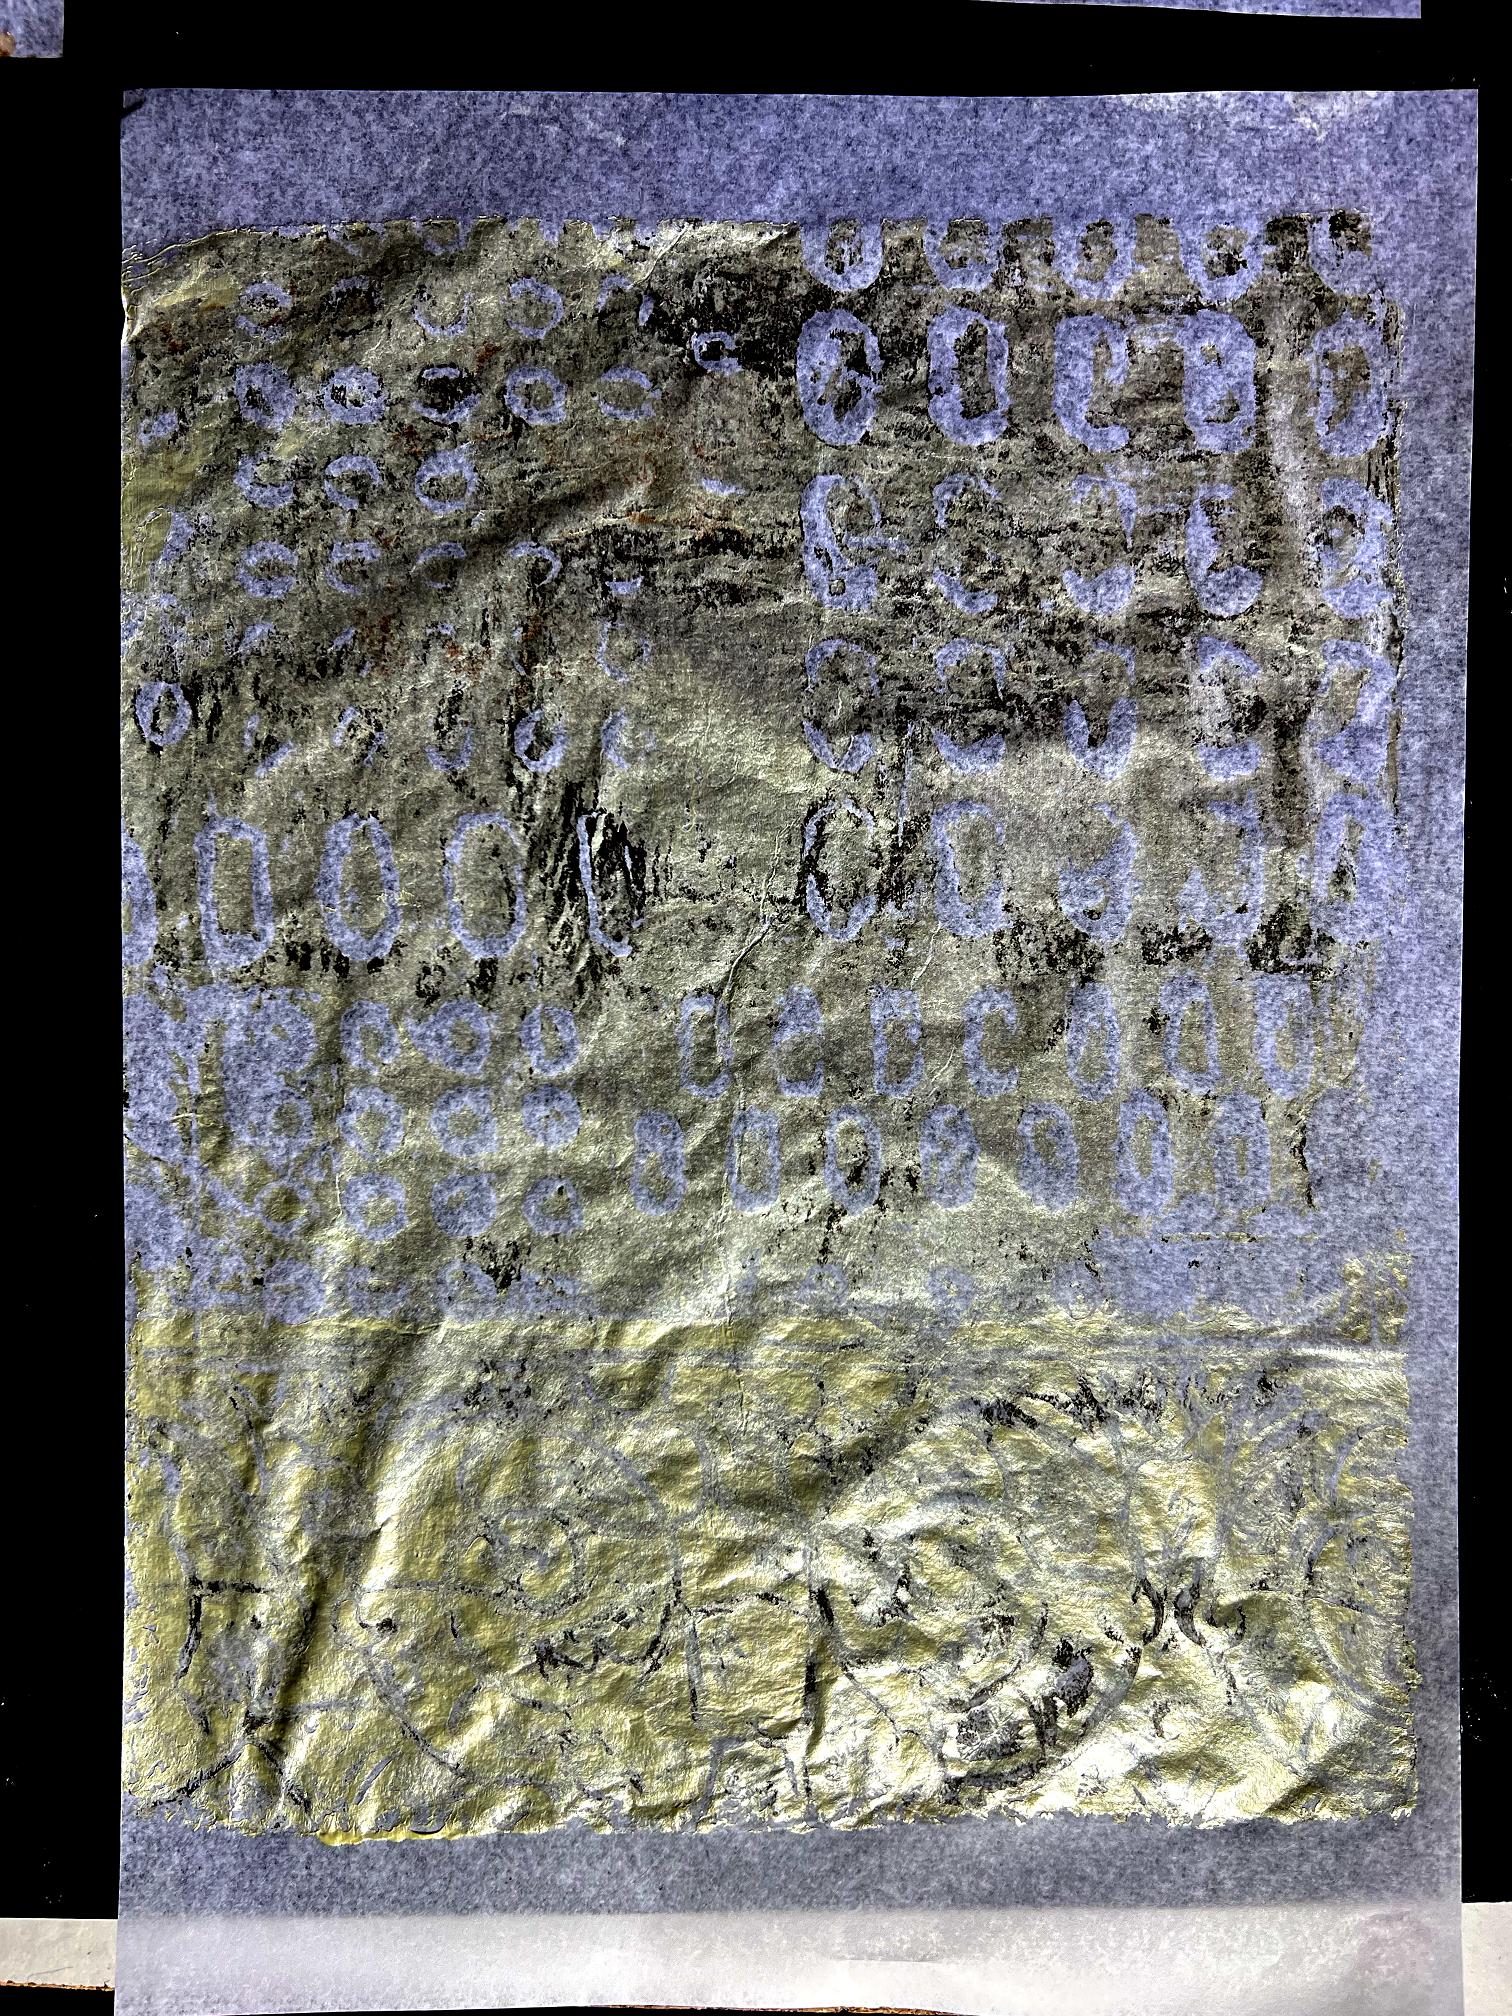
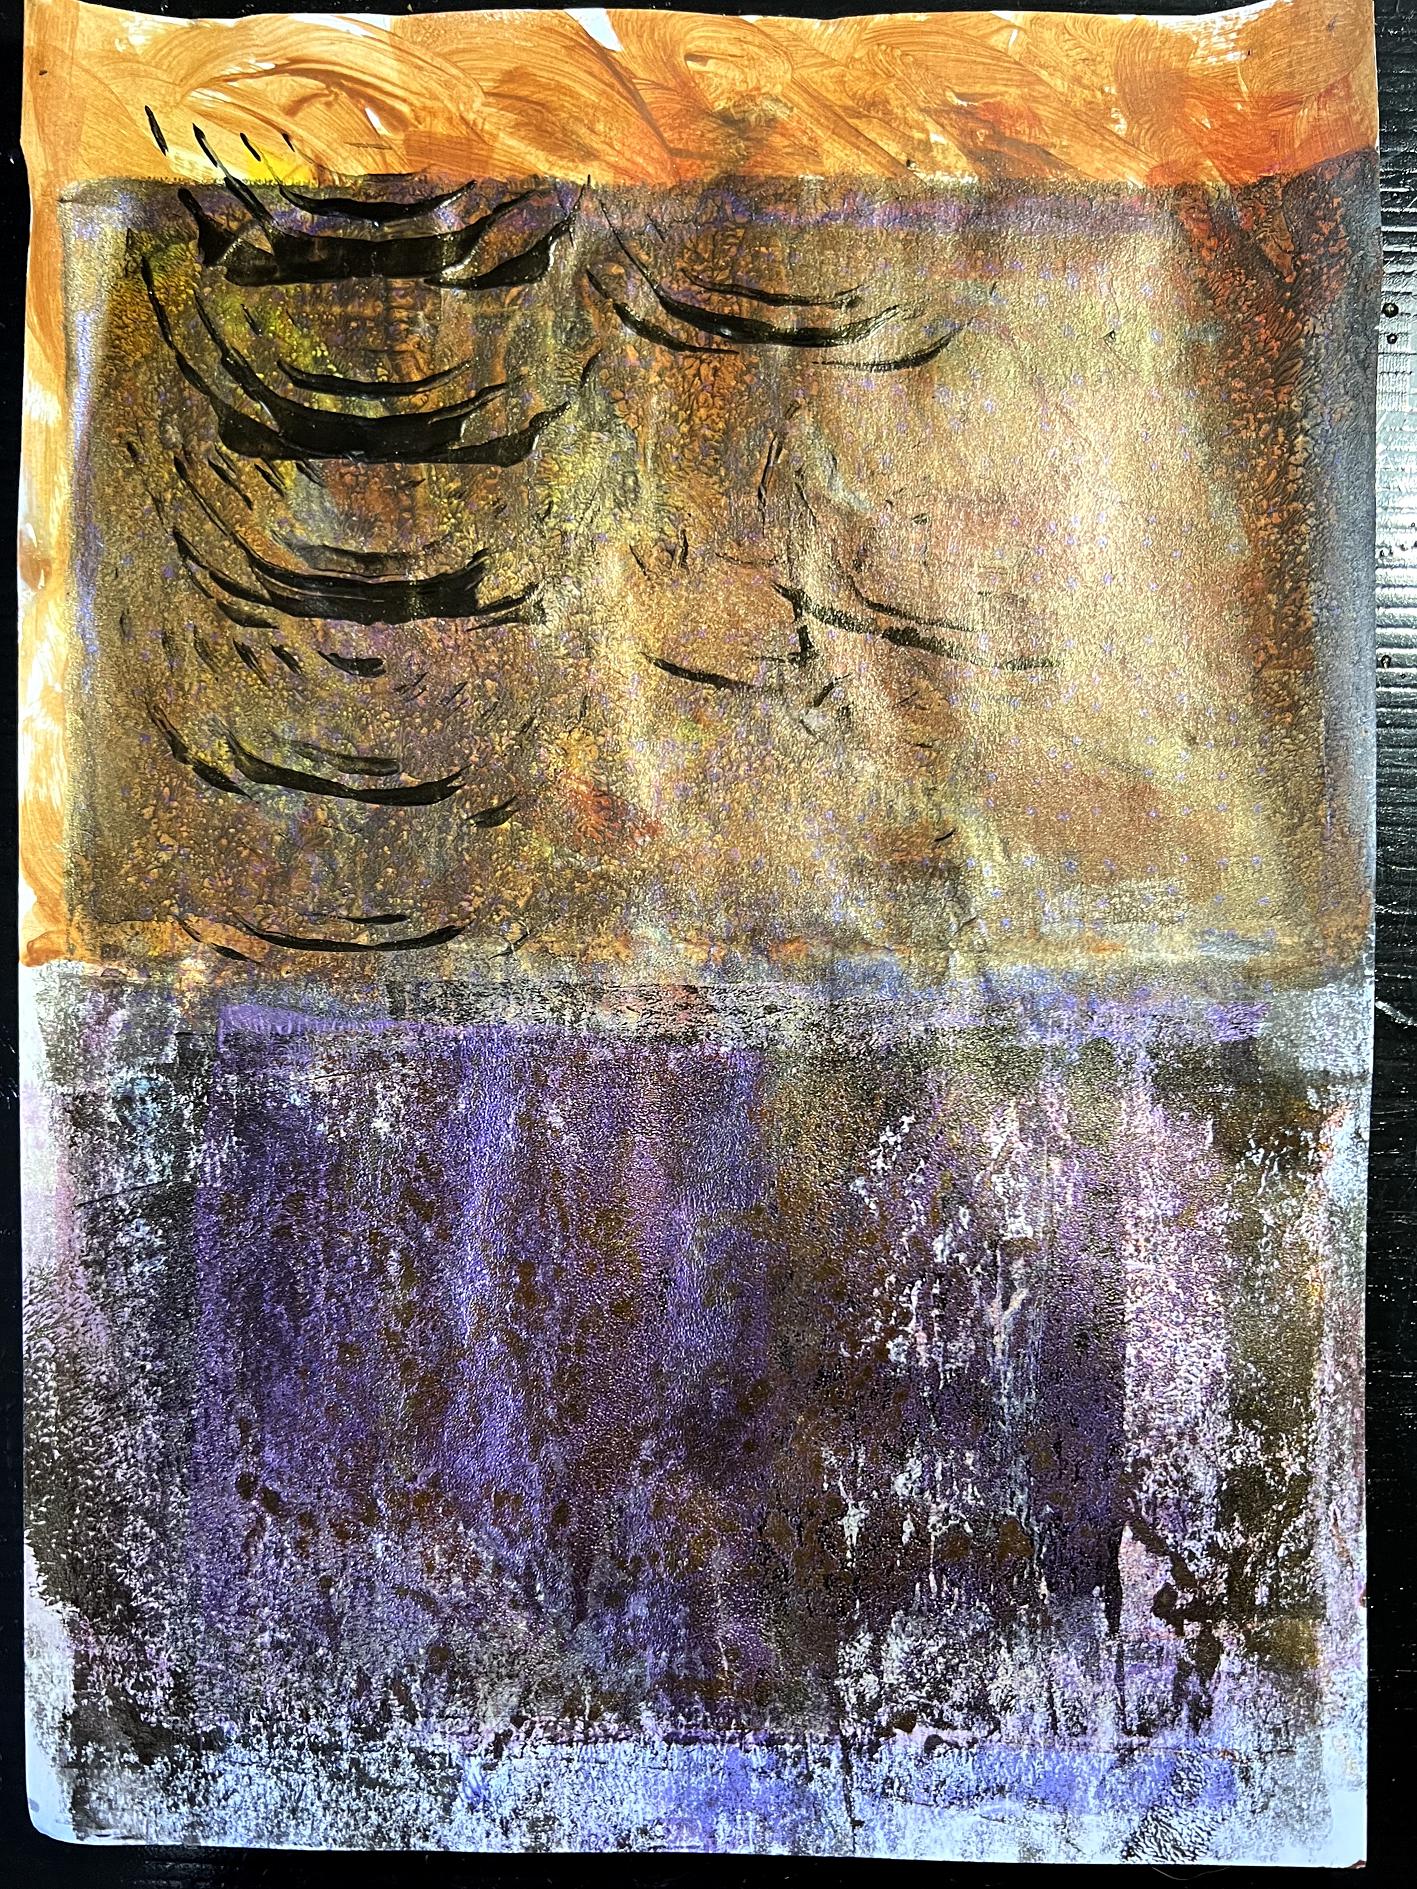
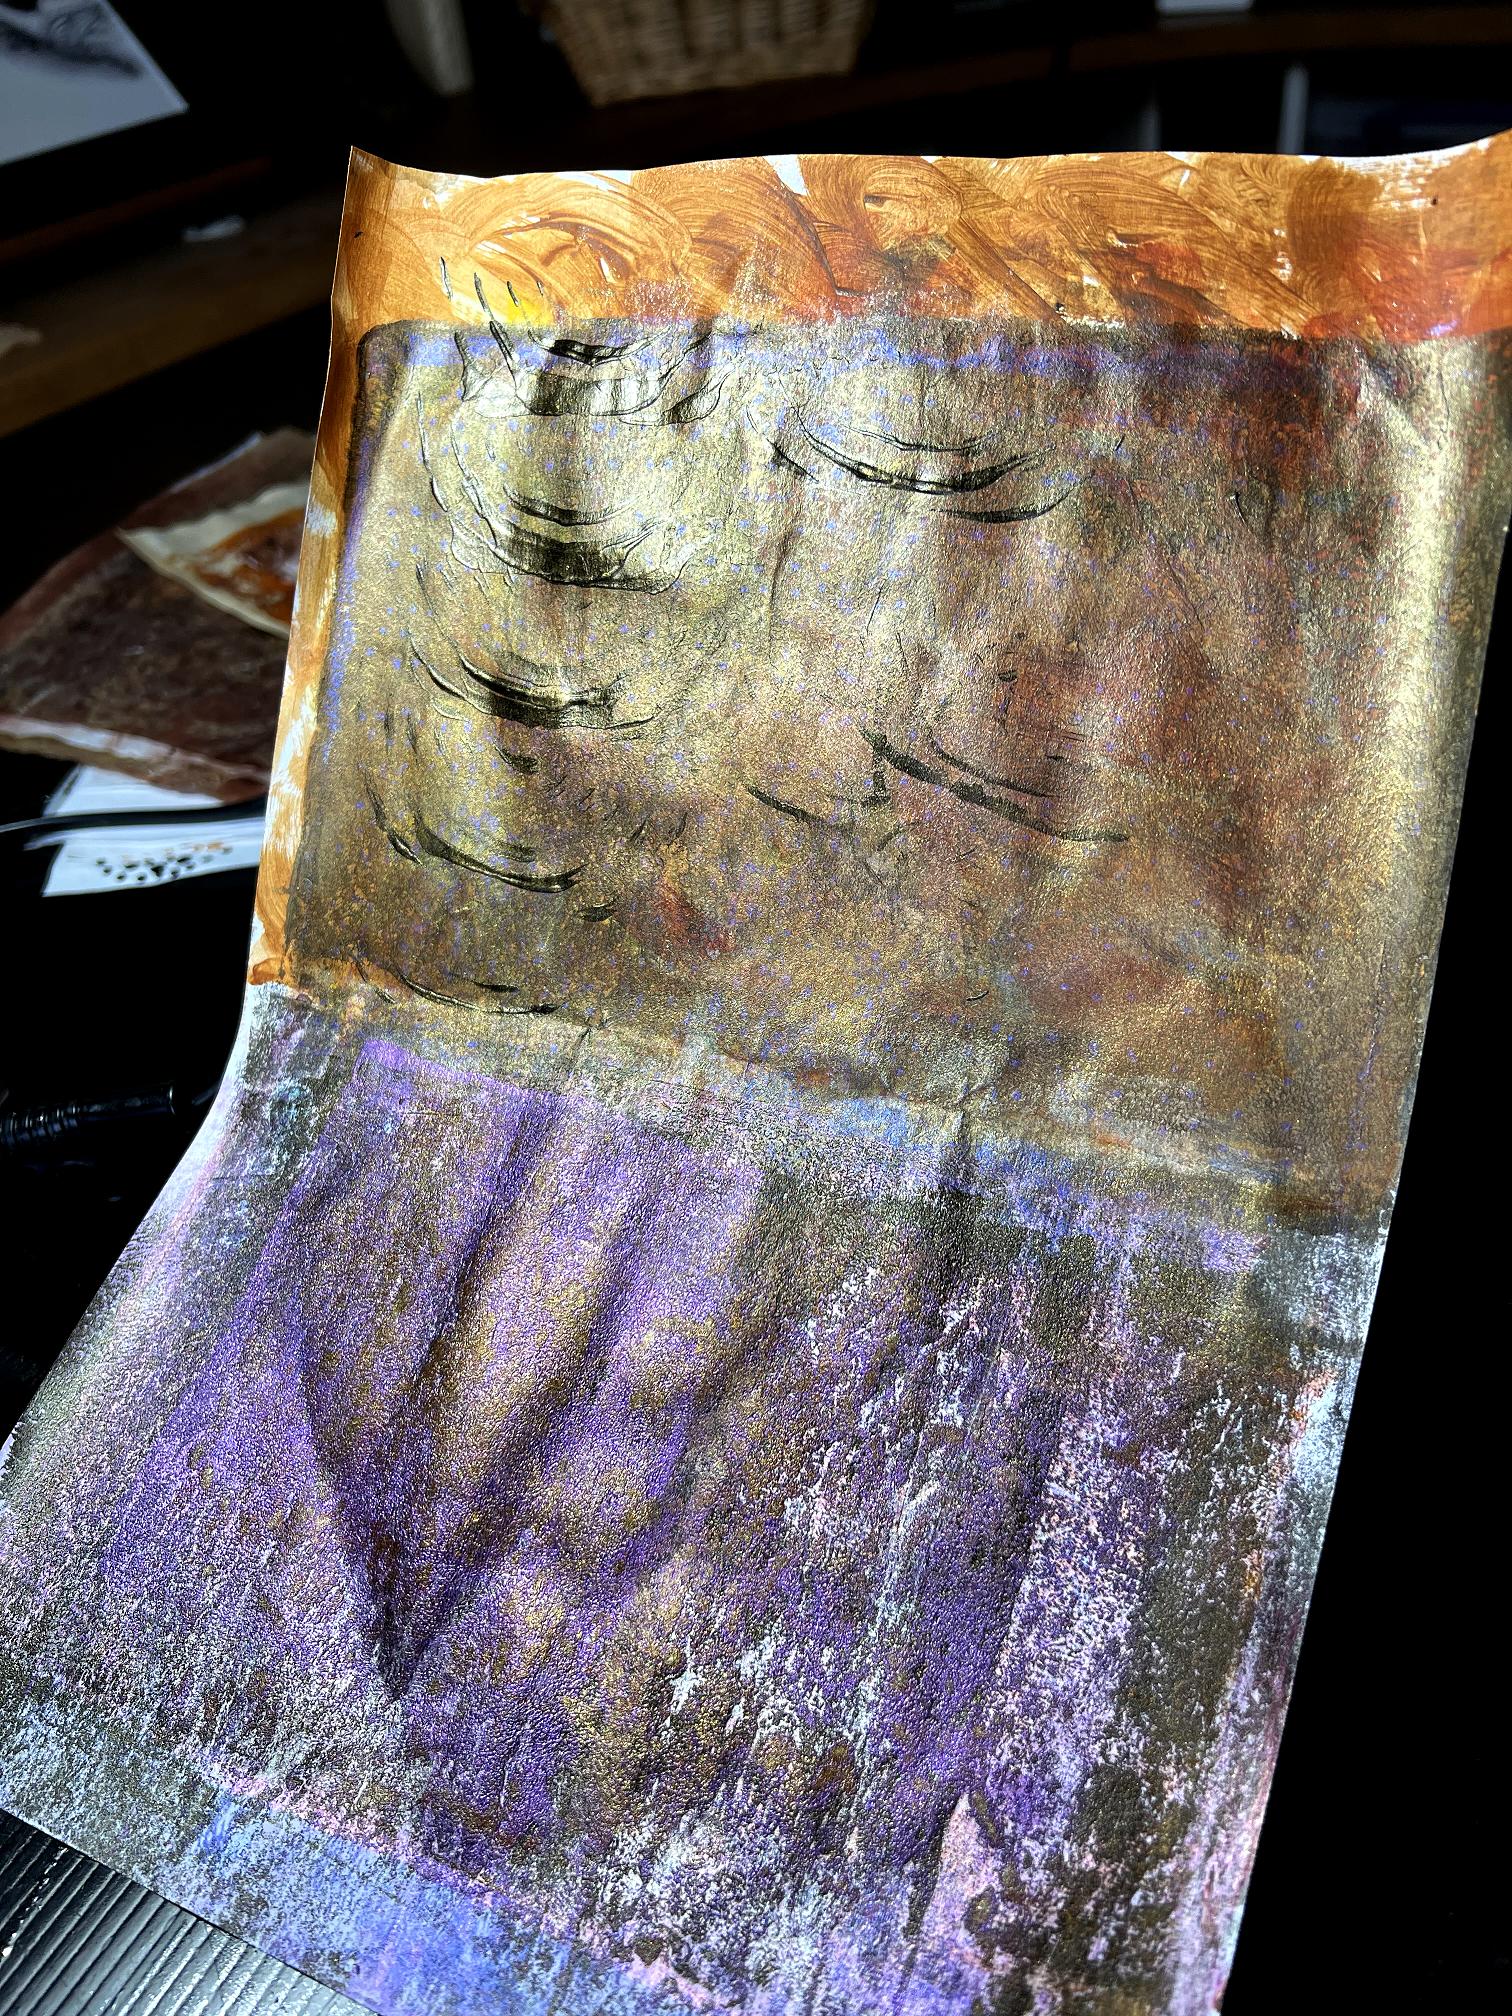
This is the purple-blue pierced paper, using the paper with circles of punched holes, and using one of my new paints. After I’d done it, I cleaned off the brayer on the top part, after I’d used it with Arteza Pearl Banana Yellow (see below). Both paints on this piece are pearlised.

Here it is, propped up a bit to catch the light, so that you can see the shine. There’s a small rip in the surface but I can repair this.
 Using texture makers
I have been wanting to try more texture makers on the gel plate for ages, and there’s always something else to do first! Today I finally got round to trying the texture plate I made recently, out of the empty medication blister packs.
I brayered down some Arteza Pearl Banana Yellow, one of my favourite paints, which is a pale yellowy-cream iridescent paint, and pressed the plate down firmly to make good contact with the squishy gel plate. Not all the pill blisters are the same height and I wanted to make a good impression.
I removed it, and then I took one of my new sink mats, and pressed it down on the bottom part of the gel plate where the texture plate had not reached, and leaving it in place, pressed down a sheet of tissue paper. The mat is quite thick so I had to go carefully, pressing it into the holes in the mat, trying to get up as much paint as possible.
This was the result. Far from overwhelming.
This is the ghost print – the print you take after removing the texture-maker.
Again, far from great, but slightly better.
I made the mistake of using a pale coloured paint on white paper. I would have done far better to choose a dark background if I was going to use this paint, or use a dark paint against the white. I needed to try to remedy it. I thought that coffee staining them might help.
It didn’t.
I shall definitely be using the blister pack texture plate again, with a more sensible choice of media. At least these attempts prove that the blister pack texture plate does work. I didn’t fill the board with the blister packs until I was sure it would, so now I can fill up the rest of the space.
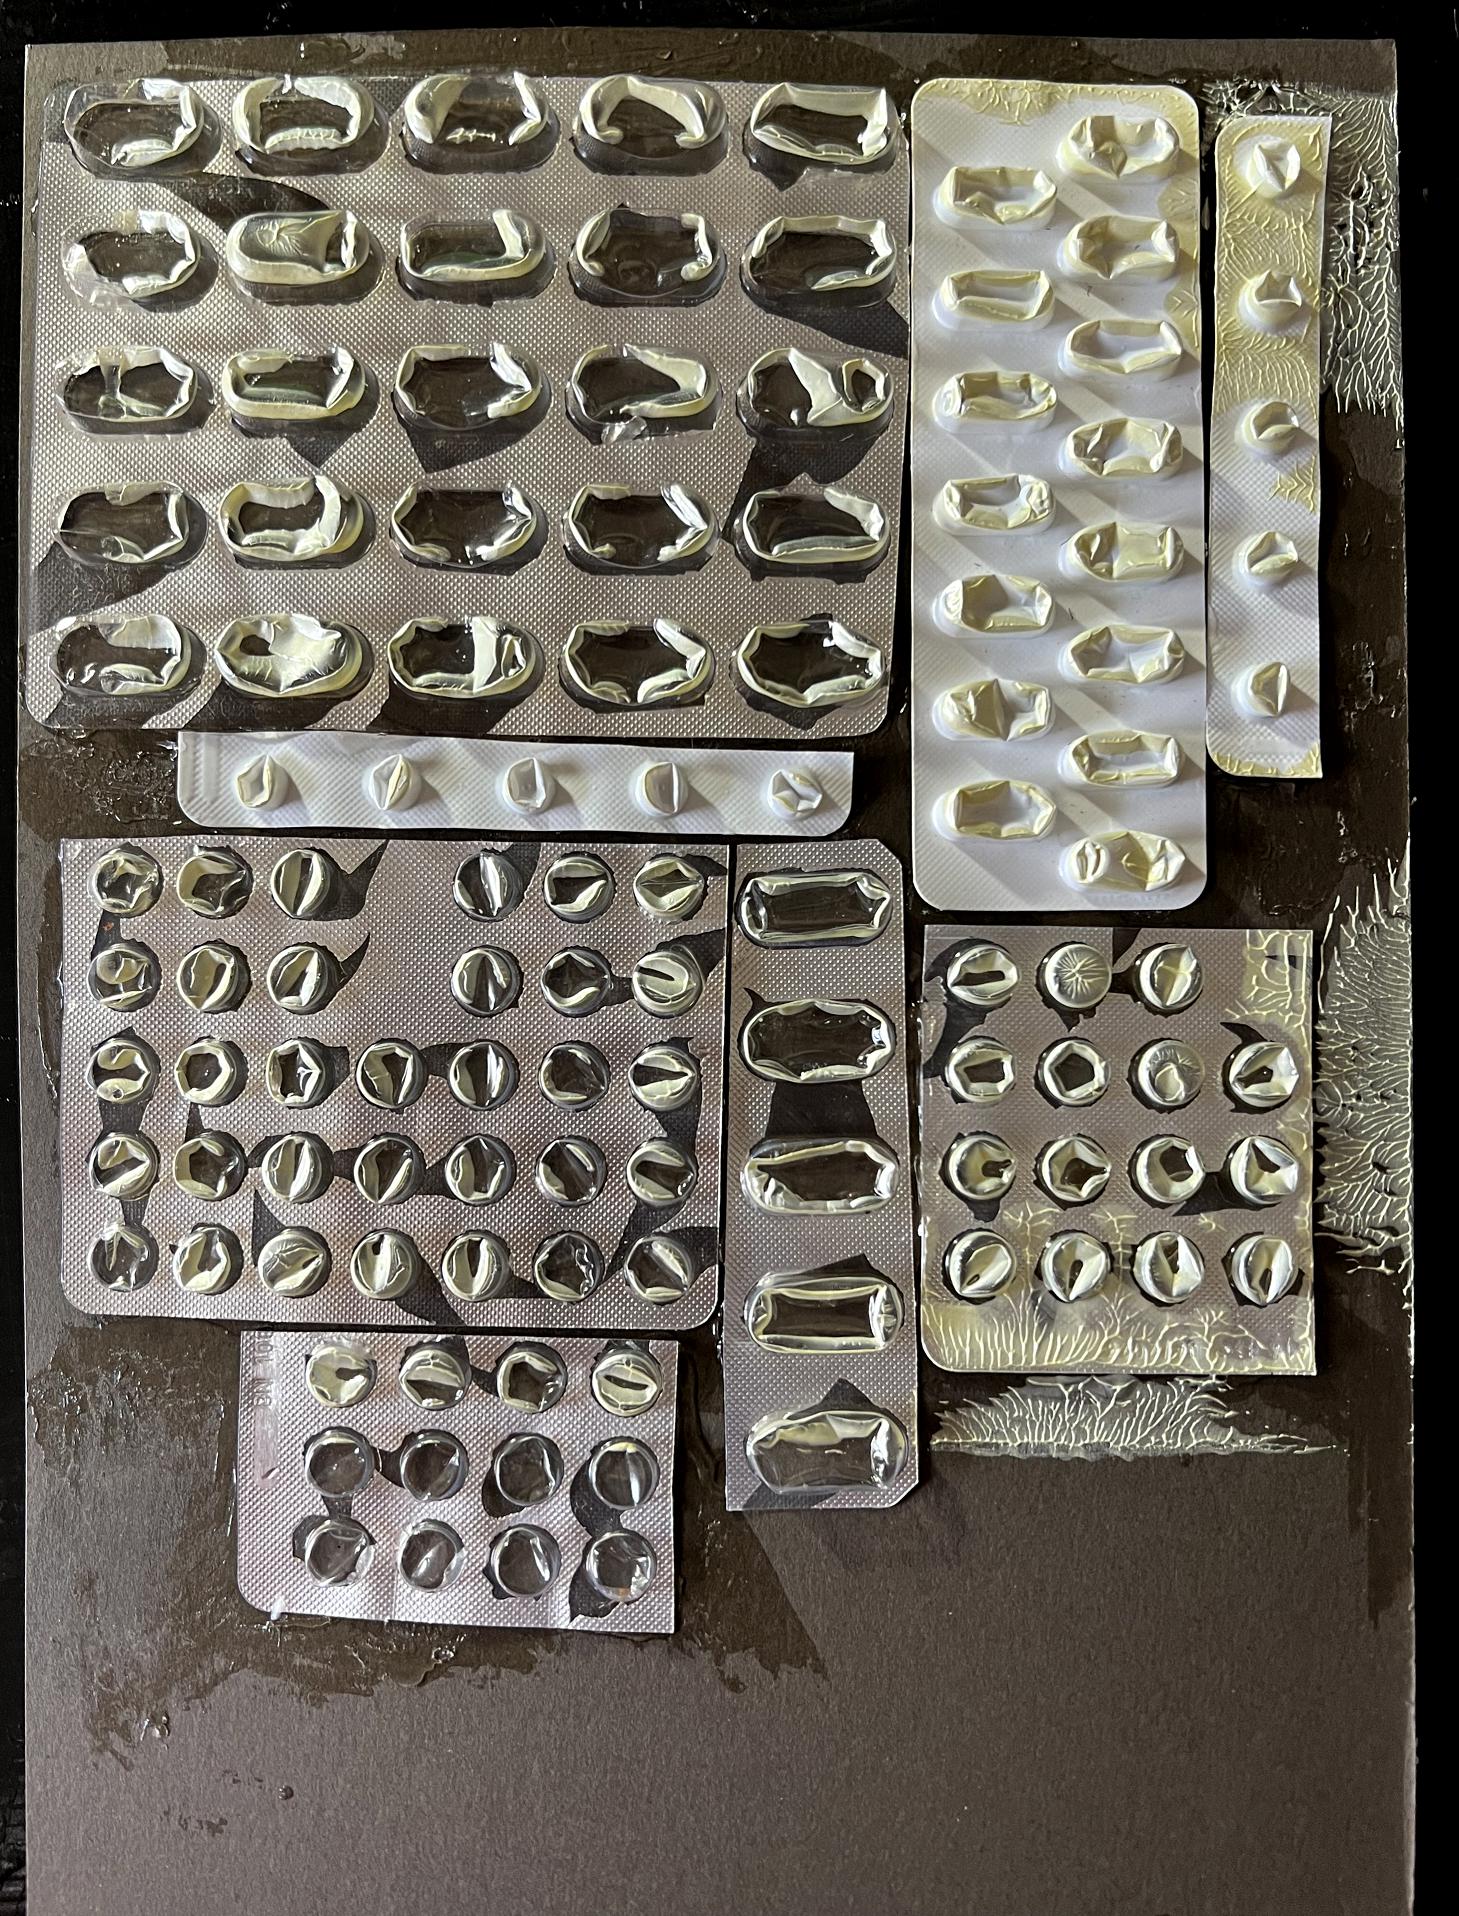
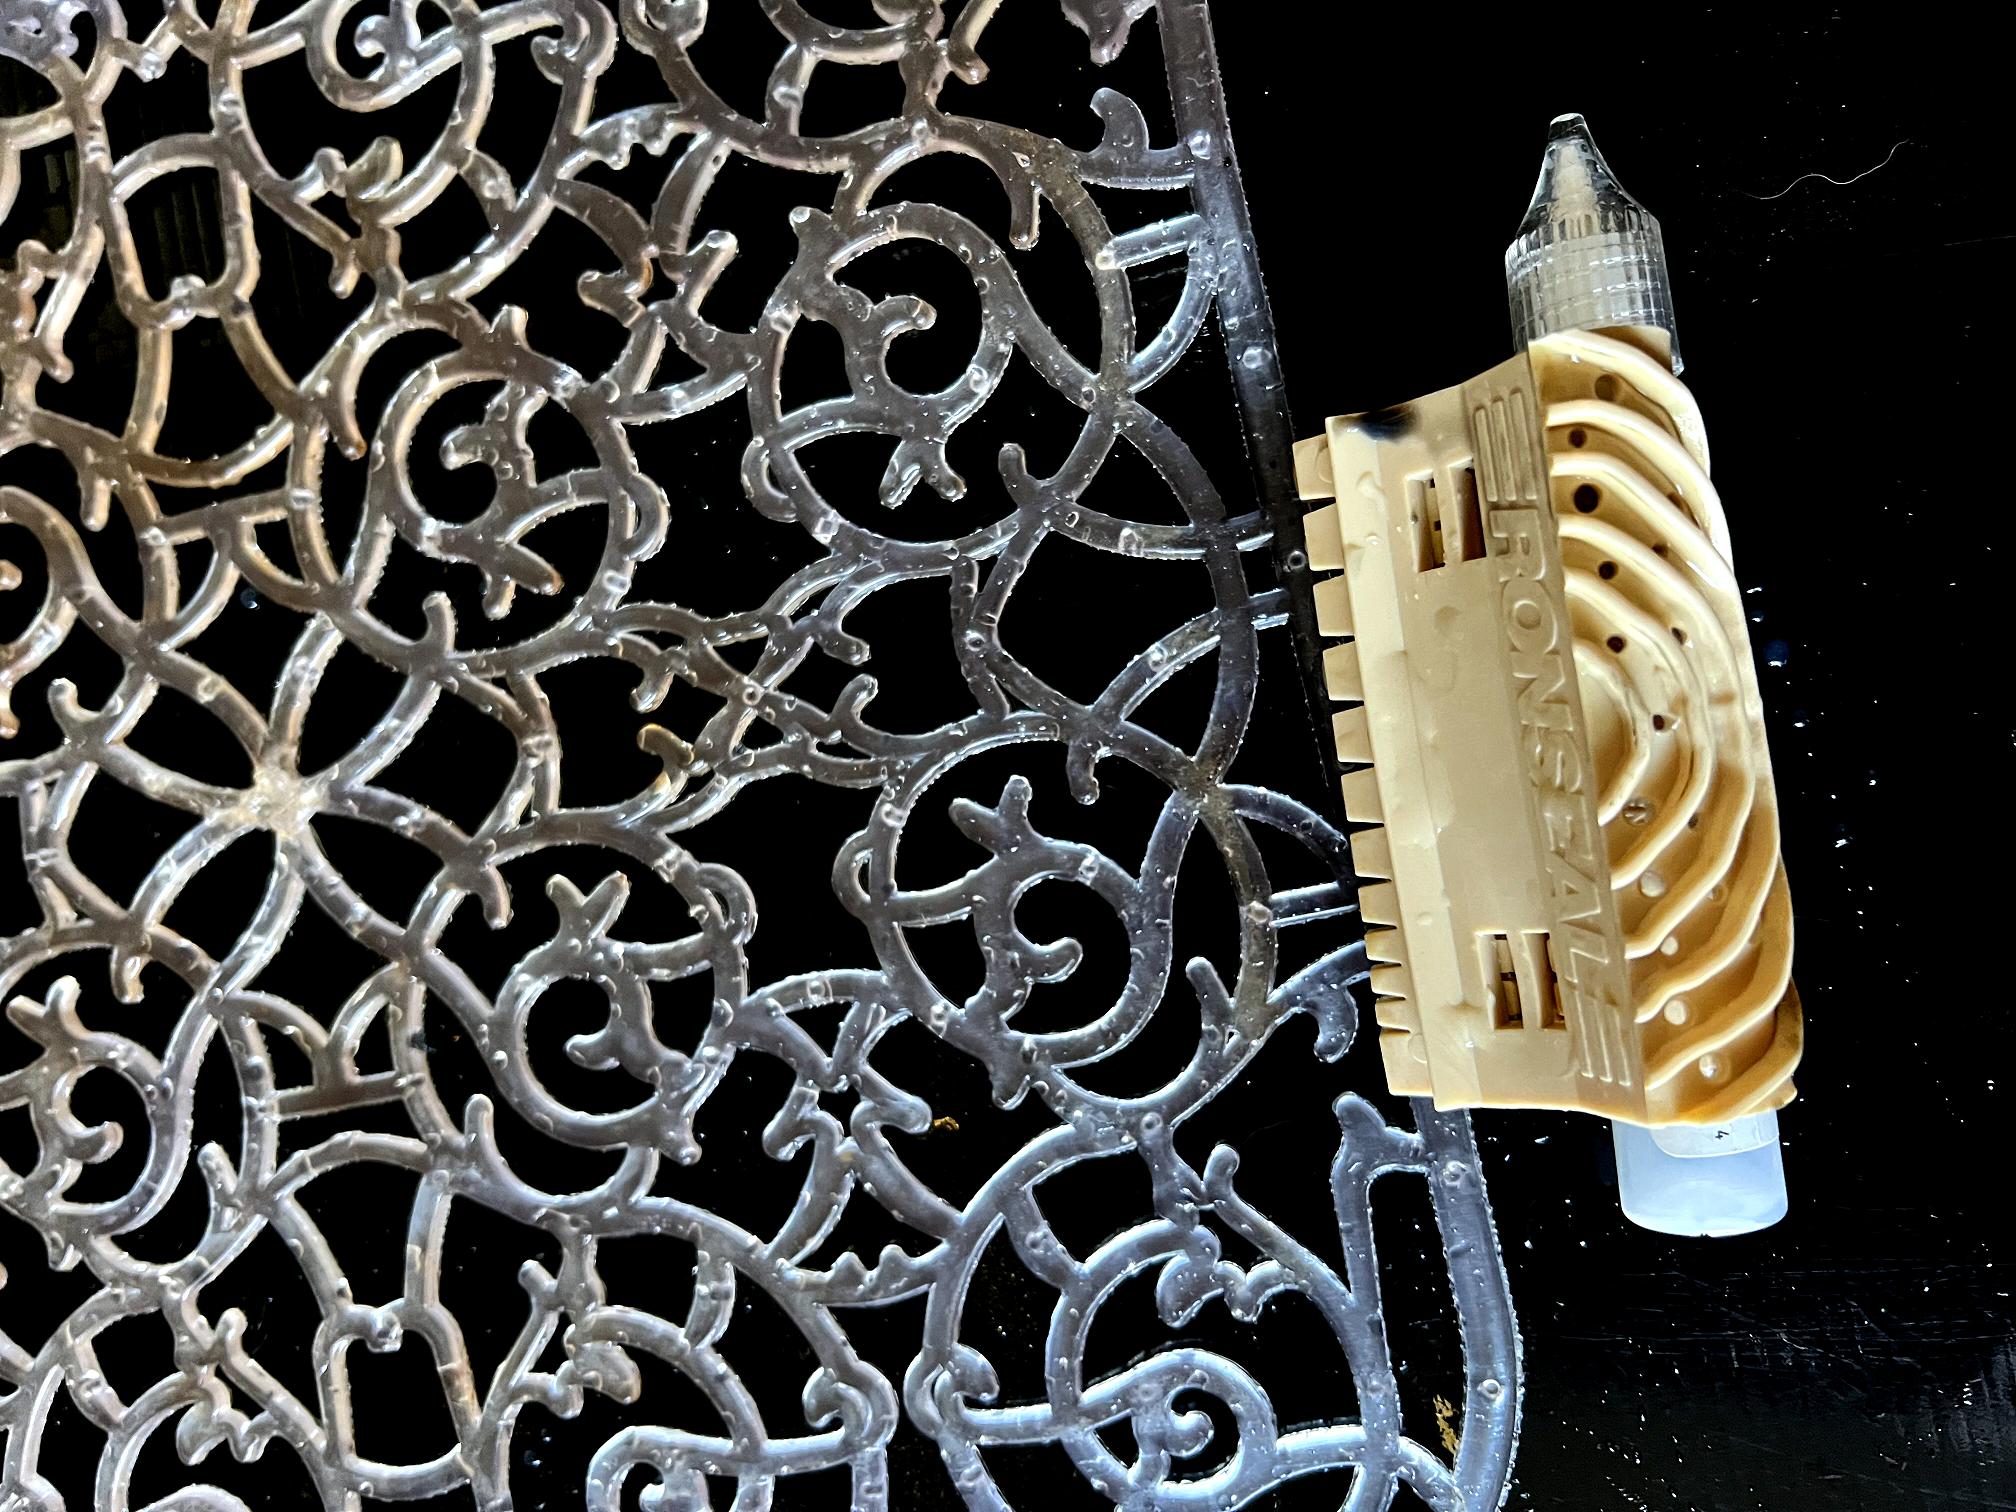
Here are the texture makers I used today.
Graining
The small tool on the right (propped up on a bottle of glue) is a graining tool This is a very old technique much favoured by the Victorians, painting their doors and panelling with a base coat, and then a layer of glaze of a darker colour. You pull the comb through the glaze to create the wood grain. The other side of the tool looks pretty weird. You run it over the glaze, and every now and then rock it, and miraculously, it creates “knots” in the wood grain.
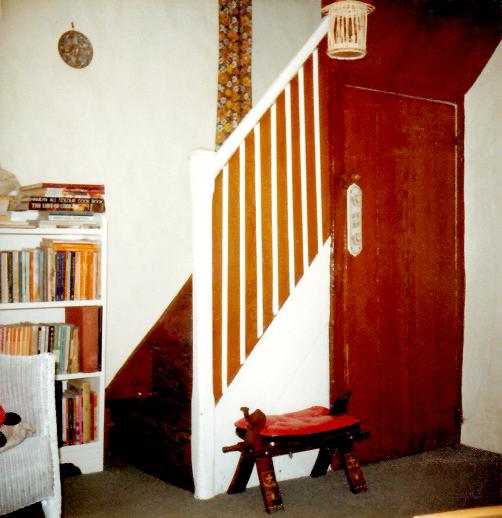
I first came across this when I had my first house, which was a small Victorian cottage. The inner doors were done with this technique. It was a rather unpleasant orange colour (they used to call it “ginger graining”) so I applied a coat of darker transparent varnish which much improved it. Not a brilliant photo (taken back in the 1970s).
I did some of this graining from scratch in the last house we lived in before we moved here. Unfortunately no knots in this painted wall panel, and unfortunately I can’t find any photos that I took of other graining that I did.

Here’s a video showing the real thing!
What amazes me is that anyone could think up how to design the curious rubber tool to create this effect! I wonder how much trial and error went into it before they achieved success? If you’ve never done it, it is really fun. Someone I know revitalised her kitchen units by doing this. It looked amazing.
Anyway, back to my gel printing…
It’s so long ago that I did his that I’d forgotten how to do it! I rocked the tool far too frequently, but I got a quite interesting effect nonetheless. I wasn’t really trying to achieve the look of wood, but more of moire silk. I saw someone doing this on the gel plate on YouTube recently and it was brilliant. I’m certainly going to do some more of this so watch this space.
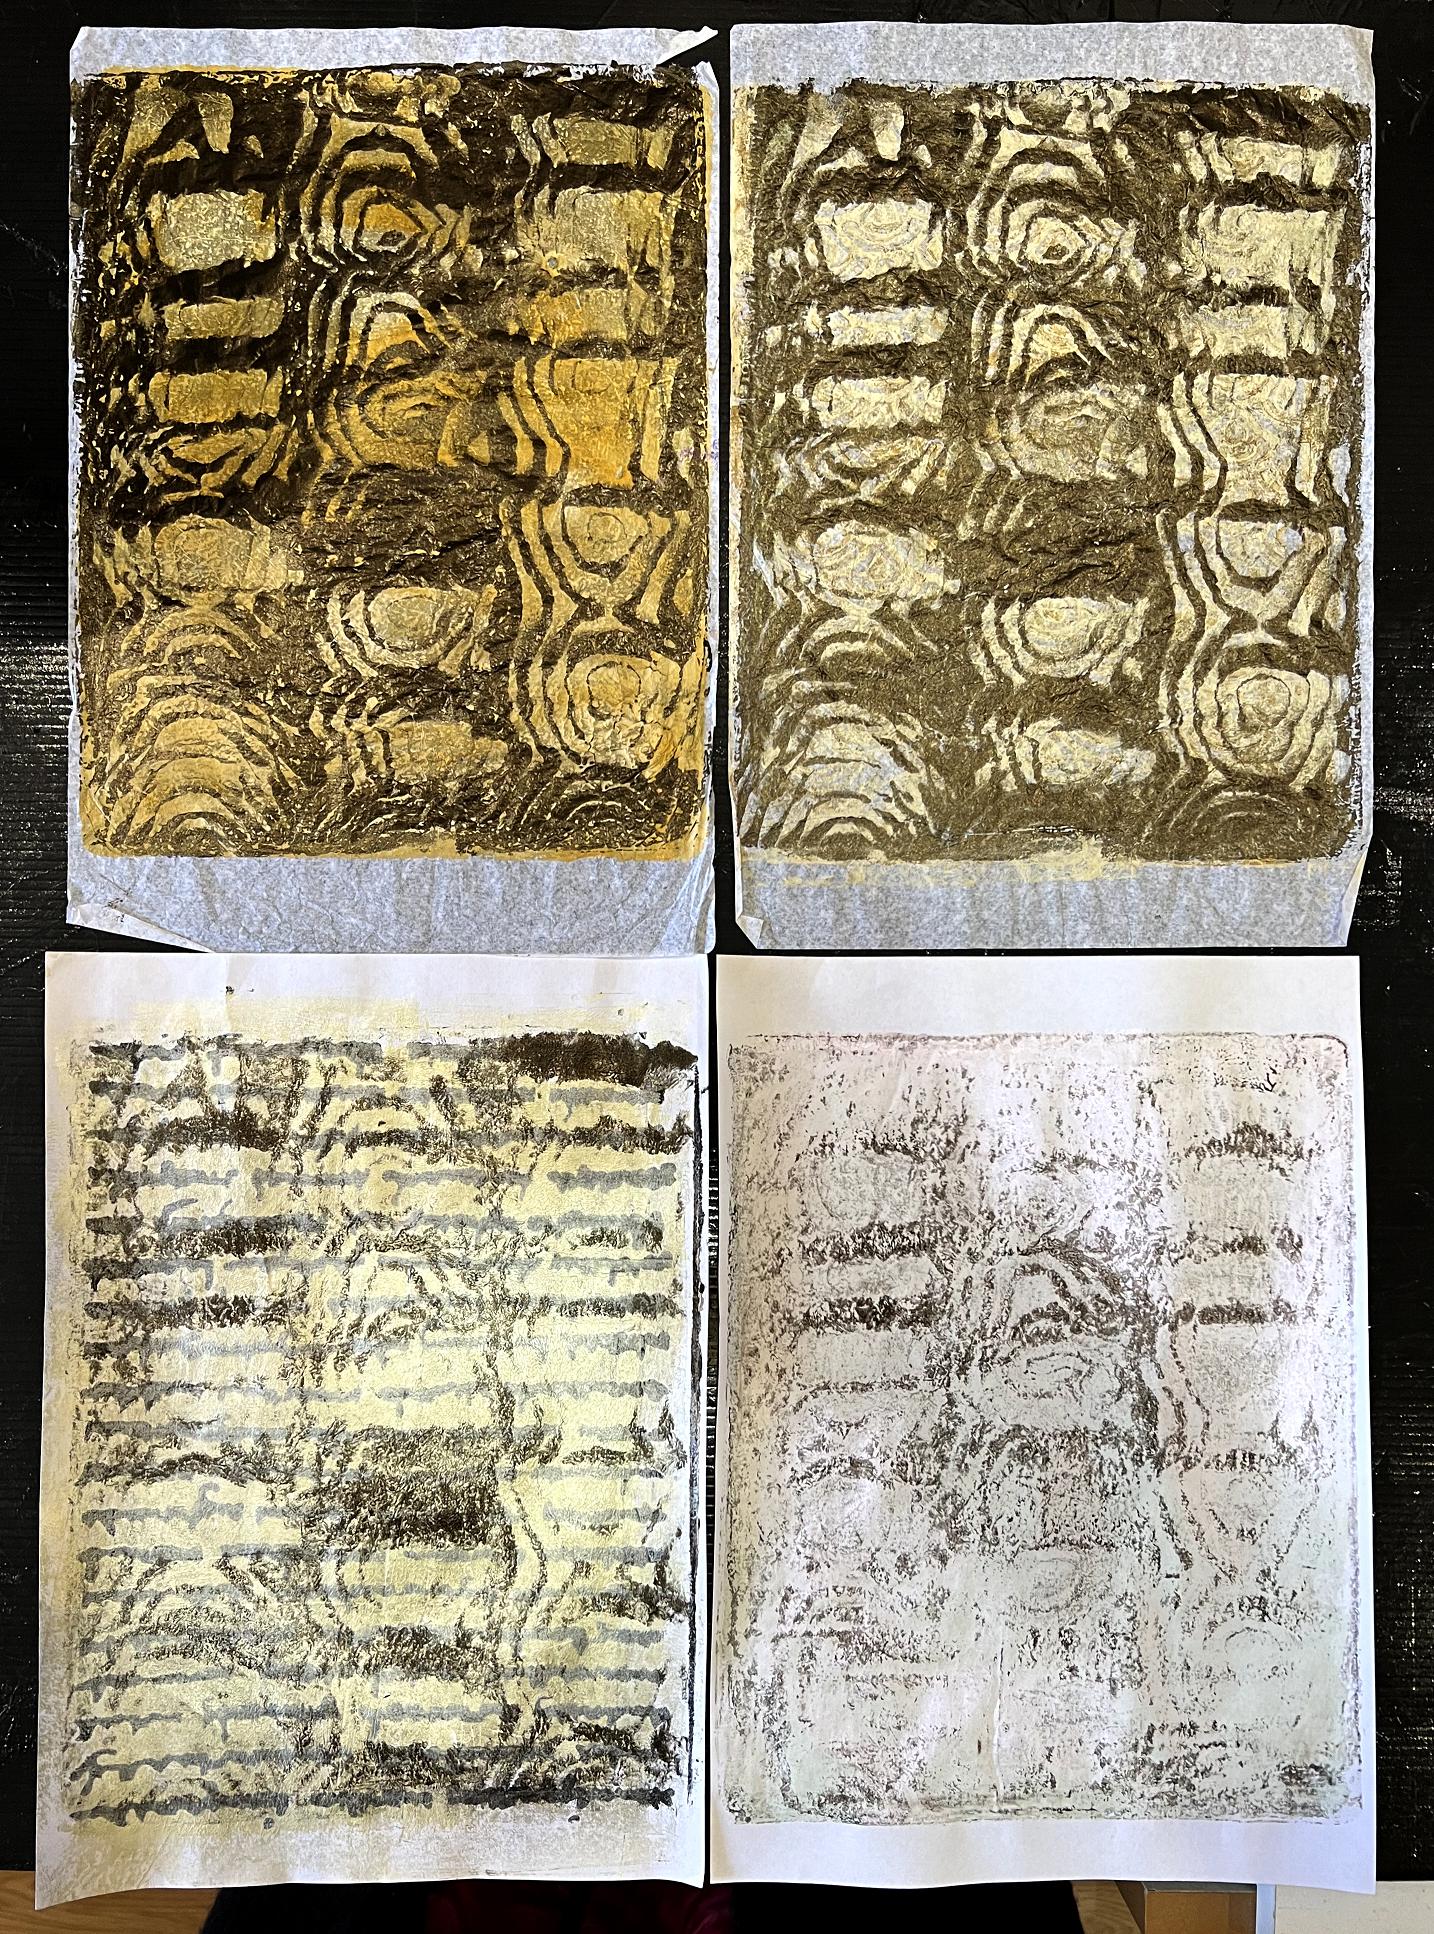
I managed to get four pulls from the initial laying down of paint and using the tool. In the above photo, the top left is the first one. I added Arteza Fancy Black iridescent paint onto the plate and worked the tool over it. I used an existing print in all four cases. The third one, bottom left, was over a text stencilled print that I really didn’t like; I had added a glazing layer over the top and then did the graining print. I still don’t like it, but I shan’t throw it away – everything is redeemable!
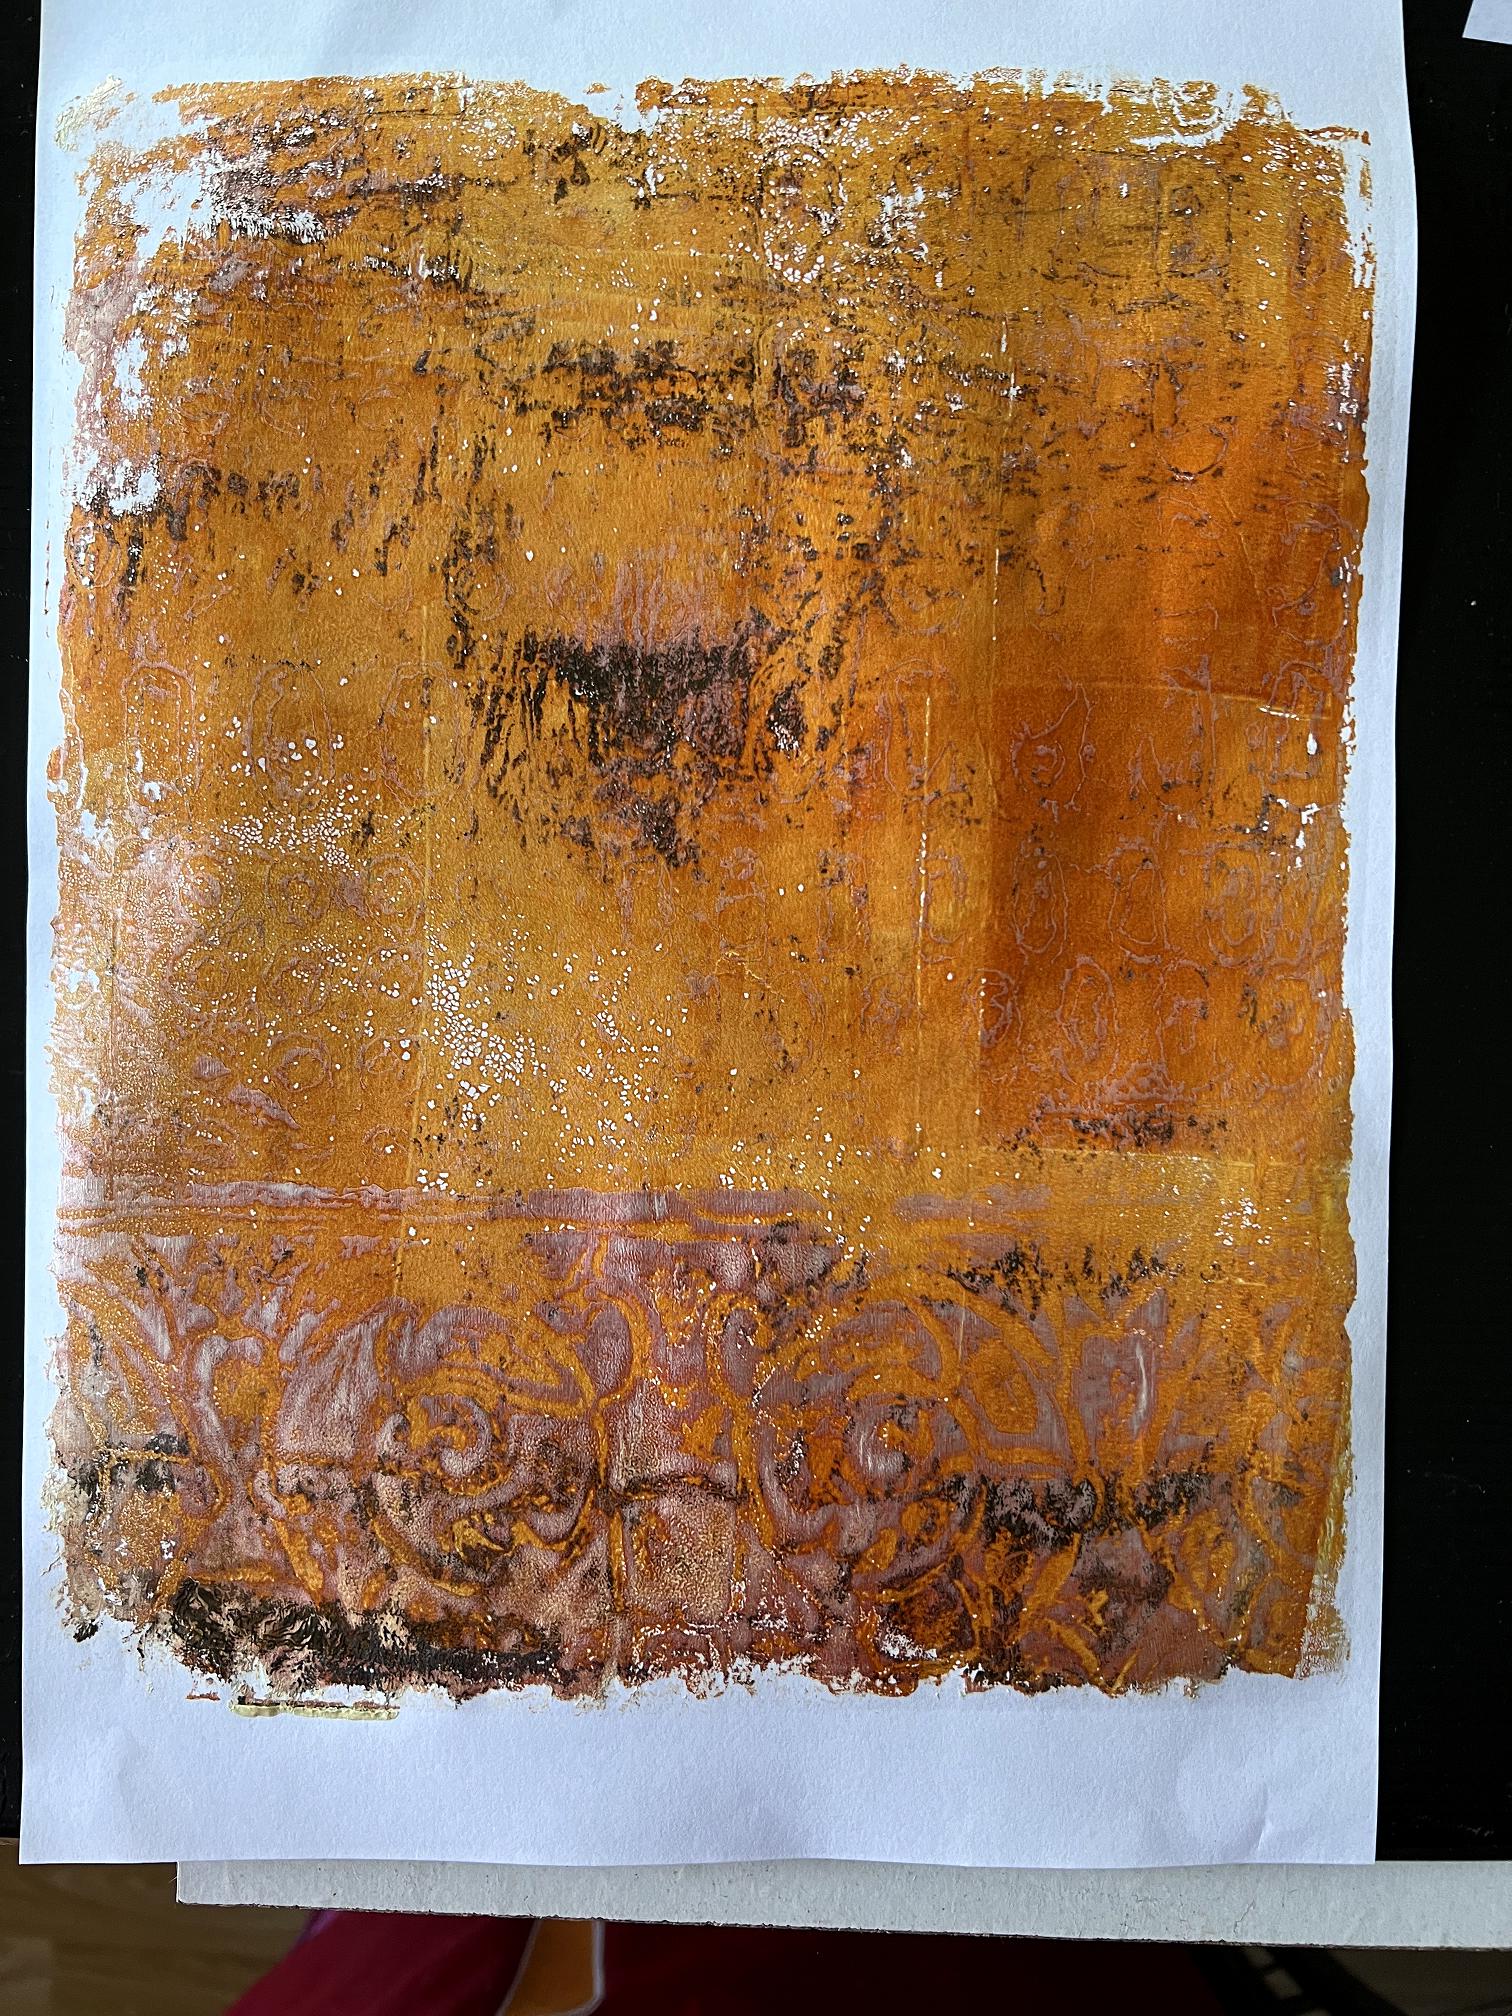
This is the final pull, to clean off the plate at the end of the session this morning. I used Golden’s Quinacridone Nickel Azo Gold, a translucent fluid acrylic with great pulling power for plate cleaning, as well as being a gorgeous colour! You can see the pattern of the sink mat at the bottom, and it’s picked up all those delicious grungey bits.
This is the brayering-off sheet I used, which started out as a gel print in two sections that I really didn’t like. I just kept adding more colours to it and didn’t consider it a disaster if it ended up as a mess.
Part of it had been used as a scratch paper for cleaning off brushes – you can see the brush strokes at the top. The curious curved black lines in the top half were from cleaning off the paint from the wood graining tool. With all the iridescent paints I used today, this sheet is now quite pearlised and lovely!
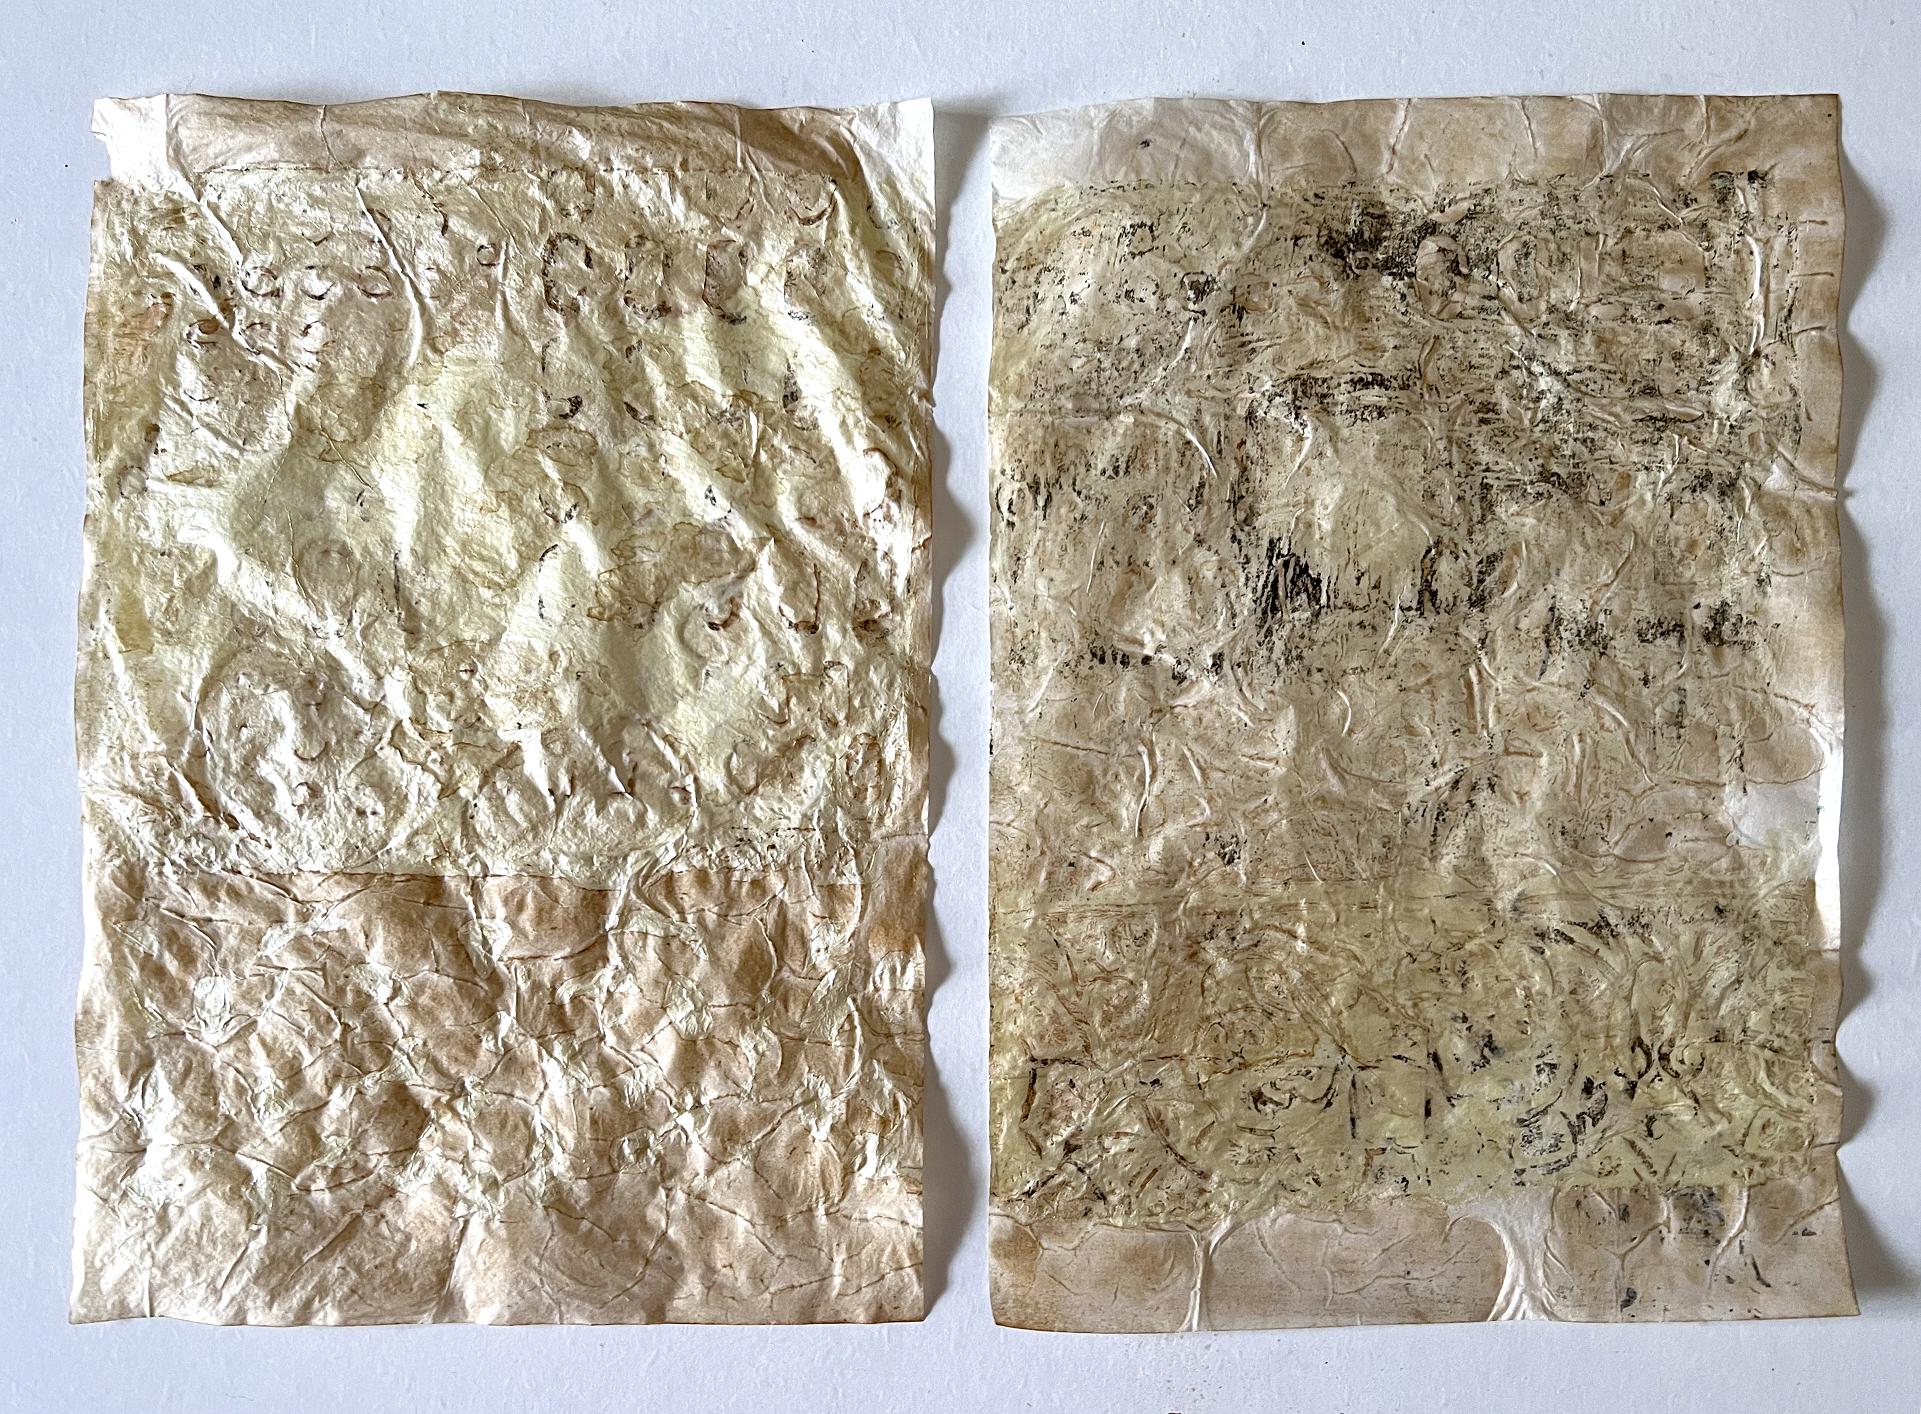
The next two photos show the sum total of everything I achieved in the morning.
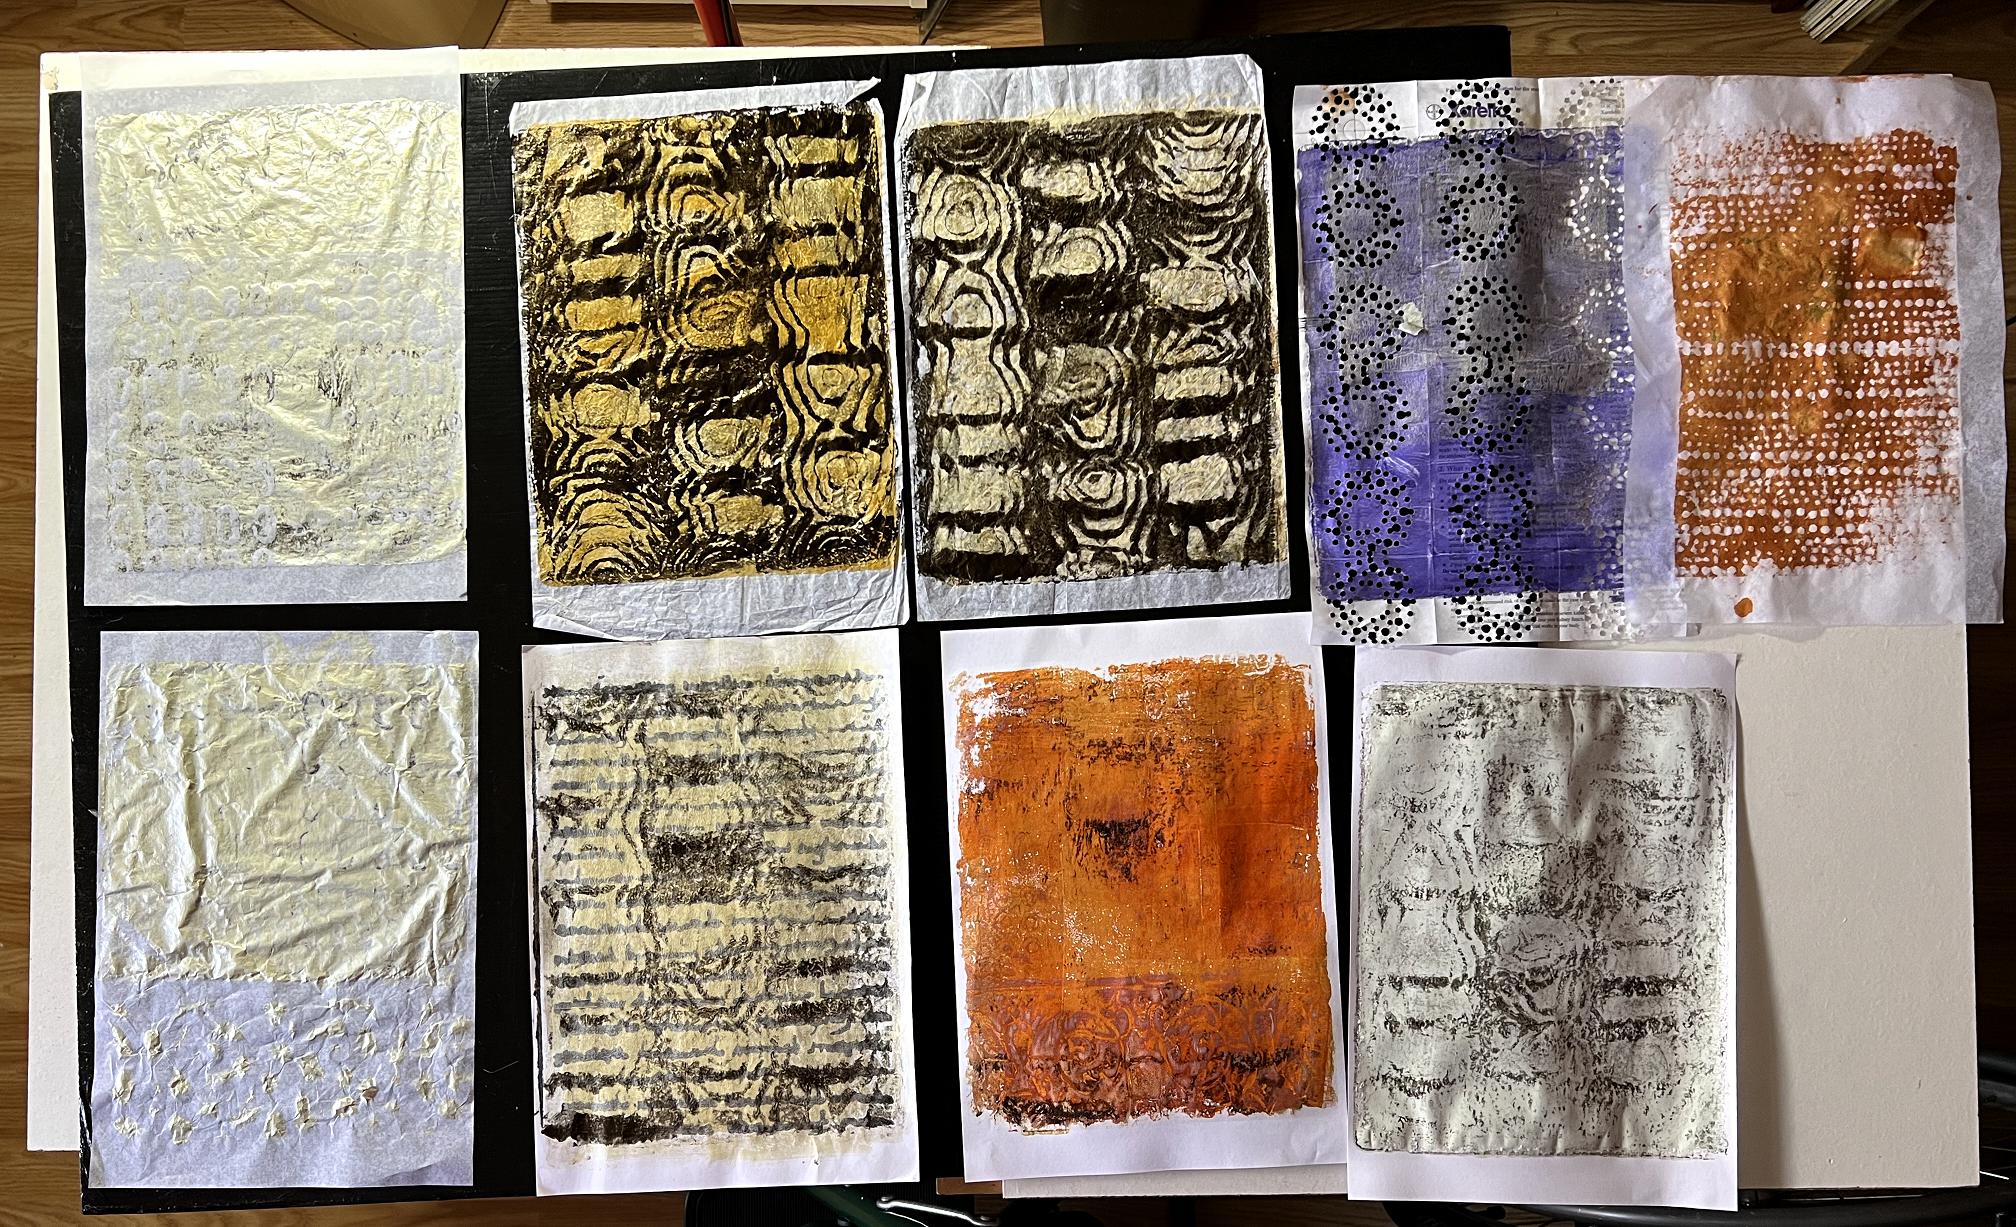
As usual, some ready for use, and some needing further treatment.
After lunch I went back up for a short while, and had a bit more fun.
I was far from happy with the blister pack ones, and decided to try the Seth Apter Izink in Coffee, which is a rich dark bown colour. Nothing ventured, nothing gained! I wasn’t too upset because at the end of the day it’s only paper, and I can always do more!
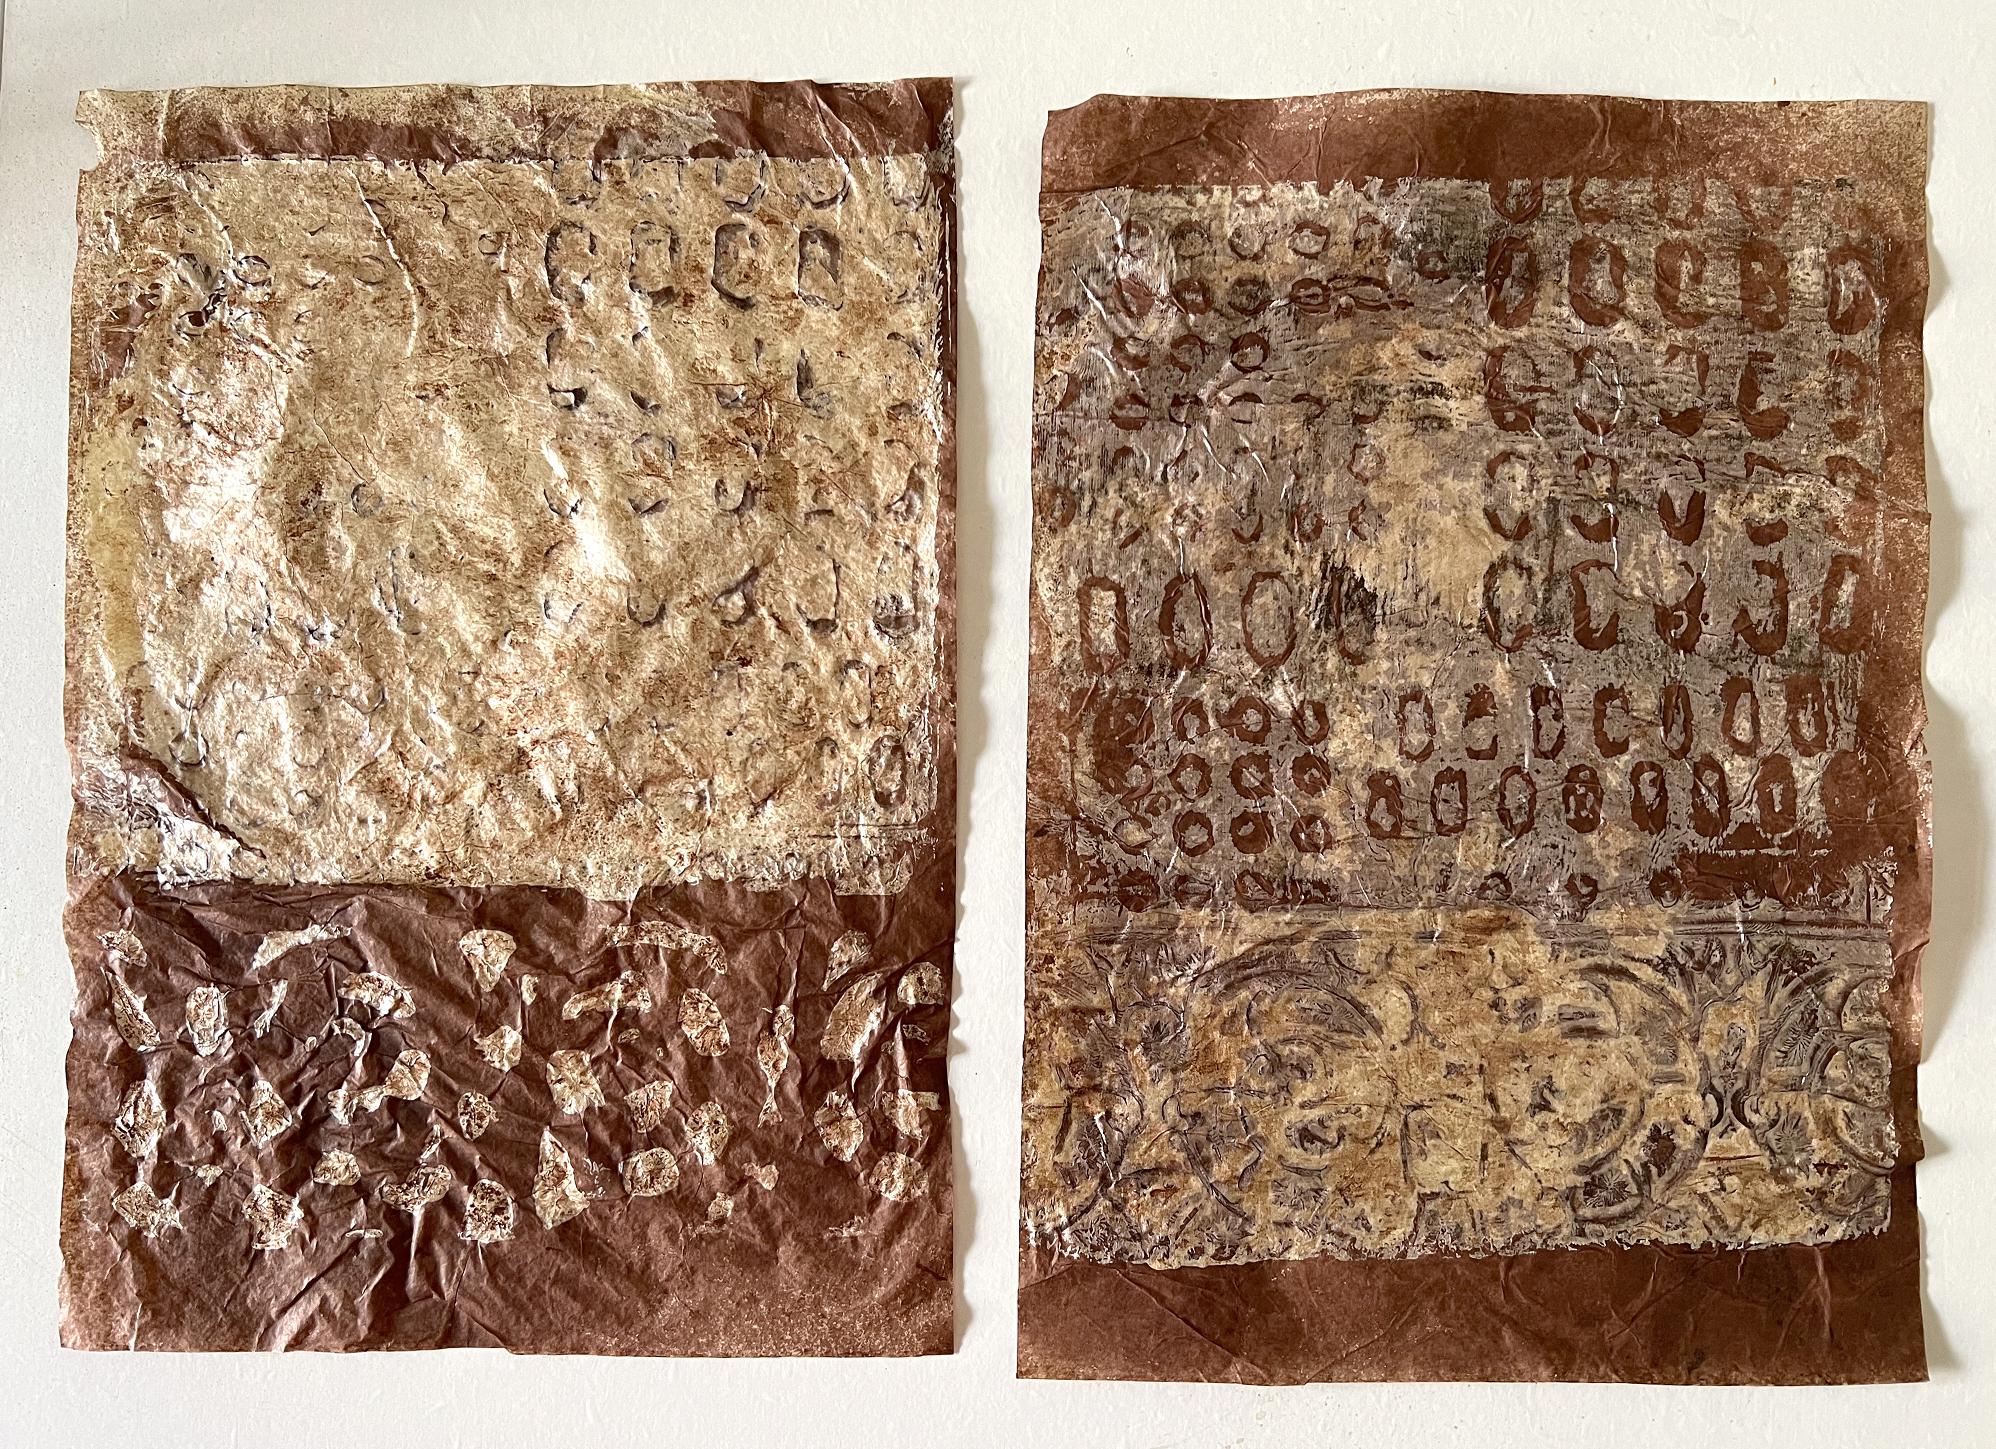
A definite improvement. As always, the ghost print is always better than the first pull when using texture makers.
I used another incomplete gel print to blot off the excess ink, by laying it down carefully and pressing gently, and then repeating the process on the other sheet. This piece had some faint red circles on it – a ghost print from when I was making a lot of circles on the gel plate. You can see some red tinges on the piece. Some nice creases too!
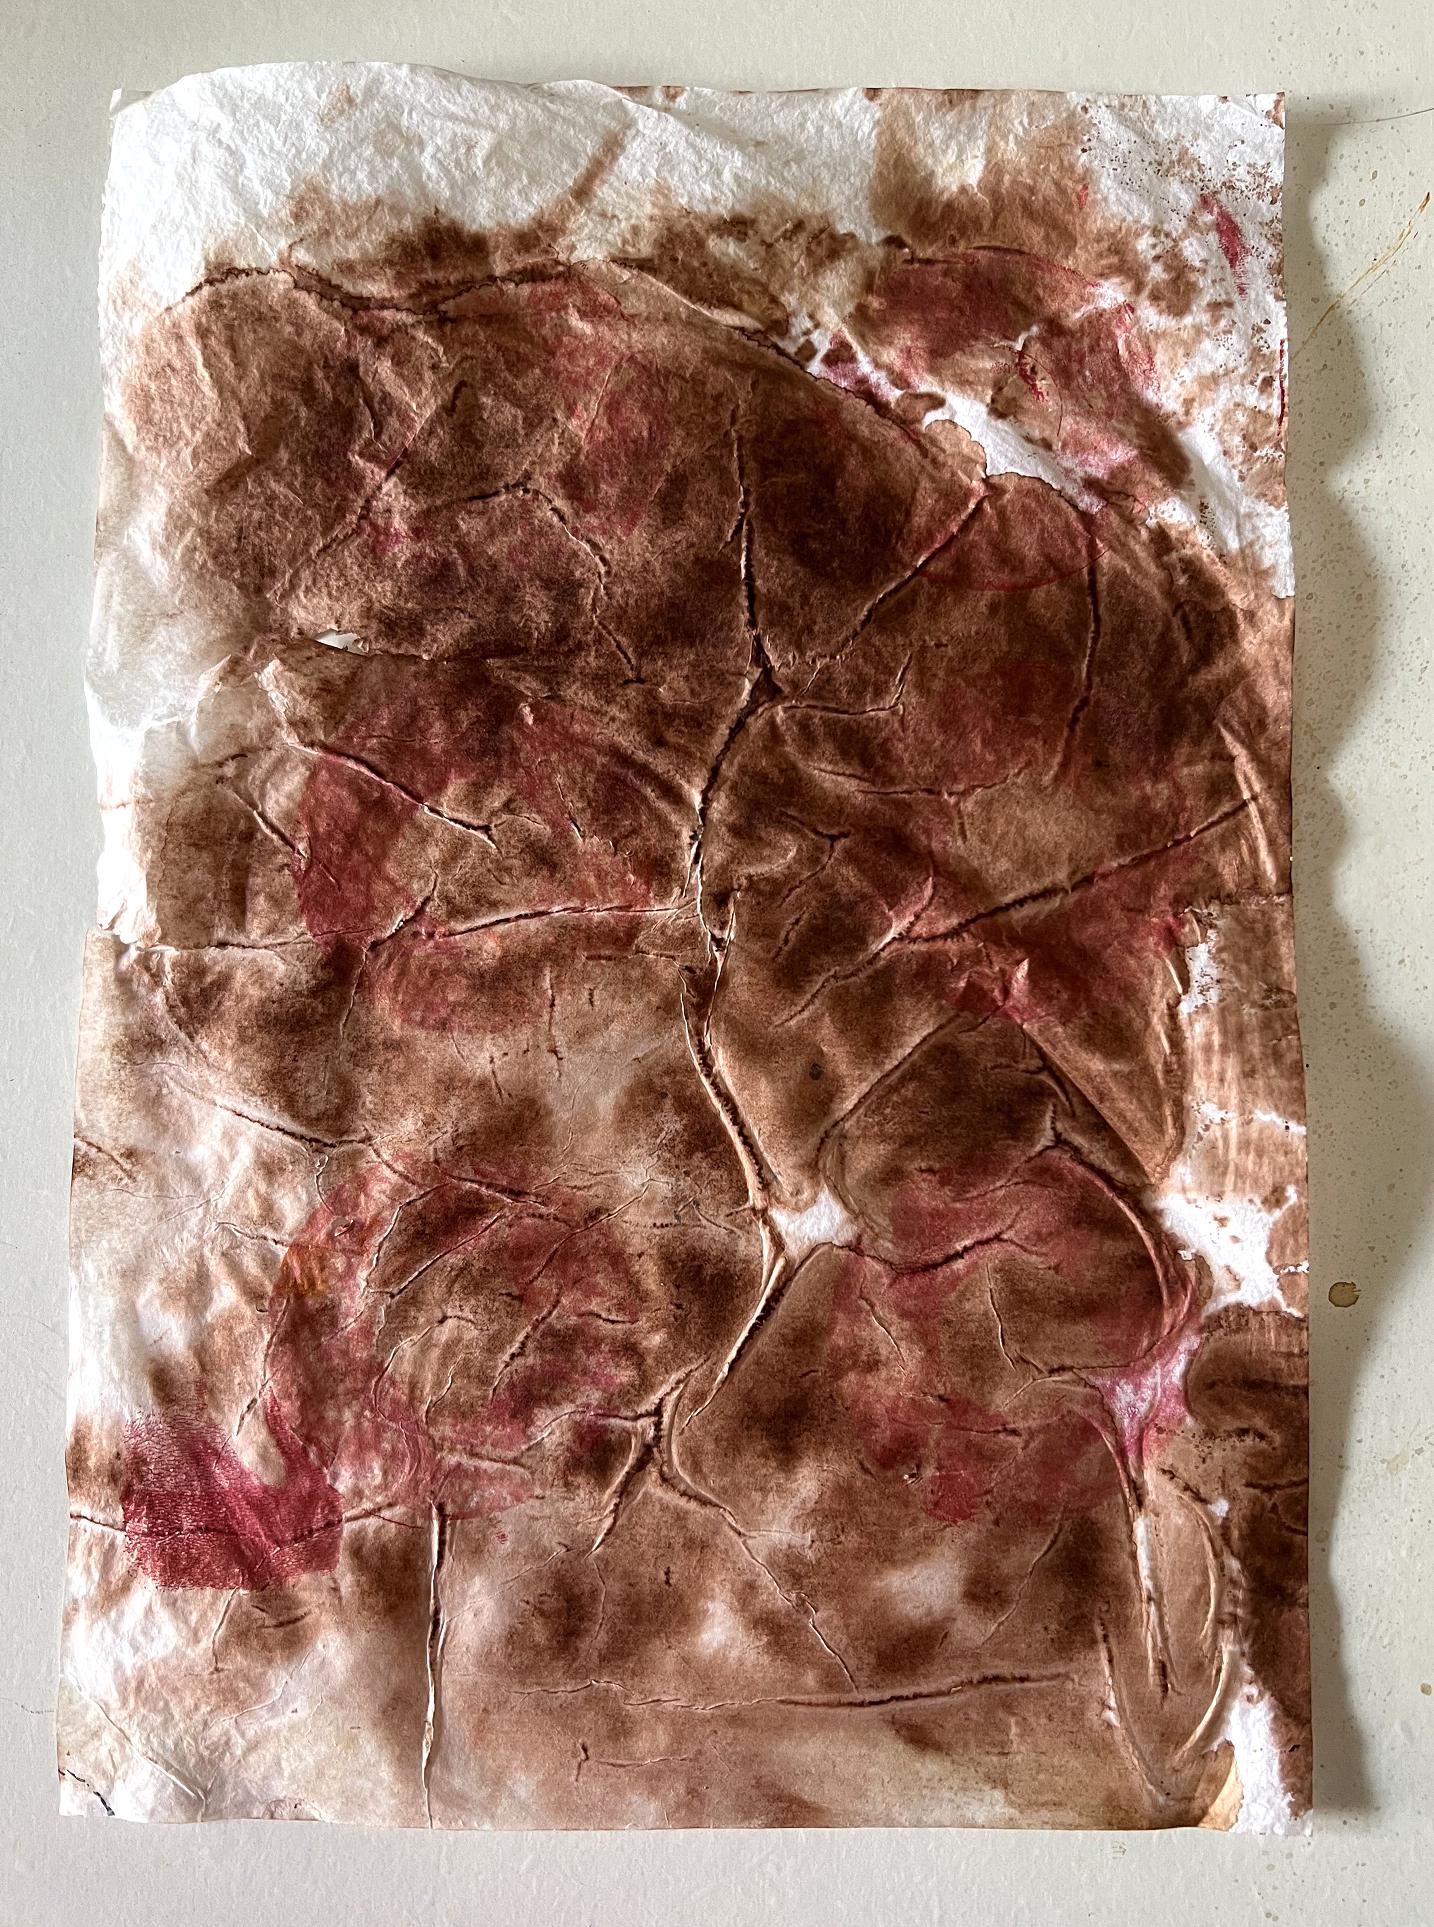
I used a couple of scrunched up pieces of tissue paper to mop up the rest of the excess ink, carefully unscrunching and rescrunching it to get good coverage. One piece ended up soaked so I have left it to dry.
The other piece I dried with the heat tool and carefully prised it apart. I wasn’t quite careful enough and managed to rip it, but it doesn’t matter. Tissue paper is very fragile when wet.
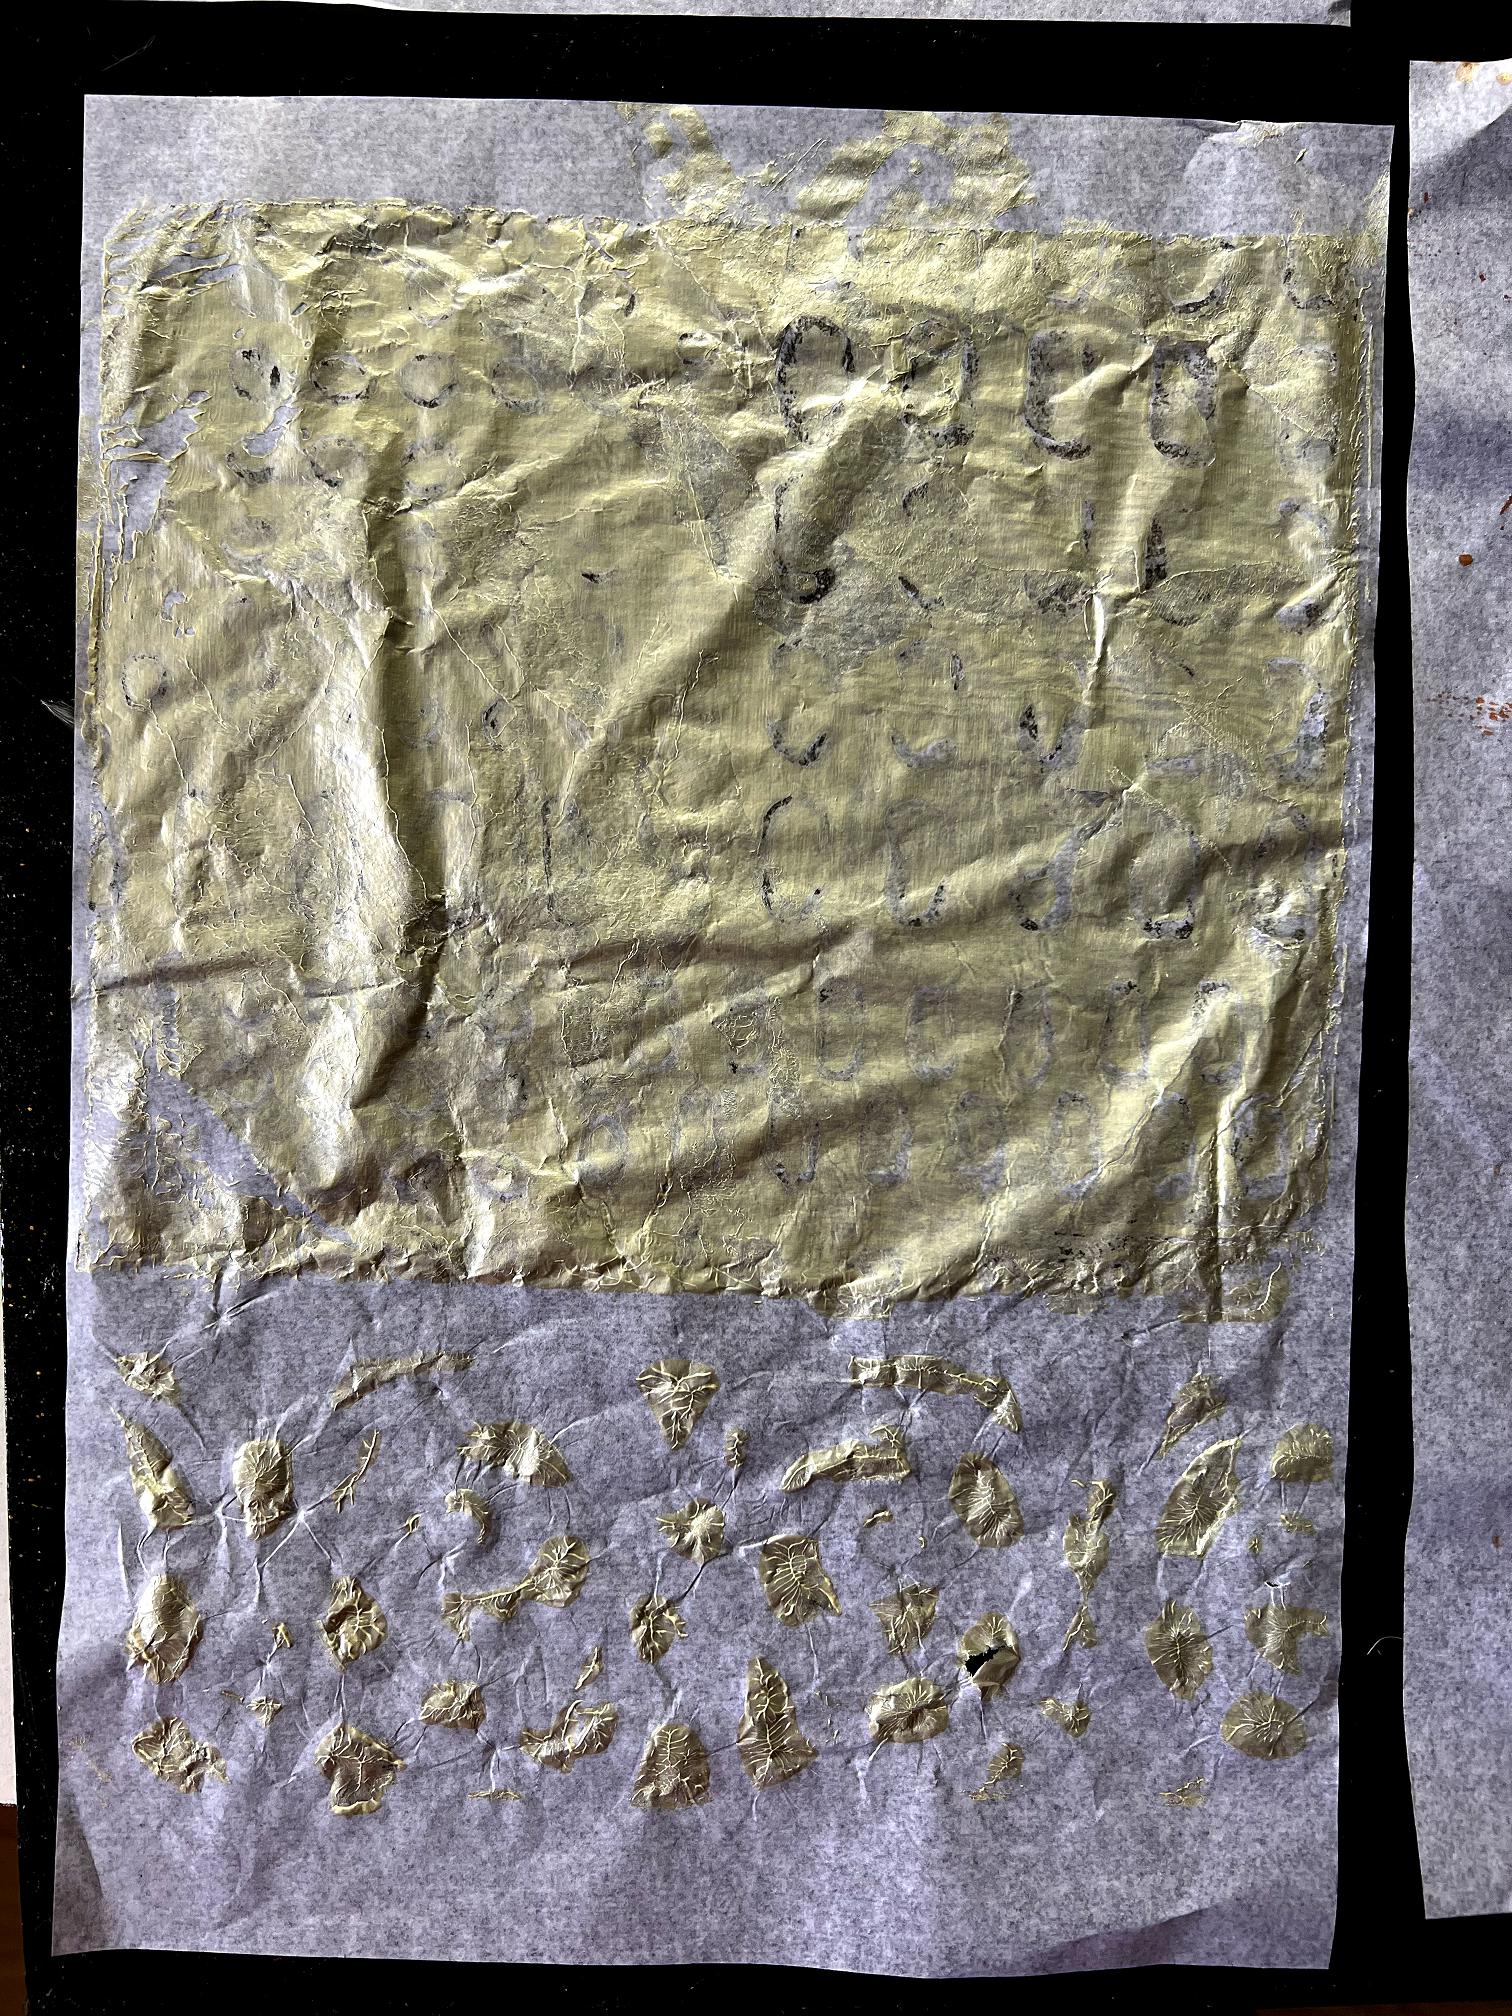
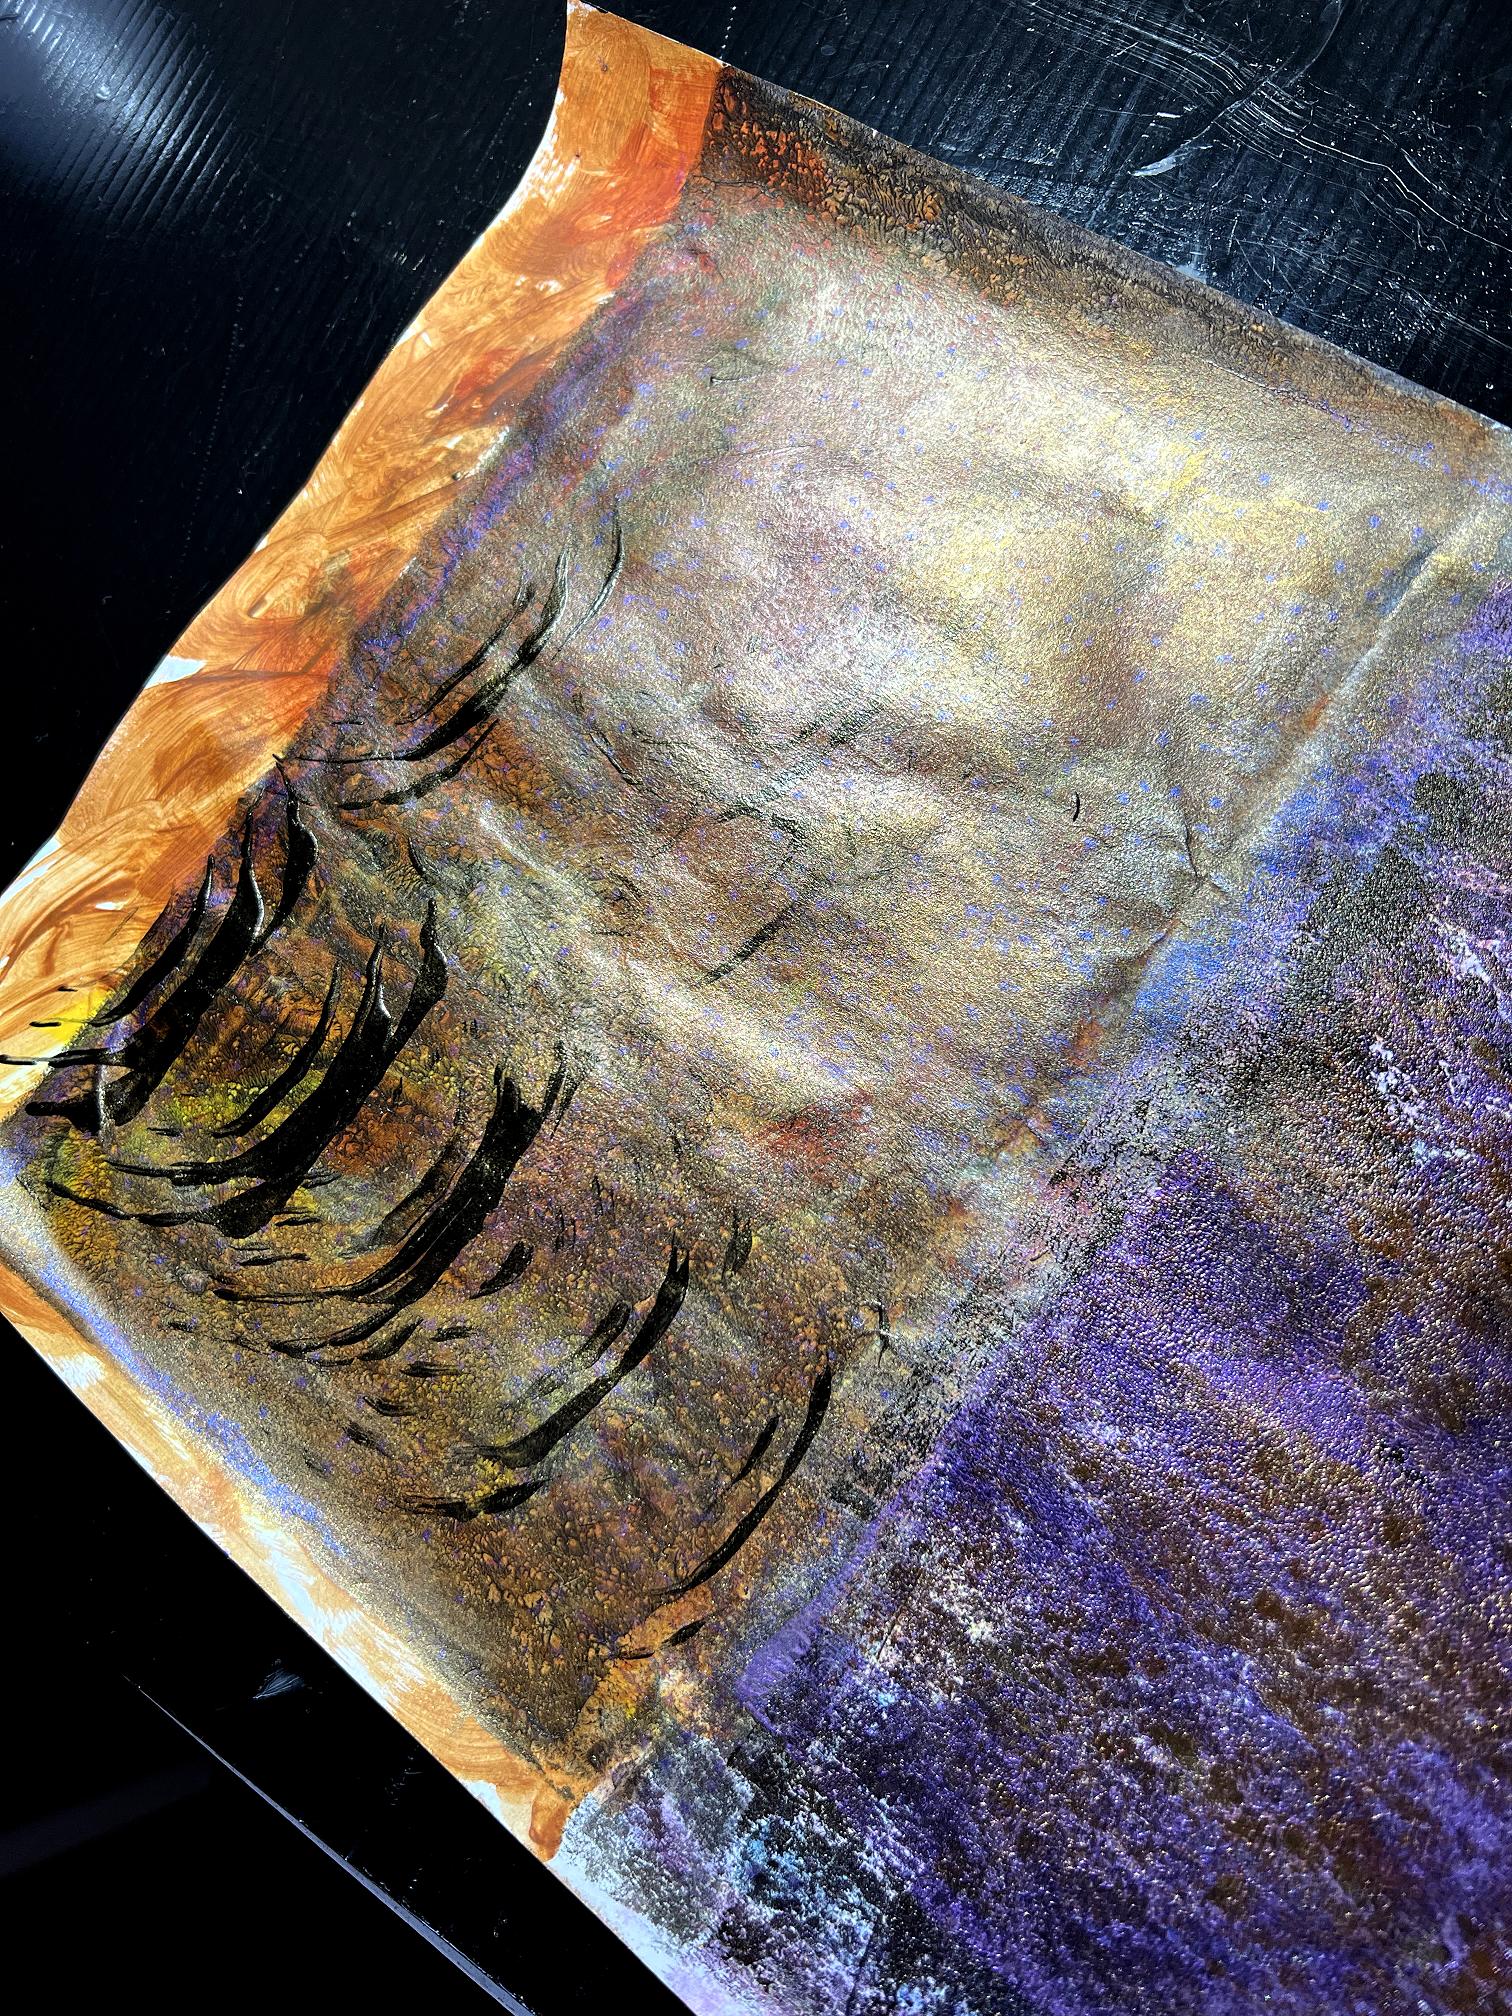
When it was dry, I laid it on top of the final pull-off sheet, and sprayed it with the Goldmine Izink. Wow!
Here it is against the black background when it was dry.
I was too impatient with it and didn’t allow it to dry completely before trying to lift it from the surface, and managed to rip it. The photo doesn’t do it justice – it is very rich and shiny!
Here is the brayering off sheet, propped up to catch the light. You can see how shiny and iridescent it is.
All in all, a very fruitful couple of sessions in the studio. Above all, it was tremendous fun. I can’t wait to perfect the graining tool technique, and to do some more with the blister pack texture plate, and also to try my other texture makers.
A special day
Exactly 38 years ago today, 17th September 1985, in the evening, my hubby and I met for the first time. We were both attending a lecture (which I didn’t find all that interesting). I had come with a few others, and we were sitting fairly near the front. Further back was my hubby. In those days, my hair was even longer than it is today (now, it is just below my waist, and then, I could sit on it) and it was loose all down my back. It’s rather a different colour today as well – all grey now, but then, very dark brown. I don’t think my hubby’s mind was on the lecture at all.
Half way through, there was a short break, and he came forward. He and the person who had brought us had been at college together, so he pretended he wanted to speak to him, but took surruptitious glances along the row, to check out whether the front was as good as the back.
He decided it was, and at coffee afterwards, he chatted me up. He told me later that he knew that night that I was the girl he was going to marry. If I’d known that, I’d have run away to China!! I wasn’t going to marry ANYBODY at that stage!
He was about to get my phone number when someone grabbed him and told him to hurry up, because otherwise Harry would miss his train. He thought, “£^%$ Harry!” and left. The following day, he phoned his old friend who had brough me to the lecture, to get my phone number. He, of course, was highly amused, and for ages afterwards this was the precept for endless teasing, especially as his phone number was only one digit different from my own, and one day my hubby rang up and got him instead of me, and was very disconcerted to hear a man’s voice on the phone! More teasing ensued, of course. Because of all this, after my mum and dad, this friend was the first person we told of our engagement.
On 30th November, we returned to my little cottage after a day out, and he started saying “when we get together” instead of “if.” I said, “What’s with all this ‘when’?” You haven’t asked me yet!” So he did, and I said yes. We were due to go to my Church housegroup that night but instead we drove over to my parents and told them, and were very late for the meeting – met at the door by his friend whom of course he told, and then everyone else in the meeting, to great jubilation!
I wrote to various friends at Christmas and told them, and one of my friends wrote and said, “Who is this bloke anyway? I’ve never heard of him before and now you say you are marrying him?” He wanted to take me off straight away and marry me in a field or something but I said no, I needed time to make my dress etc., and Mum and Dad would never permit such a thing and would want to do it properly for us! He agreed to wait six months, and we were married on 24th May 1986, less than a year after we’d first met. Phew.
There were a few times when I wished I HAD run away to China, but things got easier as time went on, and now I can’t imagine life without him! We’ve just worked out that we have known each other more than half our lives.
Happy Meeting Hubby Day! What a lovely story. And again superb results Shoshi, I particularly love the pierced paper – what amazing effects that produces, love the circles in particular <3