ONLINE ART COURSE – COMPLETION OF THE EYE STUDIES
This afternoon I completed Module A (Graphite), Project 2 (Eye Studies), with my drawing of Eye No. 4.

This was the second one where we were left to our own devices, the teacher assuming that by this time we would have enough knowledge and experience to go solo.
I found this one considerably easier to draw from the reference photo than Eye No. 3 which I did yesterday, and with which I really struggled! I’m not sure if things were easier today because I’d had more practice, or beause the eye itself was easier to draw – I think it was the latter. This one was slightly strange because the reflections had obliterated the pupil. It seems to work OK, though. Of the four, I found No. 3 to be the most difficult. People on the forum associated with the course have generally said that they found No. 4 to be hardest, which is interesting.
These graphite drawings are very difficult to photograph. If you adjust the levels to get the paper white, the drawing is much too pale. Darken the drawing, and the paper looks grey and dirty. It’s the best I can do, though, and think you get a better idea with the latter option.
Here are all my four eye studies. You can see that they have not all come out the same size, and No. 3 is placed too high, so the effect of the whole page isn’t as pleasing as it might be, but I think I’ve done OK.
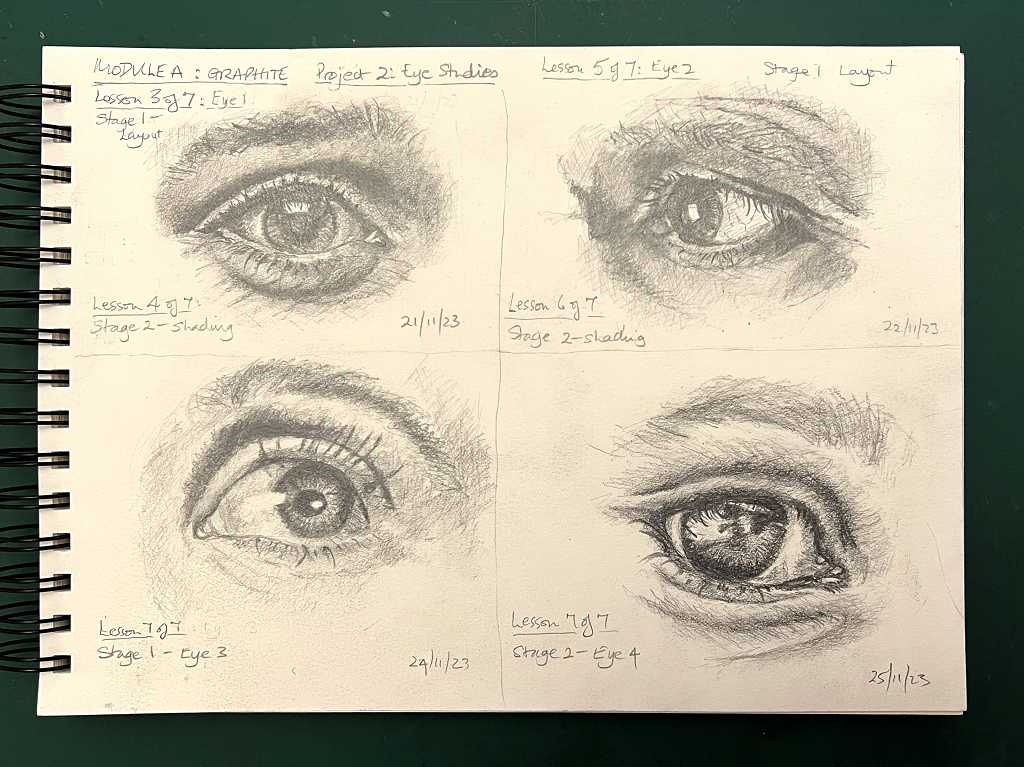
I never thought that I would be able to draw anything like this! I always thought eyes were notoriously tricky and complicated to draw, but following the teacher’s step-by-step instructions breaks it down into easy steps. It certainly teaches one how to look at things carefully. I am keen to try copying the eyes from portraits by the Old Masters and seeing how I get on.
I am not sure what the next and final project in this module will be. You have to complete each stage before the next one is released. I think this is a very good idea, because if you got everything all at once, in your initial enthusiasm you might be tempted either to race ahead and get burn-out, or start working on projects further down the line in the course. The course is designed with the modules in the correct order, so that you gradually build up your skills, and as you work on each one, it is with the assumption that you have worked on the previous ones.
I like this whole approach very much. It operates in the same way as a “real life” weekly art class where everything is paced carefully. Between the downloads, there is time to rest, and to practise on your own.
On the website, there is a list of materials required for each module. The teacher will email us a couple of weeks before a new module is due to begin, to give us time to purchase any materals we don’t already have, which spreads the cost nicely. However, I am glad to have access to the complete list because I am able to take advantage of some Black Friday opportunities to buy some materials at a discount. This is very helpful. The teacher gives certain recommendations but you don’t have to follow these slavishly – he says for instance that if you want to buy something different on Amazon, to be guided by the reviews to check on quality. Some unbranded products are considerably cheaper than the branded ones, but very often the quality leaves much to be desired. Some time ago I bought a very cheap set of acrylic interference colours and was very disappointed in the quality – they were very watery and lacking in pigment, and only two or three in the set actually had interference properties. They are all shimmery and can be used to create very nice glazes and they work well on the gel plate, so I didn’t waste my money, but they didn’t meaure up at all well compared with more expensive tried and tested brands.
Looking forward to the next project in this module! After this there will be a rest week, and then on to Module B which is Charcoal.