ONLINE ART COURSE – FIGURE STUDIES – INTRODUCTION AND FIGURE 1, AND A NEW LAP DESK
Taking on this project was, to be honest, somewhat daunting. However, that’s what I thought about the eye studies, and those turned out OK! Nothing ventured, nothing gained…
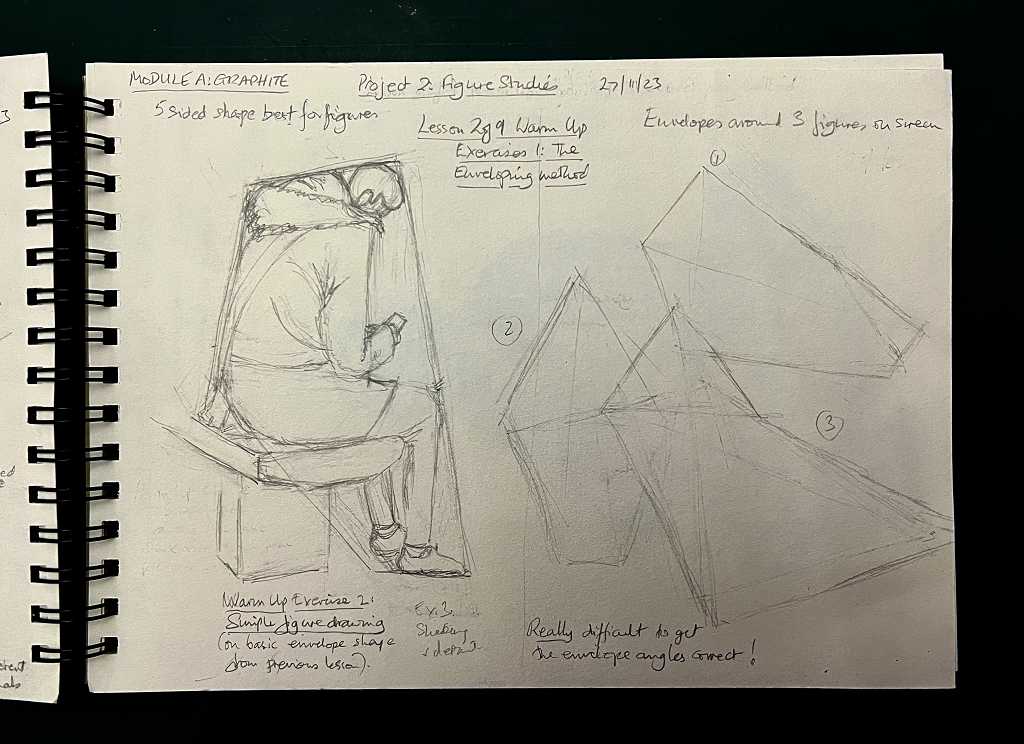
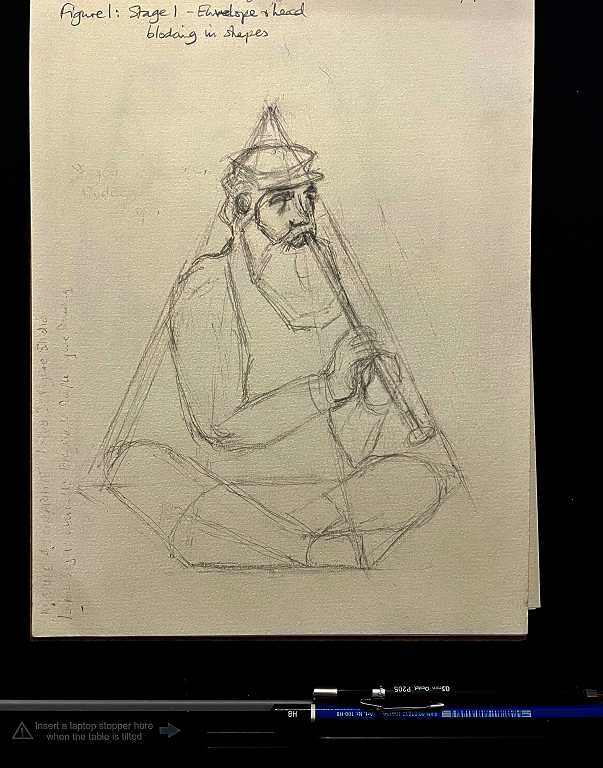
Phil, the teacher, gave us what he said was a simple method of beginning a figure drawing, which he called enveloping. This involves drawing a five-sided shape around the figure, with the points marking the most obvious points of the drawing. This proved more difficult than anticipated, because it involved getting the angles of the lines exactly right. Reading other people’s experience on the online forum accompanying the course, I found I was not alone in struggling with this! I am sure it will get easier with practice, though. I commented to one person that I might have to resort to using a protractor but she’d obviously tried that, and replied that it didn’t help!!
Warm up exercises
He got us drawing rectangles of different proportions to start with, and changing the size but keeping the proportions the same. We then moved on to simple pentagons. We had to draw one, then another with a different overall shape, which we had to adjust to match the first. Really difficult! I’m not sure my brain is wired right for this…
We were shown a series of photos of different figures, and were asked to draw what we thought were suitable envelopes for each one. The fact that we might have chosen different points on the photo from the ones he chose didn’t seem to matter.
He produced a photo of a seated figure with a fairly simple envelope superimposed on the reference photo which he encouraged us to draw.
The idea is similar to that in the eye studies project – you block in the different areas with simple shapes, and only when you are satisfied that the positioning and proportions are correct, do you move on to adding more detail, and finally the shading to complete the picture.
It is when you start that you realise that your envelope isn’t correct, and needs amending. There’s quite a bit of tweaking involved. I am sure that in time once one’s eye is more attuned to accurate observation, this technique will become a lot easier. It is certainly a very good idea, because looking at a picture of a figure and being expected to draw it is pretty daunting, not knowing where to begin, and being overwhelmed with too much detail. Broken down into simple shapes makes things much easier, and initially one can simply ignore the detail.
Figure 1
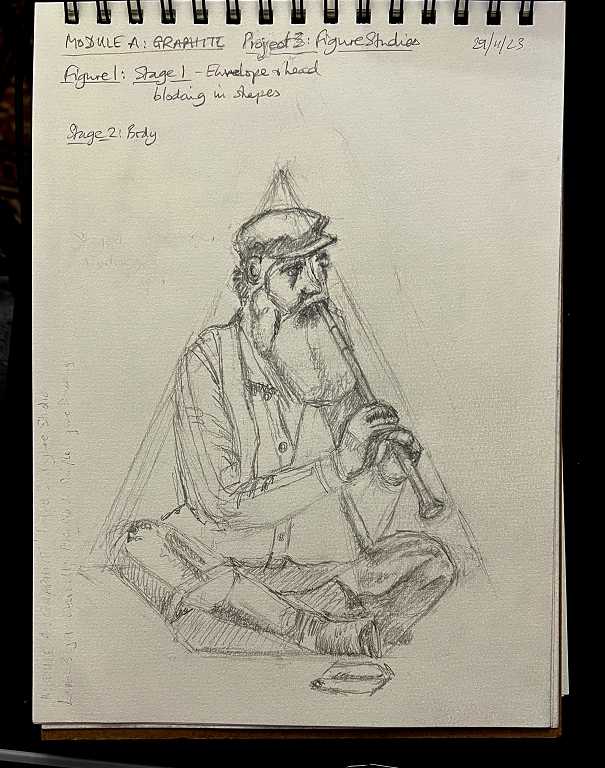
The three figures in this project are all of older gentlemen buskers, street musicians playing different instruments. The reference photos are quite complex, and involve foreshortening in some cases. The exercise involved a fairly loose, sketchy style which avoided having to get into too much detail with features such as faces and hands.
Stage 1 – the envelope and head
Stage 2 – the body
Gradually adding more detail, all the while using an HB pencil.
3. Shading, and completing the drawing
The darker shading was done with a 4B pencil. Only two graphite pencils were used for this project – the HB and 4B.

As with the previous studies, I did a lot better than I thought I would with this! I think I might put a coin or two in this busker’s cap!
New drawing/laptop/writing desk
This week I bought a folding lap desk from Amazon. This is their photo, showing the various features it has, with another one in its folded state underneath.
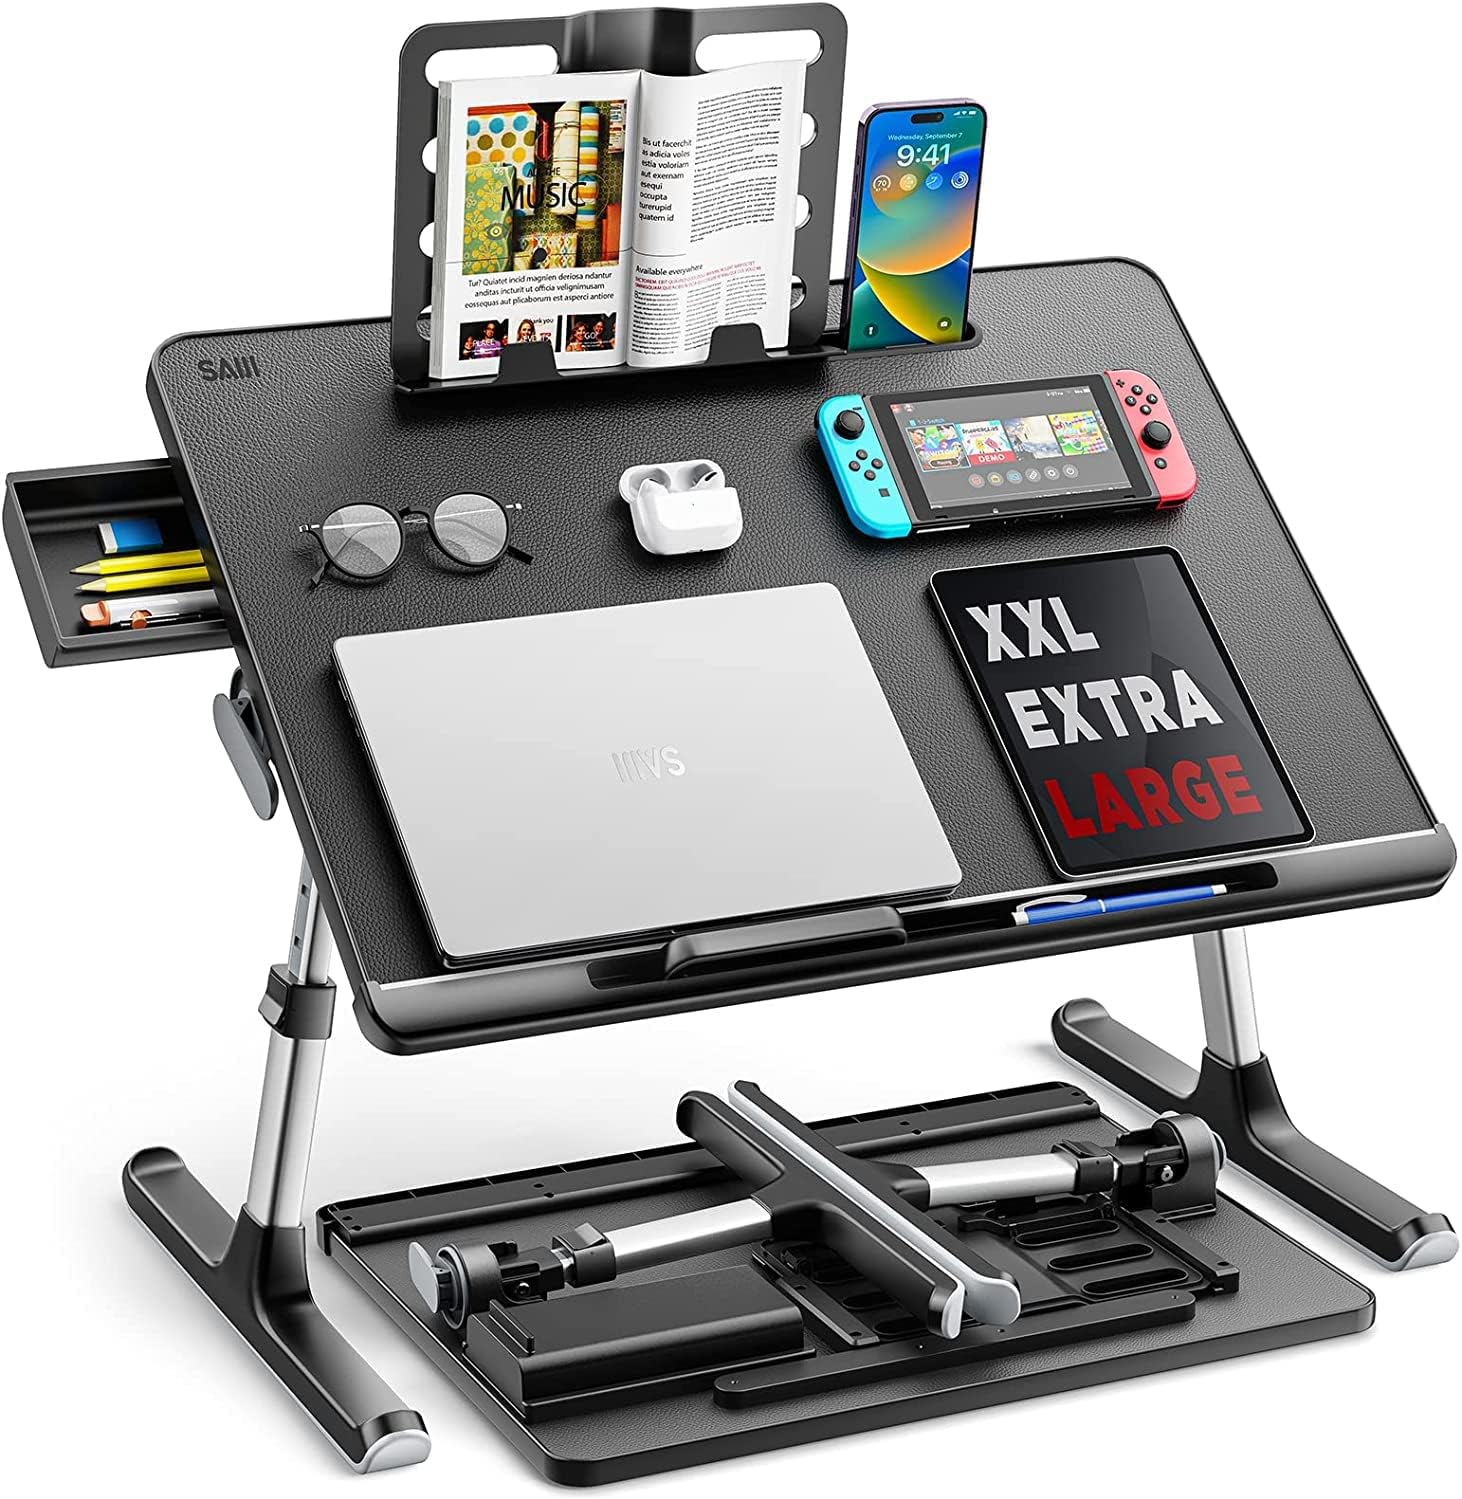
It is height adjustable, and you can alter the angle of the desk from horizontal to quite sloping (as shown – although I think this photo is unrealistic – those objects would slide off if the table was at this steep an angle!). The slot at the top will hold a tablet and/or phone, or the separate book rest, which can also be used independently of the desk, if you extend its supporting legs at the back. It has a very nice faux leather surface which is good for writing on and fairly non-slip.
The trouble is that it is really a bit too large – the feet extend quite a long way front-to-back, and unless I have the recliner extended, it doesn’t sit very stably on the settee. The legs at their shortest length are also too tall, but I have got around that problem by sitting on my wheelchair cushion to raise myself up a bit! You can put the laptop on the desk if you want, and the removable (and moveable) stop in the bottom slot prevents it from falling off. I bought this particular sized desk because my laptop is quite big, with a numerical keyboard, and many of the smaller desks would not have allowed space to the side for other bits and pieces. As it turns out, I am still using my old lap tray with attached bean bag for the laptop, so I could probably have got away with getting a smaller desk.
It is proving ideal for the art course. I put the laptop on the table in front and slightly to one side of me, with the mouse on the desk. I watch the course videos on the laptop, and I have the reference photos on my iPad which goes in the top slot so that I can easily see them. There is plenty of room on the desk for my sketch pad and my pencils and other equipment, and at a slight angle it is a comfortable position for drawing.
Alternatively, I could sit on a cushion on the floor, with my back supported against the settee, and the desk would be very stable on the floor, over my legs. I have yet to try this. I have the laptop connected to the TV and could watch the videos on that much larger screen.
I have already started using the book rest independently of the desk, and it’s great. I can see it being useful for photographing various art projects as well.
Last night I used the desk when doing my embroidery, and it worked extremely well for that as well, with plenty of room to lay everything out.
I think this product is going to be very useful, despite its drawbacks, which I can generally work around.