ONLINE ART COURSE
I am not normally someone who takes any notice of ads on YouTube, apart from getting profoundly irritated by them, but occasionally something comes up which stands out from the rest and sparks my interest.
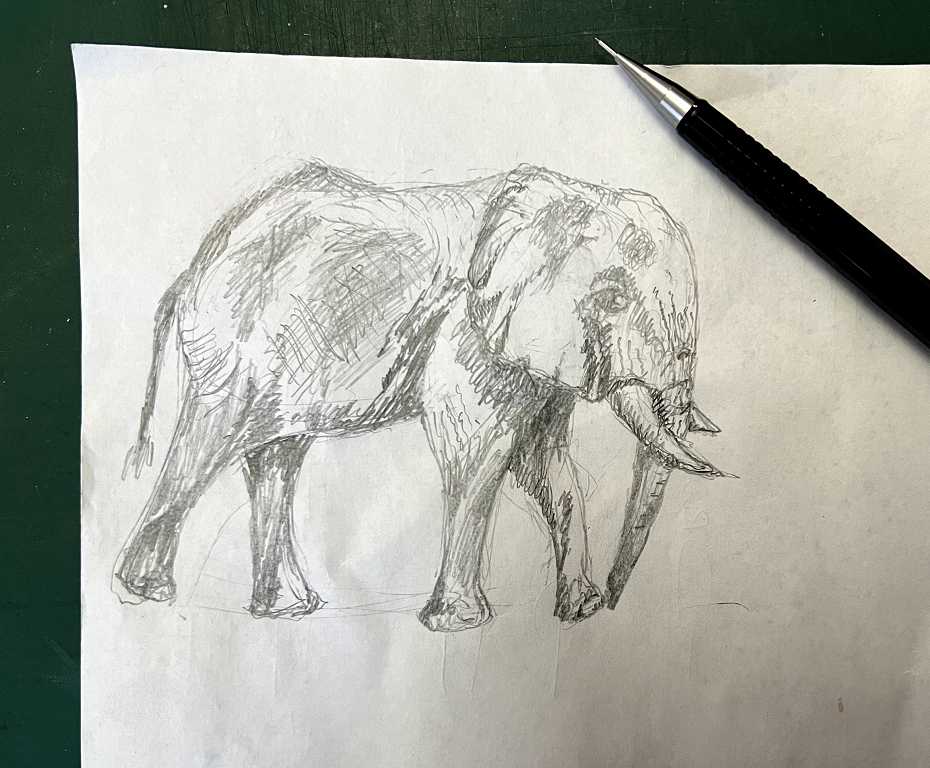
This time it was an online art course called Draw Awesome. Phil, the teacher, has a free introductory tutorial video and I decided to follow this. This is the elepant that I drew, following along with that video, just using my regular propelling pencil, on a scrap of printer paper.
He is an extremely good teacher, and when I investigated further, I could see that this year-long course was top quality, and pretty reasonably priced too, so I decided to go for it. For £1 (or $1) you can try it for a week, and if you think it isn’t for you, you can cancel, or you can continue with a monthly subscription, or pay the full price up-front. I have opted for the subscription version.
It is a drawing course in which he teaches the students how to observe, to look at things as they really are and not as we think they are. He teaches a consistent approach, which is the best way to achieve results – as my Hebrew teacher said to us at the beginning of the course, “The more work you put in, the more you will get out of it,” and he also recommended studying at the same time each day if possible, and to be consistent and regular. This art course is broken down into modules which do not require vast amounts of time each week but allow one to progress at a consistent steady pace. There is also an online community you can join, for inspiration and encouragement, to see what others are doing, and to share your own art work and progress.
Although I have always been creative in many different areas, I feel that drawing is my weak point. I can draw to design things, and I think I’m pretty accomplished at Zentangle inspired art, but lack skill and confidence in the more fine-art approach.
The first session is really to familiarise us with the layout of the course and how it is constructed, and what to expect. There are videos for each stage, and you draw along with the teacher. I am now on the first module, which is on graphite – drawing with graphite pencils ranging from HB to 7 or 8B. This is very helpful because working in monochrome does teach one the importance of values. The teacher says that with his method, you gain skills which can then be translated into any medium or style which suits you. I like the idea of this approach.
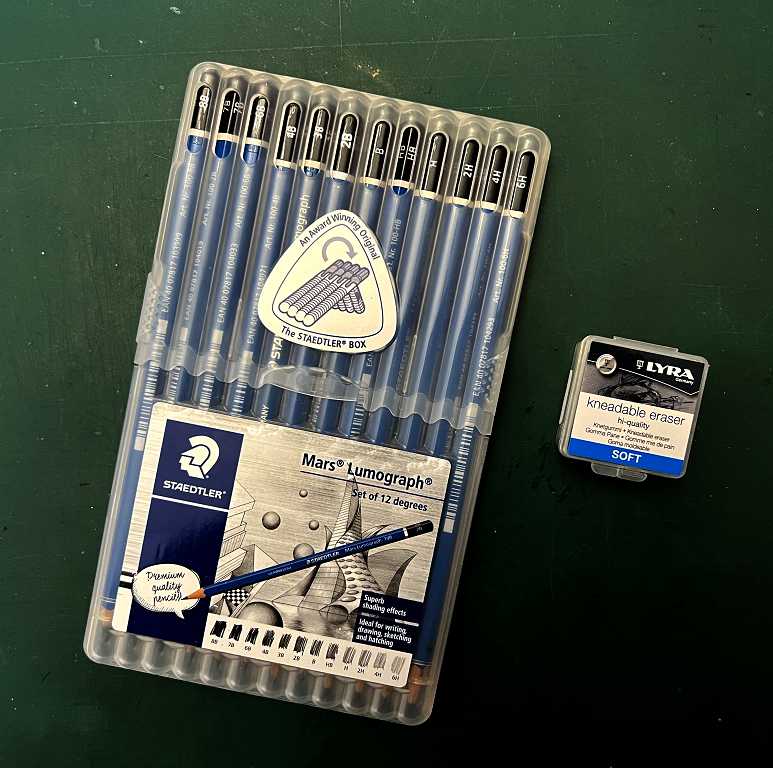
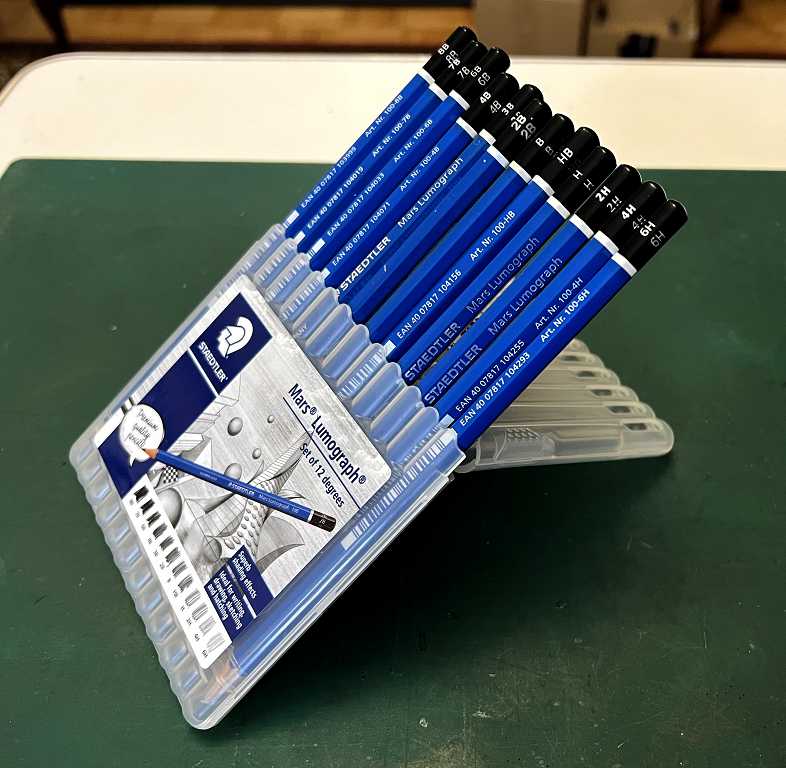
He tells us that a couple of weeks before the start of each module, he will send an email detailing what equipment is required for that module. This way, you don’t have to buy masses of stuff all at once, and for many of us, we’ve already got quite a bit of it anyway. I didn’t have any graphite pencils, so I bought this Staedtler set (recommended) – like my Staedtler fineliners (water-based markers) the pencils come in a neat plastic case which doubles as a stand. I also bought a putty eraser, and a dual pack of drawing books with nice thick paper. I already had blending stumps, pencil sharpener and various fine-tipped erasers.
The first video of each module is “Project Orientation” which sets the scene, and then there are some warm up exercises. It’s not too easy to see, as the pencil is fairly light against the white paper, but here are my warm-ups from the last couple of days.
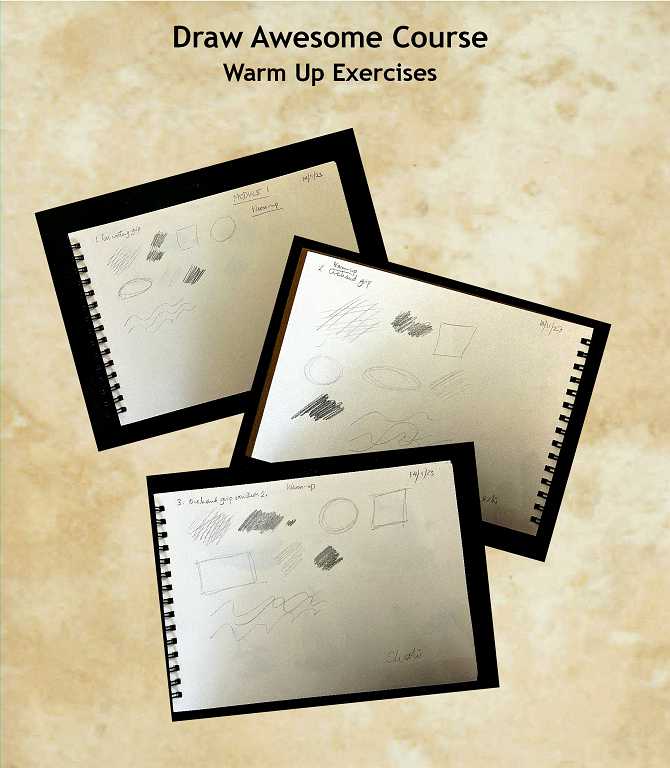
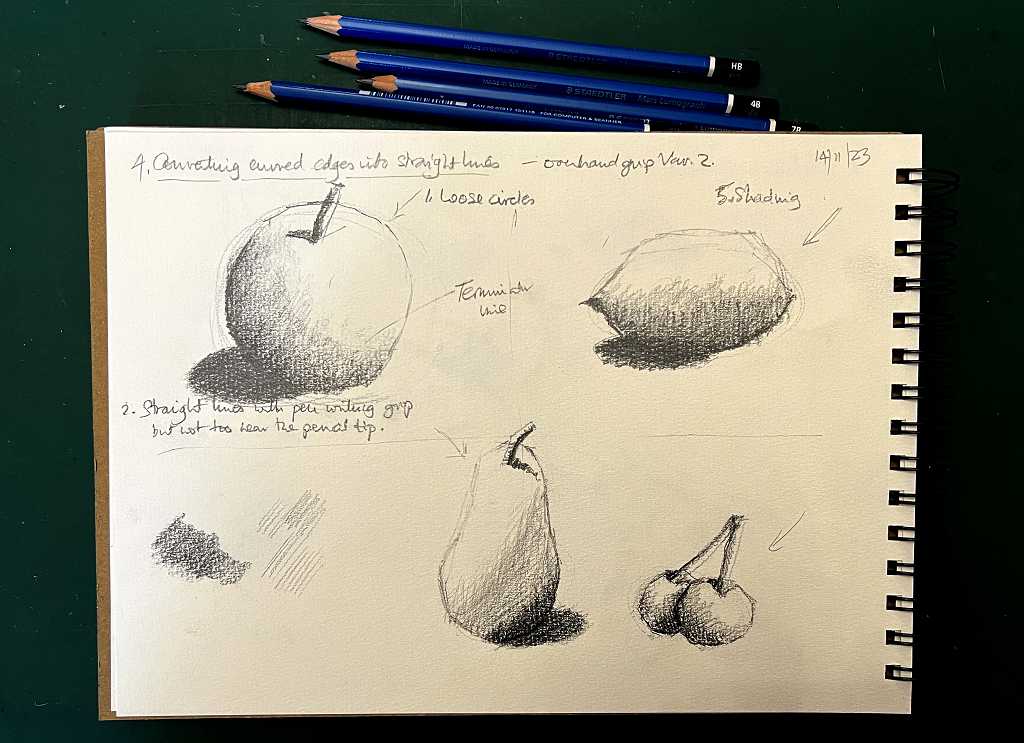
The warm up exercises involve making various marks and experimenting with shading and hatching, and drawing loose shapes. He teaches the various ways of holding the pencil, from the standard pen writing grip that we all use for handwriting, and two variations of the overhand grip which encourages you to draw much more loosely – both of these take a bit of getting used to.
After doing the mark making and familiarising ourselves with the pencil, we moved on to drawing simple fruit shapes and adding some shading.
The first real project in this module is to follow along with Phil as he draws a still life of some onions and garlic. At the end of the first session of this, this is what I ended up with. It’s basically blocking out the shapes and the main shadows – not too much detail at this stage. The emphasis is on getting the shapes the right size and in the correct relationship with each other – basic observation skills.
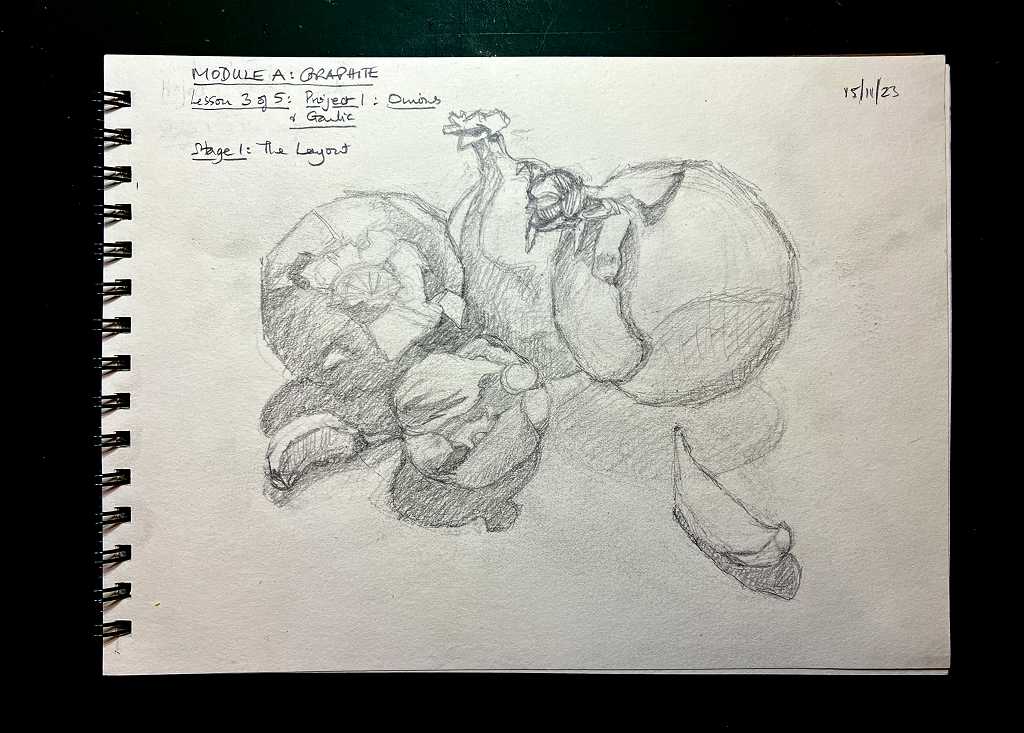
Over the next two sessions we will work on this and add the detail. It doesn’t look great at this stage but I hope for better things as I continue to work on it!
There are five sessions in this module: the Project Orientation, Warm Up Exercises, and three sessions working on the project itself. There are some other projects to work on as well, and then one to work on your own. You can see from this the general approach of the course.
Looking ahead, the next few modules will also be concentrating on media – charcoal, pastel pencils, ink pens with watercolour etc., and each one will deal with different subjects to draw, with the final one being something of one’s own choice, so one isn’t always copying, but applying what one is learning before moving on to the next module. The modules in the latter part of the course deal with subject matter rather than materials, so we will be drawing landscapes, animals, portraits, etc. There is one module per month, and the whole course lasts a year.
In the introductory session before the launch of the course proper, Phil gave a very useful illustration to help us get over any initial frustrations we might have. He said that whenever you learn anything new, it is hard, but if you keep at it, you will eventually get a breakthrough when everything falls into place. He said that if you have some ice at -25 degrees or whatever, it is definitely ice. You can increase the temperature a couple of degrees at a time, to -23, or -20 degrees, and it is still ice. However, when you raise the temperature to 1 degree, suddenly the ice becomes water! That final increase in temperature might not be any greater than the previous increments, but it makes all the difference. I found this very helpful. The point where one’s ice becomes water will be different for everyone, I suppose, and one just has to be patient and keep persevering until what we are learning becomes second nature and suddently we “get” it.
So far, I can highly recommend this course. I think it is going to be tremendous fun, and I have every confidence that it is going to produce really good results too. I am really looking forward to this! It will be fantastic to be able to draw “proper pictures” and I think it will also enhance my creativity in all areas, generally, as I translate this new mindset and way of looking at things into every aspect of my creativity.
It is not so time consuming that I will not be able to continue with my other projects and non-art related activities, but I shall try to follow his advice and set aside regular periods each week which will be dedicated to this. As he said, if you were attending a course in person on say Wednesday evenings at 7.30 p.m., you would earmark that time and make sure you attended. He said the danger with online courses is that it is all too easy to say, “I’ll do it if I have a spare couple of hours this week,” which means ultimately that you won’t do it, because life has a habit of getting in the way. It takes more discipline to set aside regular times when following a course like this, than it does when you attend a “real life” course. There’s definitely a lesson in this for life in general, not just for art courses! To do anything consistently and well, takes self-discipline, and saying “no” to other demands that life (and other people!) throw at you!
Excellent Shoshi, wow you have a real gift for drawing!! I look forward to seeing you blossom with this course and how it will extract from you even more beautiful art work!