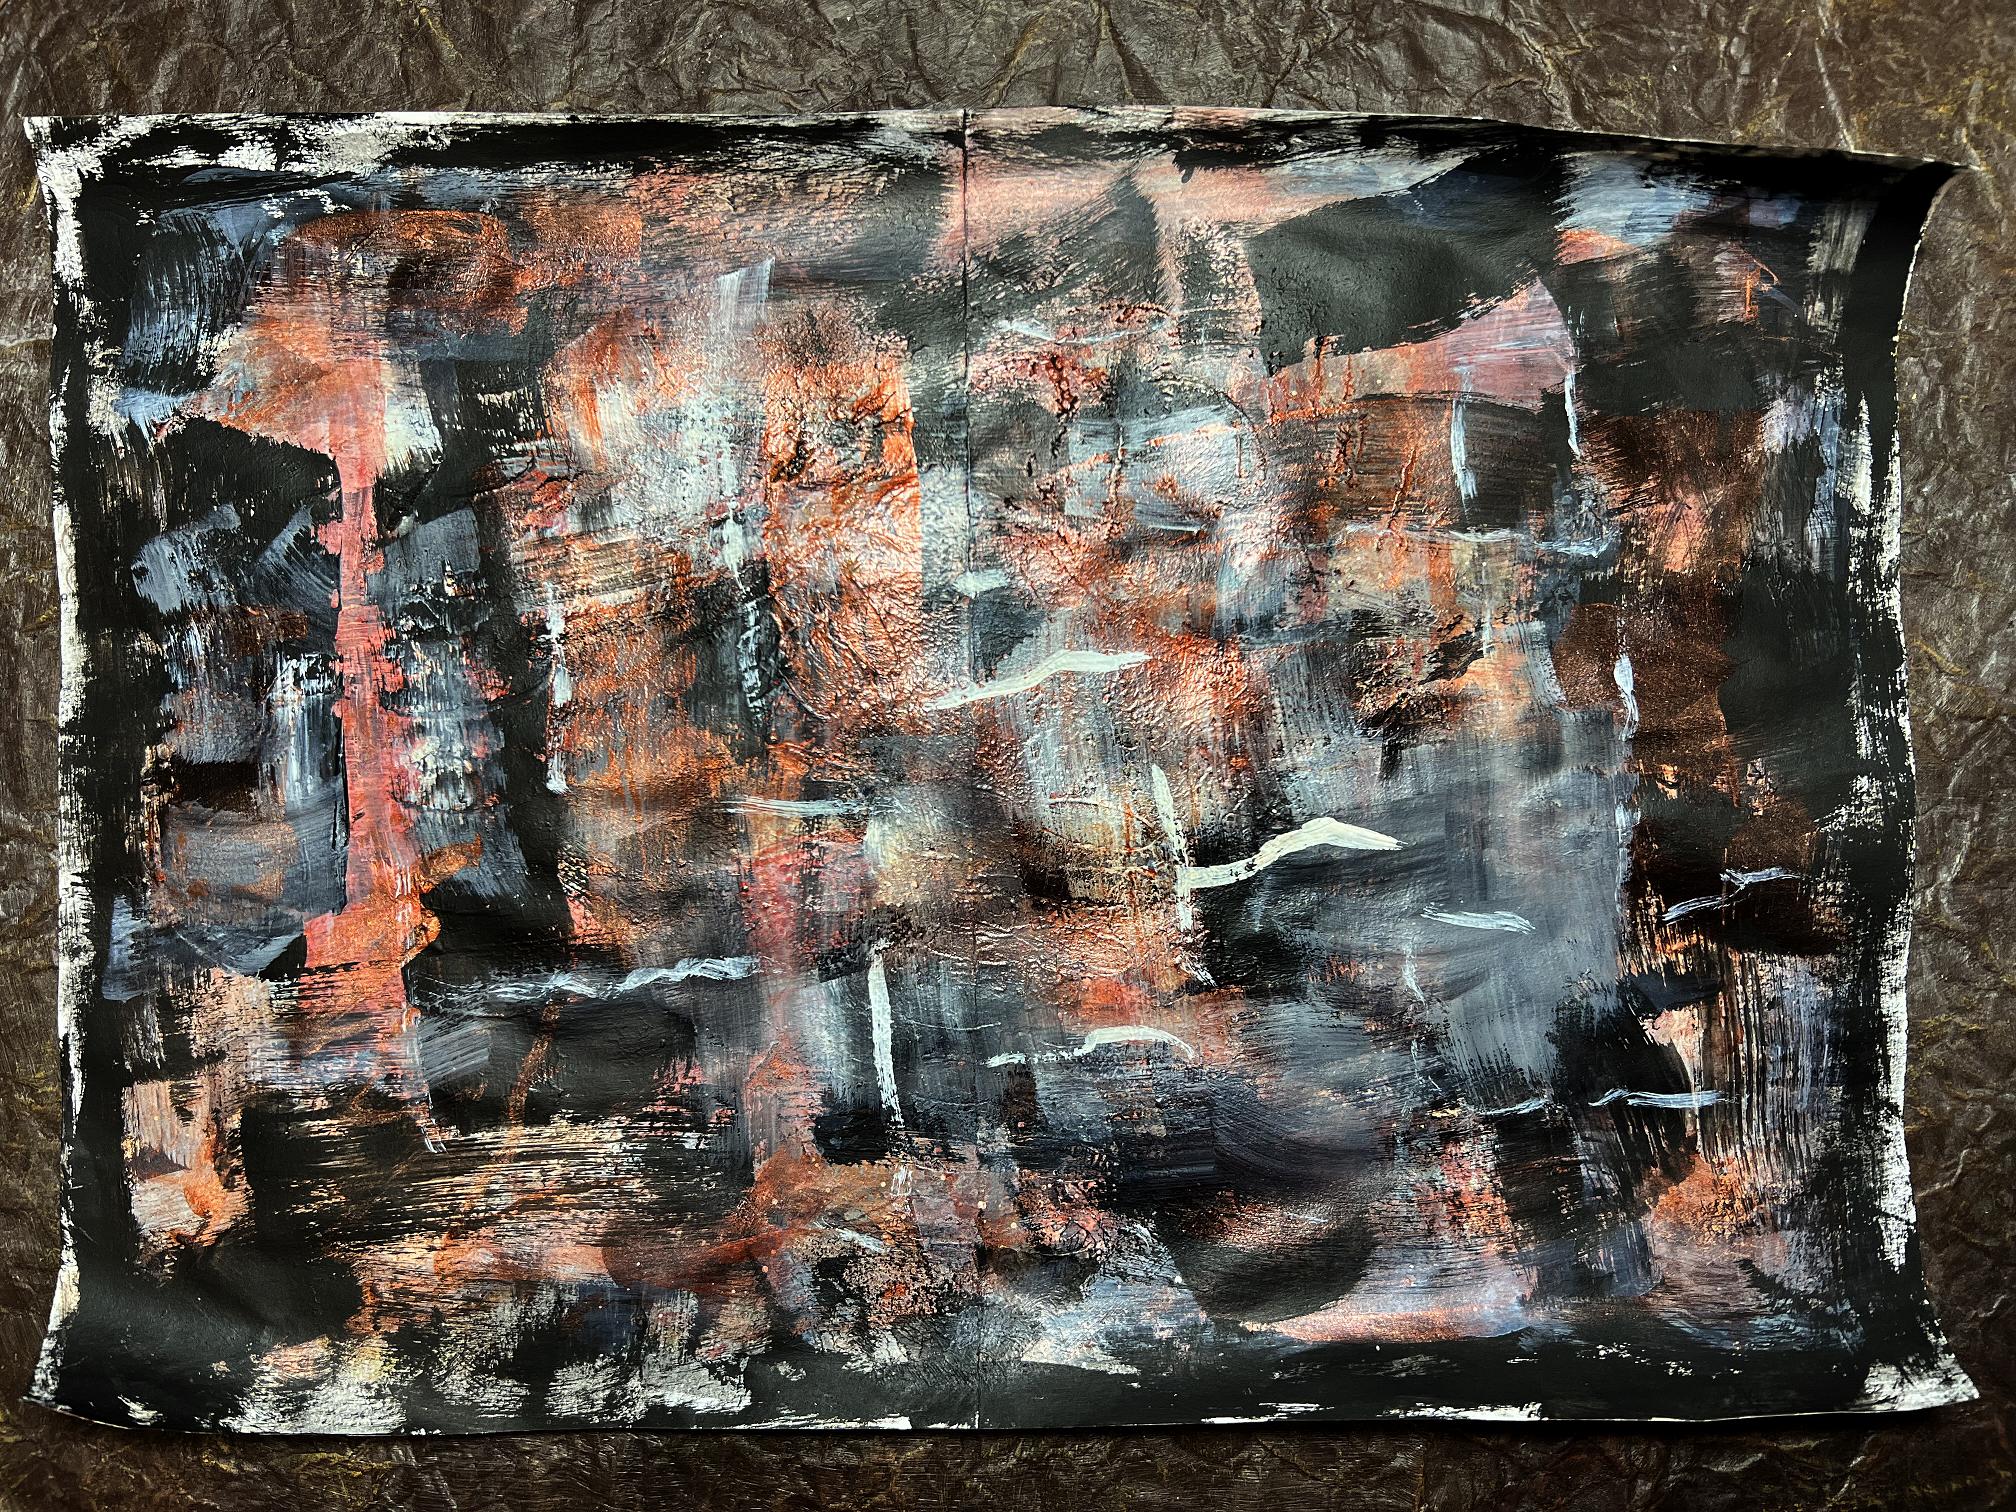
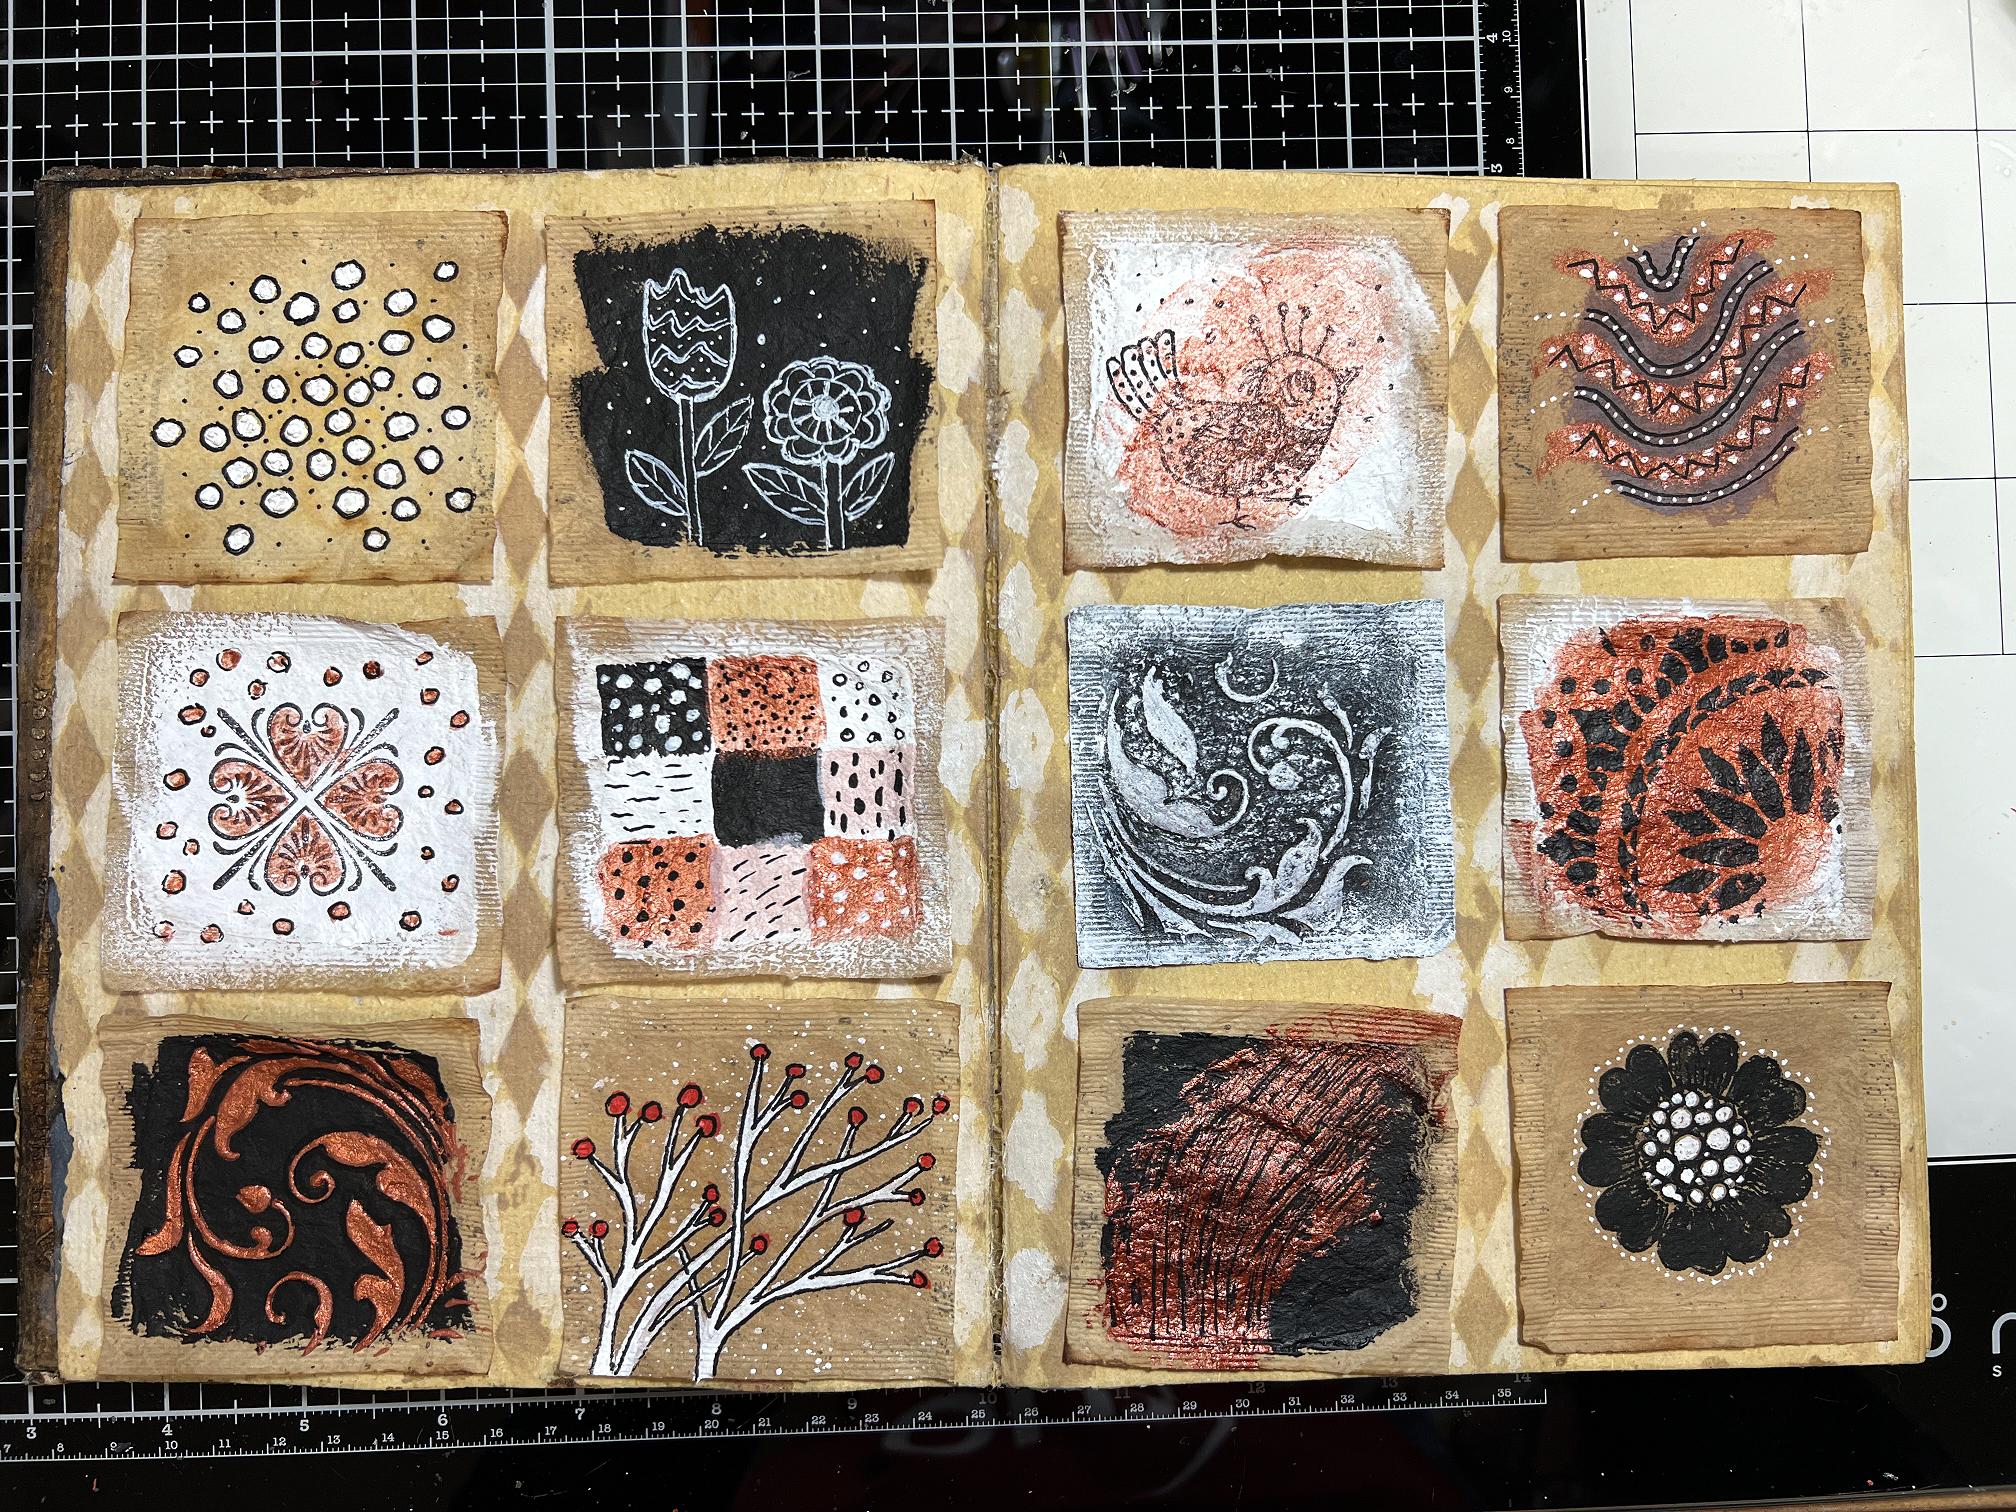
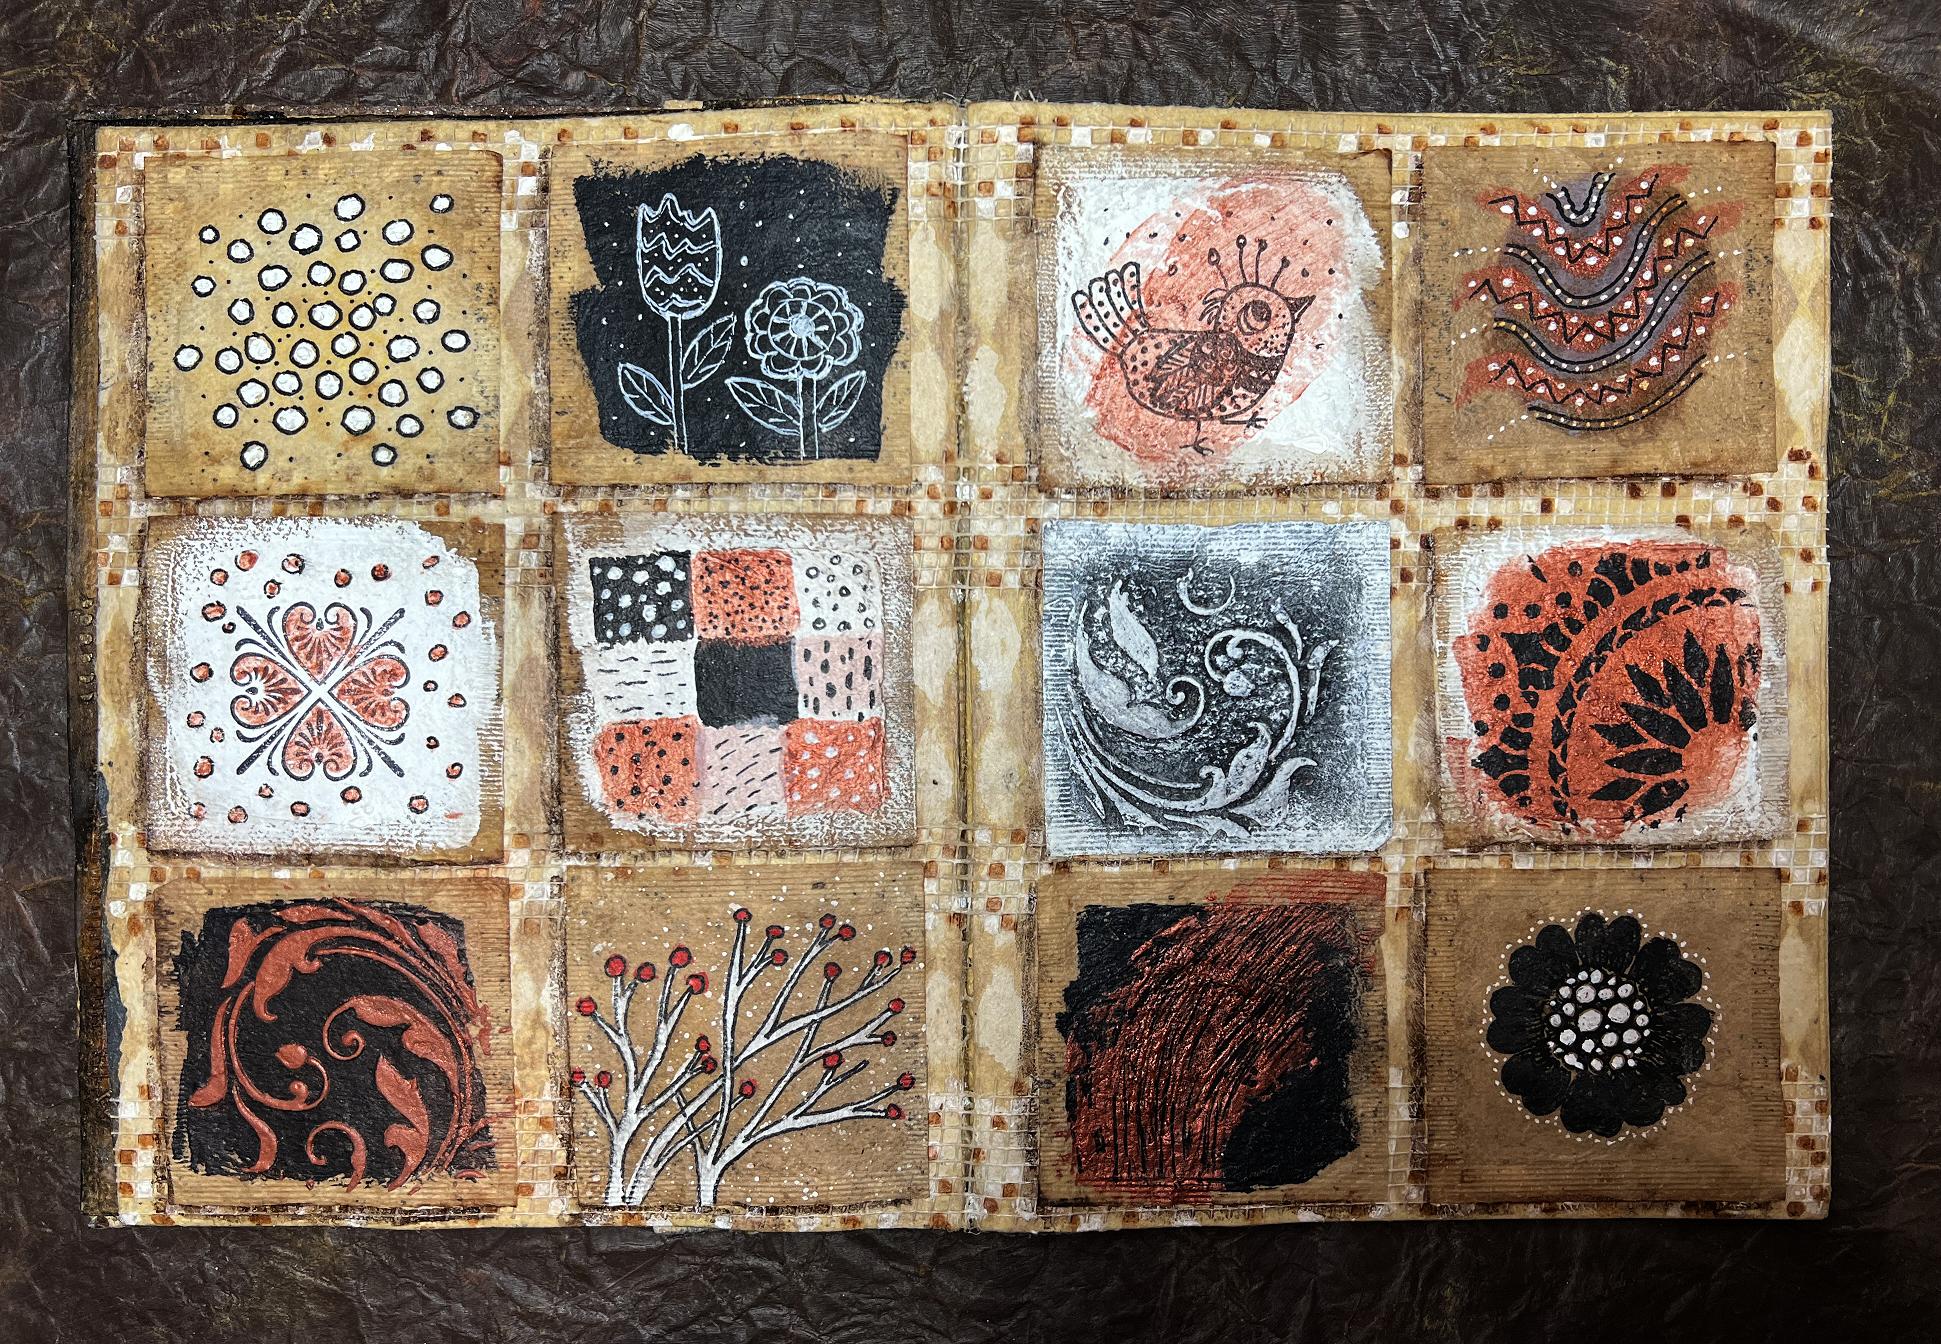
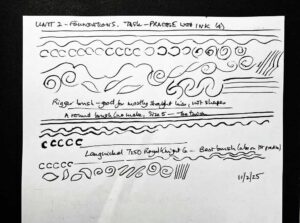
Fun with teabags
I do love teabag art! Yesterday I began a new page in my beautiful Organic Journal, by decorating a dozen teabags to stick down in a grid pattern as a kind of teabag design sampler. I kept the colour palette limited to black, white and copper (gorgeous metallic acrylic paint) and used different methods of embellishing, from drawing and painting, stamping, stencilling etc.
Prepping and arranging the teabags
I painted some white, and some black, and left the rest unpainted. Before painting, I prepared them with a layer of Golden Acrylic Satin Glazing Liquid (my new favourite ground for most of my art).
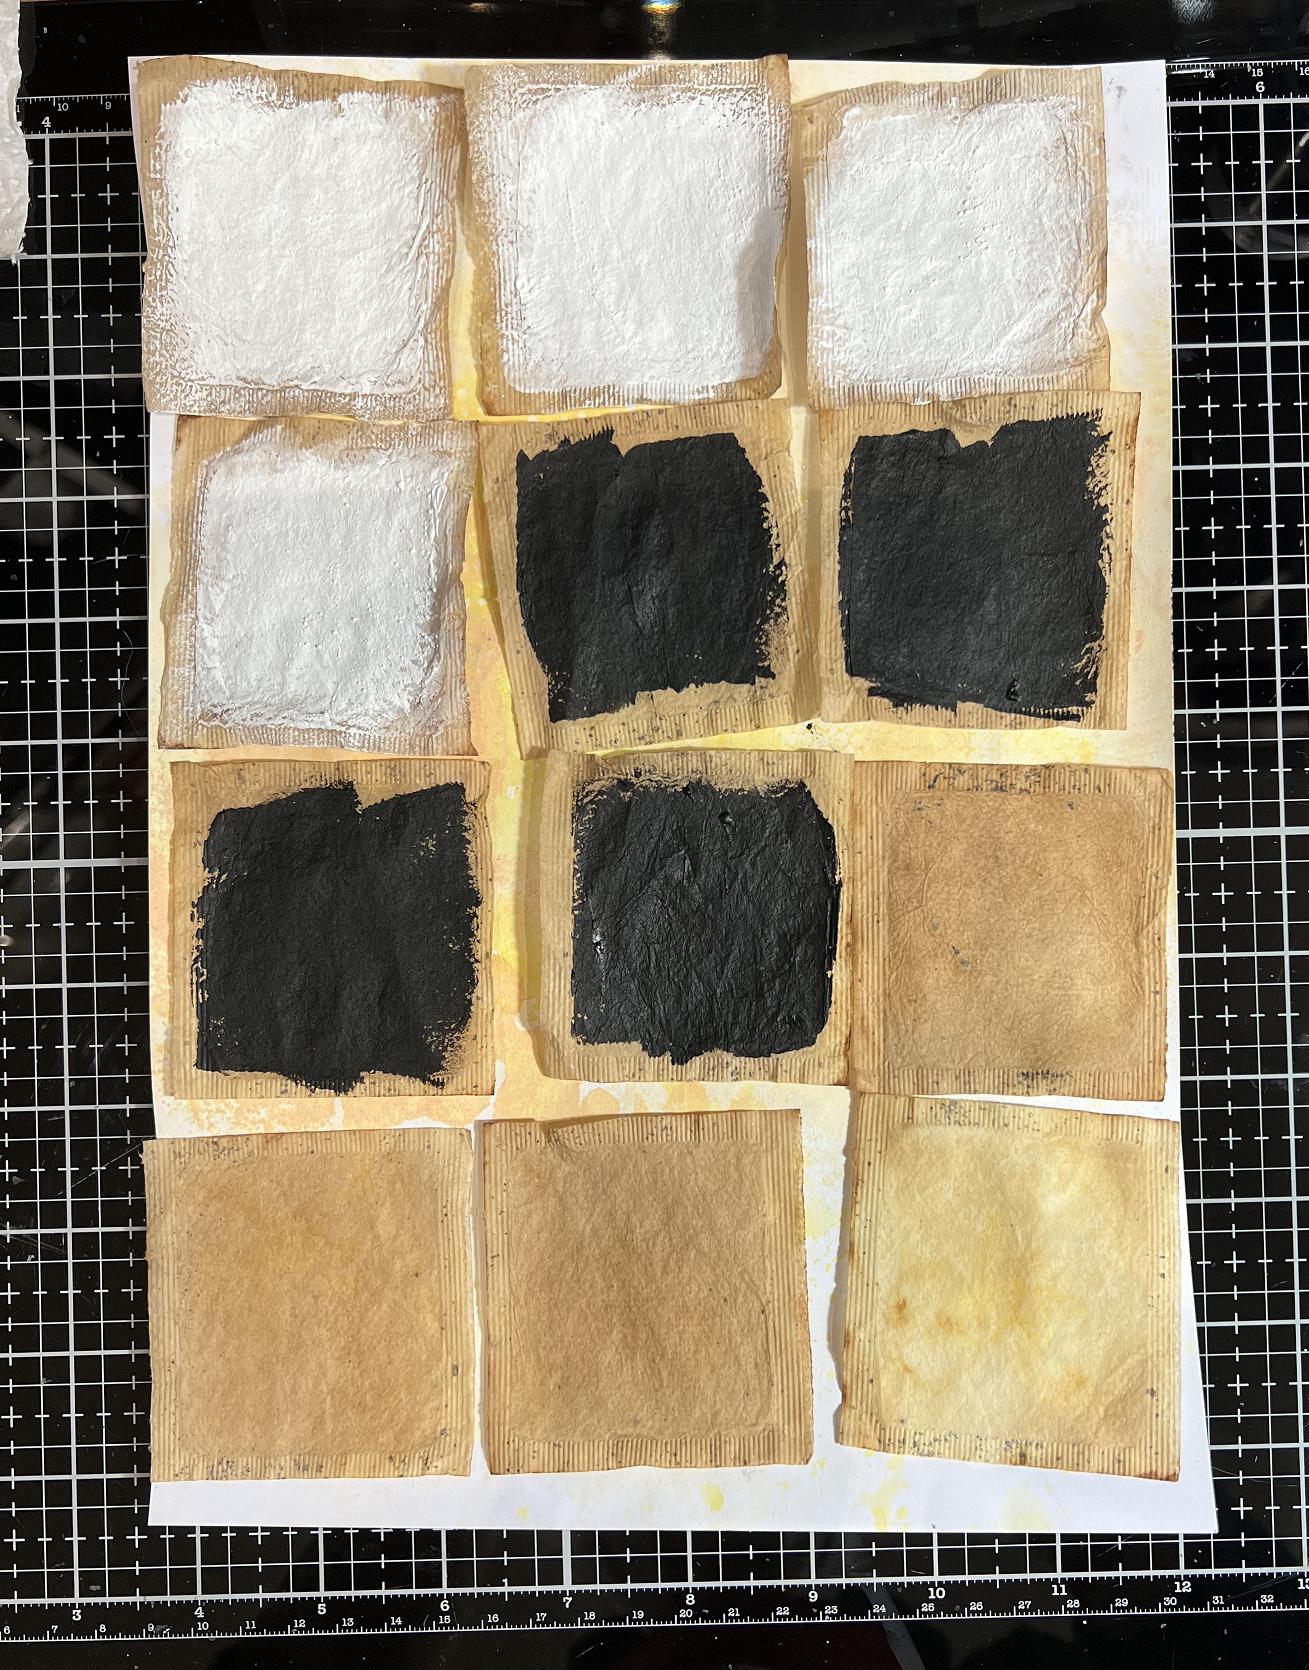
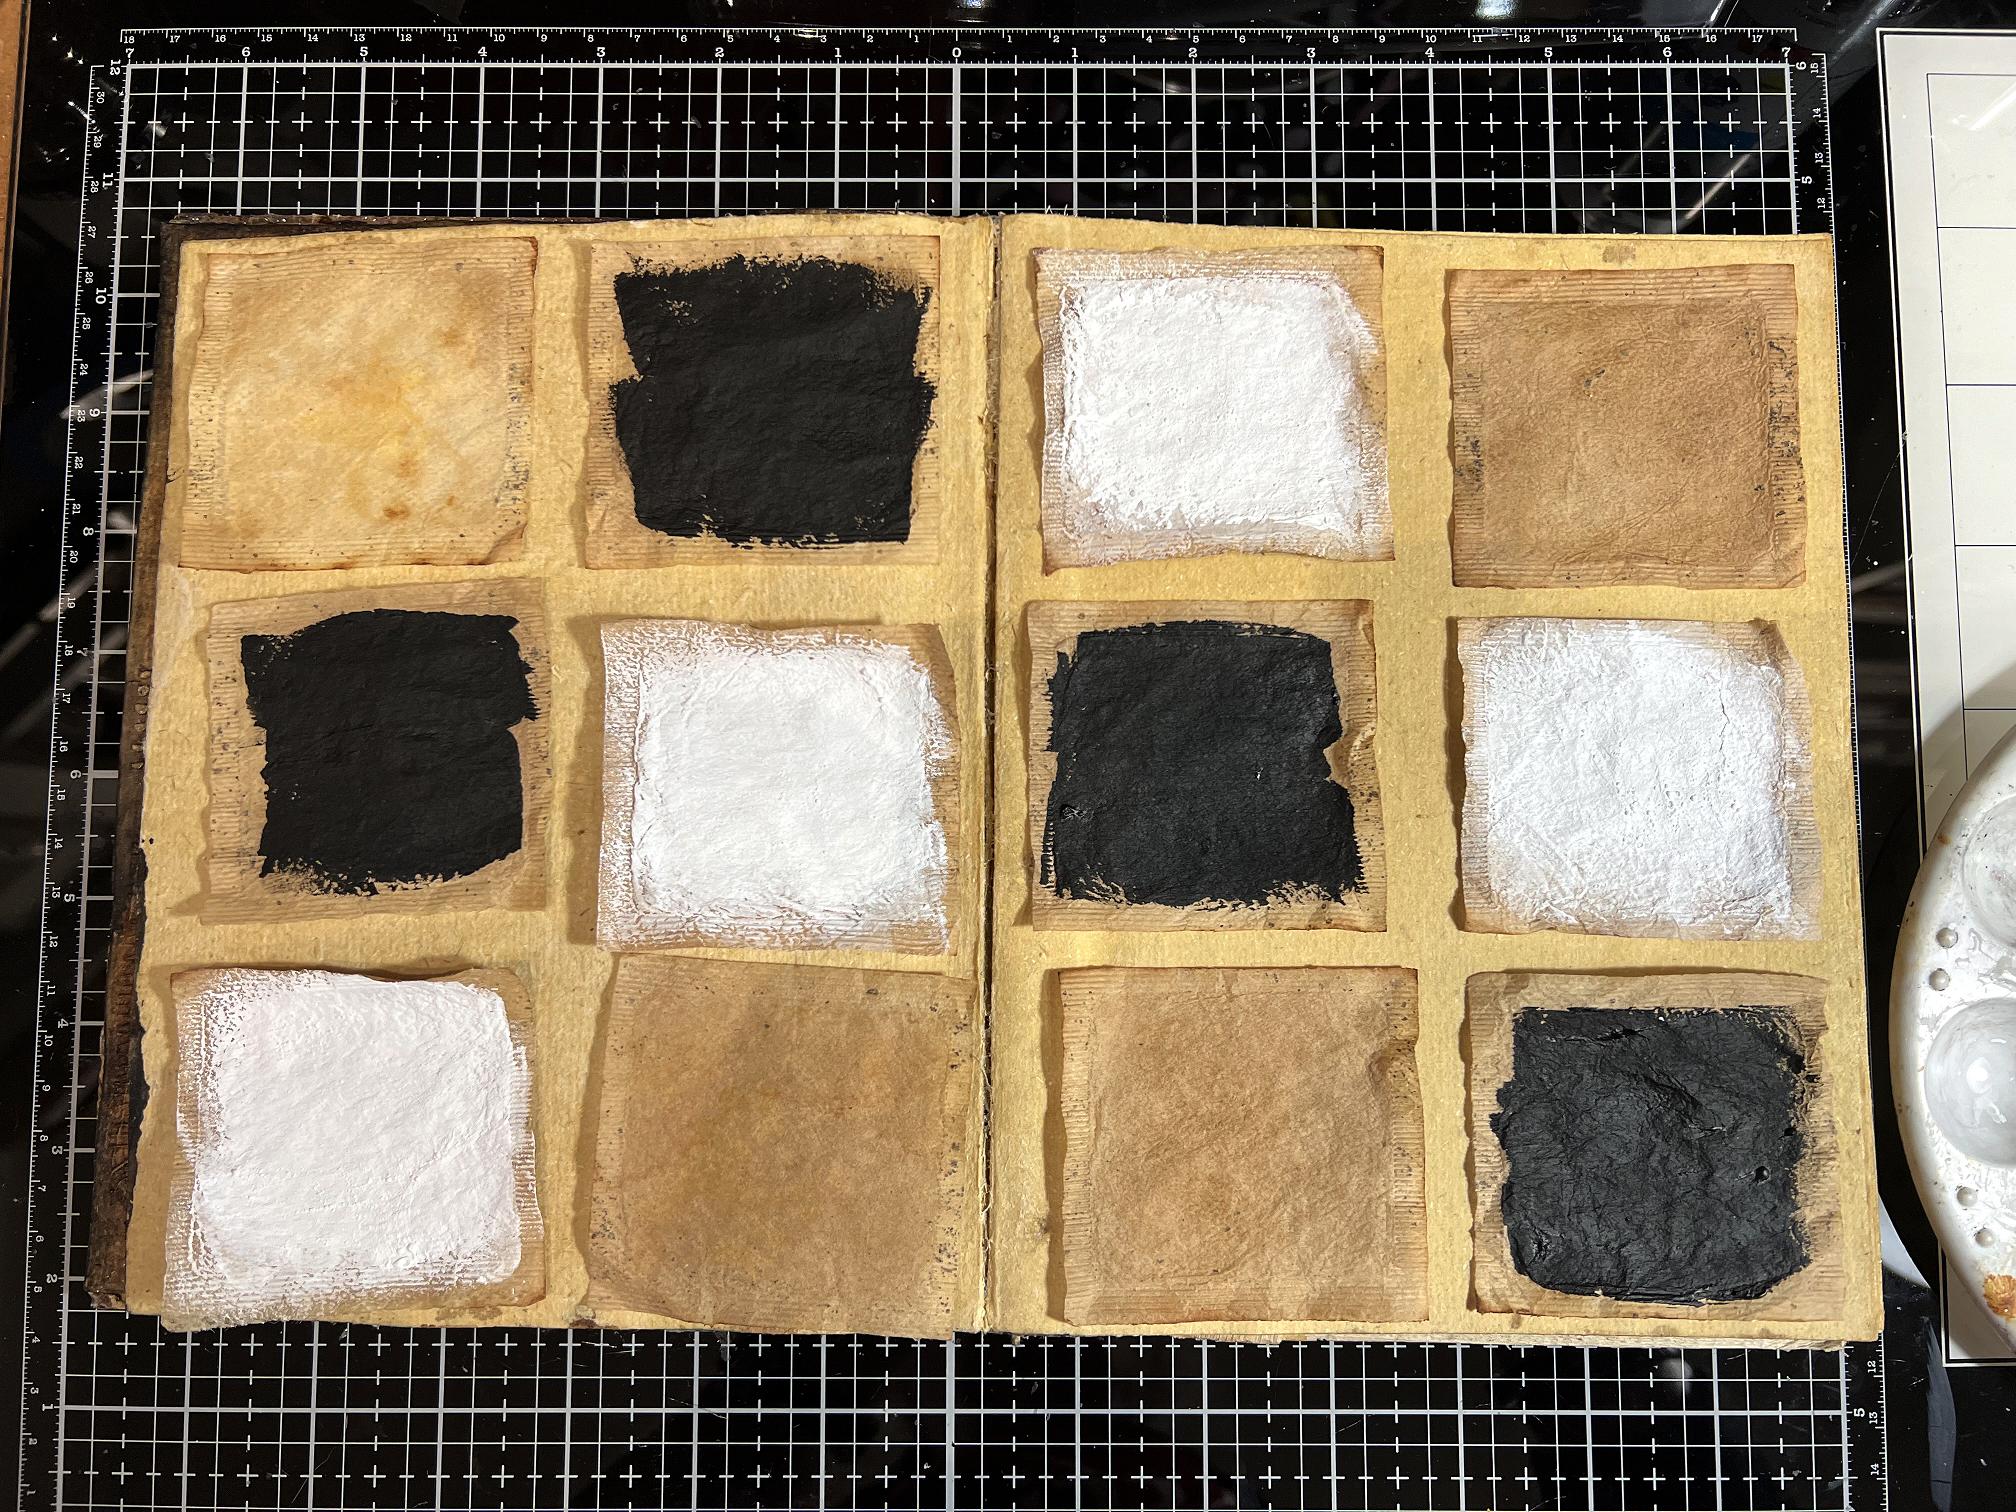
I arranged the prepped teabags in a grid formation on the book page.
The decoration
Then it was time to have some fun.

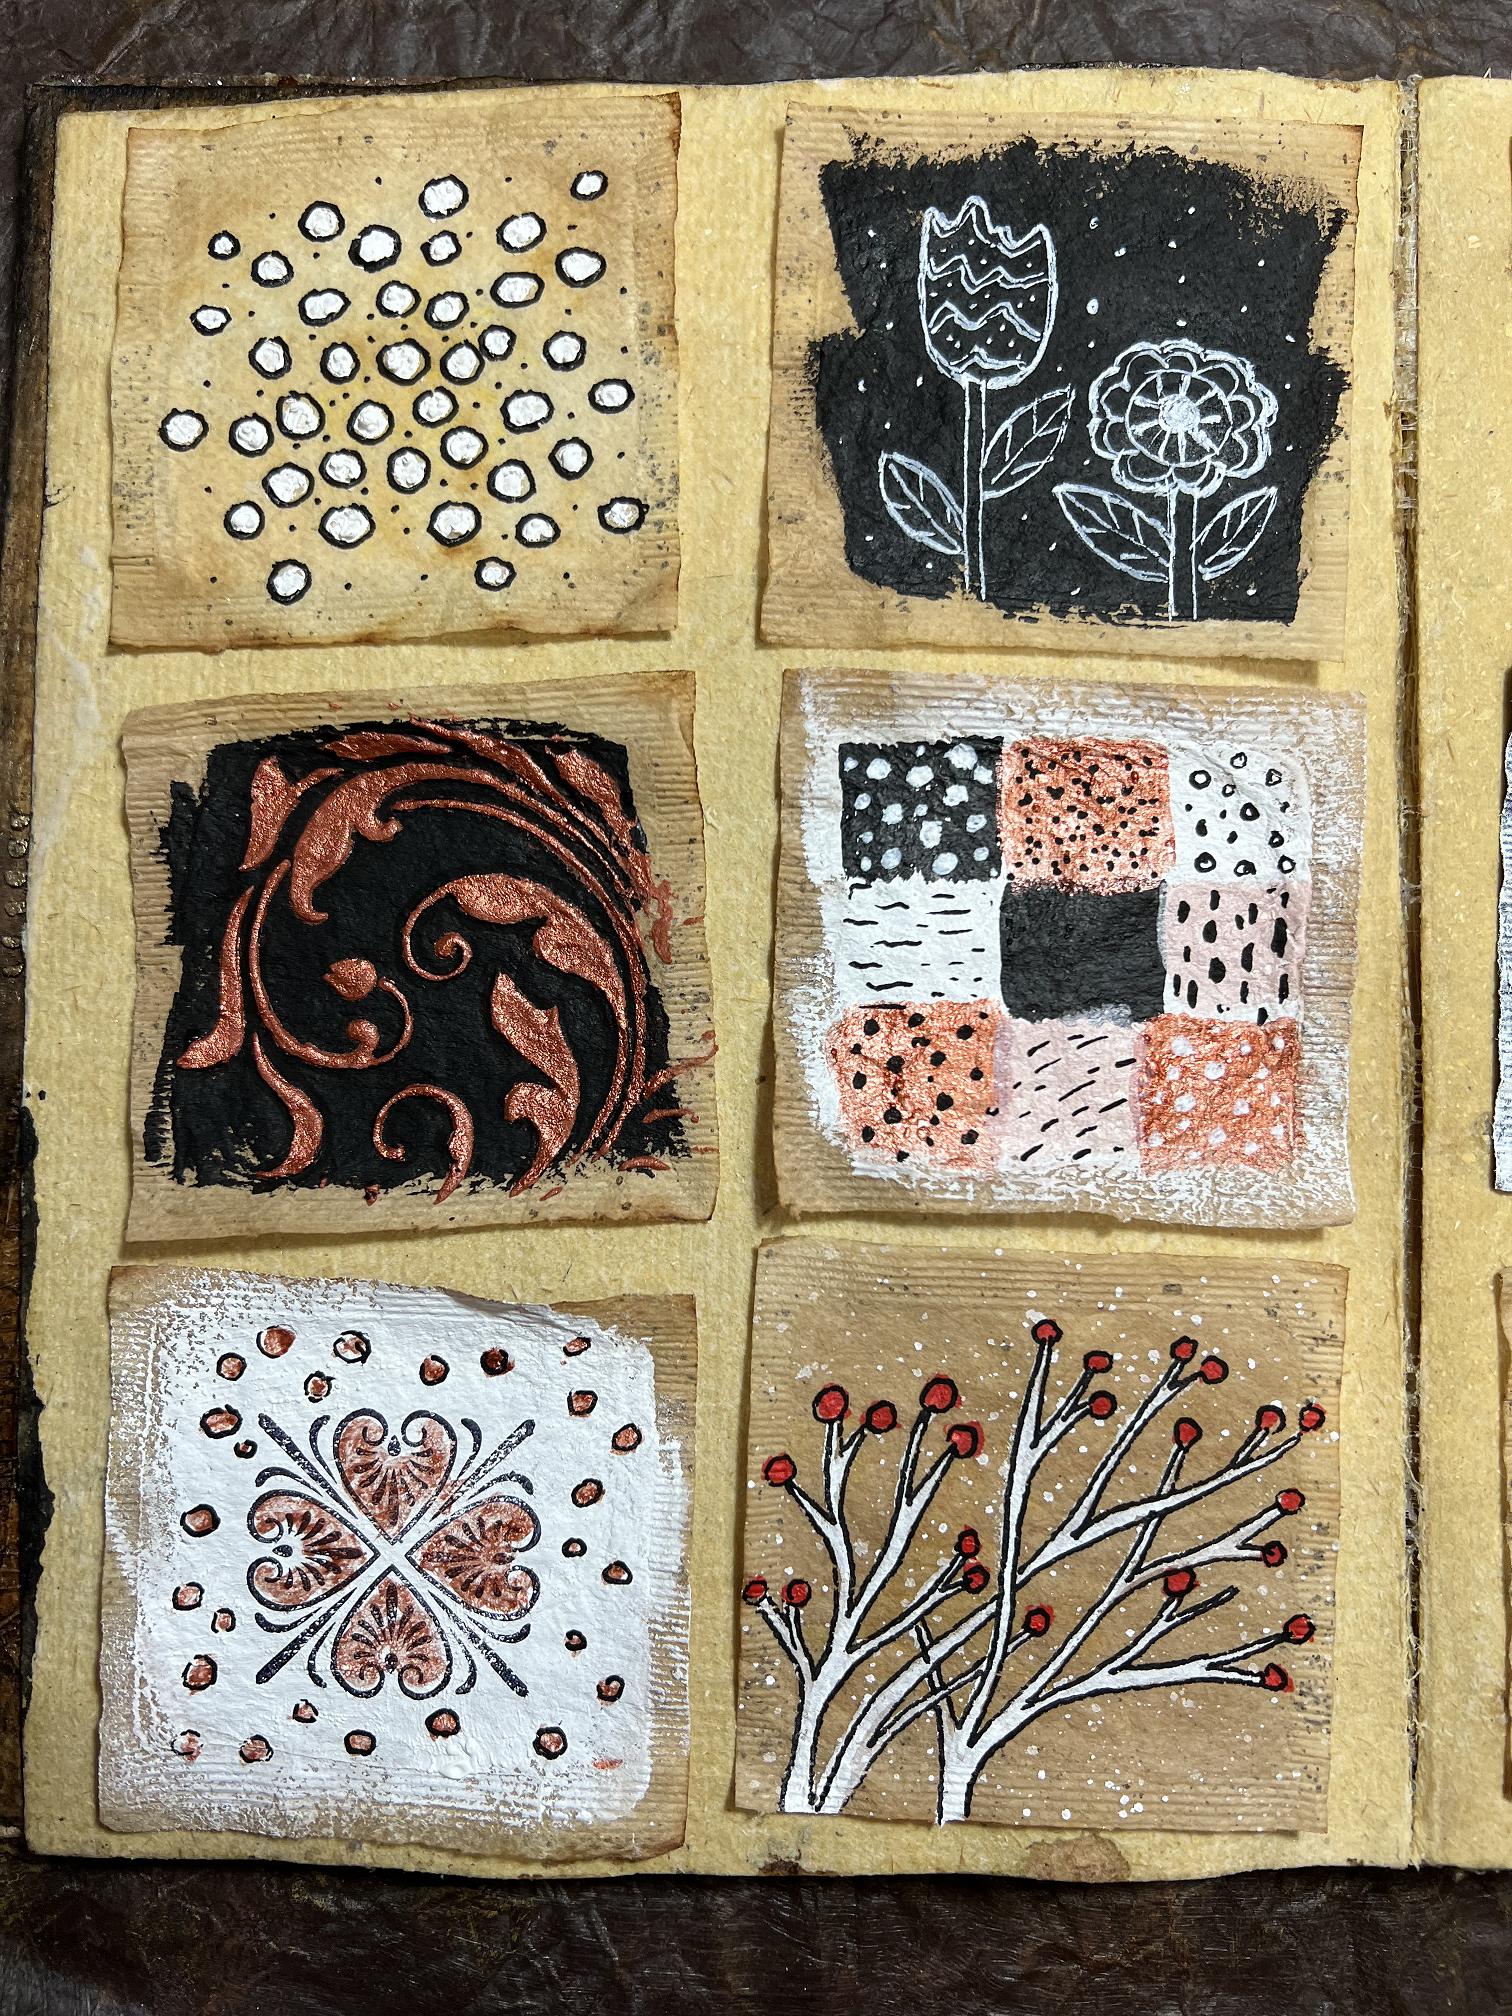
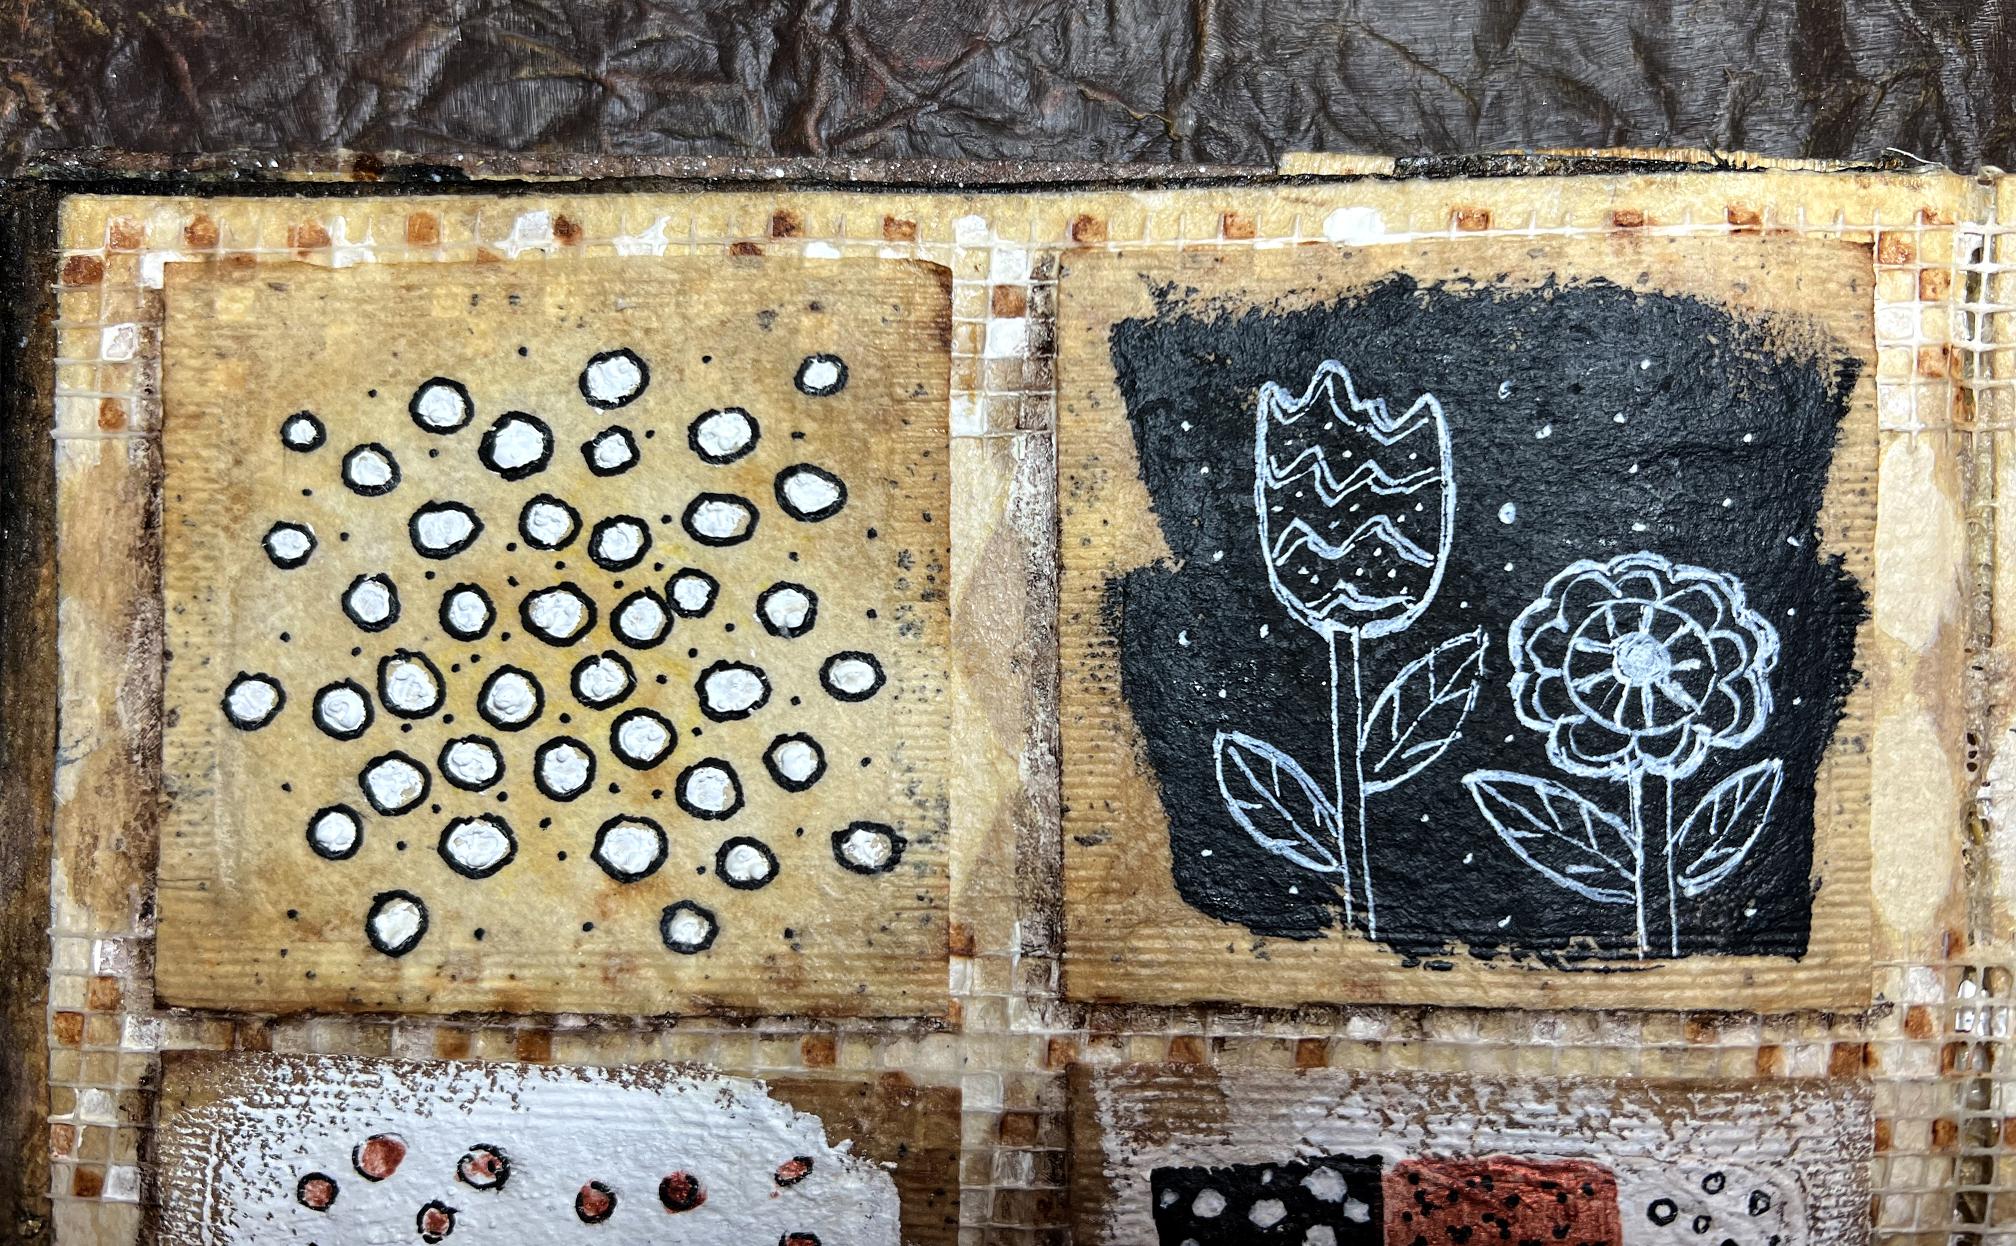
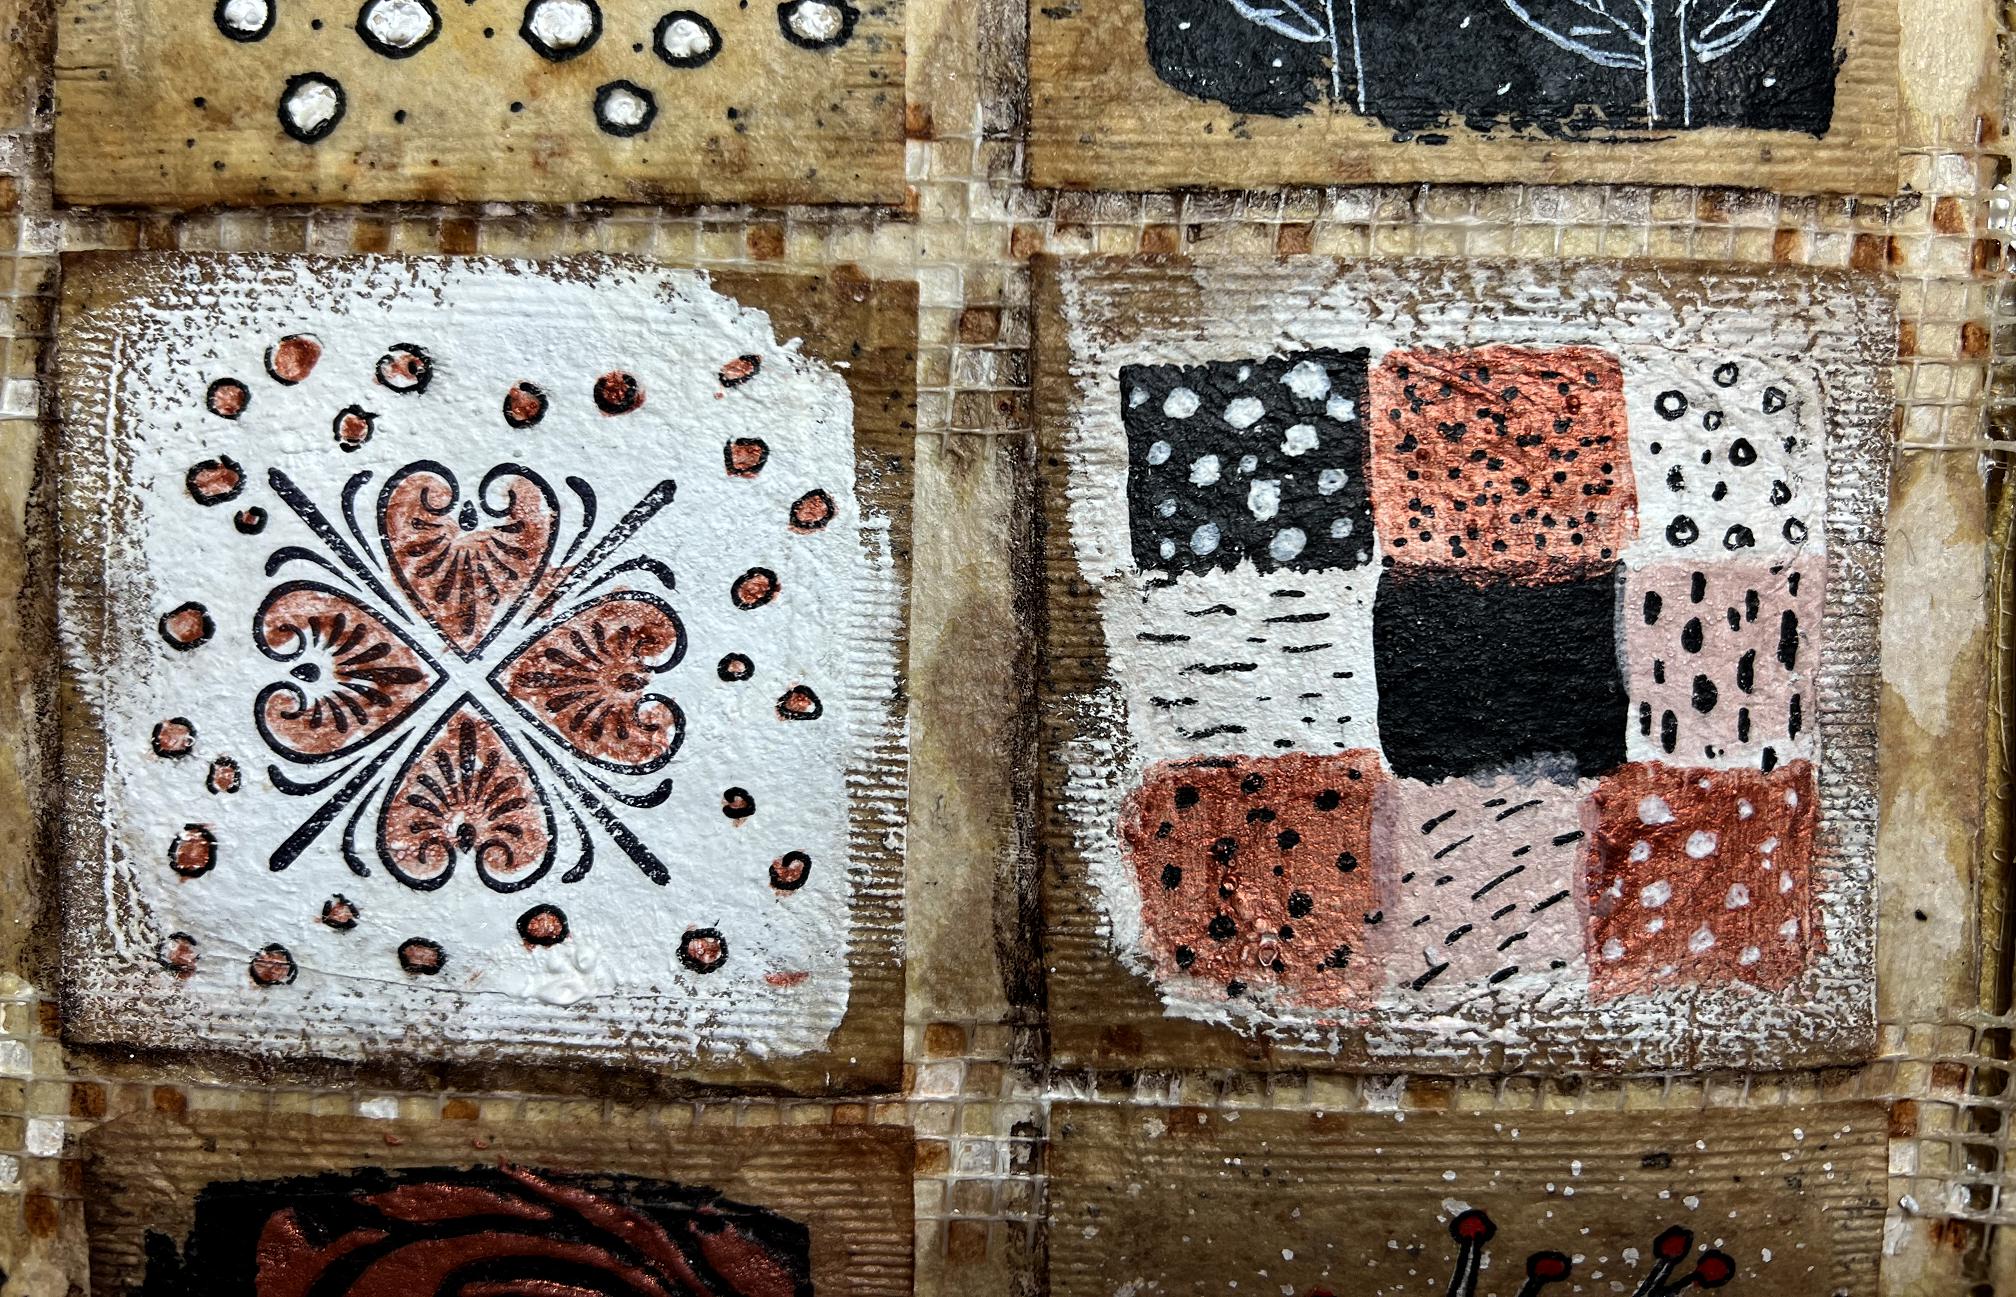
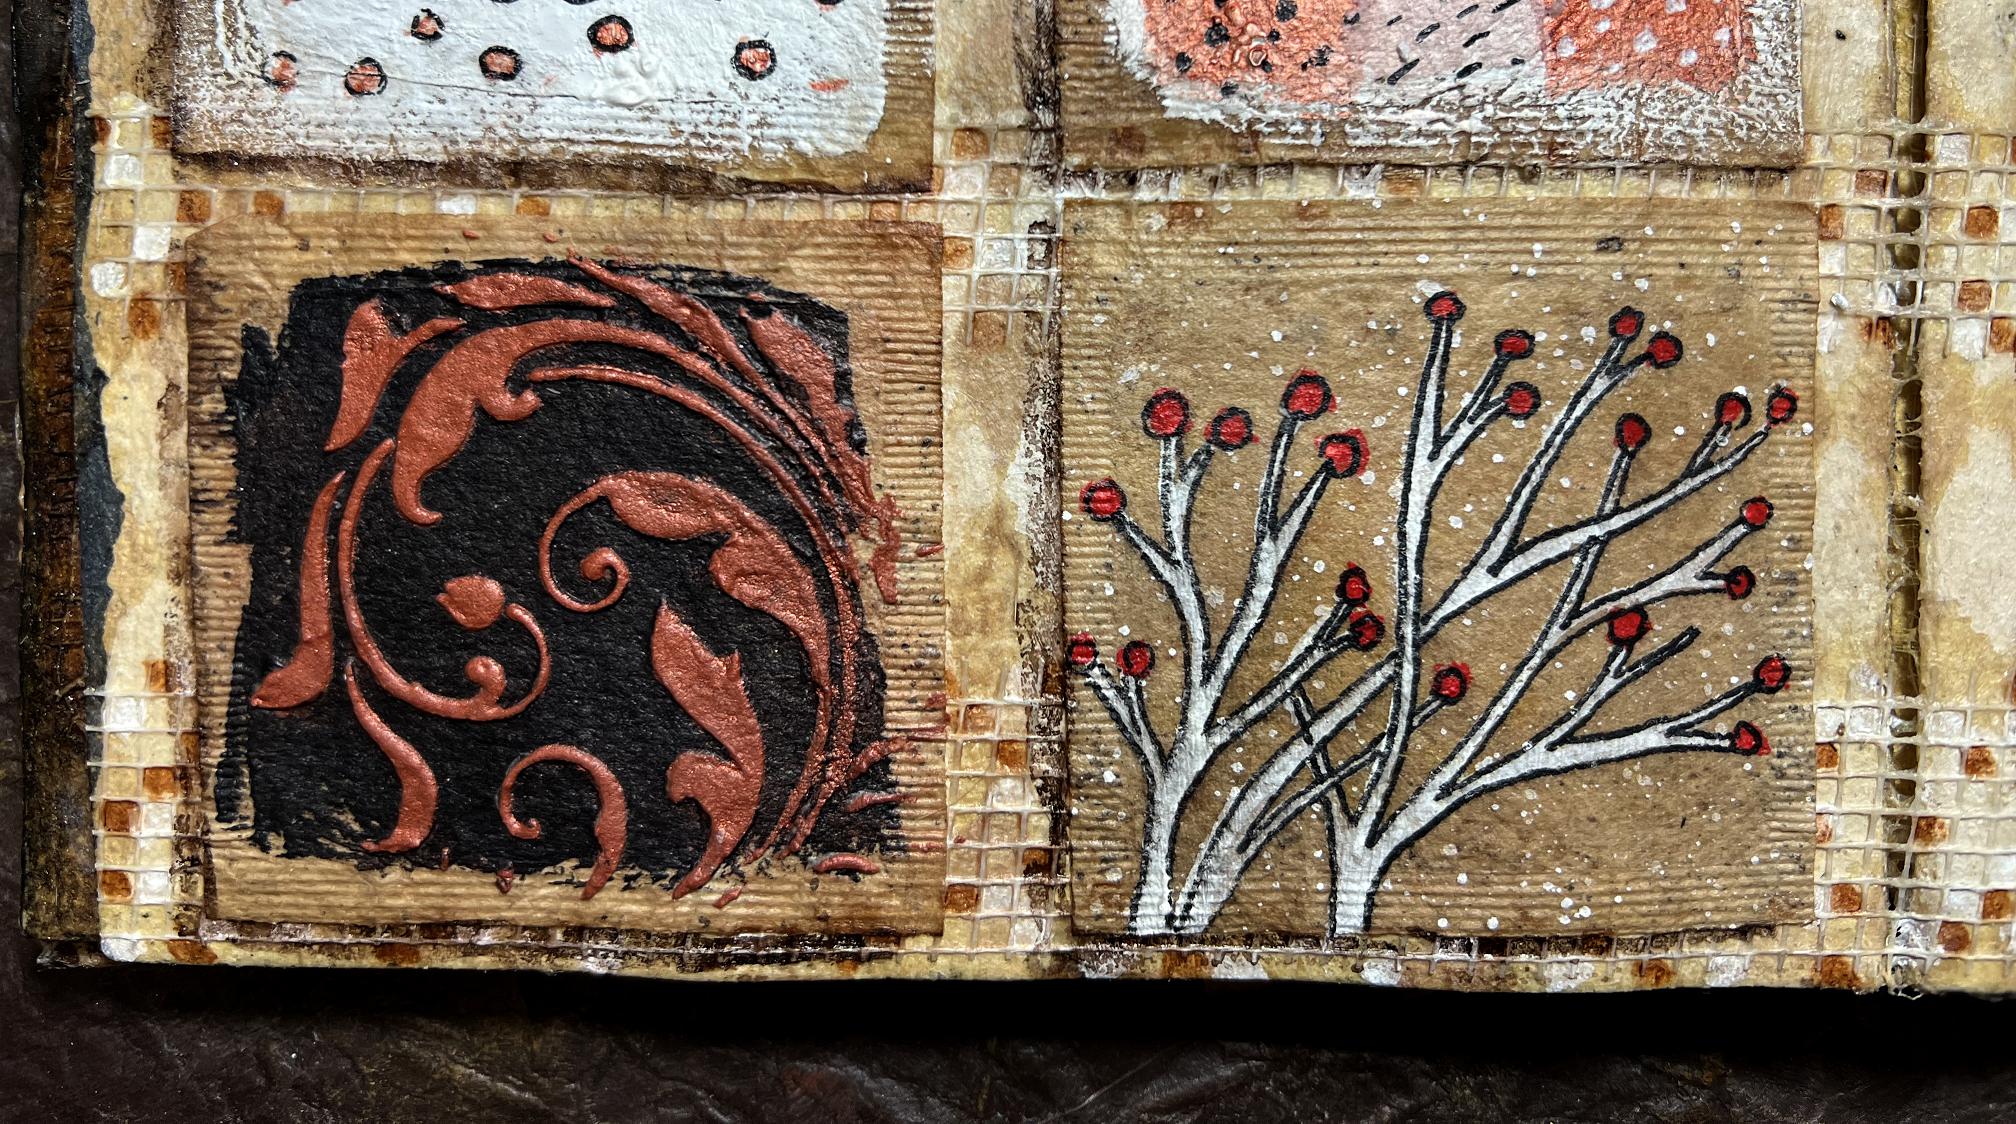
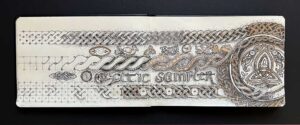
The left-hand page, going from left to right, top to bottom. White acrylic paint dots applied with the end of a wooden barbecue skewer, outlined with black Posca paint. Doodly flowers drawn with Derwent Graphik Line Painter in white. Second row: Copper acrylic paint mixed with Golden Light Moulding Paste. The metallic nature of the paint was diluted by the paste so I attempted to rub on some copper gilding wax but the pot had dried up (I’m working on a solution to that problem). I ended up painting it with some copper Perfect Pearls, and where I’d gone over onto the black, I touched it up with the Posca pen. Small sampler of squares painted in black, copper, white and a mixture of copper and white, marks made with Posca pen and Derwent Graphik Lne Painter. Bottom row: image stamped with archival black ink, painted with copper acryic paint, further embellishments copper acrylic paint and Posca pen. Branches painted with white acrylic paint, berries in red, outlined with Posca pen, white spatters added with diluted white acrylic paint.
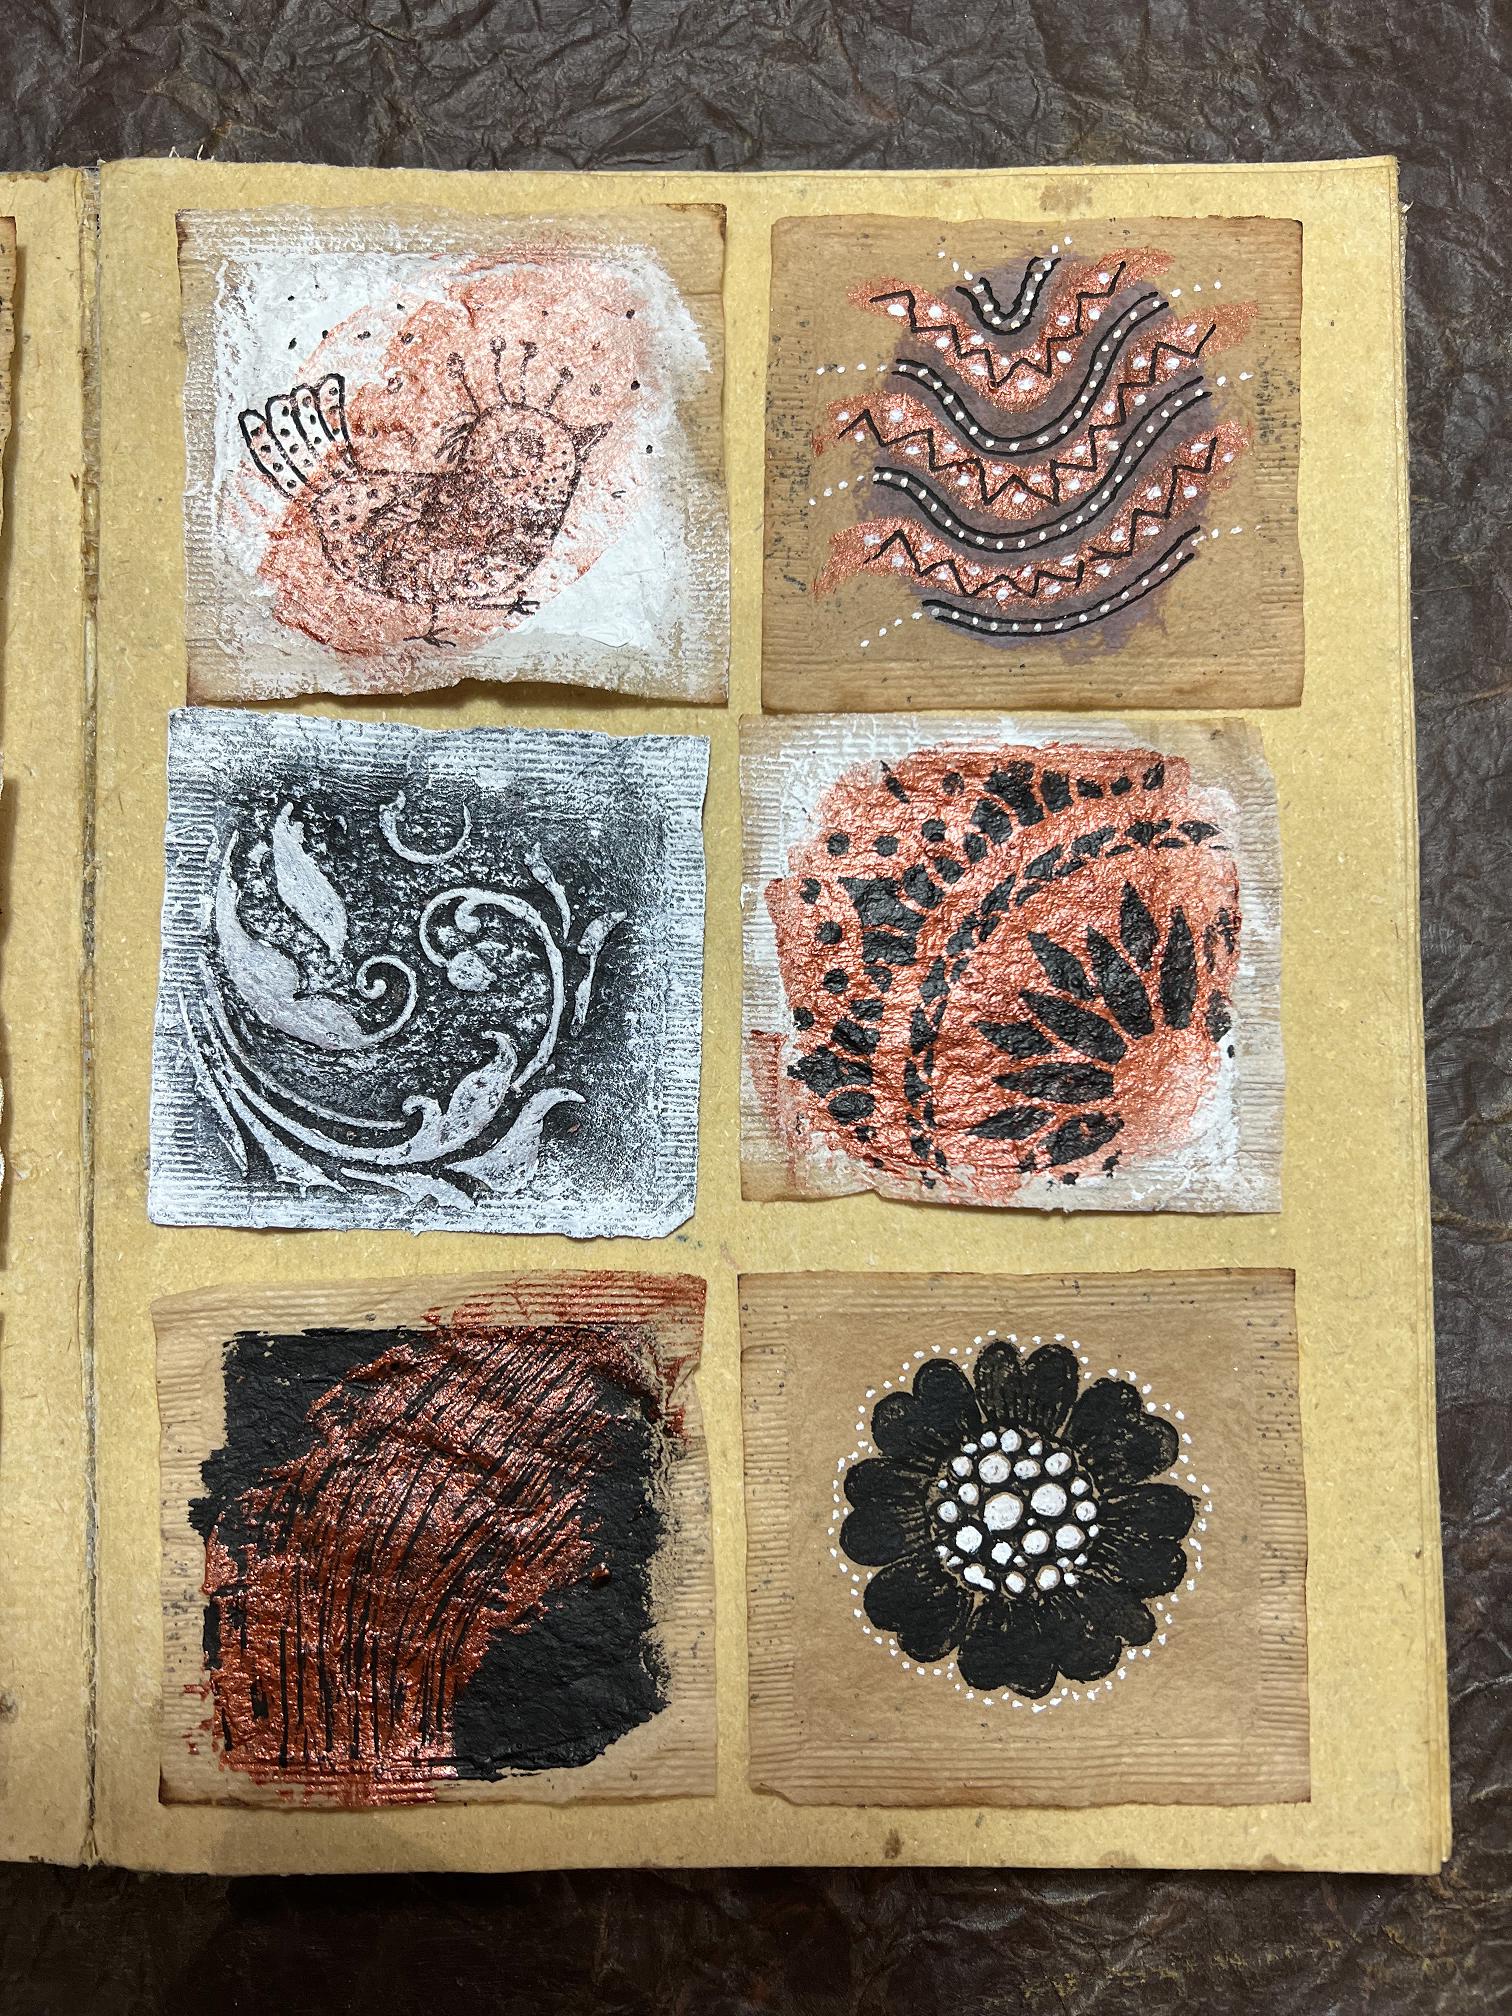
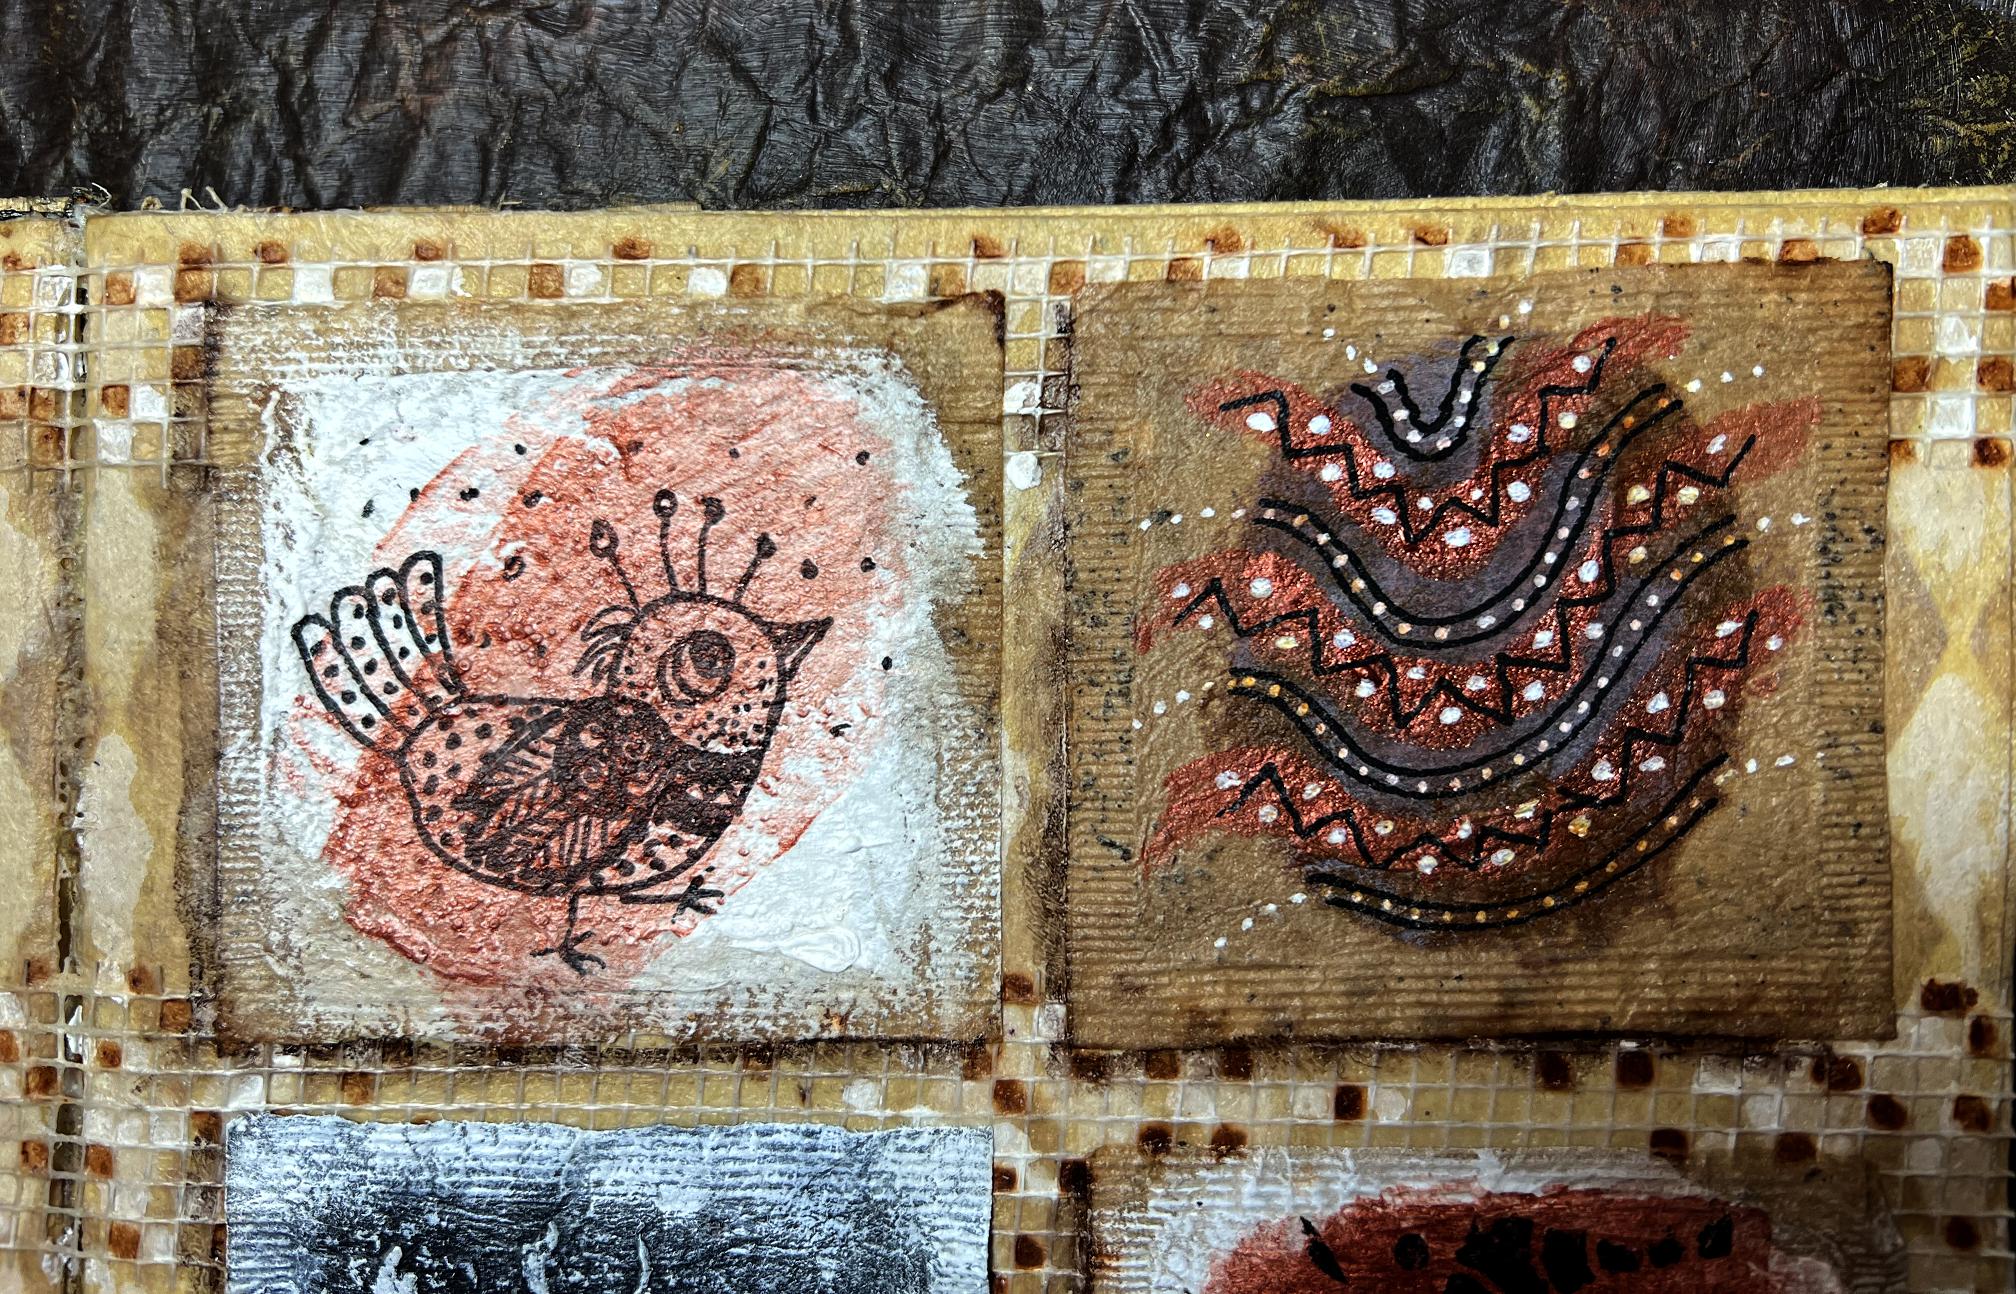
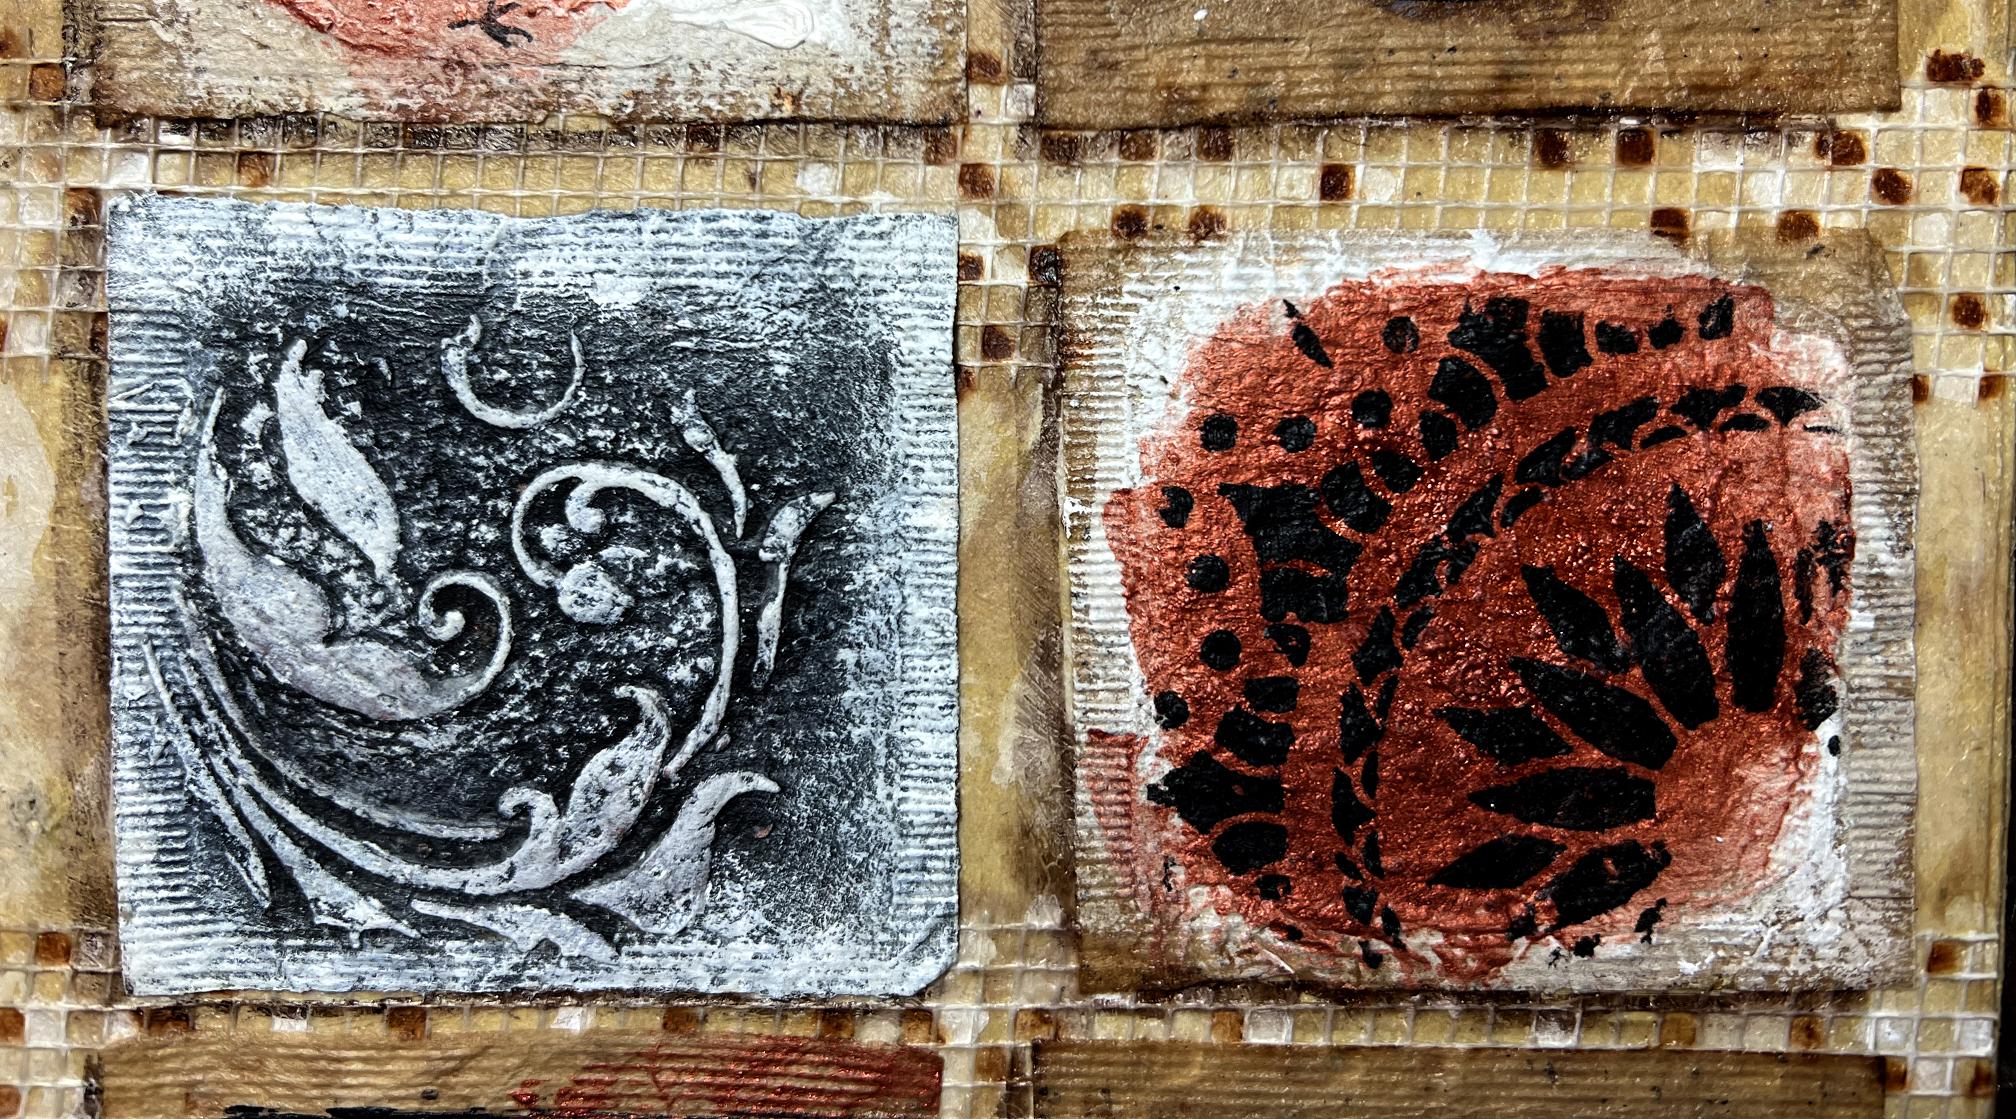
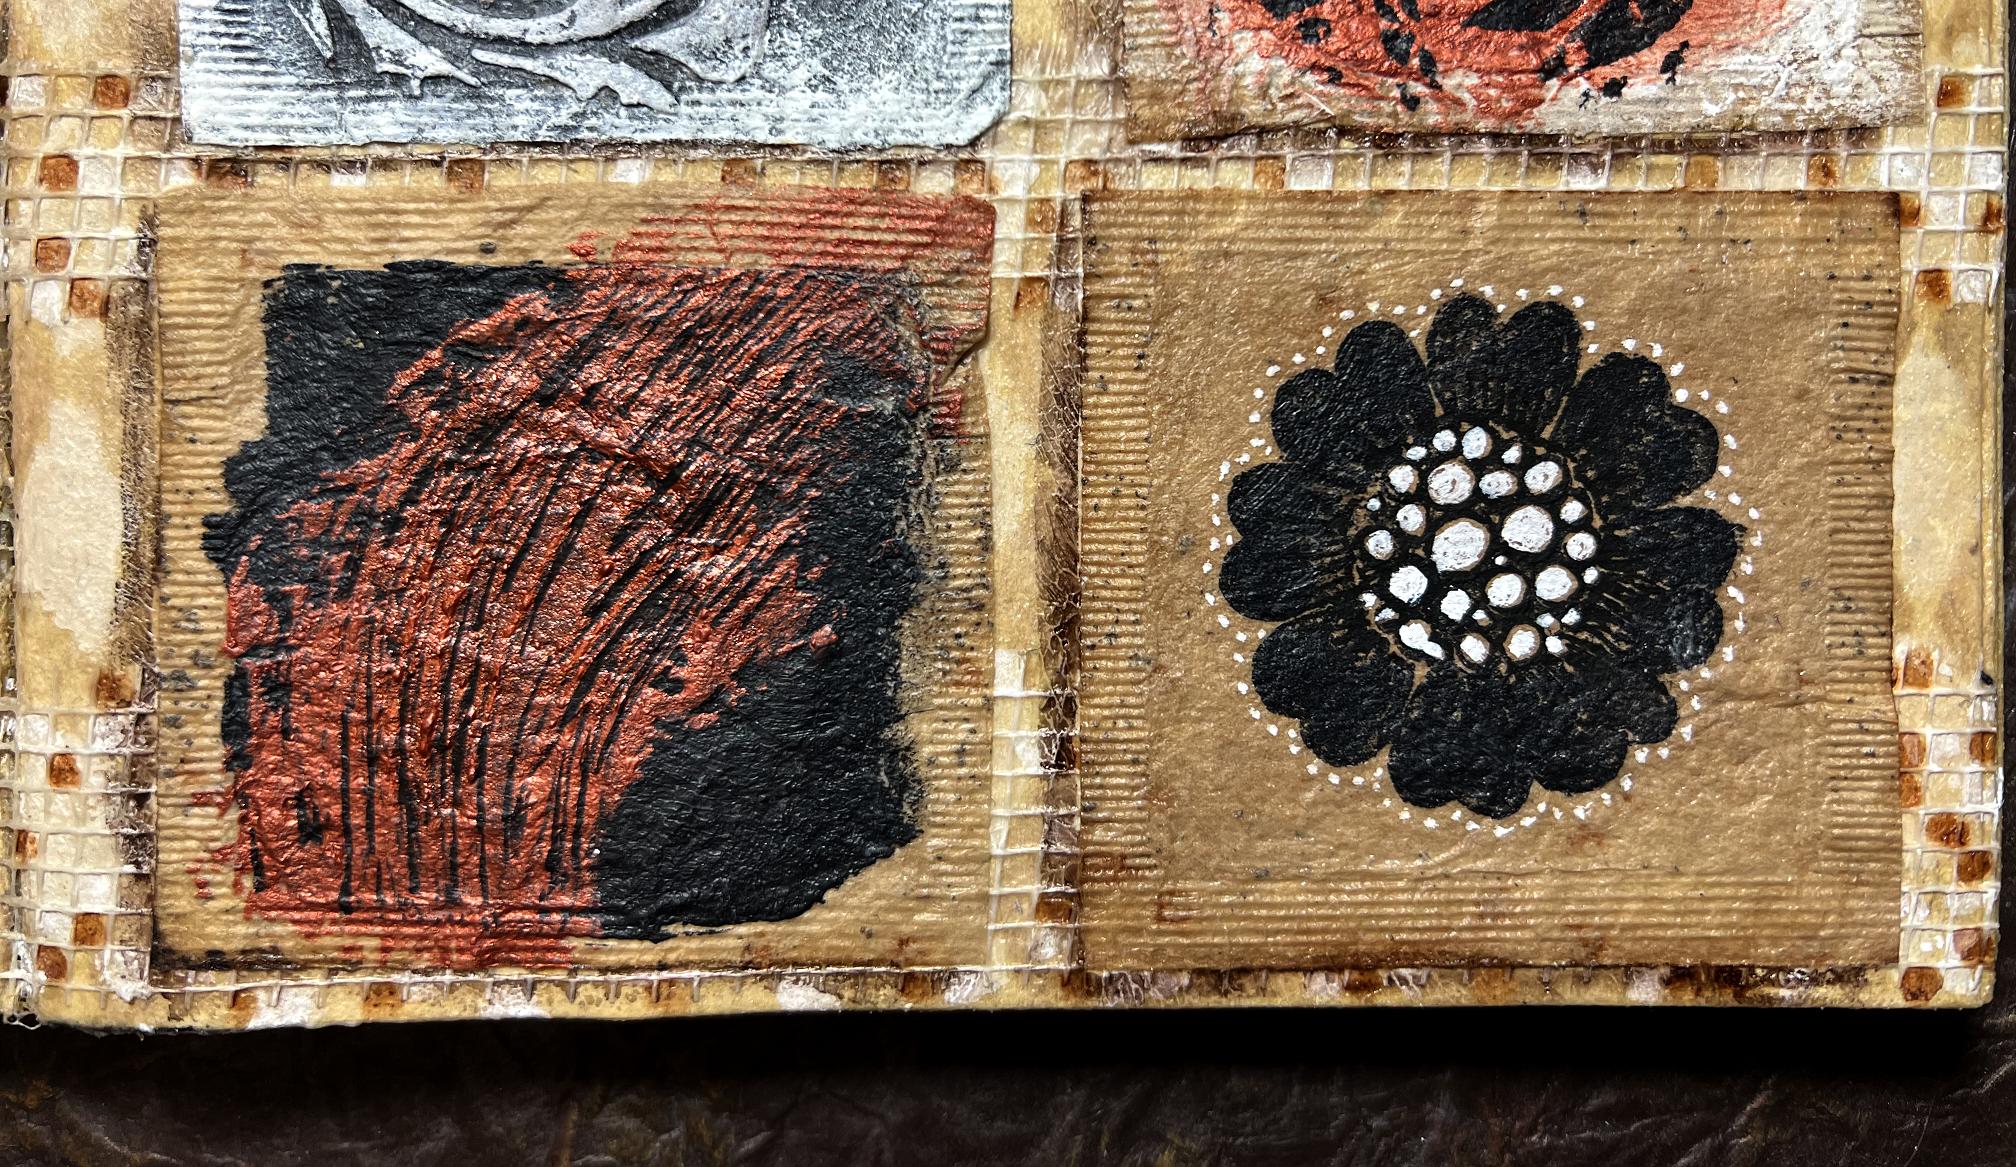
The right hand page. Top row: doodly bird drawn with Posca pen, wash of diluted copper acrylic paint over. Oval painted with Gathered Twigs Distress Stain, doodly embellishments added with Posca pen, Derwent Graphik Lne Painter and copper acrylic paint. Second row: I had some fun with this! I attempted to paint some copper acrylic paint through a Tim Holtz stencil onto a black painted teabag and it was a disaster. Thinking I would throw that one away, I turned it over, to find that some of the black paint had seeped through, so I did a practice one with moulding paste and it came out great. Some of it needed touching up a bit, so I rubbed on some Antique White Rub’n Buff and added a bit of outlineing with the Posca pen. Finally I added some dry-brushed white acrylic paint around the edges to tidy it up. I love how this one turned out. A happy accident! Never throw anything in the bin – most things are rescuable! (Just don’t look at the back…) The one that finally succeeded was the one in the middle row of the previous page. Next one along – this has to be my favourite of the whole set – I achieved exactly the result I wanted! I painted some copper acrylic paint over the white painted background and then stencilled with black paint, this time taking care to stipple it and not just sweep the brush across. In real life this is really rich and shiny. Bottom row: I took a leaf out of Froyle’s book here (she’s my latest favourite artist to follow on YouTube – I have several favourites!) – she took a silicone pastry brush out of the kitchen and used it to great effect to get a gorgeous streaky painty brush stroke, so I did this with some copper acrylic paint! Confession time – I did add a few black lines with the Posca pen afterwards where it didn’t quite work. The final one: stamped flower using black acrylic paint. The quality of the stamped image wasn’t that terrific so I filled it in with some more black acrylic and a bit of Posca, and added the white with acrylic paint. I’m not sure if this needs something further – the image is rather small.
Scratch papers
At the end of each session I have started photographing my scratch papers which I use for cleaning excess paint off my brush and clearing the palette, which I try to control a bit so that they end up as usable pieces. The main one has come out absolutely gorgeous – from this: (centre piece from previous session – a mess that I nearly threw out):

to this, with the addition of the latest brush cleanings:
I also created a small one on a piece of corrugated cardboard which I initially used to practise some paint swirls on with the pastry brush.
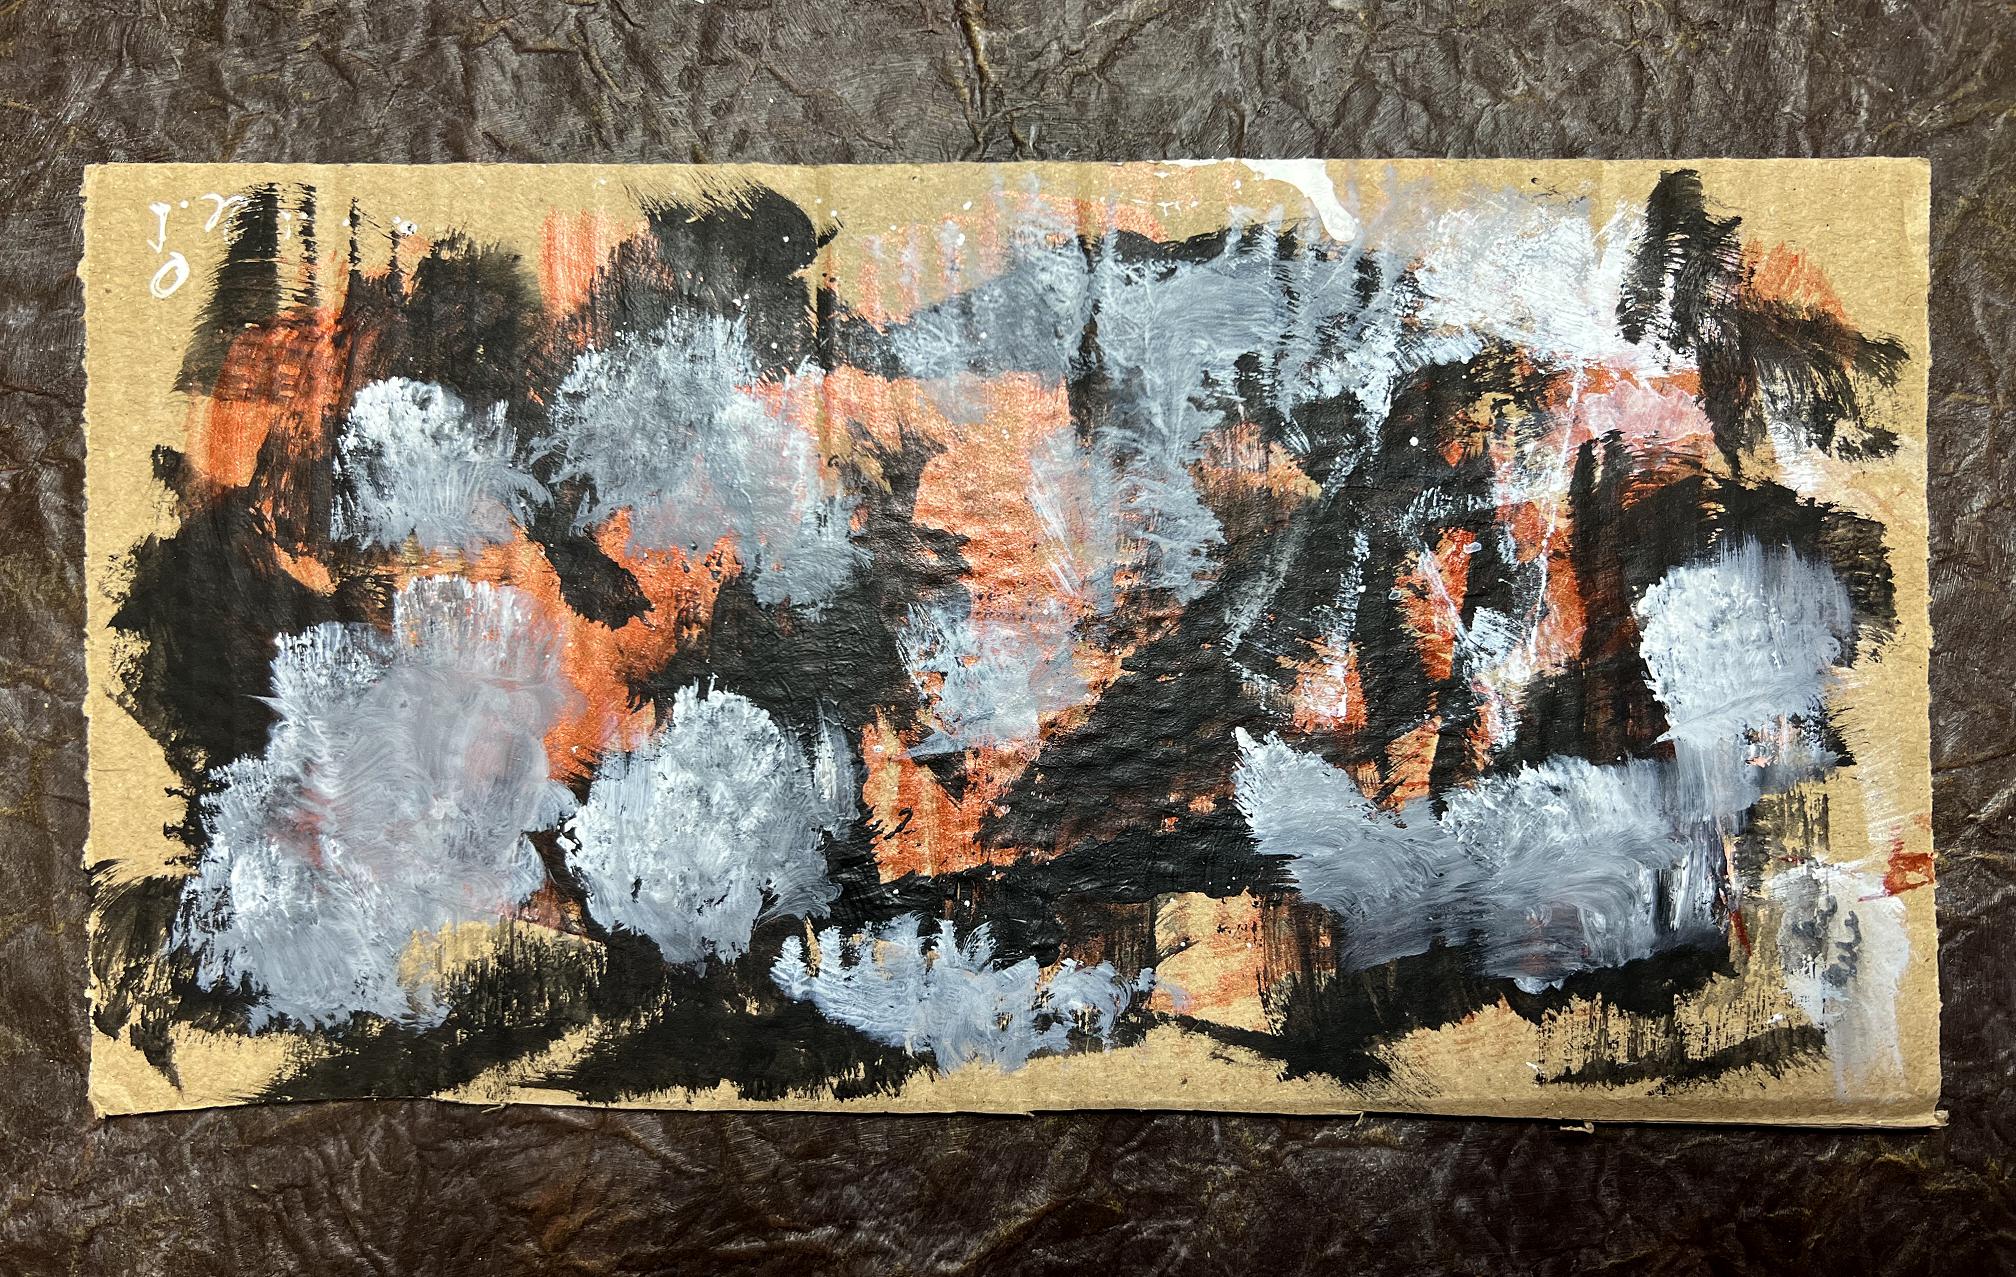
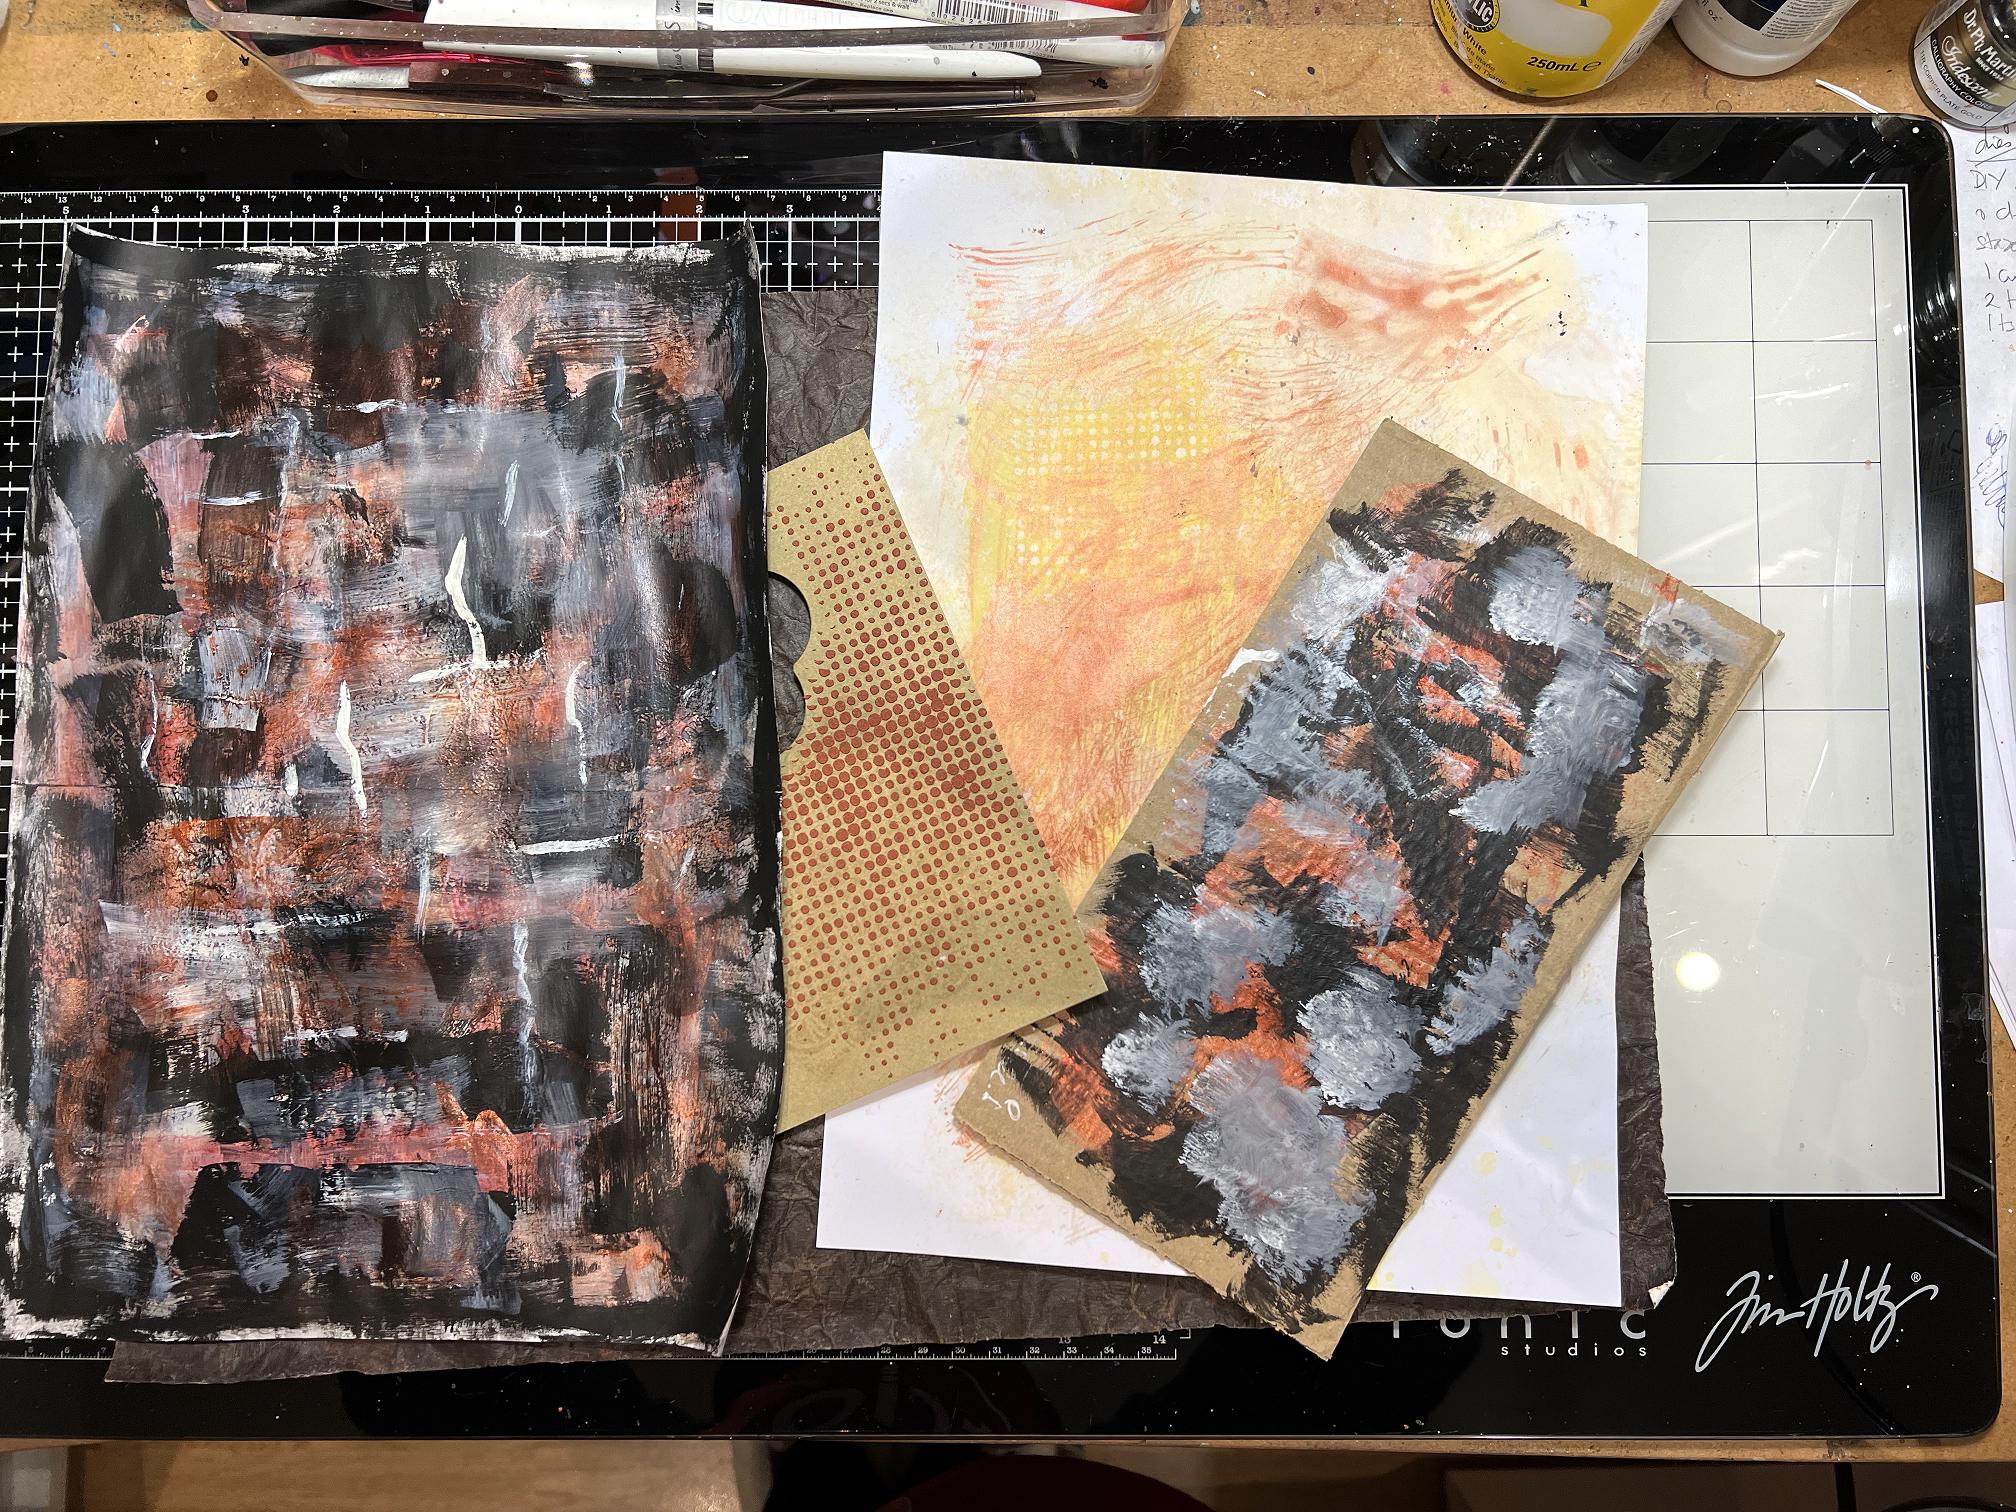
Here they are with a couple of other ones. The white one doesn’t have much on it yet, and will be used in the next session to build on. The small piece of slightly gold card wth a die cut taken out of it, was to use up the rest of the moulding paste with the copper acrylic paint in it. I can cut this up and use it.
I love how nothing needs to get wasted. Think of all that delicious paint just being washed down the sink when you can make art out of it.
Completing the page
Returning to the studio in the evening, I began work on the background. Taking a stencil, I used Frayed Burlap Distress Oxide to blend a nice distressed diamond pattern for the vertical areas between the teabags.
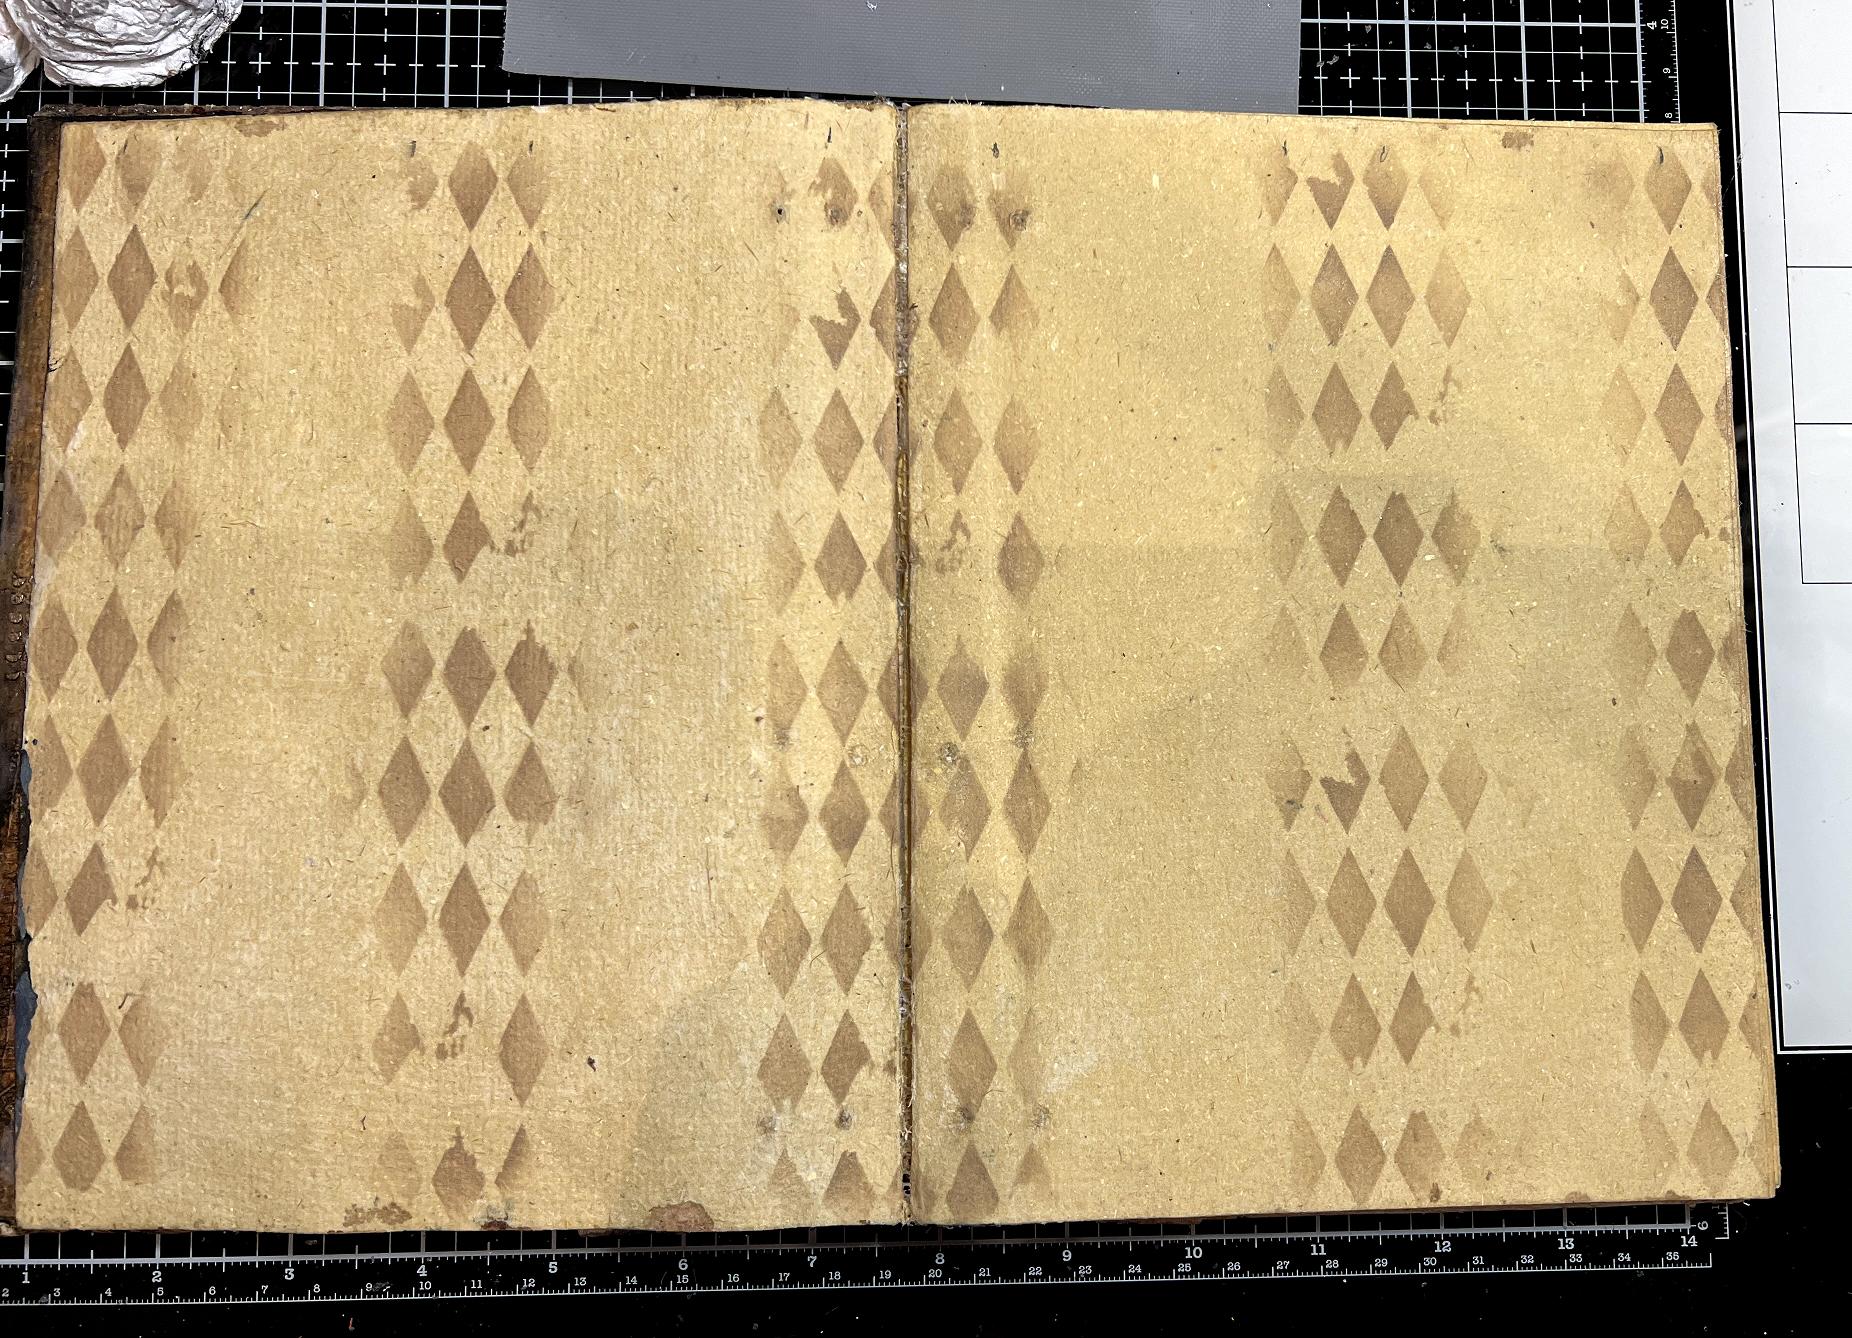
Today my Dr. Ph. Martin’s white Indian ink arrived, so I used this to paint in the alternate diamonds, blending it with a little water for a subtle effect.
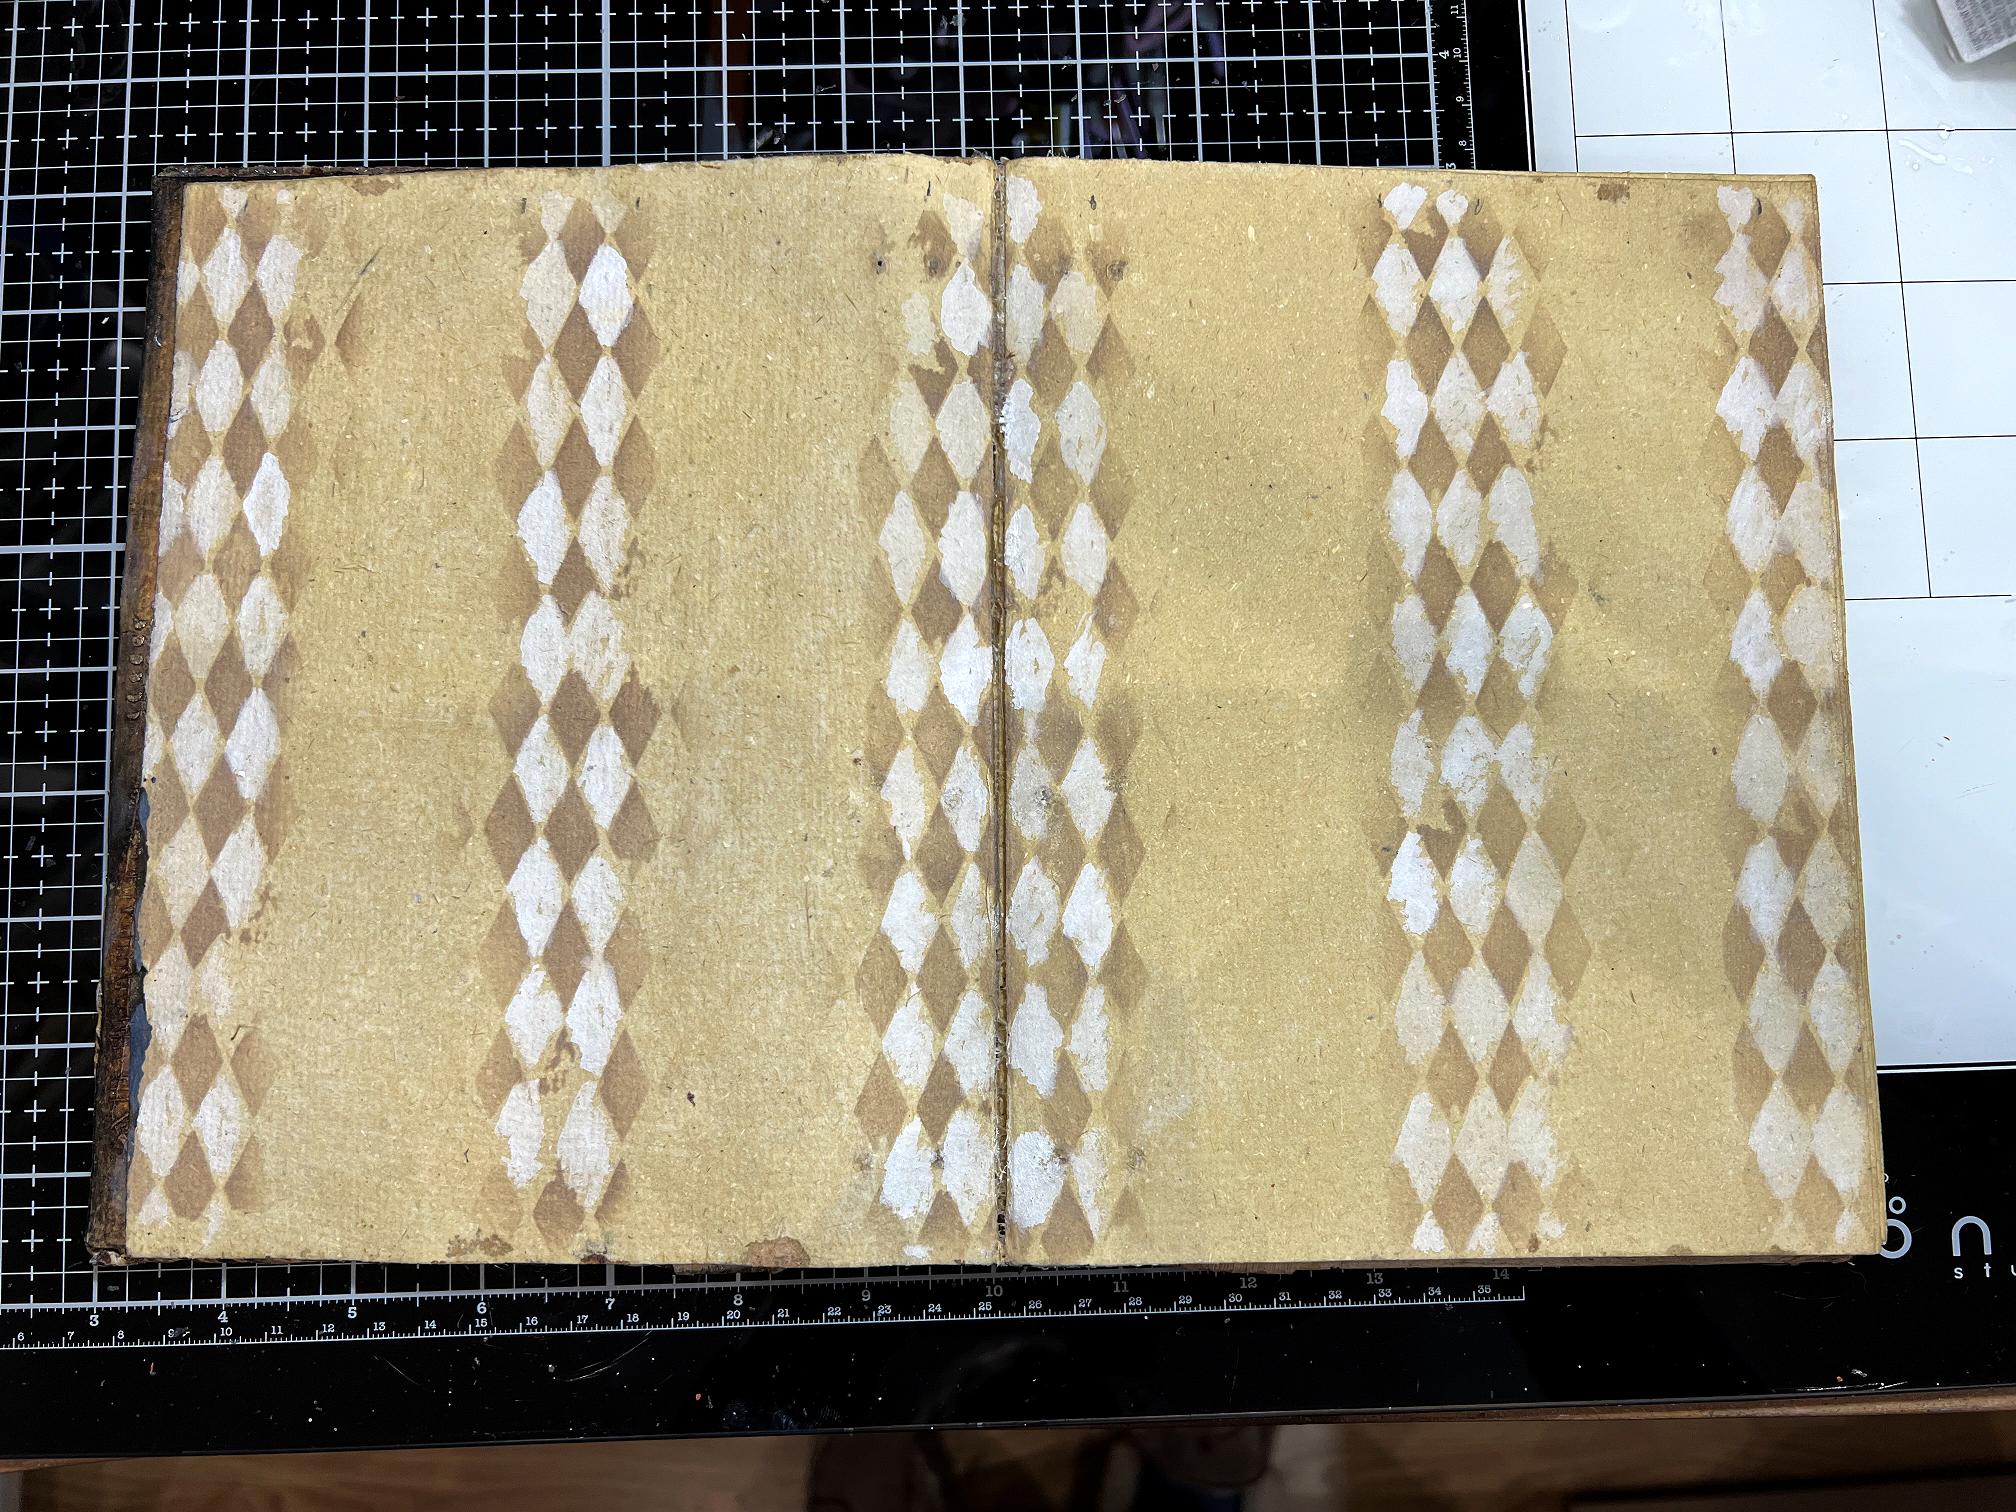
A mock-up of the teabags in place on the page.
Adding some plasterboard (drywall) tape. This is the modern version of the old roll of scrim that I have got. This tape is fairly stiff, and is self-adhesive with a low-tack glue which wouldn’t be sufficient to keep it on the page, so I stuck it down well with some soft matte gel medium afer I had cut the strips in half lengthwise.
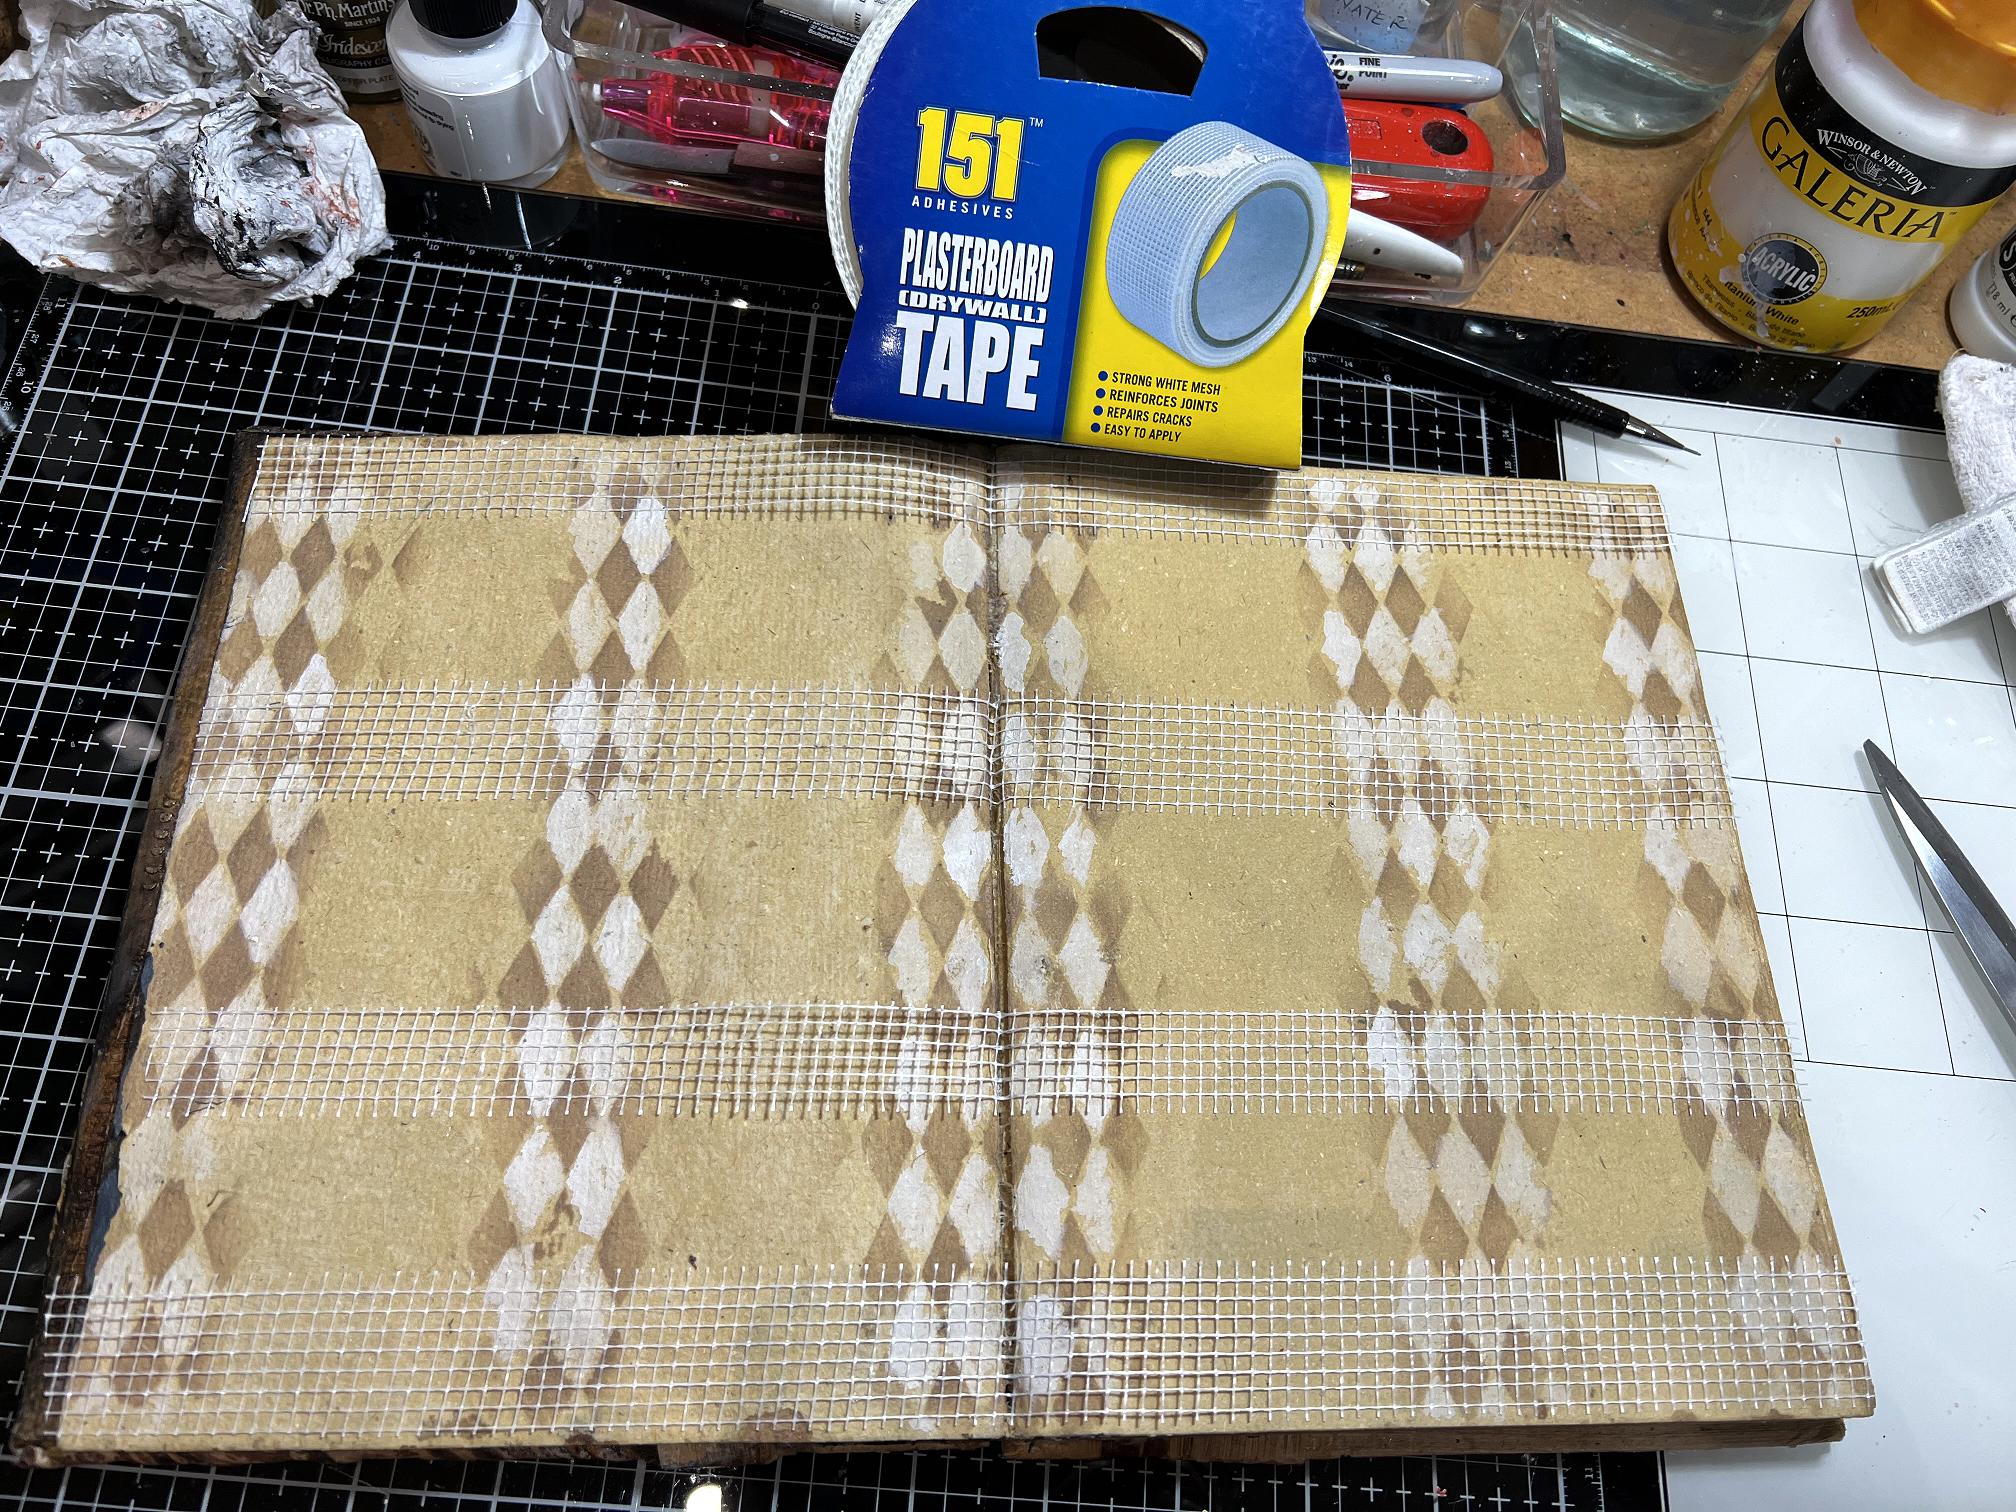
A detail shot of the tape.
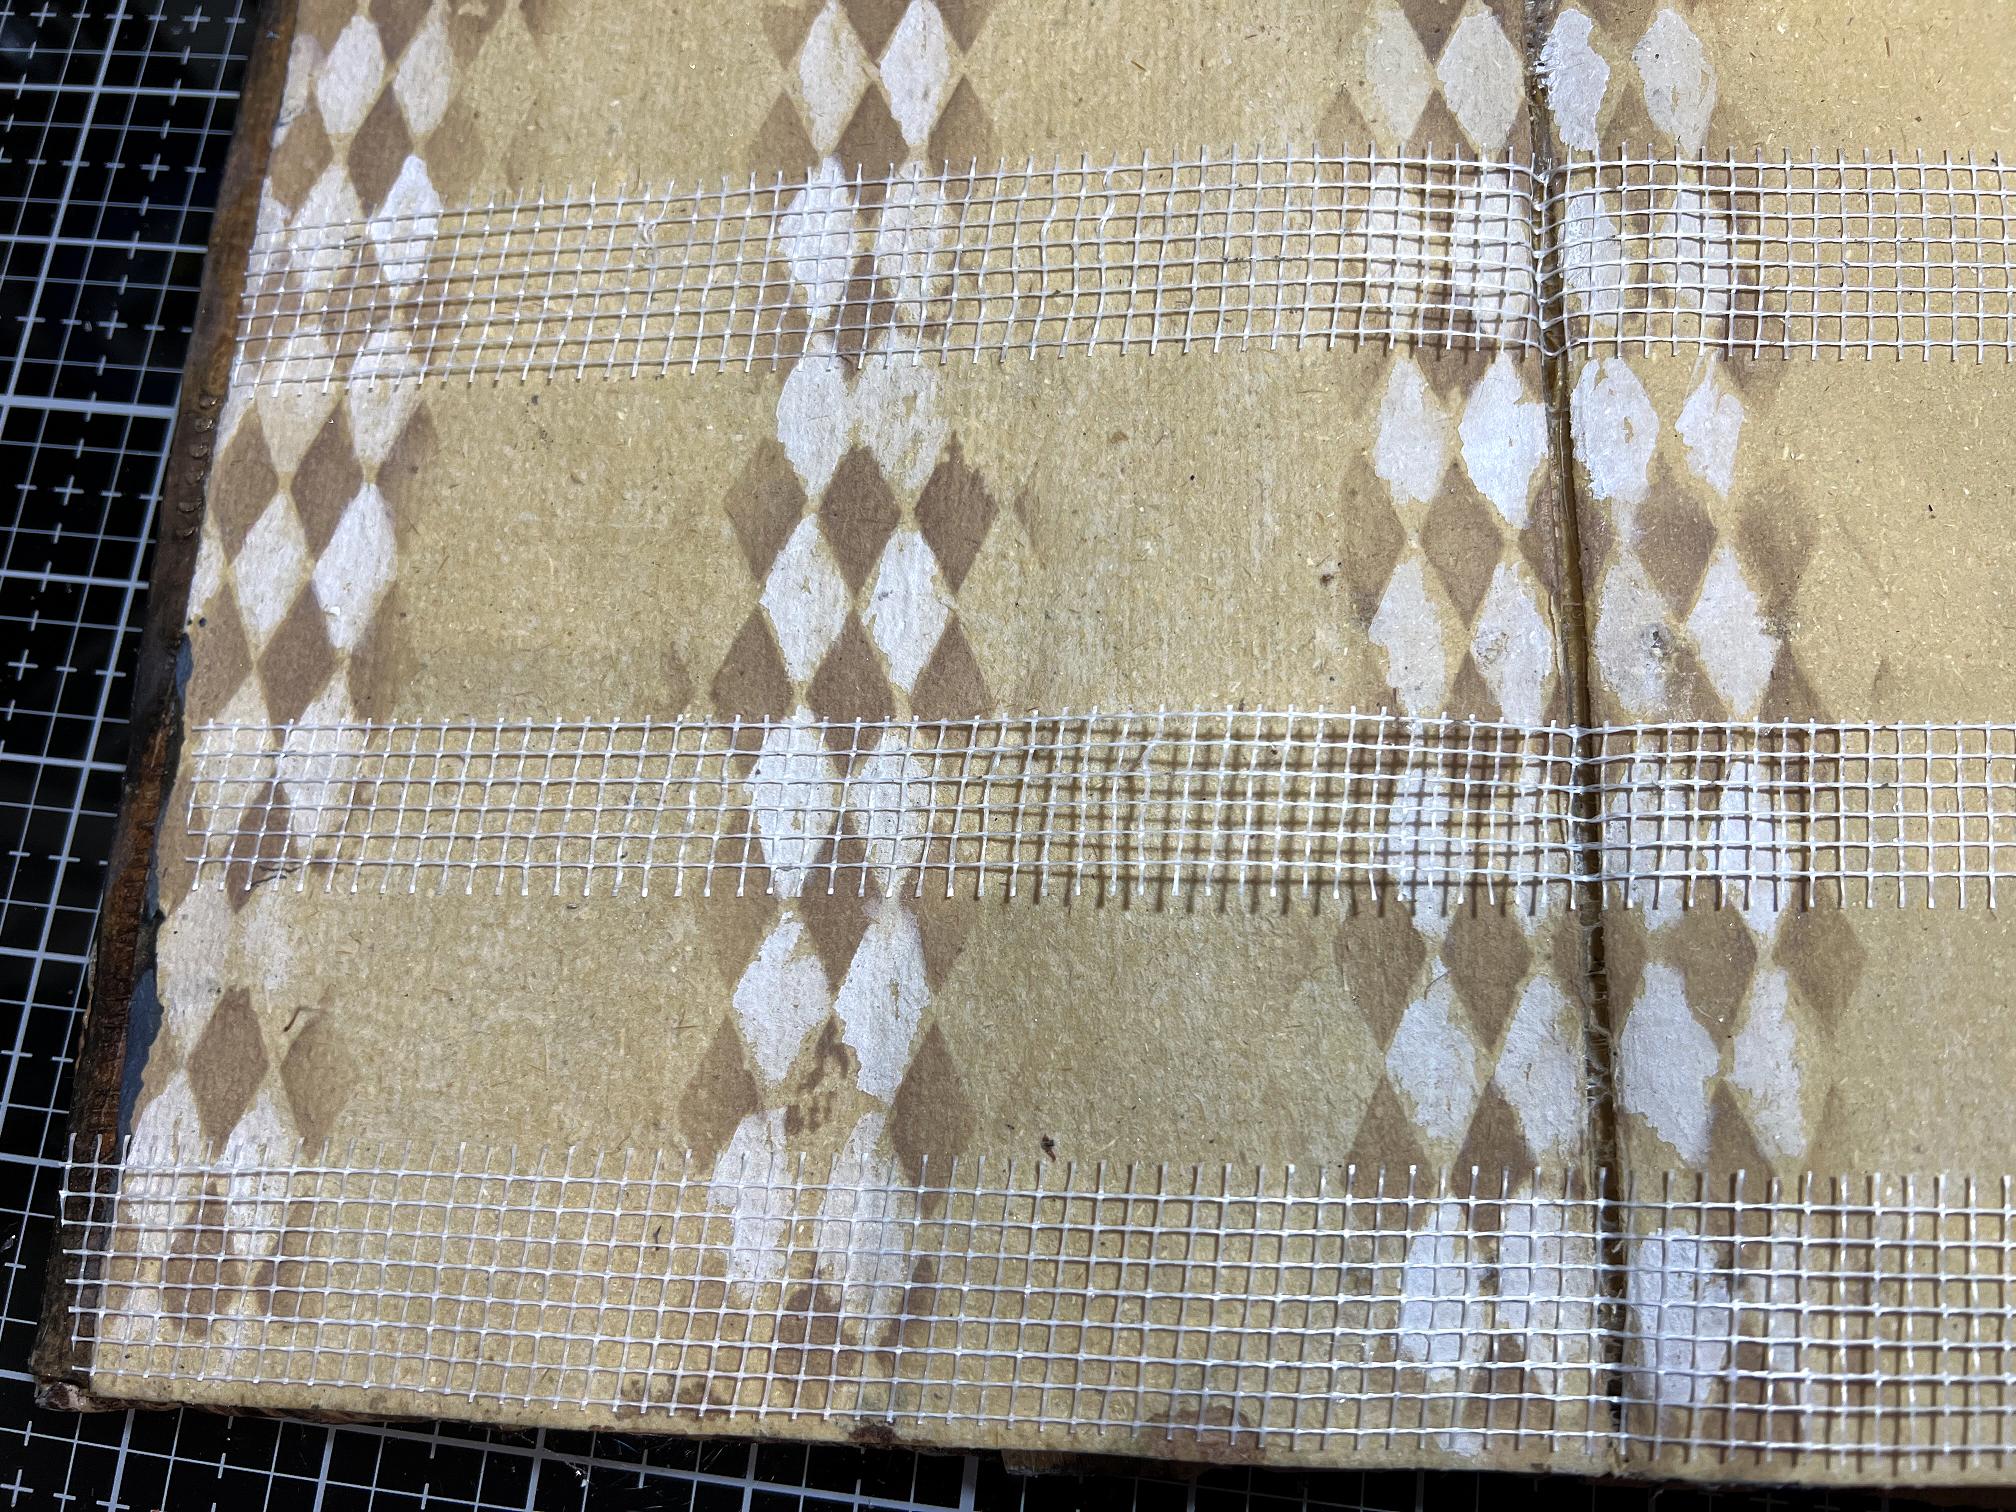
Using a Tombow Dual Brush Marker and the Indian ink and a fine brush, I filled some of the squares in the tape randomly with brown and white.
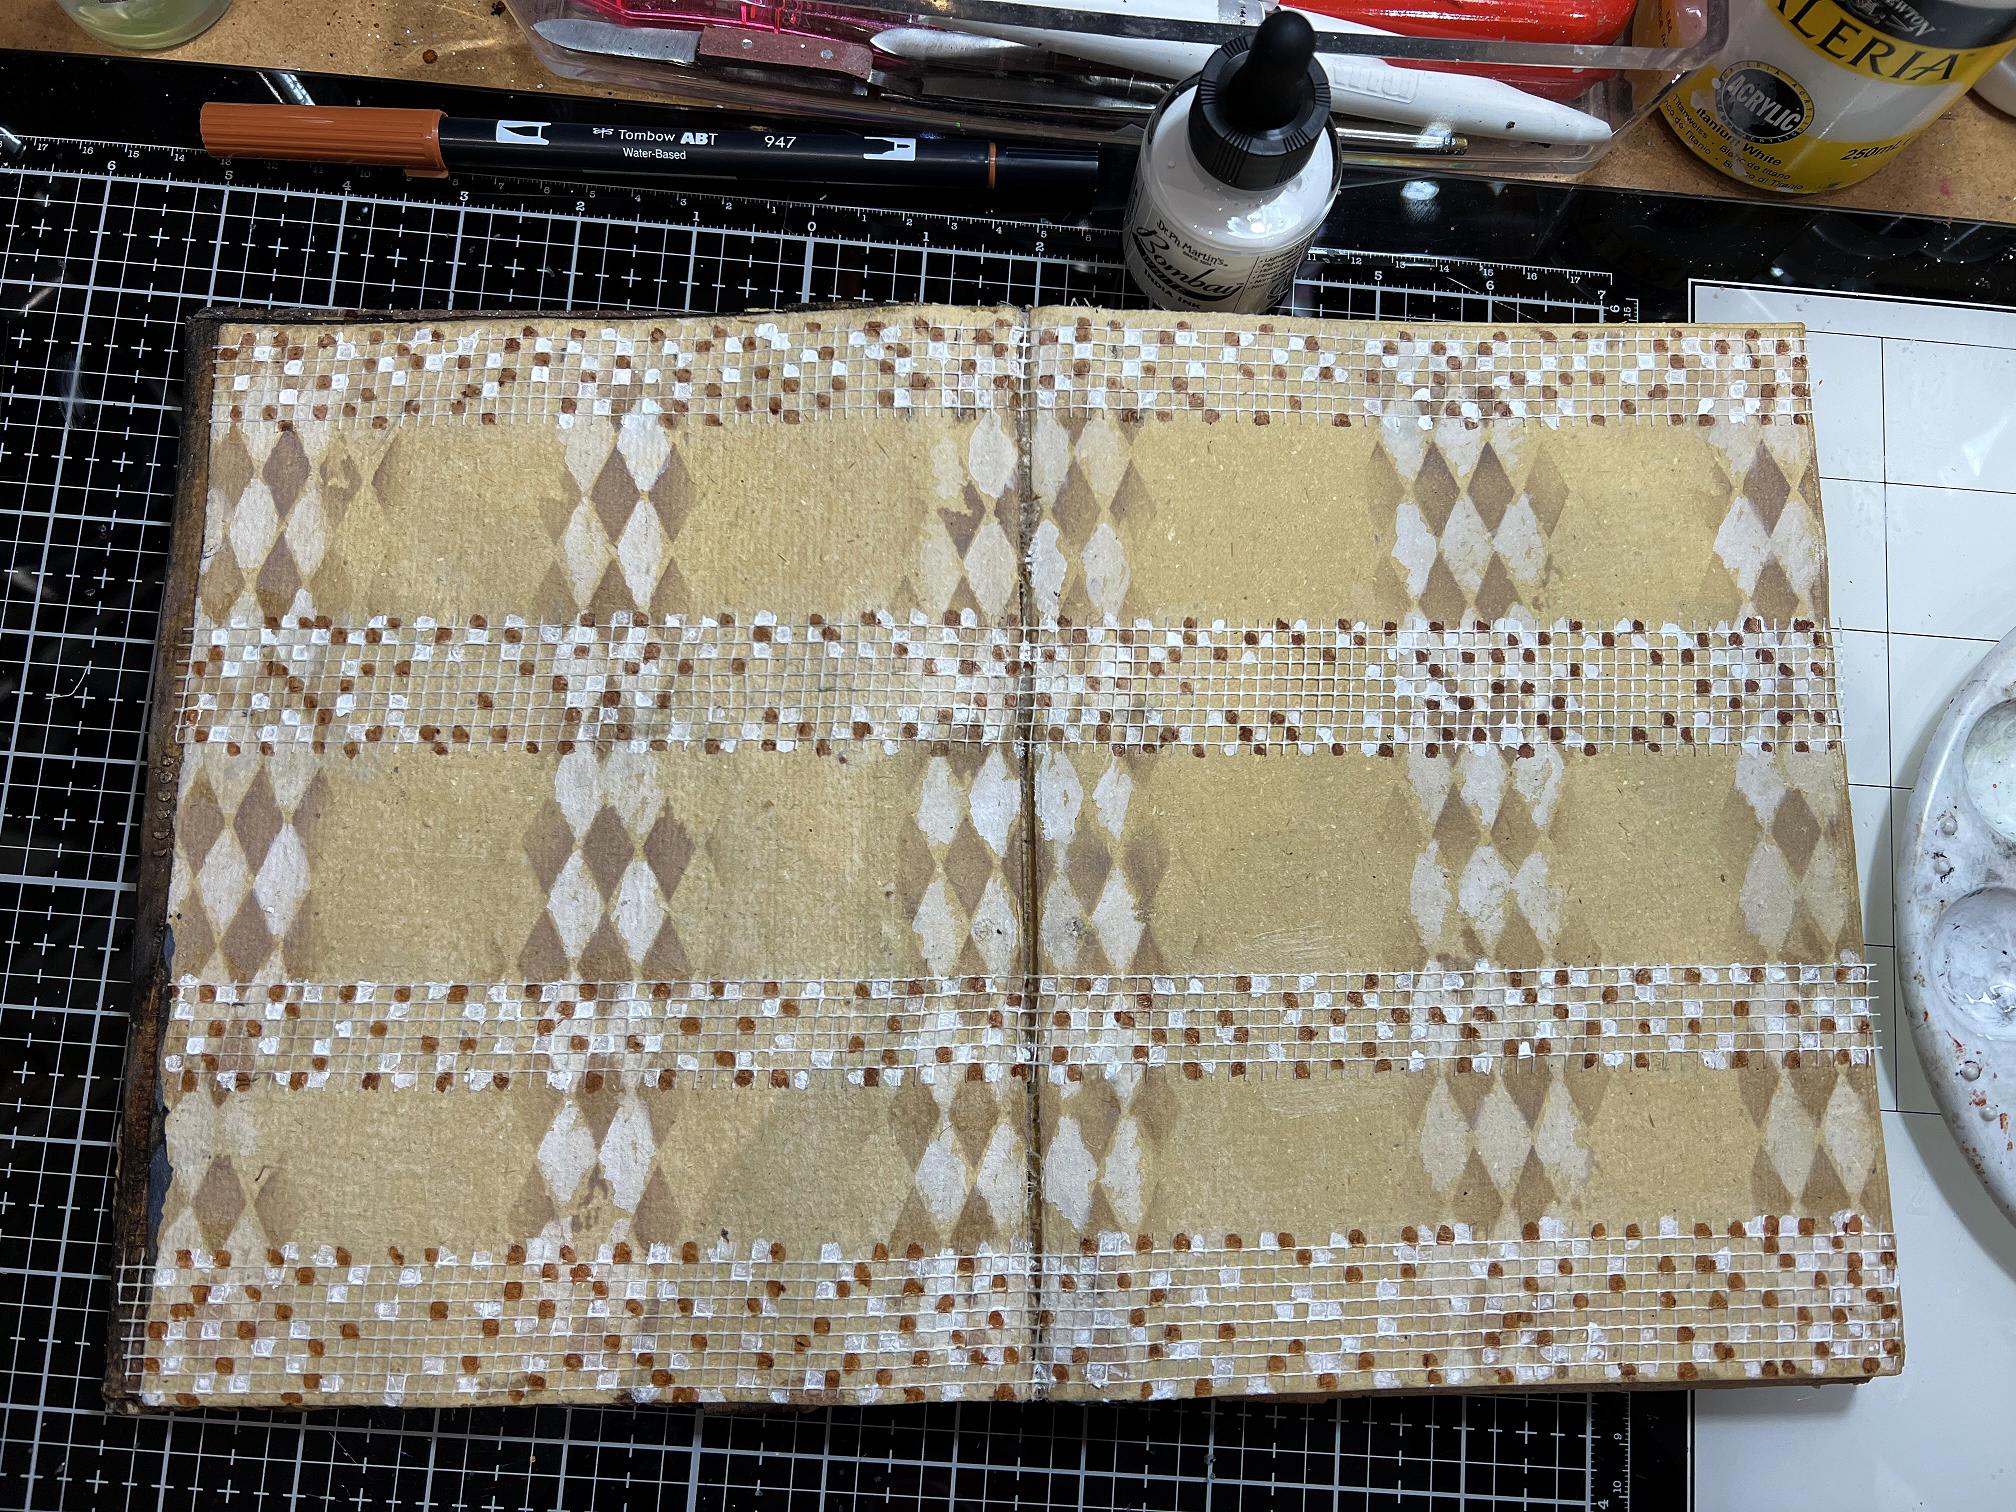
The Indian ink is permanent when dry, but the Tombow marker is not, so before adding the teabags, I sealed the surface over the decoration with Distres Micro Glaze fllowed by a coat of clear gesso. I was then ready to complete the page.
After sticking the teabags down with soft matte gel medium, I added drop shadows with another Tombow Dual Brush Marker in dark brown and blended it out with some water.
Finally, some detail shot of the teabags.
This has been a fun page to do, as a kind of sampler of different teabag art forms. I shall develop them further in due course.
Gelli printing
I have finally bitten the bullet (or got bitten by the bug!) after watching gorgeous Froyle making gorgeous gorgeous art with her gel press. Some time ago I bought a cheap one and had no success with it. Reading a review on Amazon of the genuine article, someone else reported that she had also found a cheap alternative to be a dismal failure, and buying a proper one, she was making fabulous prints straight off. I decided it really was time to start doing this and I’ve ordered one.
Even though I am greatly blessed with a beautiful studio, the envy of many people who are jealous of how much room I’ve got, I do not actually have a lot of working space to lay out drying art work. Two of my pull-out units are currently pulled out (one is permanently out as its home is under the main surface where I work) and I’m ashamed to say that they are both covered with clutter at the moment. The end nearest to where I work is where I keep my guillotine. I need to have another major tidy up and put some of the other stuff away as the whole area has become a dumping ground.
When you first enter the room (originally a bedroom), there is a small part sectioned off (described as a “dressing room” in the agent’s particulars when we moved), with a doorway into the room proper. This small section is my office, with my desk, filing cabinets etc., but just inside the door, where there was originally a washbasin, I have a sink, and in front of the balony door, which I don’t use, is a table with a vinyl covering on it. This is my “wet area,” and it is where I intend doing my gelli printing. How to dry the papers? I did a search online for drying racks for art and blenched at the totally ridiculous prices – £500?? Are you kidding? I redid my search, framing it to ask how people dried their gelli prints, and got lots of smashing advice via YouTube and Pinterest.
On Pinterest I found someone had bought a pack of metal grids which she assembled into a cube with shelves, all held together with cable ties. I remembered that in our old house I’d made a storage unit out of these, to keep papers in (a cube system) – I had disassembled this when we moved, and stored the grids under my desk in the office. My hubby bought me some cable ties and I made one this afternoon.
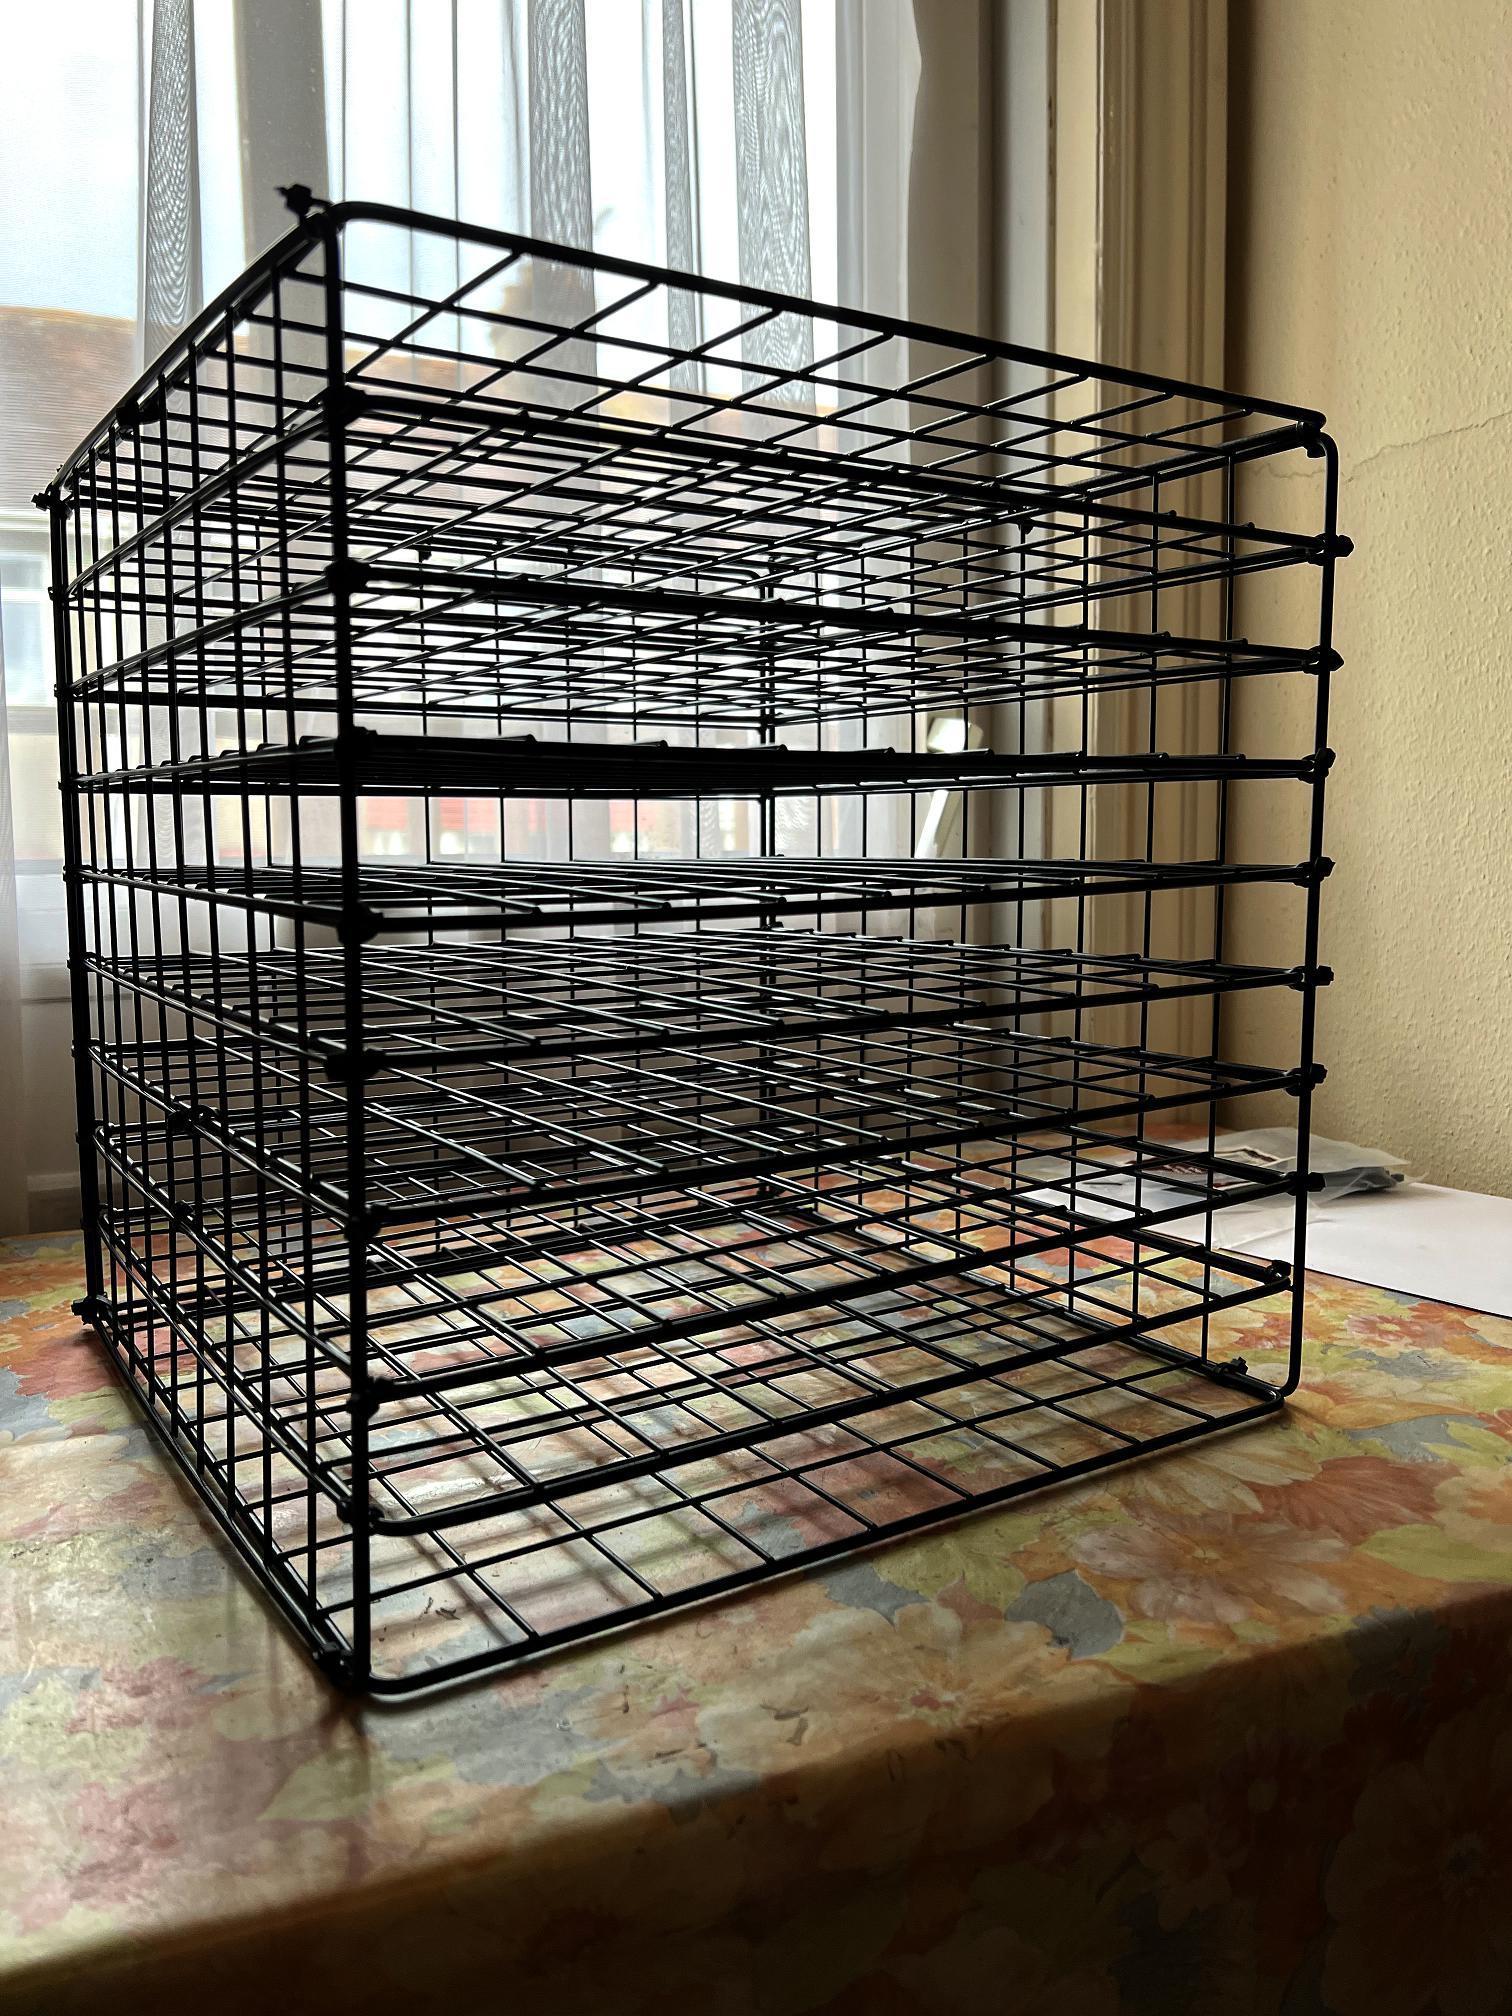
I’ve got enough grids and cable ties to make another one if I need to. This can sit either at the end of the table, or on the floor while I work, and it can be stored on the top of my storage area in the studio when not in use. This has hardly cost me anything so I’m delighted! (There is also now more space under my desk.)
Froyle made me laugh the other day because she’d found a fabulous texture maker for her gel press – it was a really cheap rubber bathmat! I found almost the exact equivalent for about £4 on Ebay today so I’ve ordered it – it’s pink, and extremely ugly, and I would never have it in my bathroom, but I can see that it has great potential as a texture generator! Watch this space!
I’m now all ready to go. I can’t wait to get started.
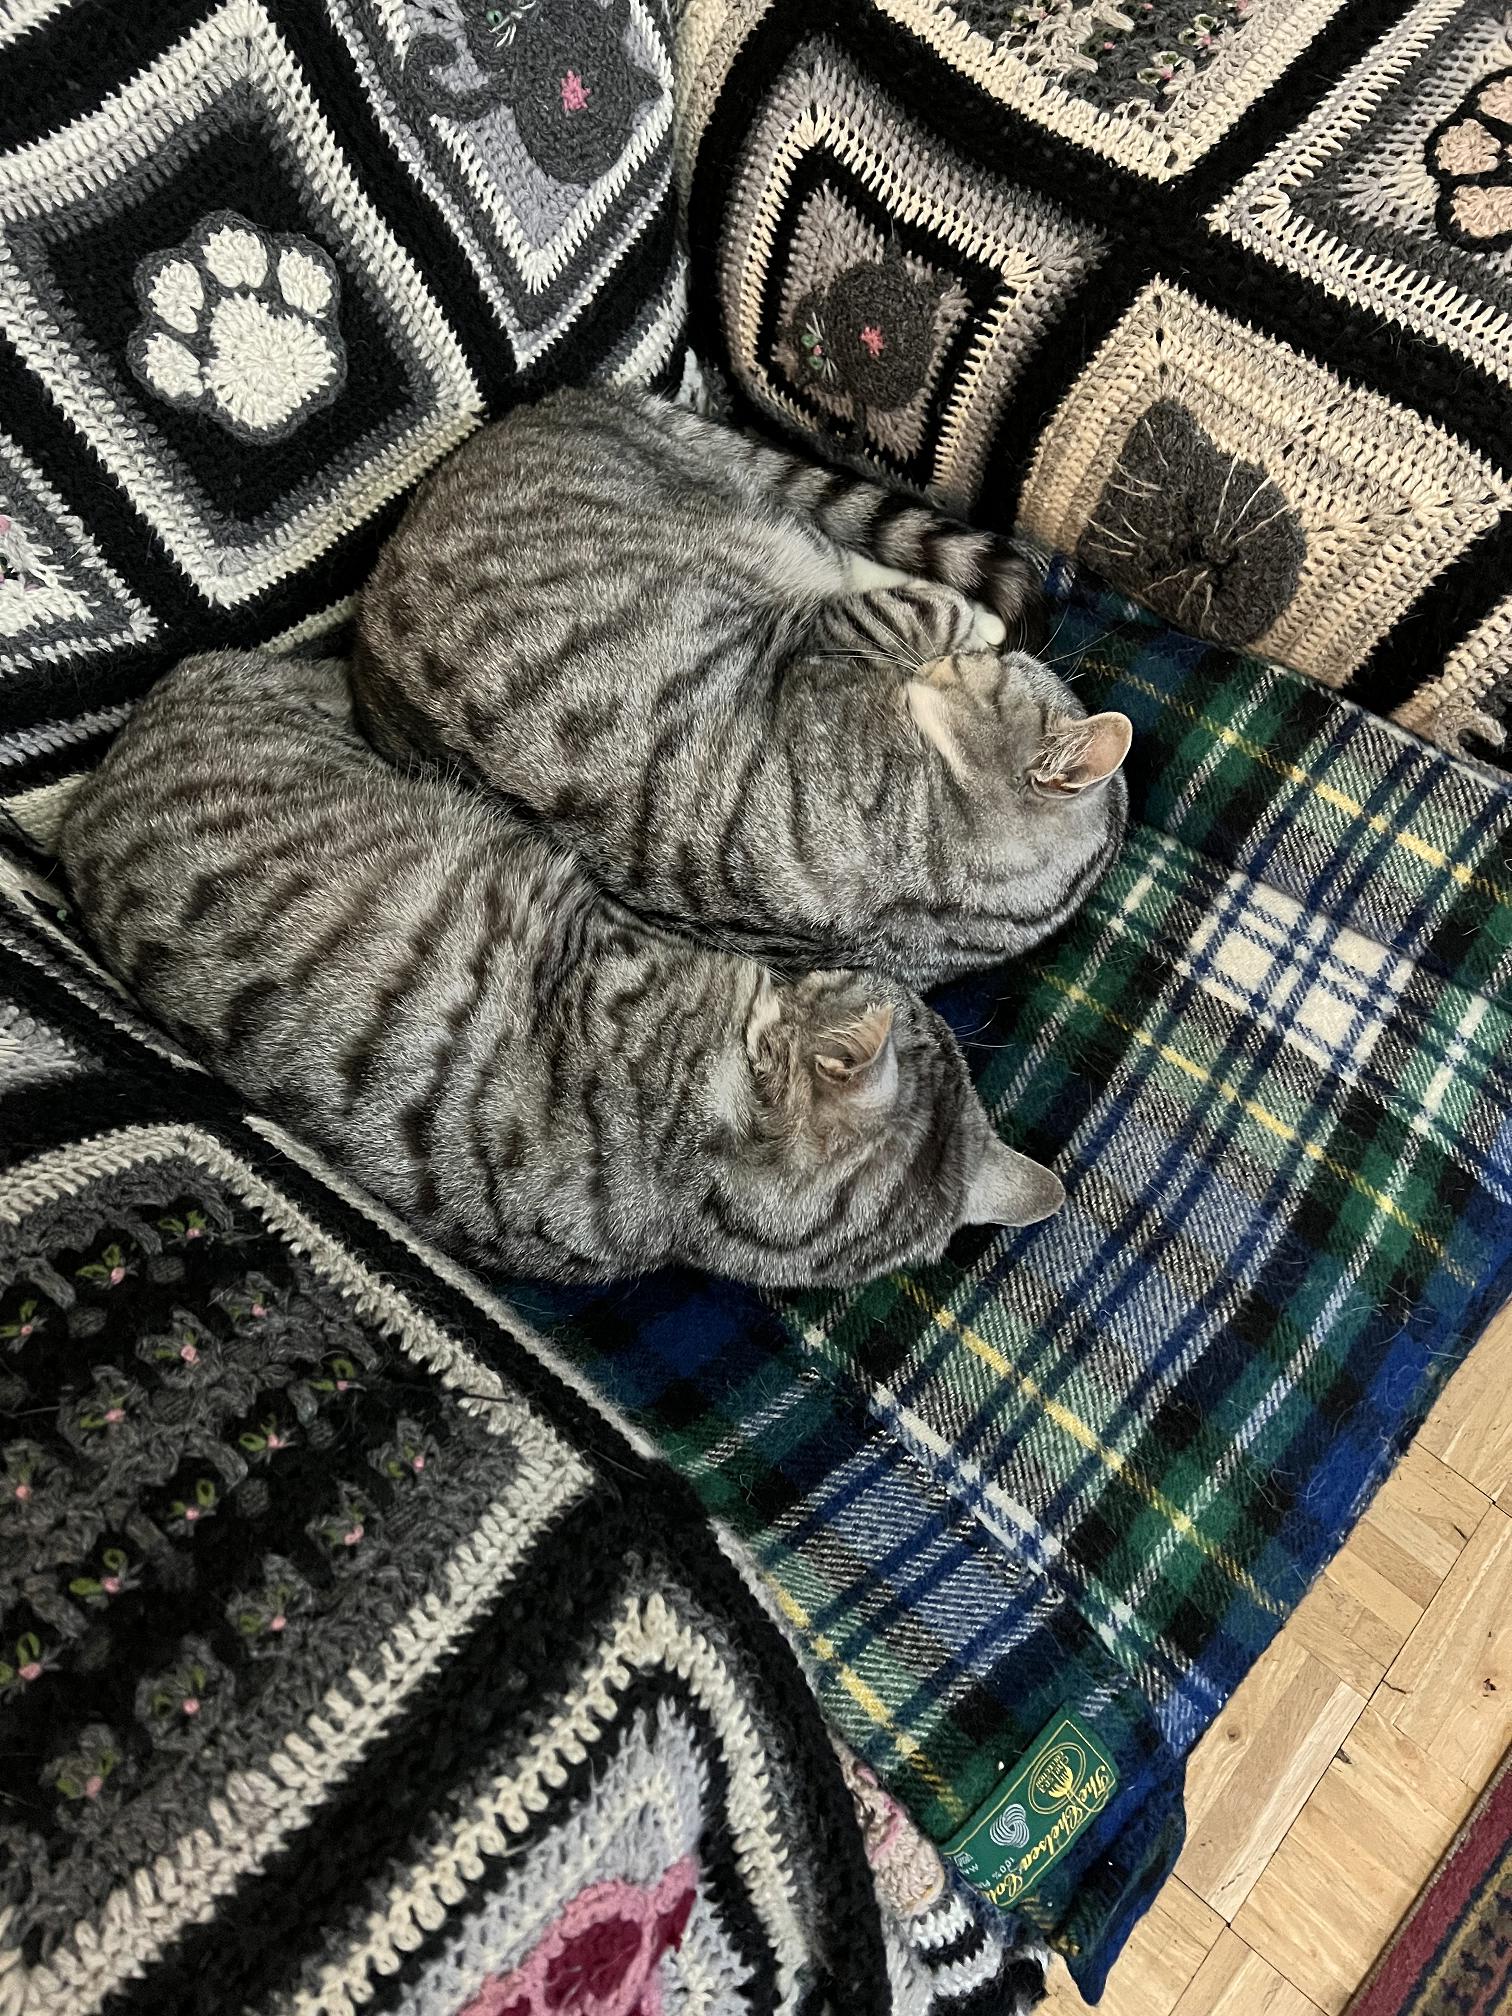
Kitties
Two little beans.
The other night when I was getting ready for bed, I put my bag down on the floor as I always do, ready to pack it with my stuff to take up. Instantly, Ruby hopped in!
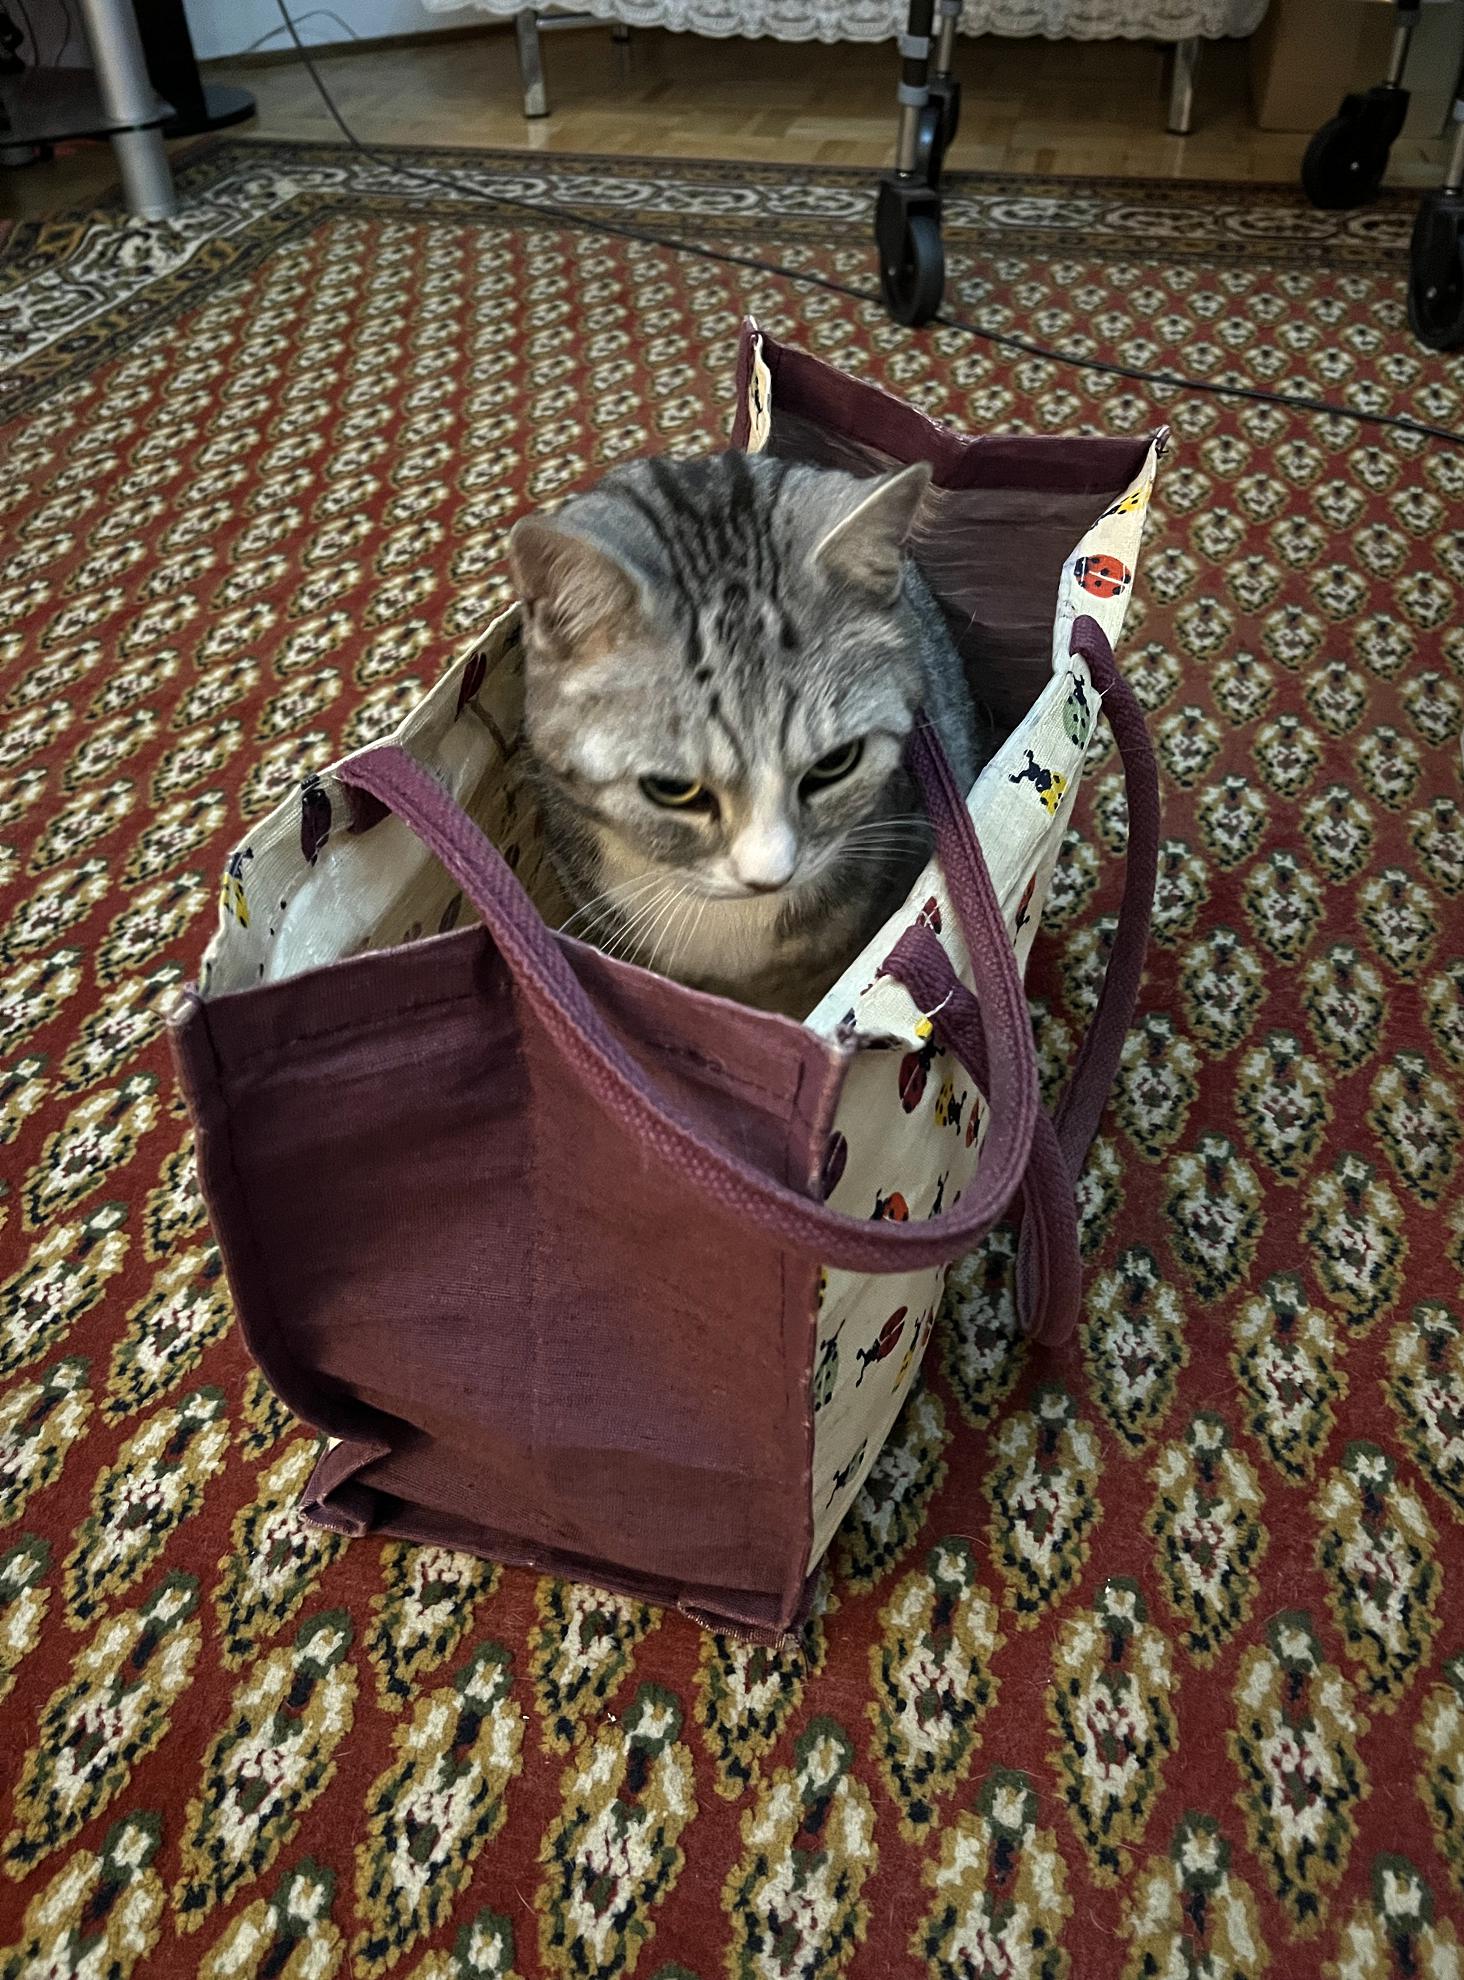
Peek-a-boo.
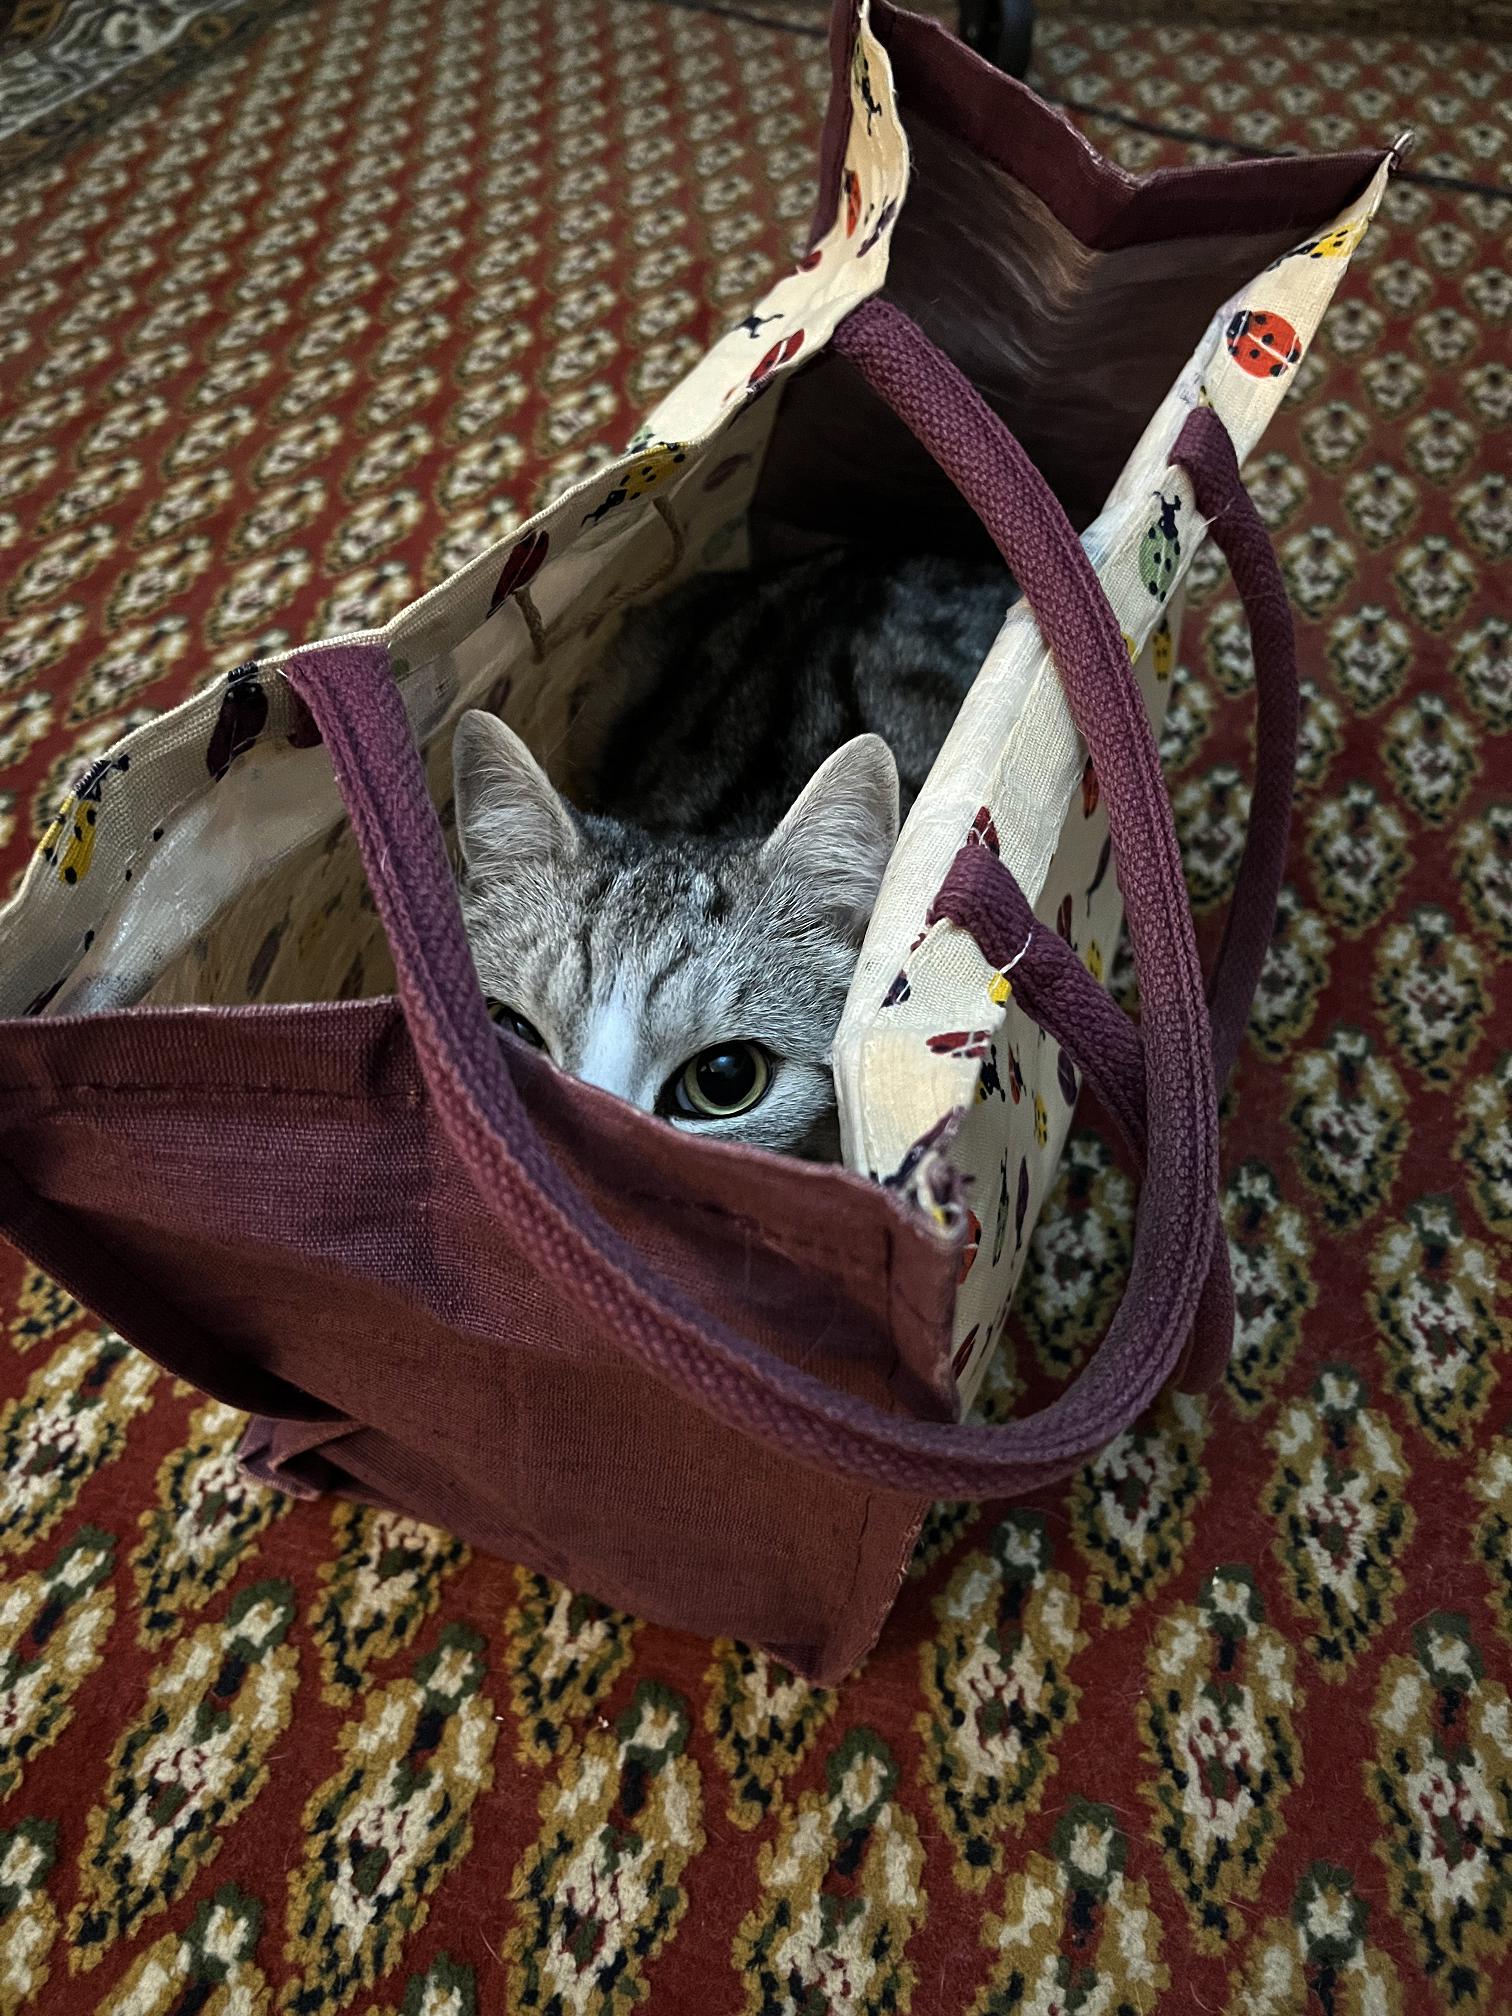
Needless to say, bedtime was somewhat delayed.
My birthday
Today is my birthday. I cannot believe I am 69! How in the world did THAT happen?
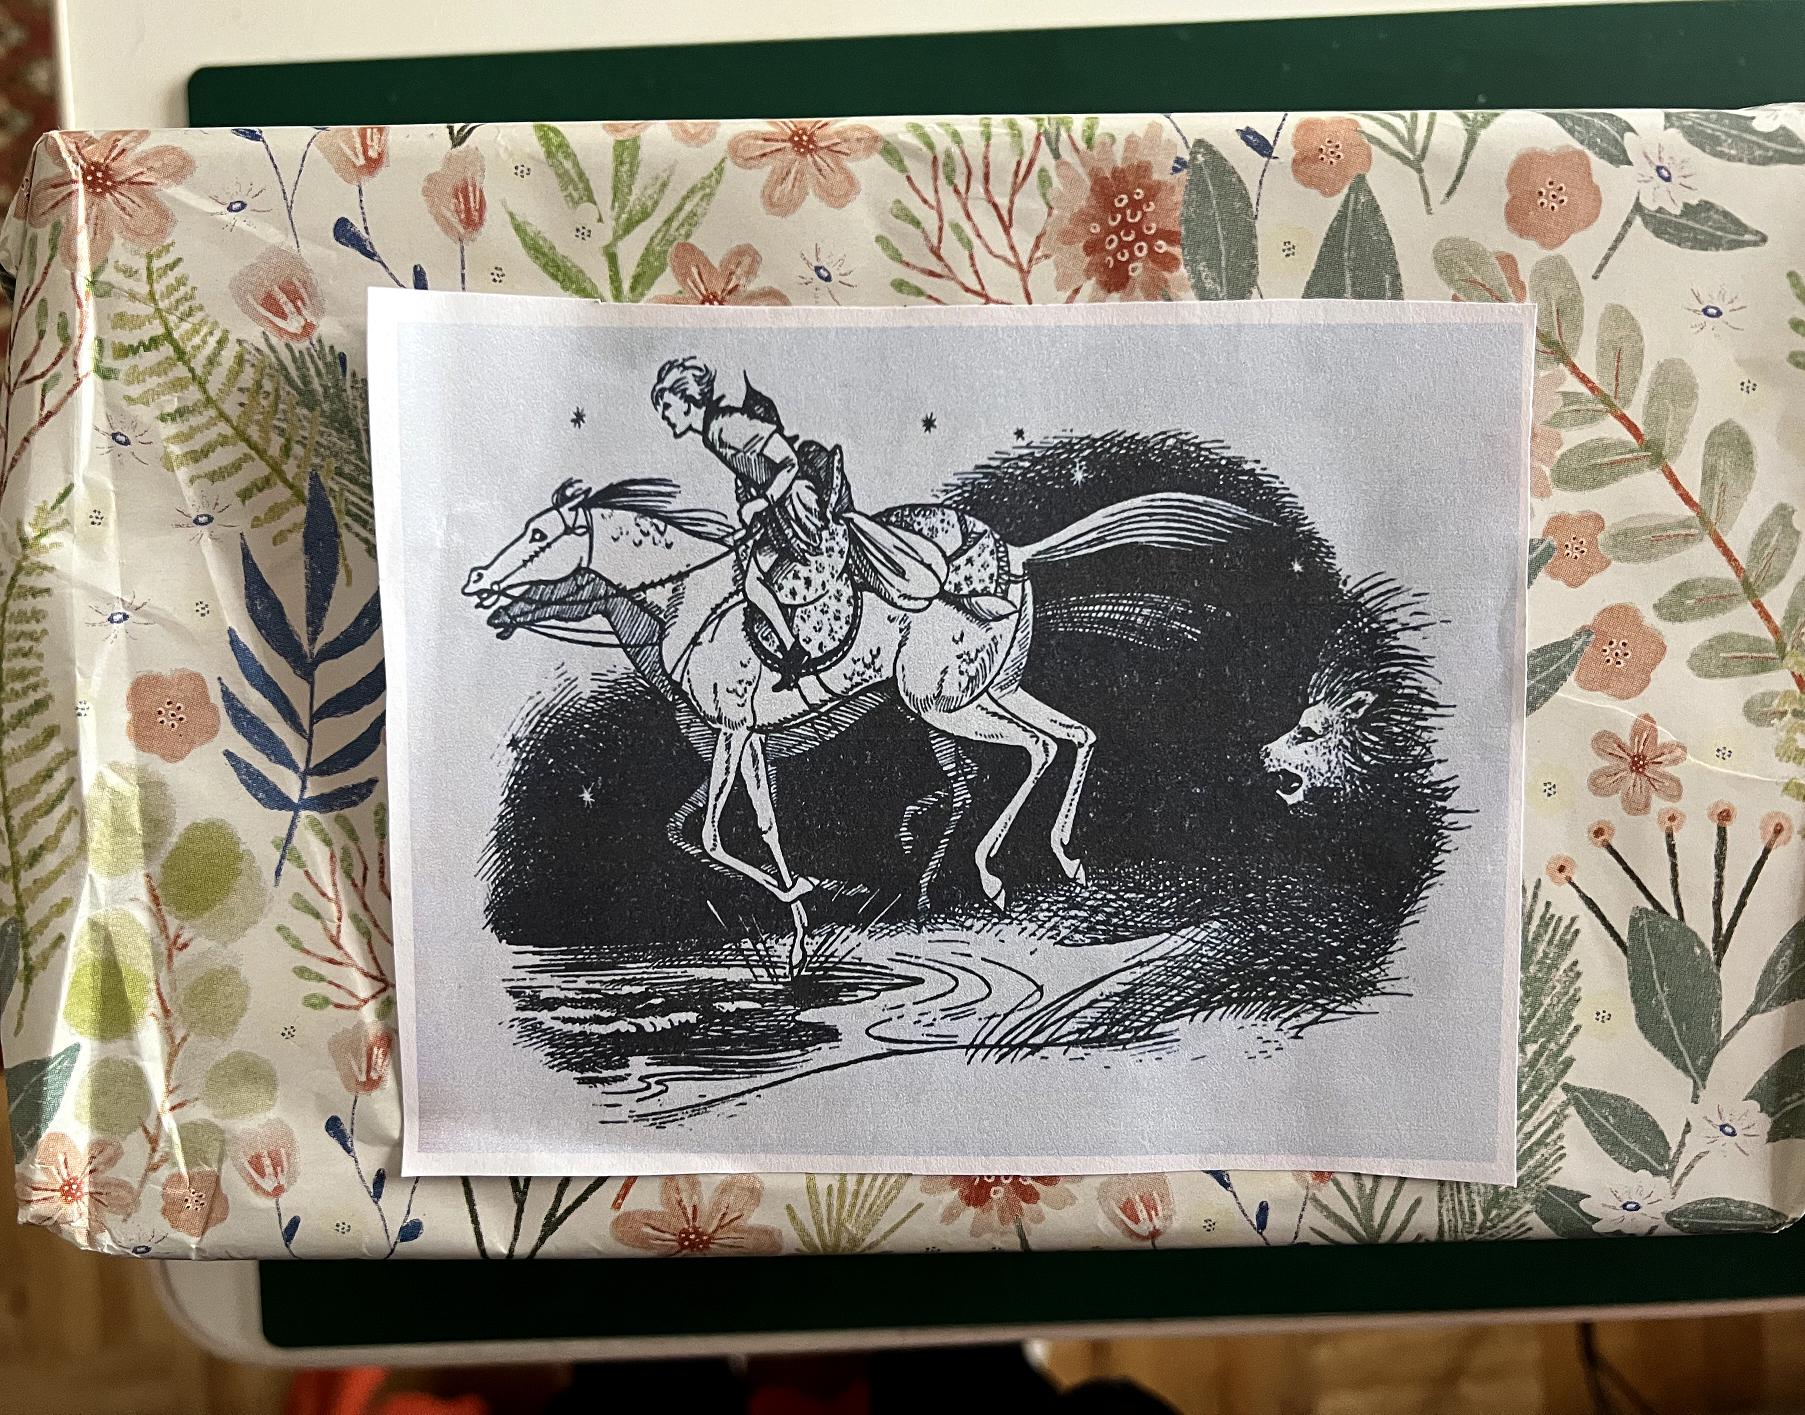
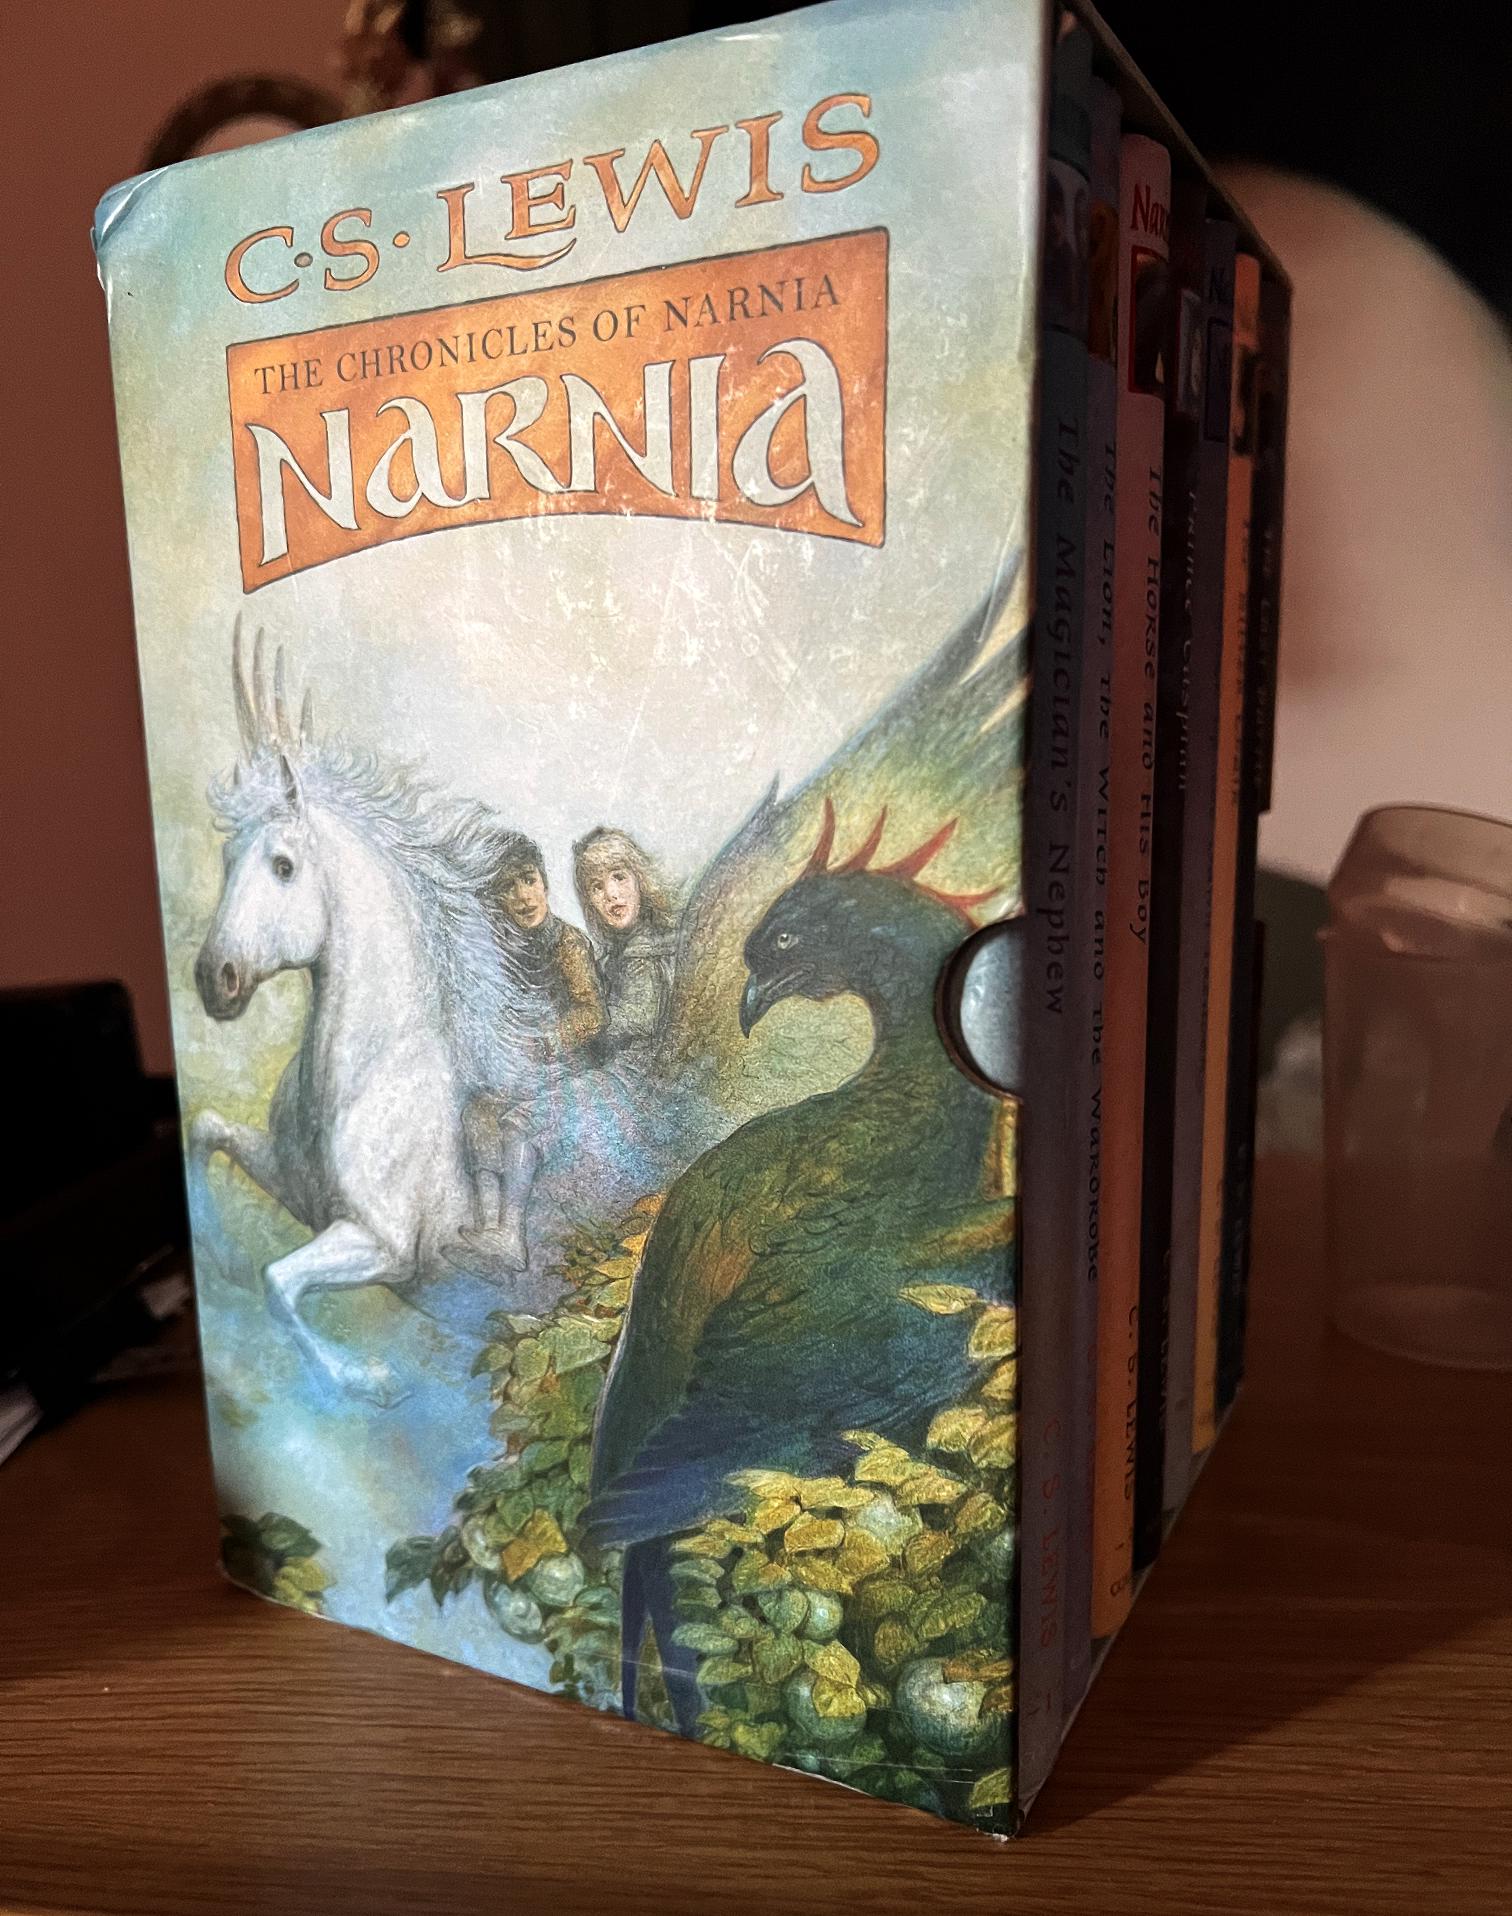
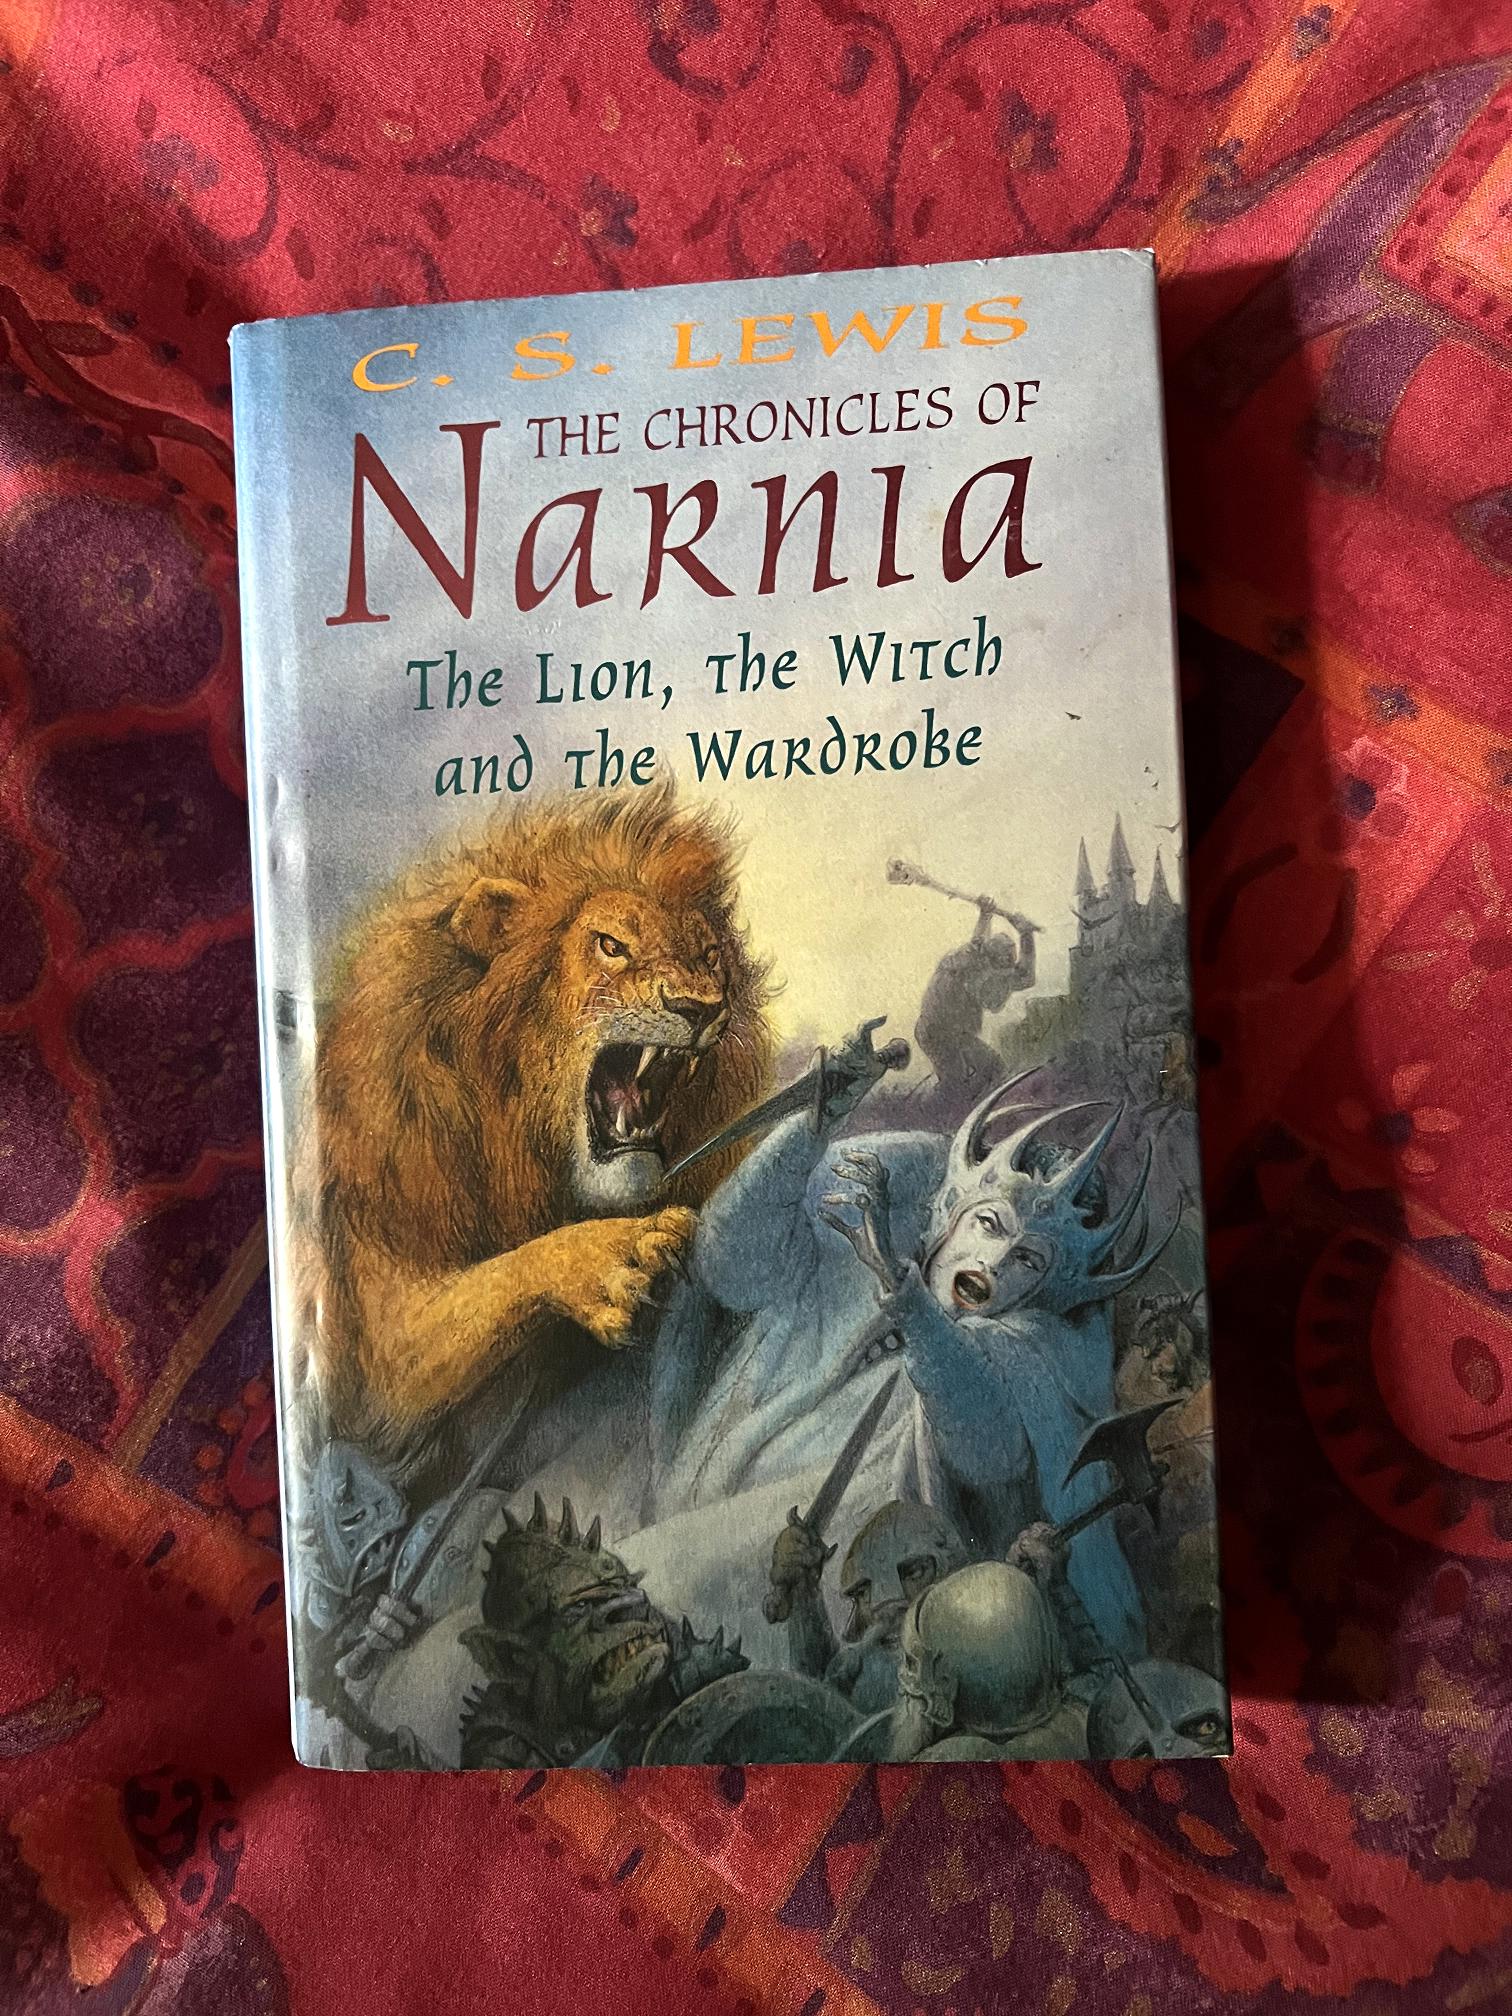
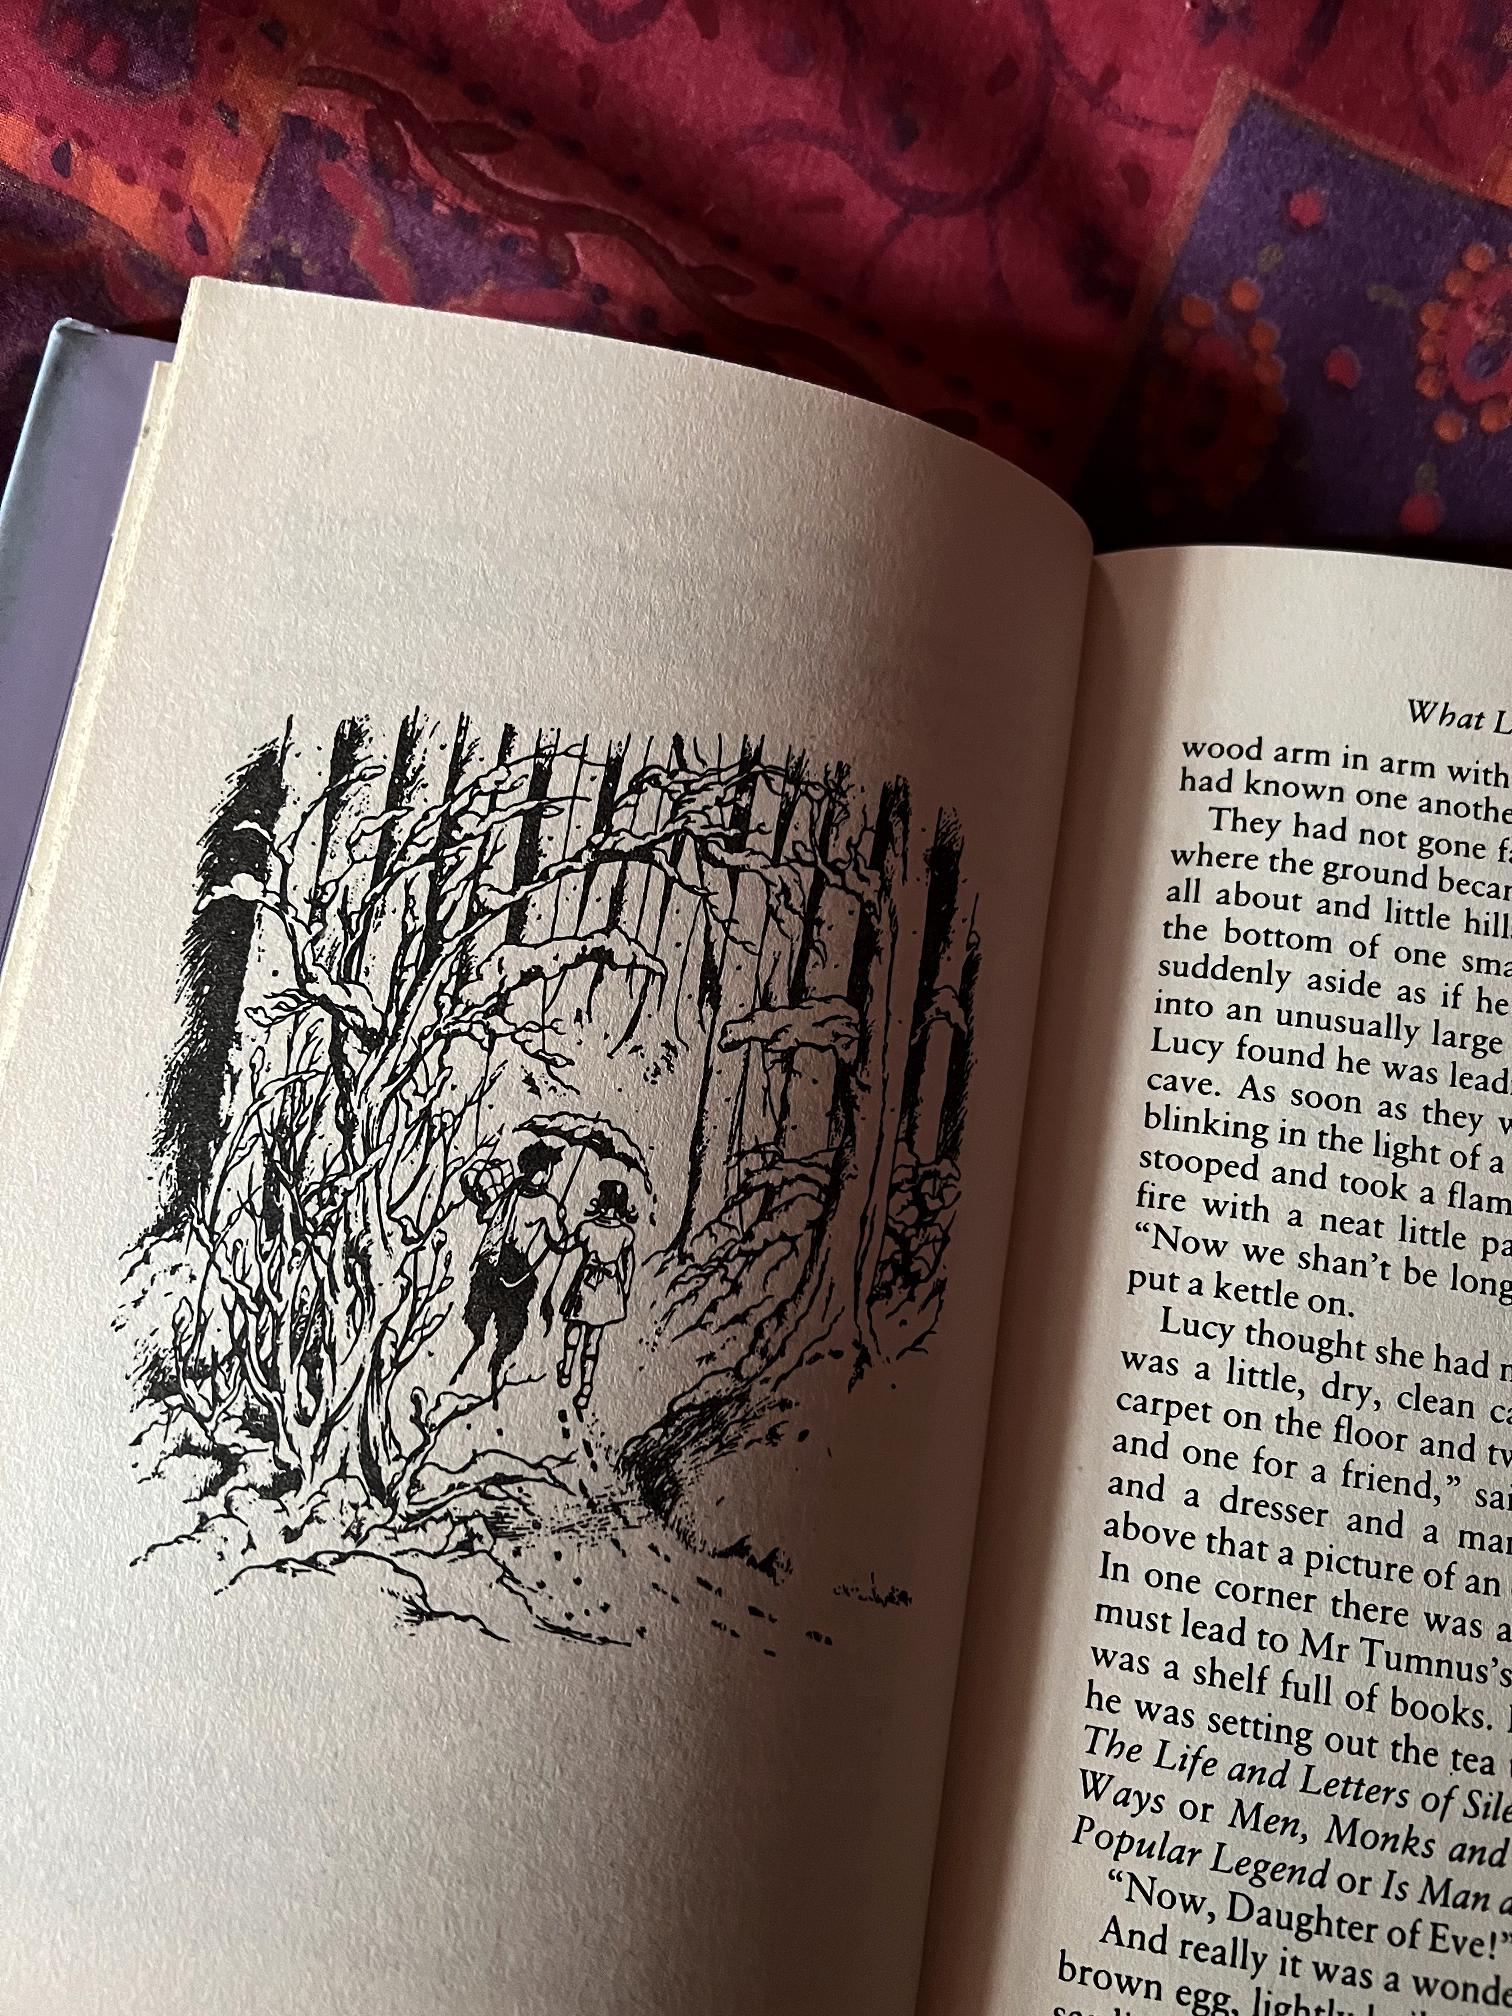
My hubby has given me such a lovely present. Ever since I was about 9 years old I have loved C.S. Lewis’ Narnia Chronicles. When we moved house my Puffin paperbacks seem to have gone missing. I found a beautiful boxed set in hardback, second hand on Ebay and he has given it to me. I was especially pleased that in this particular edition, while the cover illustrations are by another artist, the illustrations inside the books are by the original artist, Pauline Baynes, whose drawings I have always found magical.
My hubby knew this, and found several to download and print, and he stuck them on all four faces of my parcel!
Opening it up, the books were revealed.
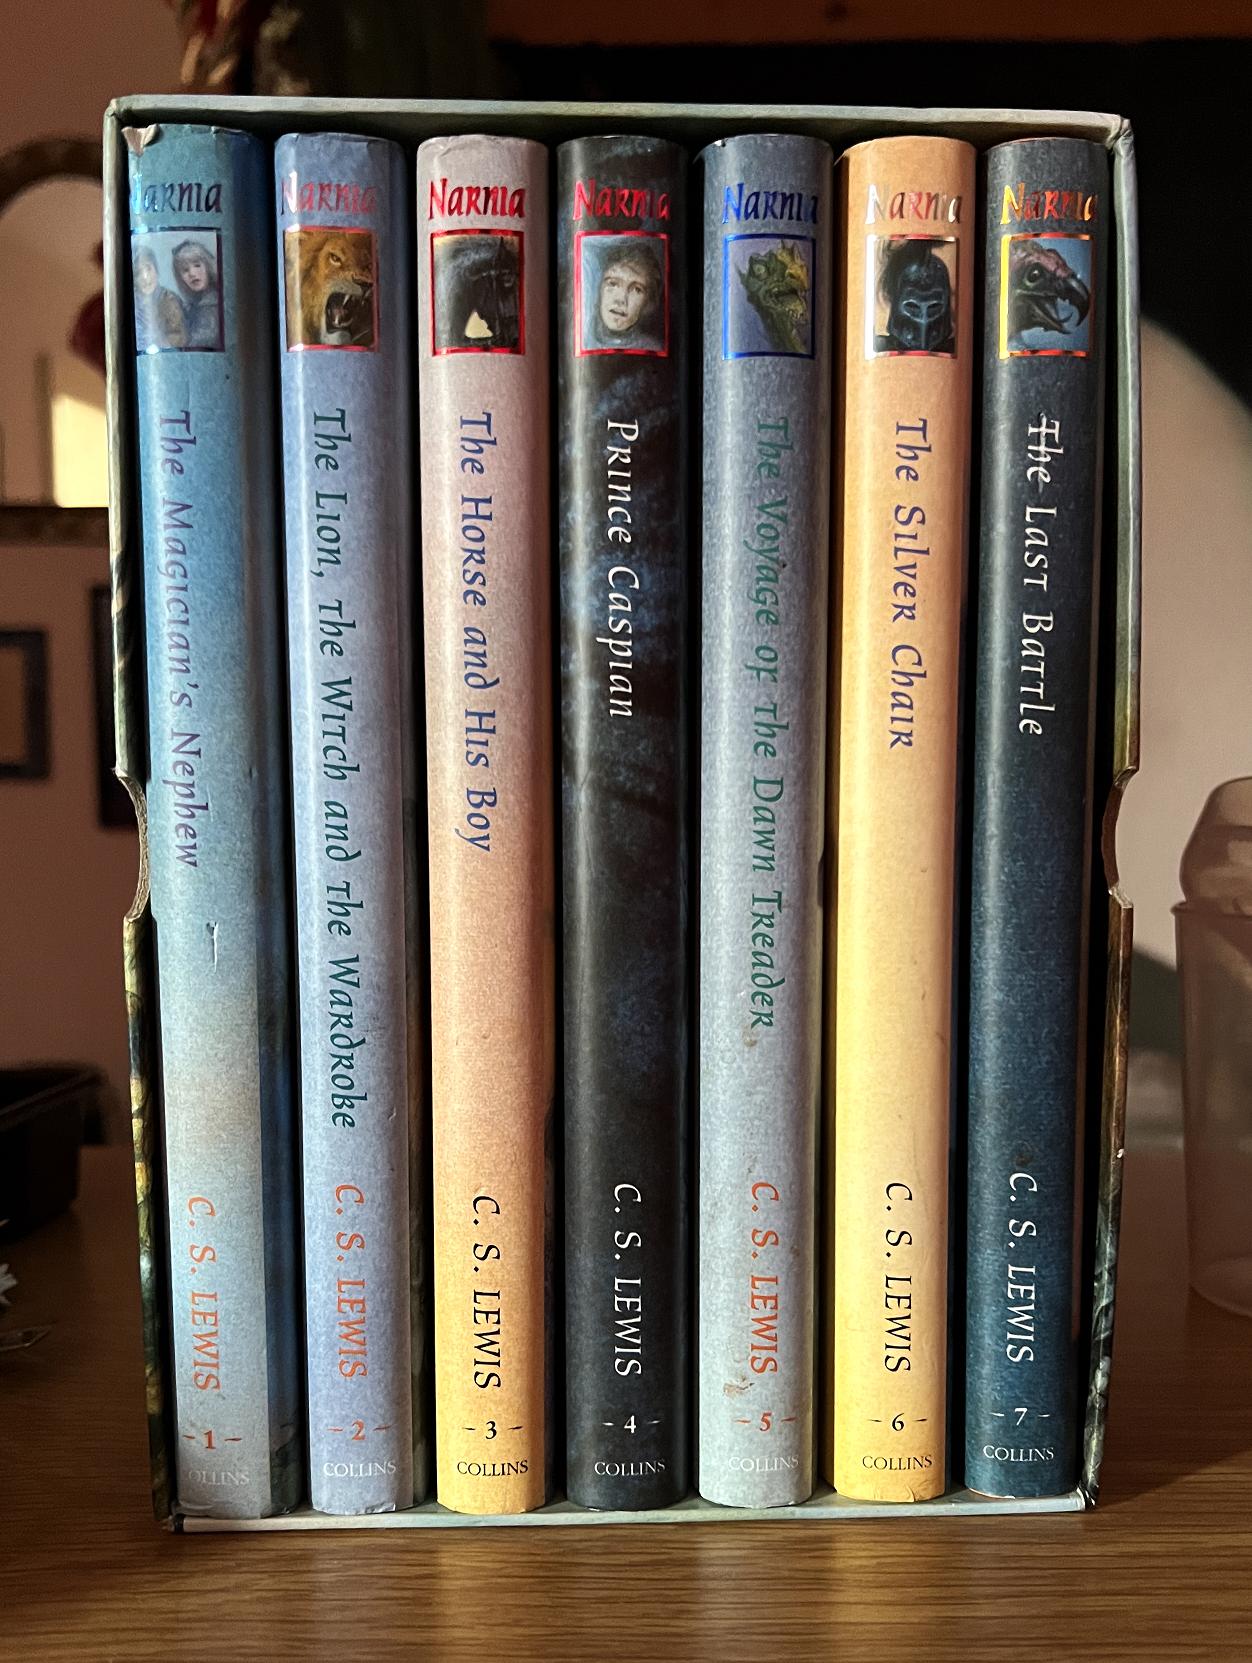
There is minimal damage on one or two of the books and the box, but nothing major, and I can probably repair it.
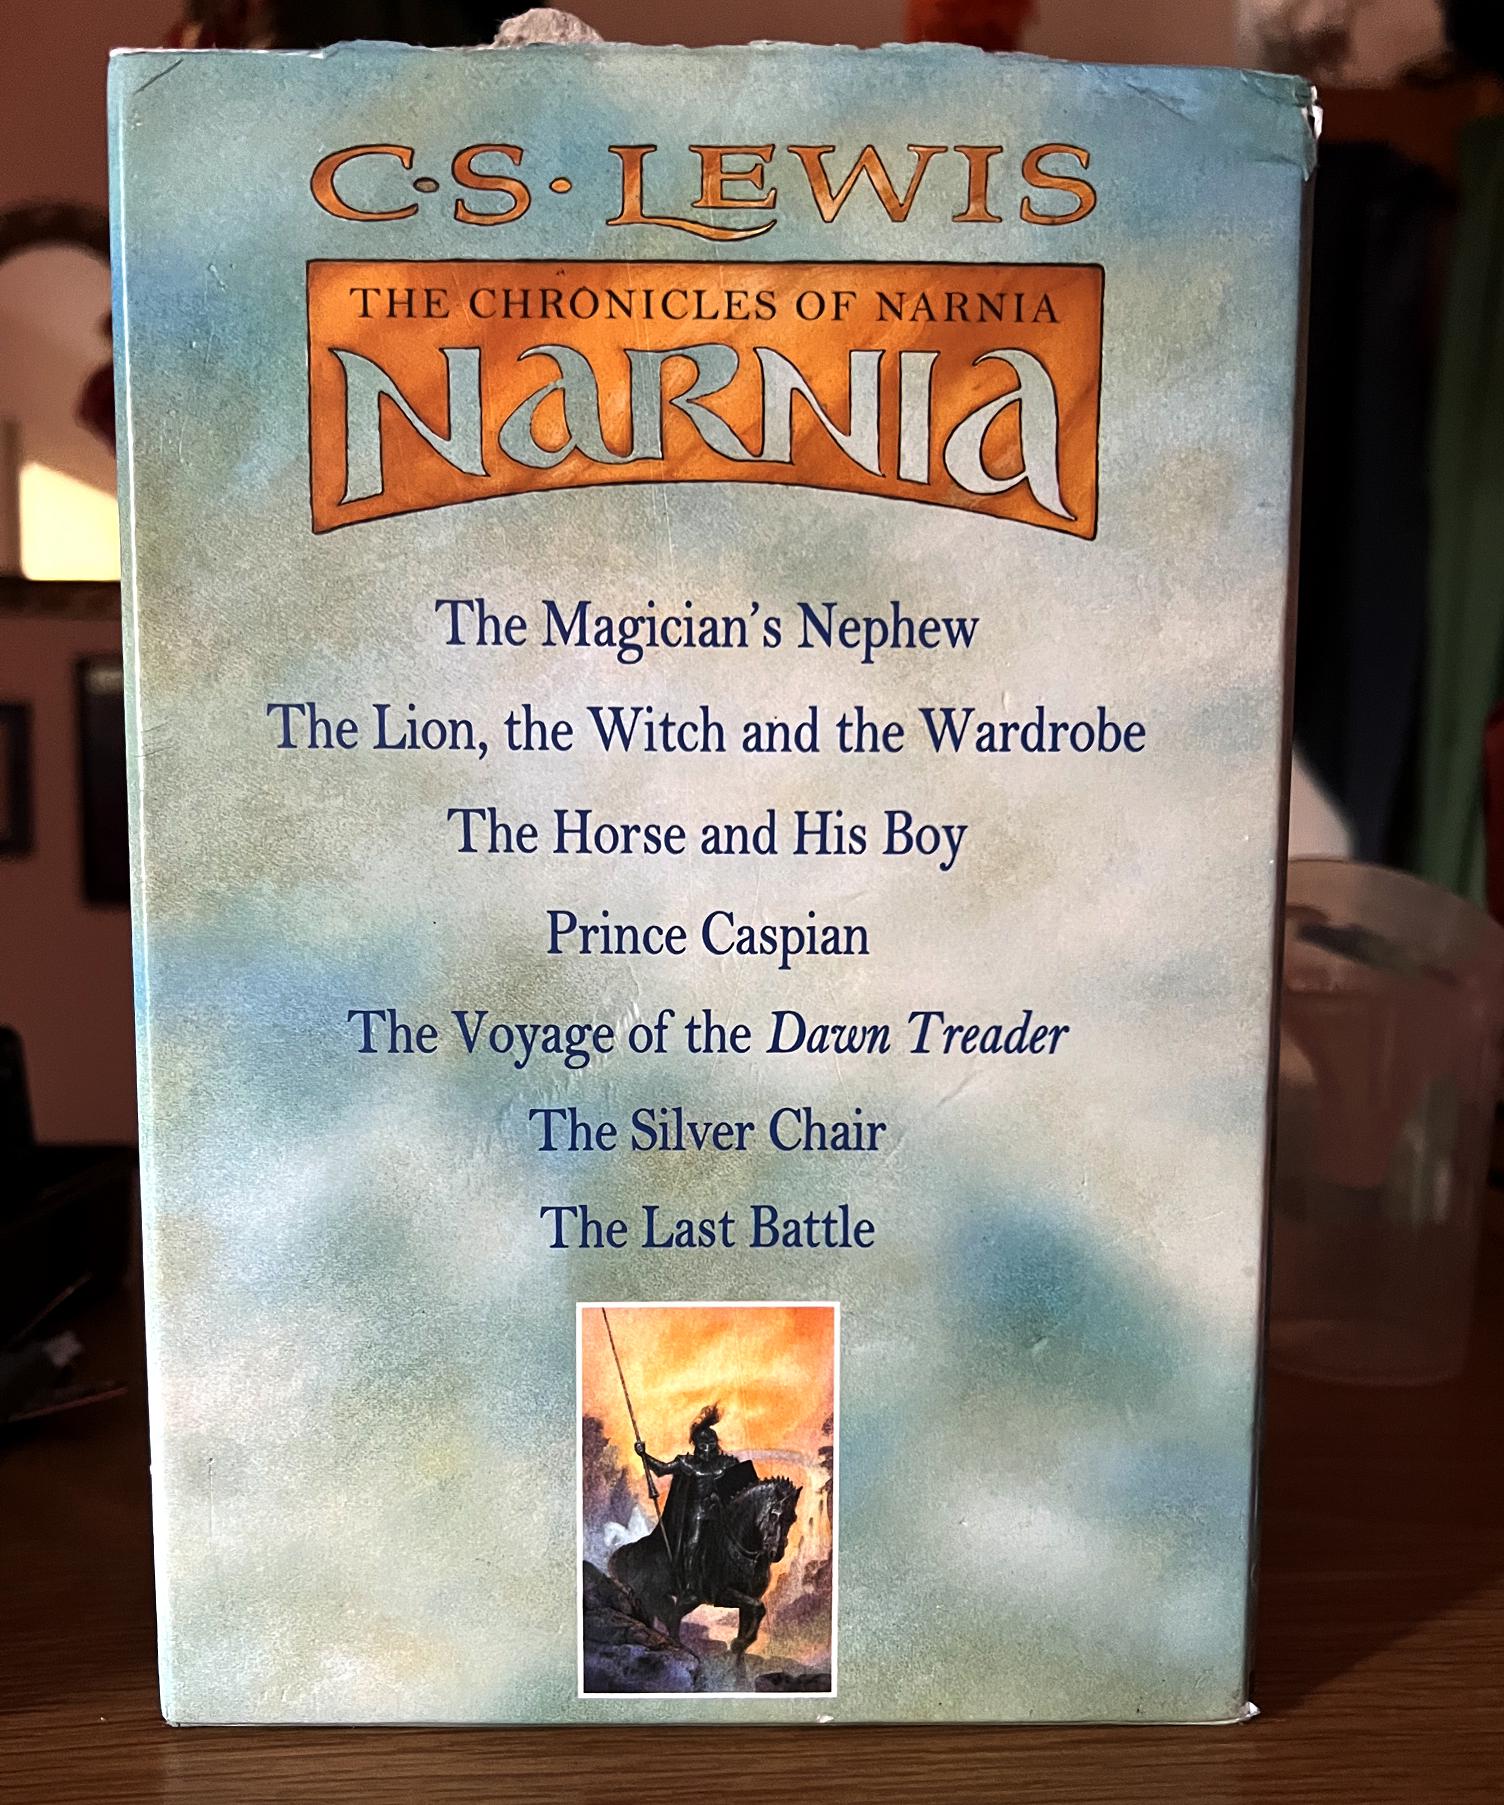
I am so, so thrilled with my lovely present.
Happy Birthday, Shoshi! Hope you are having a wonderful day. I’m sure you are – you enjoy the moments and seem very resilient and up regardless of life’s challenges. And you have had a few of them!
I was over the moon to see your comment on my blog! I rarely, rocking horse teeth rarely, get comments. I assumed you’d be spam but NO!! Delighted.
I’ve read your blog posts for years but never commented… the big incentive was to support you and encourage you to carry on following the big hair flip and flounce-off after the post re Covid vax…
Glad your palpitations have settled – they can be disturbing.
The tea bag art is amazing and I wonder at your resourcefulness and ability to see the beauty in imperfections… wabi sabi?…… probably your nature to seek or see the potential for the good in something. You turn sows ears into silk purses with lovely artworks.
And your practical bent – you should be a product designer! You know the dishwasher was designed by a woman? She’s have been someone like you!
Ruby in the bag made me laugh. Cats are so funny. My little Gracie snuggles up and purrs and purrs but dribbles… eventually she gives her head a shake and I get a fair old spray of cat dribble. We say she’s showering us with love!
Have a really wonderful, happy and fabulous birthday.
The email address is different but it’s still me, btw!
Helen, aka, Elly ! x
Happy Birthday, Shoshi! Hope you are having a wonderful day. I’m sure you are – you enjoy the moments and seem very resilient and up regardless of life’s challenges. And you have had a few of them!
I was over the moon to see your comment on my blog! I rarely, rocking horse teeth rarely, get comments. I assumed you’d be spam but NO!! Delighted.
I’ve read your blog posts for years but never commented… the big incentive was to support you and encourage you to carry on following the big hair flip and flounce-off after the post re Covid vax…
Glad your palpitations have settled – they can be disturbing.
The tea bag art is amazing and I wonder at your resourcefulness and ability to see the beauty in imperfections… wabi sabi?… I think. it’s your nature to find the inner good or potential in things.
The collage of teabag art looks really lovely.
Ruby in the bag made me laugh. Cats are so funny!
Gracie snuggles up and purrs and purrs and dribbles and dribbles… every so often, she gives her head a shake and sprays me with it. We call it being showered with love.. ha ha.
Your hubby is amazing with the prints from the LW&W book and the present is so thoughtful. He seems a lovely guy.
Have a fabulous, super birthday. Enjoy the moments and live the life you love.
Helen aka Elly x
The email address is different but it’s still me – just on a different machine/account today.
Morning Shoshi,
Bathed in sunshine here today and so good to see things coming to bloom and some fabulously buzzy bumble bees, fat as ping pong balls in striped fuzzy coats – possibly queens looking for new palaces.
I’m intrigued about these ‘gelli’ things so expect the full Shoshi-forensics from the outer packaging to the inny-bits and what you will do with them!
Thanks for comment on dungarees. I think we both have an arty bent to our dress sense with more than a nod to boho. You did some lovely mirror-work embroidery a while ago and turned something plain into something unique and beautiful.
Years ago, in UK, I went to a sari shop and – you’d have loved it – full of jewel coloured silks, satins and chiffon bolts of gorgeous cloth… I had an old four poster bed then and wanted to drape chiffon swathes between the uprights. They also sold T-shirts… Black with embroidery in bold – think decorative canal barge colours – with lots of little mirrors stitched in. (I can’t remember the name for this type of embroidery… you mentioned it in your post at the time.. sheesha? shish? 🙂 I had a couple of them. Shirt-bottomed with flared sleeves… felt like the cat’s pyjamas in them!
I’d better get a wiggle on and do some work but happy Wednesday, or welly gelli day, in your case.
Keep well and smile from the heart.
H x