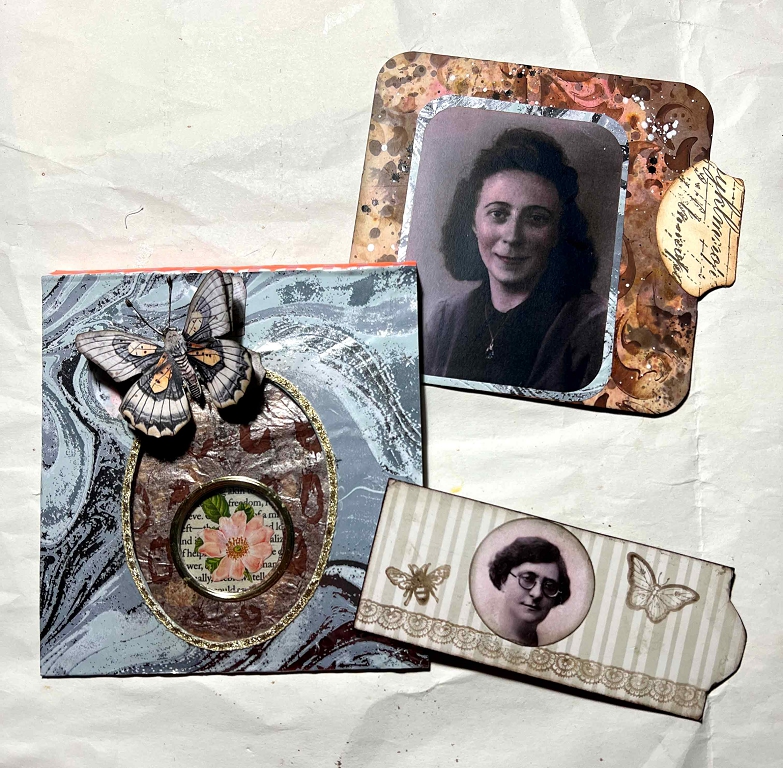
OVAL WINDOW POCKET WITH PULL-OUT TAGS – CORRECTED AND COMPLETED
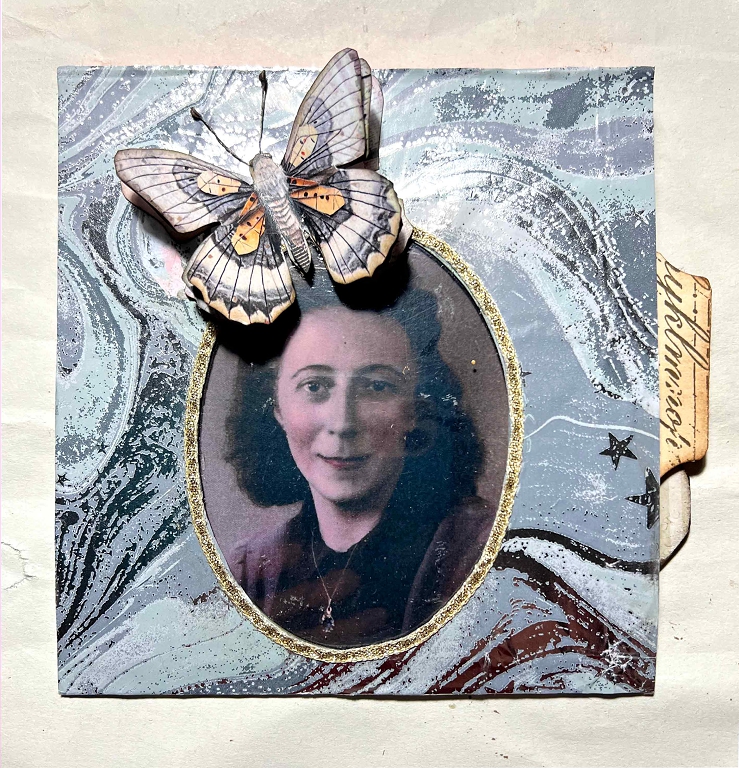
When I first worked on this element, I intended to make a pull-out tag for both the larger oval window and the smaller round one, but forgot the latter. I thought it would be too late to do anything about it as I was sure everything was now glued closed, but when I looked at it again, I realised that the right-hand side was sufficiently open to complete the project as I originally wanted it. I also replaced the large butterfly on the front with a smaller one, which is better proportioned.
The new version.
Before and after.
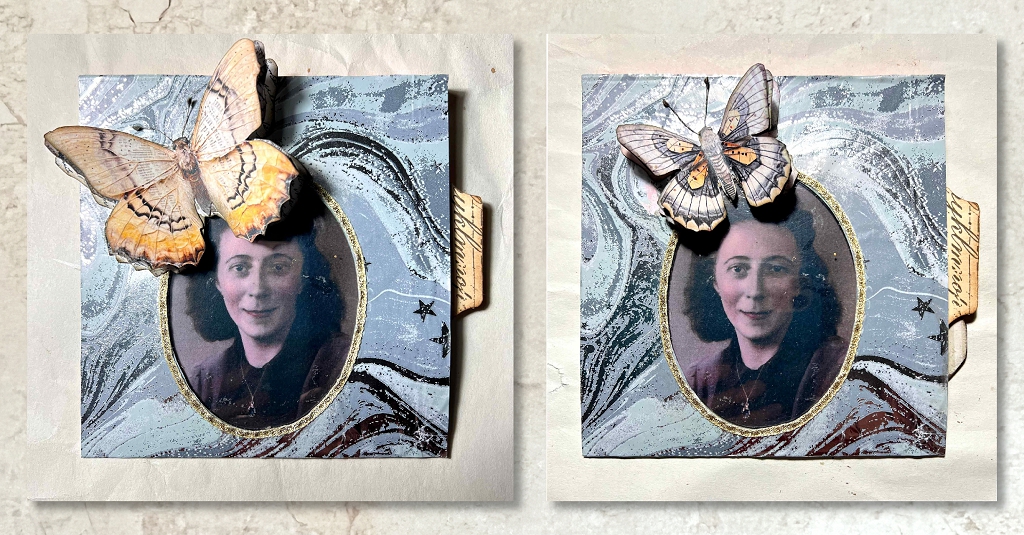
You can also see the additional tab on the right hand side, for the new smaller removable tag.
When I pulled off the large butterfly it caused quite a bit of damage to the silver gift wrap paper underneath. The pattern is so random, though, that I was able to tear of a small fragment from the remaining paper and glue it down, and once the new butterfly was in place, the addition wasn’t that noticeable.
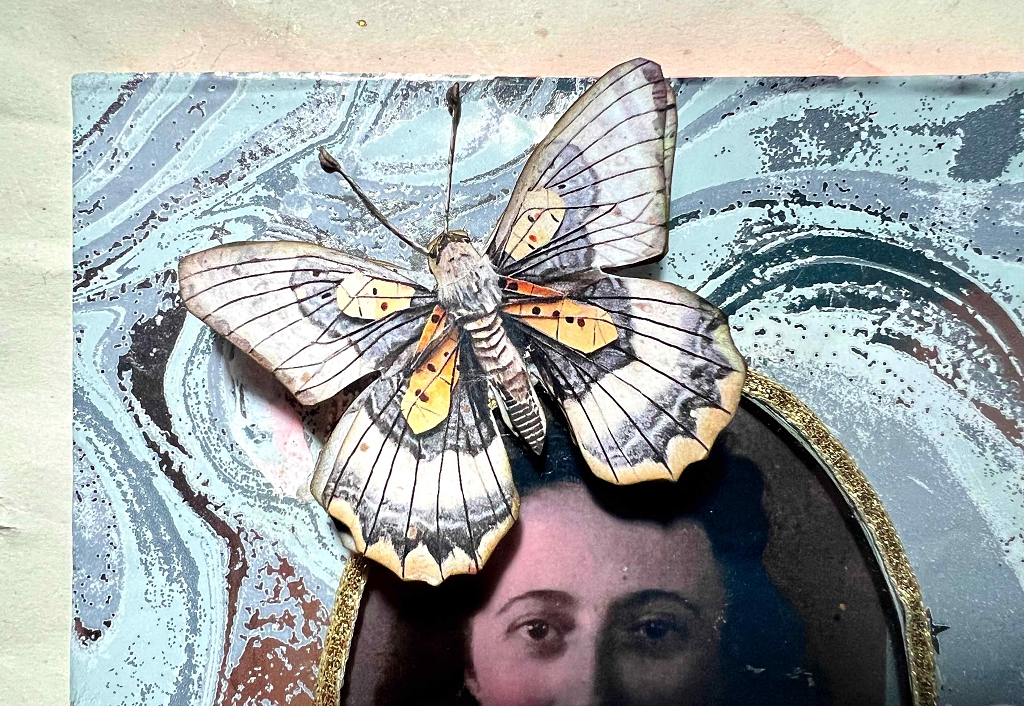
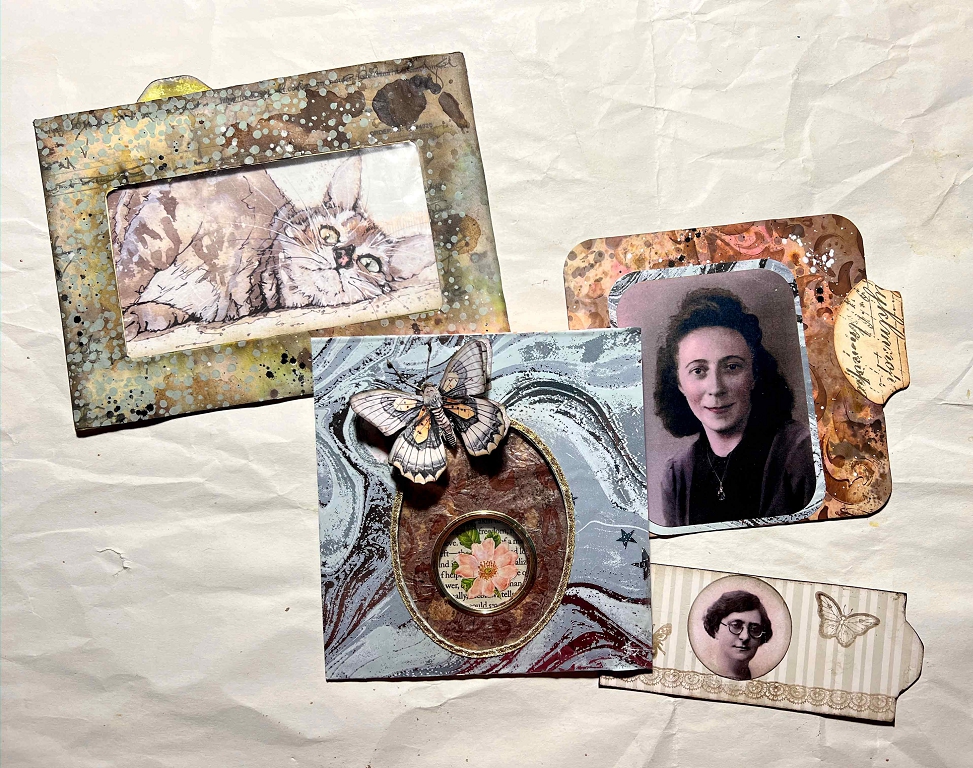
Detail of the new smaller butterfly.
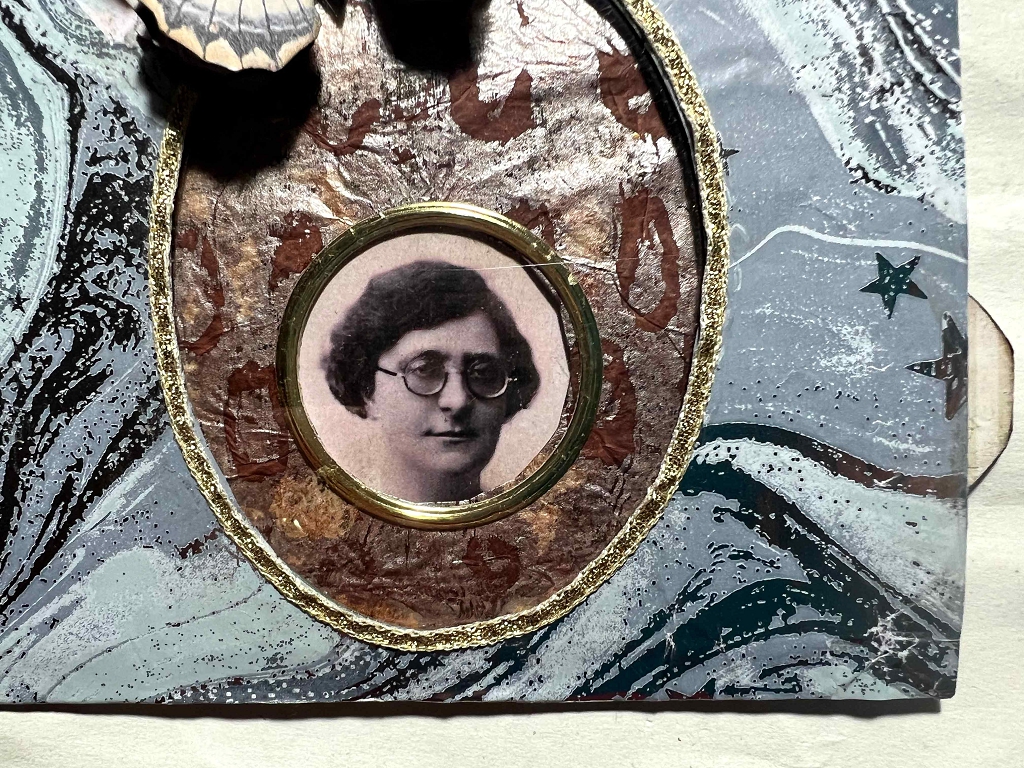
With the larger tag removed, you can now see the new image through the small round window underneath.
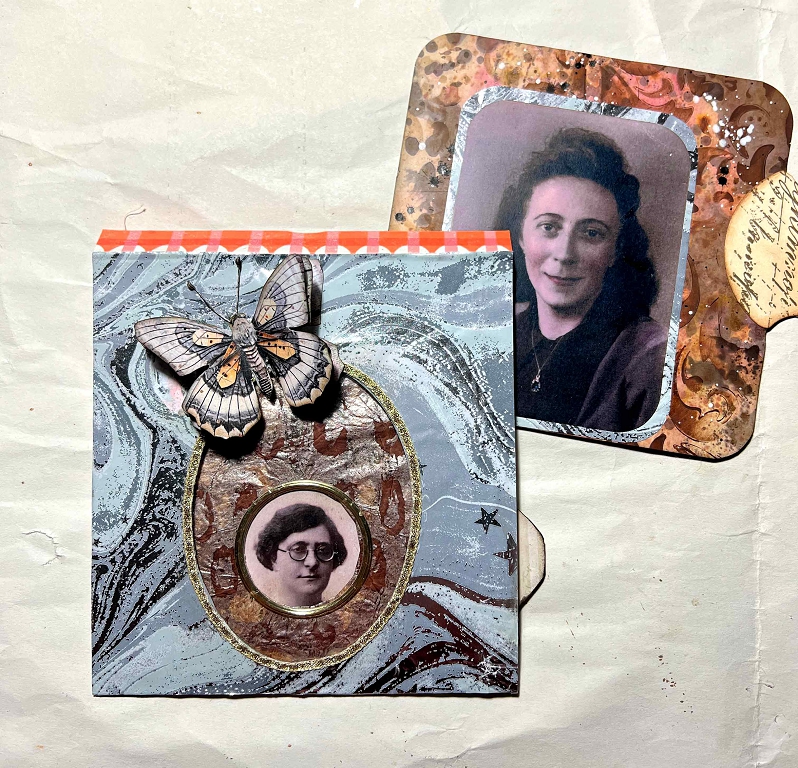
When the new small pull-out tag is removed, the original flower image is revealed.
I die-cut the lady’s face from a larger picture and stuck it down on the tag. I couldn’t place it centrally because it had to be in exactly the right position to show through the small window. To make the tag look a bit better laid out, I stamped on a lace border at the bottom and a bee and a butterfly for further embellishment. I cut the pull tab using my envelope punch board.
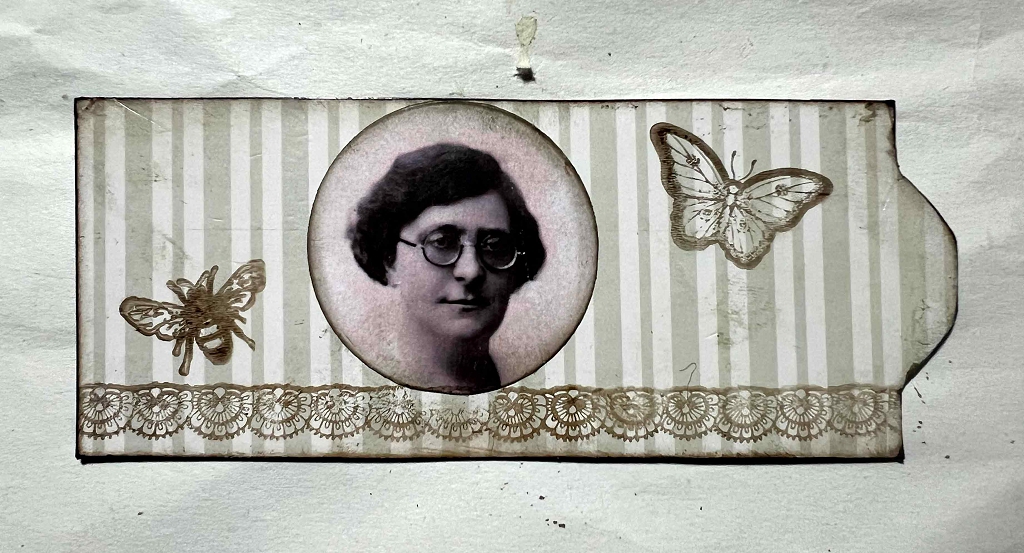
I inked the back of the tag and then added further ink through my swirly stencil.

Here is a detail shot of the second lady behind her small window.
That element is now completed to my satisfaction. It took a while to get it right but worth the work in the end.
A tag for the window envelope
The other thing I did this afternoon was to complete the embellished window envelope that I made at the start of this ongoing project.
I have a box of old greetings cards. Quite often I can use the images as they are, or adapt them, and the card is always of good enough quality to use as the base for different elements if I don’t like the image, or if I want to use the back of the card. In this case I found a card with a delightful drawing of a cat which a friend had sent me for my birthday once. With a bit of fiddling, trimming it and mounting it on a larger piece of card, I was able to fit it in the envelope so it showed through the window correctly.

I think the texture of the cat picture goes well with the spotted texture of the surround. and the colour is good, too.
When the tag is removed, you can see that it is on a green background. This was a piece of card that I had used for cleaning off the paint from my brayer when I was doing some gel printing. These scratch papers usually have interesting texture and never get thrown away – even the more rubbishy ones can be cut or torn up and the best bits used. Before sticking the cat image down, I inked the edges, and also added a bit more ink to the background to mute the bright white background. I rounded the corners of both the image and the base card.

Again, I created the tab at the top with the envelope punch board and inked the edges of the card.
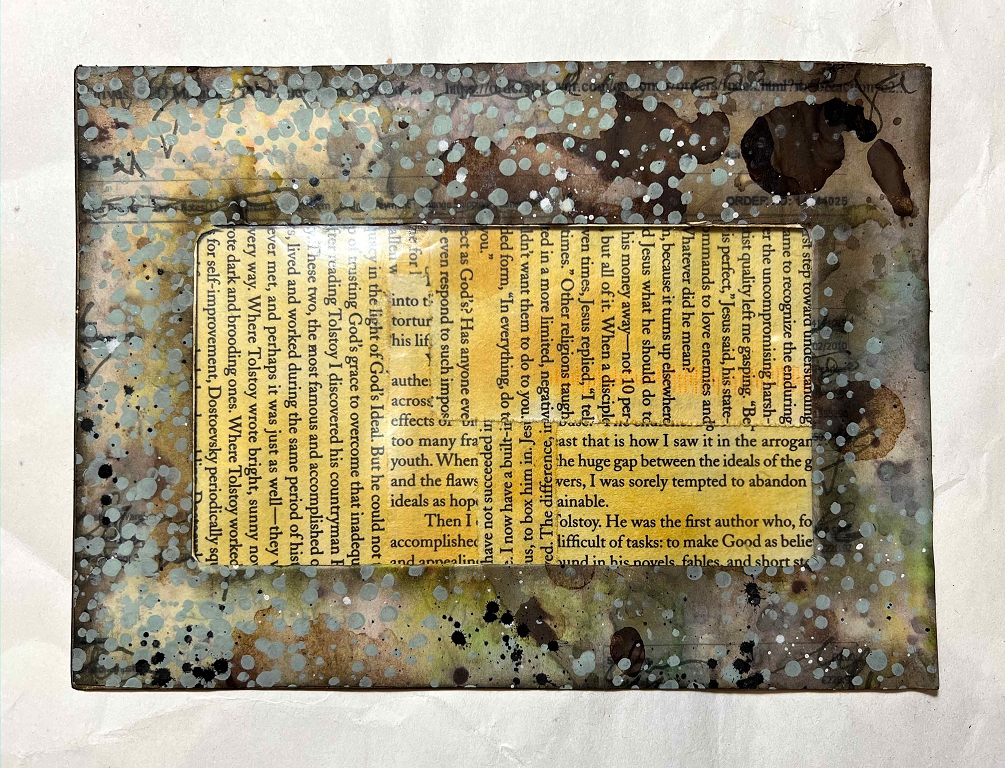
I used a simple technique to cover the back of the tag – something I have done frequently in the past but hadn’t thought about it for a while. I covered the entire back of the card with ink, applying it from the ink pad with a make-up brush. It’s impossible to get completely uniform coverage but I like the randomness of it. Then I spattered water onto it and left it to sit for a few minutes before blotting it off with some kitchen paper. A second application of water spatters and blotting off resulted in what you see below.
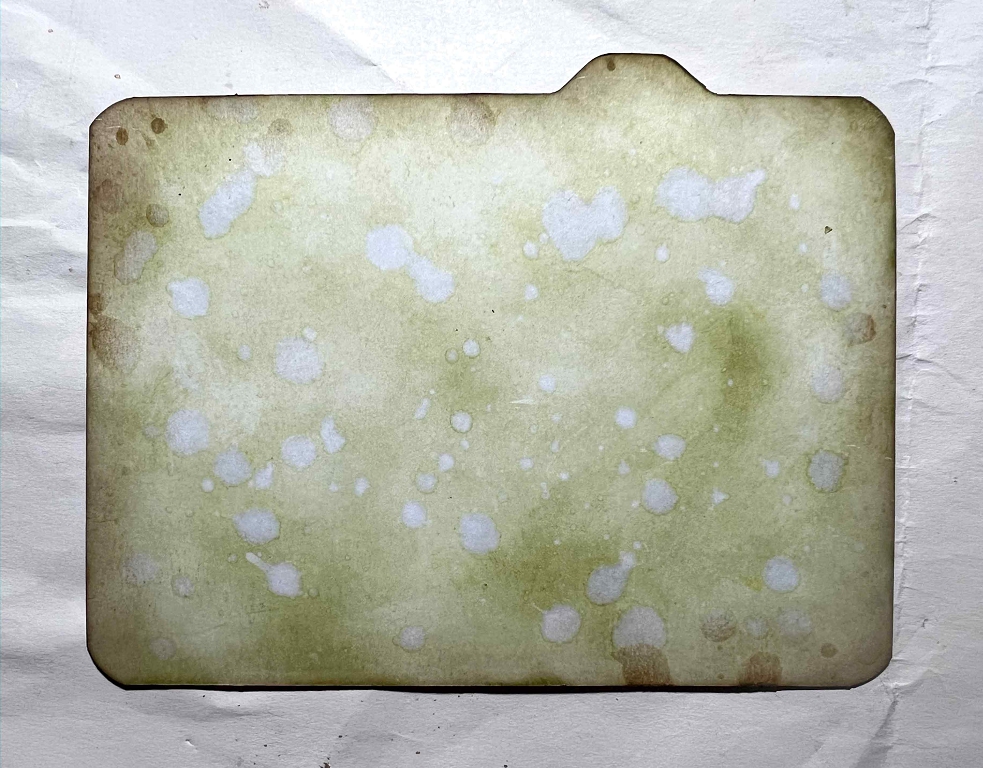
Inking around the edges, the darker brown ink covered some of the spatters in an unexpected way I really liked. It may be because the card was still a bit wet.
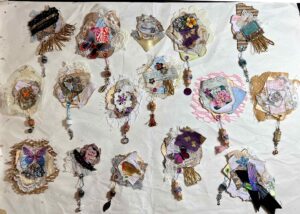
Total work achieved this afternoon. It doesn’t look a lot but getting images on tags to fit in windows takes a lot of fiddling about!
These are gorgeous Shoshi – love them, what a wonderful thing to do with photos of loved ones too. They are so special.