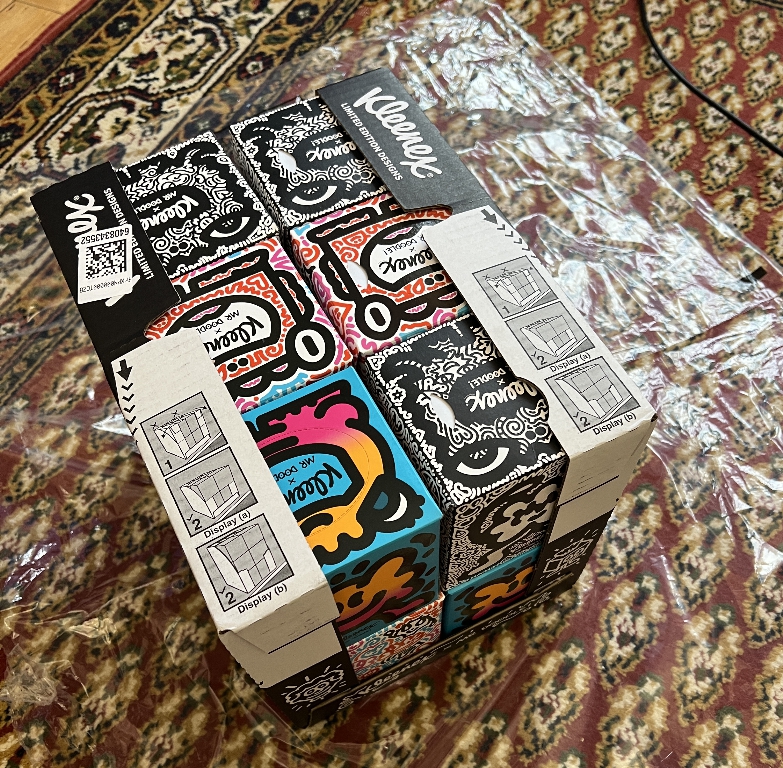
SQUARE TISSUE BOX FOLIO 1 – FLORAL
Fortunately I have not had to pray for a cold! We are getting through my order of 12 cube-shaped tissue boxes fast enough for me to start upcycling the boxes.
Again I am following Chasing Paper on YouTube for another of her excellent tutorials, and again, I have adapted one or two things to suit my materials and needs.
With the previous tissue box folios, made from the rectangular-style boxes, I soon realised that the lady on the video was using tissue boxes which looked identical to mine, but which had slightly different measurements. From this experience, I learnt that I had to adapt my method to suit what I had, and not simply follow her measurements slavishly. Actually she does minimal measuring and a lot of “eye-balling” to get her results.
The square tissue box folios are smaller and less complex than the rectangular ones but they still have potential issues to deal with.
As before, I began the work with two folios concurrently, but soon abandoned one in favour of the other. I didn’t want to duplicate any problems I might encounter with the first one. I am glad I did this because in the video, I still have one in the early stages of construction for illustration purposes.
The tissue box
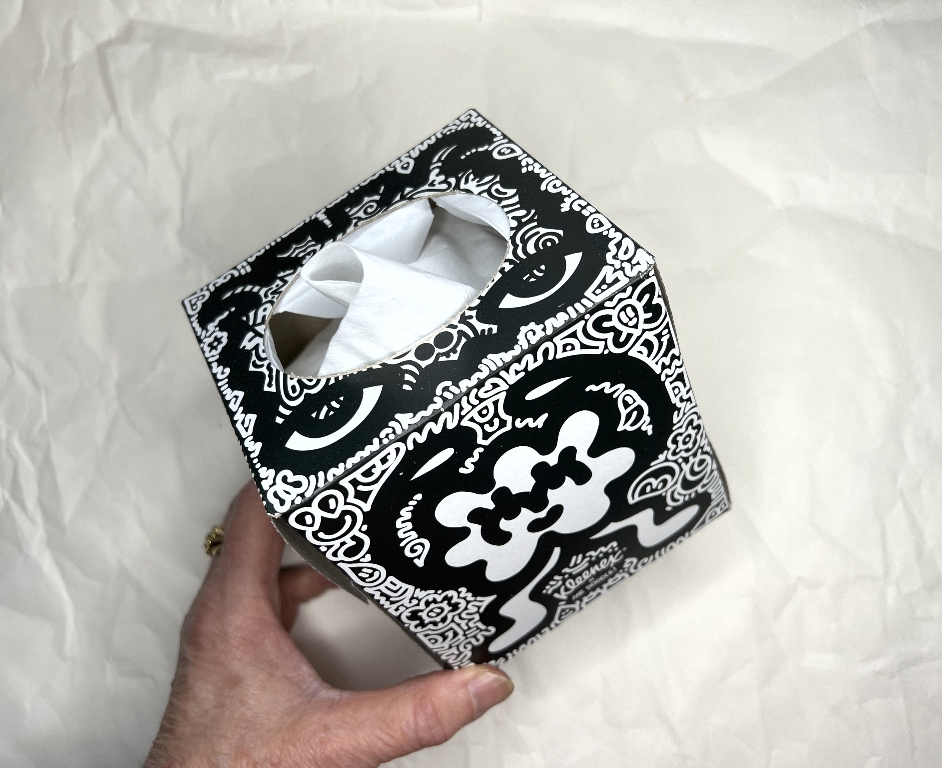
Again, there were differences between hers and mine. Mine are Kleenex and hers were Scotties which might account for the difference, or it may be the result of international differences.
The aperture in the top of her boxes was in portrait orientation, whereas mine are in landscape. I should have preferred portrait but can work with what I have.
The flaps of her boxes were slightly different when you disassembled the box – they were straighter and with rounded corners, whereas mine are more angular and leaving a gap at the bottom where the flaps meet in the project. More on this later.
The disassembling and construction
Here are my two folios in the initial stages of construction.
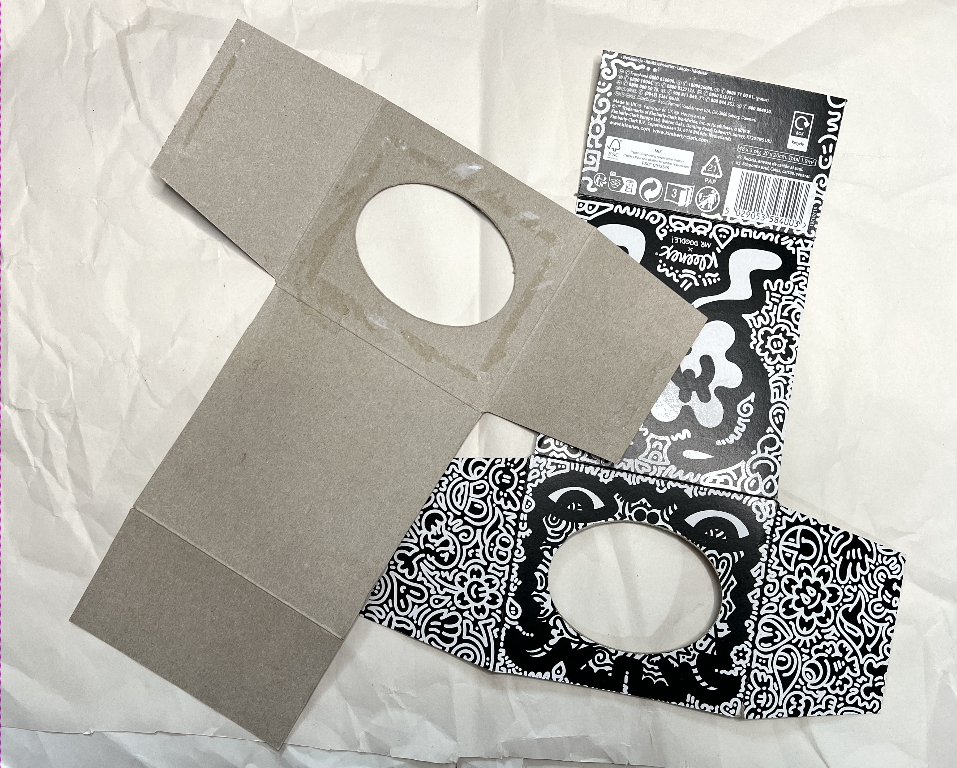
At this stage all I had done was to open up the box along the glued seams, and remove the flaps that weren’t required for the folio. I have also added acetate to the apertures, forming the clear window on the front of the folio.
The closure
This is where I was to depart from the tutorial, because I found a simpler method without the problems associated with the original.
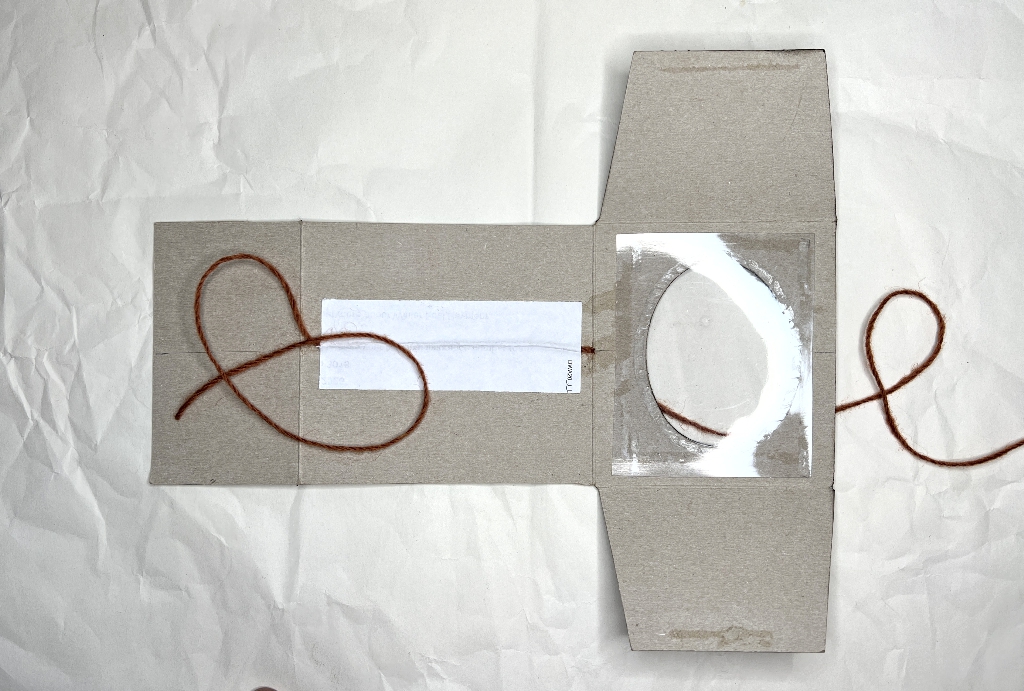
Chasing Paper’s method is very clever, because there are two threads, top and bottom, to be wound around the central embellishment, but the thread doesn’t show across the window. However, I immediately saw some drawbacks in this. Someone receiving this as a gift might be confused by the two threads for the closure. If you tried to unwind the wrong one first, you could potentially end up with a tangled mess behind the embellishment. After I’d created this arrangement in both folios, I decided to use just one of the threads to wind around the embellishment. This held everything closed quite adequately.
Having made that decision, I was left with a yarn coming out through the hole I’d made. Initially I decided I would shorten this, and add some bead embellishments on it just for decoration at the top of the folio, but later something different arose which showed that I could make a loop with the yarn and glue the end securely inside, so that the folio could be hung up if necessary. With the second folio, I may remove this string from the central part and adapt the closure.
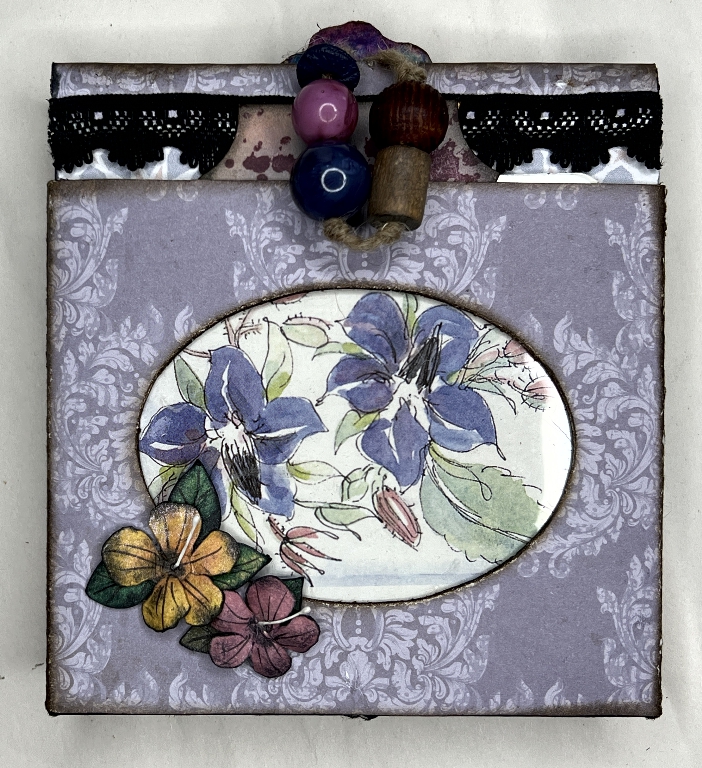
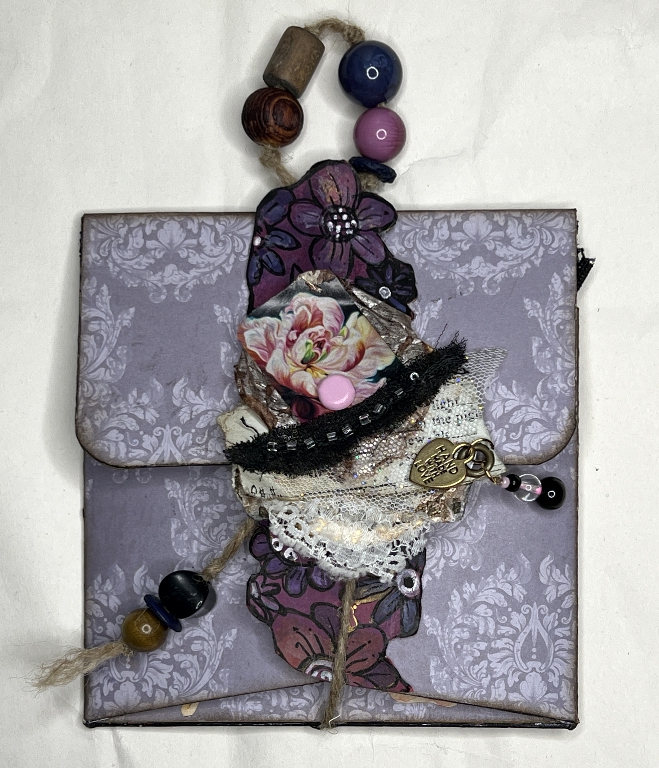
The window side of the folio
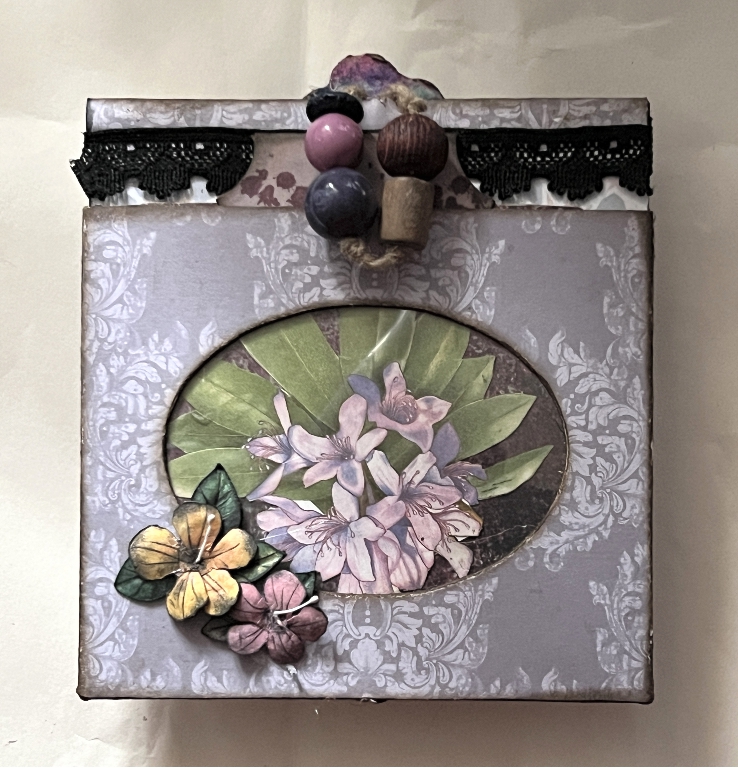
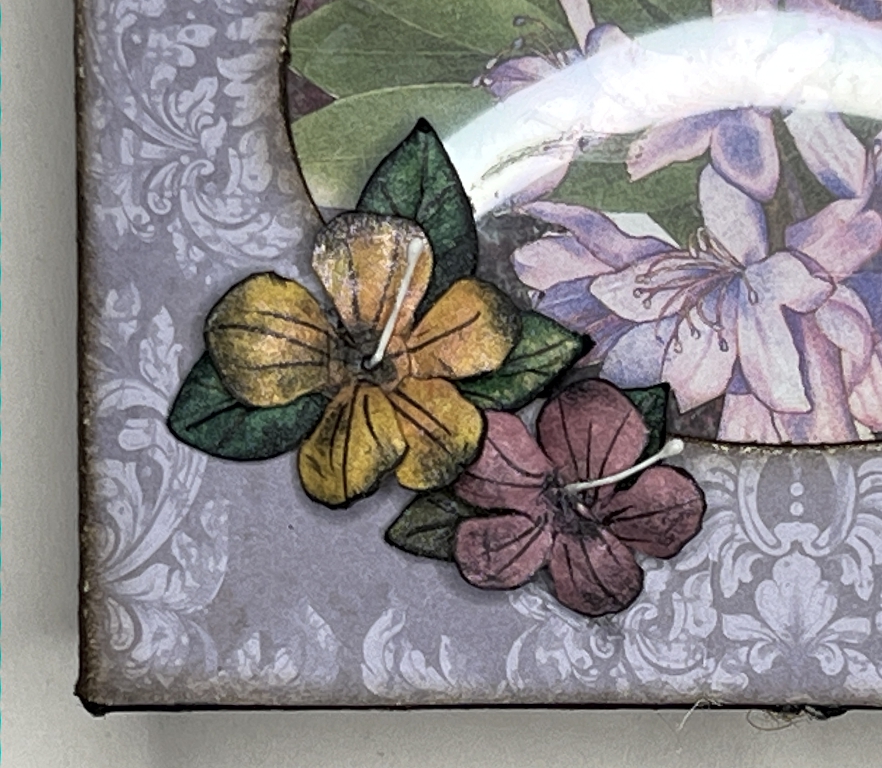
It’s difficult to refer to one or other side as the front because each side can be equally embellished. This is the window side of the folio which I completed with some decorative paper visible through the window, and added a couple of hibiscus flowers from my stash. I made these from one of Penny Duncan’s files for the cutting machine, and coloured and hand-embossed them. I have a number of these flowers in my stash, of different designs.
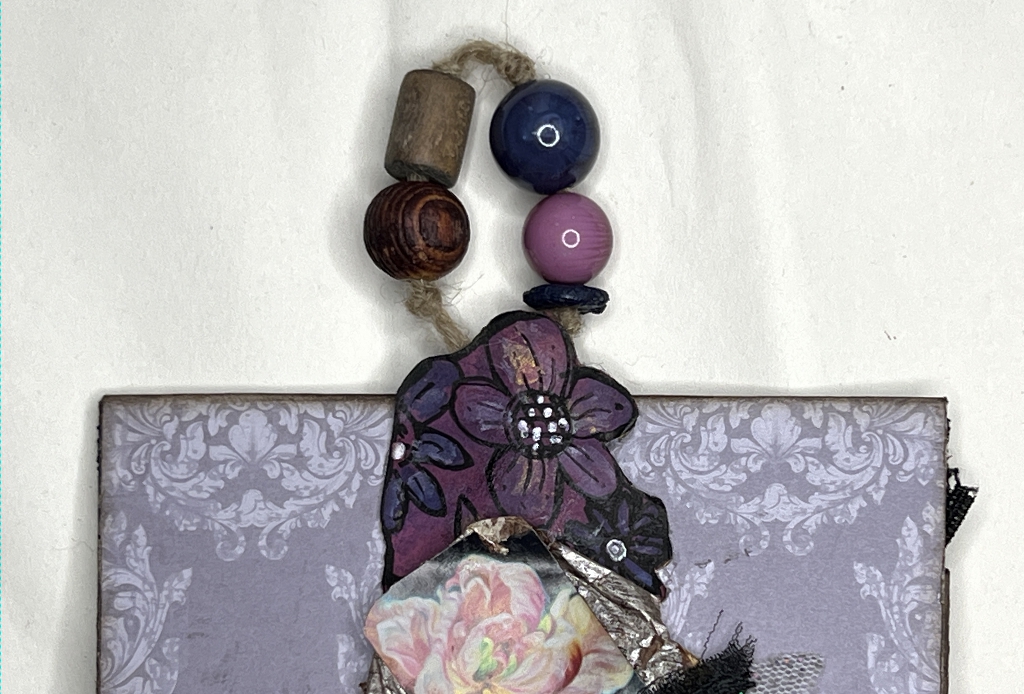
This panel with the acetate window is a pocket, and I have made a removable double-sided tag which shows through the window, with a different picture on each side. You can choose which one you want to show through the window.
The double-sided tag
The embellishment on this side was one of the fussy cuts I made from the old British flora and fauna book a while back, glued down onto some grungey scrap booking paper which I got at The Range.
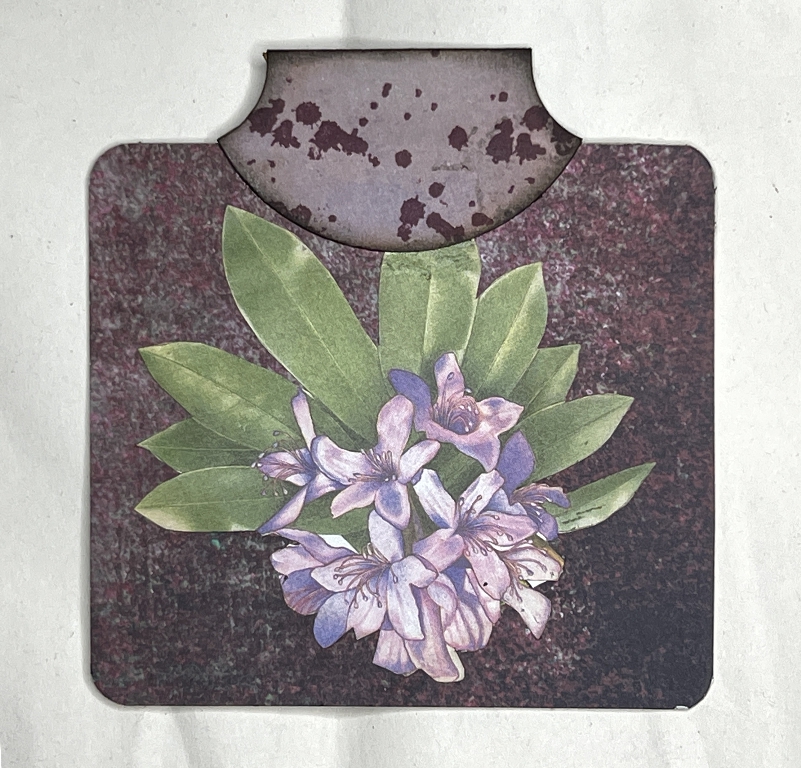
The embellishment on the other side was cut from a greetings card. It is very shiny but that doesn’t matter in this case.
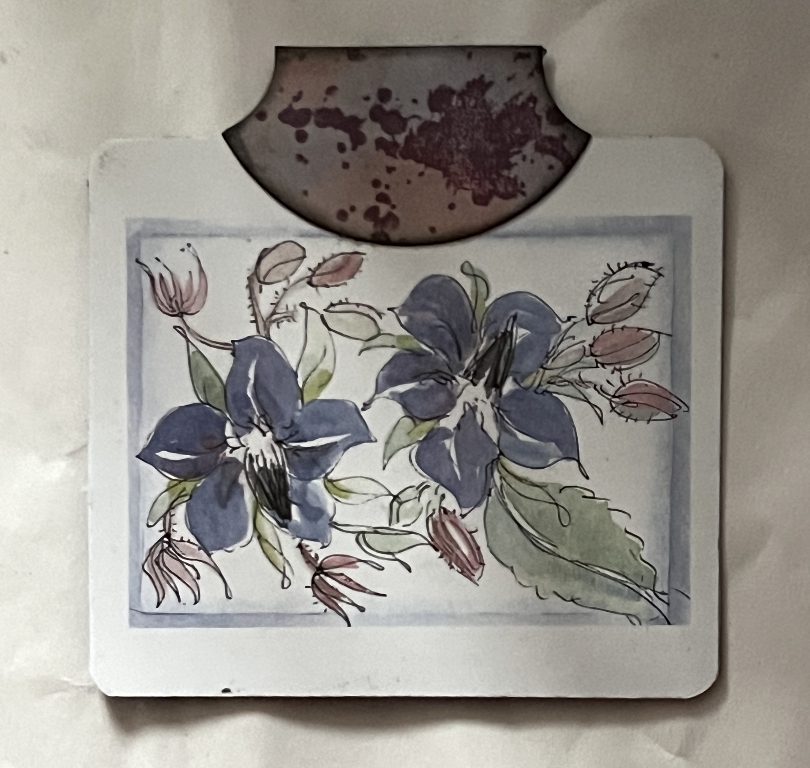
The tab was one of a collection of whale-tail tabs I made several months ago, stored in a box ready for use.
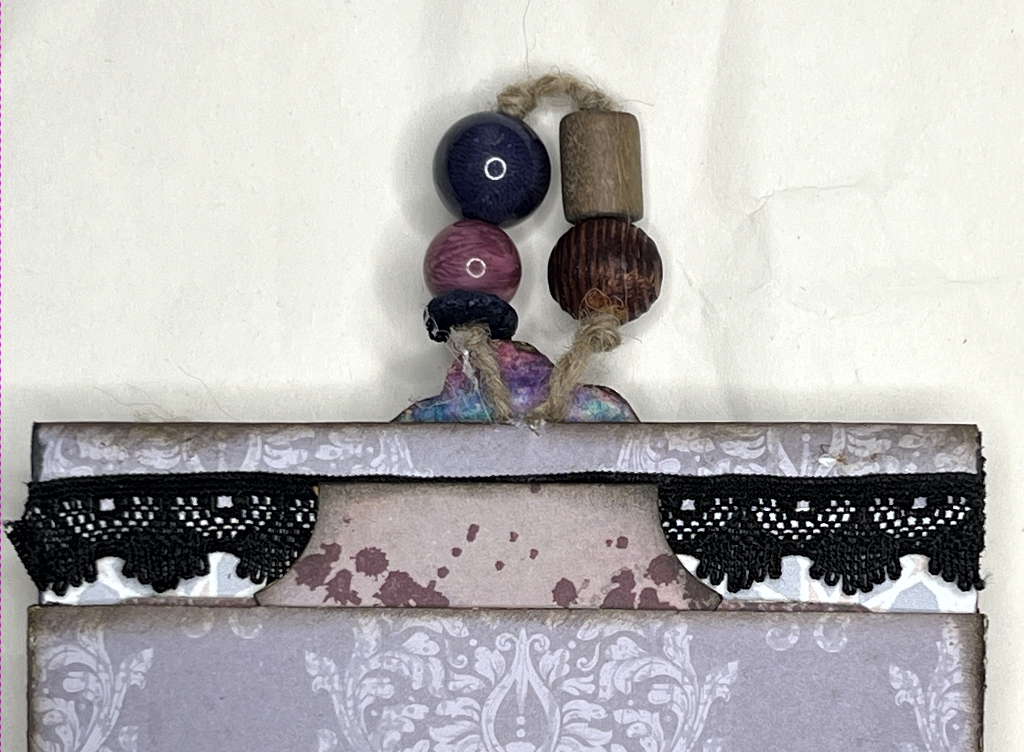
Beaded hanging loop
Here is a detail of the beaded loop I made at the top of the folio, after amending the closure. A random collection of beads on jute twine. The beads are a bit big in proportion to the rest of the folio but they were the only ones with a large enough hole for the twine to pass through. This is a common problem for me – most of my beads have rather small holes!
You can also see the spattered pattern on the whale-tail tab, and the black lace detail along the top.
The other side of the folio
This is where the folio opens. The beaded loop was originally going to be the length of twine coming down from the top. It was to be wound around the embellishment along with the length of twine from the bottom of the folio. This is now the only means of closure.
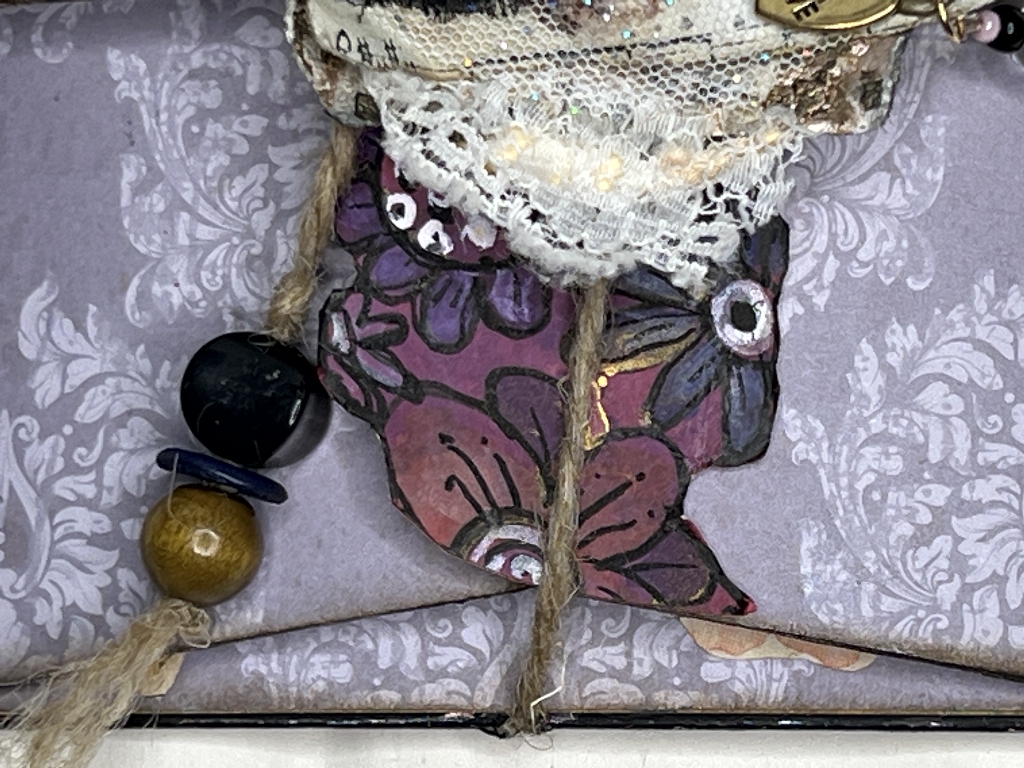
The cluster
This is one of my mass-make clusters. It is securely fixed with a brad through the top flap, and also glued firmly in place to prevent it from rotating.

The twine from the bottom, now embellished with some more beads, passes around the cluster and there is enough friction between it and the card backing of the cluster to hold everything in place.
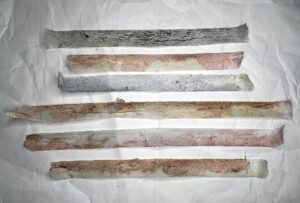
Additional decorative paper
It was at this stage, as I was rummaging for more bits and pieces, that I came across one of my decorative card strips. I made a whole collection of these many years ago from some coloured card strips someone gave me who worked in a paper works, and I coloured and cut them into decorative edging strips. This particular one was perfect for this project, and I stuck it down in two separate pieces so that it looks continuous under the cluster. It was then that I realised that I could turn the top twine into a loop, and glue the end underneath this extra piece of card.
The decorative strip at the bottom of the folio. You can also see the beads on the end of the jute twine.
Opening the folio
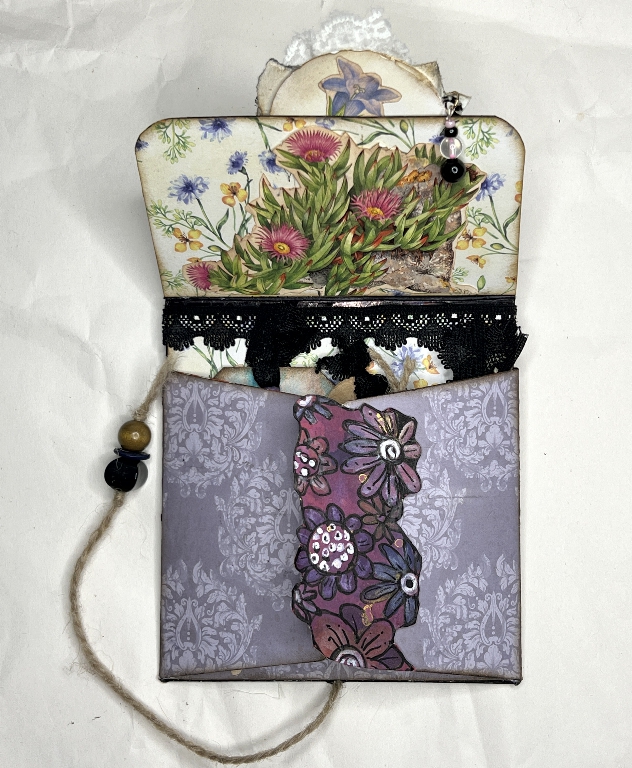
When the twine is unwound from around the cluster, the top flap can be opened. The circle at the top is the back of the cluster, onto which I have stuck another fussy cut flower.
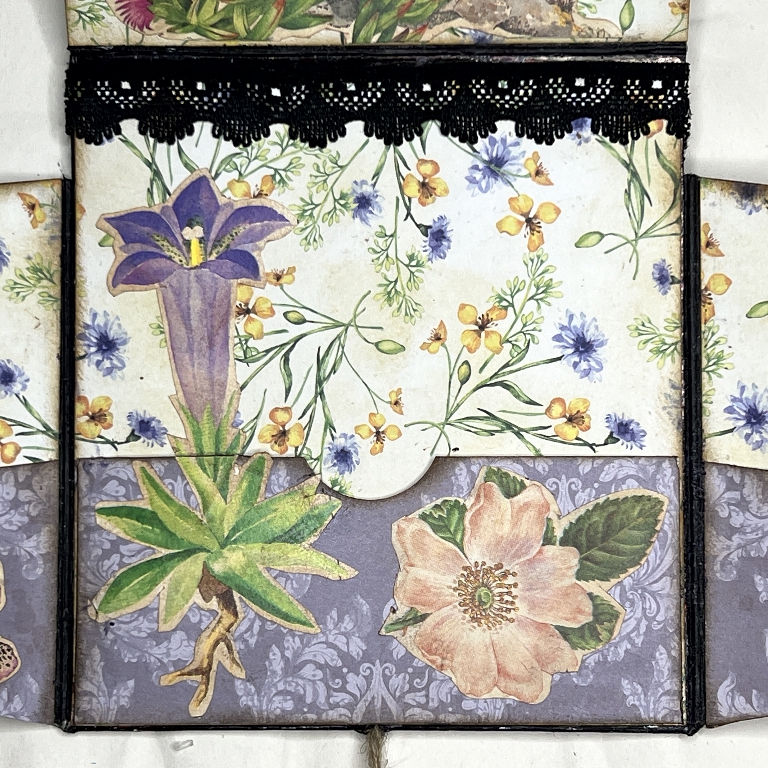
In fact there are numerous fussy cut flowers on the inside of the folio. The background paper is another scrap booking paper from The Range and it makes a suitable summery background to this floral folio.
The whole of the bottom part of the decorative card strip is now visible, covering the join between the two side flaps.
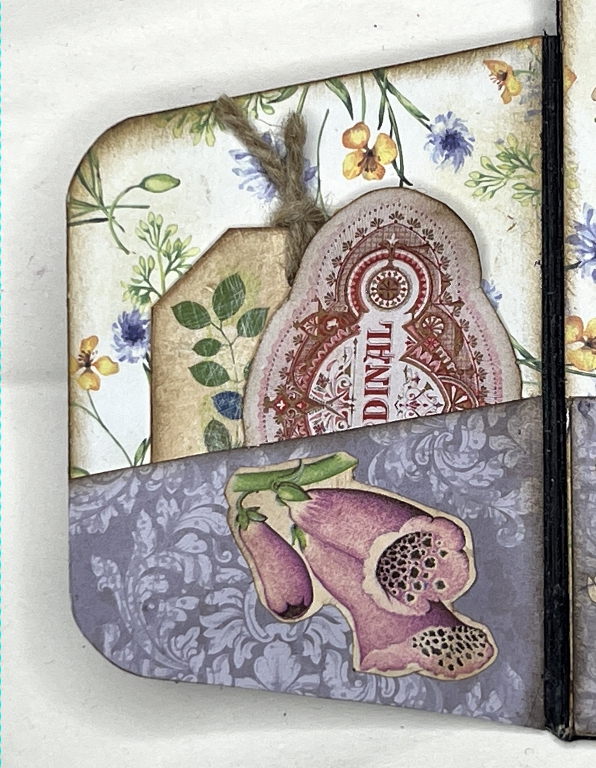
Opening the side flaps
Lots more fussy cut flowers, and added pockets filled with ephemera.
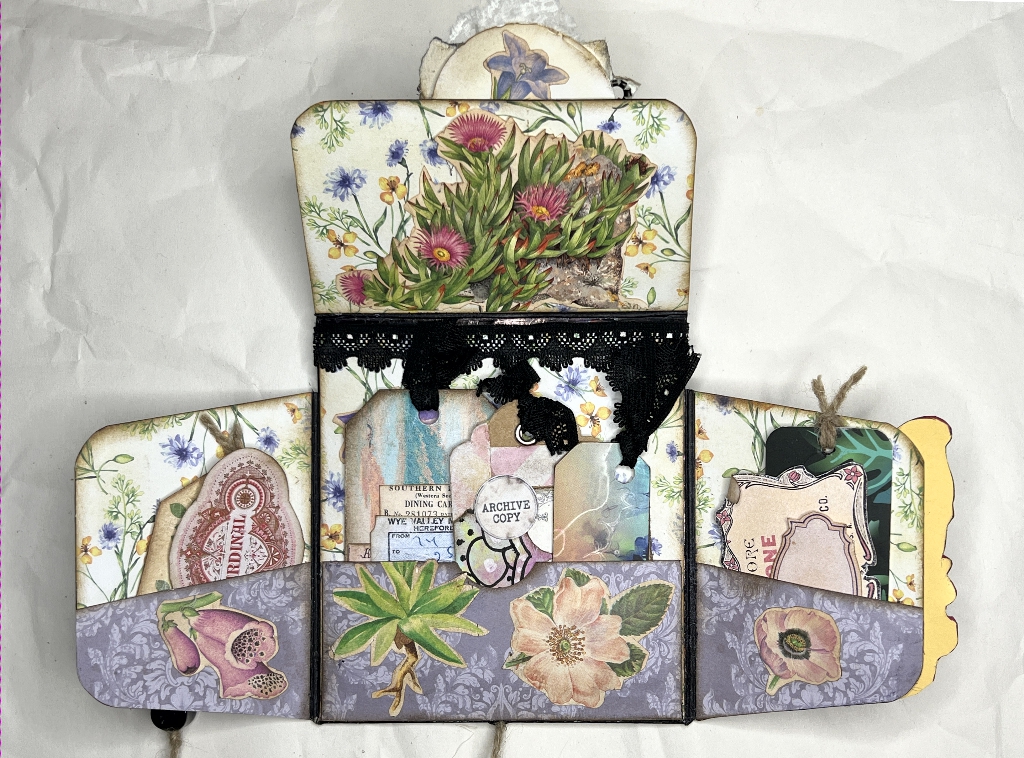
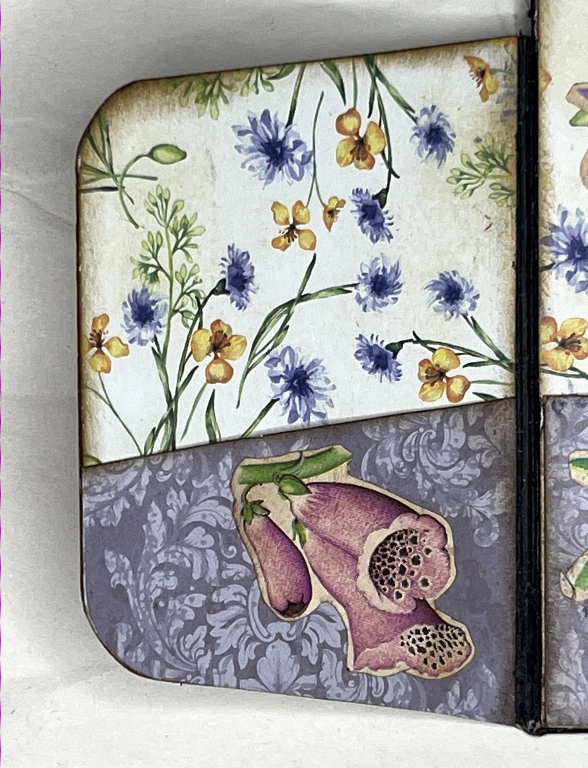
The side flaps and the base of the folio
This is where the difference between my side flaps and the YouTube tutorial ones became apparent. Hers were much more horizontal at the bottom, rather than being angled like mine, which meant that when the side flaps were closed, you could see hardly anything of the bottom of the centre panel. In my case, though, the sloping bottoms of the side flaps left a triangular gap at the bottom which really didn’t look good. I covered the pockets with the same paper as I’d used for the other side of the folio, so that when the flaps were closed, this was not nearly so obvious.
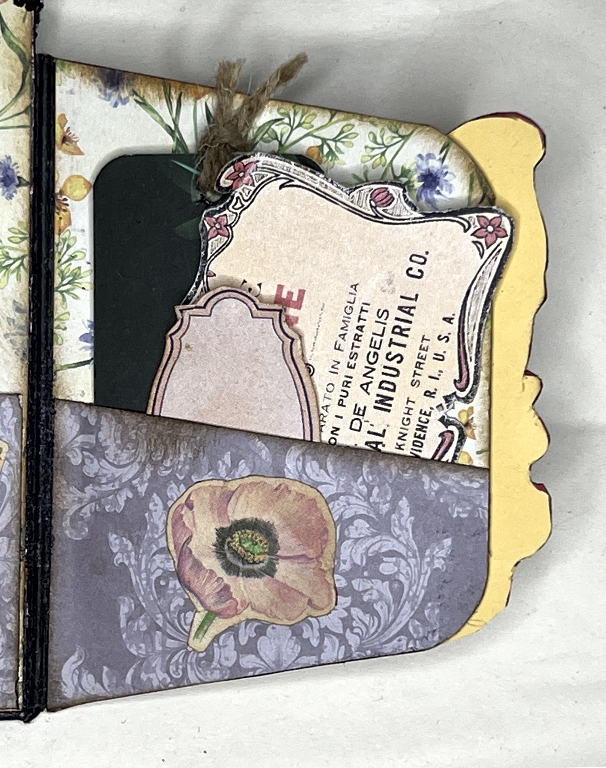
Pockets and ephemera
The folio completely opened, with all the ephemera removed, so that the whole of the background shows.
The fussy cut flower on the left of the central panel has been cut in half so that the leaves are on the pocket and the flower on the background. With the tags removed, you can therefore see the whole flower, but it allows you to put things in the pocket.
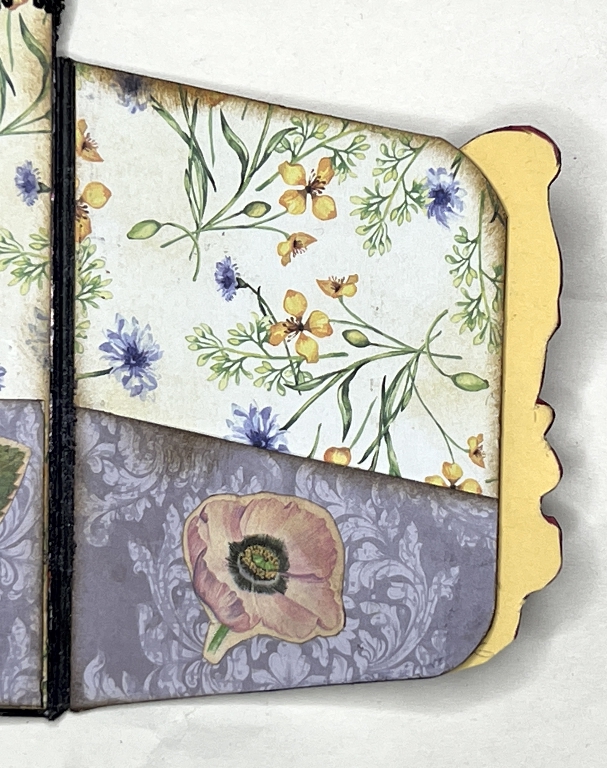
The yellow card on the edge of the right-hand flap is the back of the decorative strip. This card was a bit flimsy so I backed it with this.
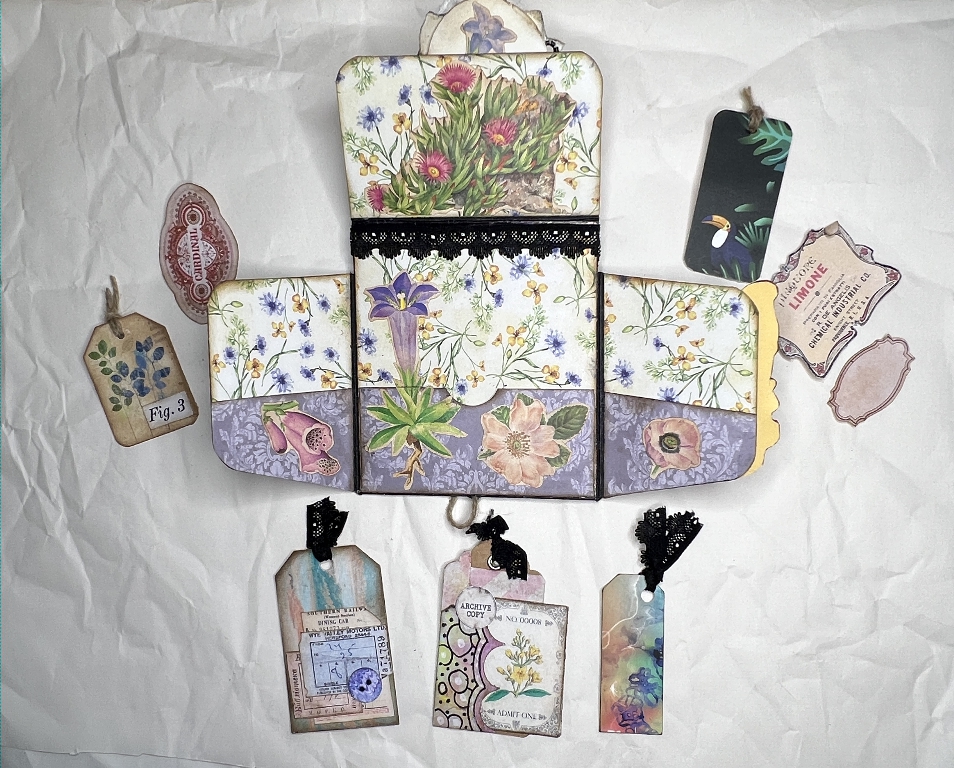
The tags and ephemera
It’s always fun to have some random elements to put in the various pockets on a project, to make it interactive. Making these ephemera uses up lots of scraps. In this case, quite a few of them were small clothing tags that I had saved, with added collage to cover up any printing on them. Some of them are really pretty in their own right, like the one on the right with the toucan in the jungle, or the narrow one at bottom right which is especially gorgeous. The one at top left had some printing on it but after I had inked and sanded it, this just serves for a bit of extra texture without being intrusive.
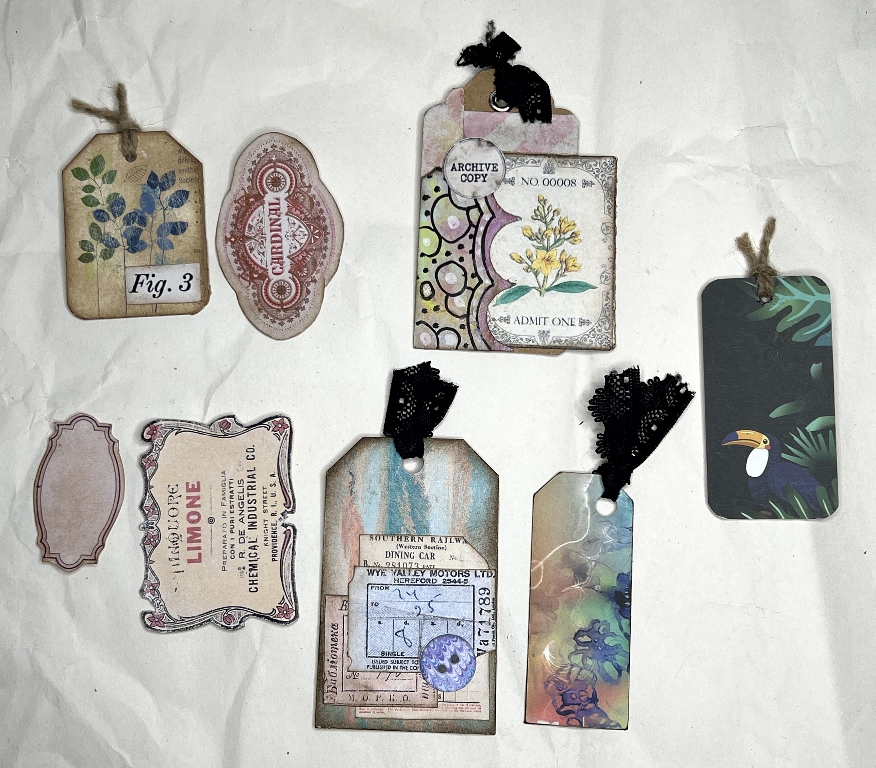
Each piece is reversible. Here are the backs.
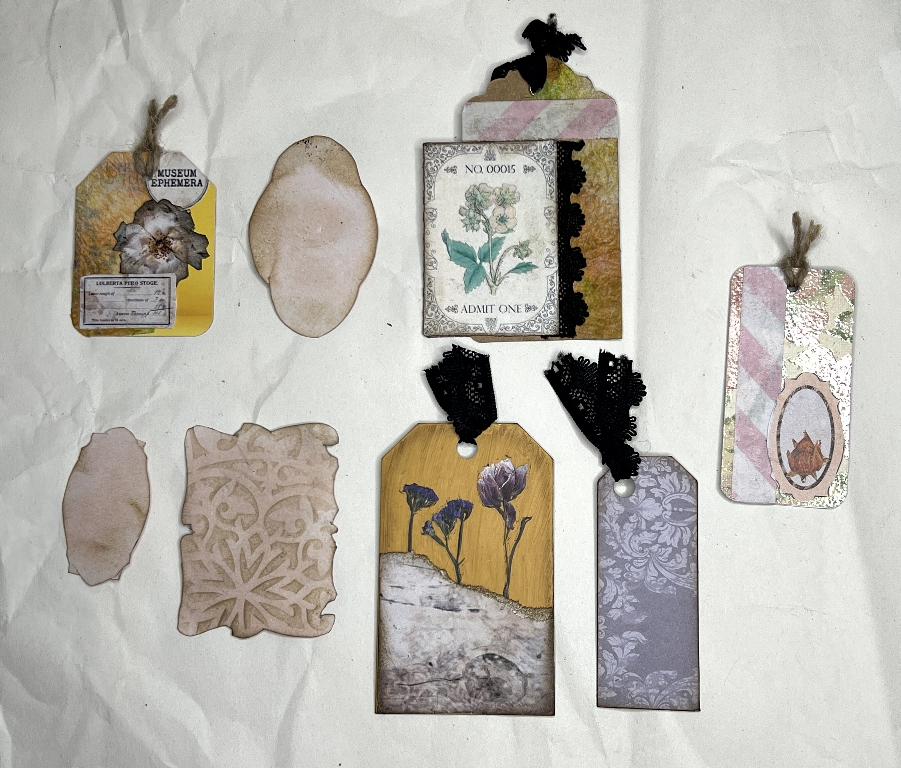
On the one at top left I have added a small piece of a faux washi strip I made by tearing kitchen paper that had been used for mopping up ink, and backing it with double-sided tape. I have a large collection of these strips. When stuck down, they have a lovely soft texture to the touch. You can see two examples of the pink striped washi tape that I made recently on the computer and printed out on Japanese washi paper. The centre one at the bottom was already orange and I added some Taperlogy rub-ons and a fragment of scrap booking paper to cover the printing. I painted on some matte medium to stabilise the rub-ons which can sometimes rub-off! Some of the tag toppers were made from fragments of the same black lace used elsewhere in the project, and the others are jute twine.
The pockets complete with ephemera
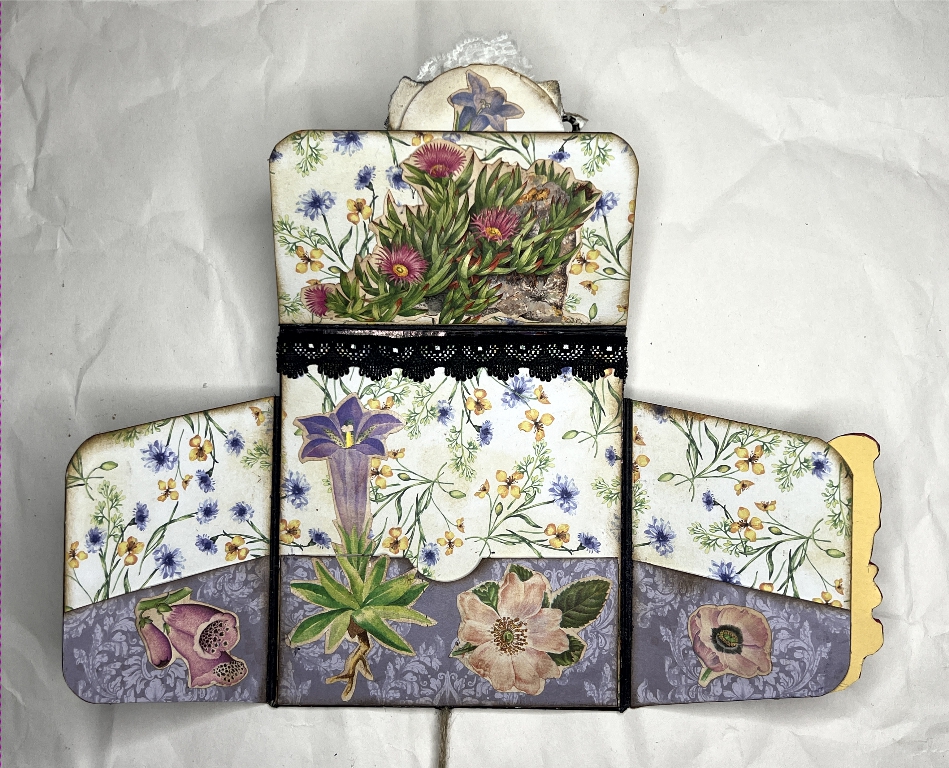
I am pleased with how the colours have come together in this folio. They are fresh and summery but also quite muted.
The video
I have made this video showing the finished folio, which also contains details of my paper strips, and the issues I had with the closure.