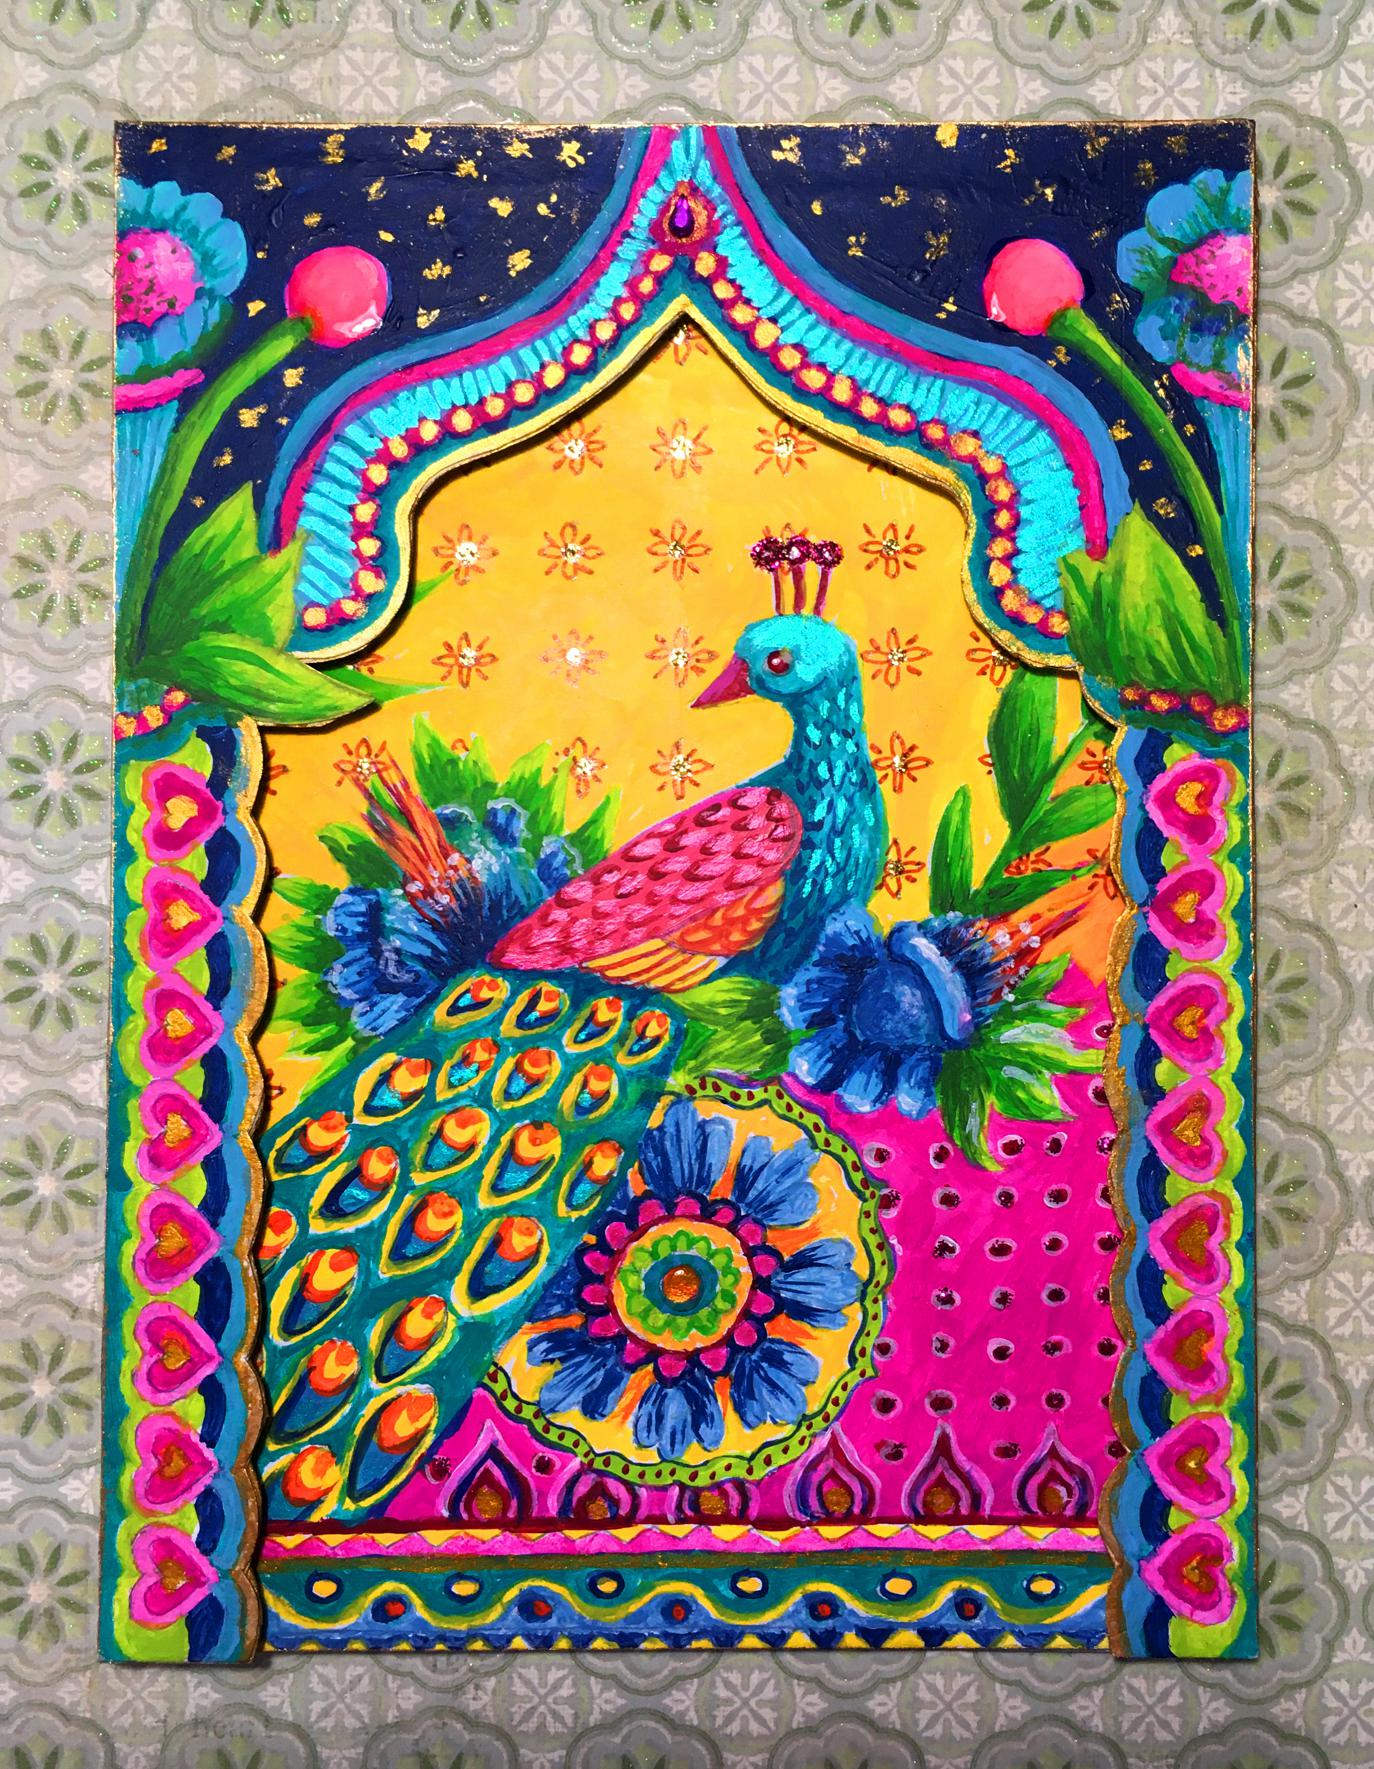
This is a special card I have made for my surgeon, who recently performed my breast cancer operation, to express my gratitude for his skill and kindness, and for dealing with it so promptly.
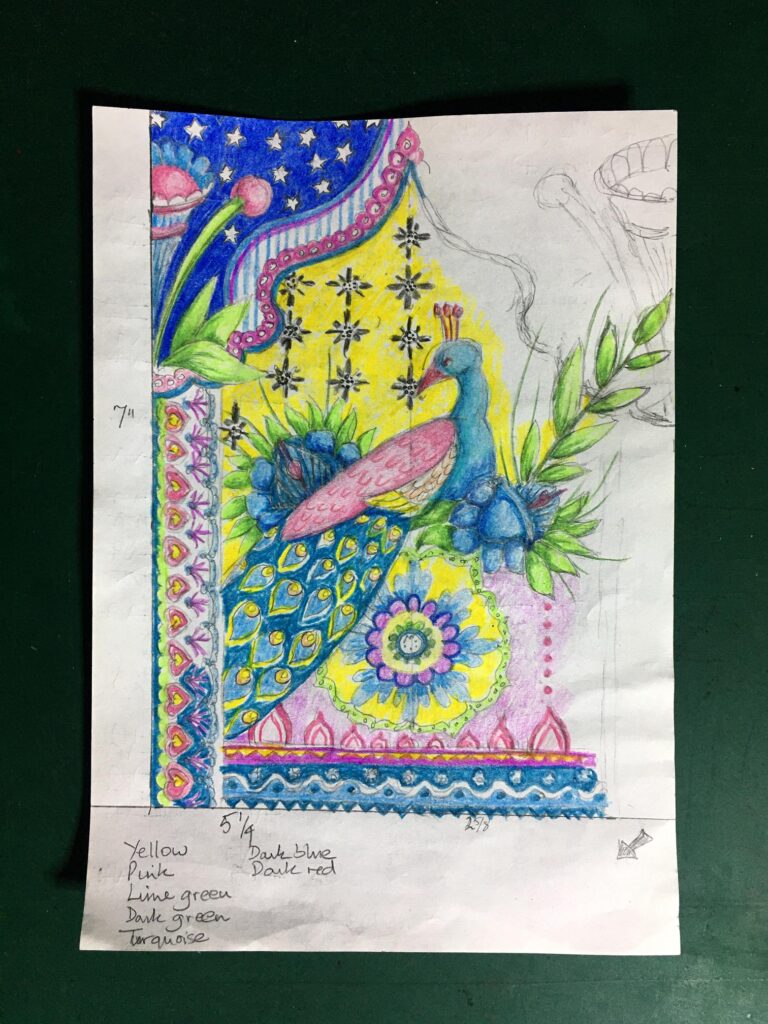
Initially I made a sketch with coloured pencils to use as a guide.
How I made the card
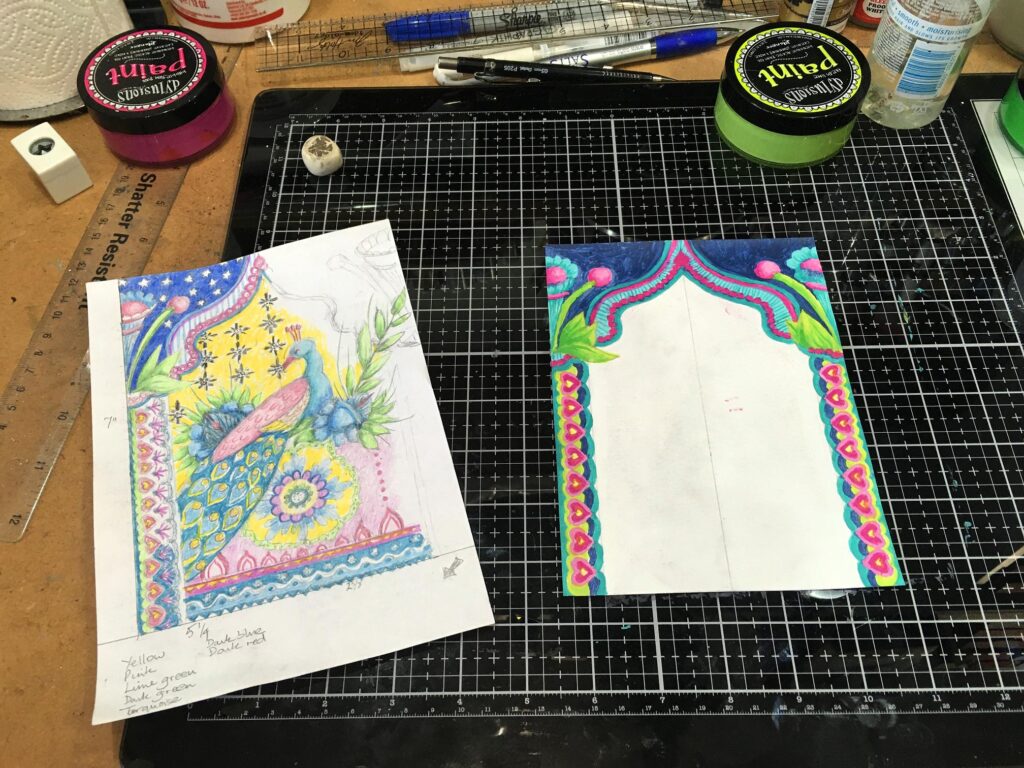
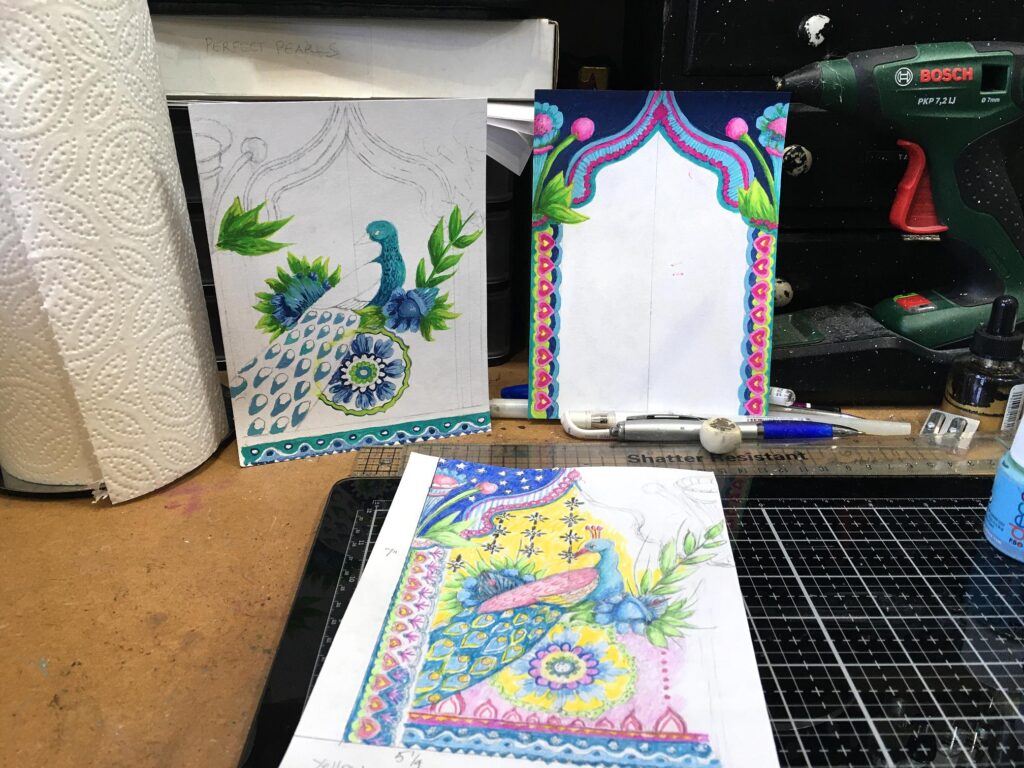
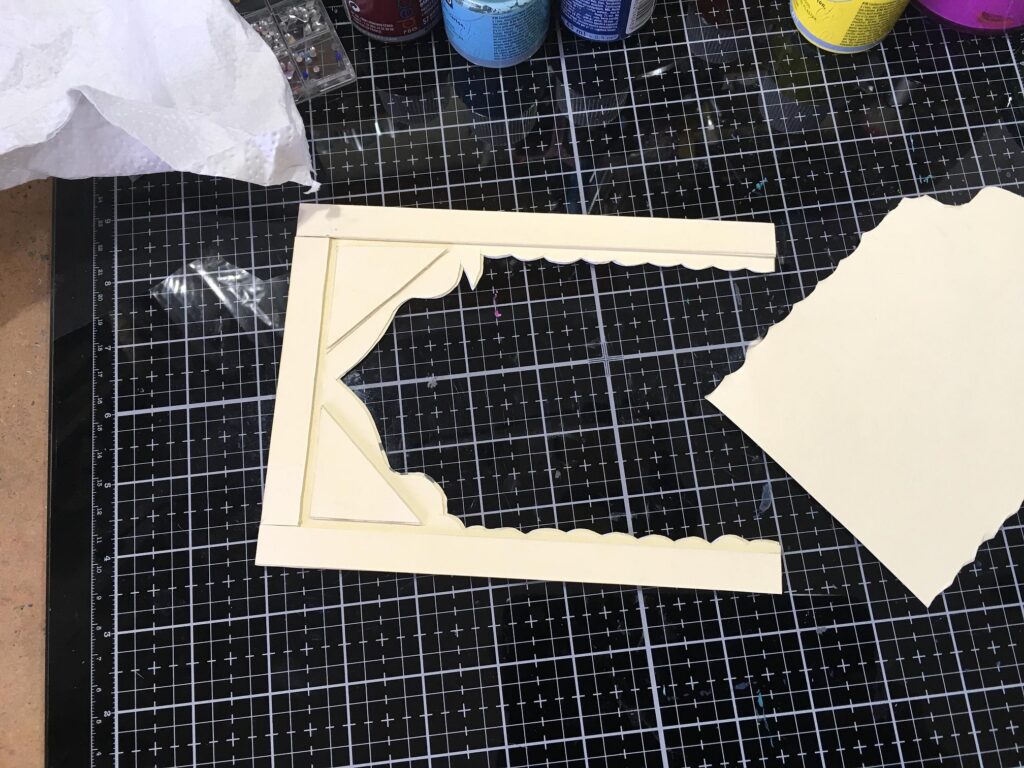
I traced the basic outlines of the design from the sketch and transferred them to two pre-prepared pieces of printer card that had been painted with white gesso and then gently sanded to give a really smooth finish. I’ve got several sheets of this in my Tombow Dual Markers drawing folder. I wanted the arch to be on a separate piece to give depth to the finished design.
![]()
I painted it with a mixture of Dylusions acrylics and Pebeo fluid acrylics.
I was devastated to discover that my Dylusions paints were drying out! I bought them several years ago and to be honest I haven’t used them very much, although I did at the beginning. The yellow and pink ones are virtually unusable now but I managed to salvage a bit. I think I’ve managed to rescue the others by spritzing the surface of the paint generously with water and leaving it to stand.
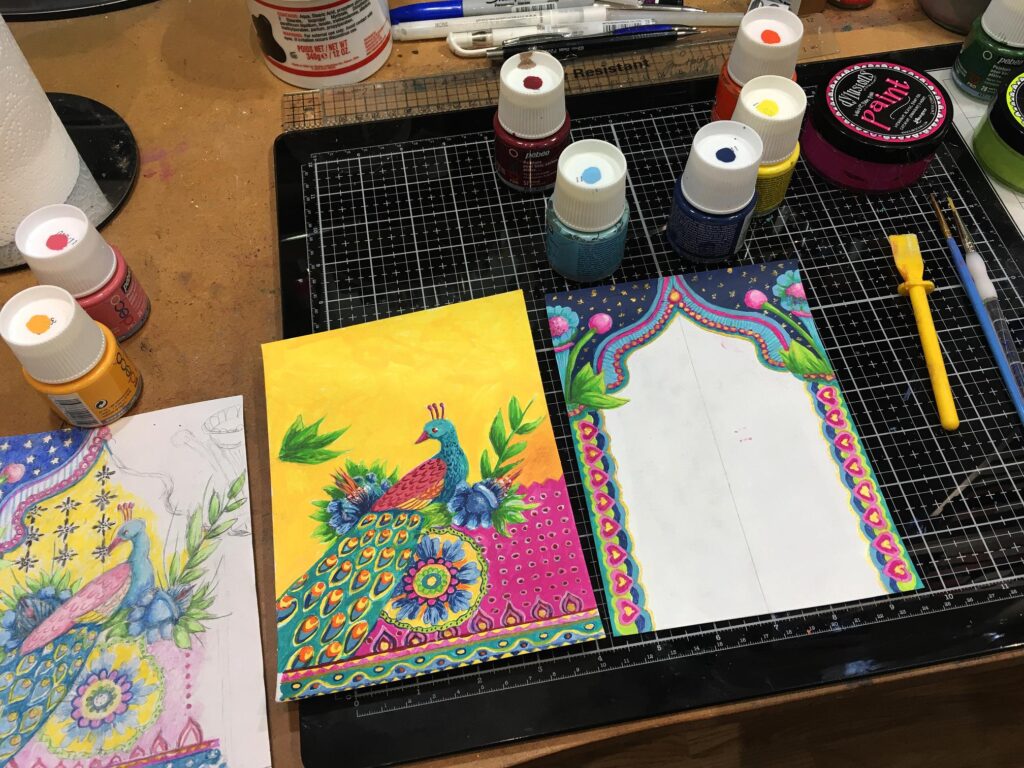
The Dylusions yellow was a bit lemony for my taste on this project, so I mixed in a little of the orange Pebeo paint to get a more vibrant sunshine yellow.
Once the painting was complete, I constructed the arch part. I fussy cut out the centre, and then cut a single layer of heavy white cardstock to exactly the same size and shape, and glued it in place on the back of the piece with liquid adhesive. I then cut strips of the same card and glued stacks of three together, which I then glued onto the back of the reinforced arch piece, so that the inner edge of this overhung a little, and the dimensional pieces remained hidden.
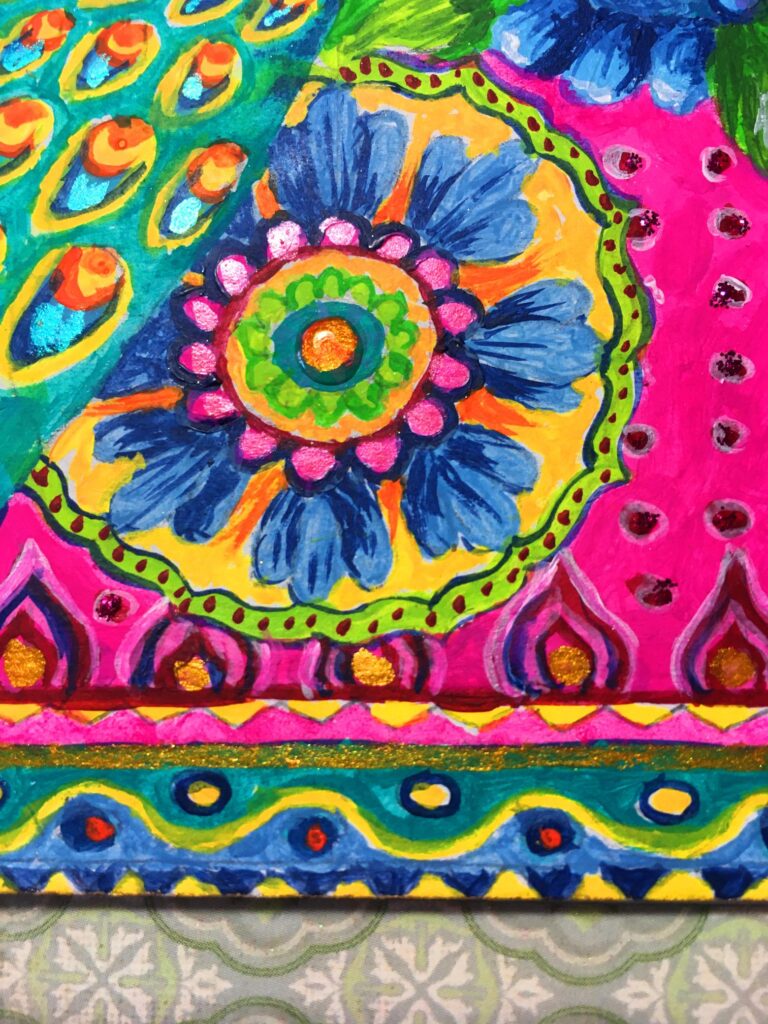
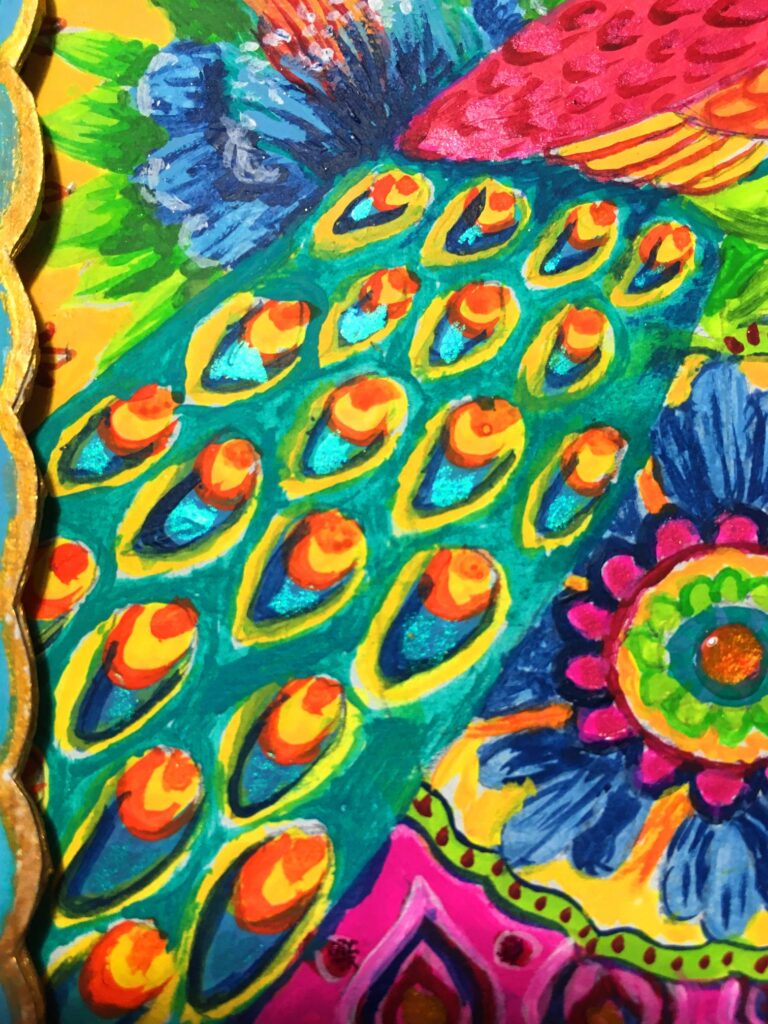
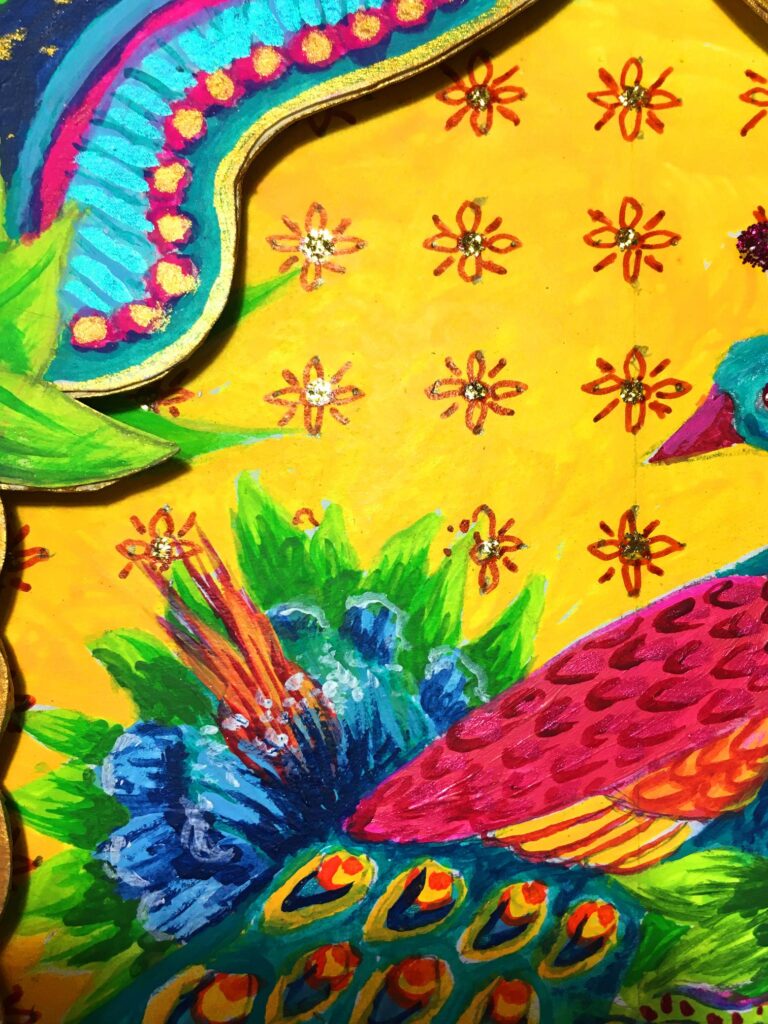
Adding the shimmer and sparkle. You can see the Perfect Pearls palette that I made up – I love using these as watercolours.
![]()
I picked out the feathers on the peacock, and added some detail elsewhere on the design as well. Using a fine sanguine pen I added the background pattern all over the yellow, having marked the grid with pencil first. Stickles provided additional sparkle, and I applied some Glossy Accents in various places too.
The final touch was to paint around the edges with more gold paint to cover up the white. This whole assembly was then ready to be glued to the back piece on which I painted the main design.
Once everything was complete, I glued the whole assembly to a heavy cardstock card base trimmed to size, and added more gold paint to the edge of the whole of the front. I found that this wasn’t giving adequate coverage, so I also applied some gilding wax. Then I was ready to make the card liner. I found a peacock feather stamp and some great thank-you sentiment stamps in my stash.

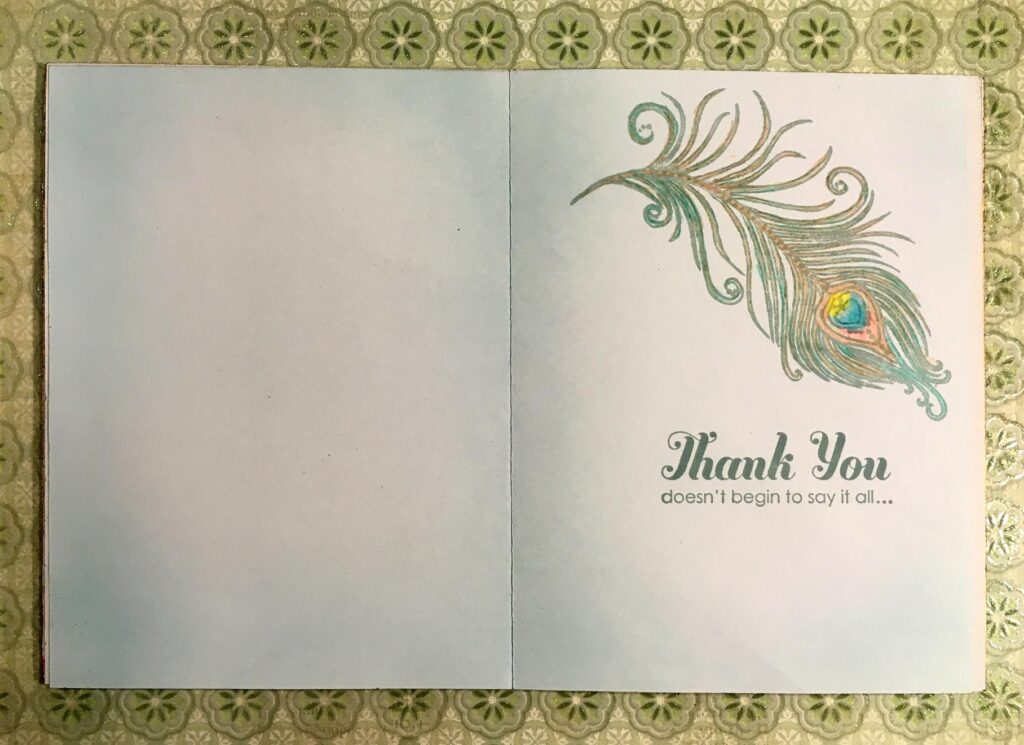
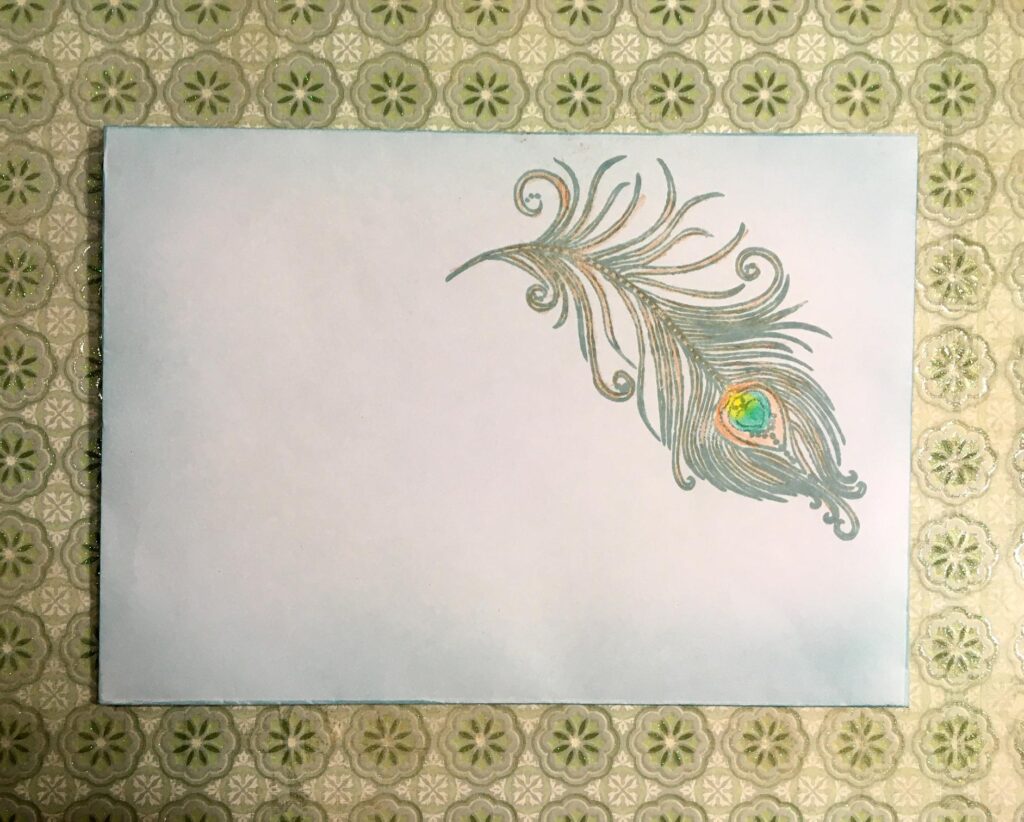
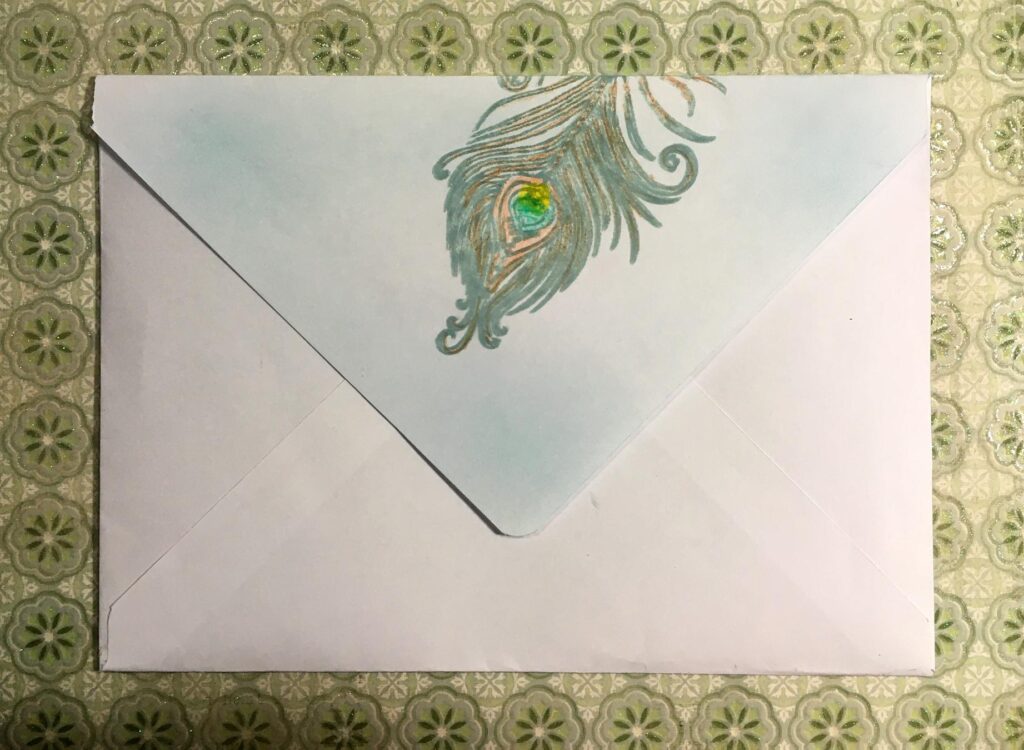
I colored the peacock feather with coloured pencils, and lightly inked the edges of the envelope and card liner with my new Tim Holtz Speckled Egg Distress Ink.
The finished card
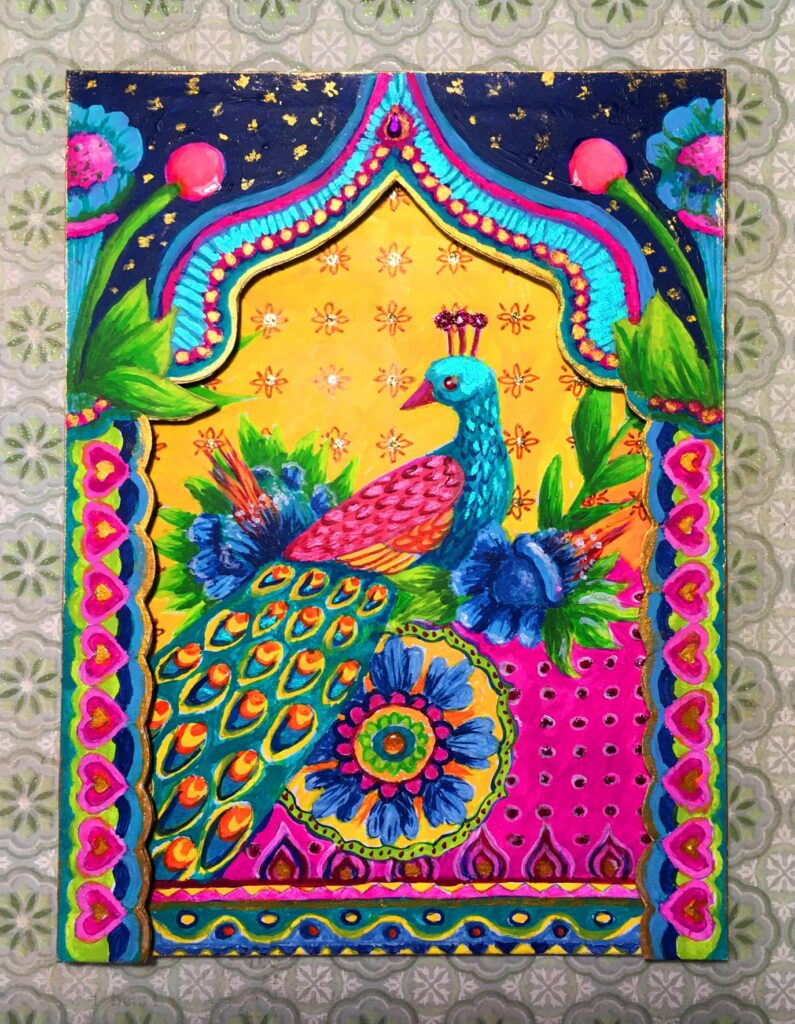
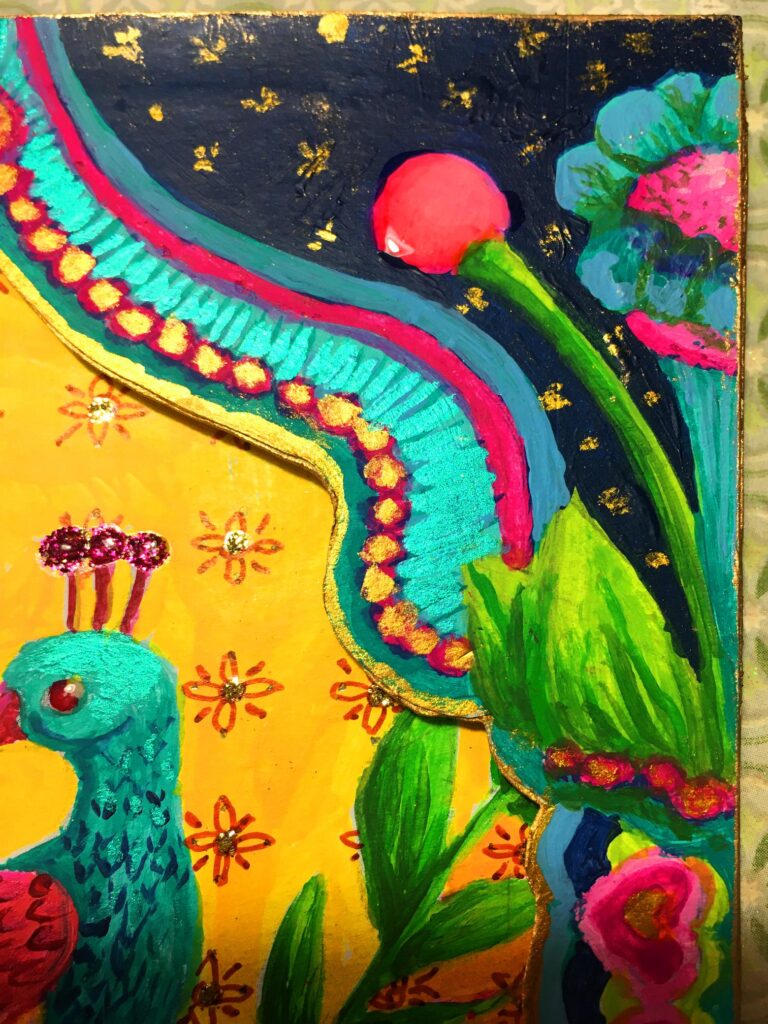
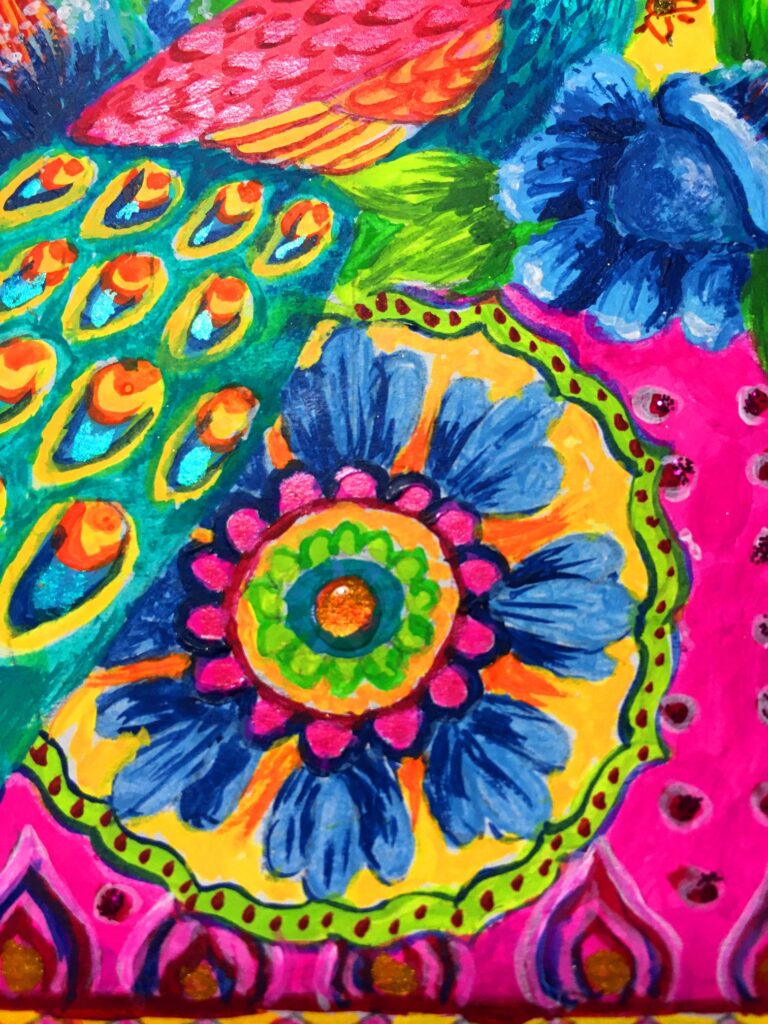
Some of the shimmer actually shows up in the photos for once, I am pleased to say! Even so, they don’t do it full justice – the whole card shimmers with vibrant colour and iridescence. I like the Glossy Accents in the centre of the medallion – it is applied over gold, and it really shines. There are also Glossy Accents applied to the peacock’s eye and his top-knot, and the two spherical flower heads at the top of the arch piece. There is a tiny gem adhered to the centre of the top of the arch. I make no apology for this card being totally over the top!!
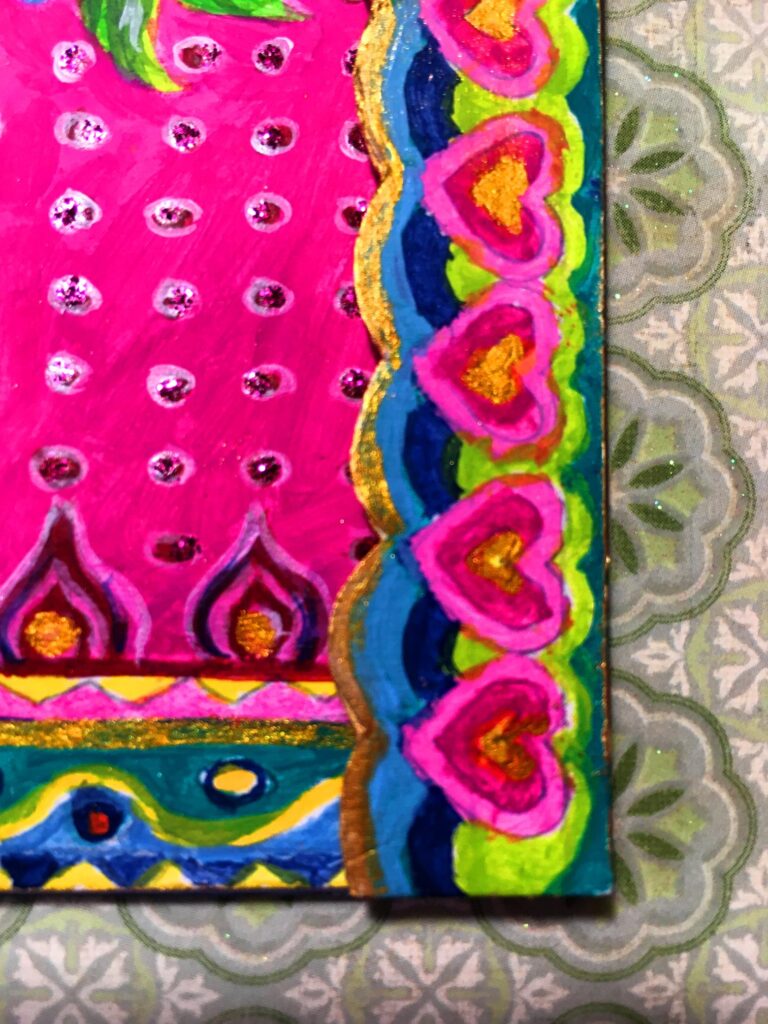
Here are some detail shots.

This has been such a fun project to work on that I would like to do more painting like this. I love the vibrant colours, and the possibility to add some shimmer and sparkle. I do wish that photos would show this up better!
Here is the video I have made of the project.