TEABAG EMBELLISHMENTS AND KITTY CONTORTIONISTS
Teabag embellishments
A few days ago I had my first session in the studio for 2023.
I recently watched a YouTube video showing how to make gorgeous little embellishments from teabags and book pages. I started the project without re-watching the video so ended up doing things in a different order but I think it worked out OK!
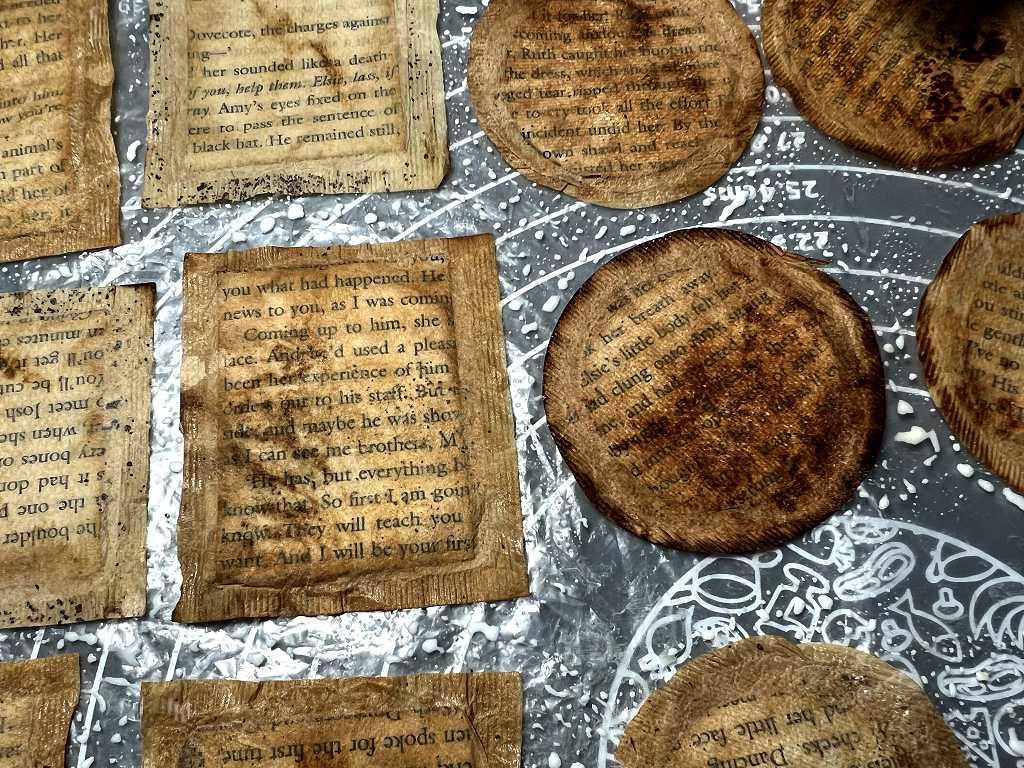
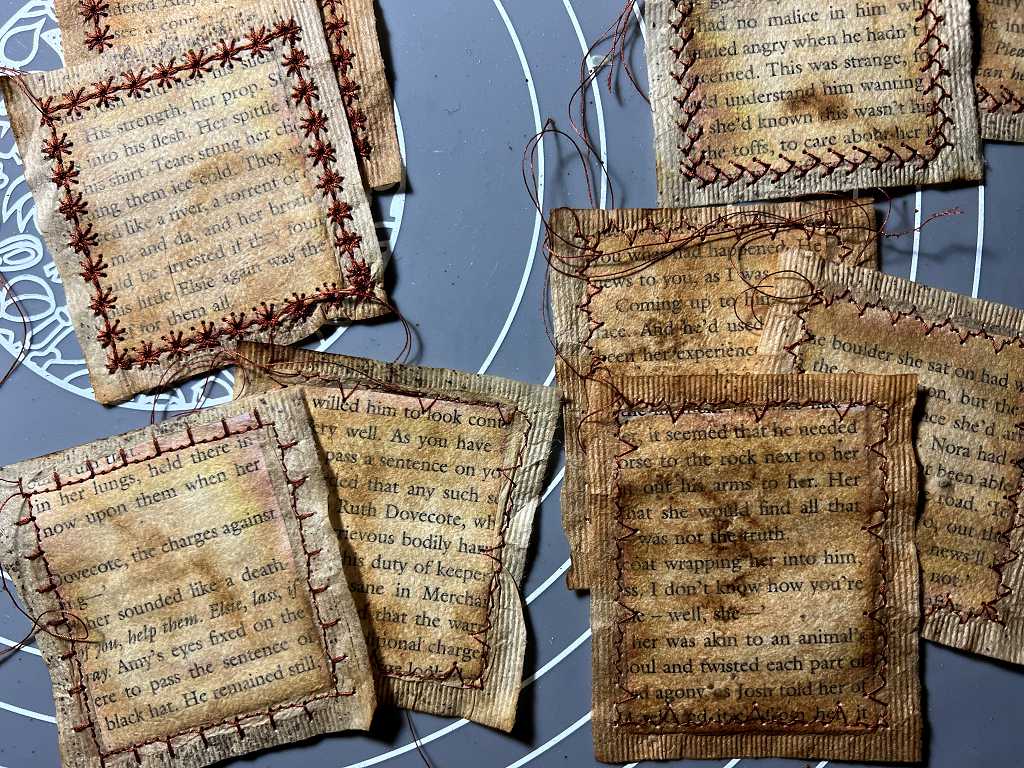
I began by selecting a dozen each of square/rectangular, and round teabags, choosing ones which had the most interesting tea stains on them as much as possible.
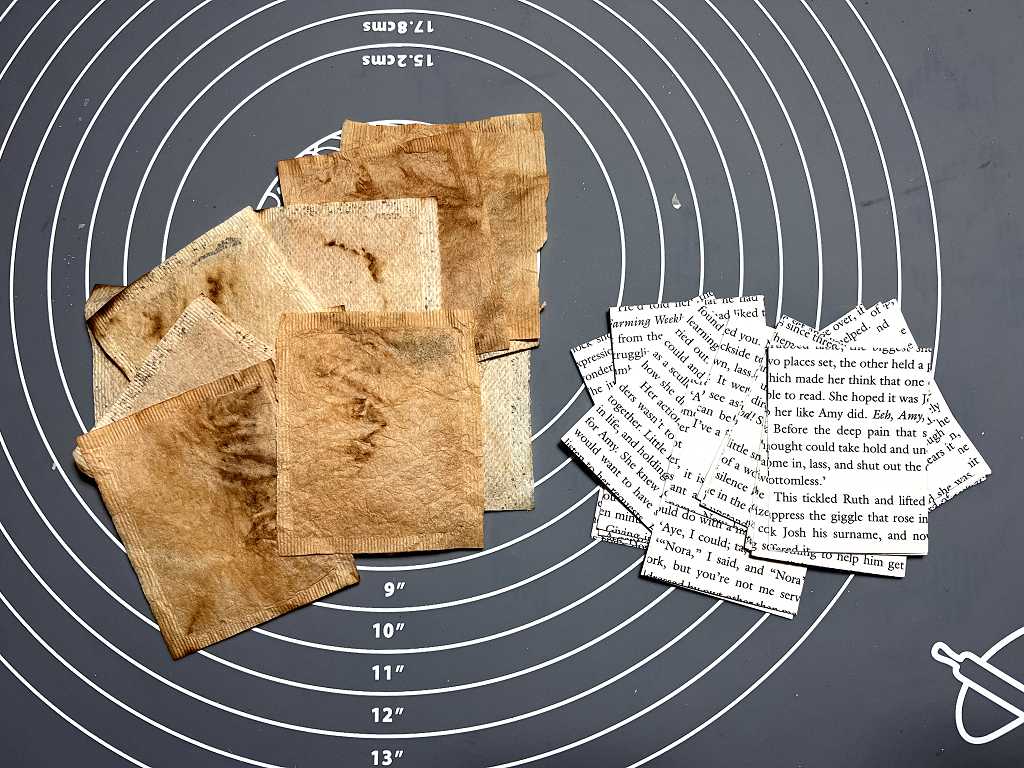
I tore out some more pages from the junk novel I have been using as a source for book pages. I used my guillotine to trim away the white borders and then trimmed them down to size. Some of the teabags were more square than rectangular so a few of the pieces subsequently needed to be trimmed down a little more – unfortunately after I had inked them, so I had to re-ink the cut edges.

The idea is to insert the book page pieces inside the teabags. I made the mistake with the rectangular ones of ironing the teabags first. This tended to make the layers fuse together and it was a bit of a fiddle to prise them apart. Each teabag already had a small slit at the top corner, through which I had extracted the tea, and I extended this slit across the whole width of the teabag to enable me to slip the book page piece inside.
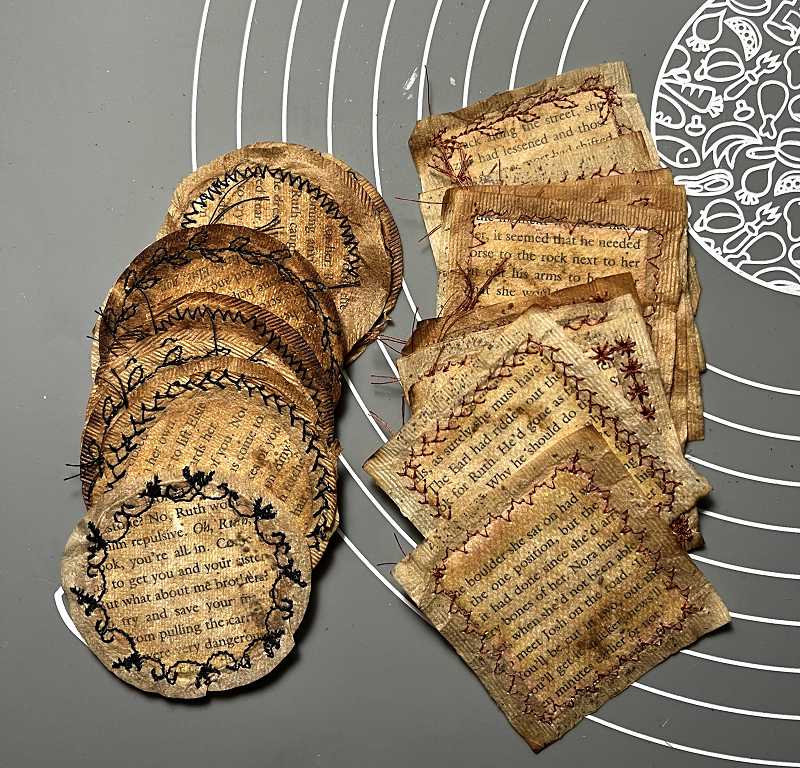
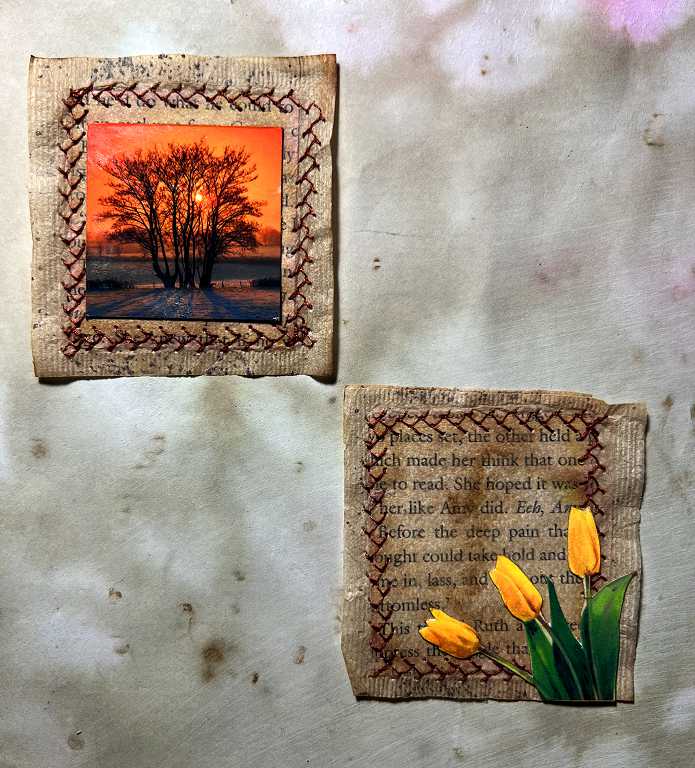
Here are the round teabags – a lot of these had lovely dark tea stains on them. I cut circles from the book pages with a 2-inch circle punch and inked the edges as before, and then slipped them inside the teabags after enlarging the slits in them.

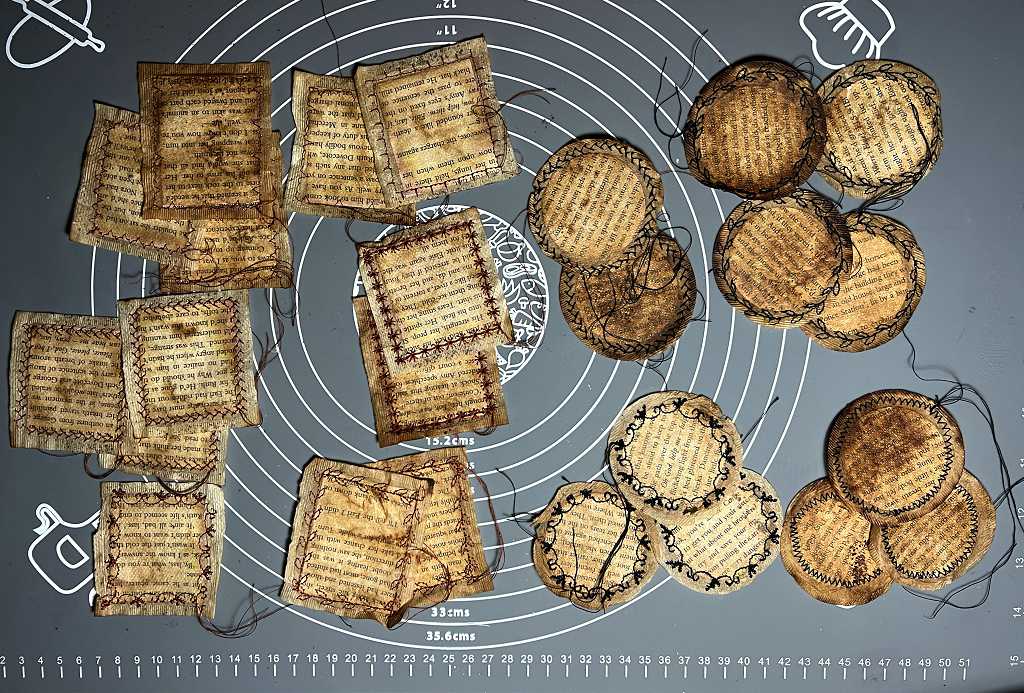
Here are all the bags with their book page pieces inserted, and ironed flat.

It was at this stage that I jumped ahead without consulting the video, and applied glue to the teabags before embellishing them. In the end, this didn’t matter – in fact I think it was better, because they were more stabilised.
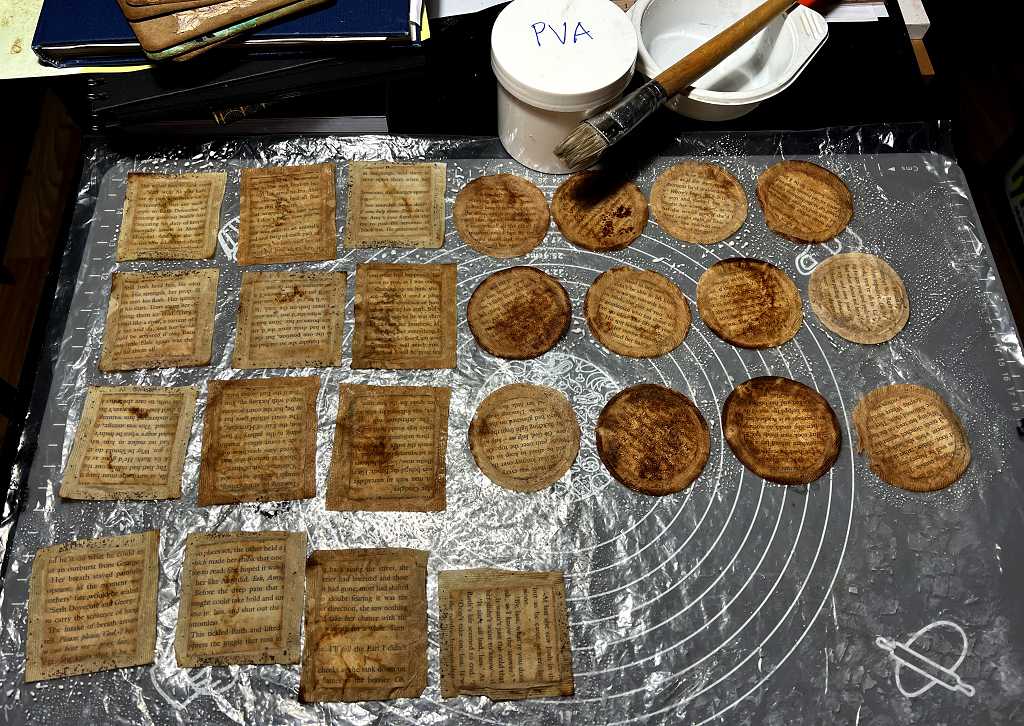
I spread them all out on a plastic sheet and painted on a watered down solution of PVA glue and left them to dry. Here is a close-up. You can see that the glue makes the printing of the book pages a lot more distinct.
Once they were dry, I stitched around each bag with the sewing machine. The glue didn’t seem to make any difference to how the sewing worked.
This was a good opportunity to try out some of the fancy stitches on my machine. I haven’t really explored the full potential of this sewing machine yet, although I’ve had it for quite a while! The instructions aren’t exactly user-friendly, and the trouble is, I use the machine so infrequently that when I learn something new, by the time I use it again, I’ve forgotten what I’ve learnt!
Here are some close-ups. First, the round teabags.
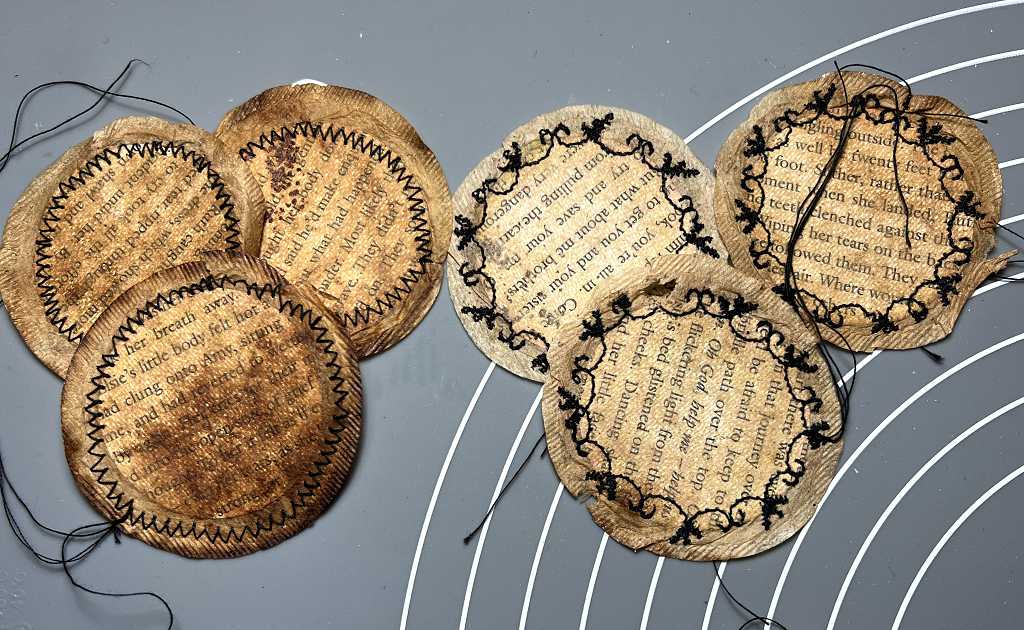
I wasn’t terribly adventurous to begin with, confining myself to a normal zigzag stitch, but then I had a bit more fun with it.

I used black thread on the round teabags as they were mostly pretty darkly stained with tea.
Now for some of the square ones. I used brown thread for these.
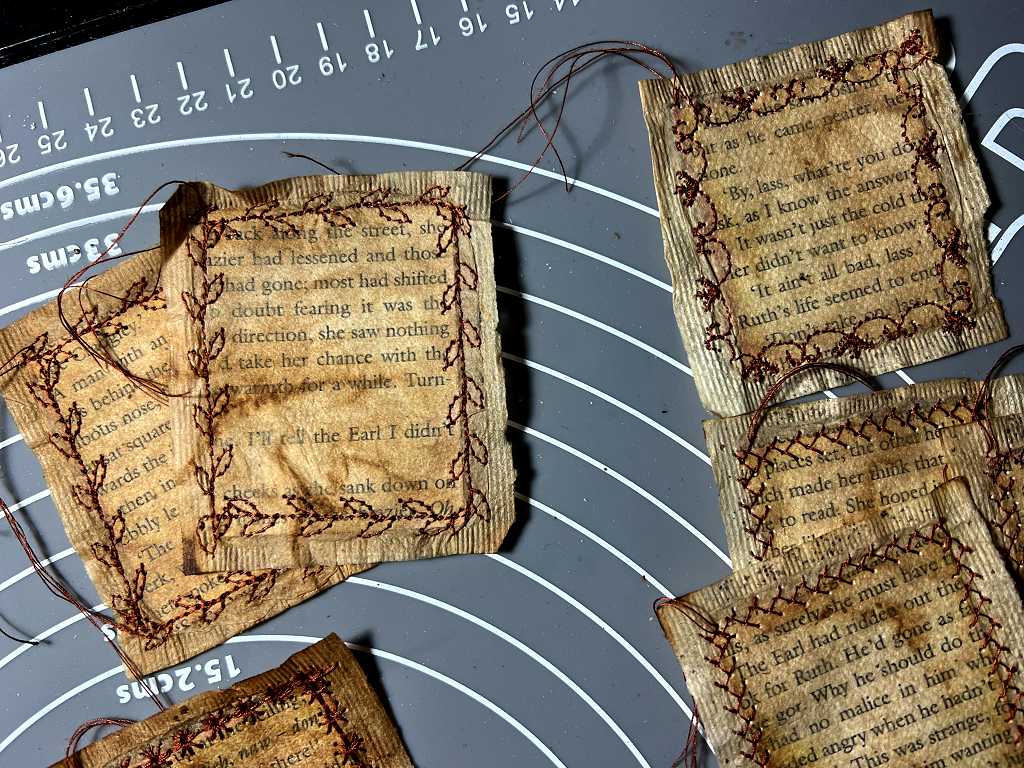
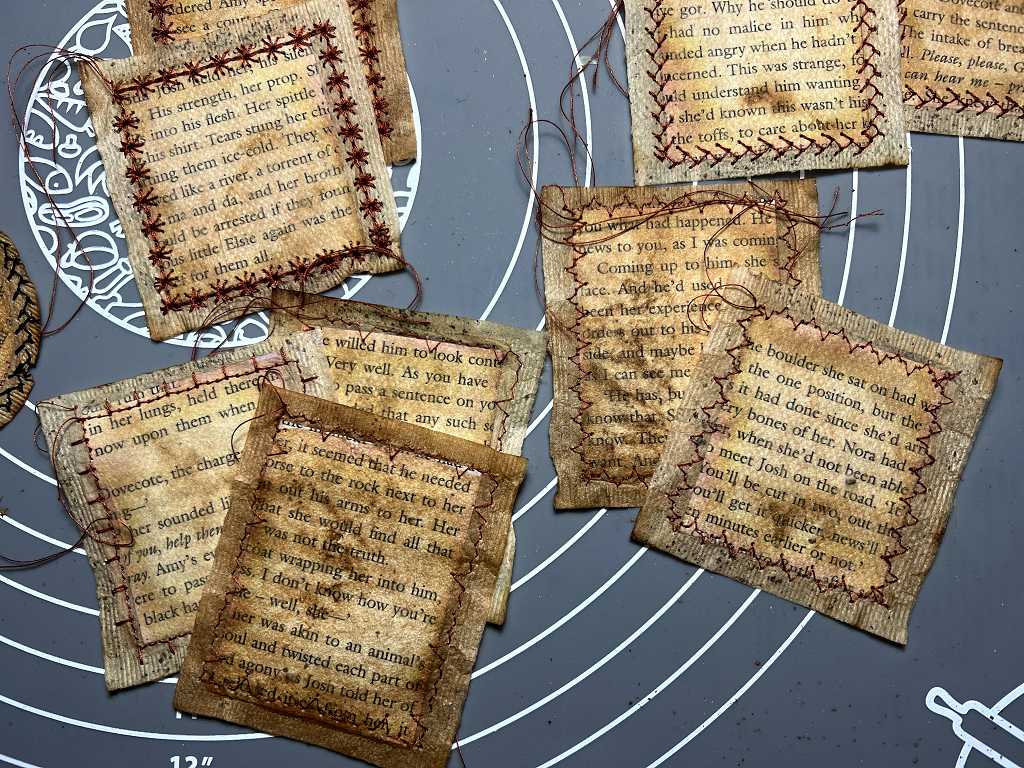
Some of the stitches are really pretty. Others were a bit disappointing. I think you can probably alter the stitch width and length on these patterns but that isn’t something I have explored yet.
A bit later, I brought them all downstairs, and while we were sitting watching TV, I pulled all the threads to the back of each teabag and tied them off, and then cut them shorter. Later, I glued the ends to the backs of the teabags with a glue stick to keep them tidy and secure.
I was then in a position to add some embellishments to them. Here they are, laid out, as I was choosing what to put on each one. At the back of the photo you can see the two polywallets with the various small embellishments I made recently – the watercoloured book pages that I cut flowers and other shapes from, and little images cut from recycled greetings cards.
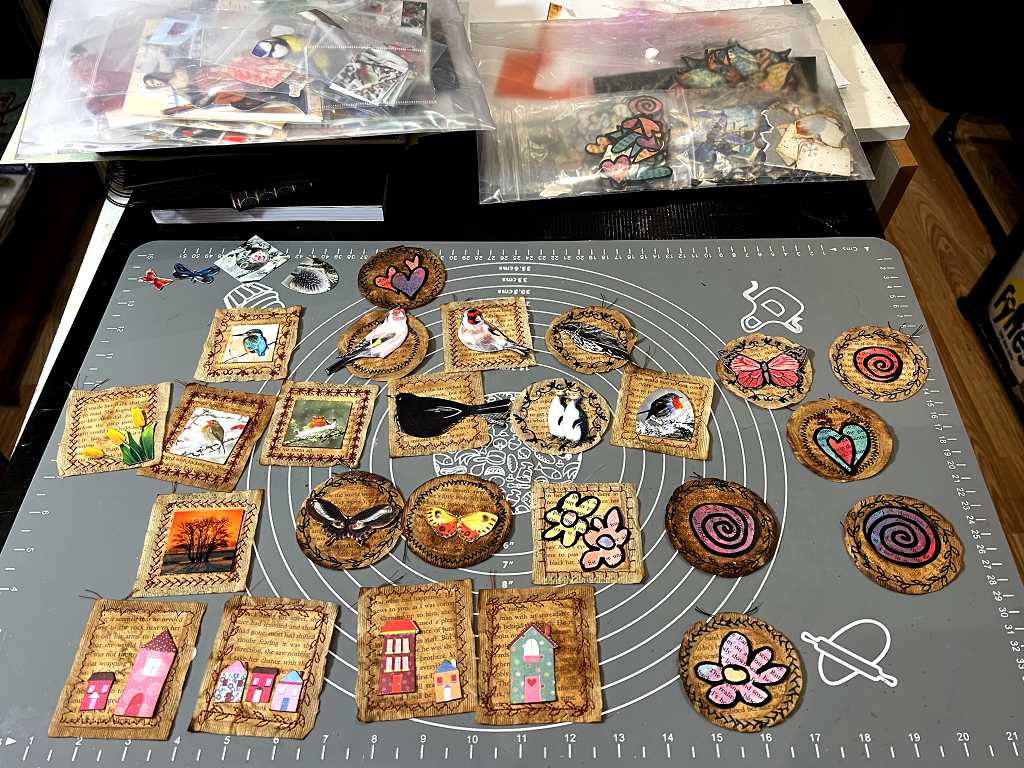
I glued them in place, and in some cases I added some mesh or punched papers behind them to add more layers and interest. Here they are being left to dry.
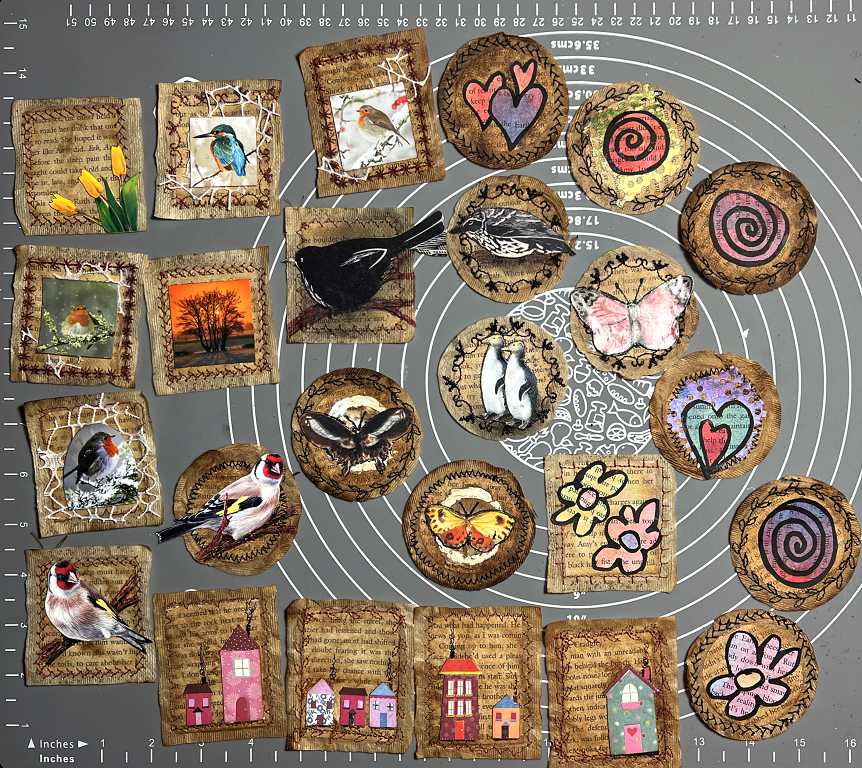
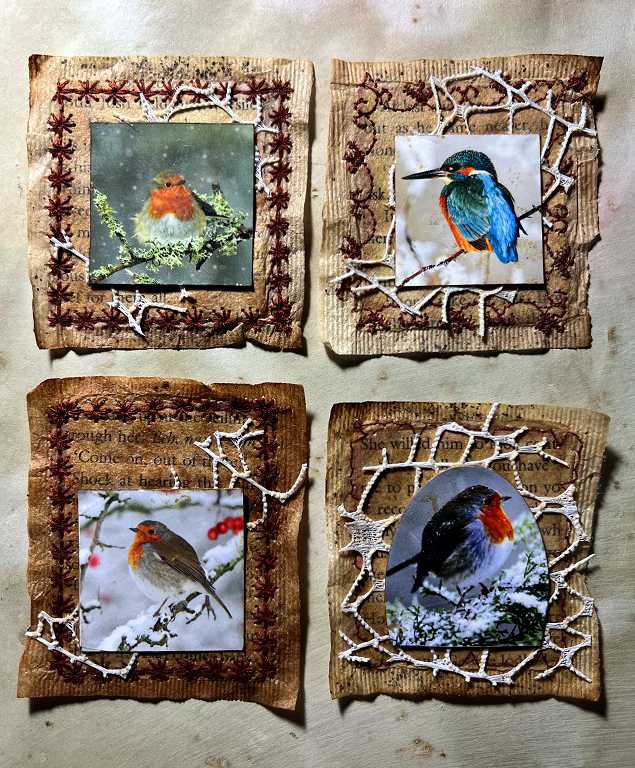
Here is the finished collection, sorted by category. Firstly, all the birds.
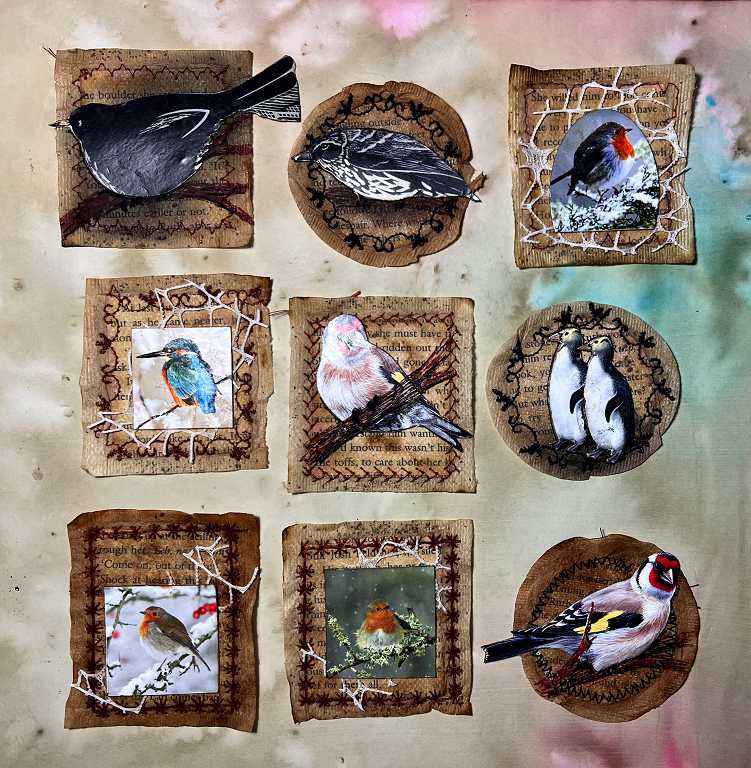
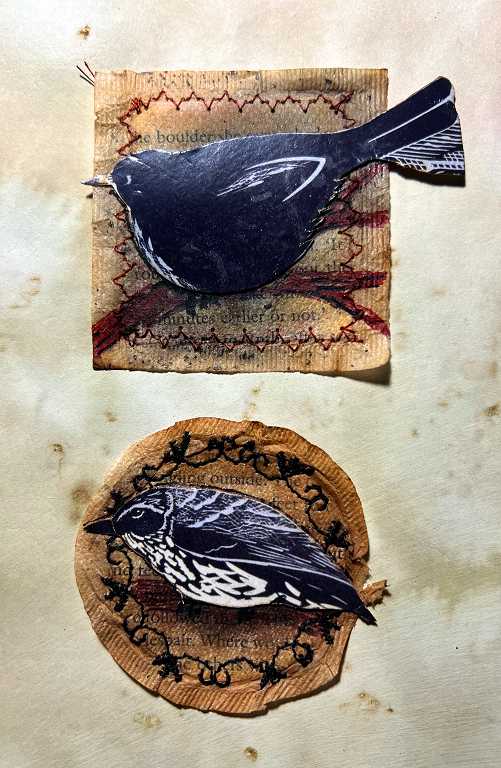
Now for some detail. I think these two black and white bird images were my least favourite of the collection.
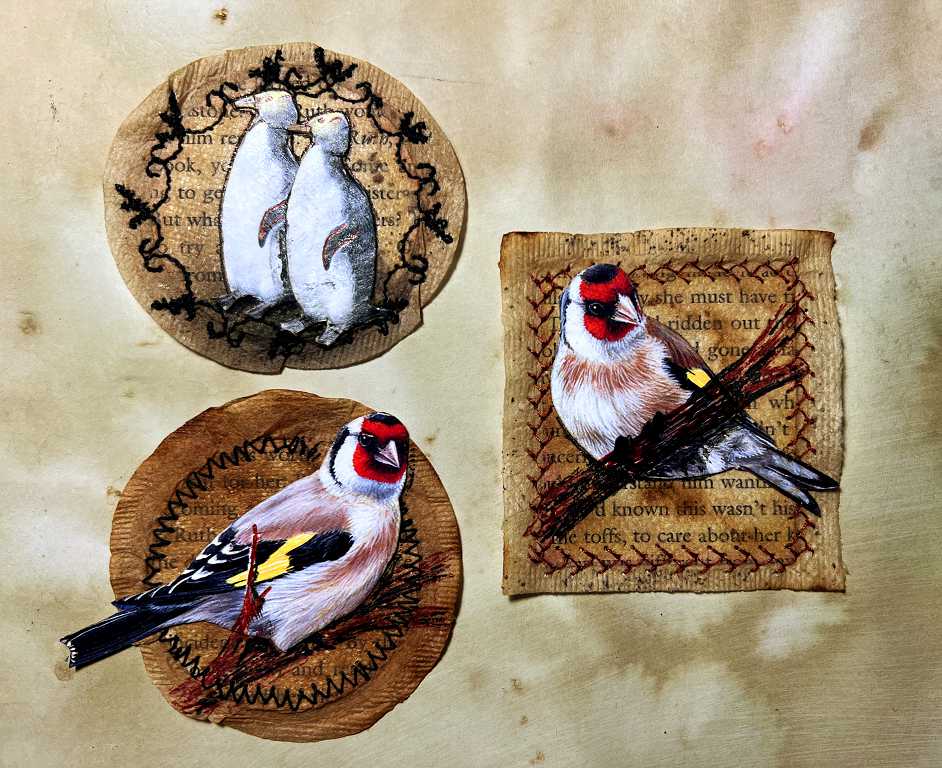
All these birds were cut out from old greetings cards. The penguins look really washed out in this photo (see the photo of the whole bird collection for a better rendition!) – the card is quite shiny so they didn’t c come out as they should. They came from a card with a circular design with lots of identical penguins all around the edge, so I’ve got plenty more to use in future!
I drew in the branches for the other two birds afterwards, using a Derwent Grafik liner acrylic paint pen for the brown and a black Sharpie for the shading.
Here are the rest of the birds. These images were cut from a greetings card that had lots of small images arranged in a grid. Under each image I stuck down a fragment of the plastic/paper mesh stuff I got not long ago. It’s pretty difficult to handle and was reluctant to stay stuck down but I got there in the end. I inked the pieces lightly with some Vintage Photo Distress Ink to reduce their stark whiteness somewhat. That stuff is pretty resistant to ink as well as to glue, unfortunately.
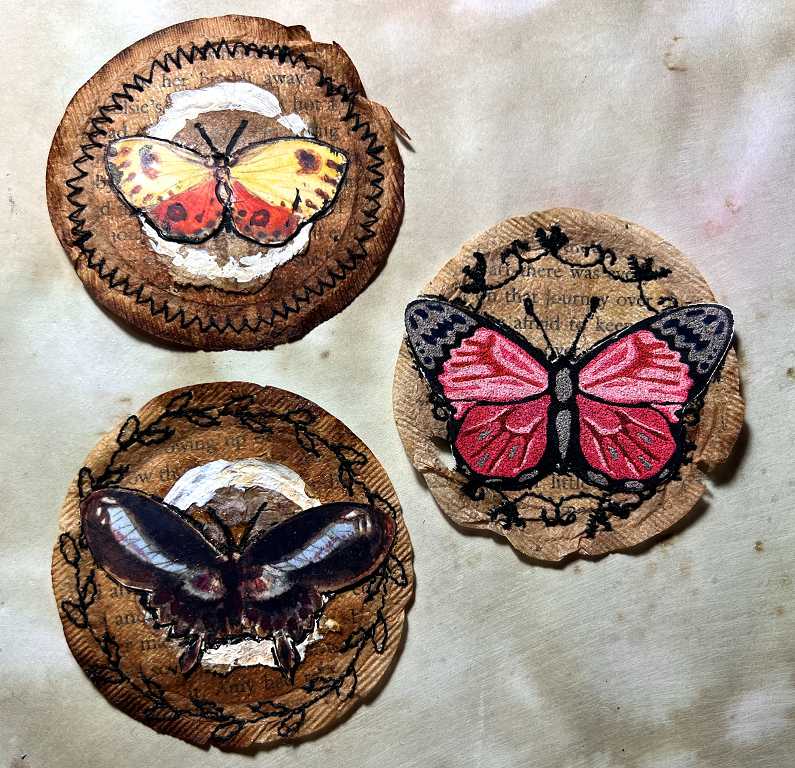
Butterfly and moth images. Some of these are laid over a fragment of tissue paper with stamped white acrylic circles on it. The images were cut from another greetings card. I drew the antennae in afterwards with a black Sharpie.
Now for my watercoloured book page embellishments.
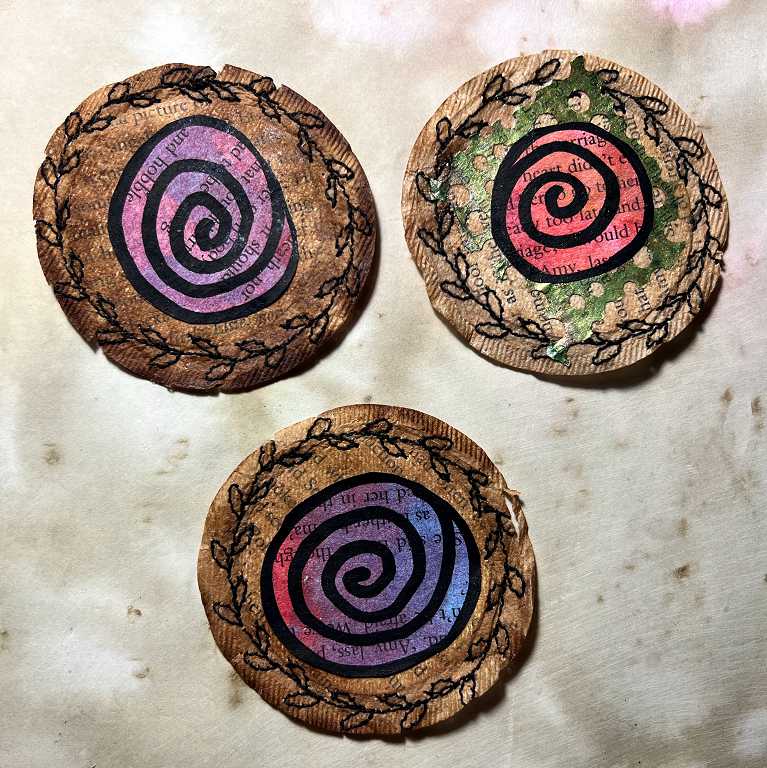
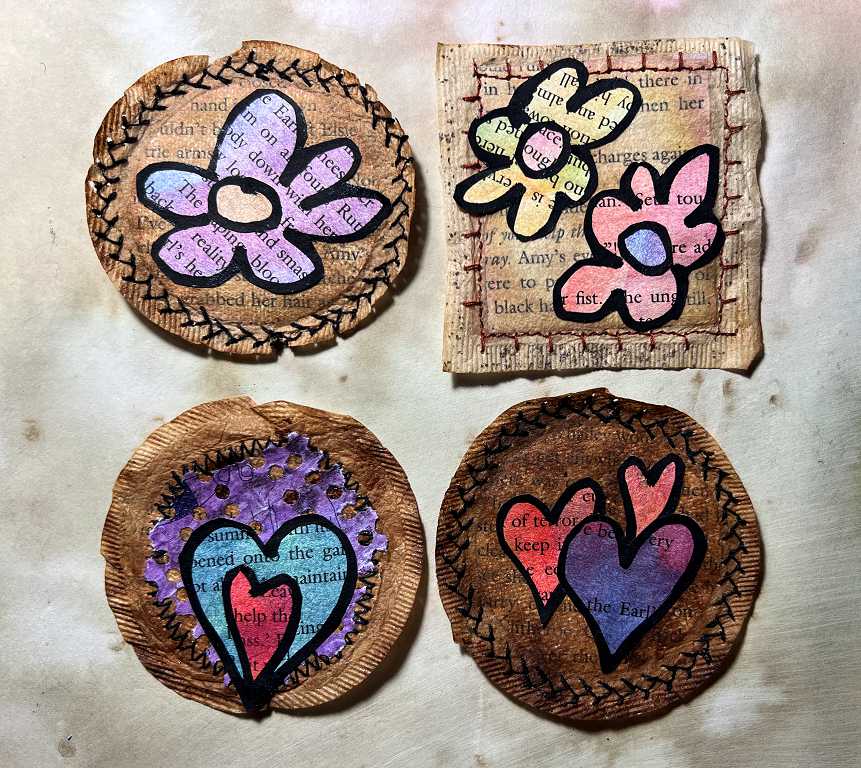
A couple of these have got a fragment of my punched paper under them – I made these papers from the accordion-folded leaflets from medication packs, and then painted them wth acrylics. They tear beautifully along the perforations and they have added texture from the printing on them.
A couple more from greetings cards – the first was from another grid, and the second was fussy-cut from the small replica of the image from the back of the card.
I cut the grid images out carefully so that I could use the remaining grids in other projects.
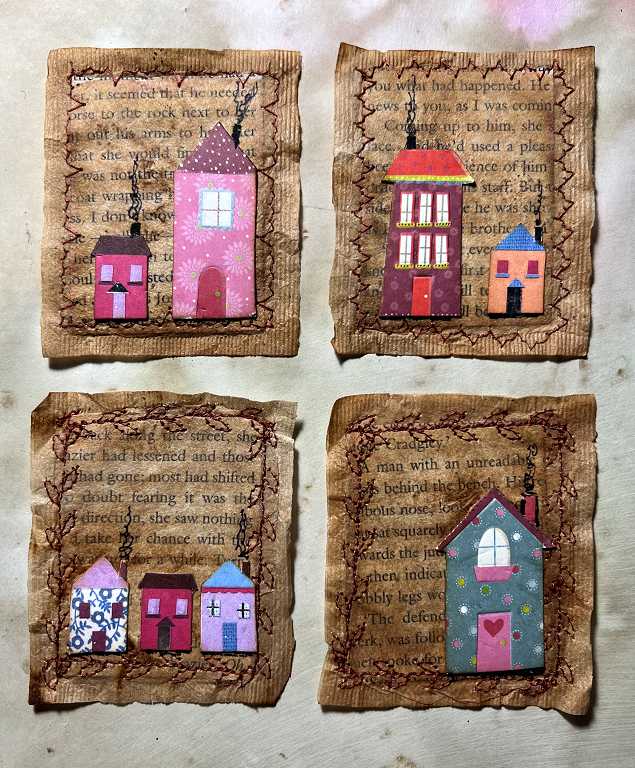
Finally, the collection with the little houses on them. I fussy-cut all these from “New Home” cards. I think they are my favourite of the whole collection! I added chimneys where necessary, and some curling smoke. Some of the little images have silver on them.
From now on, I shall definitely be on the lookout for small images that can be applied to teabags. Old greetings cards are a good source, and also magazine pages, as well as downloadable images and clipart. I think this is a good way to use these small images, and other embellishments made from scraps.
These little teabag embellishments can be used on book pages or for greetings cards, on tags, etc. etc. They will be added to my growing stash of such things. I want to accumulate quite a collection of small embellishments of this kind so that I have plenty to draw upon when I begin my Bonnie Book (my name for a junk journal because I don’t like that name!). Watch this space for more.
Kitty Contortionists
My hubby called me in to look at the kitties the other day. They were asleep together in his chair, and there was a paw in a most extraordinary position and it wasn’t at all clear to whom it belonged!
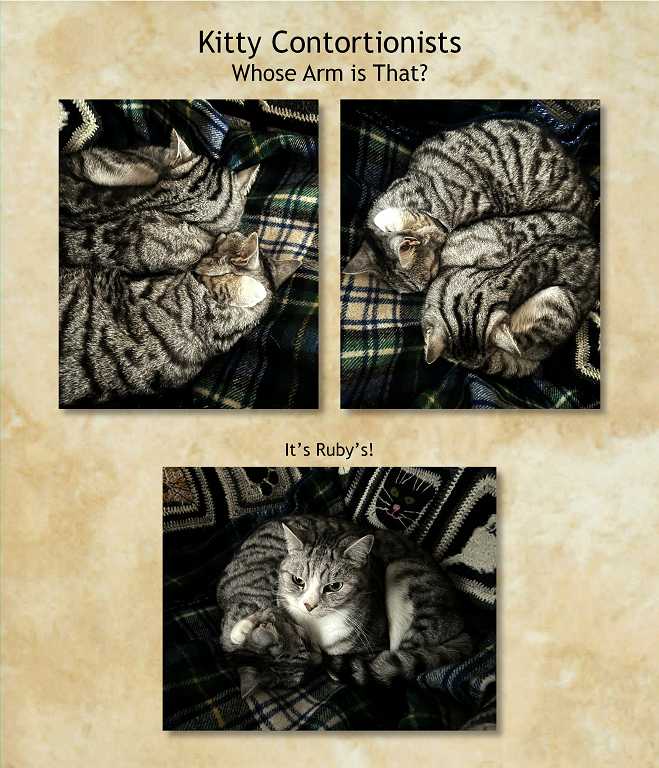
As I photographed them, Ruby woke up and it became clear that the paw belonged to her. I should have guessed, because she often holds Lily down in order to wash her, and then she goes to sleep and leaves her paw in place. I think Ruby must have been quite uncomfortable with her arm twisted around like that!