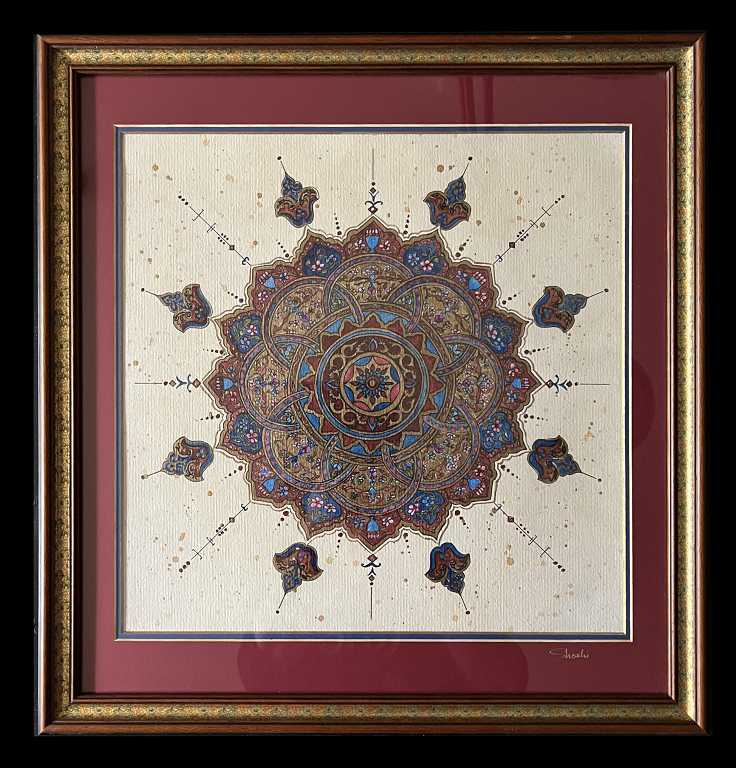
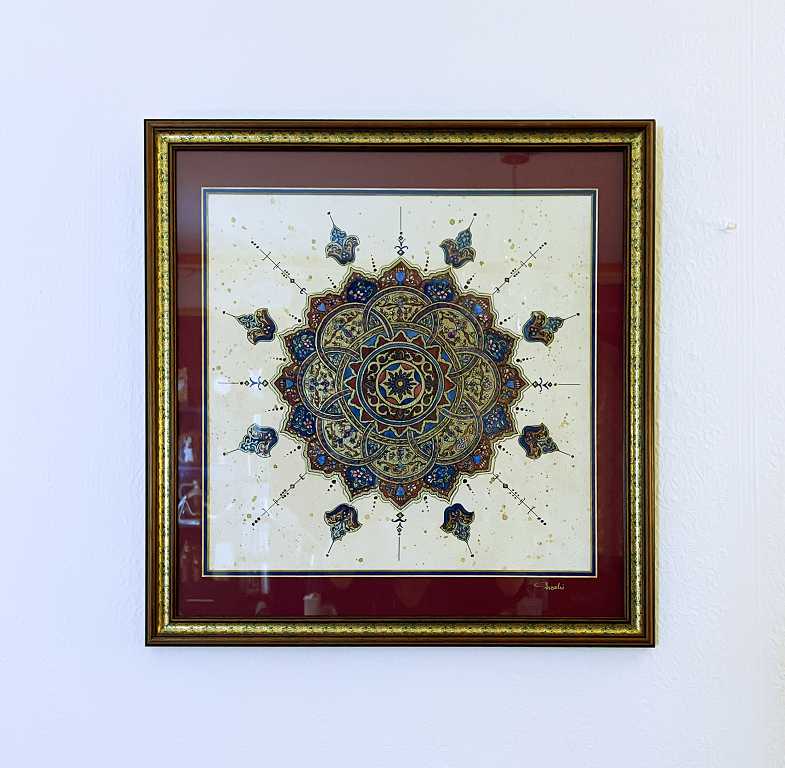
ISLAMIC ART – SHAMSA PART 4 – COMPLETION AND FRAMING
I am delighted to report that this piece of Islamic art is now completed, framed and hung.
The mount
My hubby bought this frame at the recent village fete, and reluctantly agreed to let me have it – when I first set eyes on it, I knew what I wanted to do to fill it! Unfortunately the double mount was not in proportion with the frame, and the aperture was also too big for the largest piece of paper I had, so I had to order a new mount.

I chose the same colour combination, which was perfect for my art piece. When it arrived and I opened it, everything was fine, but the mountboards both had white cores which I did not like. I knew this would be the case when I ordered it, but the choice is limited. The white was much too stark, in contrast with the aged paper background for my drawing.
The first step was to tone down the colour of the bevel of the outer mount. I did this first with Antique Linen Distress Ink, using a small stiff brush, with a piece of scrap paper up against the edge to prevent any ink getting on the inner mount. This step was probably unnecessary as the ink is very pale in colour and the inner mount is dark blue. You can just see the difference in this photo.
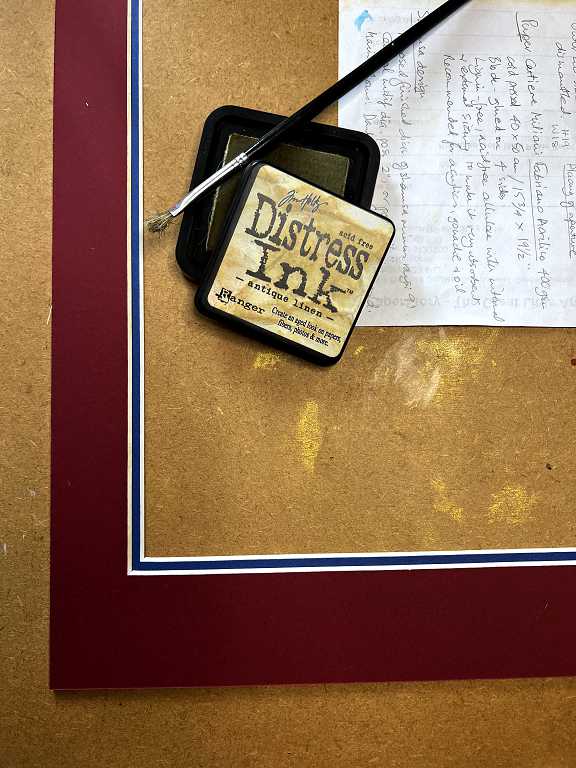
Later, I repeated the process with some Tea Dye Distress Ink, as it was still a bit too light.
I then took a fine brush, and extremely carefully painted the bevel of the inner mount with Golden iridescent bronze fine fluid acrylic paint – my favourite gold paint – which featured in the drawing itself. I was terrified of getting any gold on the blue face of the mount! I took my time, holding the brush at an angle and working from the inside of the mount, and all was well. In the end, it doesn’t show up much, but it is a definite improvement on the original.
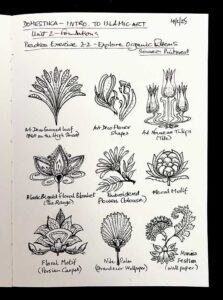
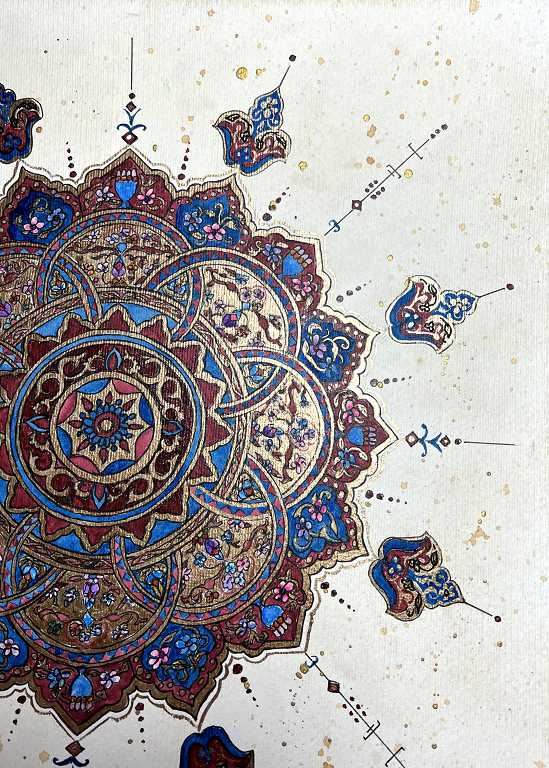
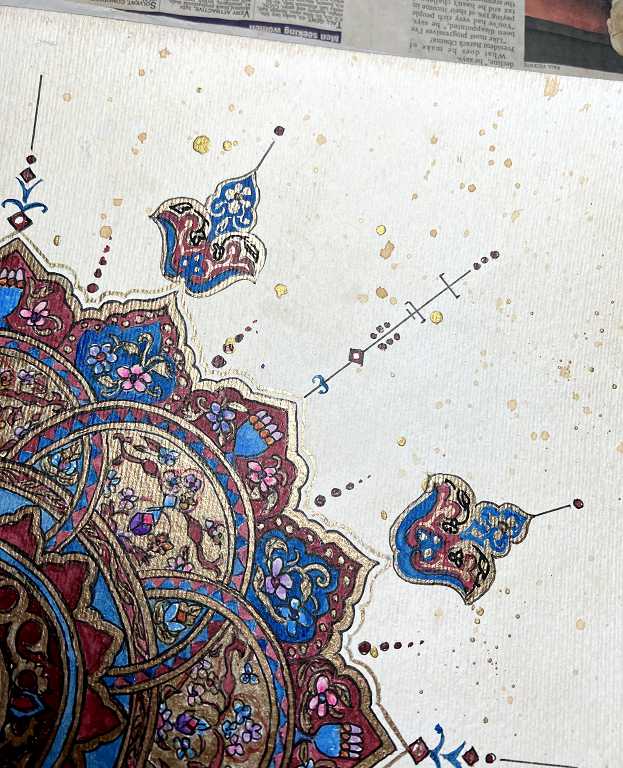
Adding the rays to the shamsa
This is the finishing touch to the drawing, and very traditional. I chose several different traditional designs for my shamsa, with smaller motifs echoing the form and colours of the main part.
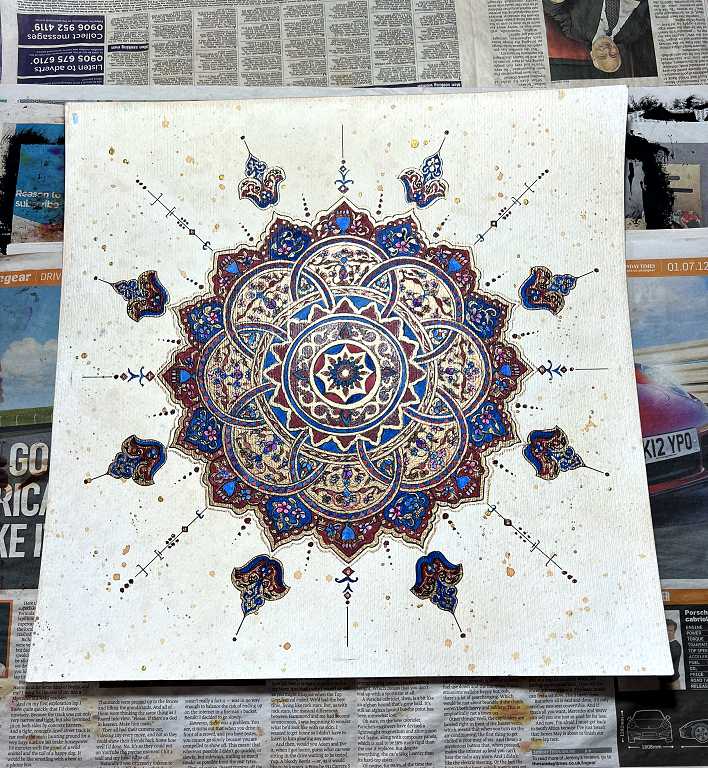
I added some biomorphics in black and gold to these small motifs.
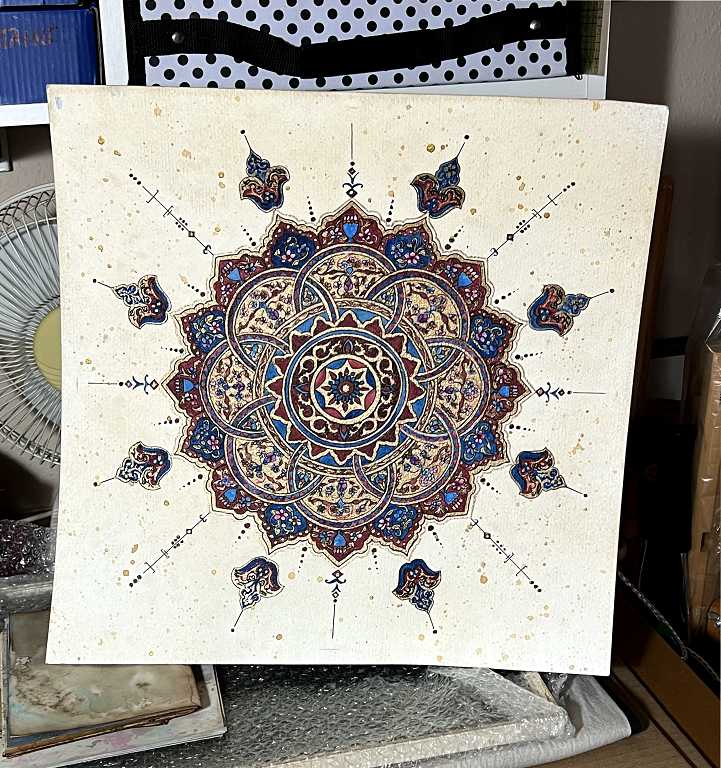
Propped up at the far end of the studio for a distance view.
Framing
This proved a lot less straightforward than I anticipated. The little metal lugs on the back of the frame to hold everything in place were extremely stiff, and also quite small, and I had to press quite hard with a screwdriver to bend them at all. I had measured the back board carefully before ordering the new mount, but it turned out to be an extremely tight fit and in the end, I trimmed a tiny bit off the top and bottom in order to get it into the frame. Bending the metal lugs back also proved difficult and they did remain a bit proud, but taping the whole thing down with masking tape made a huge difference. The frame did not have anything to hang it, so I added a couple of brass screw eyes and some picture cord, and I was ready to hang it.
Here is the finished picture, duly framed, waiting to go down to the sitting room to be hung.
Hanging
I moved my Hebrew calligraphy piece to the right, and hung this new picture to the left. Here they are, side by side.
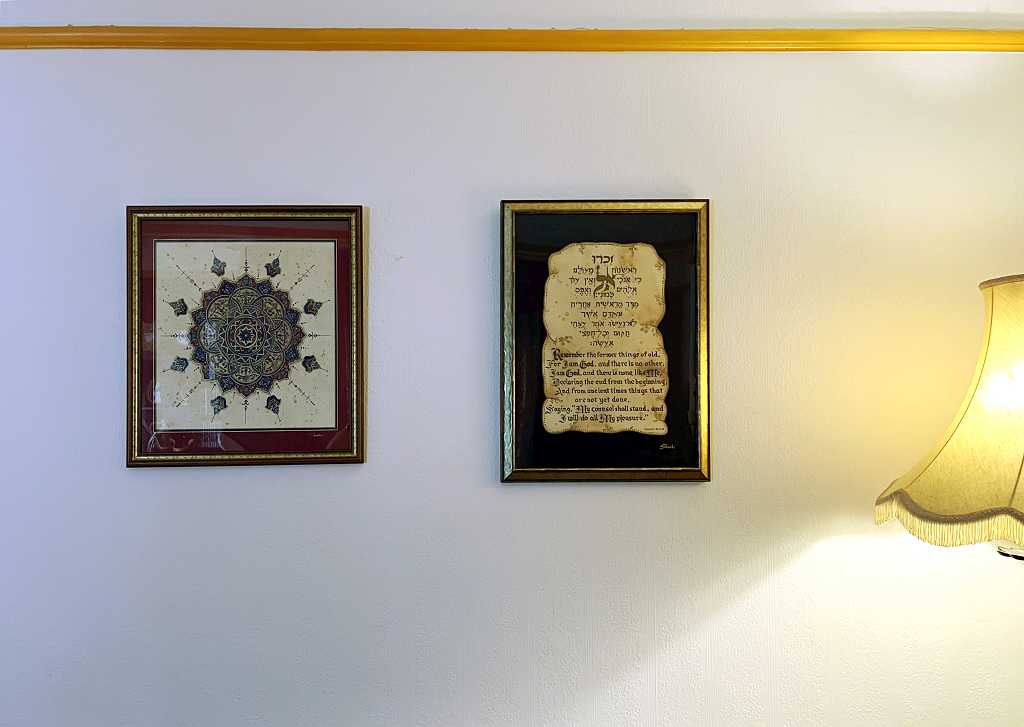
I am very pleased with how this project turned out, and I think the second-hand frame is perfect for it. It has been hanging for the past couple of hours and my hubby has come home and been in and out of the sitting room, but so far he hasn’t noticed it!! I’m not going to say anything, and see how long it takes him to notice! He’s got a big clue, though, because I’ve put the old mount on his desk.