TISSUE BOX FOLIOS PART 2 – COMPLETION OF FLORAL FOLIO
Continuing to follow the “Chasing Paper” YouTube video, I steamed ahead, working solely on the floral folio, which I completed in a couple of sessions in the studio. I didn’t photograph every stage but once it was completed, I photographed the whole project in detail, and I also made a video flip-through of the folio which will be uploaded once I’ve had a chance to edit it.
Despite some small difficulties in the construction, I am pleased with how this turned out in the end. As I stated in the first part, I have learnt that I must measure my own raw materials before starting, because I cannot guarantee that the tissue box will be exactly the same size as that on the tutorial, especially if the video creator is from a different country. Also, having the backs of the brads exposed on the inside of the folio is a major problem, because they interfere with the interactive elements of the project. I wished that I had made one complete folio from start to finish, rather than working on the construction of two at the same time in the early stages, because these errors were duplicated in the second folio, but fortunately I was able to peel back the lining paper and pull the brads through, and stick it down again.
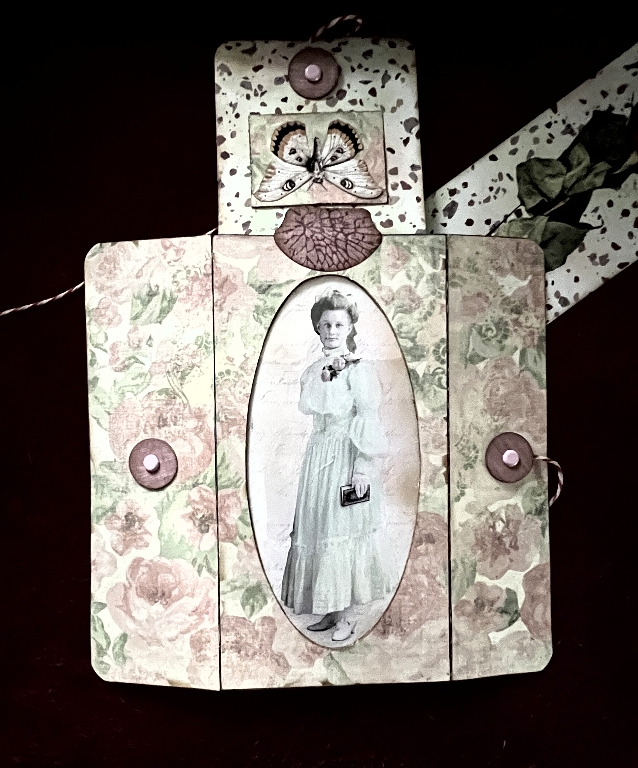
The outside of the folio
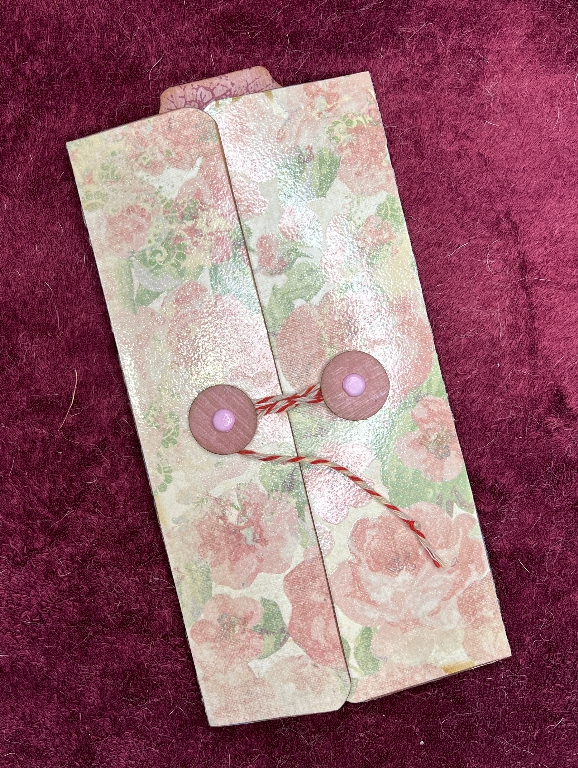
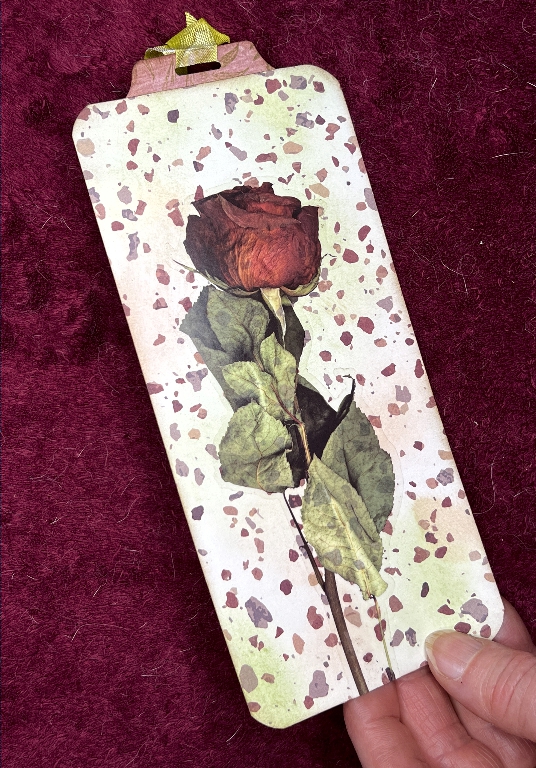
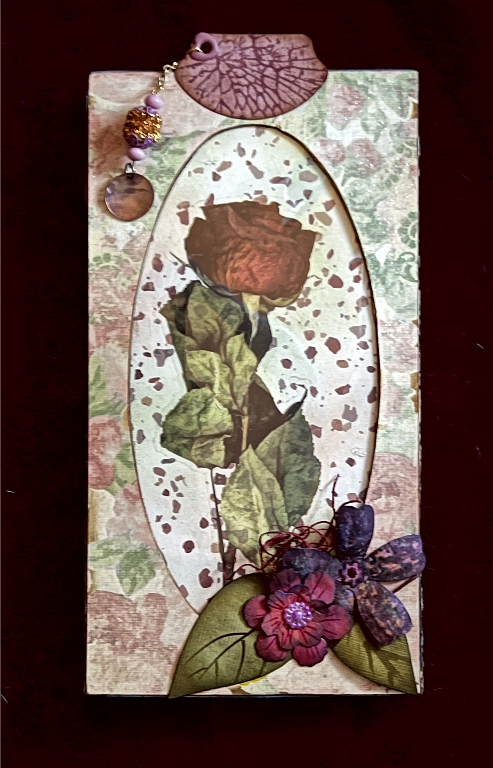
The other side of the folio, showing the oval aperture from the tissue box top, now with acetate forming a window. I have added a page tab to the top, purely as decoration. I have subsequently added a dangle to this.
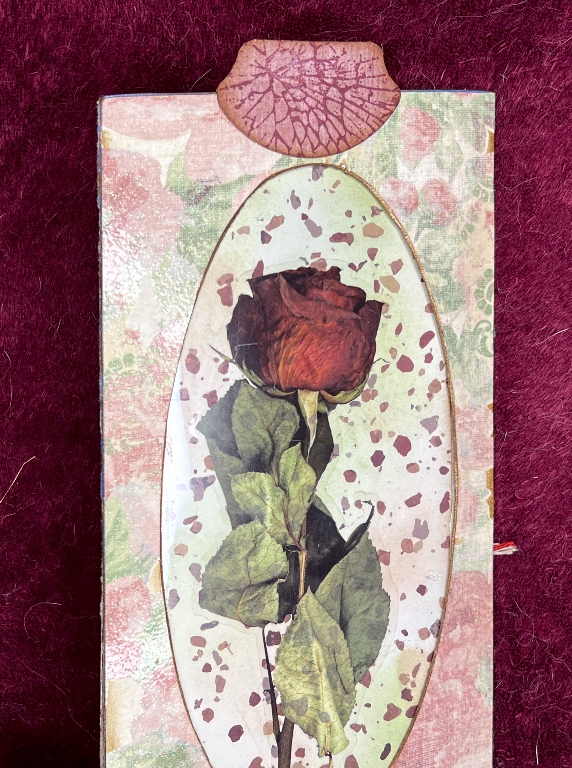
Underneath the window you can see some scrapbook paper with a gorgeous rose sticker from Taperlogy, which I have had in my stash for a long time. These stickers are hyper-realistic.
Inside the folio
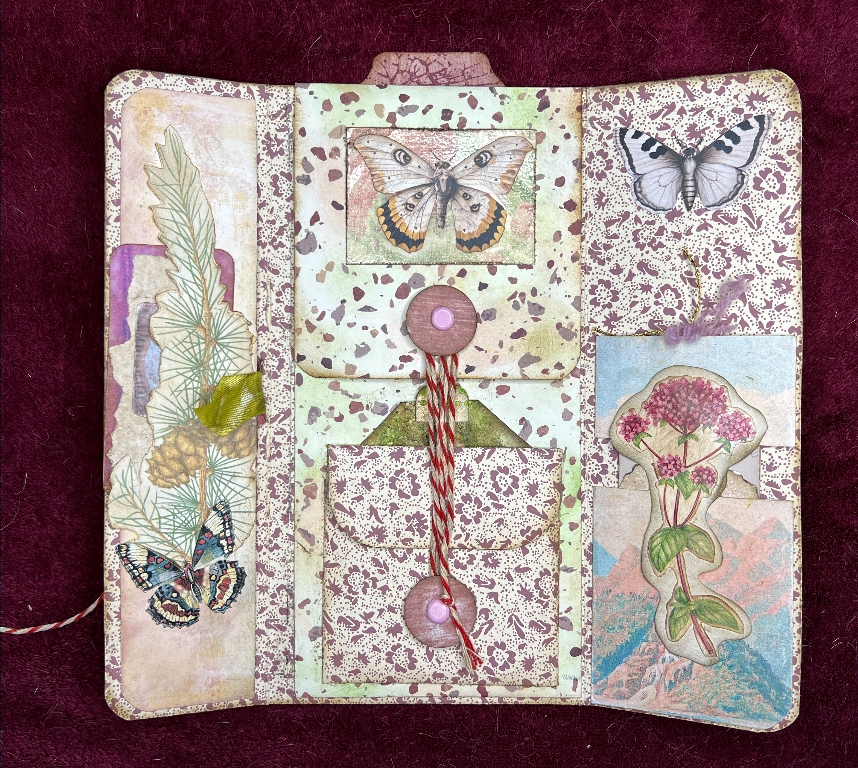
Undoing the closure, the two flaps formed from the sides of the tissue box can be opened. There are plenty of interactive elements. The folio is lined with some Laura Ashley wallpaper which I had in my bedroom before we got married so it is over 40 years old!
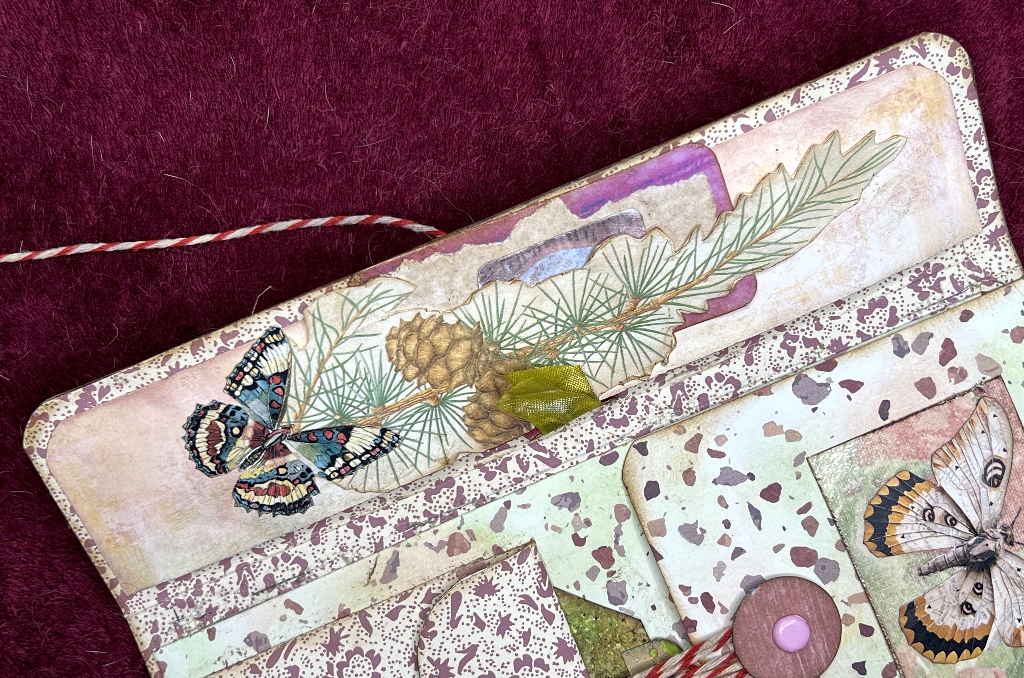
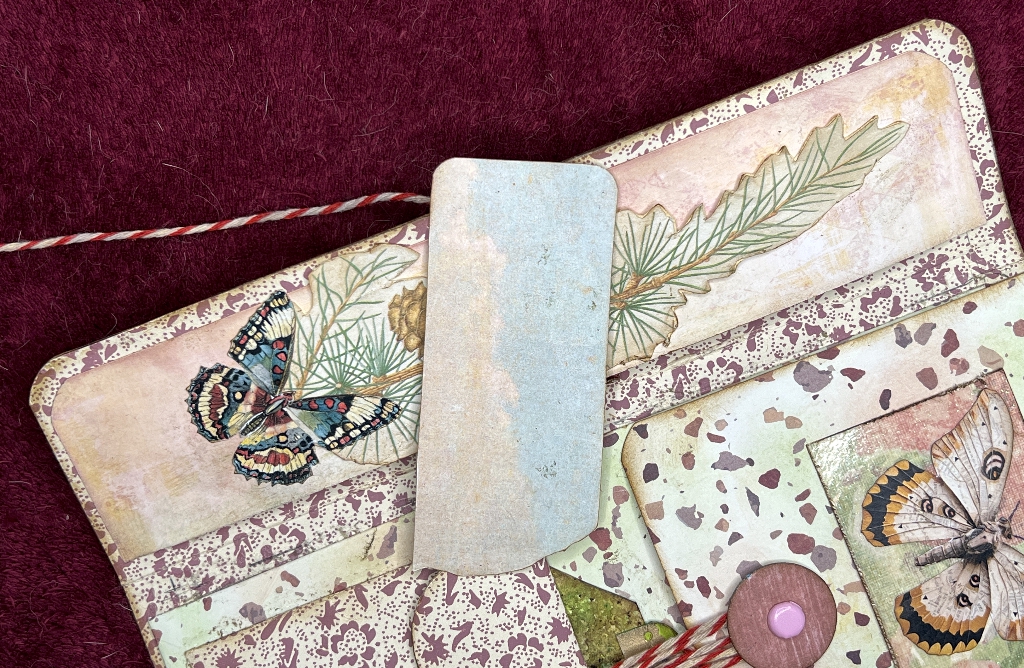
The left-hand panel
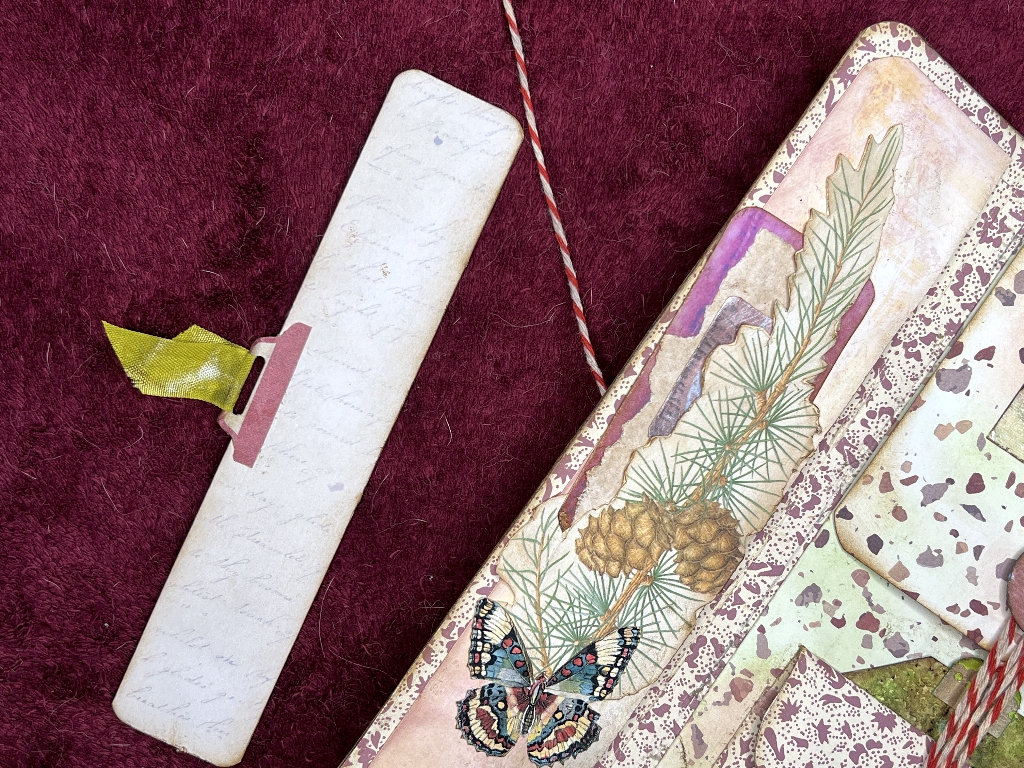
There is a side pocket running the whole height of the flap, on top of which is a belly band formed from a fussy cut image from an old book of British flora and fauna, backed with card to reinforce it. It is glued to the pocket at the top and bottom only, enabling one to slip a small tag behind it. The butterfly was from my stash and simply glued in place.
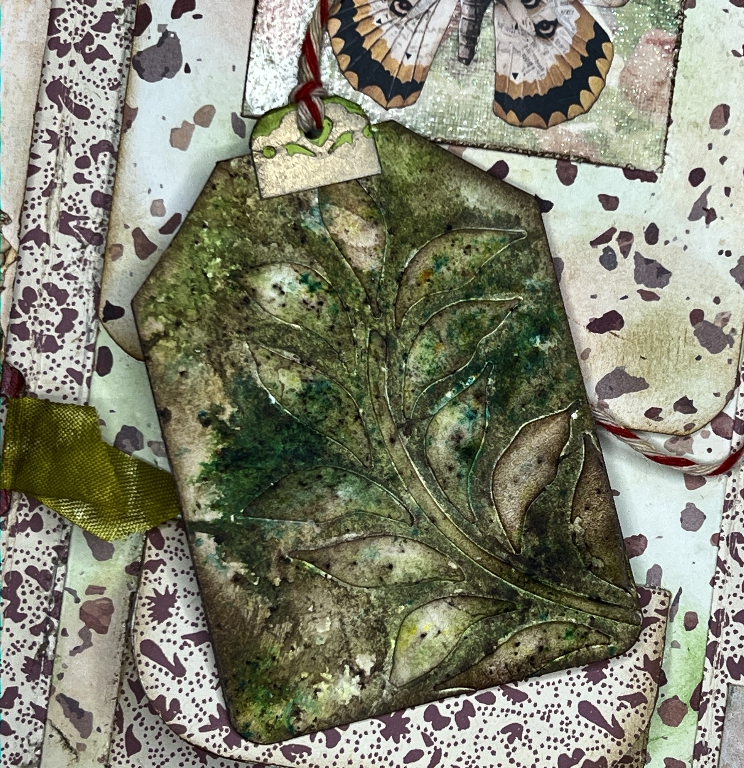
The tag was formed from a couple of scraps, with a printable digital image of a leaf on top.
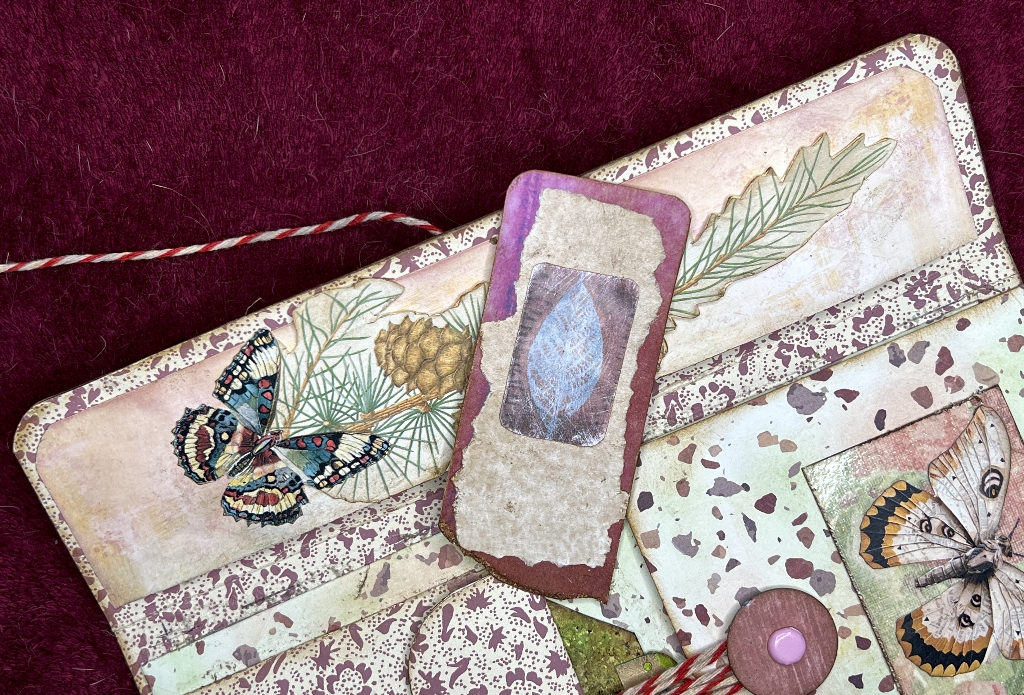
The back of the tiny tag.
The paper for this was cut from an image in my stash, which I think was probably from a magazine. It was a stylised Oriental scene and I kept it for the colours. More of it appears elsewhere in this project.
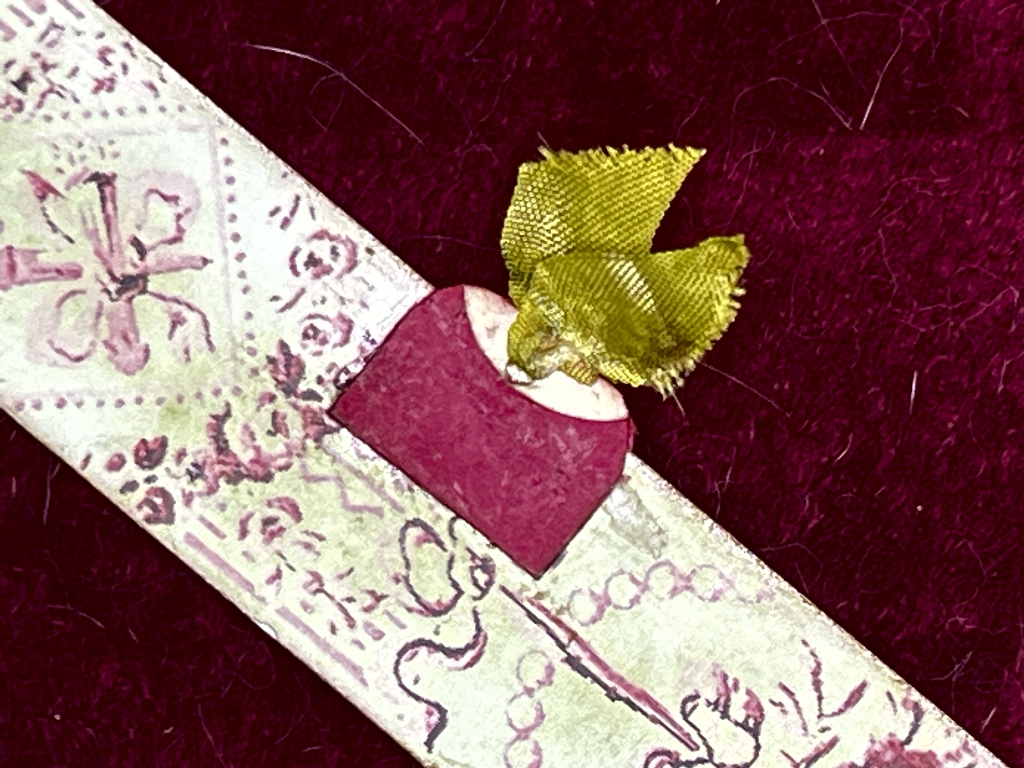
I made a very narrow tag to go in this pocket. It is decorated with a printable from the Graphics Fairy Premium Membership site, and I added a small page tab and a fragment of ribbon to help pull it out of the pocket. This tab wasn’t very strong and I eventually replaced it.

The reverse of the tag. Another Graphics Fairy image of some script which I printed with reduced opacity.
The right-hand panel
I liked what the YouTuber did with this. She created a pocket, with a matching belly band which was stuck down above the pocket, leaving a gap. It acts as an extension to the pocket, and you can catch a glimpse of what is inside. The whole thing is topped with an embellishment – in my case another fussy cut from the botanical book, mounted on some card. The pocket and belly band were cut from the picture I mentioned before. Using fragments like this creates an abstract effect rather than a recognisable image.
I covered the text on this little clothing tag from my tags box, and added the yarn through the existing hole, and it just fits in the pocket.
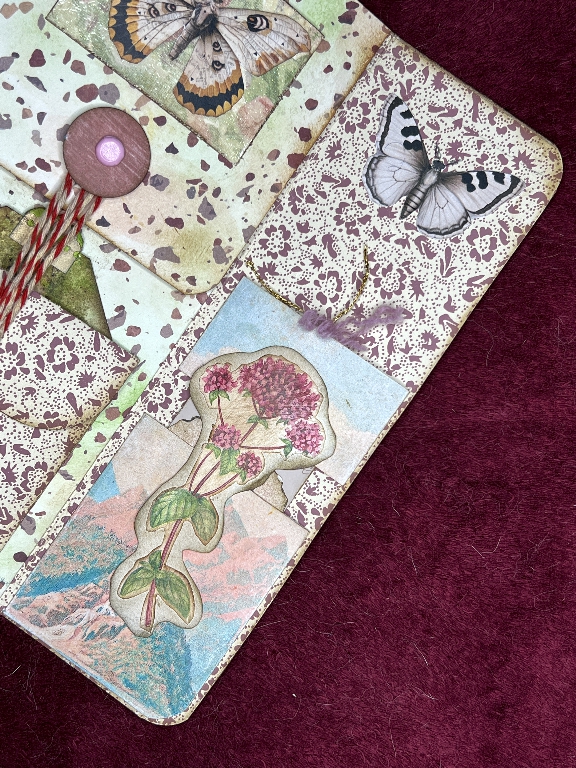
The centre panel
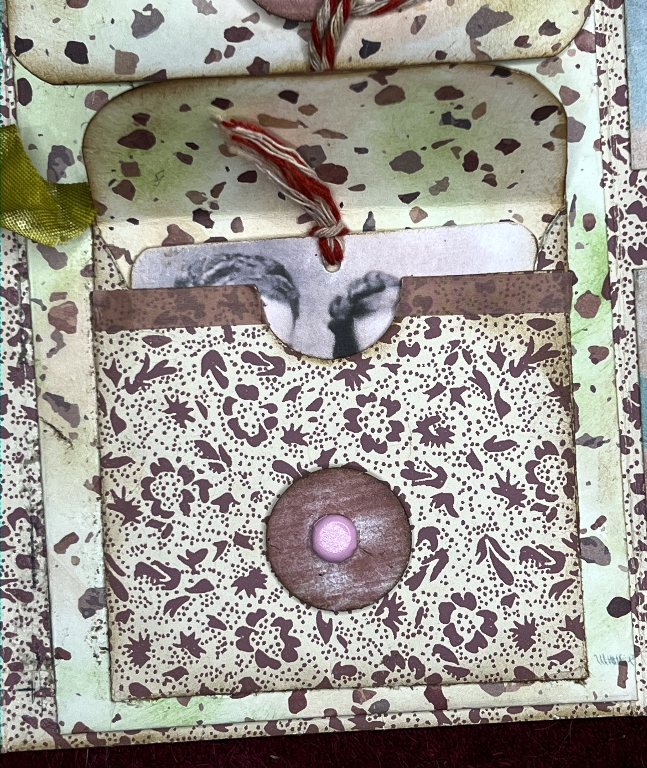
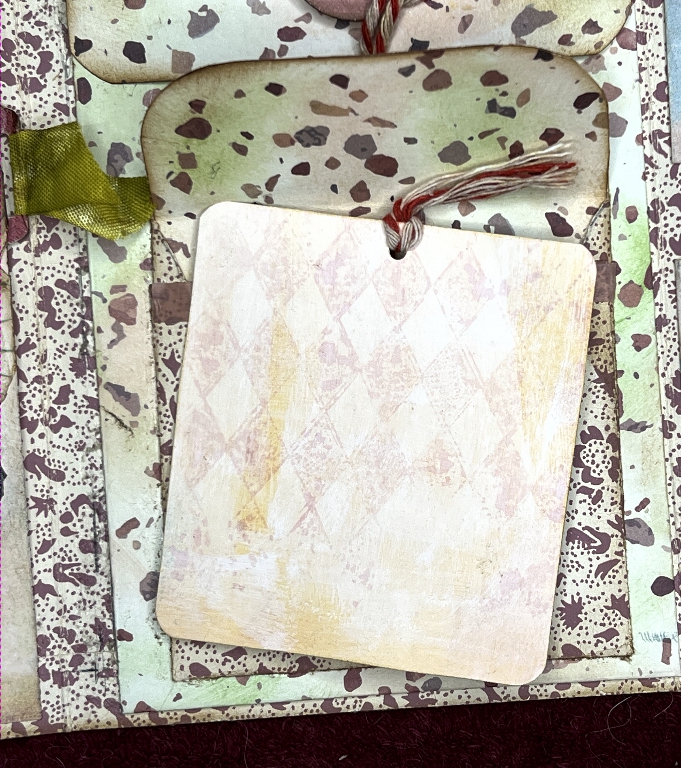
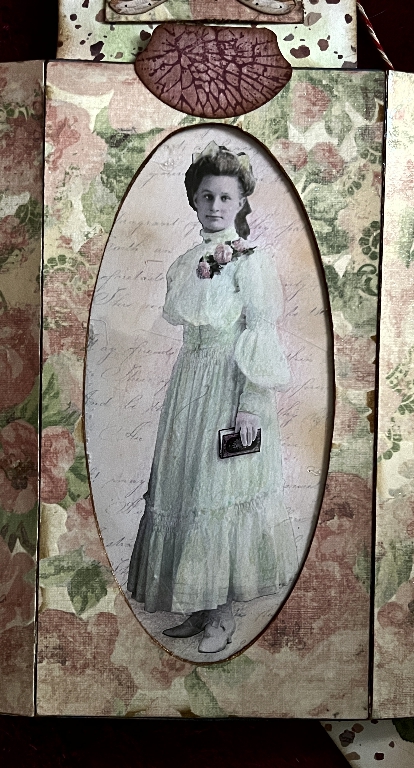
This consists of an extended pocket running almost the entirety of the height of the panel, with a matching flap at the top, and a small envelope at the bottom. There is another closure which keeps both the flap and the envelope closed.
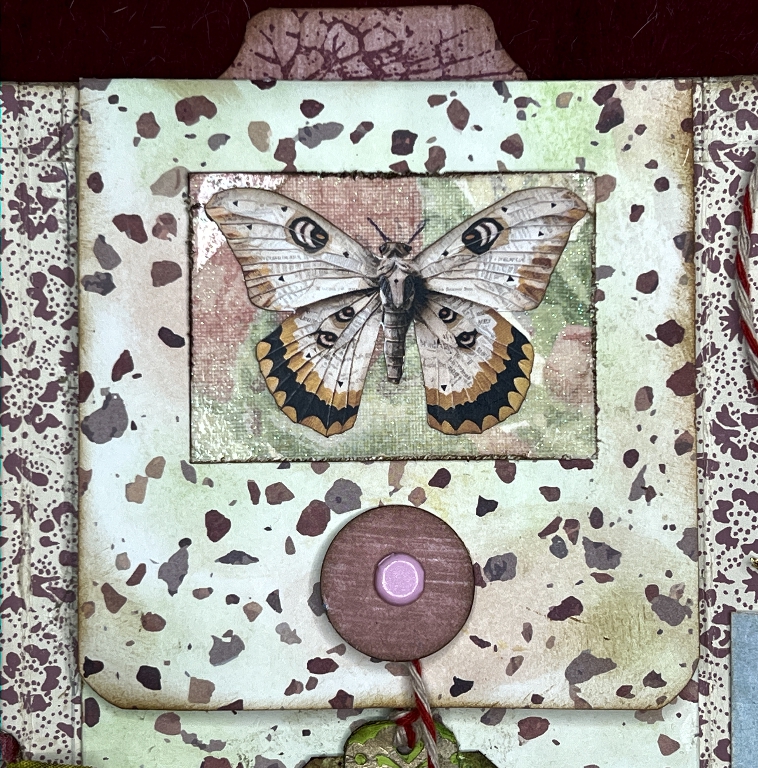
I made these disc closures from scraps of paper backed with card to reinforce them. They are attached with a brad, and I have used a length of red and white striped butcher’s twine to wrap around them to make the closure. I inked this twine to grunge up the stark whiteness.

The butterfly at the top is stuck down onto a scrap of the same scrapbook paper I used for the outside of the folio. Not so keen on shiny paper these days, but decided to start using up the papers I bought at a craft shows years ago and never used. Most stuff can be altered, but anything with foiling or embossing is harder to change.
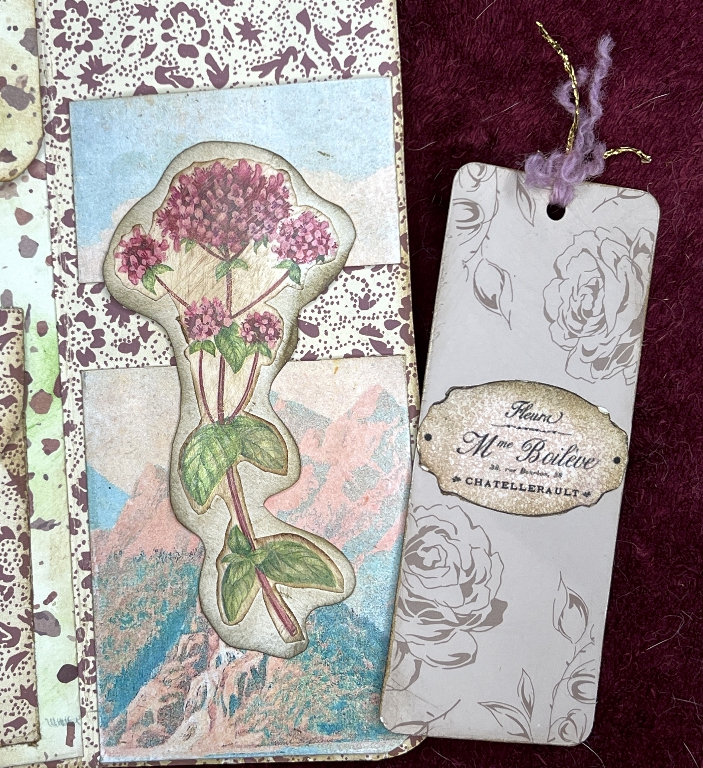
The envelope is made from a single piece of the Laura Ashley wallpaper, folded into three and the sides glued. I glued it down on three sides, so that it also forms a pocket. I chose a small tag left over from a previous project and backed it, and added the tag pull on the top.
I backed it with a bit from my scraps folder, and added a couple more of the flower stickers from Taperlogy.
I have lined the flap with more of the background scrapbooking paper. I reinforced the top edge of the envelope with washi tape as it was starting to rip. Originally none of the removable tags had pullers on them and it was really hard to get them in and out. They were also catching on the brad legs and I had a job covering these with Scotch tape once the elements were stuck down. This envelope contains a vintage photograph from the Graphics Fairy Premium Membership site.
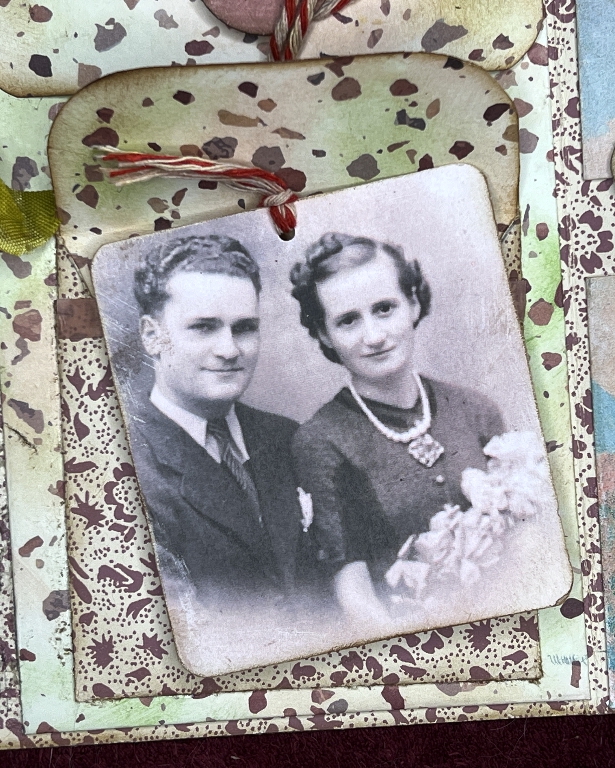
These vintage photos are so charming, and take us back to simpler times.
I backed this photo with a scrap with some pale stencilled colour on it. Many of these scraps were bits of failed experiments or offcuts from other projects.
The top flap
Butterfly stuck down onto a scrap of the paper from the cover of the folio.
Opened up, it reveals another two-layered element which covers the closure brad. This was a magazine image which I distressed by sanding and inking, and stuck down.
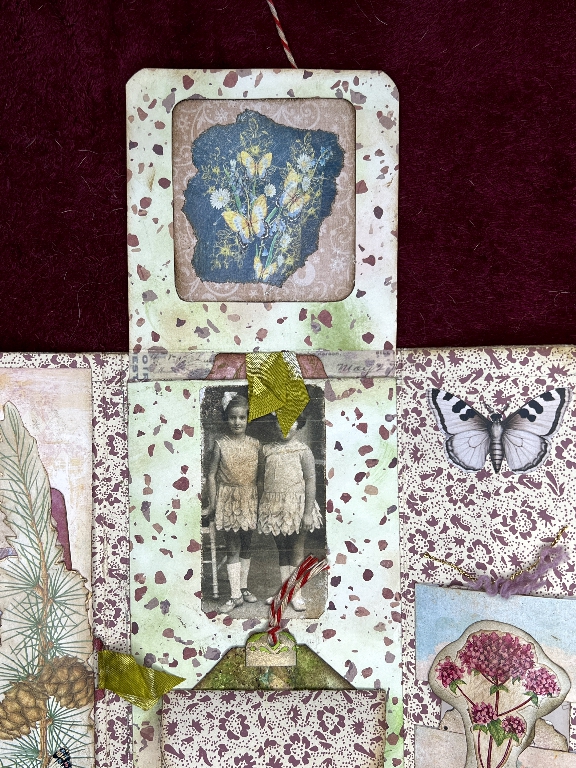
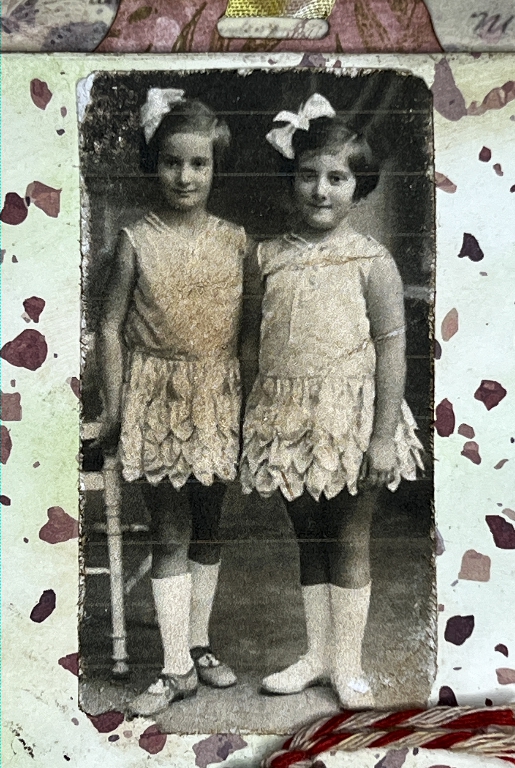
Underneath the flap is another vintage photo of two little girls who look as if they are going to a dancing class.
The large pocket
Tucked under the flap is the hidden secret pocket. This contains a large tag.
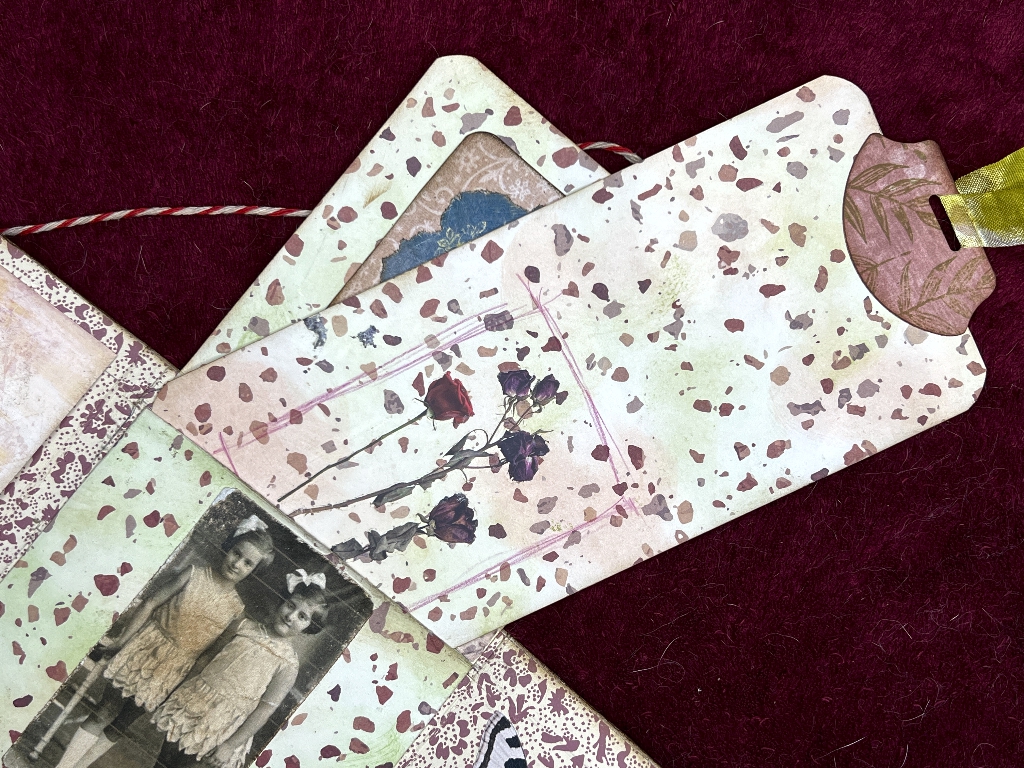
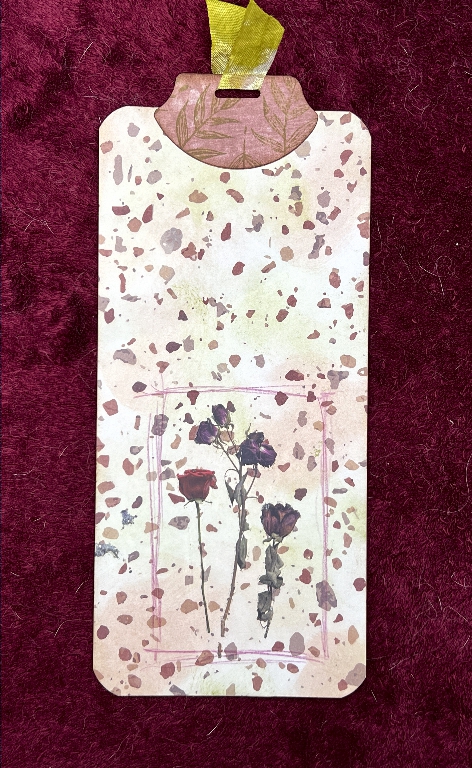
Again it has some of the Taperlogy flower stickers, and I sketched a few lines around them to emphasise them.
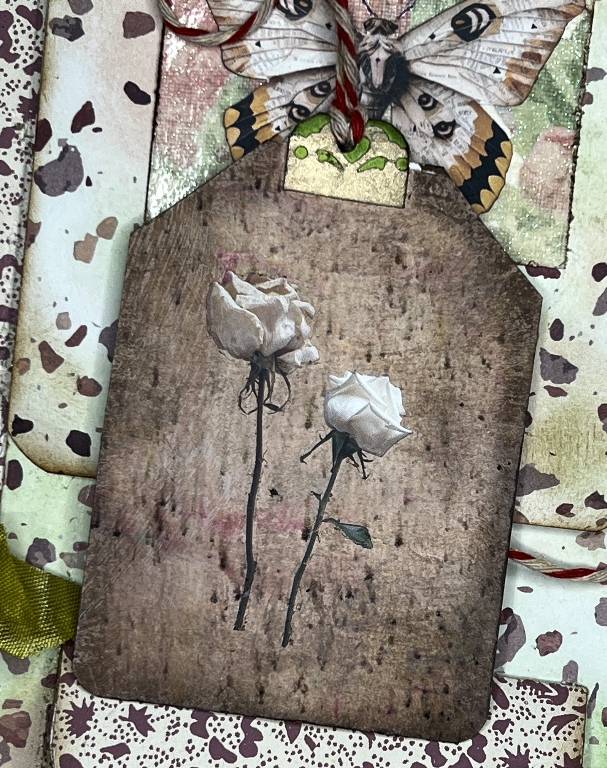
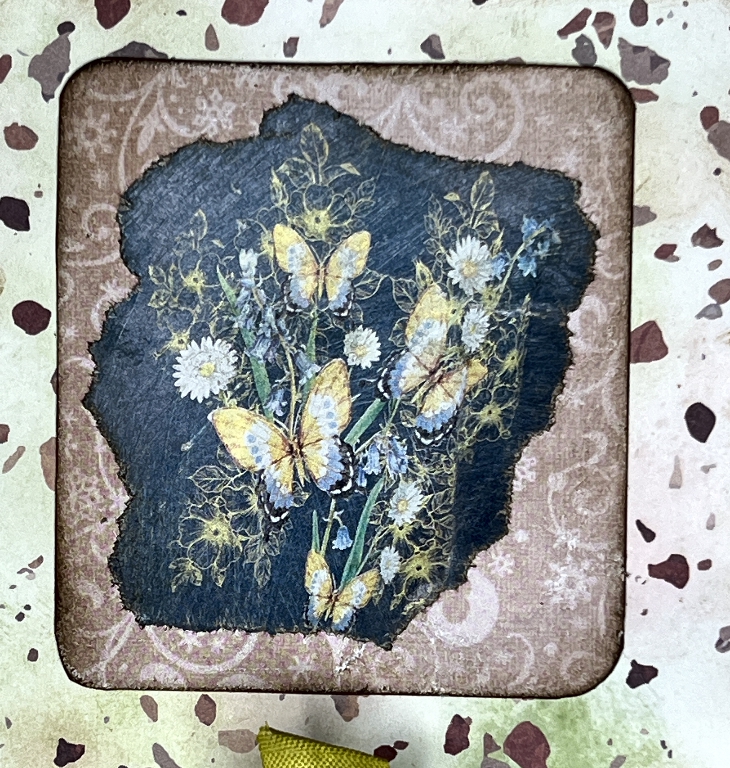
Turn the tag over, and what is revealed is what you see through the acetate window on the outside of the folio!
The surprise
My favourite part of this whole project! With the flap down, and the rose showing through the window, you would not know there was anything hidden. When you turn the folio over and pull out the tag…

…another, secret picture is revealed! Isn’t that cool? I loved making this!
This is another of the Graphics Fairy Premium Membership site’s images. It was a black and white image and I digitised it further by putting it on a script background whose opacity I had reduced, and after I printed it out, I added a little colour to the figure with coloured pencils.
Finishing touches
I wasn’t very happy about the tag pull on the narrow tag inside the left-hand flap, so I removed it, and replaced it with one that was more robust.
I also added some embellishments on the front cover. Firstly a dangle from the tab at the top, made from one of my sparkly ribbon beads.
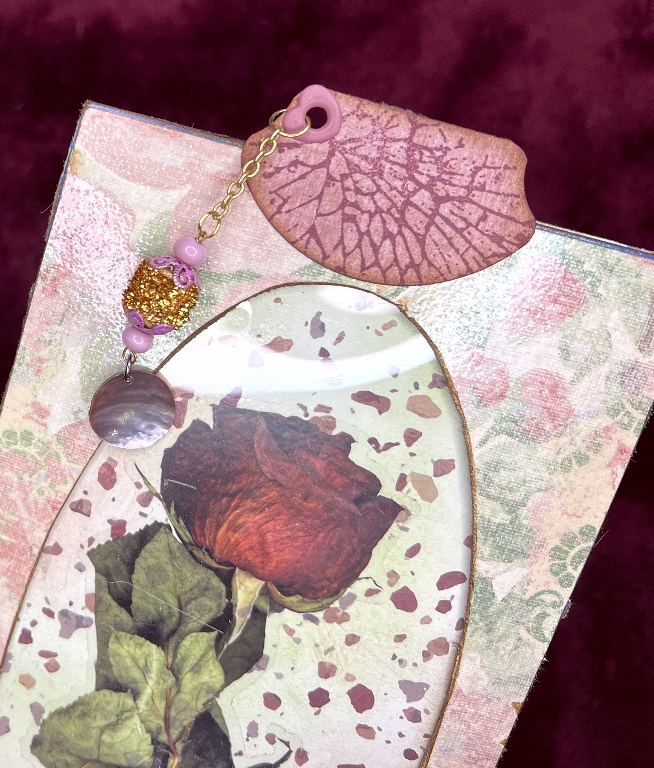
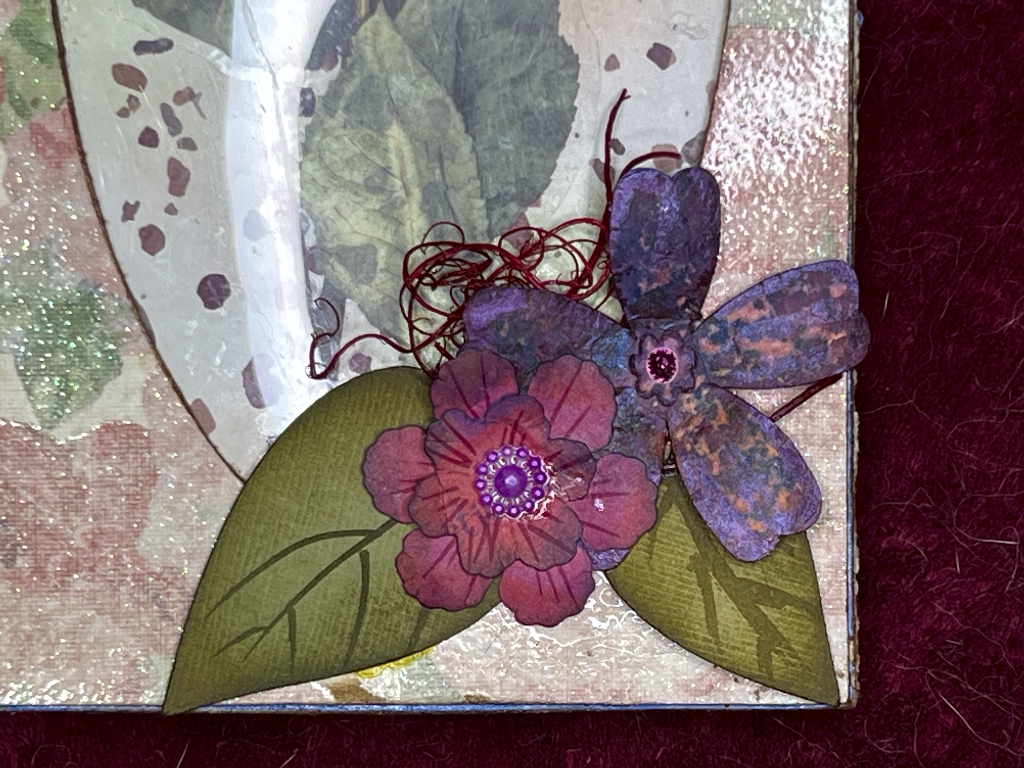
A floral cluster on the bottom corner, made from my own paper flowers – I keep a stash of these.
The (finally) finished front cover of the folio.
This is such a fun project, and could be adapted in any way you wanted, but I would always retain this grand finale of the hidden image!
Further thoughts
I saw another video today where someone took a cube-shaped tissue box and turned it into an accordion-fold album consisting of four quirky houses! It was embellished front and back. Unlike this project, where you cut off all the tabs that hold the box together, she left them intact, and folded some up to make pockets along the bottom, and the roofs of the houses above. I just loved this free-standing album and am determined to try making this. I have some lovely digital printables of quirky house windows and doors, and really the sky’s the limit once you exercise a bit of imagination. I now have some cube shaped boxes of tissues on order! I never thought I’d wish for a cold, but it would be one way to use up the tissues quickly, to free up the boxes!
What fun it is to make art out of rubbish.