A LITTLE BOOK OF ENCOURAGEMENT
A very dear friend of mine is currently facing some distressing family news. I thought I would make her a little gift to encourage and bless her at this hard time. I made this over a week ago but couldn’t upload this post until I had given it to her, as she sometimes visits my blog and I wanted it to be more of a surprise.
Tinne’s Celebration Week Booklet
I am following Tinne of VectoriaDesigns, and this wonderfully generous young lady is frequently posting videos with free downloads to make up her gorgeous mini-projects. I have already made several. I thought this one, “Celebration Week Booklet” could easily be adapted for my friend.
Several years ago in Christian circles, promise boxes were very popular. The box contained a number of printed cards with Bible verses on them, and you took one out each day, and after you had read it, you put it to the back of the box so the cards were constantly rotated. It was amazing how often the verse would relate directly to whatever one was dealing with on any particular day. They could also be used as flash cards – aids for memorising Bible verses.
I haven’t heard much about promise boxes recently, but I thought this little accordion booklet would lend itself really well to the idea. You can see Tinne’s video about the project here. The design consists of seven little pockets which unfold accordion-style, and inside each one is a card. I thought I could insert several cards in each pocket, printed on both sides, and you would work your way along the weekly pockets, taking out a card each day from its pocket.
Here are the printed sheets, ready for cutting out.
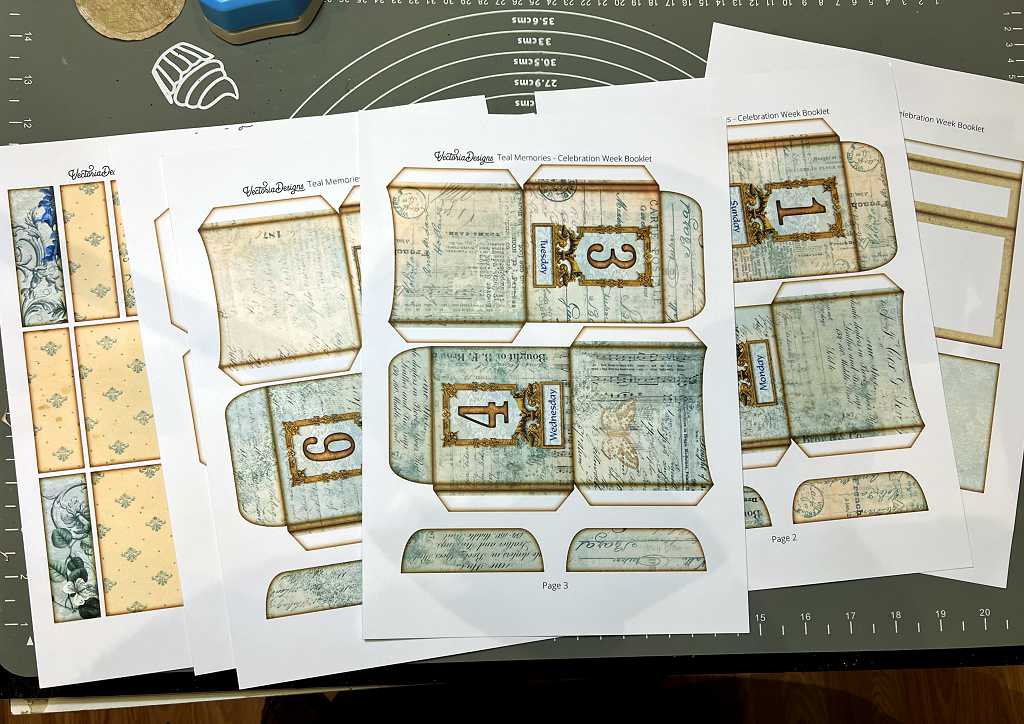
The kit includes seven of the blank cards (one can be seen on the far right in the above photo, at the bottom of the sheet tucked under the rest). I cut several pages of these, on 100 gsm printer paper. Tinne recommends using 260 gsm card as it is stronger than paper and holds up better for her projects, but I didn’t want too much bulk with the little cards. I also have a problem with my printer, in that it is impossible to line it up accurately enough to print exactly on the reverse side, and having experienced this problem in the past, I knew the only solution would be to print single-sided, cut out the cards and glue them back to back. With two layers of the 100 gsm paper, this would produce a lightweight card which would be less bulky than the rest of the project, enabling me to tuck several into each pocket.
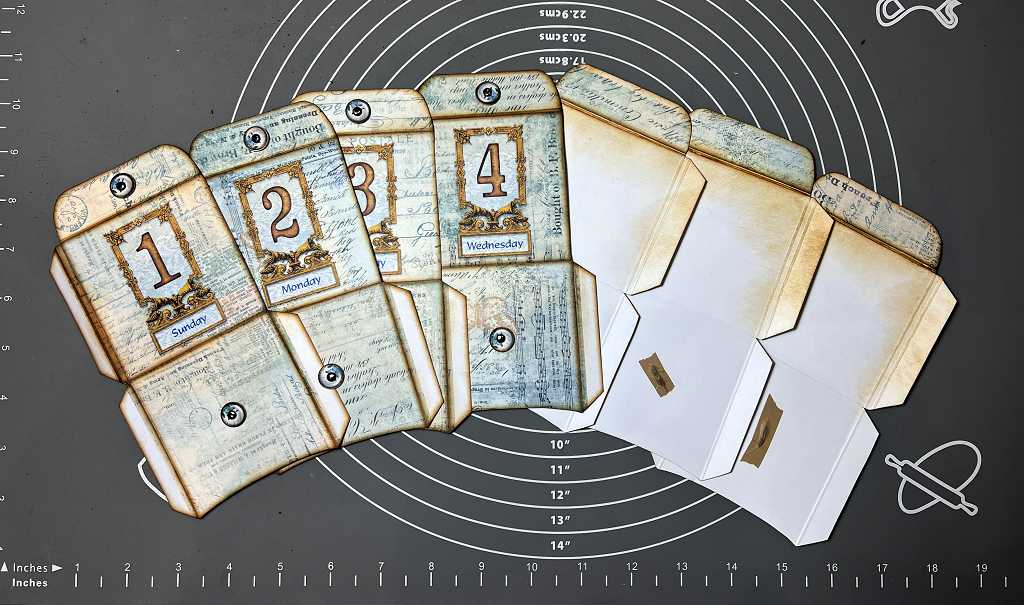
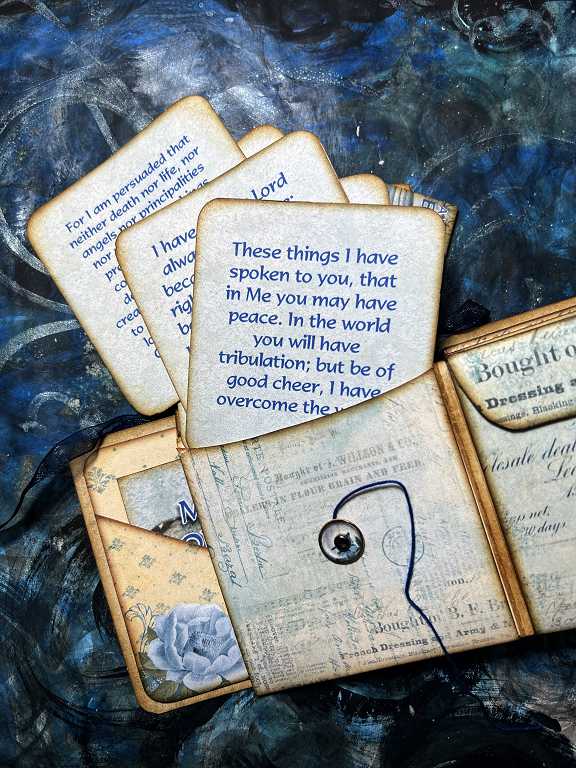
Here are the Bible verse cards completed. There is a different verse on every one, and on the reverse side of each. There are enough verses for about two months if you look at one each day. I added the text before I printed the sheets of cards, choosing an attractive font in dark blue. Each card, once printed and cut out, had its corners rounded and its edges inked.
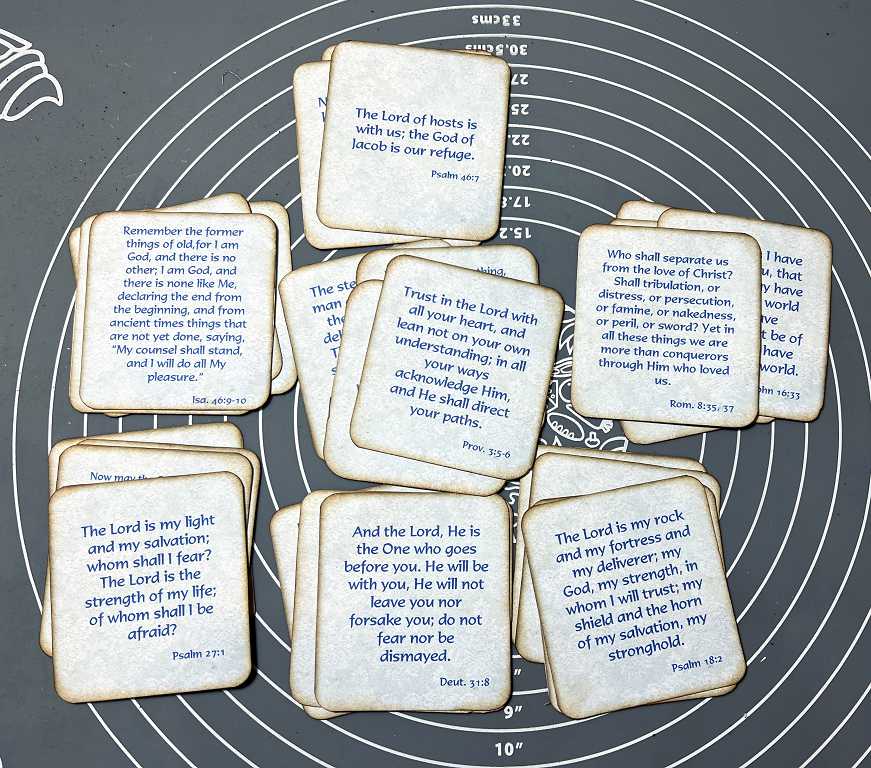
I had a terrible time with my corner rounder punch. Cutting through the double-sided tape that is joining the two halves of the card, the little offcut would get stuck in the punch and the next attempt wouldn’t cut properly. To start with I couldn’t think what was going wrong, and thought it was a fault with the punch, but when I realised what was causing it, I had to check after each use, and extract the offending fragment with fine tweezers. Sometimes it would slip right inside before I could grab it. There’s no way to take this punch apart to remove them, so it’s a bit hit and miss! Most of the bad cuts were able to be corrected with fine scissors, and once the edges were inked, any discrepancies were less noticeable. As a result of this problem, this stage of the project, which should have taken mere minutes, took considerably more time, and was pretty tedious! Worth it in the end, though, because the rounded corners give such a lovely finish.
The rest of the pieces cut out. At this point I was working downstairs, but had to keep going up to get things I had forgotten! Hardly worth the effort – much better to do it all in the studio!
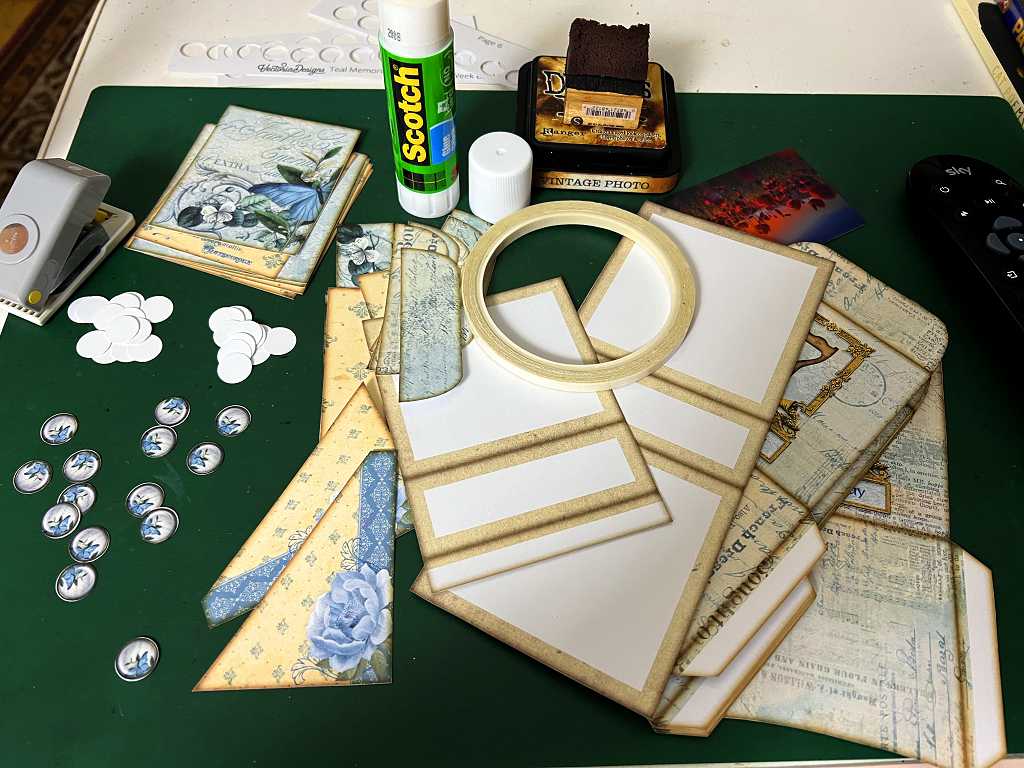
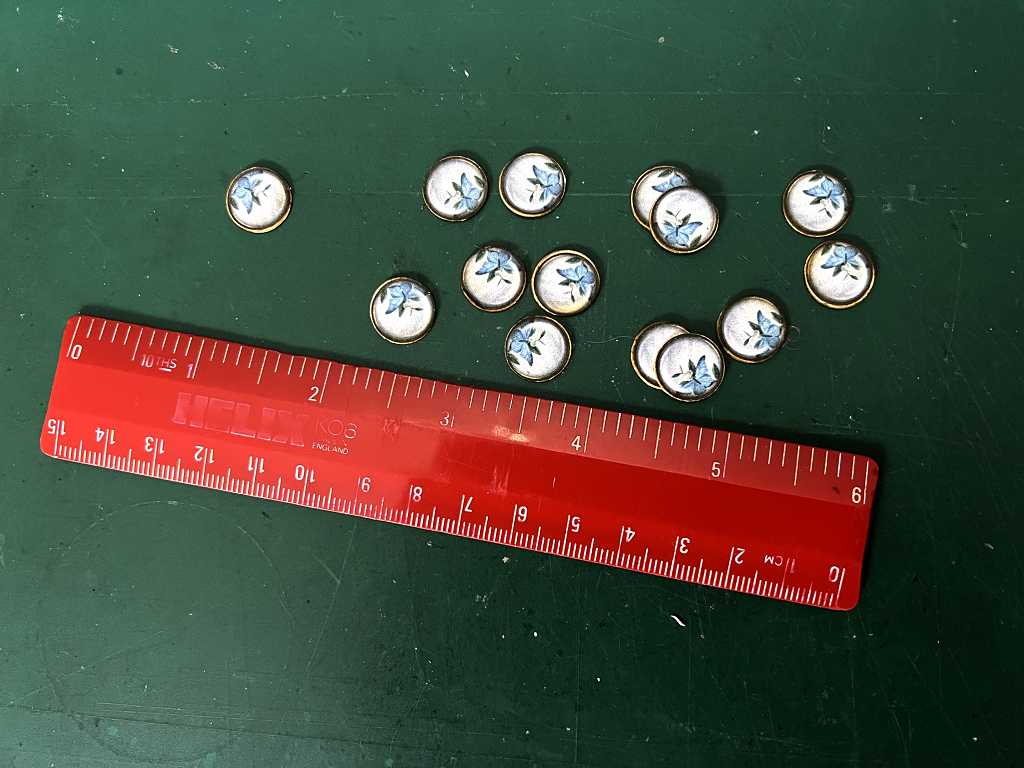
On the left you can see the little discs cut, ready for the fastenings on each pocket, with plain ones to stack up to make each “button” more substantial. Tinne always uses a 5/8″ punch for these, and unfortunately I don’t have one of these, but I have one on order. In the meantime, I reduced the size of the buttons to 1/2″ before printing them out. 3/4-inch was too large. These smaller ones are a bit of a fiddle to deal with, but they look fine once attached in place with tiny brads.
Here they are, with their backing layers all glued in place. Once the edges were inked a bit more, the white edges were less obvious.
The front cover consists of two printed pieces which have to be stuck together. Here are the first panels glued in place on the outside of the cover. You can’t glue them all on at once, because the ribbon closure has to be added first, and then the final two panels will cover this.
Back in the studio again, here is the completed outside of the front cover, with the ribbons glued in place with double sided tape, and the remaining panels attached over the top, covering up the ends and securing everything in place.
Here is the inside being worked on. Again, you can’t glue on all the panels because the accordion part has to be attached first, so the centre panel is blank for now.
Working on the pockets. The photo shows some of them right side up, with the remainder showing the insides. You can see that small panels have been glued to the inside of the top flaps to finish them. These are printed exactly the same size as the flap of the pocket, but when you fold them over, the edges stick out, so they have to be trimmed. Again, all edges and folds are inked. You can see that the area just under the flap on the inside has been inked; this part will show when the pocket is assembled.
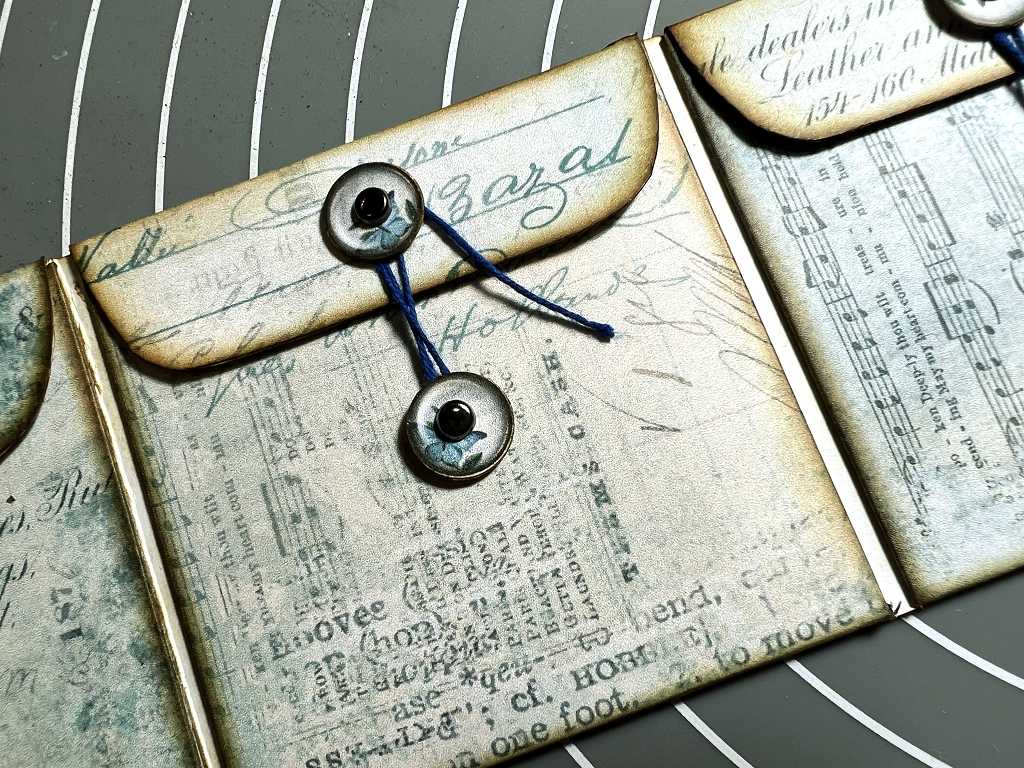
The little buttons are attached to each pocket with a brad. The backs of the top ones, on the flaps, are covered with a little strip of double-sided tape which is covered when the inside flap panel is stuck down. The backs of the brads on the inside of the pocket are covered with a little strip of washi tape. This stops anything put into the pocket getting caught on the back of the brad. Once completed, each pocket will have some twine added to the buttons for the closure.
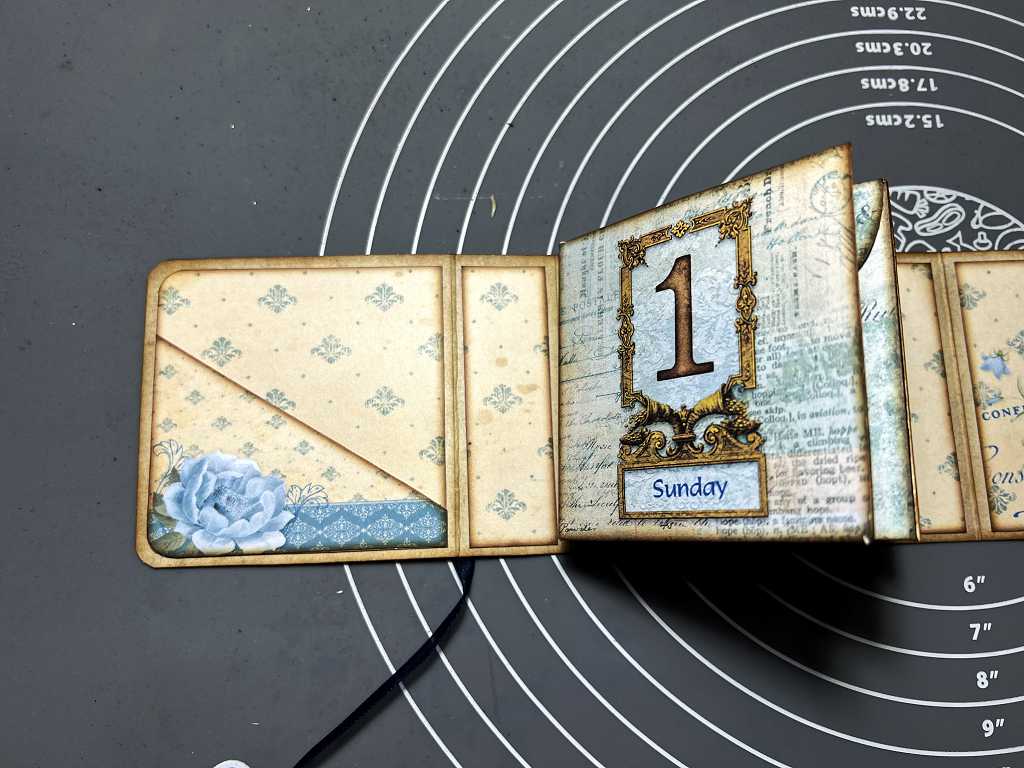
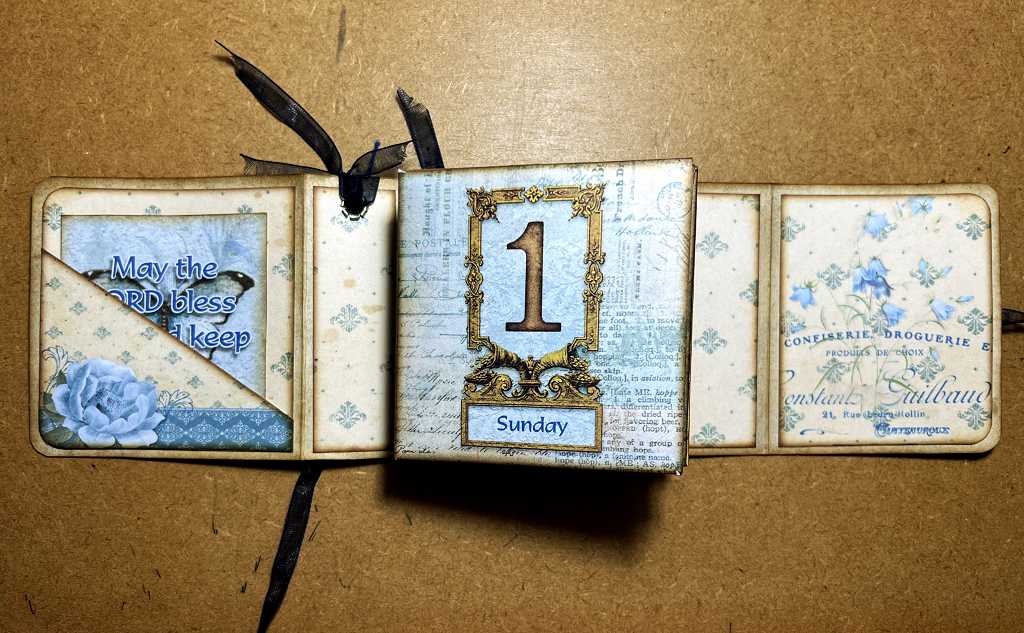
In the original design, the little name plate under the number is left blank so that you can write in what you like. Before printing it out, I typed in the days of the week, using the same font and colour that I used for the Bible verses.
All the additions I made were done in my desktop publisher. This way, I was able to produce a more professional result than if I had written the words by hand.
Each pocket has a tab with which to attach it to the adjacent pocket. Here they are, all duly joined up. The bottom halves will be folded up behind the fronts of the pockets, and the tabs will fix them in place.
This photo shows the first of the pockets complete. You can see both tabs on the bottom of the next pocket, ready to be glued on the underside and then folded in, the bottom half of the pocket folded up and secured in place. You can also see the washi tape covering the backs of the brads.
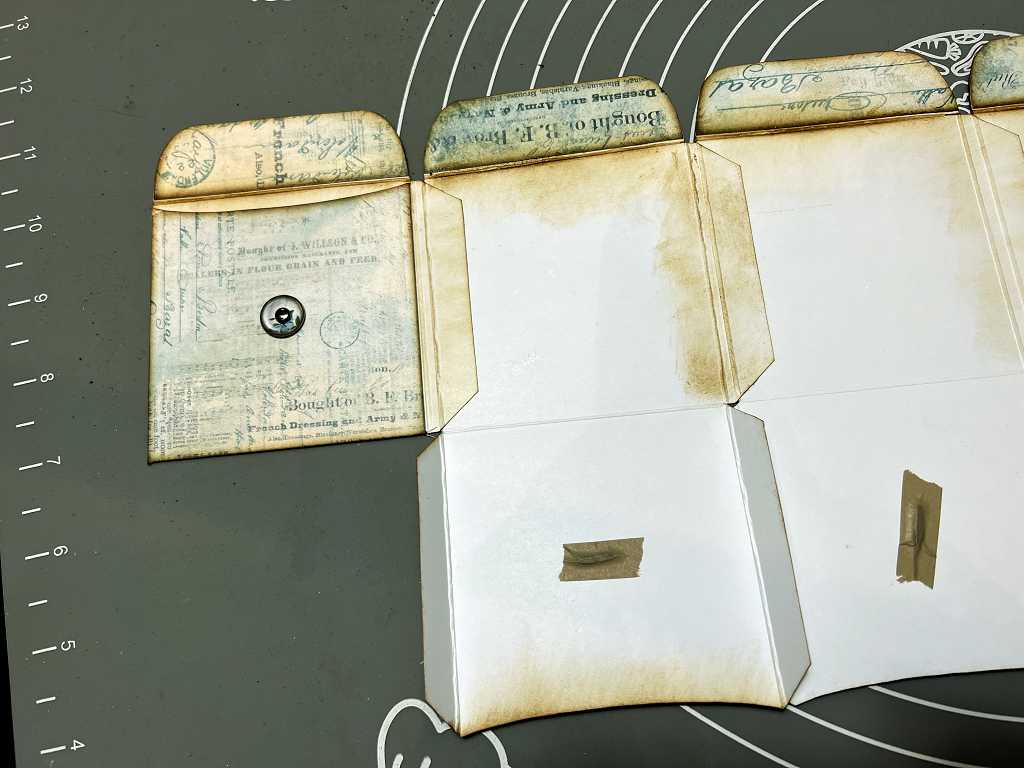
All the pocket backs folded up and glued in place. The final tab on the right-hand side is the one which will attach the whole accordion fold inside the cover of the book.
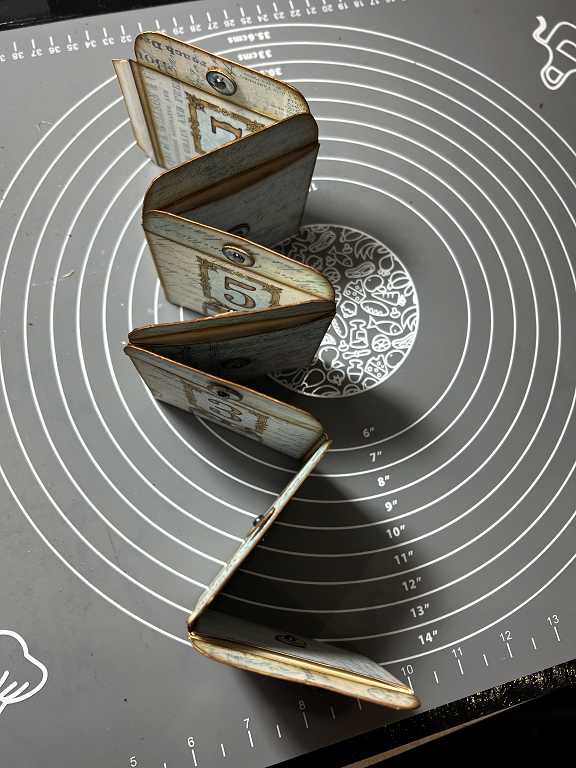
The whole accordion fold flipped over to show the fronts of the pockets.
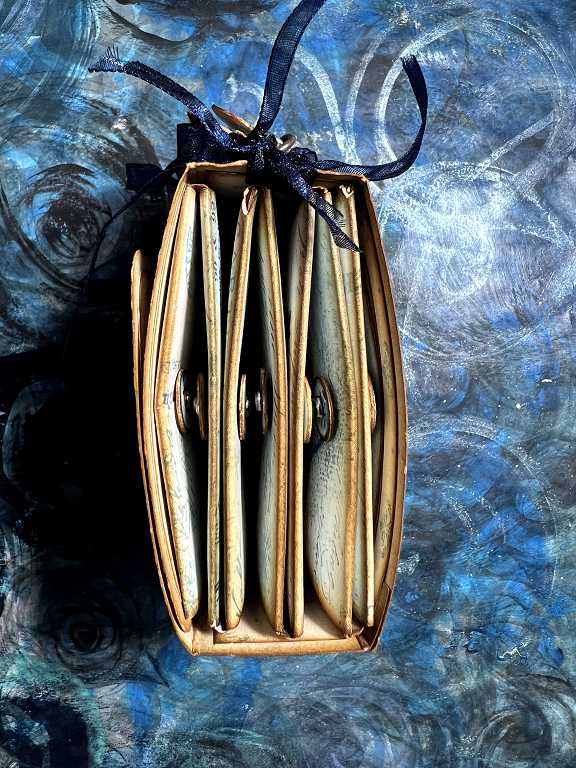
The accordion folded up.
The accordion fold from above.
The final step in making the pockets was to add the closures. In each case, I tied the end of some dark blue embroidery thread around the brad on the body of the pocket, and trimmed off the end under the button so it wouldn’t show. After winding the thread up around the top brad, back around the bottom one, and again around the top one, figue-of-eight style, I was able to cut the thread from the spool, leaving a sufficient length to work the closure. (If I had tied the thread onto the top button, when it was closed, the end of the thread would be pointing upwards and not downwards, and would show out of the top of the book when it was closed, which we don’t want. This way, the result is much more neat and tidy.)

These “button” closures with the yarn work very well on this kind of project, although for this one, they did produce quite a bit of extra thickness. If you follow Tinne’s instructions to the letter, and only put one card in each pocket, this shouldn’t present too much of a problem, but with the four or five cards I put in each pocket, the little book does end up pretty chunky!
A detail photo of the closure.
Once this was done, I was ready to attach the whole accordion fold inside the cover of the book. You can see the tab glued down onto the centre section of the book. The tab on the right, which joins the two halves of the cover together, was inked much more darkly than the pocket attachment tab, so I added some ink to the latter.
At last it was time to add that final panel to the inside of the cover. You can see that the inking on the pocket attachment tab makes it look much better. I also ran my ink blender pad over each fold of the accordion, which made a great improvement.
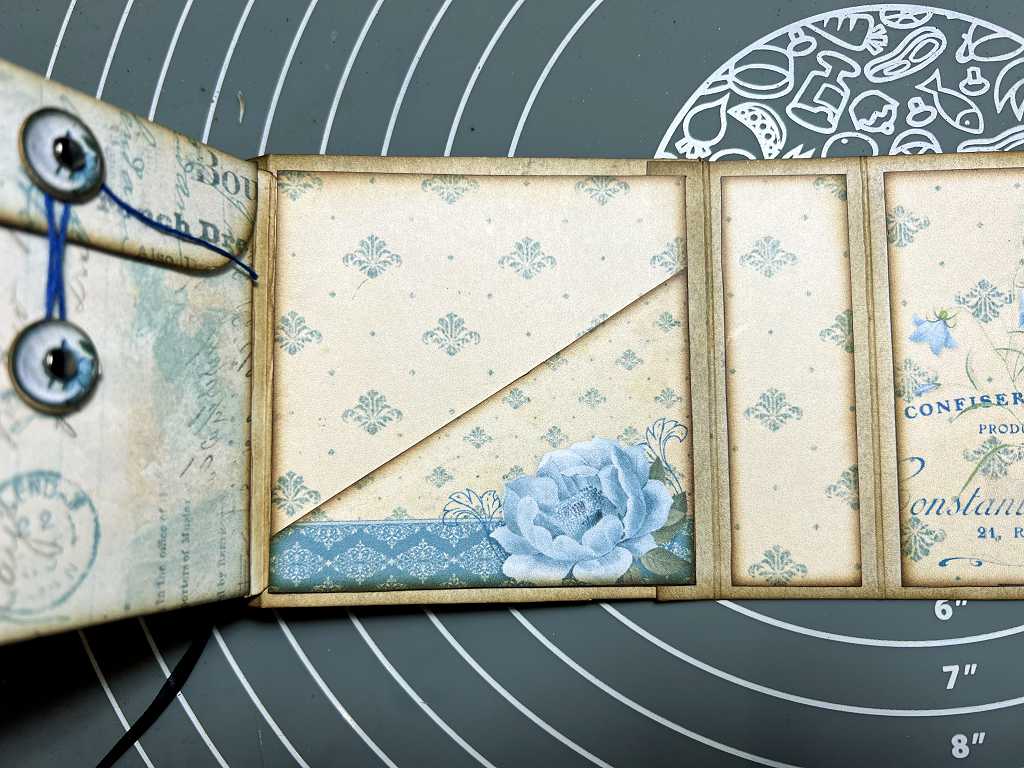
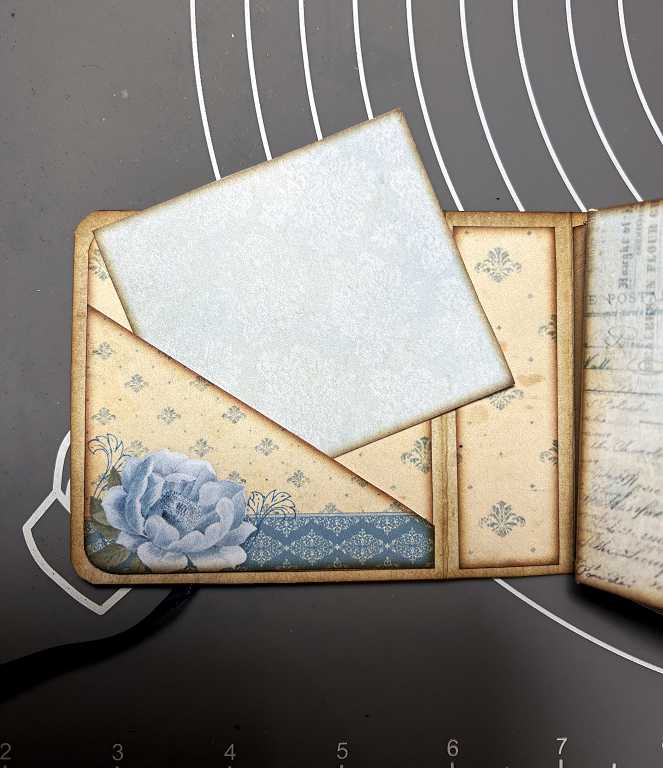
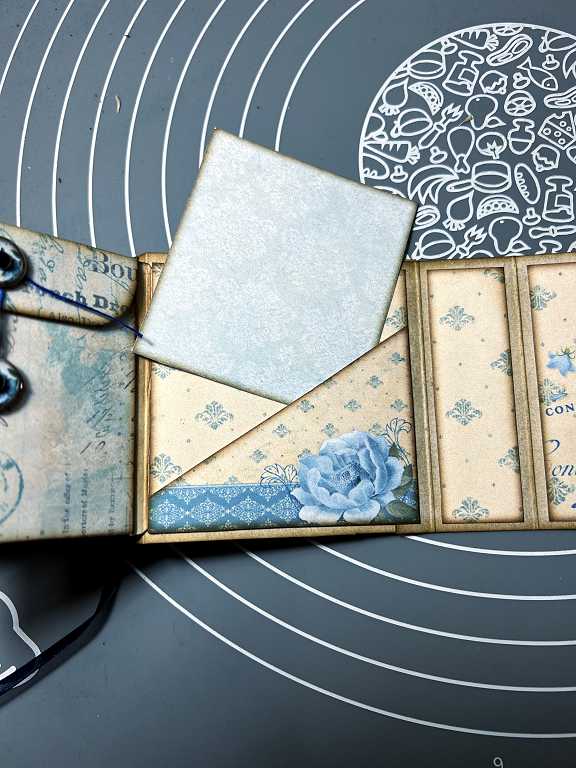
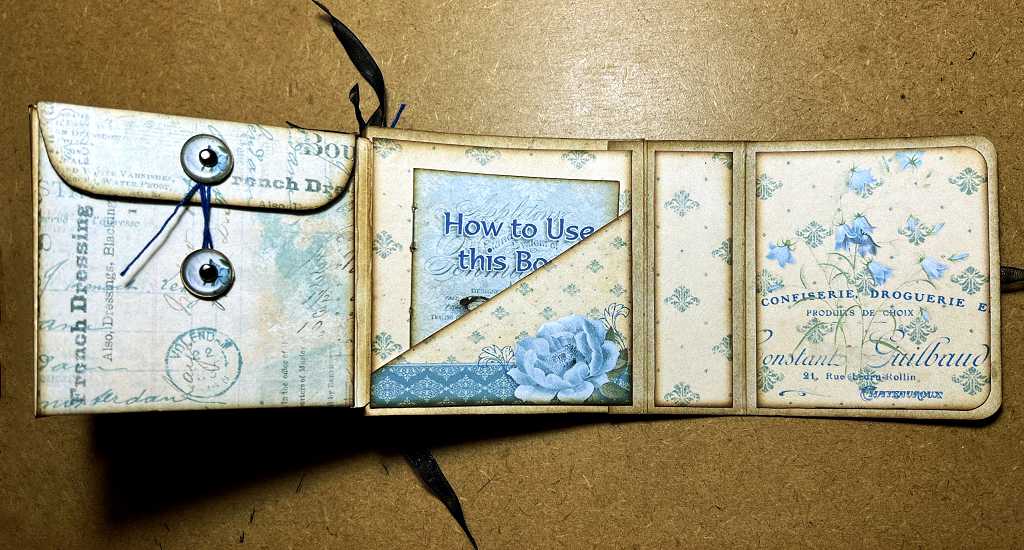
The final additions to the structure of the book were the two diagonal pockets, one on the inside of the front cover (you can see that I rounded the corner to match the cover), and the other on the panel in the centre of the book.
Tinne left it open for us to decide what we wanted to put in these pockets, if anything. I just slipped in a spare card identical to the Scripture cards, to show how the pocket works.
I did the same for the centre pocket.
Additional finishing touches
For my front cover, I made a tiny greetings card (out of 80 gsm copy paper to keep the bulk to a minimum) for my friend, using papers from the kit, and adding the words in my desktop publisher. I have written a personal message inside. I also made a tiny booklet with instructions on how to use this unusual format promise box, and this will go in the centre pocket. You will see pictures of these below.
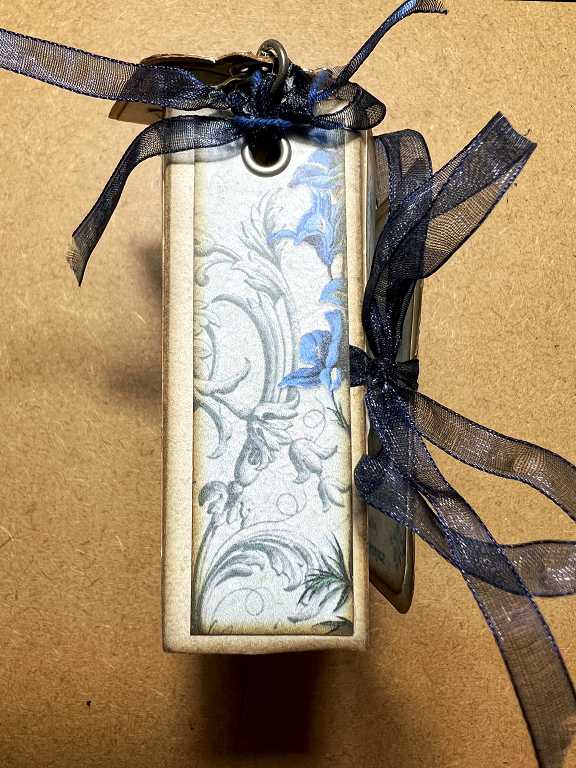
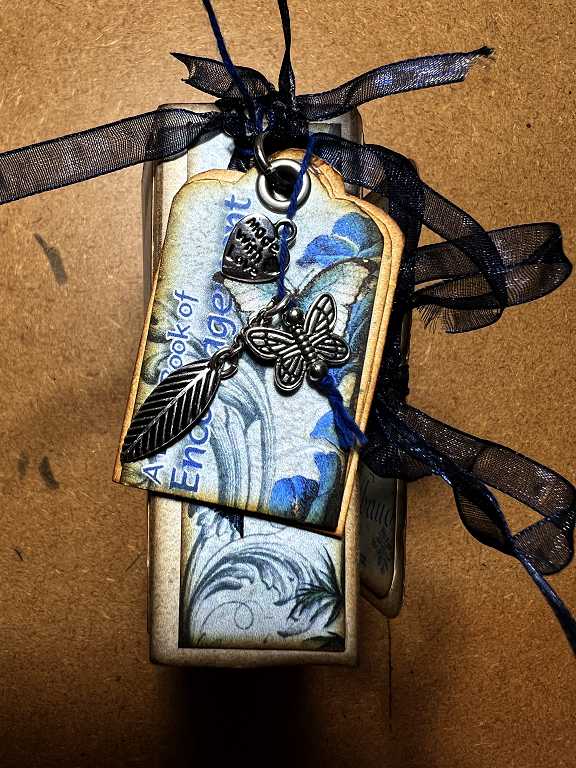
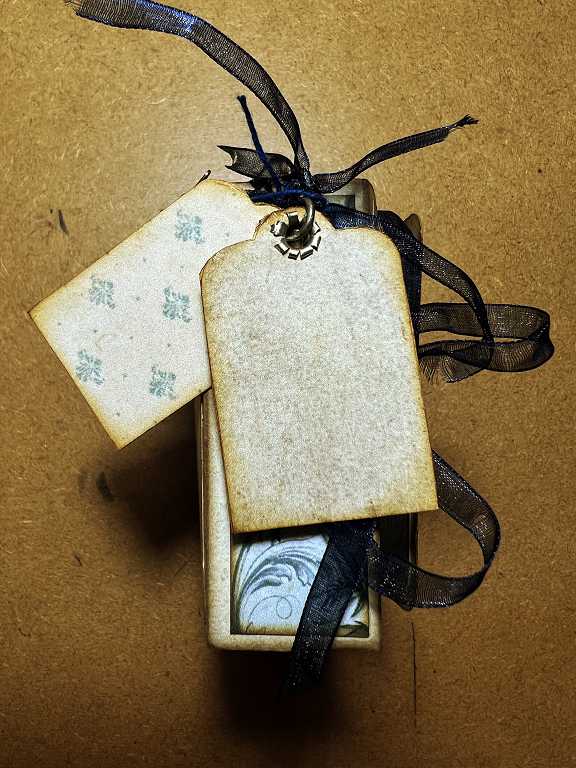
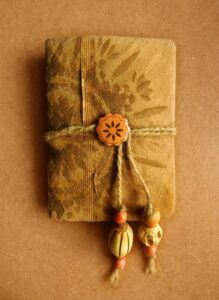
In addition, I punched a hole at the top of the spine and added an eyelet with my Crop-a-dile. Through this, with some of the dark blue ribbon used for the book closure, I attached two little tags made from papers in the kit, one with the title of the book, and the other with some fussy-cut butterflies. Both tags also had eyelets fitted. I tied on some little metal charms with a piece of the blue embroidery thread used for the accordion pocket closures. Finally, I added some offcuts of the ribbon used to close the book. All of this makes a pretty little embellishment for the spine of the book. You can see pictures below.
Final photos of the completed project
Here is a complete view of the little accordion booklet from start to finish.
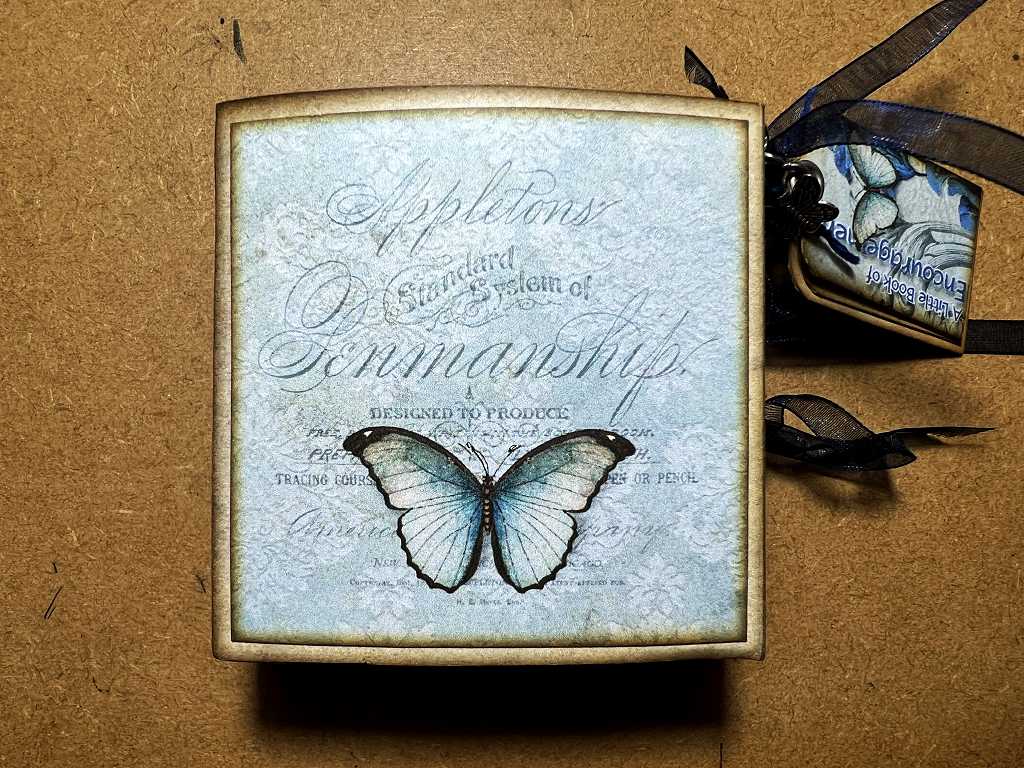
The front cover.
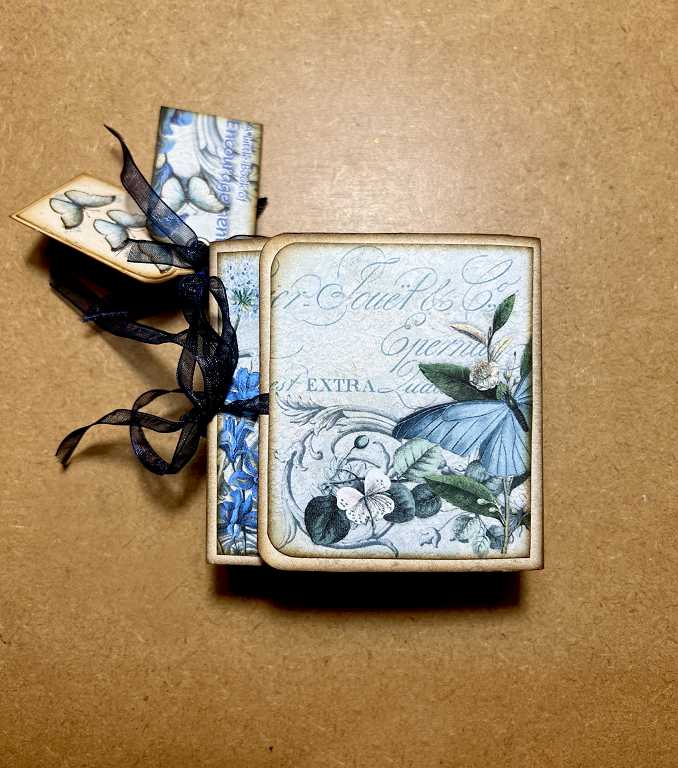
The spine.
The two little tags on the spine, tied through eyelets with ribbon.
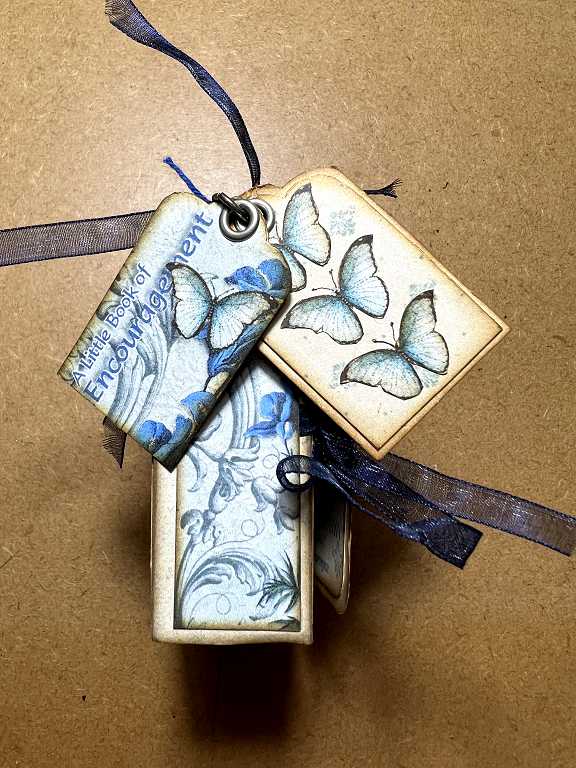
Three little metal charms attached with dark blue embroidery thread.
The backs of the tags.
The back of the book.
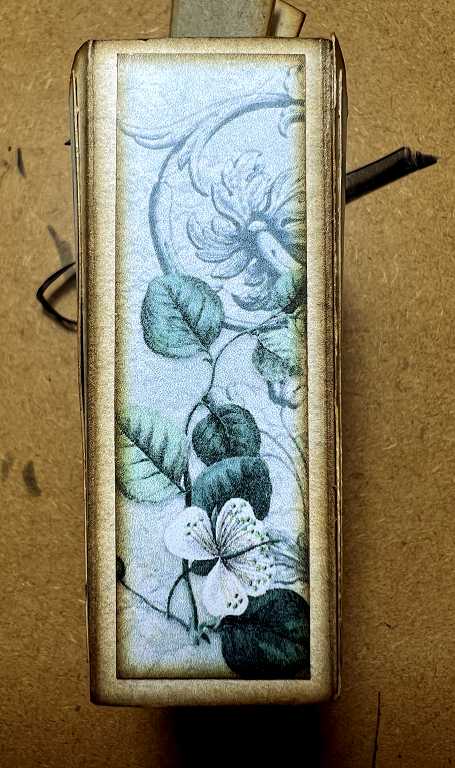
The other spine.
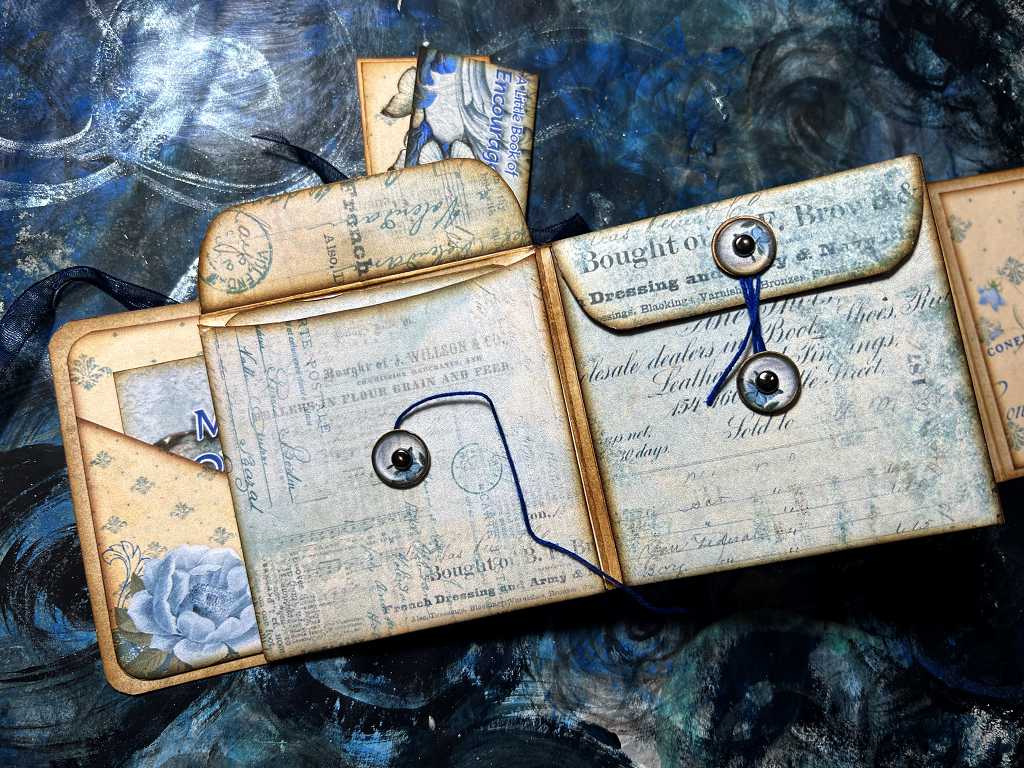
Opening the front cover.
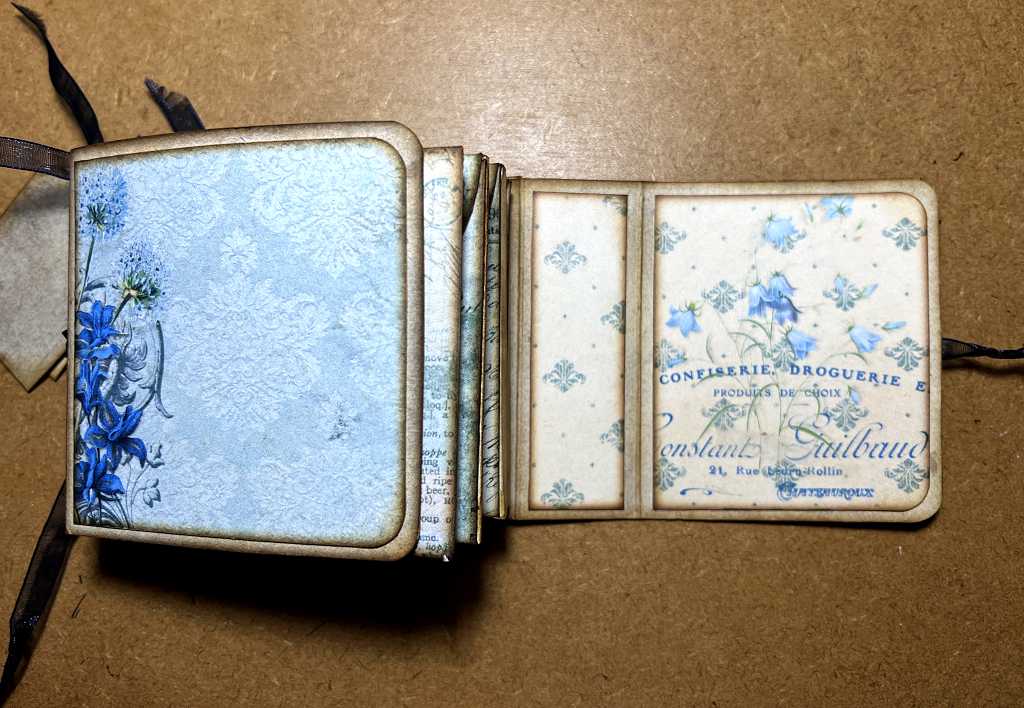
Opening the second flap reveals the contents of the book.
Flipping over the whole accordion folder, you can see the pocket in the centre of the book which holds the instruction booklet.
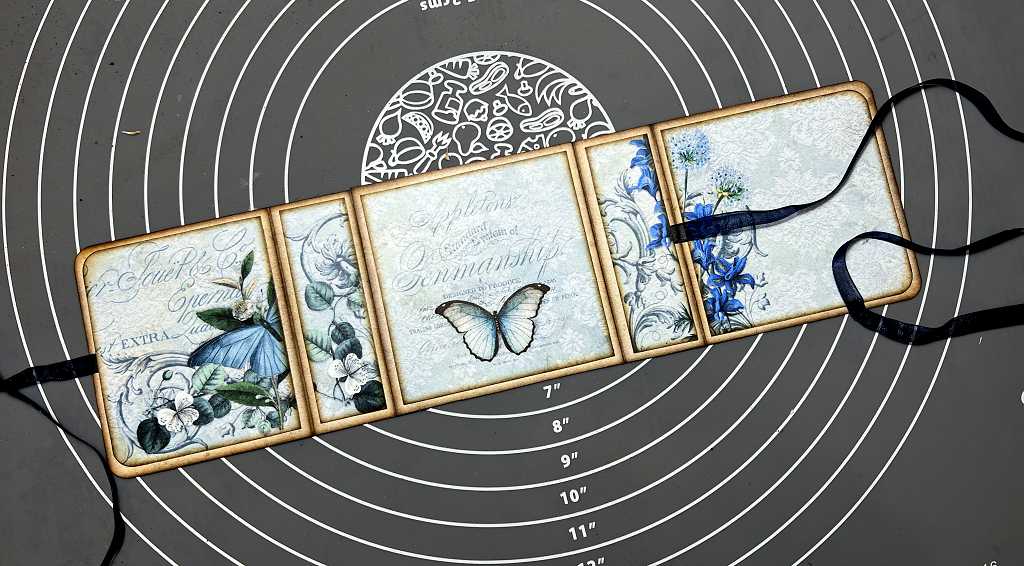
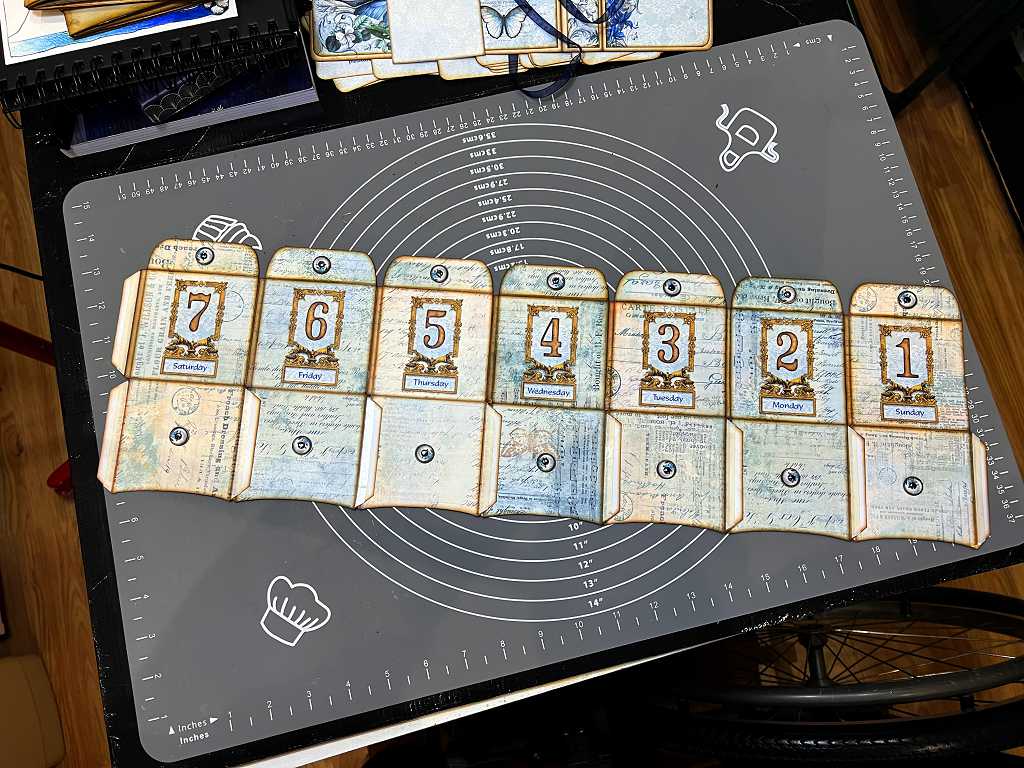
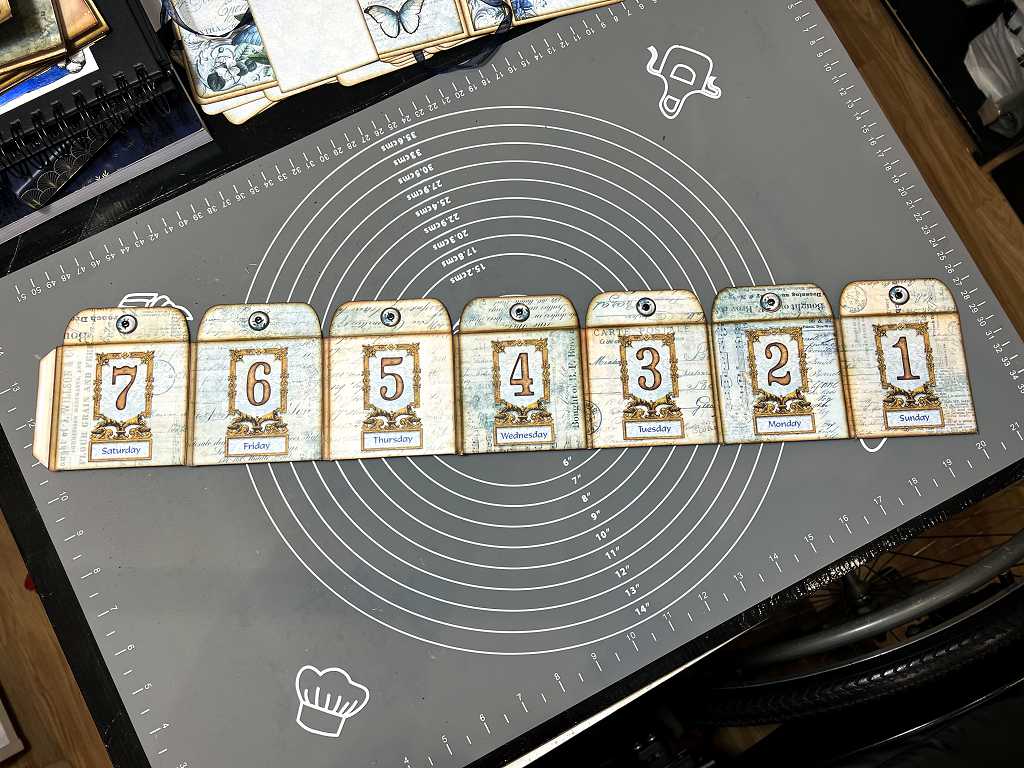
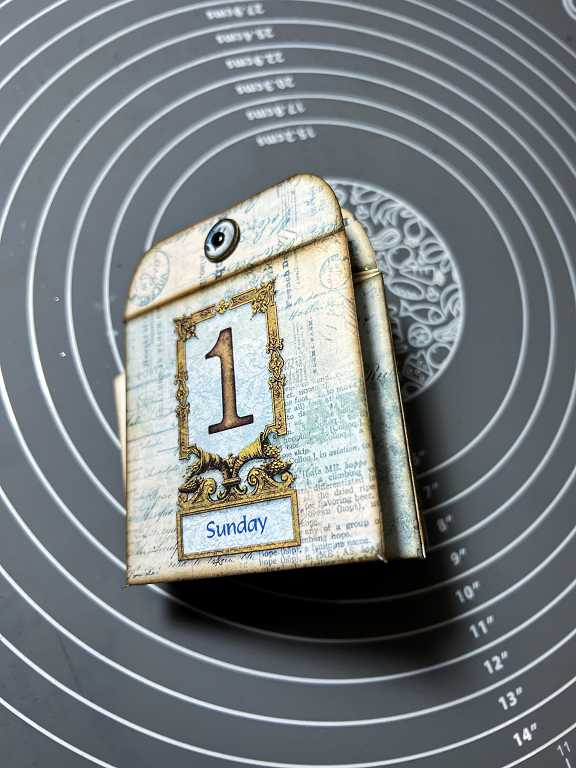
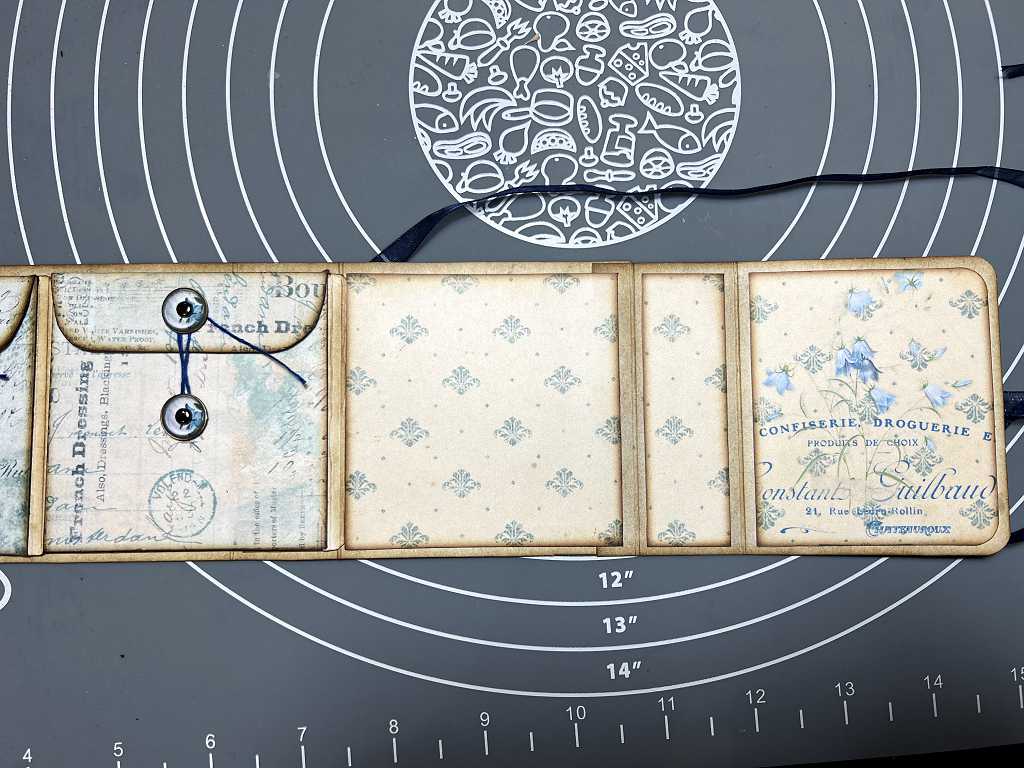
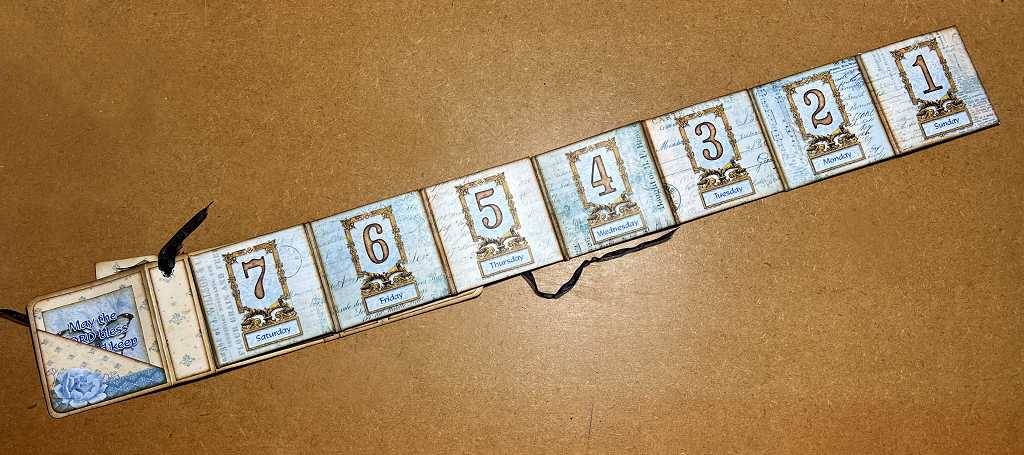
Unfolding the accordion to reveal the fronts of the pockets, numbered and named with the days of the week.
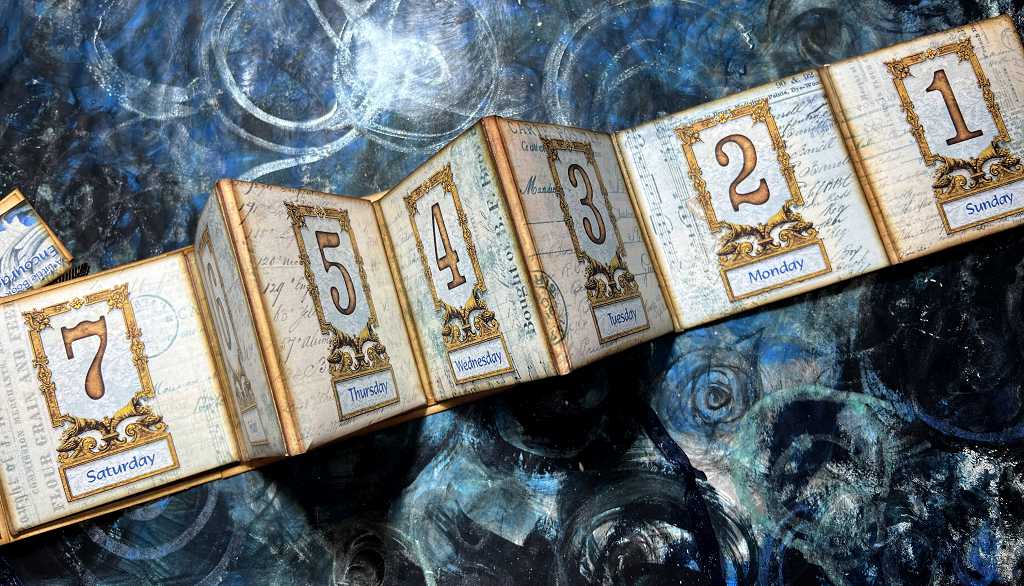
The front side of the accordion fully unfolded.
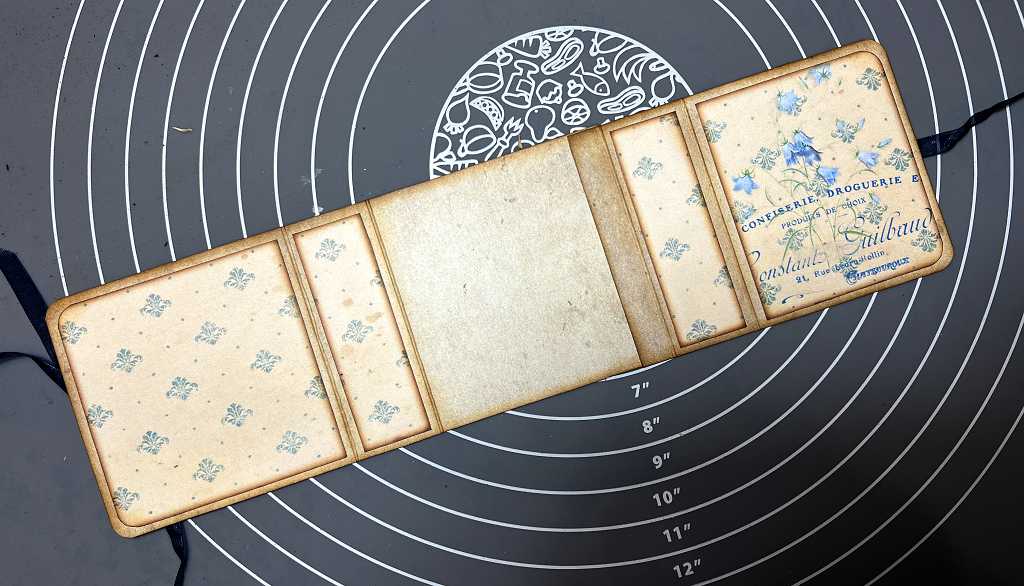
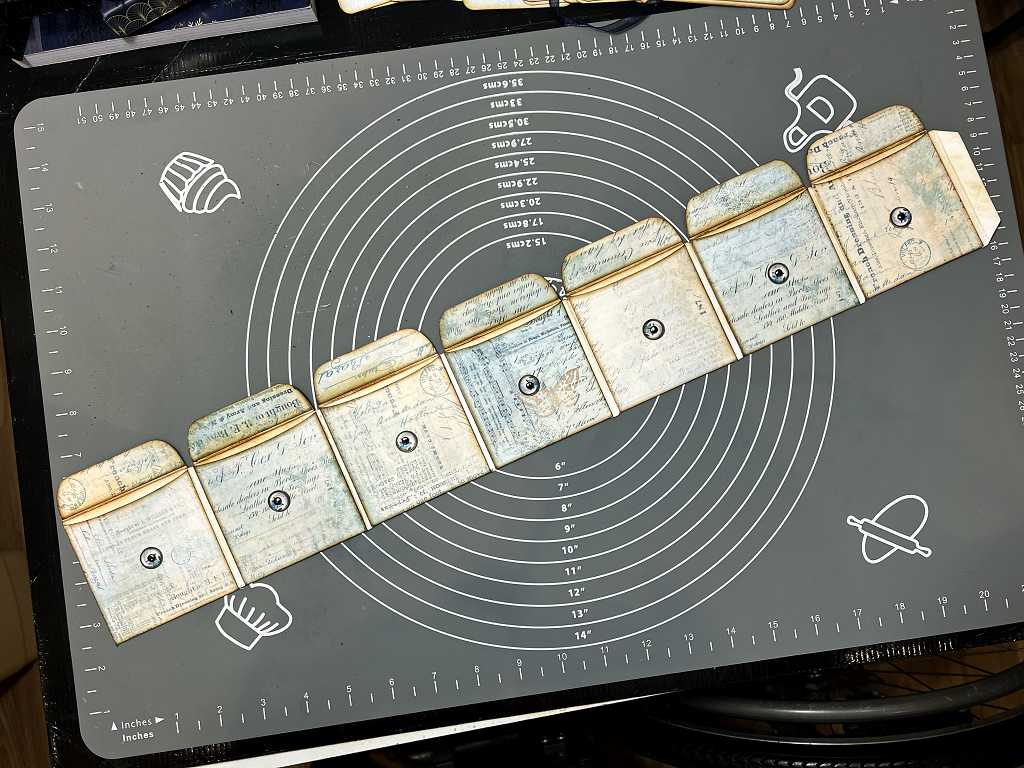
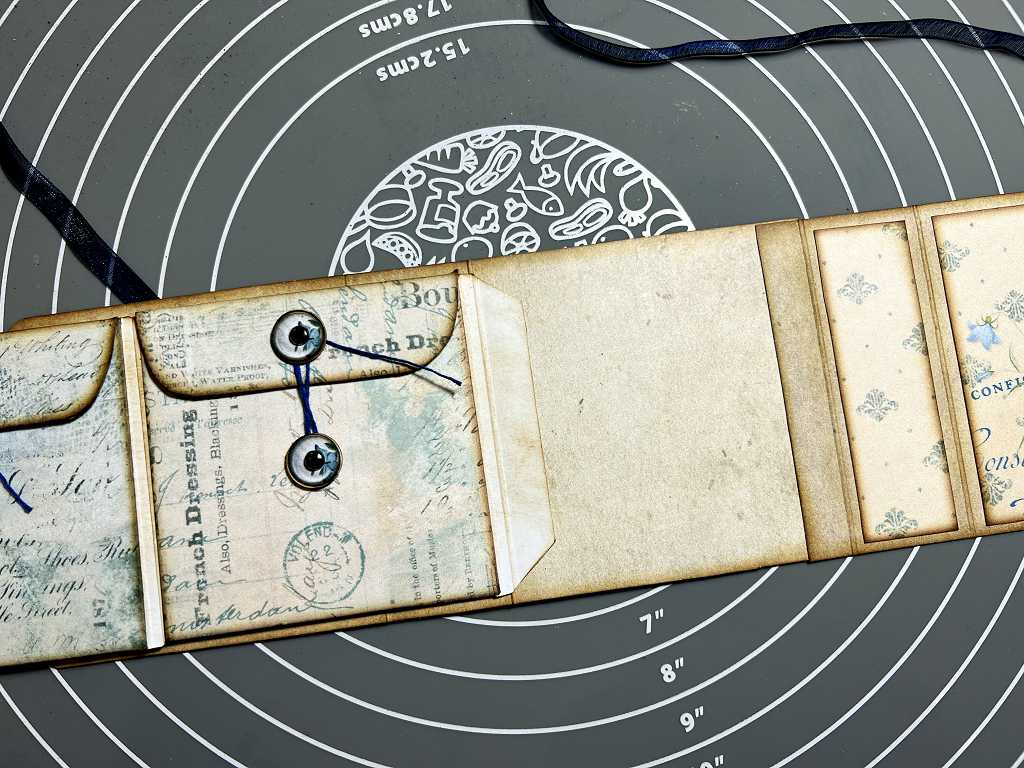
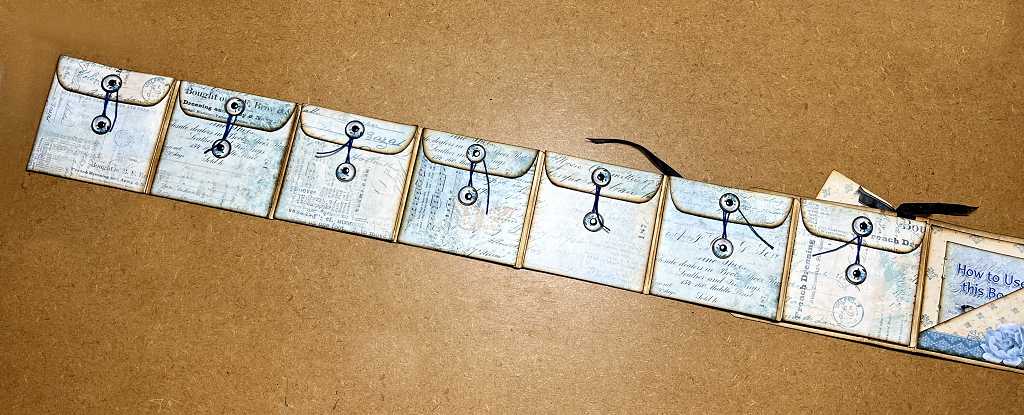
The reverse side of the accordion, showing the pocket closures.
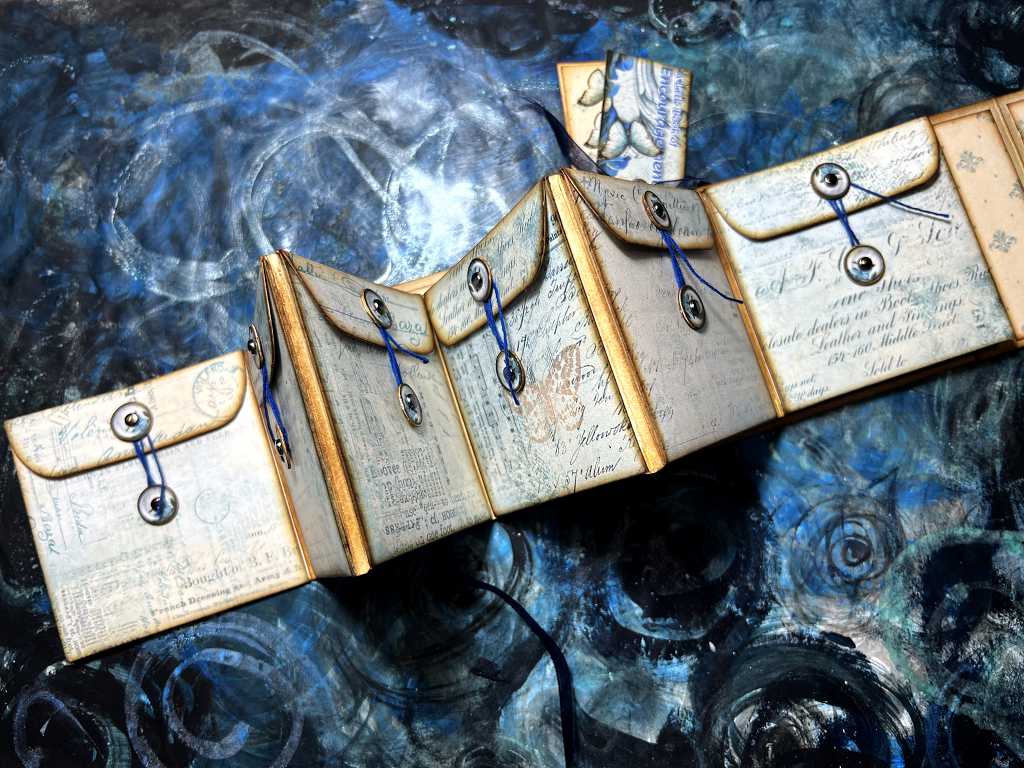
The reverse side of the accordion fully unfolded.
One of the pockets opened, showing the Scripture cards inside.
The Scripture cards emerging from the pocket.
The little greeting card for my friend, which goes in the pocket inside the front cover.

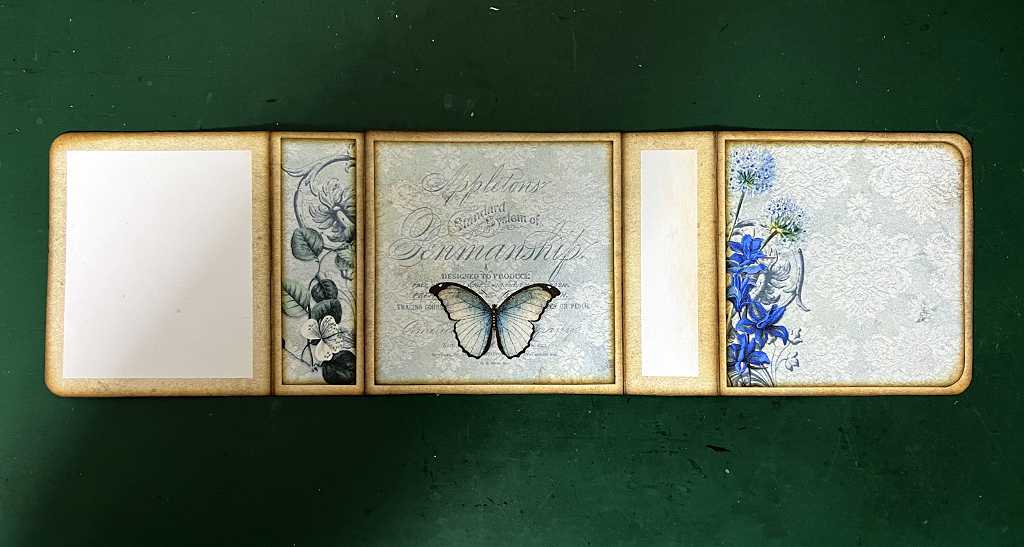
The front cover of the little instruction booklet, which lives in the pocket in the centre of the book. It is bound with two staples.

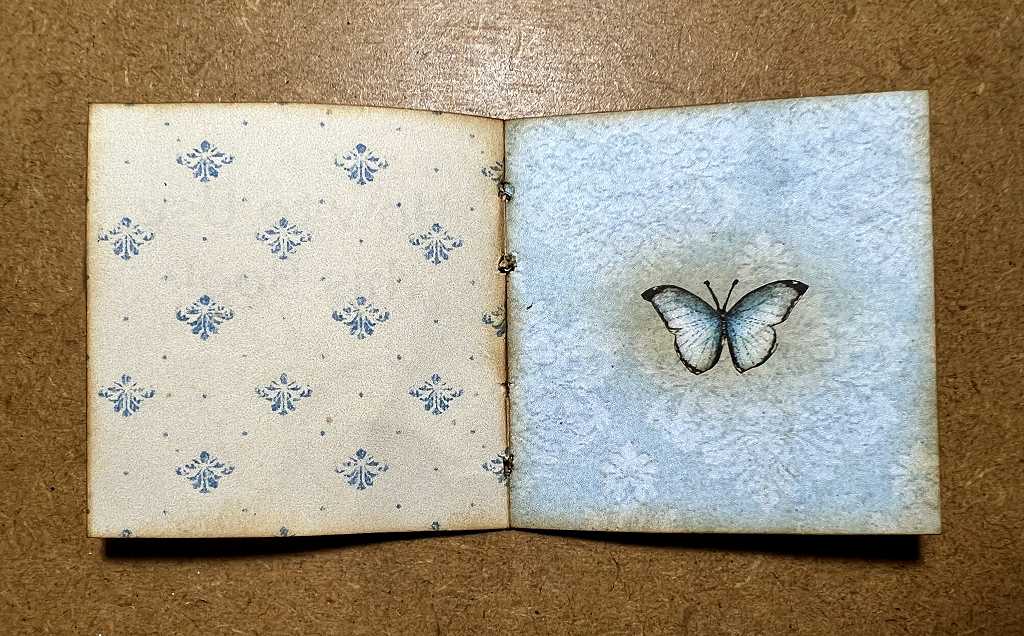
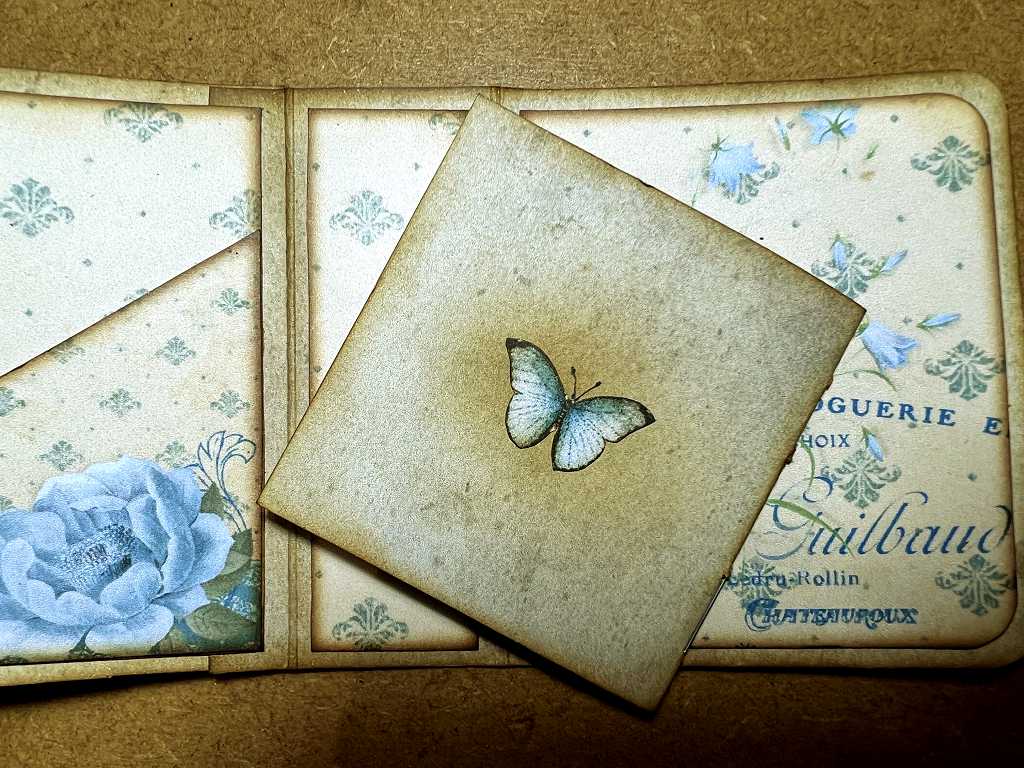
Inside the front cover of the instruction booklet. I added a little Vintage Photo Distress Ink behind the butterfly before glueing it down.
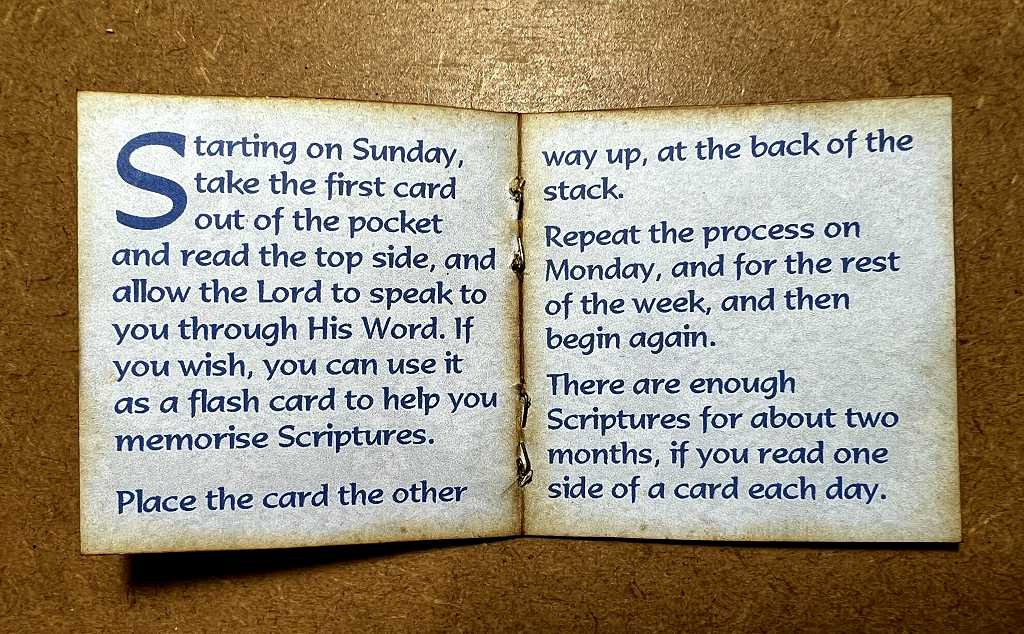
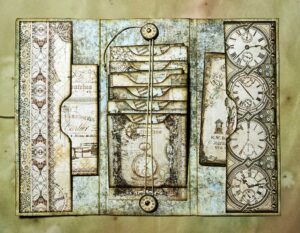
The centrefold of the instruction booklet, with directions on how to use the book. It’s a bit hard to see in the photo, but the lettering in dark blue is outlined with a thin line of white.
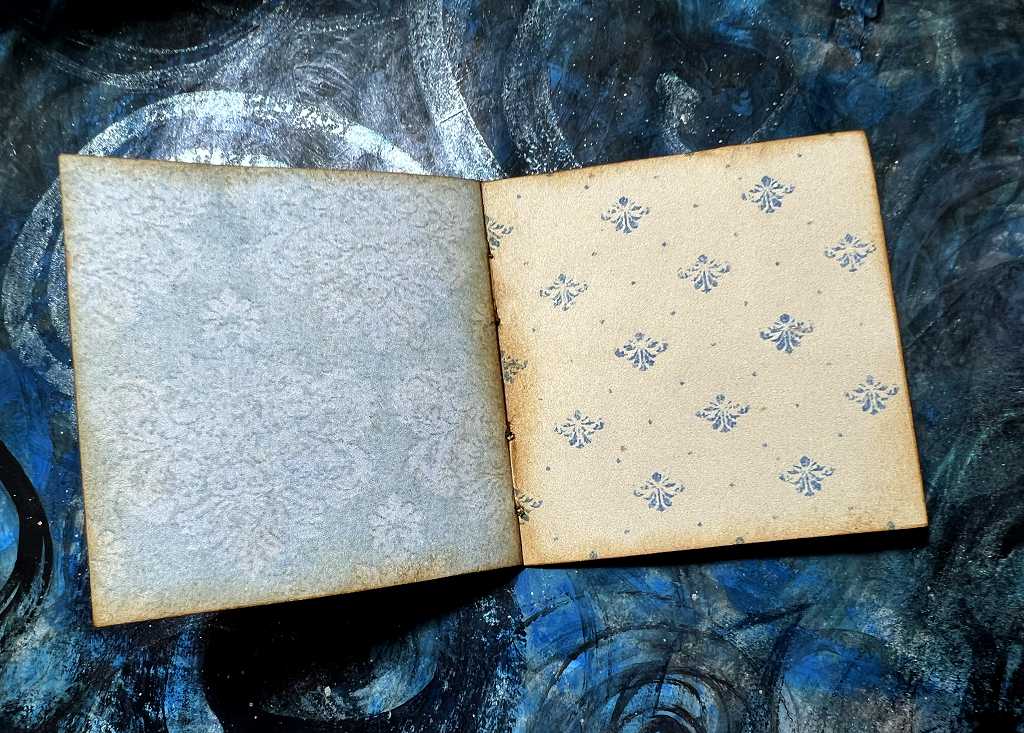
Inside the back cover of the booklet.
The back cover of the booklet. Again, I have inked behind the butterfly.
This is what the closed book looks like from above. You can see that it is quite chubby, and that the brads really add to the thickness of it. Having so many cards in each pocket doesn’t do much for its obesity problem either!
Finally, how the book looks from the bottom. Not so chubby from this angle, because the brads are at the top.

I hope my friend will find much encouragement in the contents of this charming little fold-out booklet, and that she will enjoy it for its own sake – it is a very attractive object in its own right. Thanks, Tinne, for your gorgeous little freebie!
P.S. We went over to visit her on Saturday evening and I am pleased to report that she absolutely loves her little gift!

As the recipient of this truly exquisite and unique gift I can say I am well and truly amazed at it and it’s been fascinating to read how you constructed it all Shoshi – what a lot of work, love and care went into this very special accordion book – a gift that keeps on giving every single day. The amazing variety on each piece of card is superb and I particularly love the music on the back of Day 4!
The whole item is so beautifully made and thank you SO much for this truly special gift. Undoing the organza ribbon each morning and untwiddling the button closures is like opening a present every day. I will treasure it.