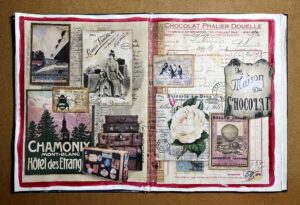
I have had such a lovely day on Saturday, full of creativity, receiving gifts, and ending with a really great phone conversation with a friend in the evening. My birthday present arrived from Ebay – my hubby is giving me a lovely boxed set of hardback books – the complete Chronicles of Narnia by C.S. Lewis, magically illustrated by Pauline Baynes. I grew up with these books from about the age of nine (60 years ago! Yikes!!) and have loved them all my life. I had the Puffin paperbacks but since the house move in 2013 these seem to have disappeared. This set is very much more special. It’s second-hand but in good condition. I am restraining myself and giving them to my hubby to keep until my birthday at the end of the month.
Organic Journal
In the morning my hubby went to a local boat jumble. Apparently they have people selling all sorts of other stuff apart from boat-related things, and along with a few boaty bits, my hubby bought me a present – an early wedding anniversary present for 24th. He spotted this book on someone’s table and knew he had to get it.

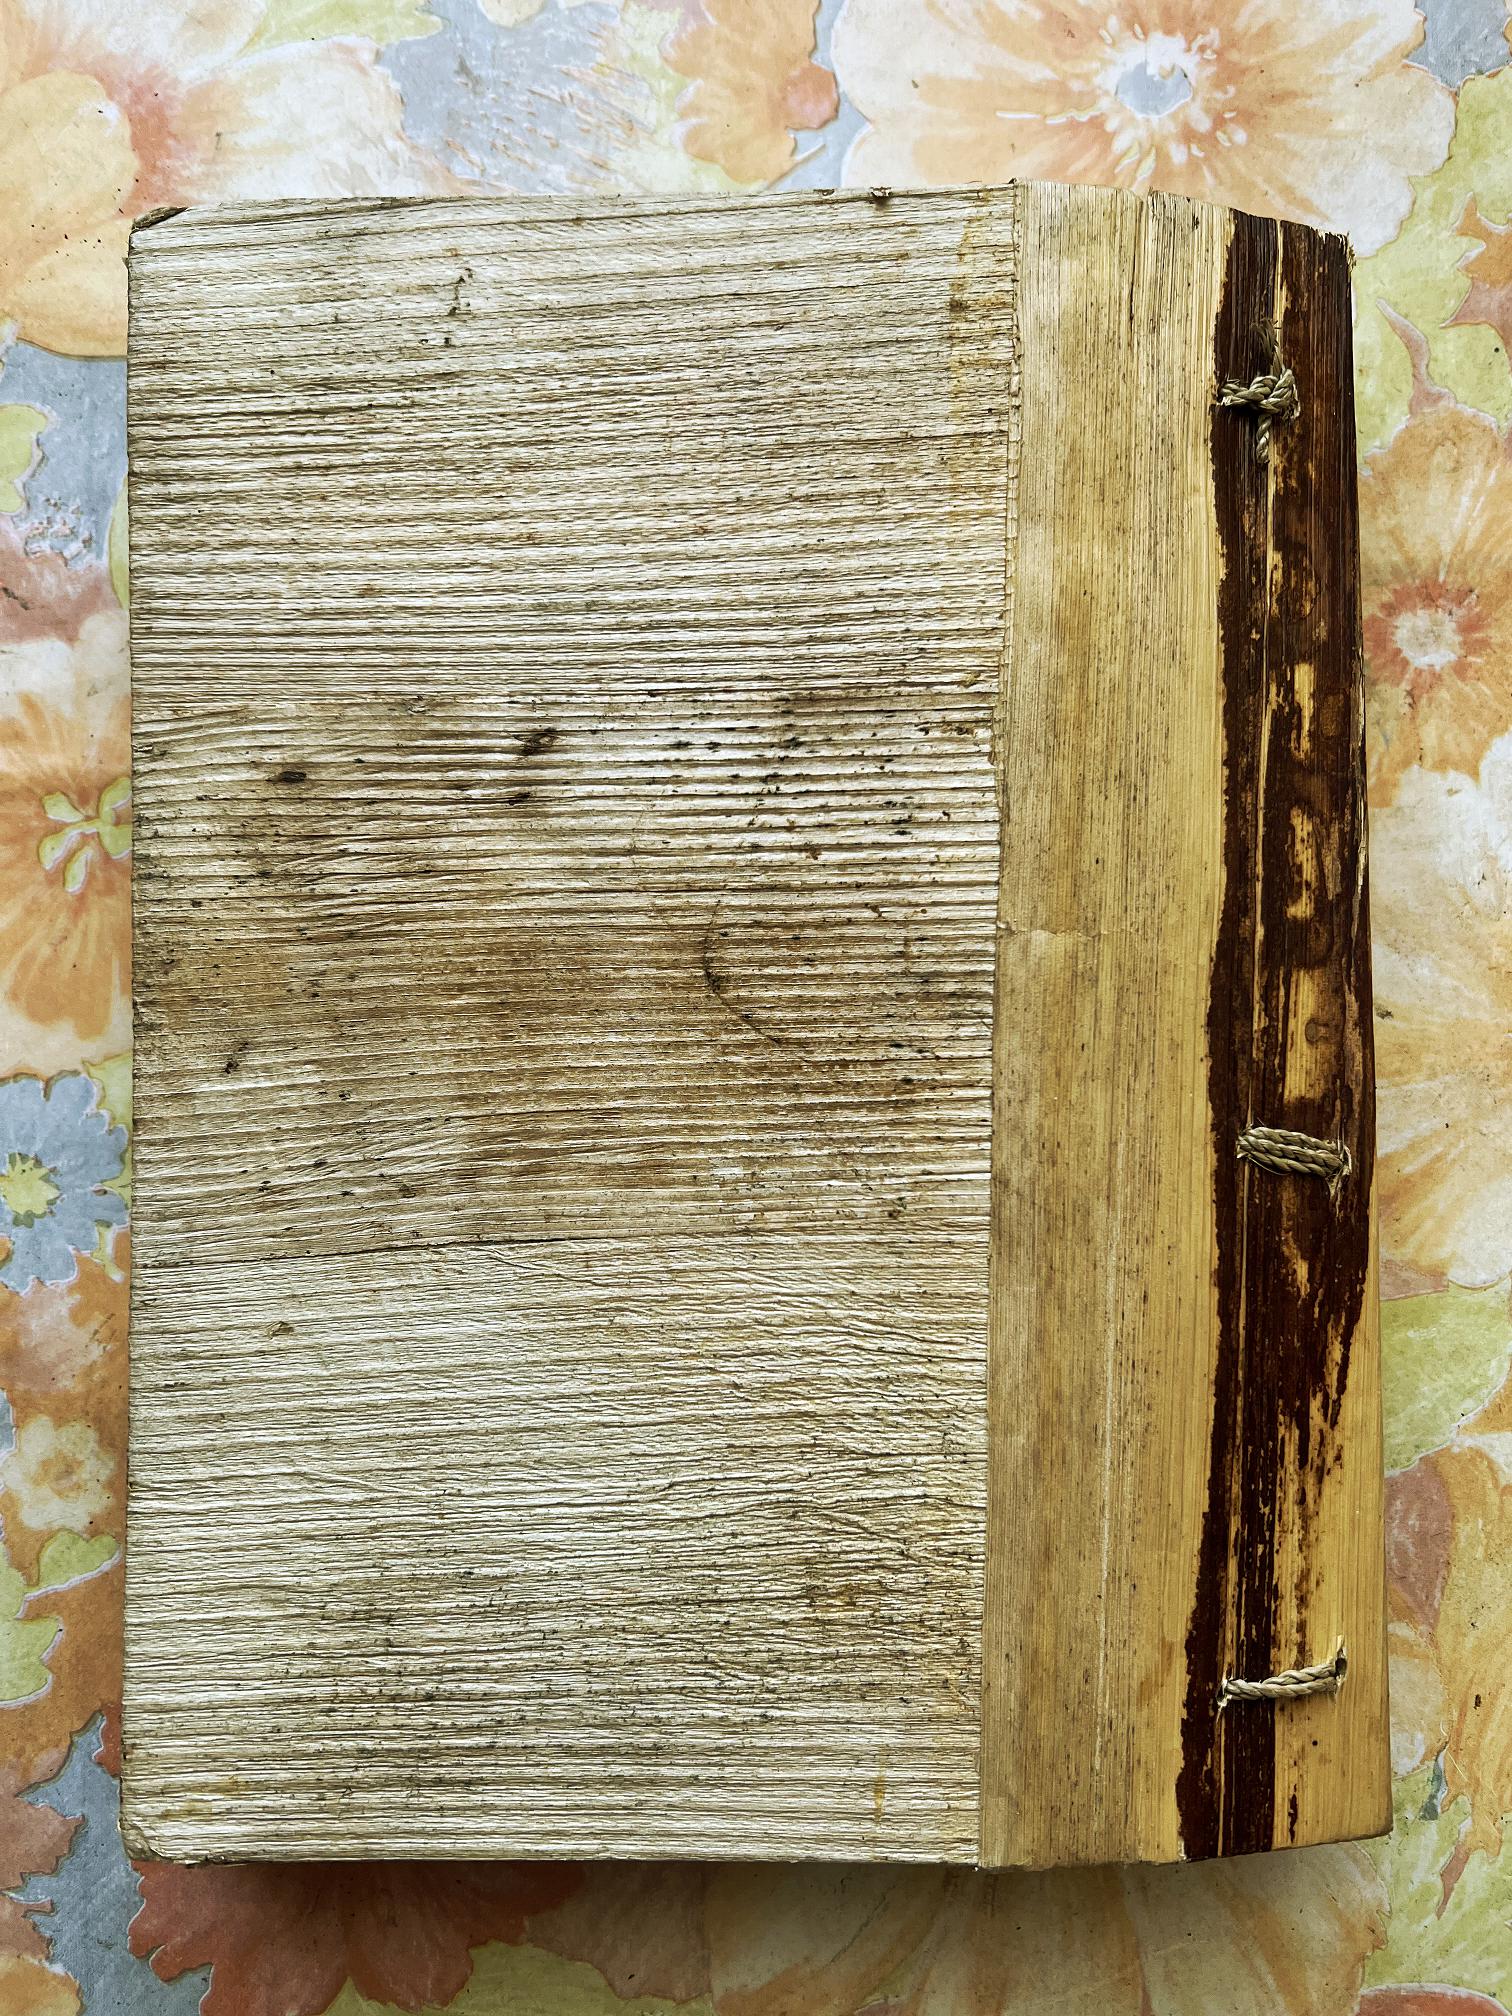
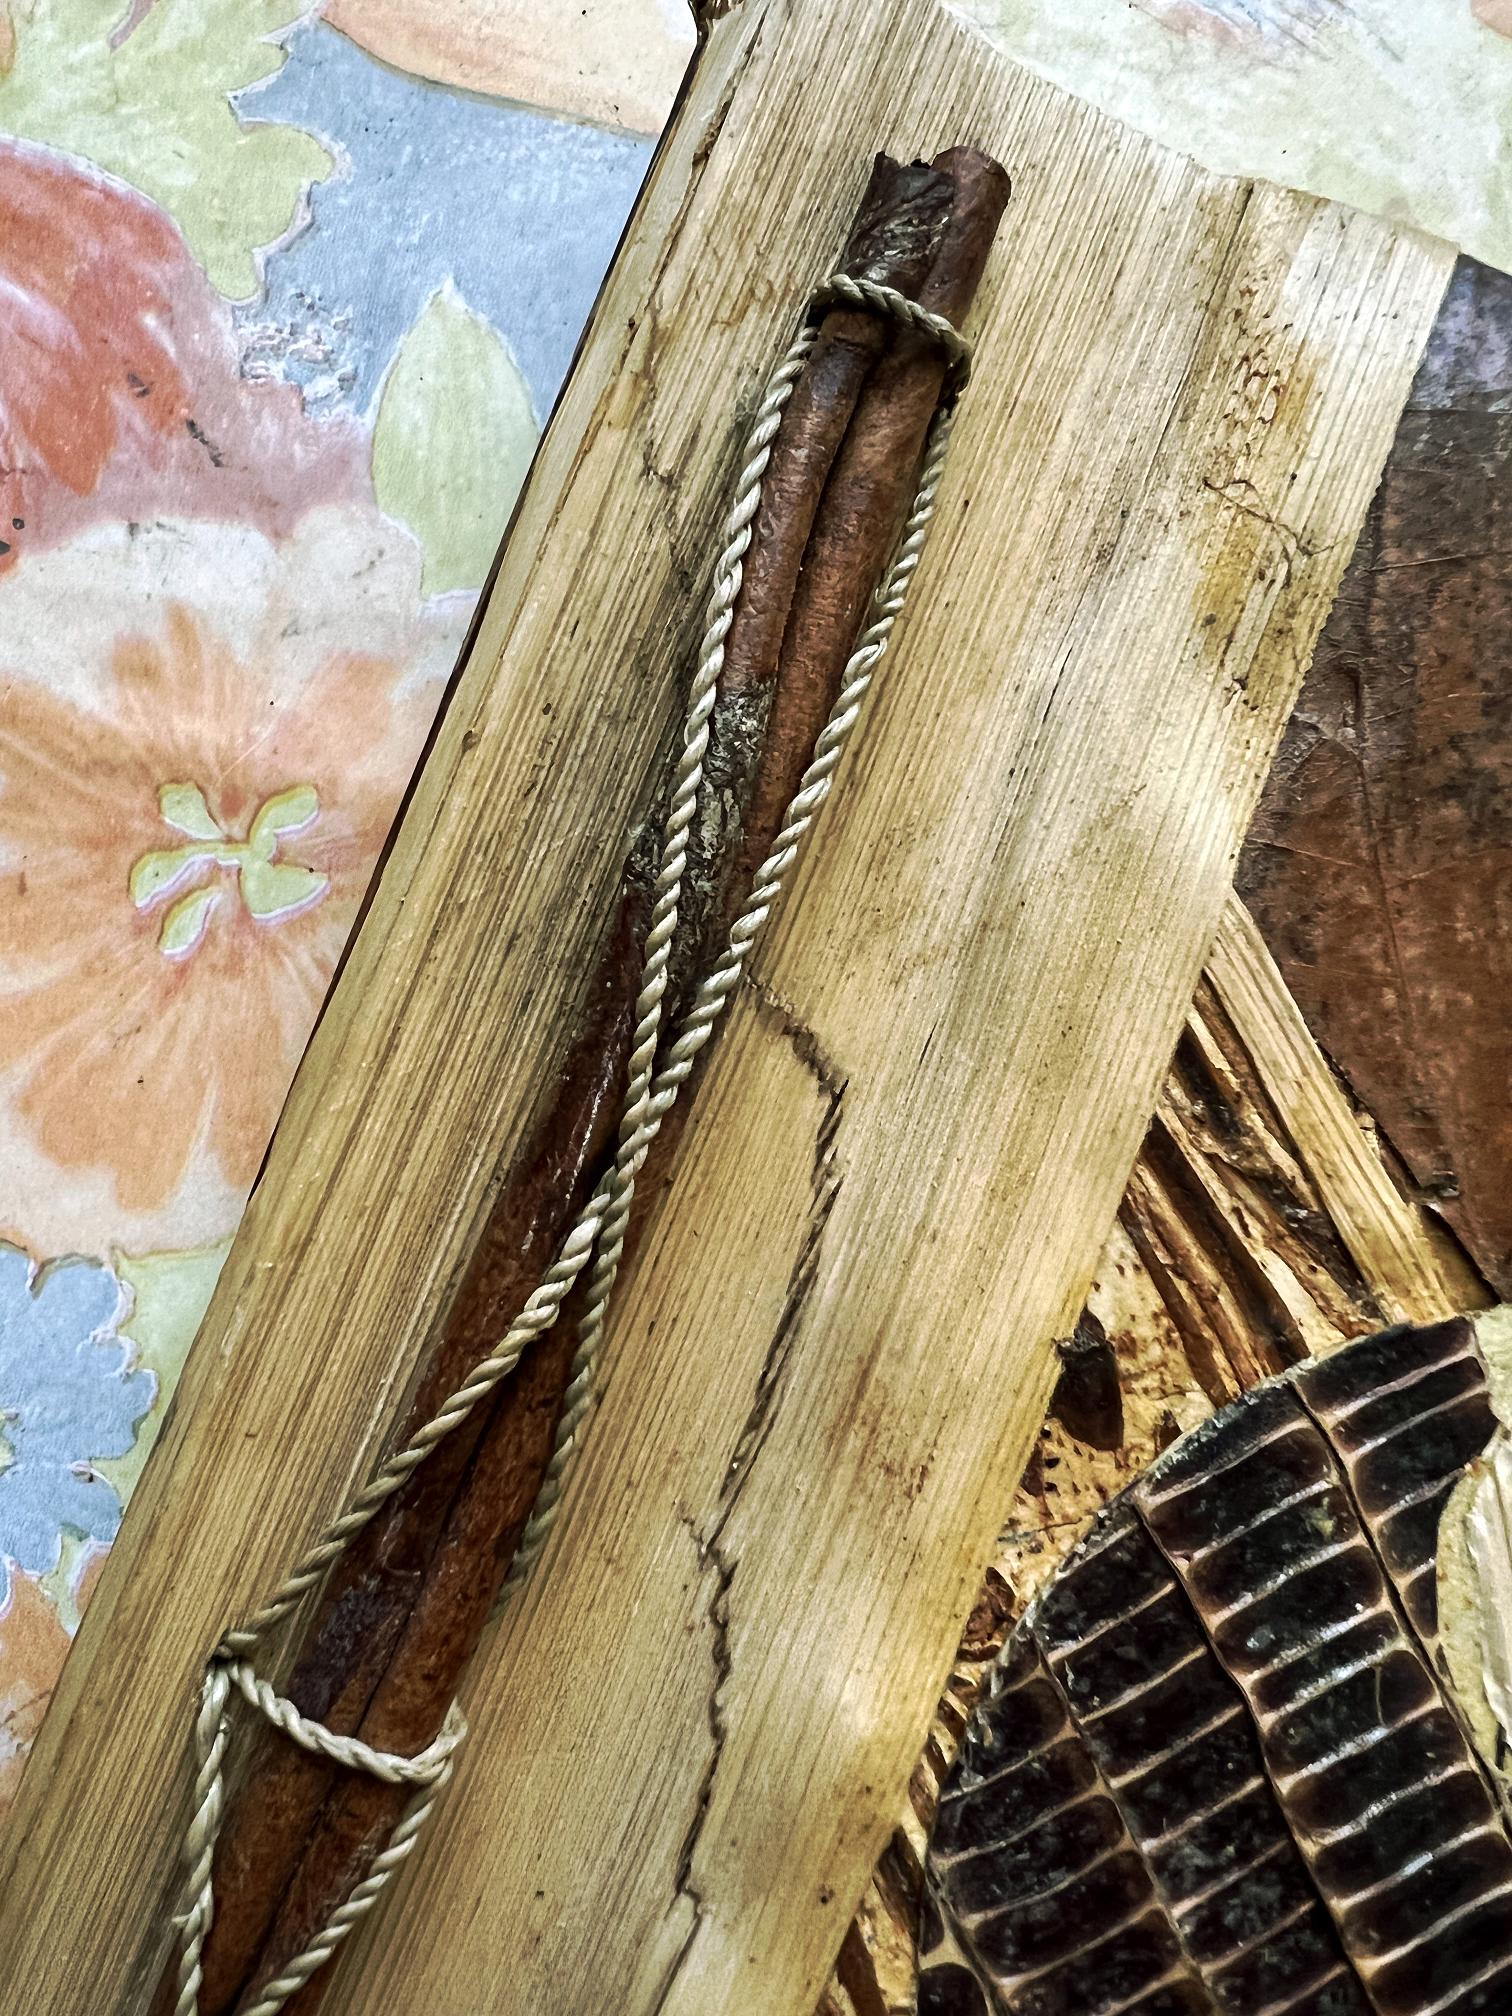
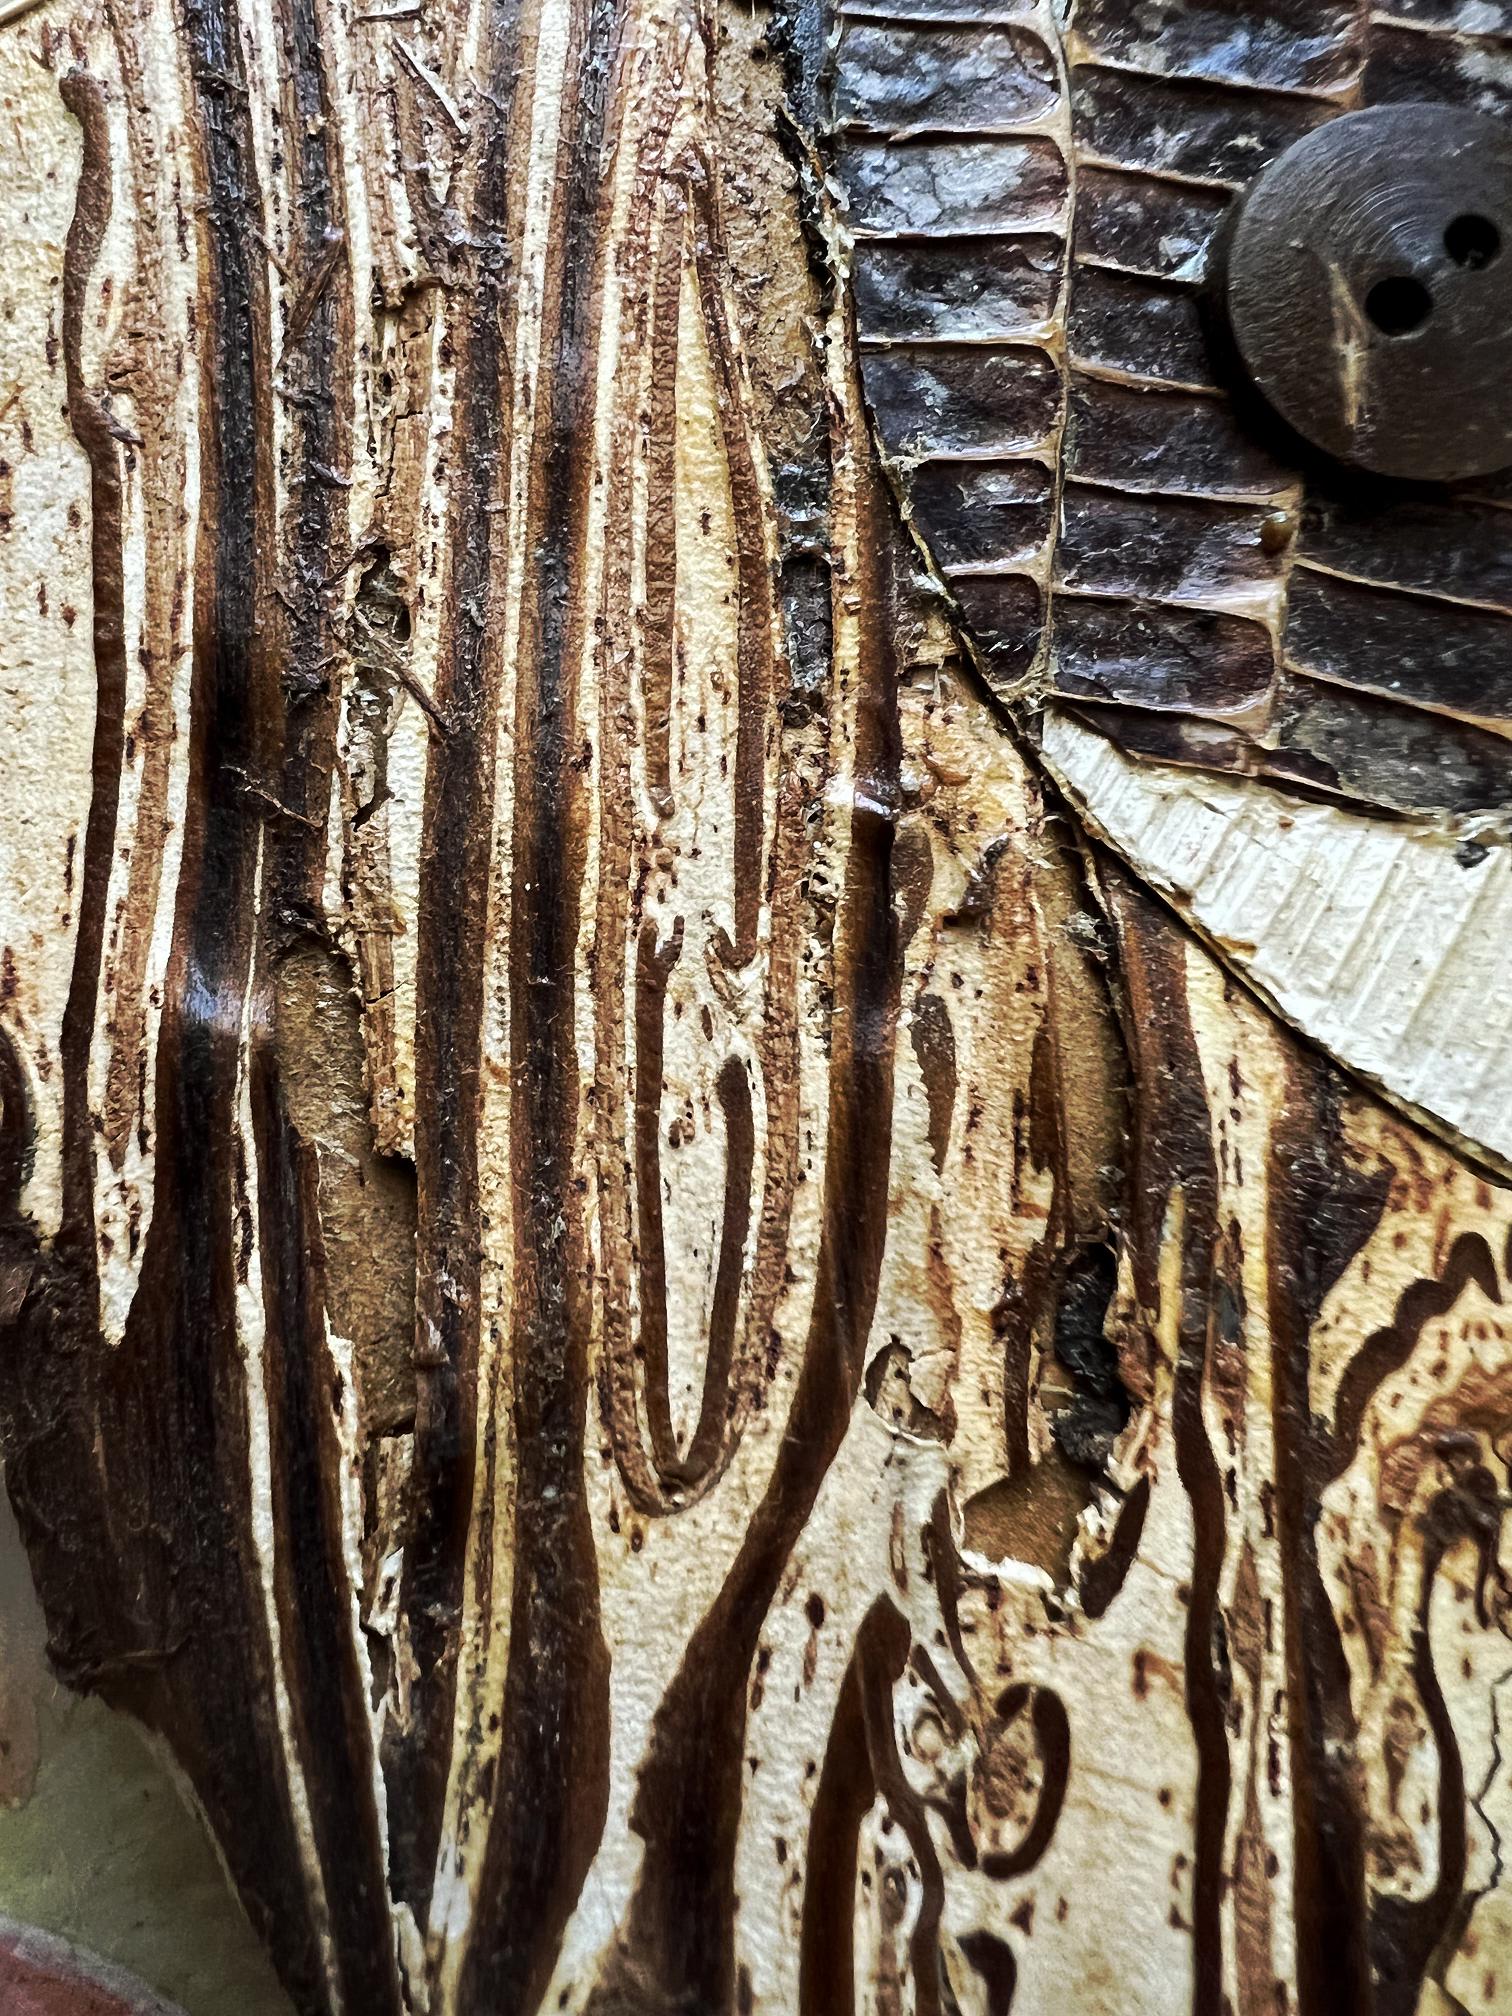
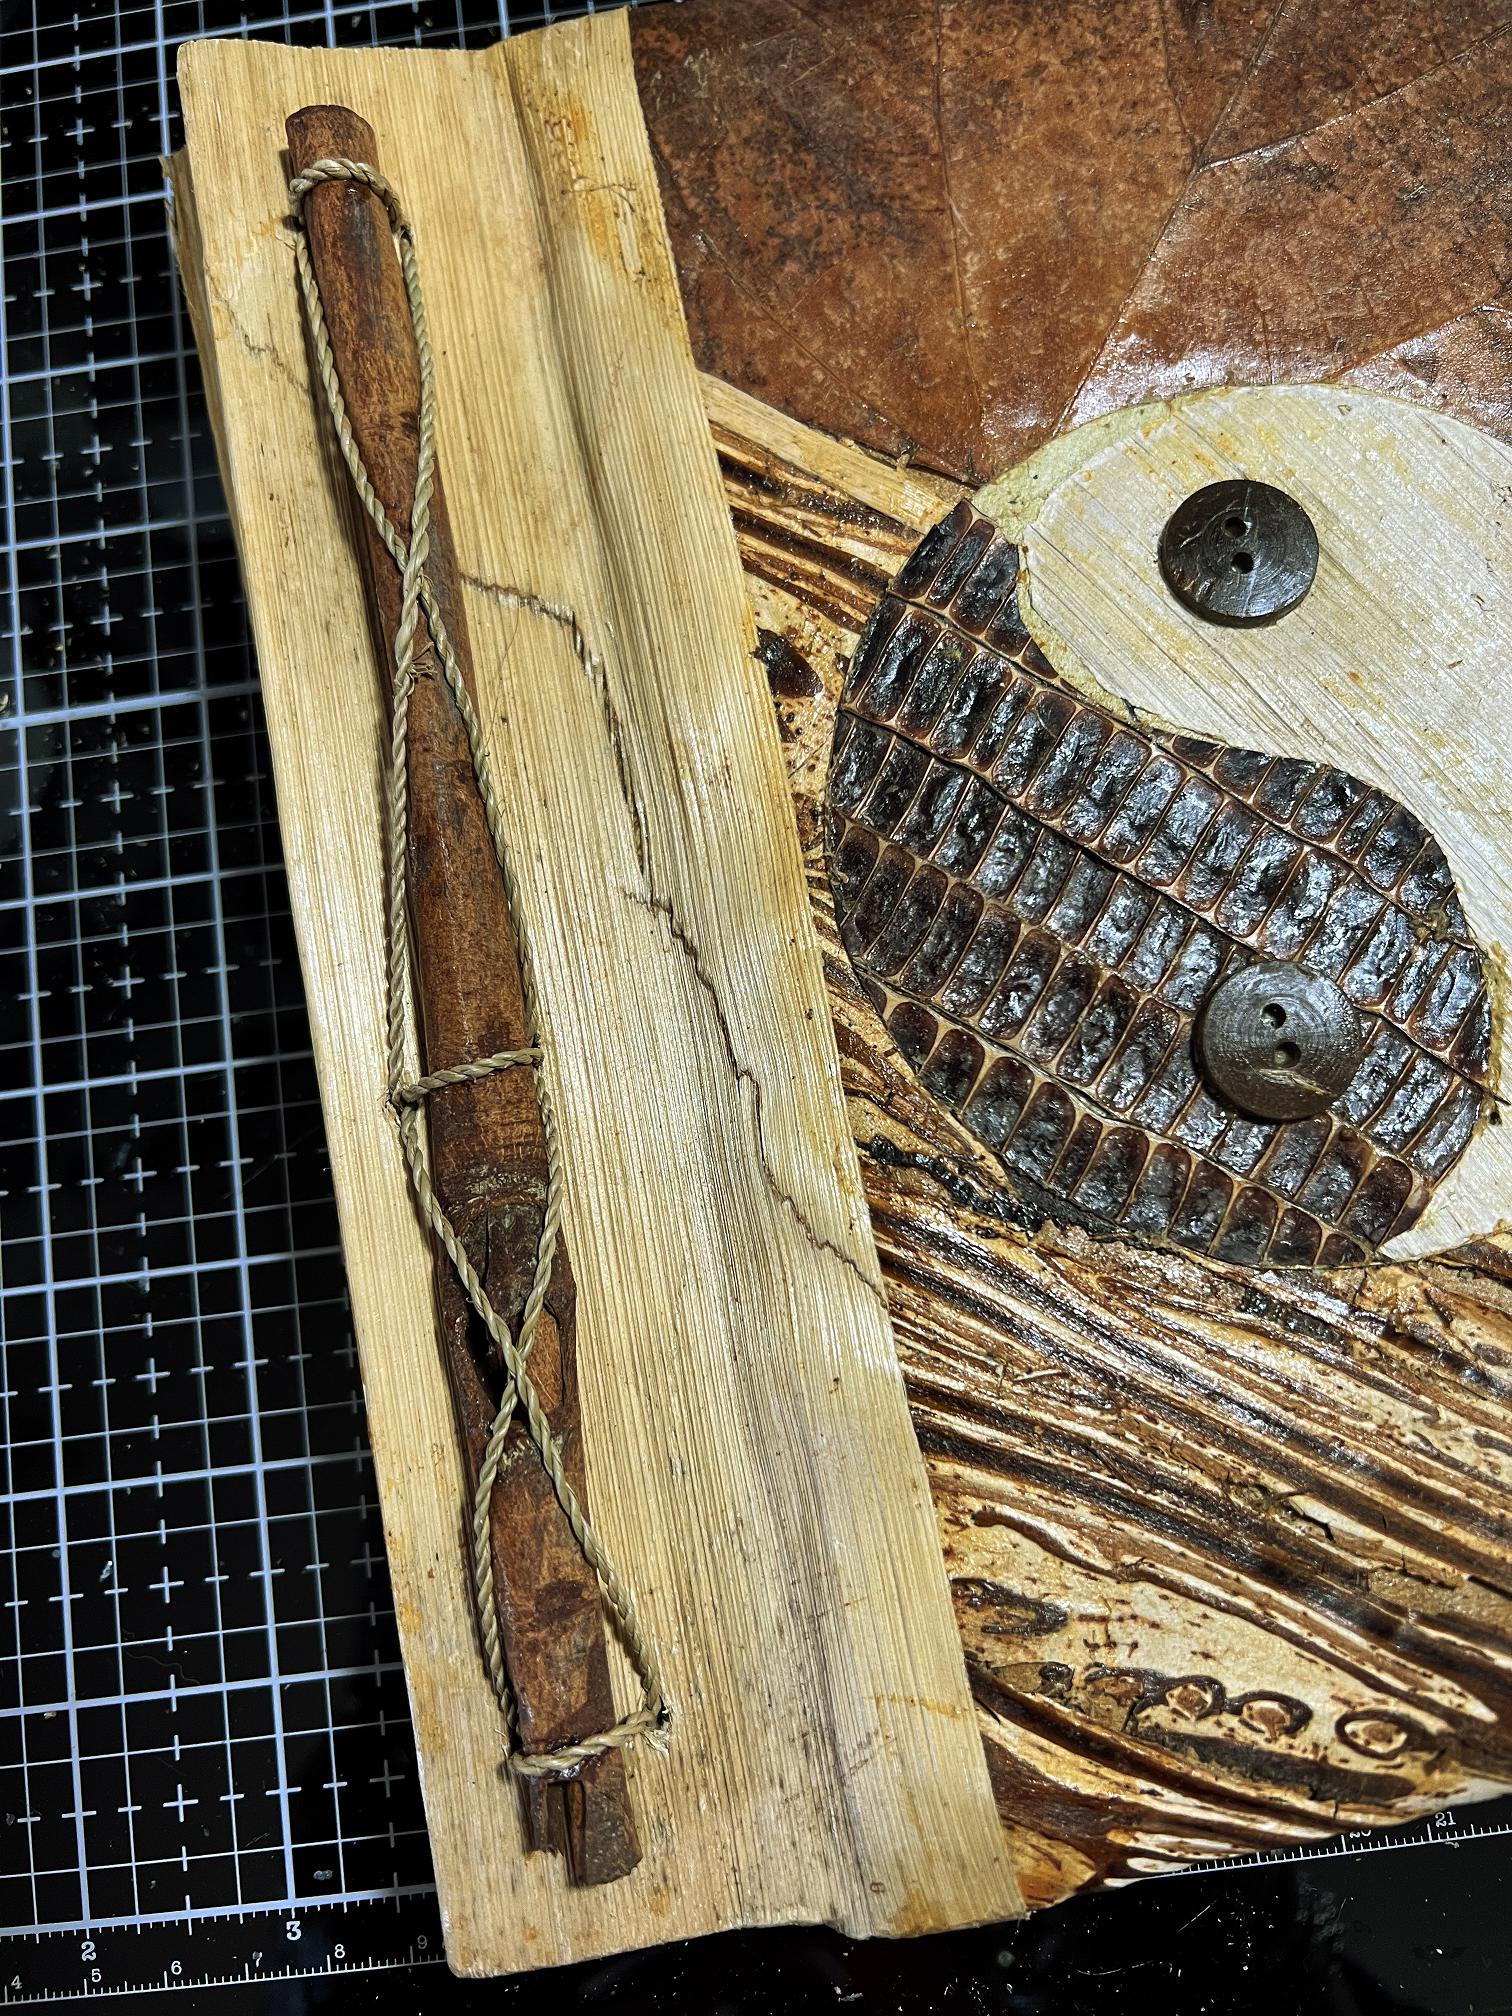
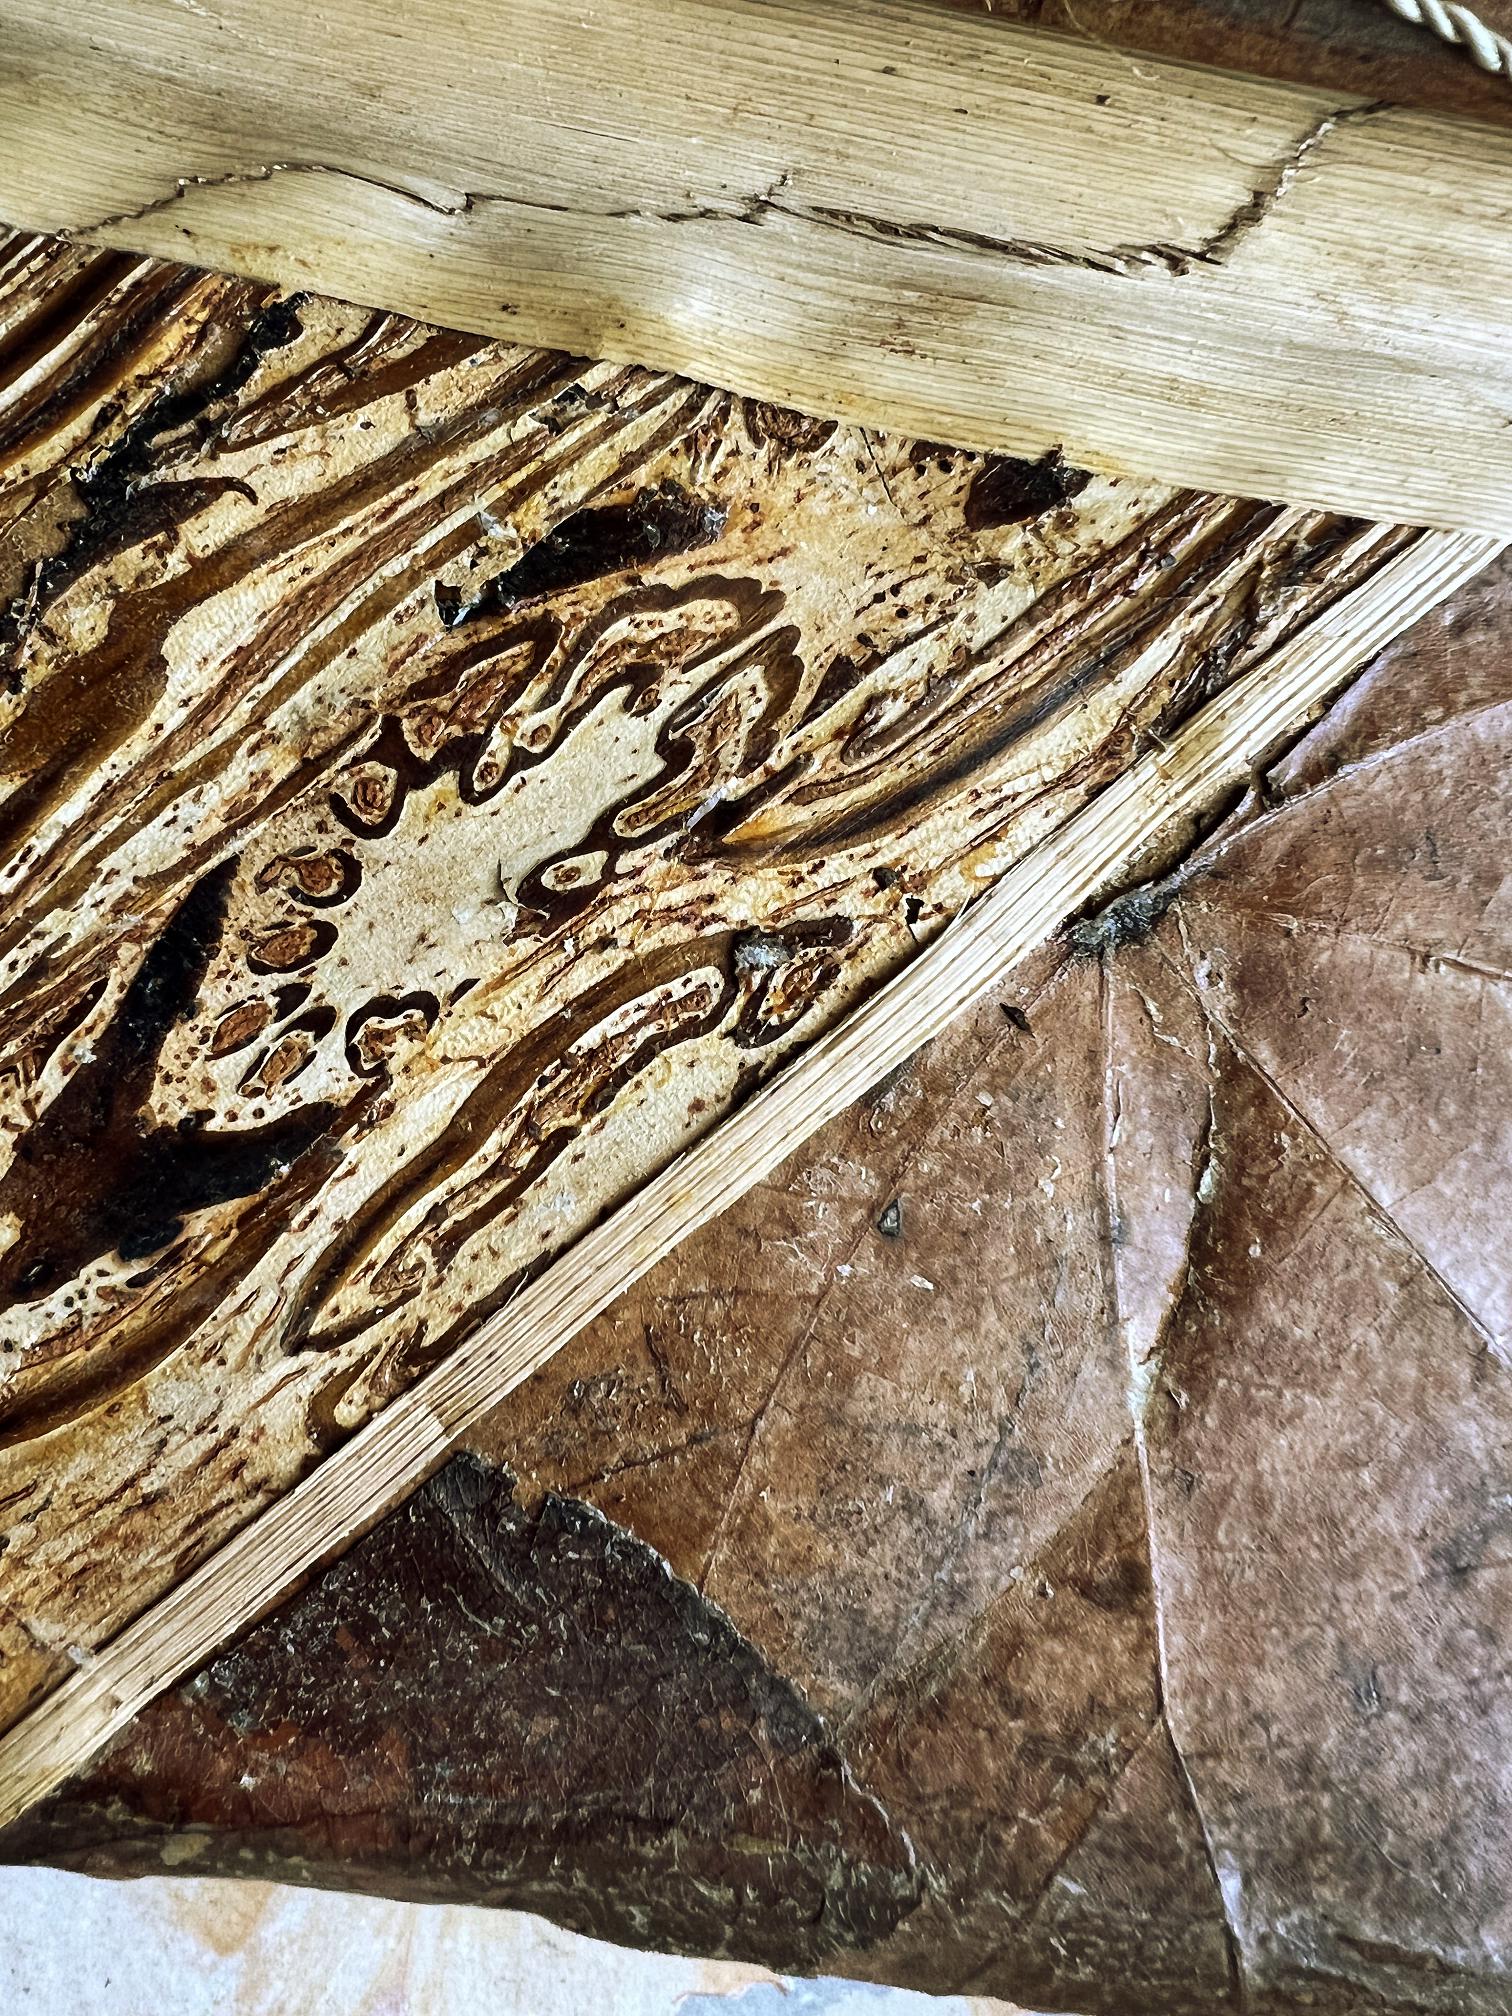
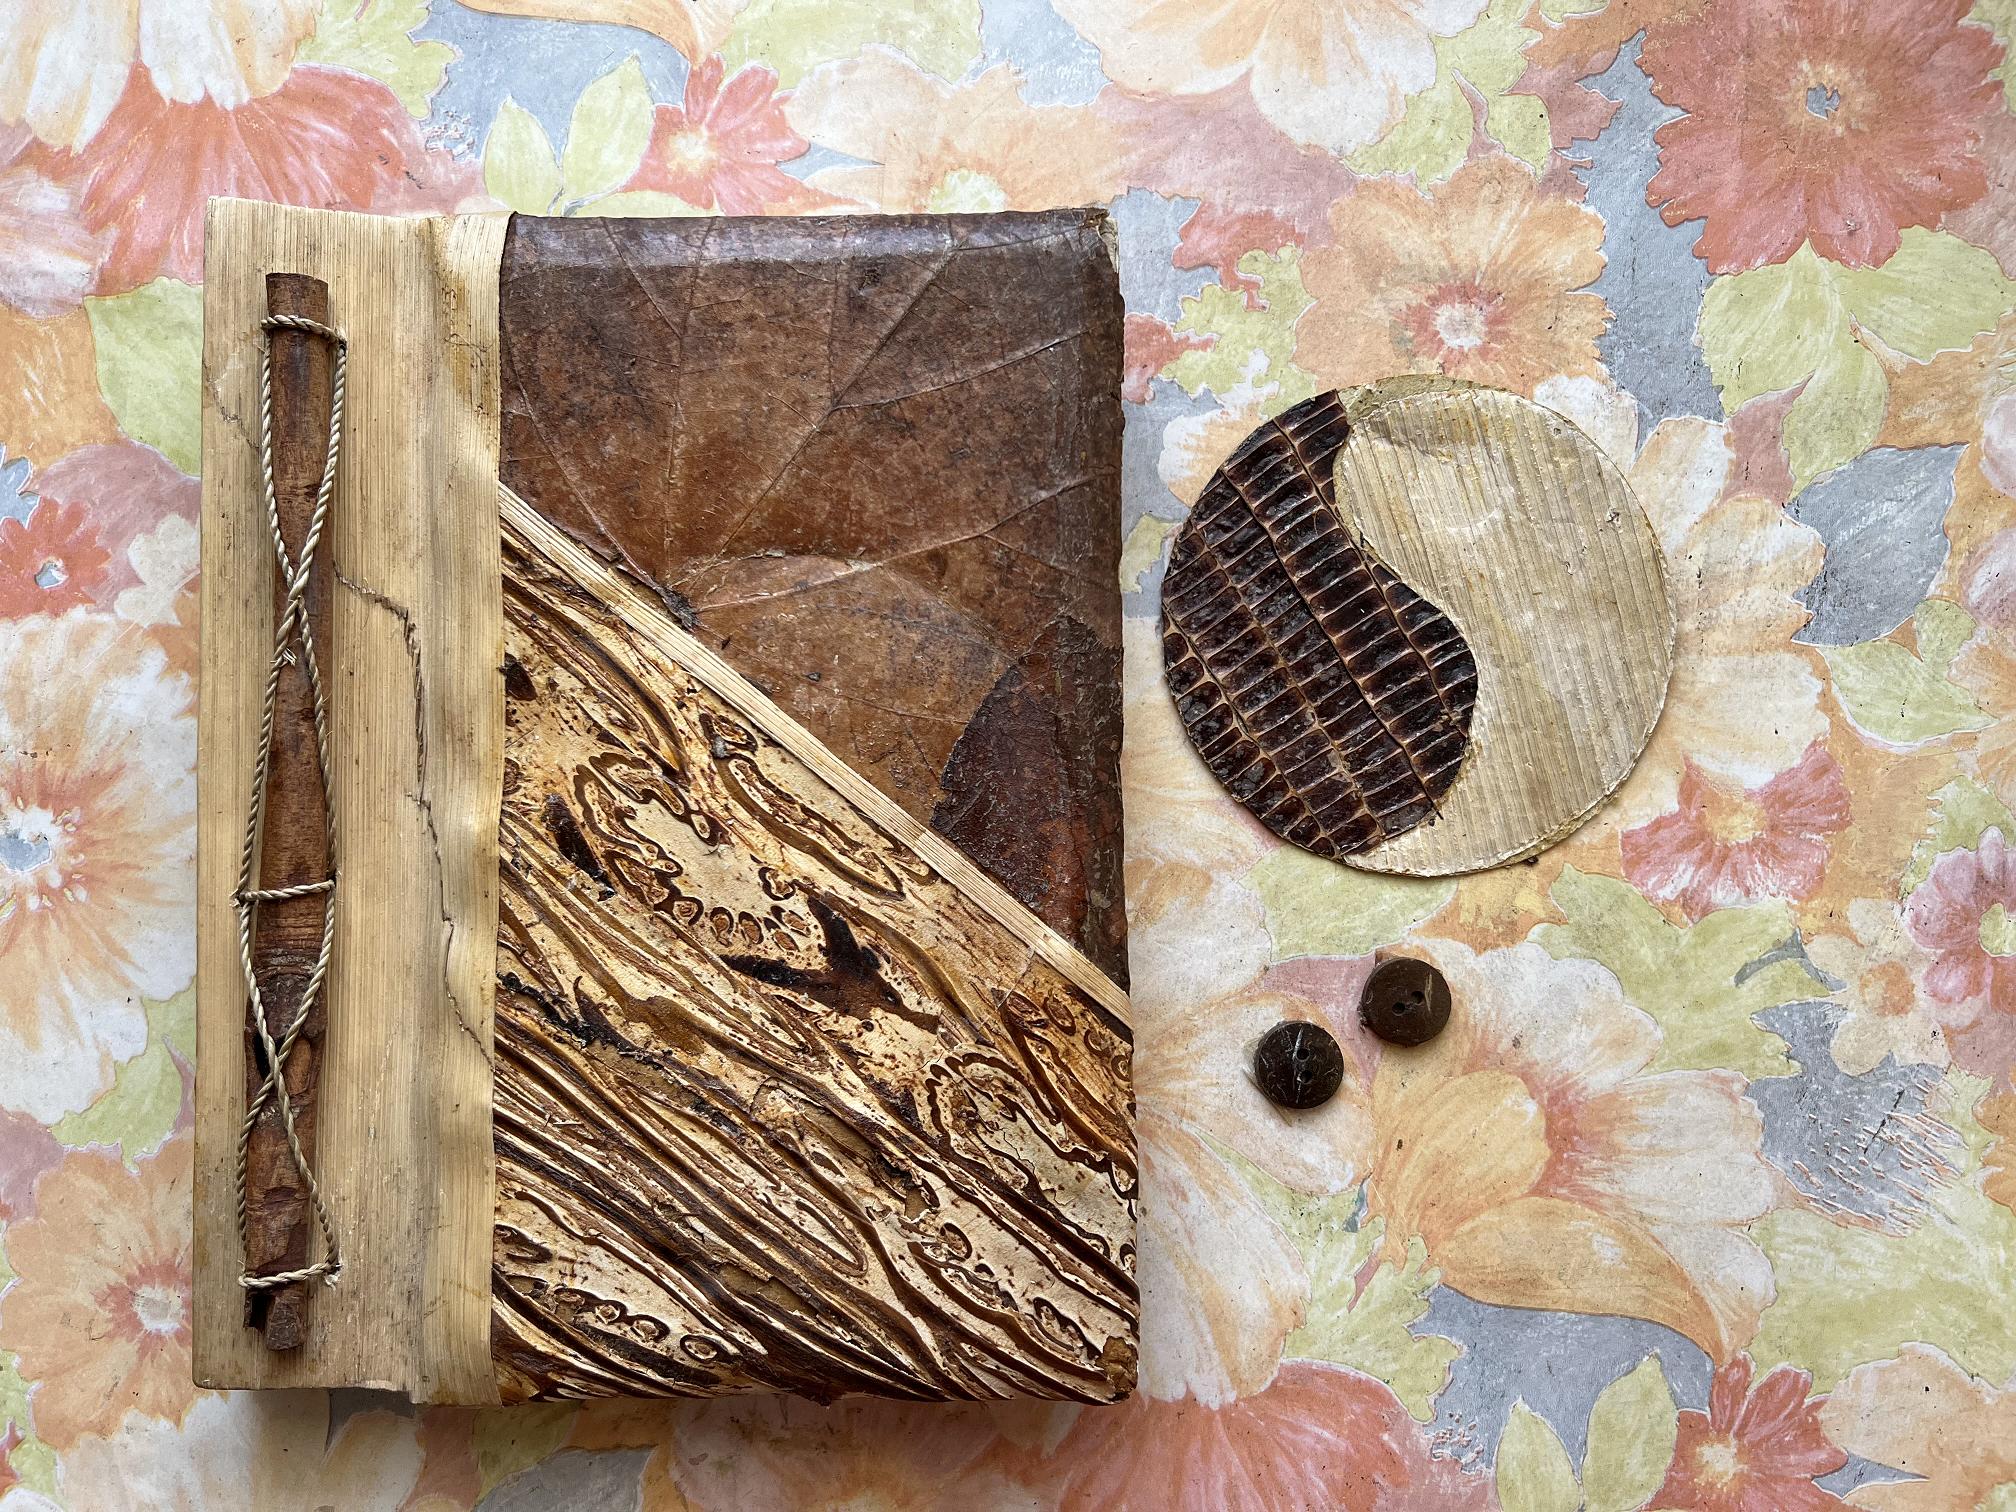
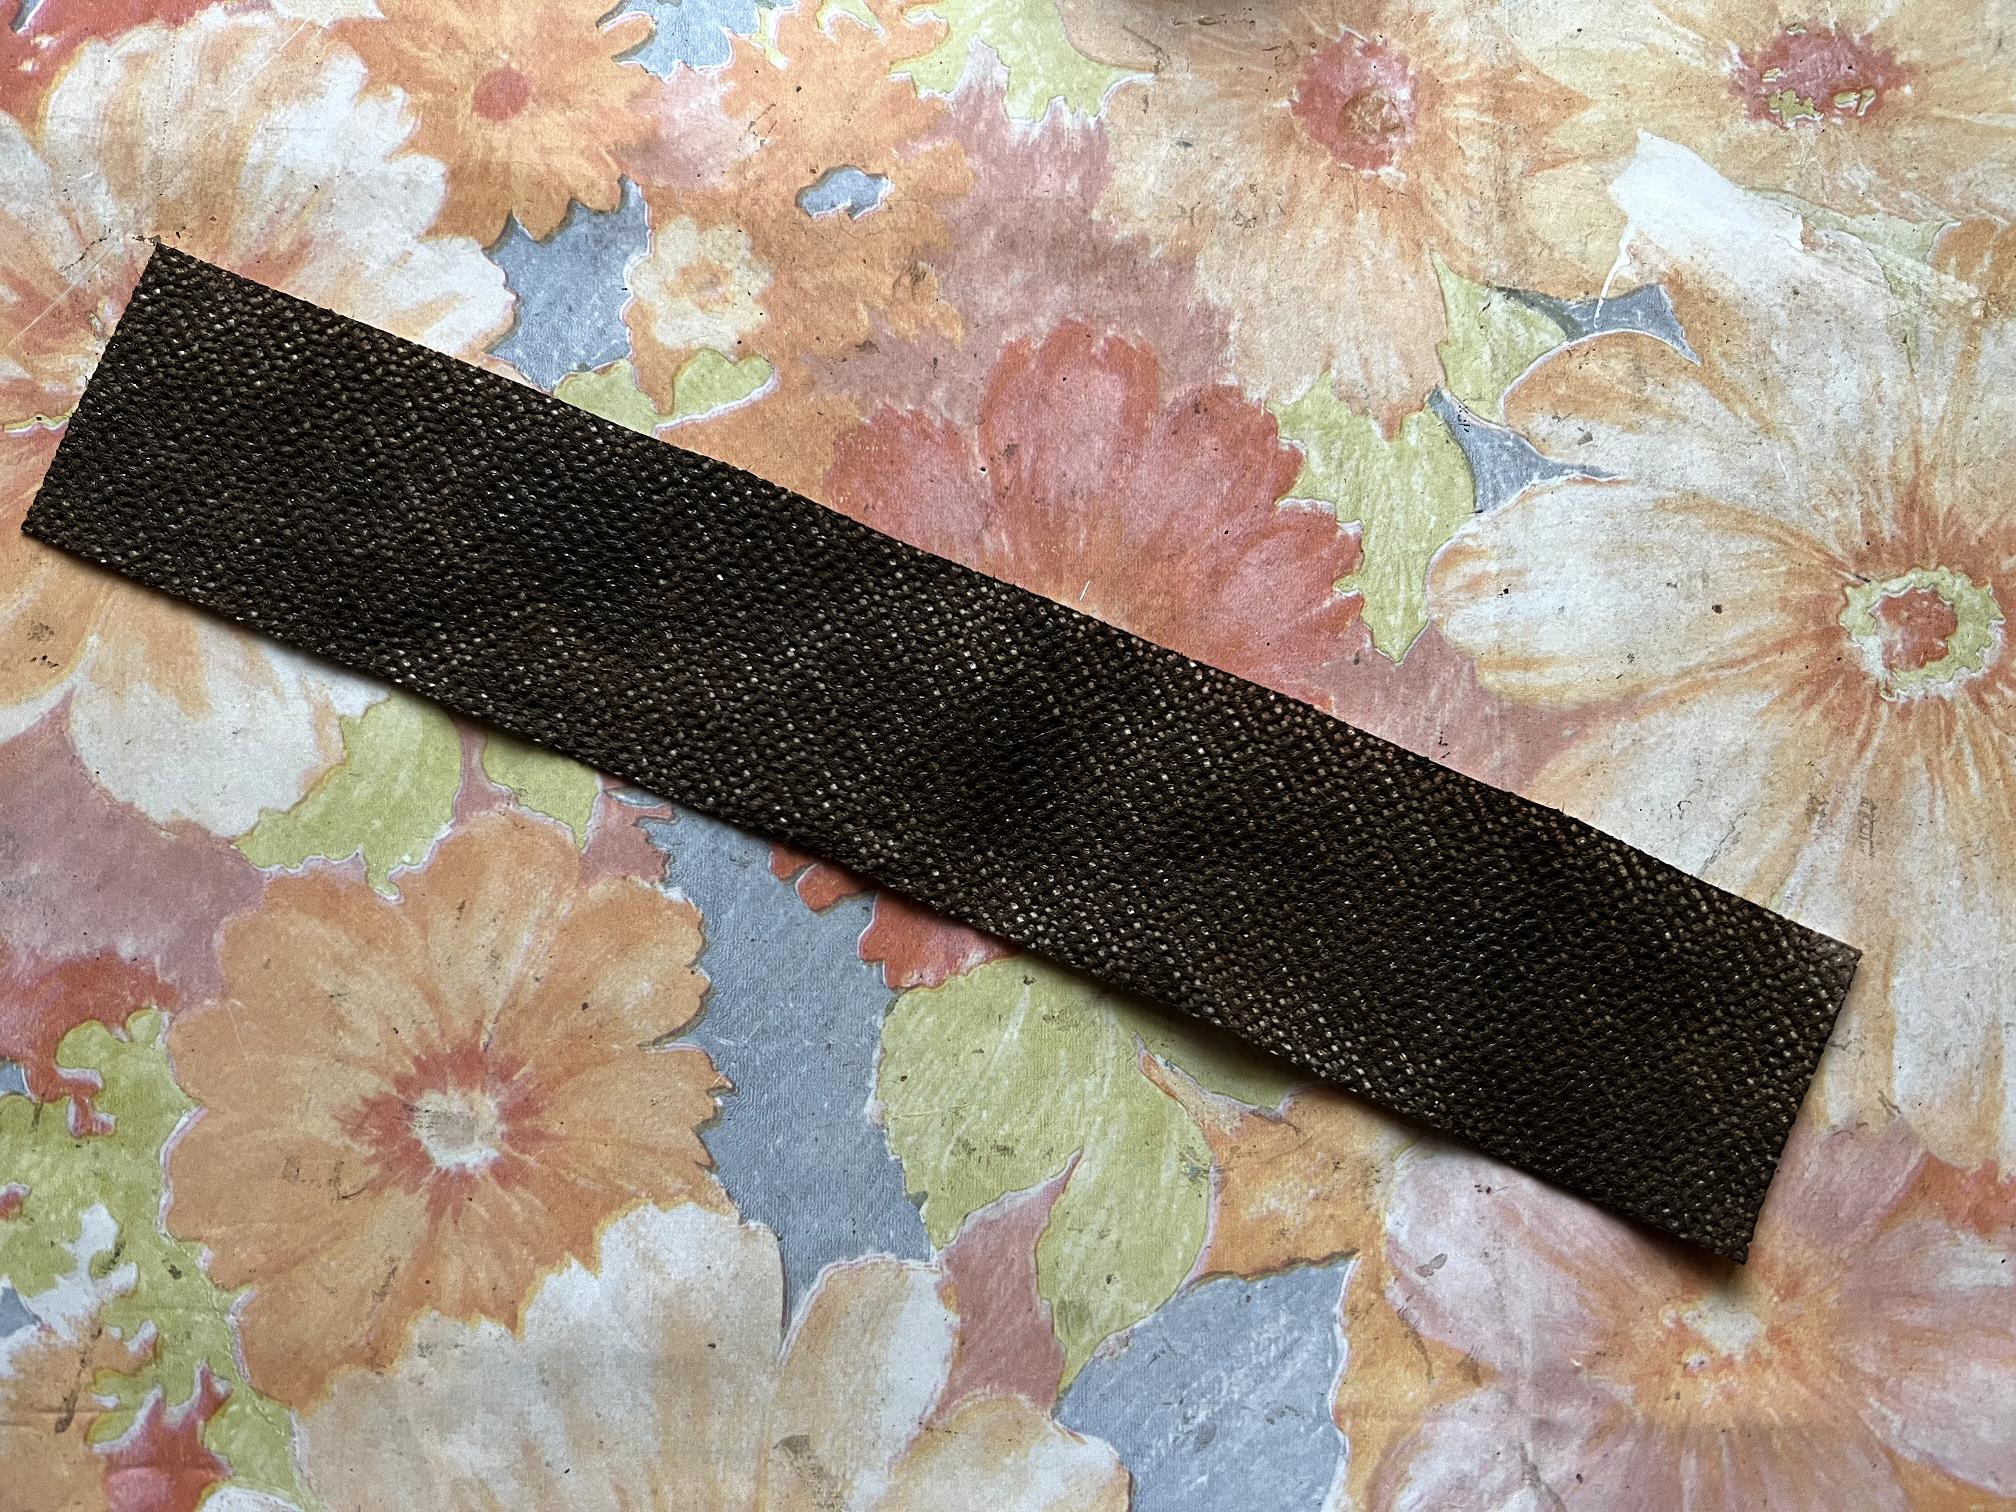
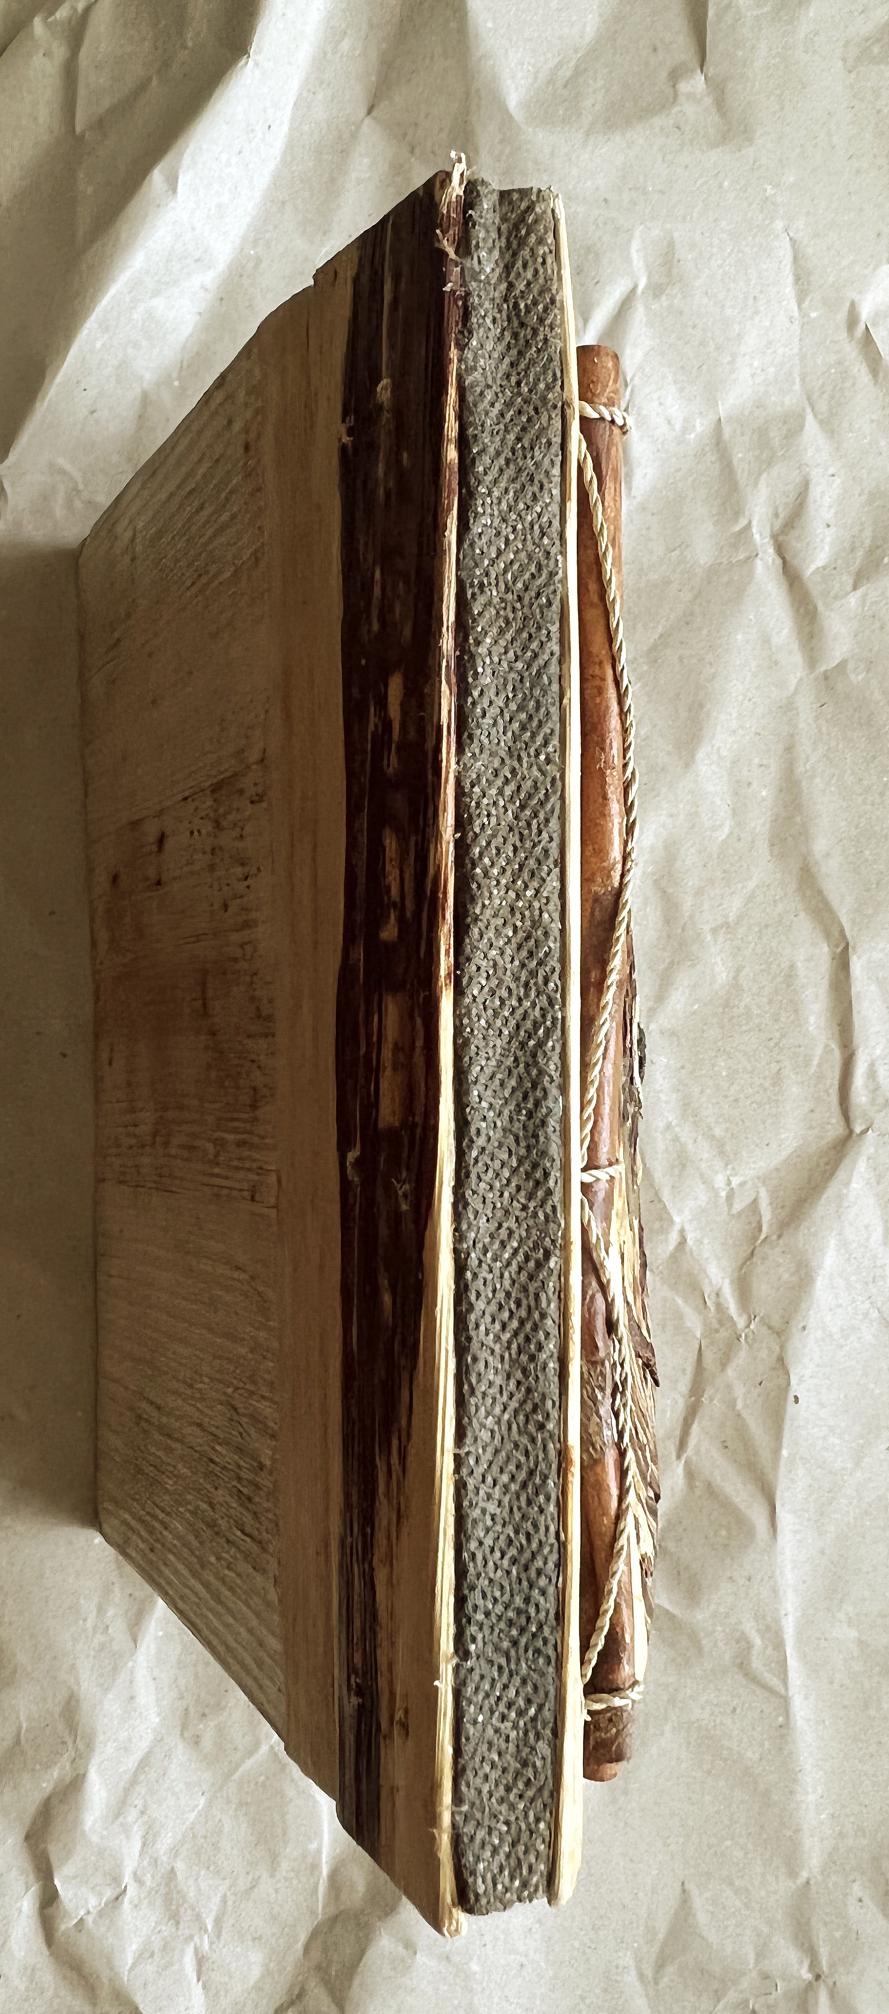
The cover appears to be made of organic materials of various sorts. I was not keen on the “Yin-Yang” symbol on the front and immediately intended removing this, but retaining the materials though, as they are beautiful. The twine bordering it was coming off anyway so I pulled it all off, and laid it back on for the sake of the photos. The spine is covered with something that appears to be palm leaf, and there’s a large leaf at the top right-hand corner, and some really interesting textured stuff that I think is bark at the bottom. The spine is stitched and decorated with a piece of what appears to be rolled up bark – it reminds me of a large cinnamon stick!
Here are some more detailed photos of the cover.
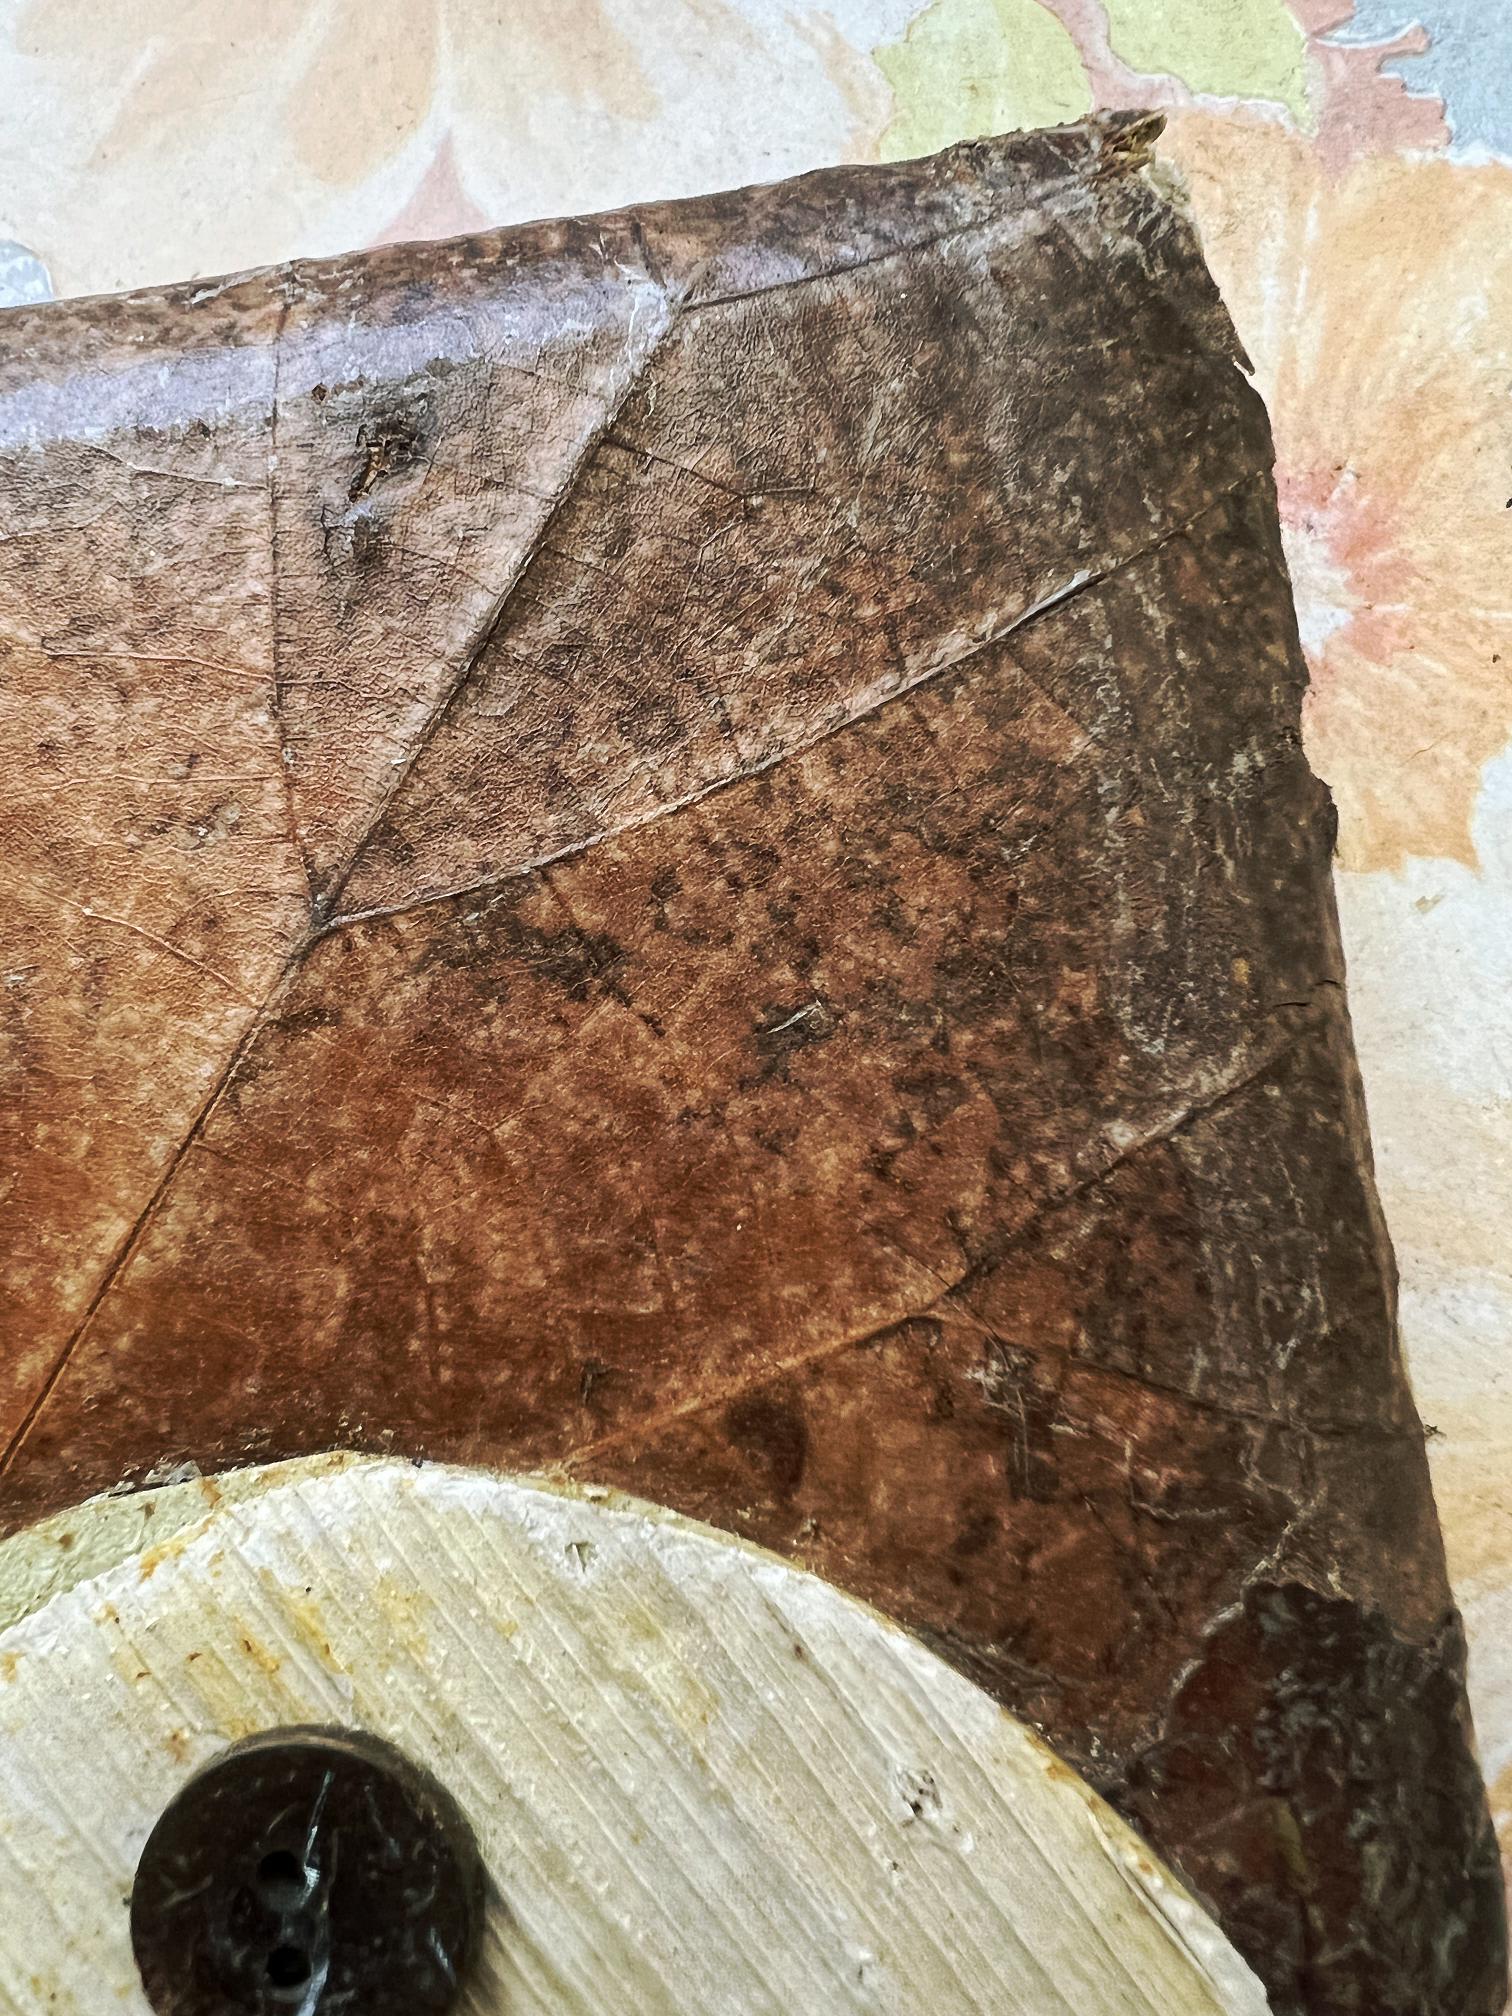
Firstly, the back of the book. This looks like woodgrain but it’s clearly quite thin and maybe another leaf, or bark, or possibly some sort of papyrus. It has a lovely texture. You can see the binding stitching on the spine.
The decorative binding. The rolled up bark was a bit loose and I had to push it back under the string at the bottom. Later I added a touch of glue to keep it in place. There were also one or two areas of damage on the cover which needed repairing as well.
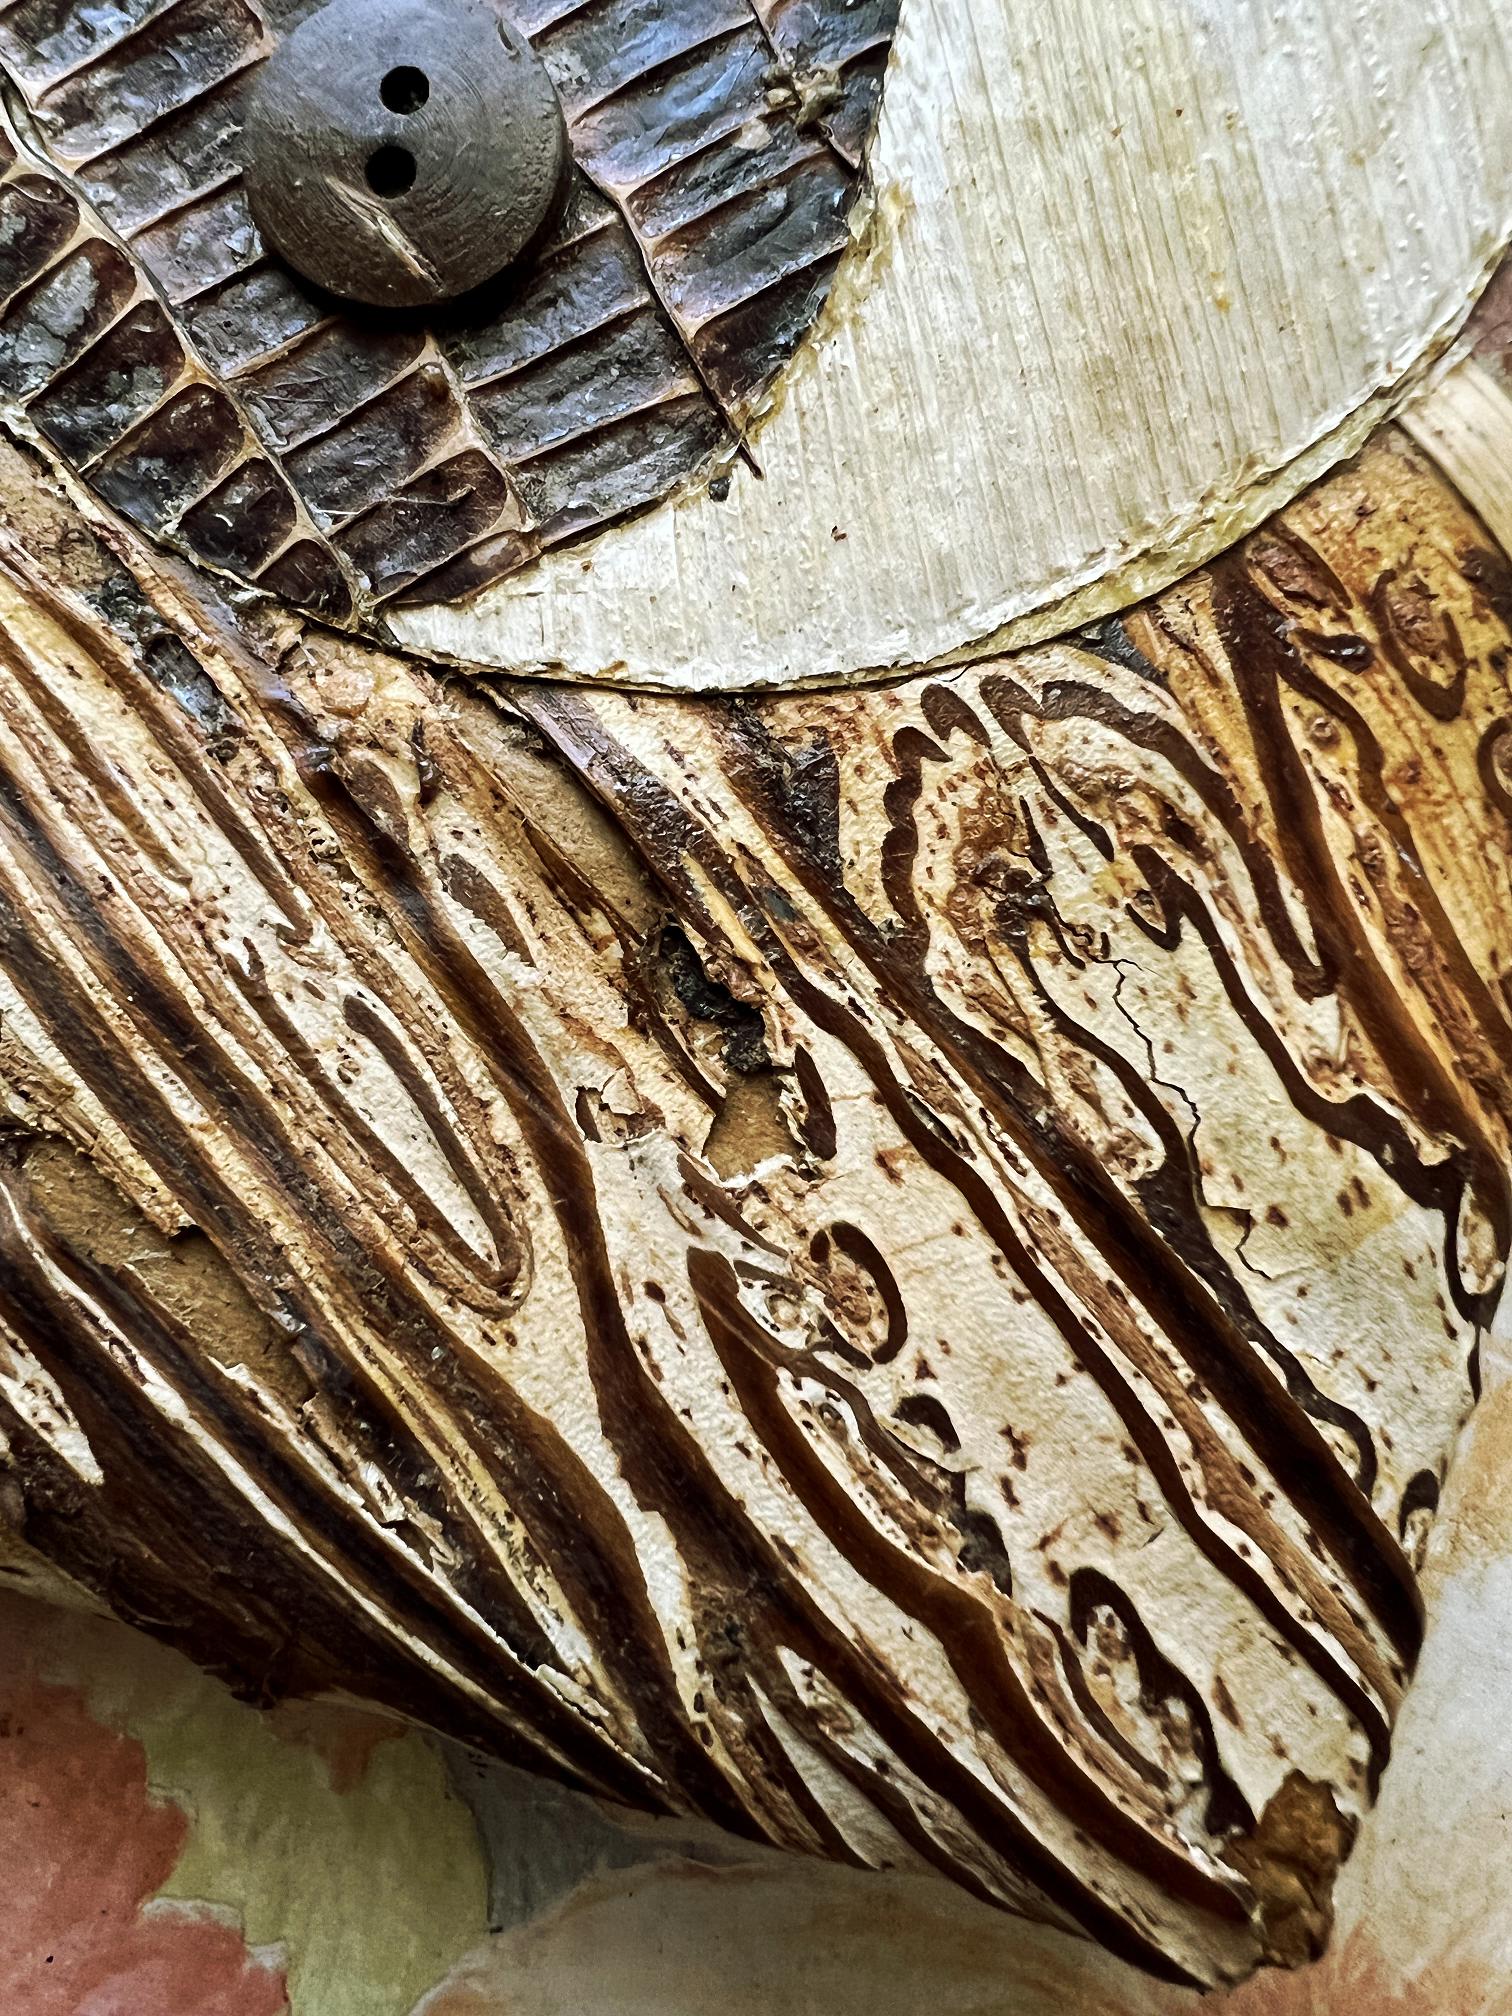
Very interesting textures on the “Yin-Yang.” I am not sure what the dark stuff is but the lighter stuff looks like the material on the back cover.

A detail of the leaf covering the upper right corner of the book.
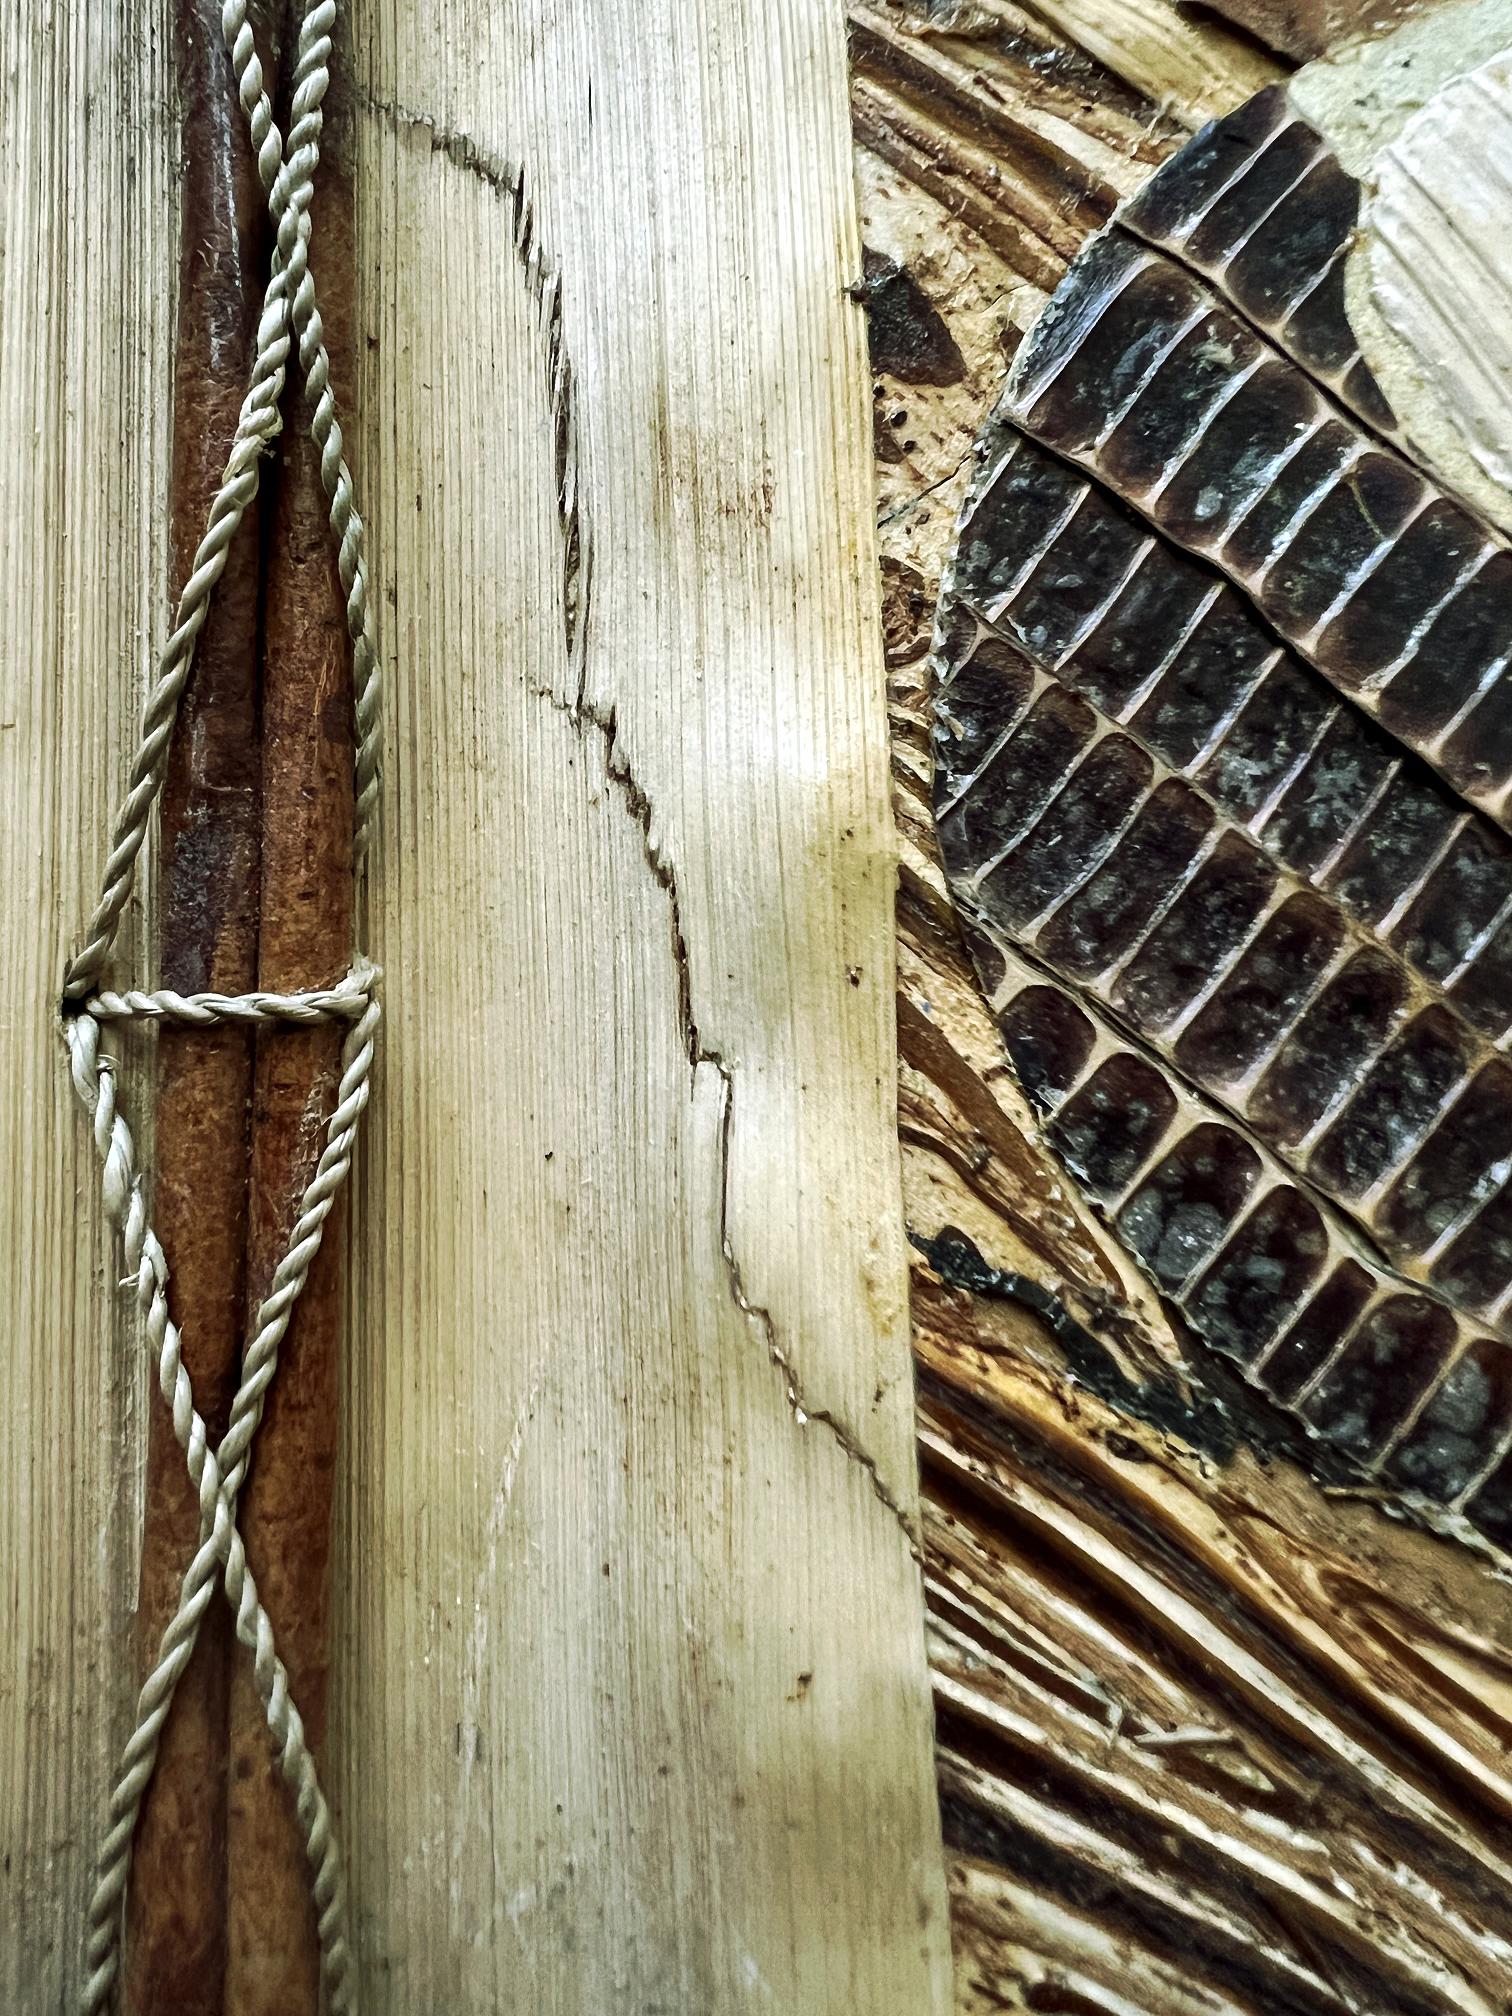
Detail of the bark at the bottom right corner.
Detail of the leaf covering the spine.
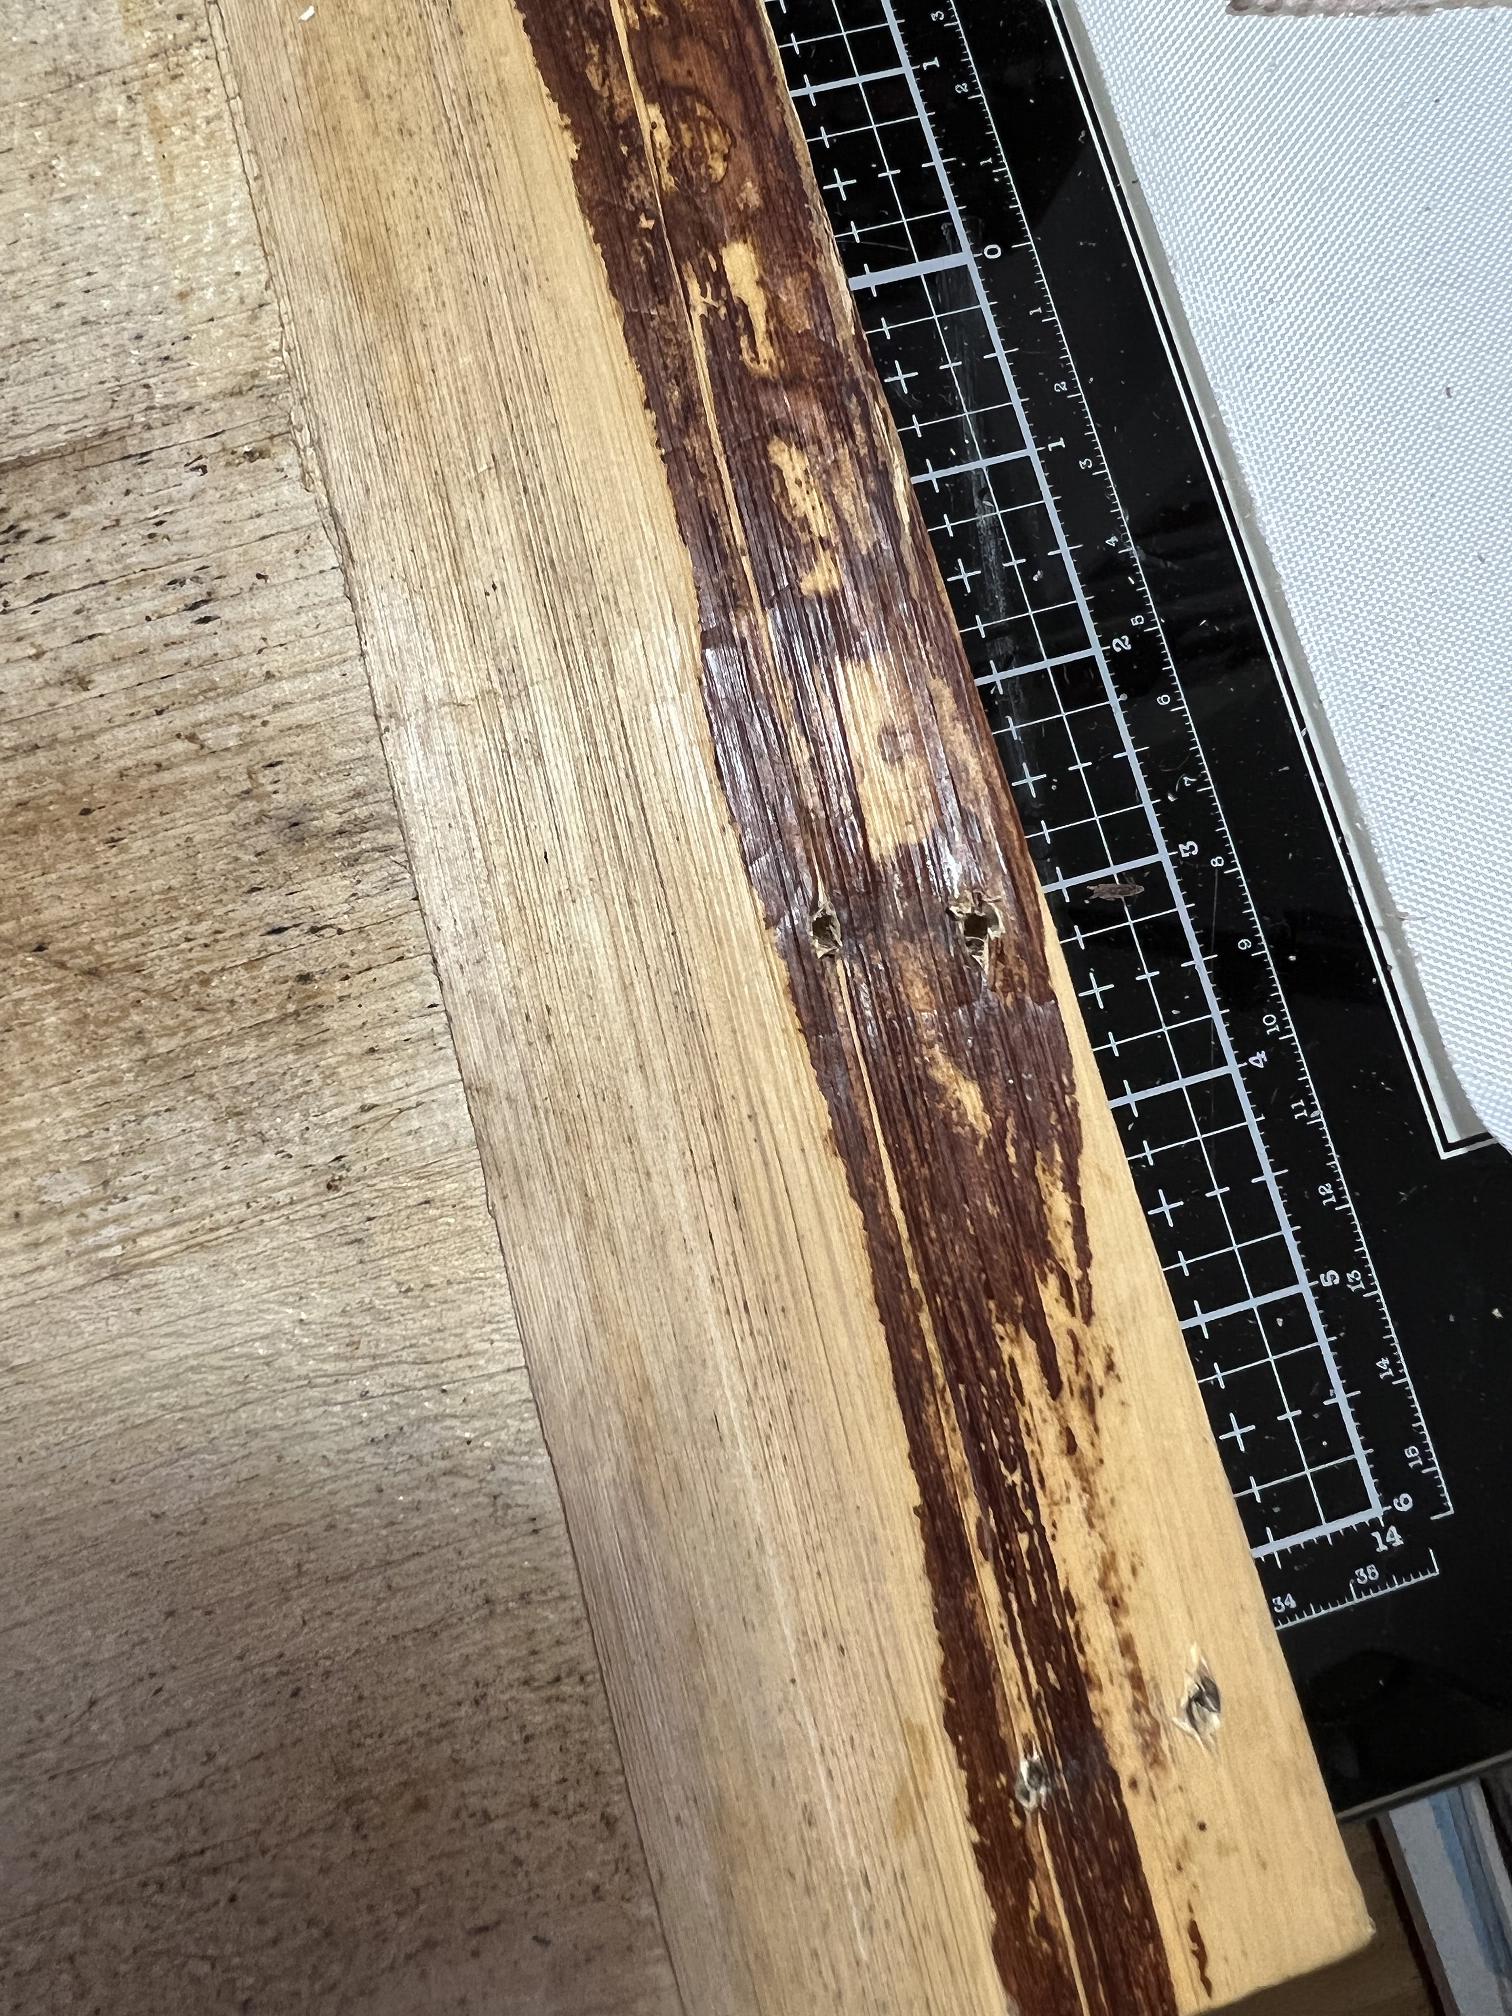
On this photo, if you look closely, you can see evidence of damage to the bark – two holes, one quite large and the other smaller. This stuff is quite brittle. I needed to carry out a few minor repairs to the book before I could use it.
Further damage, this time at the corner of the book. Later, after repairig it, I thought I might add some metal corners – I think I have some left from an album I made several years ago.

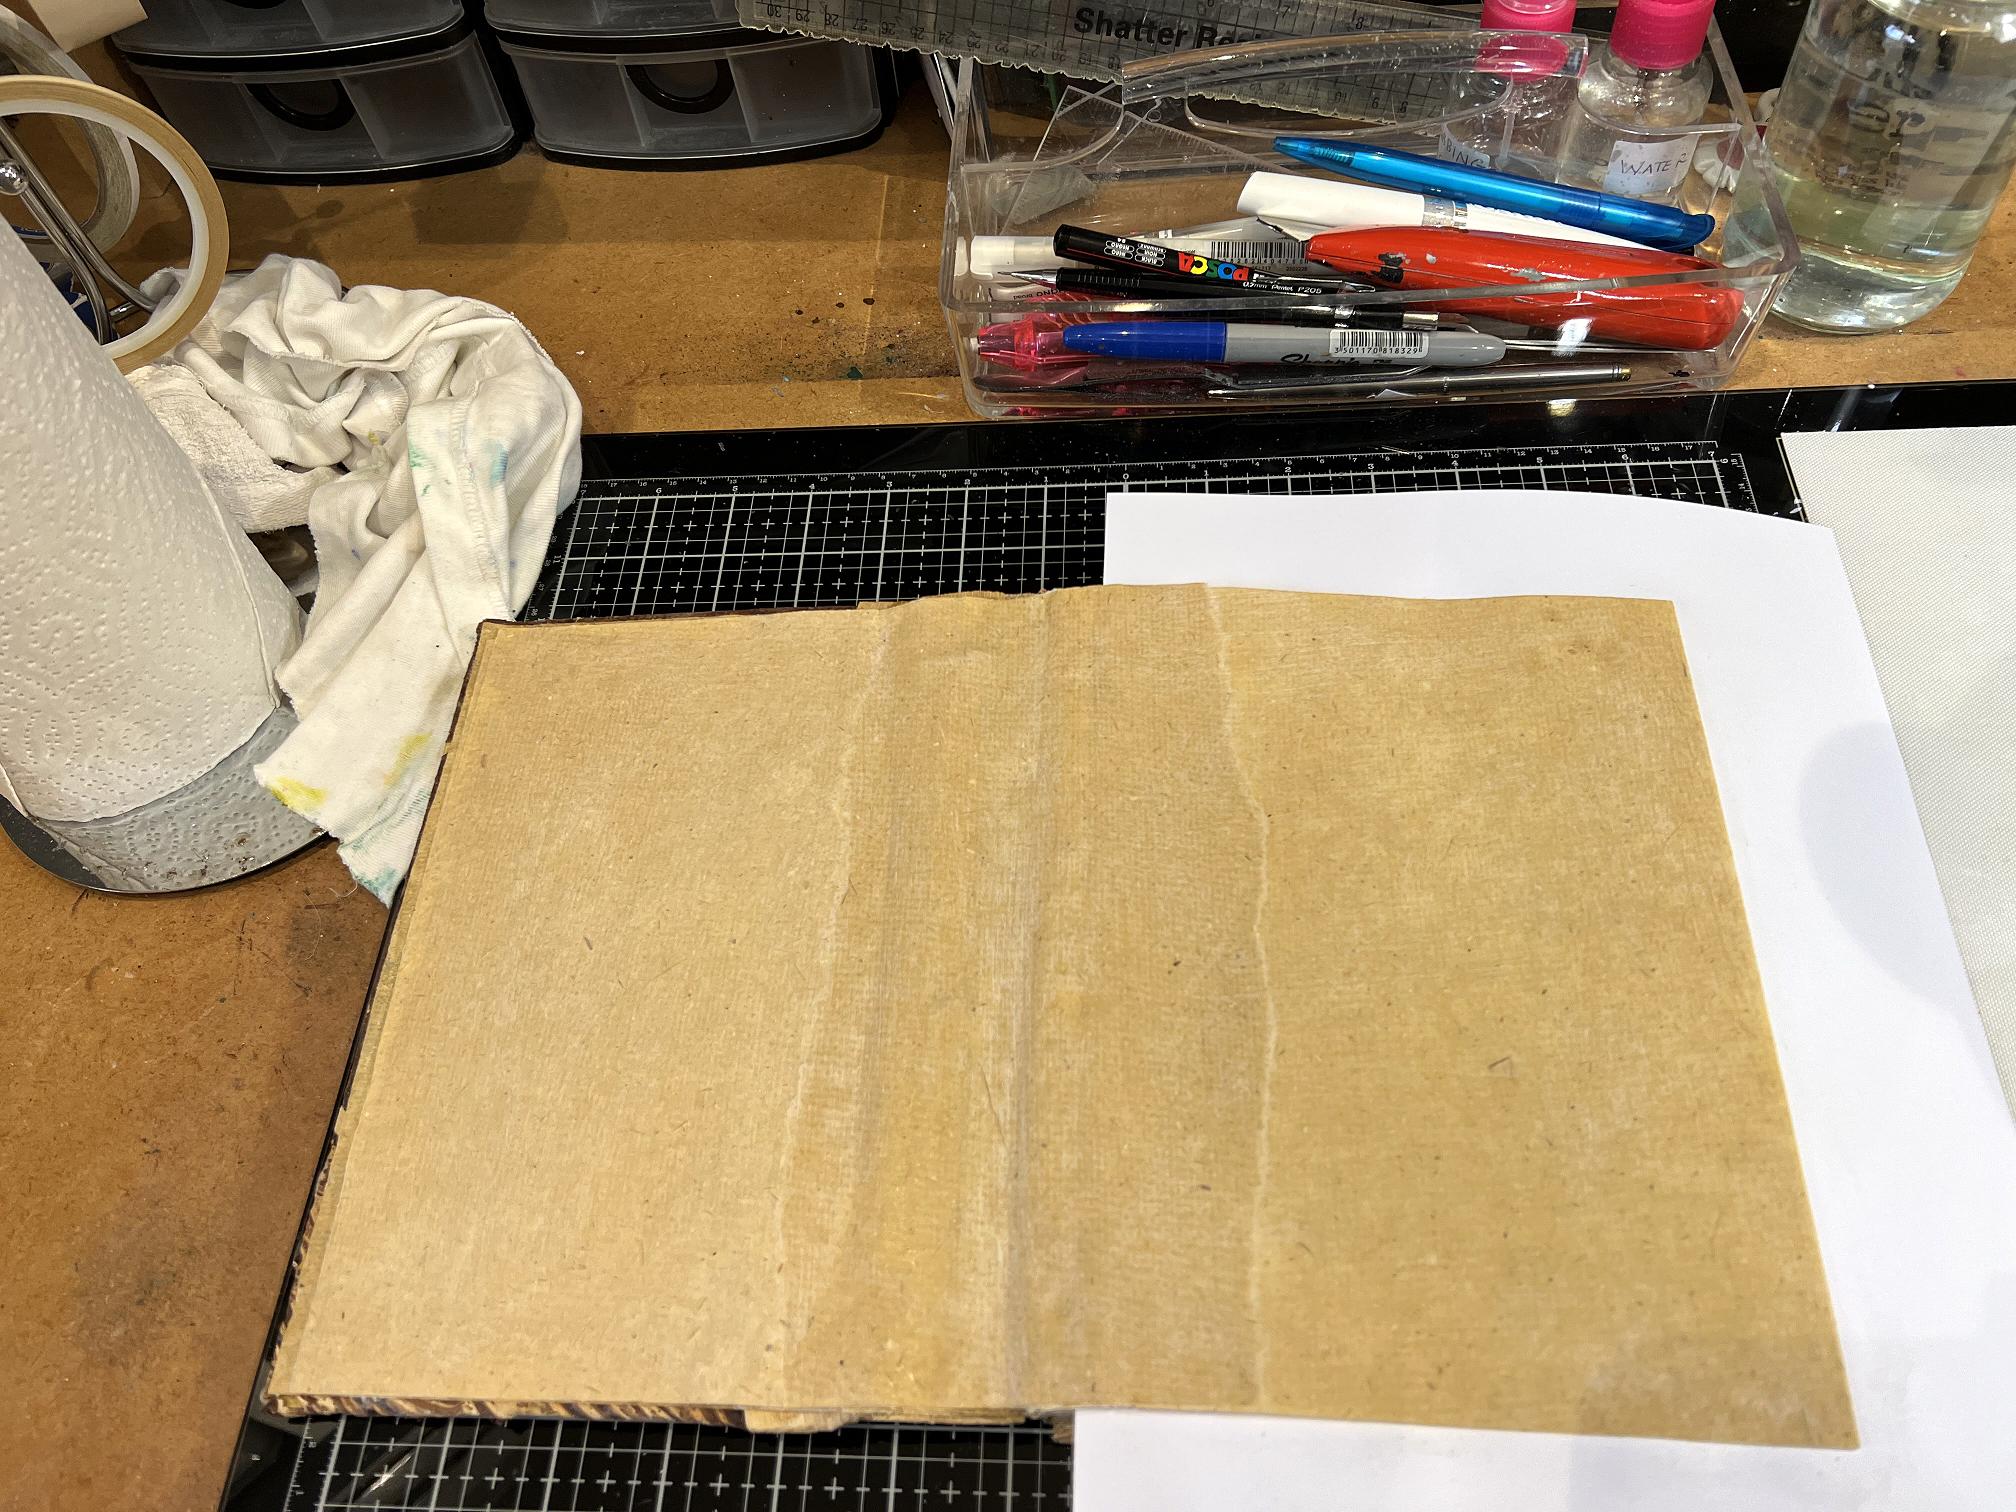
The book propped open with my iPad! The trouble with this form of binding is that the book would not lie flat when open. You can see the texture of the paper which is a lovely rich colour.
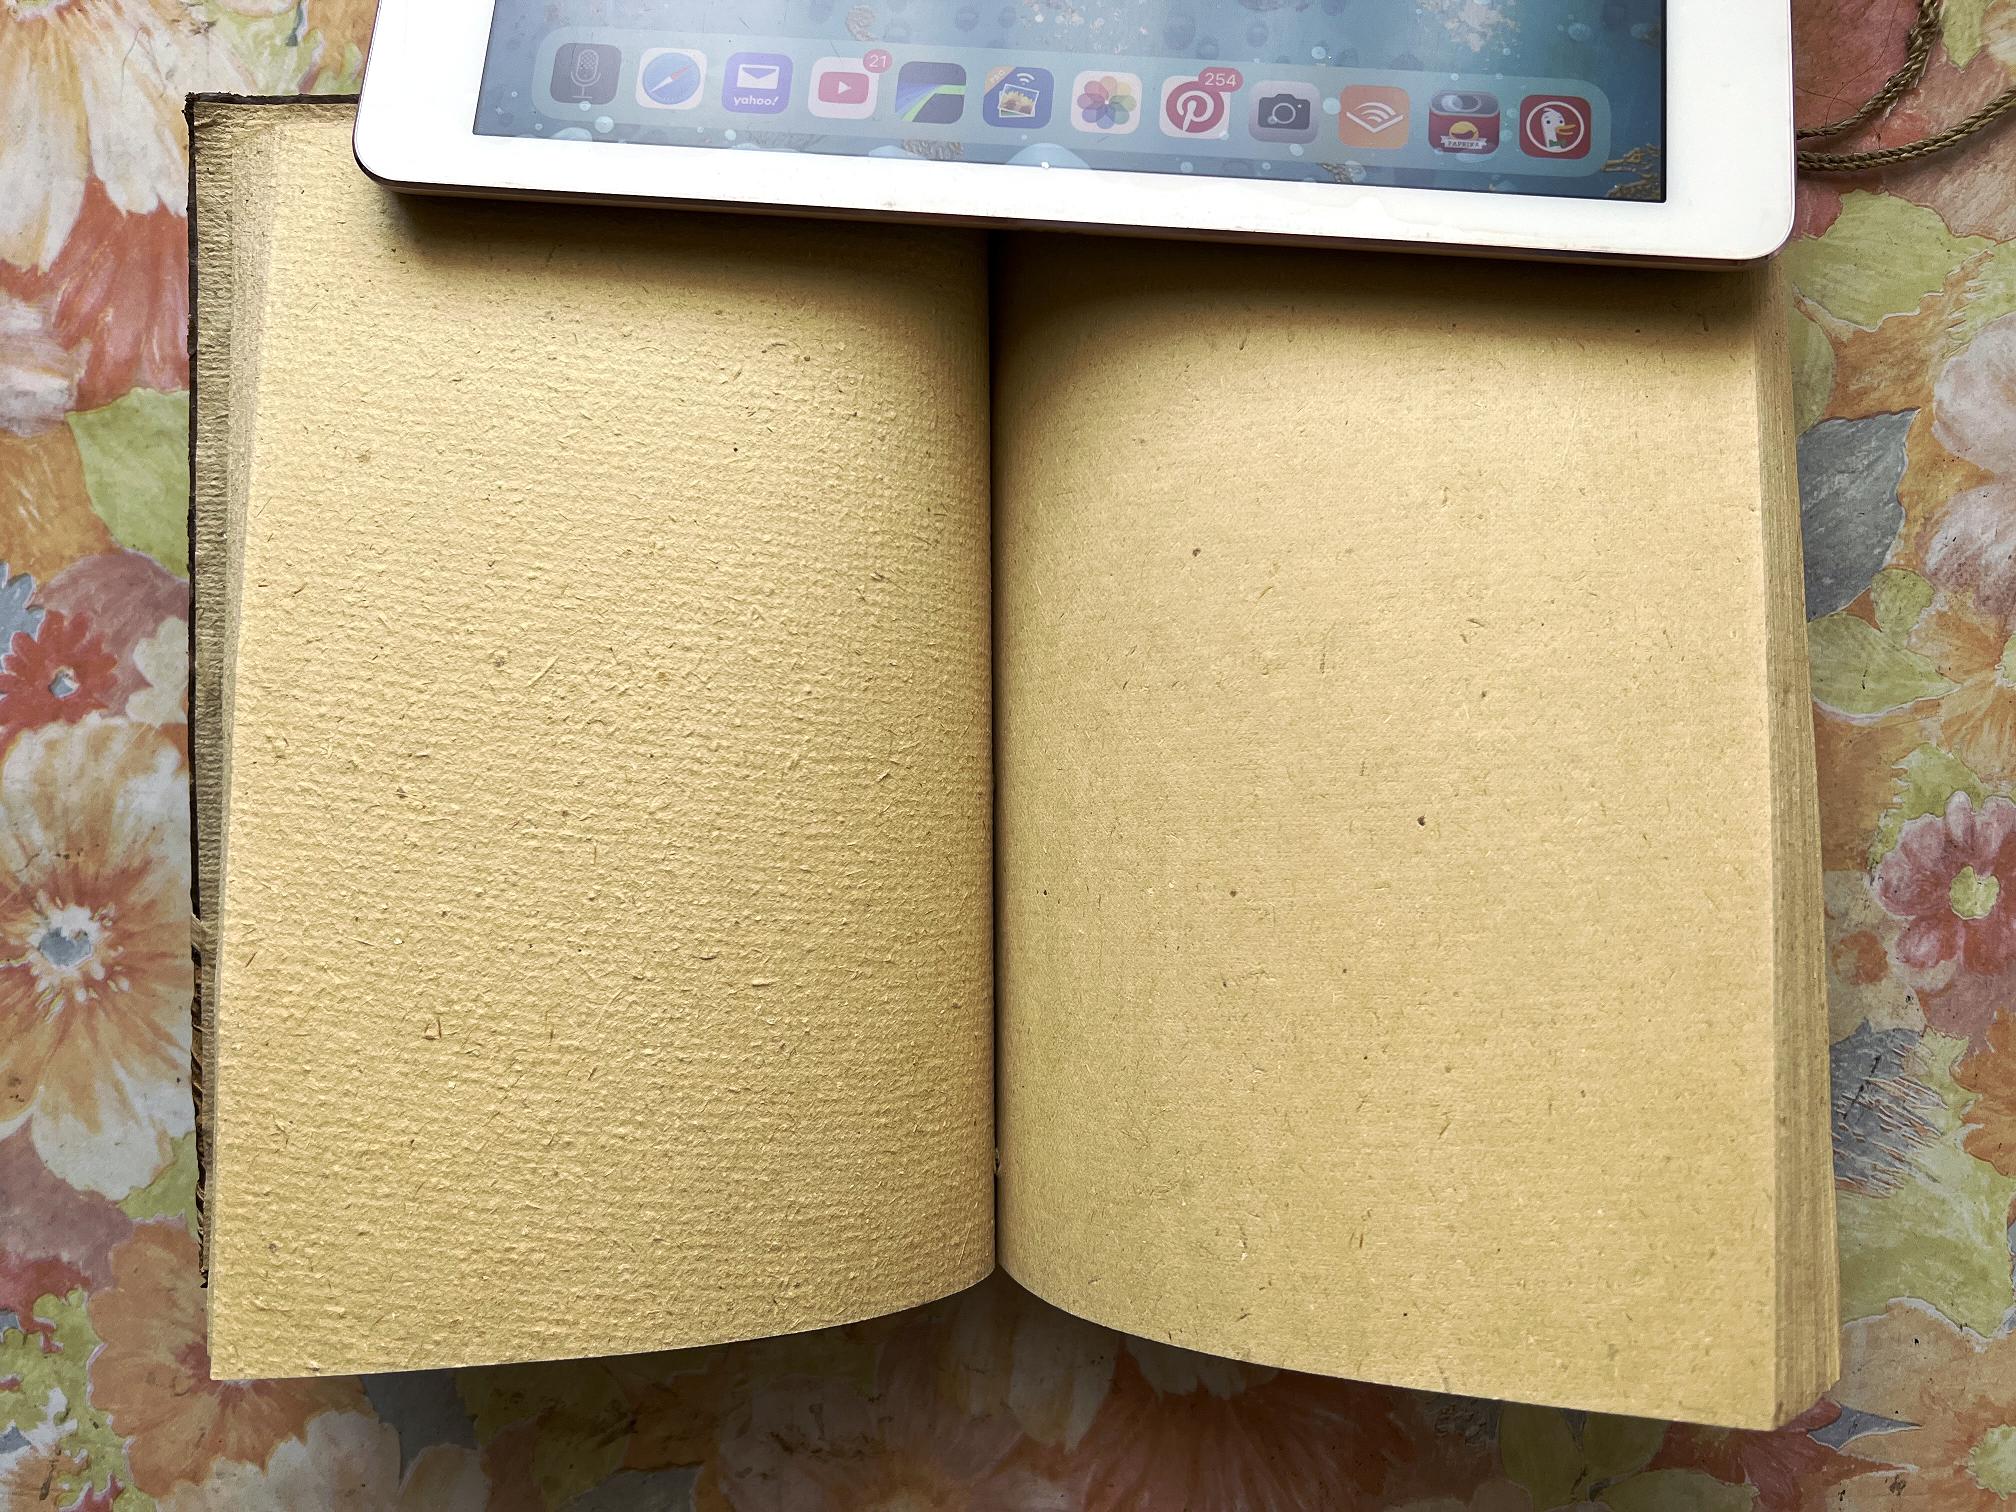
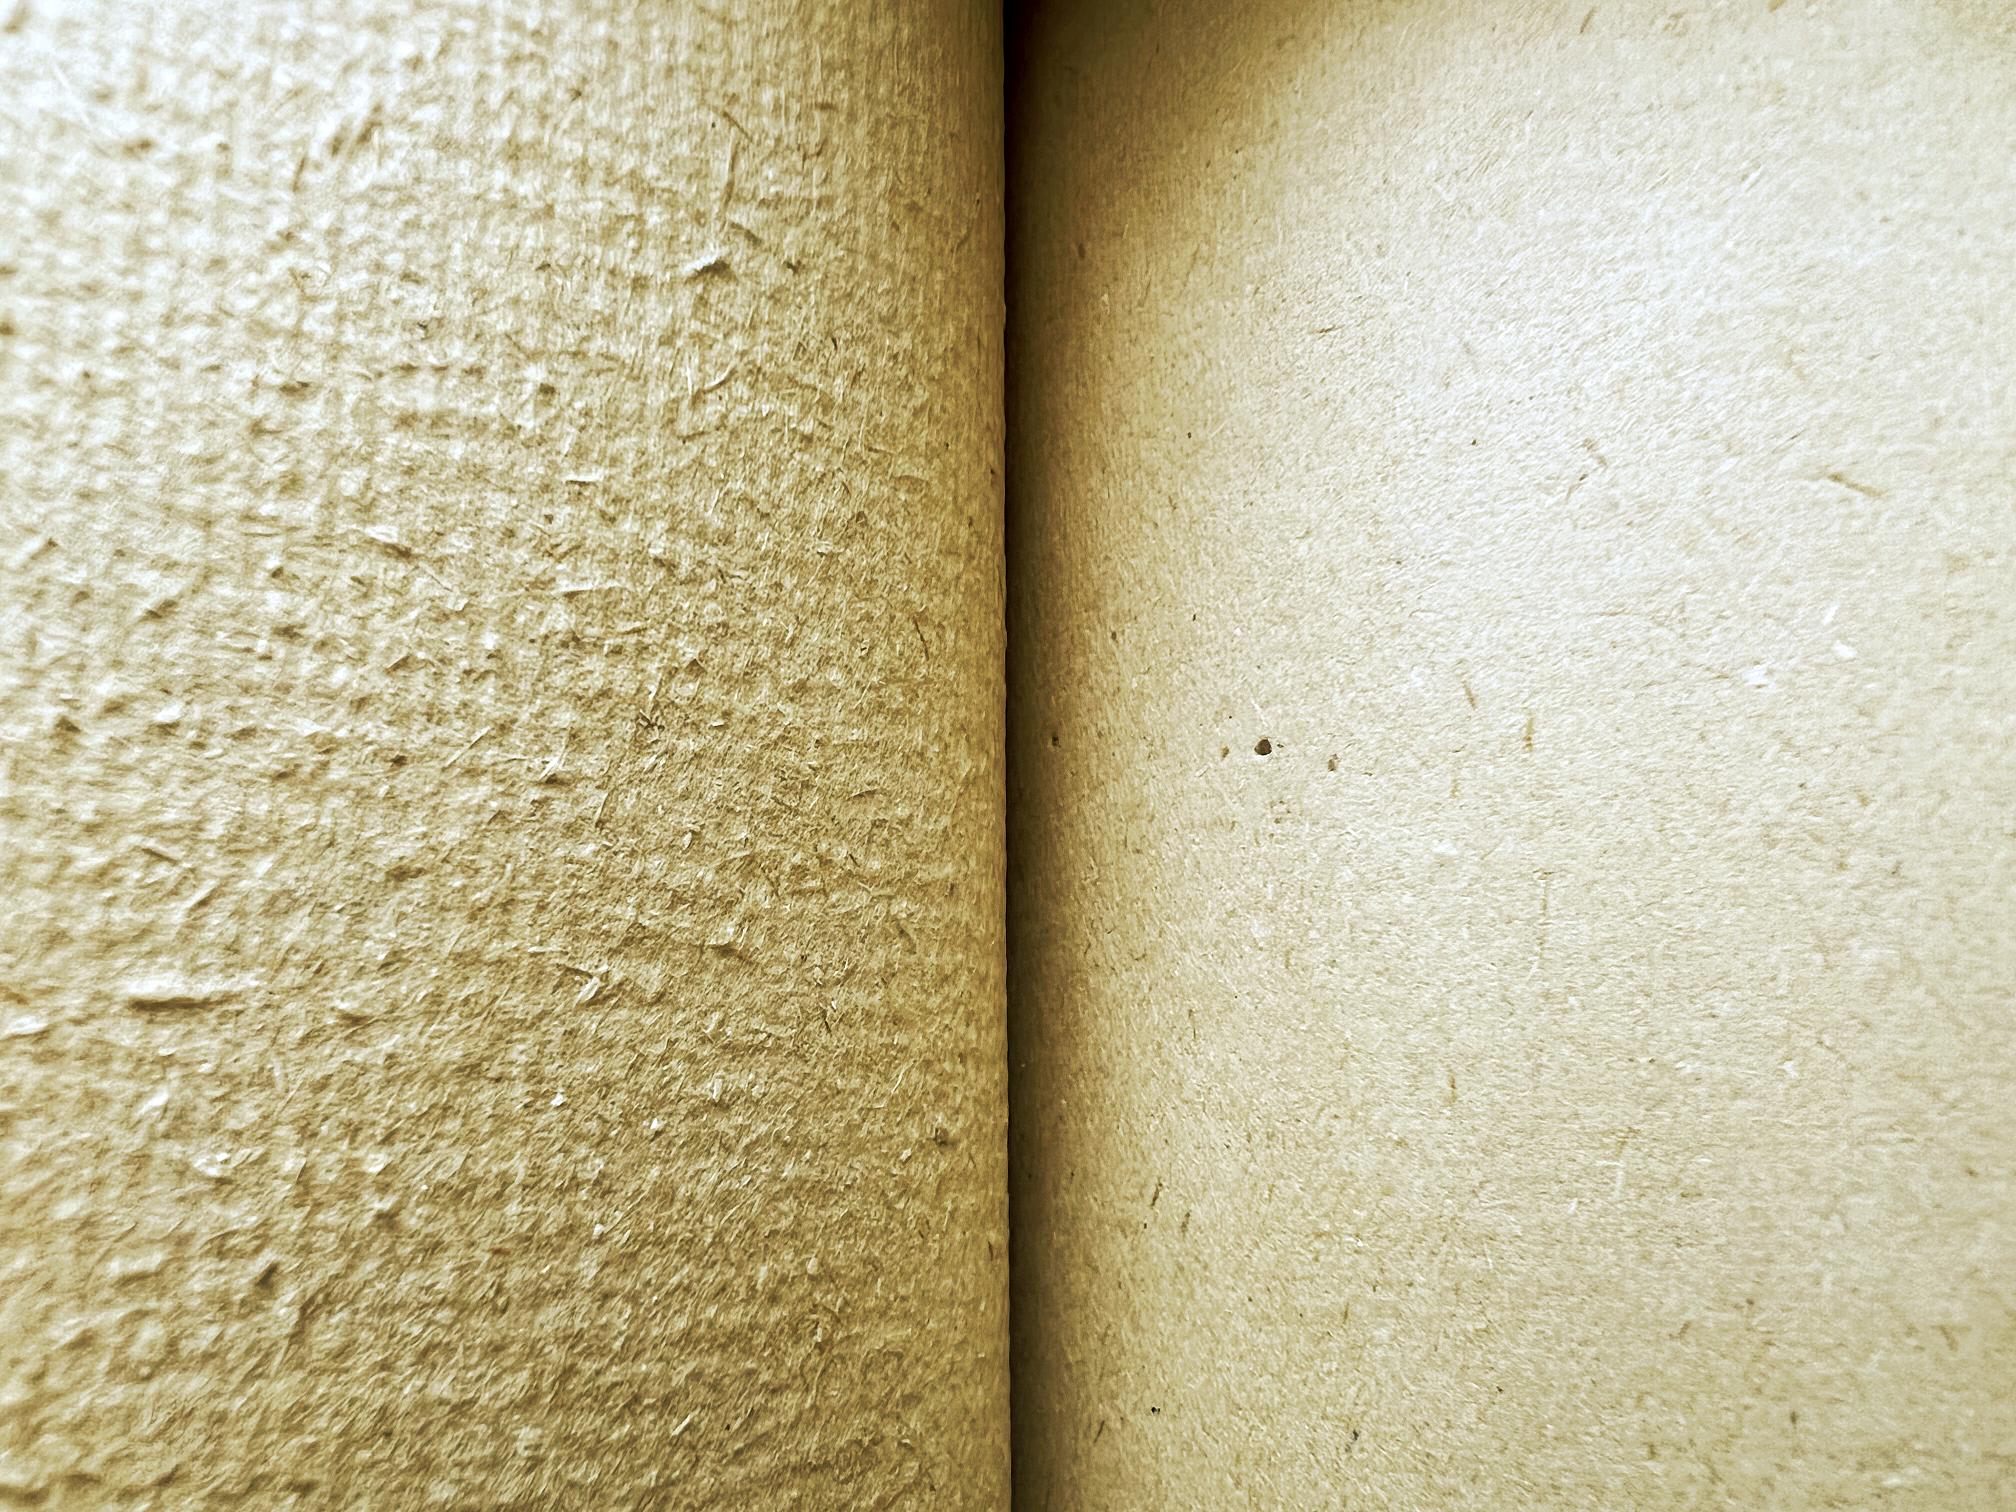
A close-up shot of the paper. It is textured on one side, and plain on the other, and it has the look of hand-made paper (which would be in keeping with the cover). If I am to work on this, I think it would need to be treated first with clear gesso or other priming. Not being able to lay the book flat to work on it was going to present a problem, though, and I came up with a solution after sleeping on it (the problem, not the book!).
I have been planning for some time to start an album with a brown, black and white colour scheme, with gold accents. The pieces could also incorporate teabags. A while back, I ran out of gold gilding flakes, so I ordered some more on Amazon, and while I was searching for what I wanted, I came across some “black gold” flakes which were fabulous, so I ordered those too! These arrived on Monday.
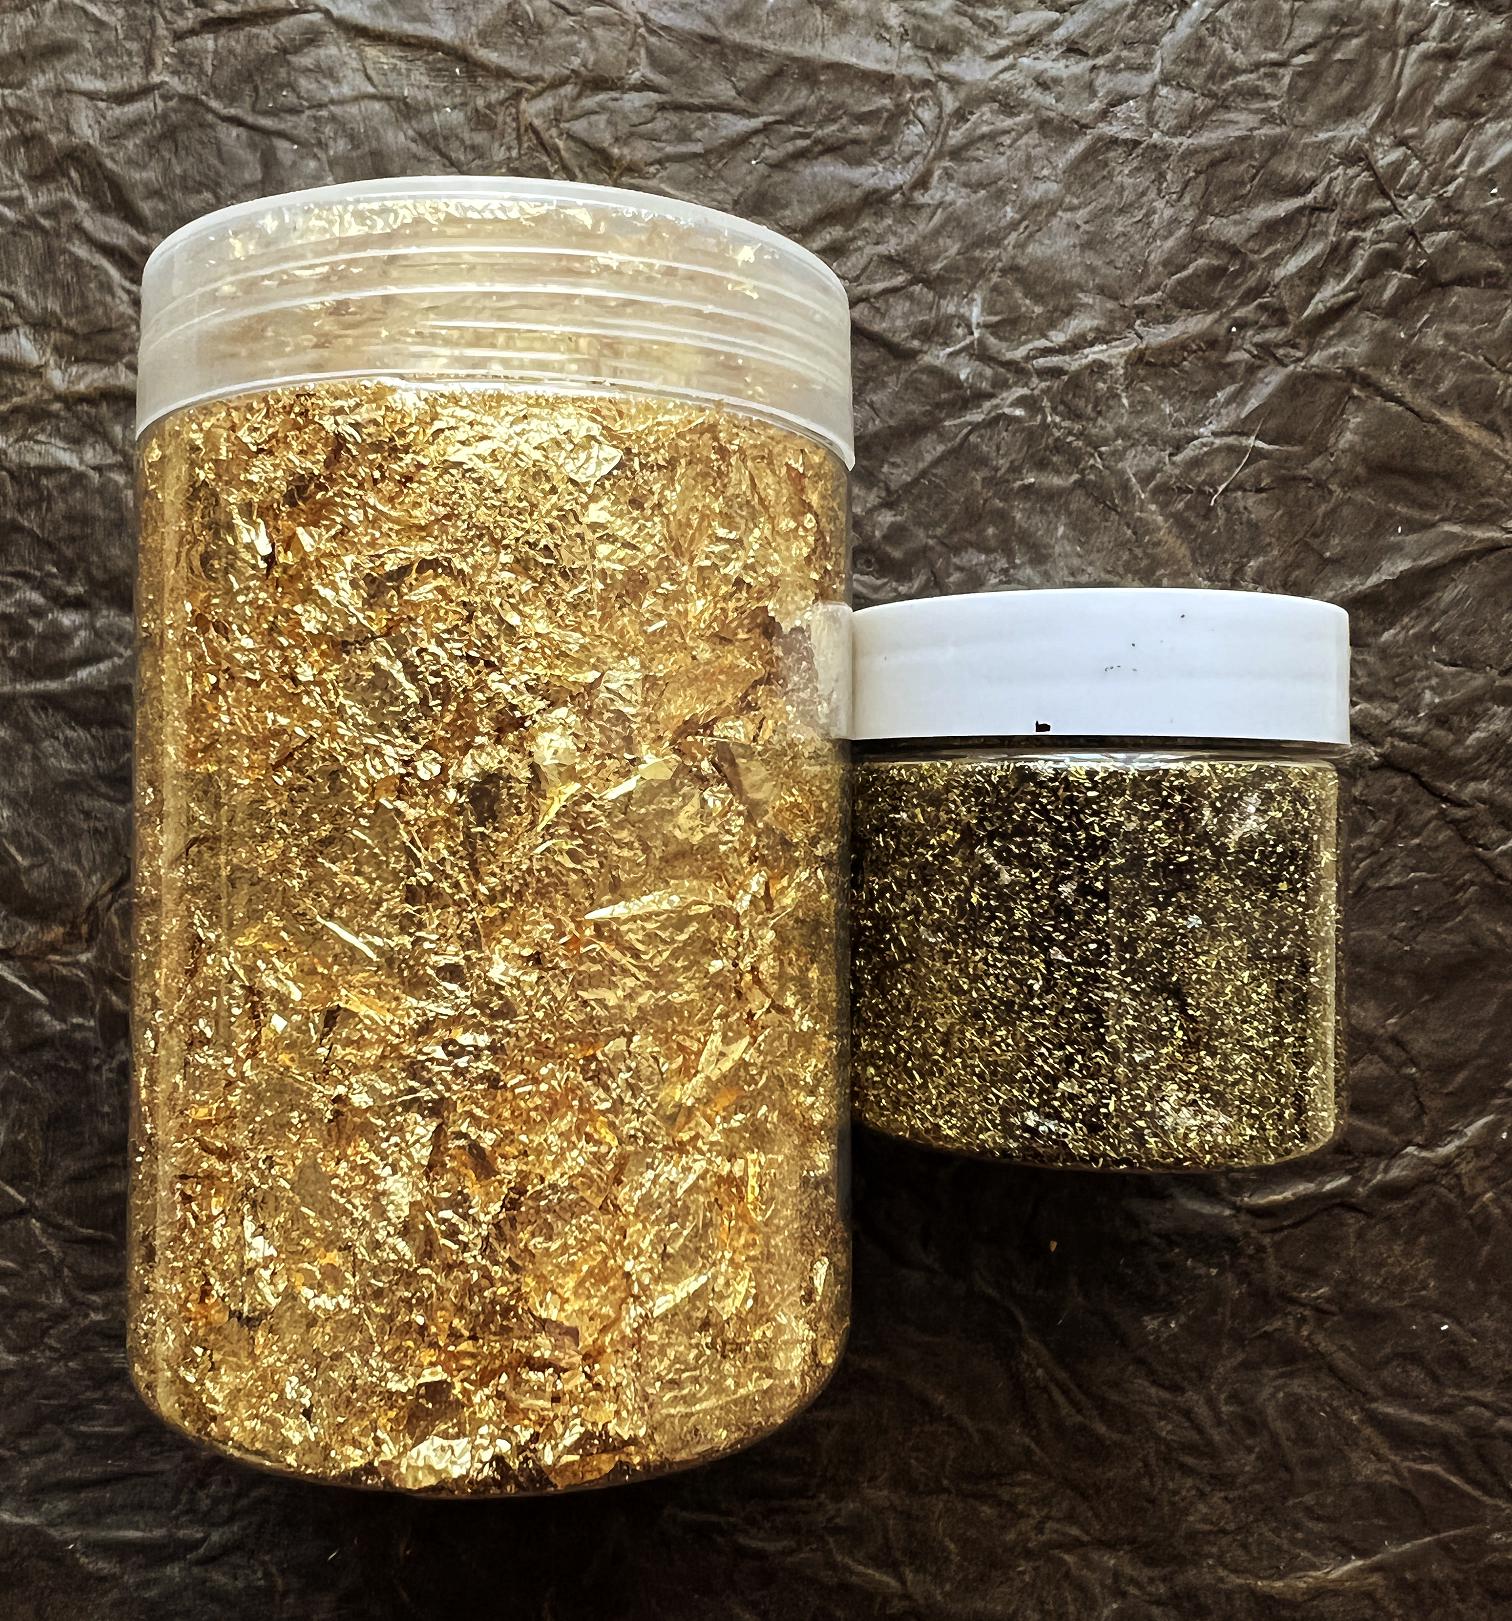
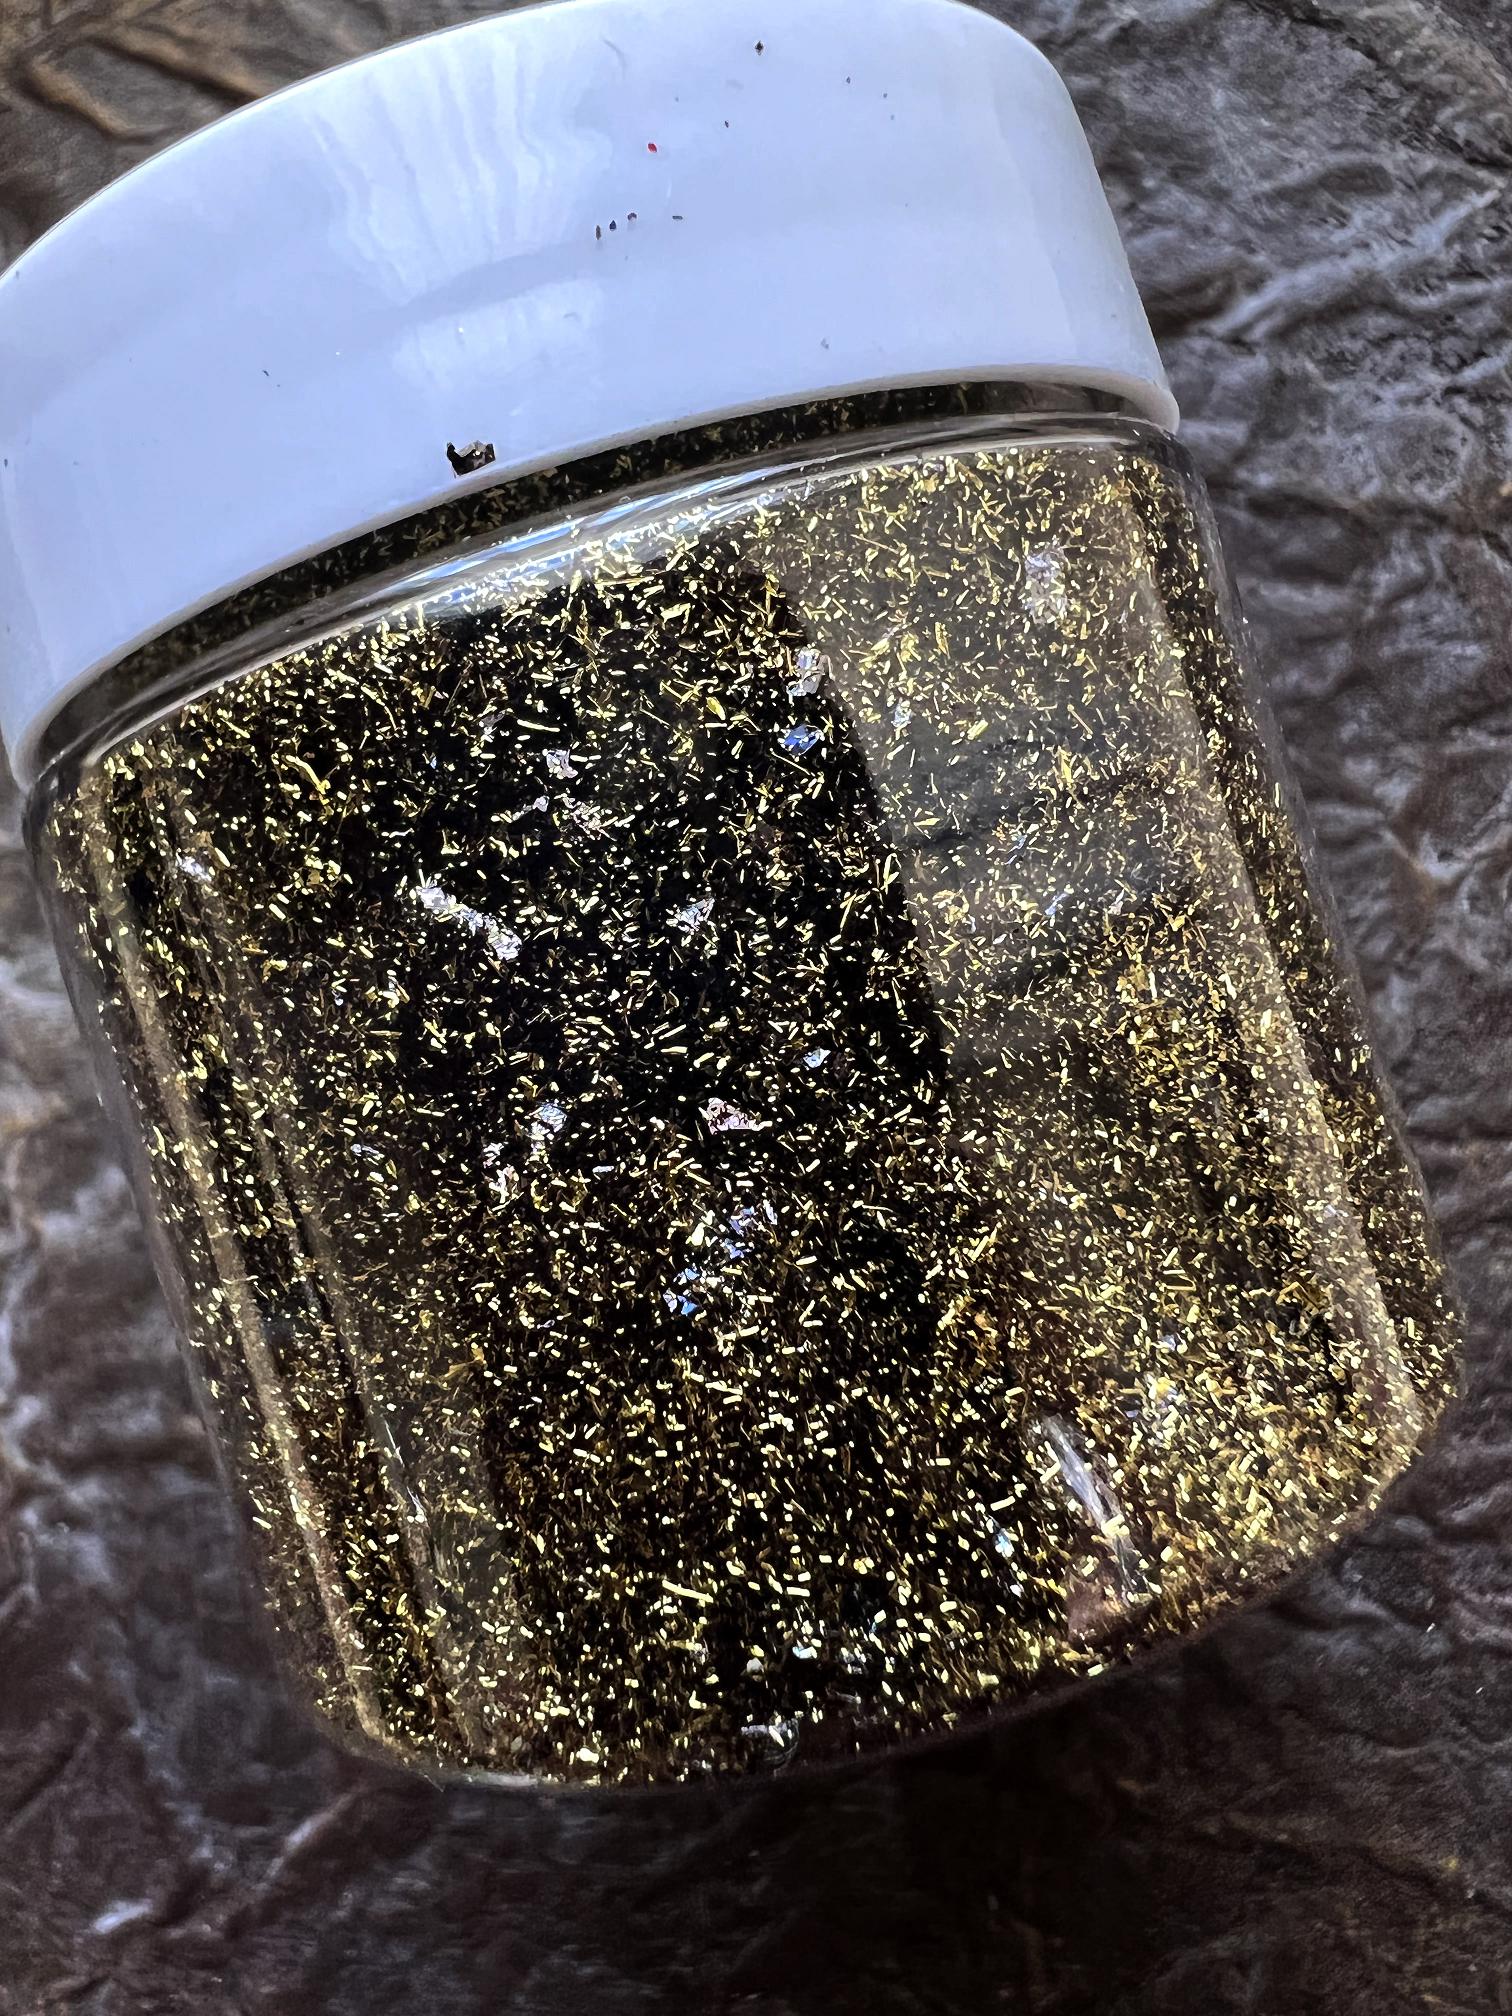
I wish the photos did these gilding flakes justice. They are just gorgeous, especially the black gold ones.
I have plans for mixed media pages made from kraft card/paper, corrugated cardboard, teabags, brown packaging papers, coffee-dyed papers, natural jute and other fibres etc. with accents of gold and black. This book would be ideal for such a colour scheme! I would need to trim out quite a few of the pages in order to create enough space for the thickness of the work.
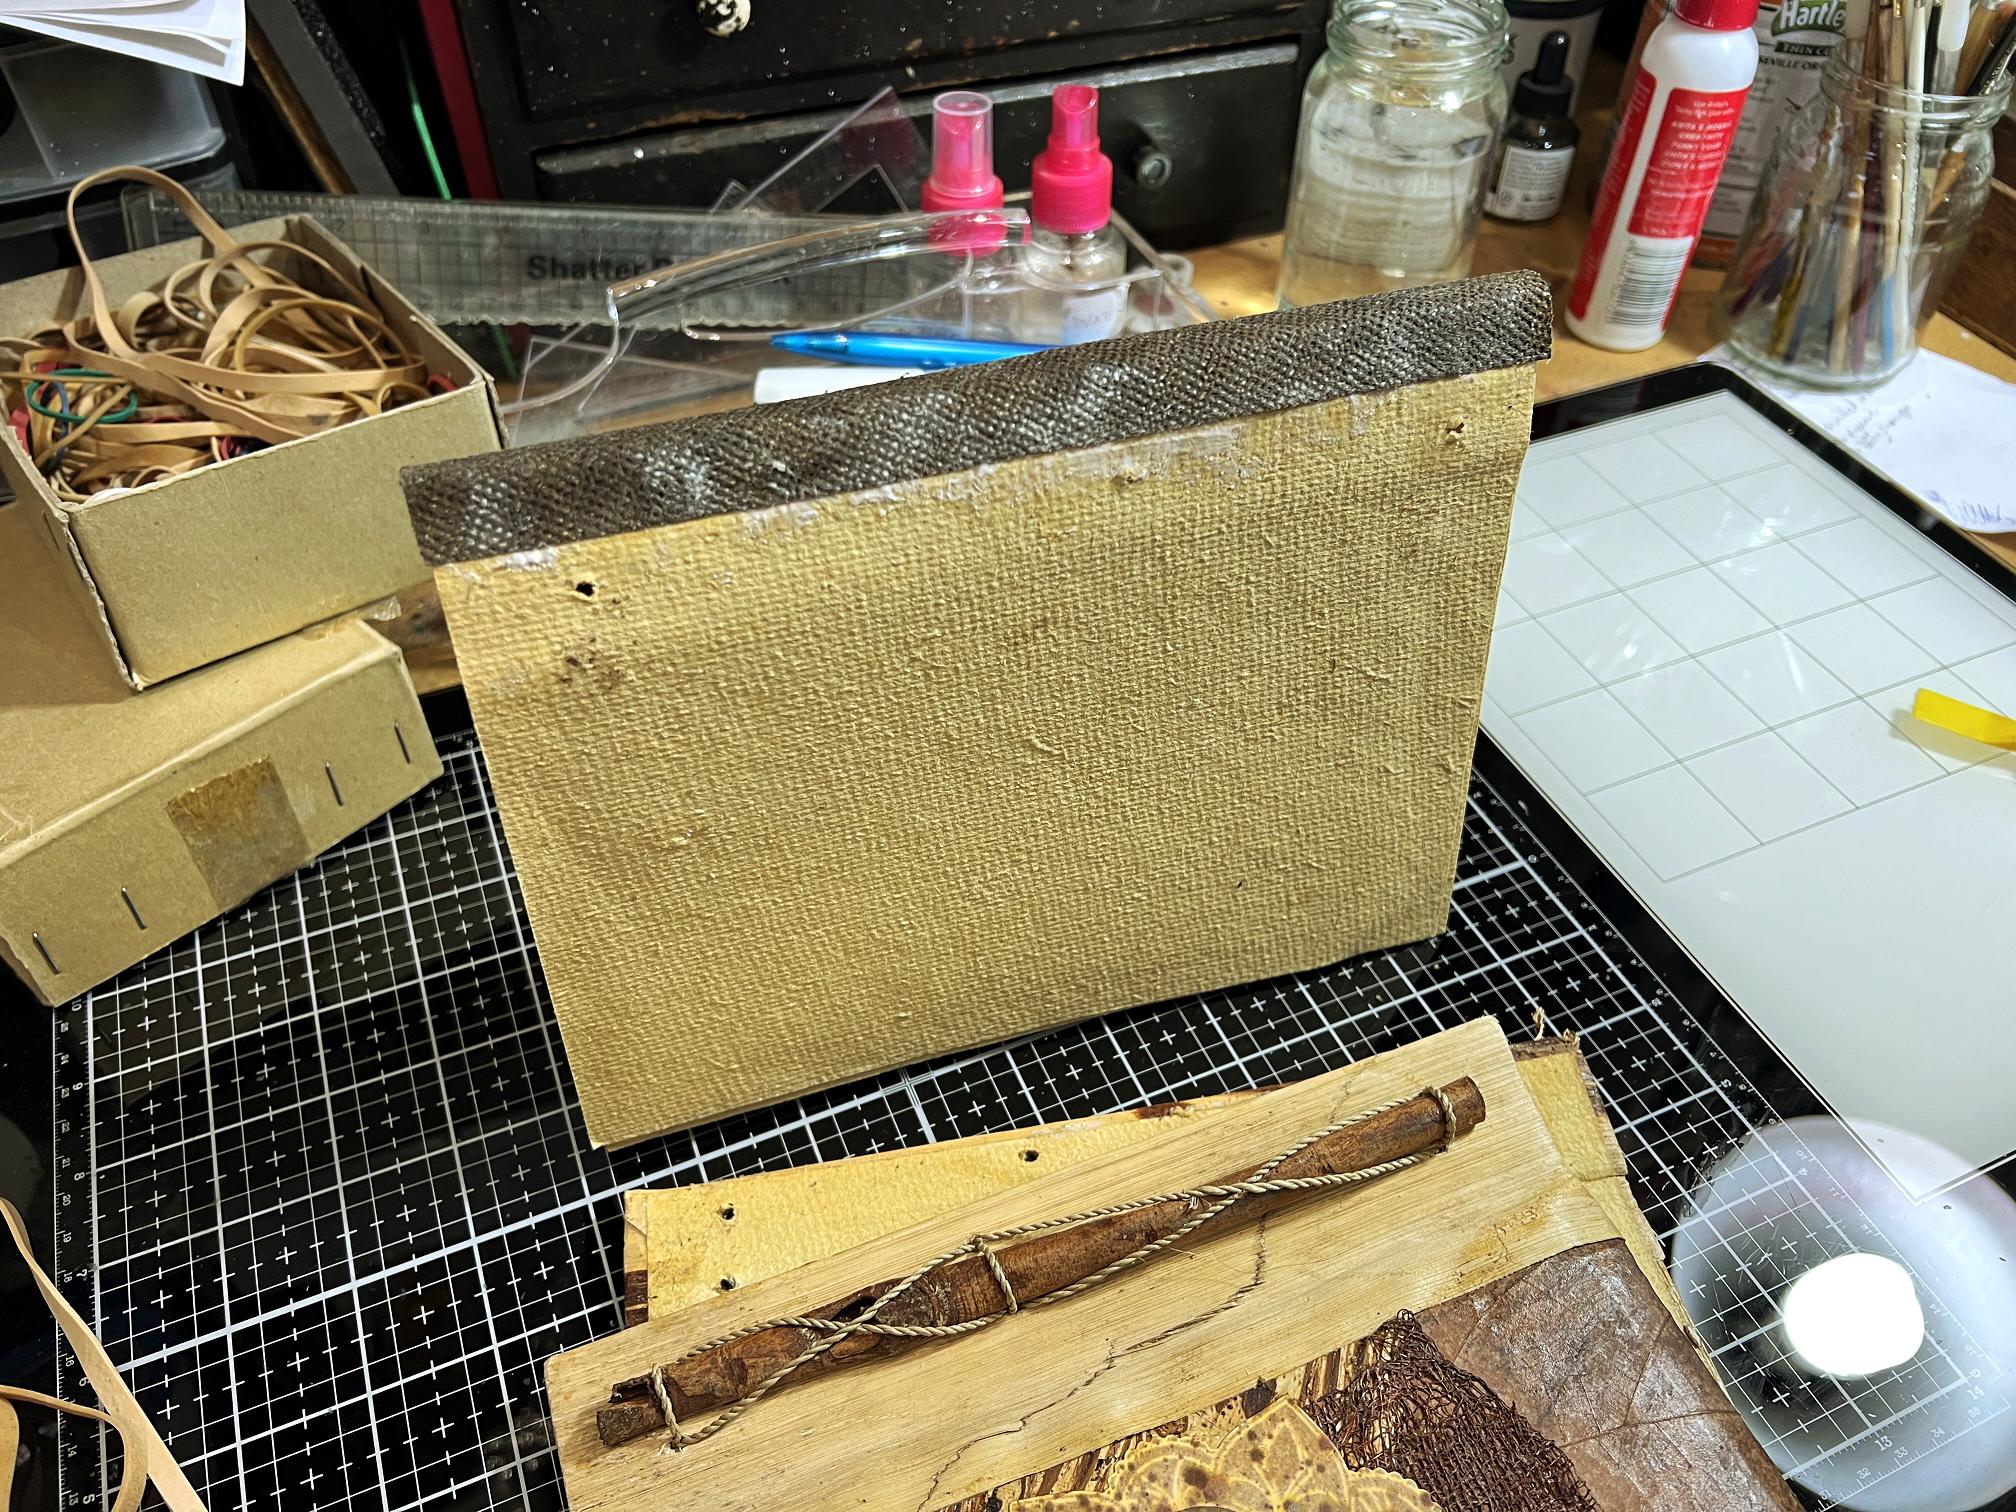
I began work on repairing and altering the book on Sunday. Having decided I could not use this book unless the pages opened flat, I removed the binding by carefully untying the knot in the string on the back of the cover, and eased the string right out. I put the decorative part back on the front cover only. Having less thickness to go through, there was sufficient string to enable me to tie it off again, and I added a dab of tacky glue to prevent the knot from untying. I also glued under the ends of the rolled up bark, and under the stitched string holding it in plae. It certainly won’t shift now.
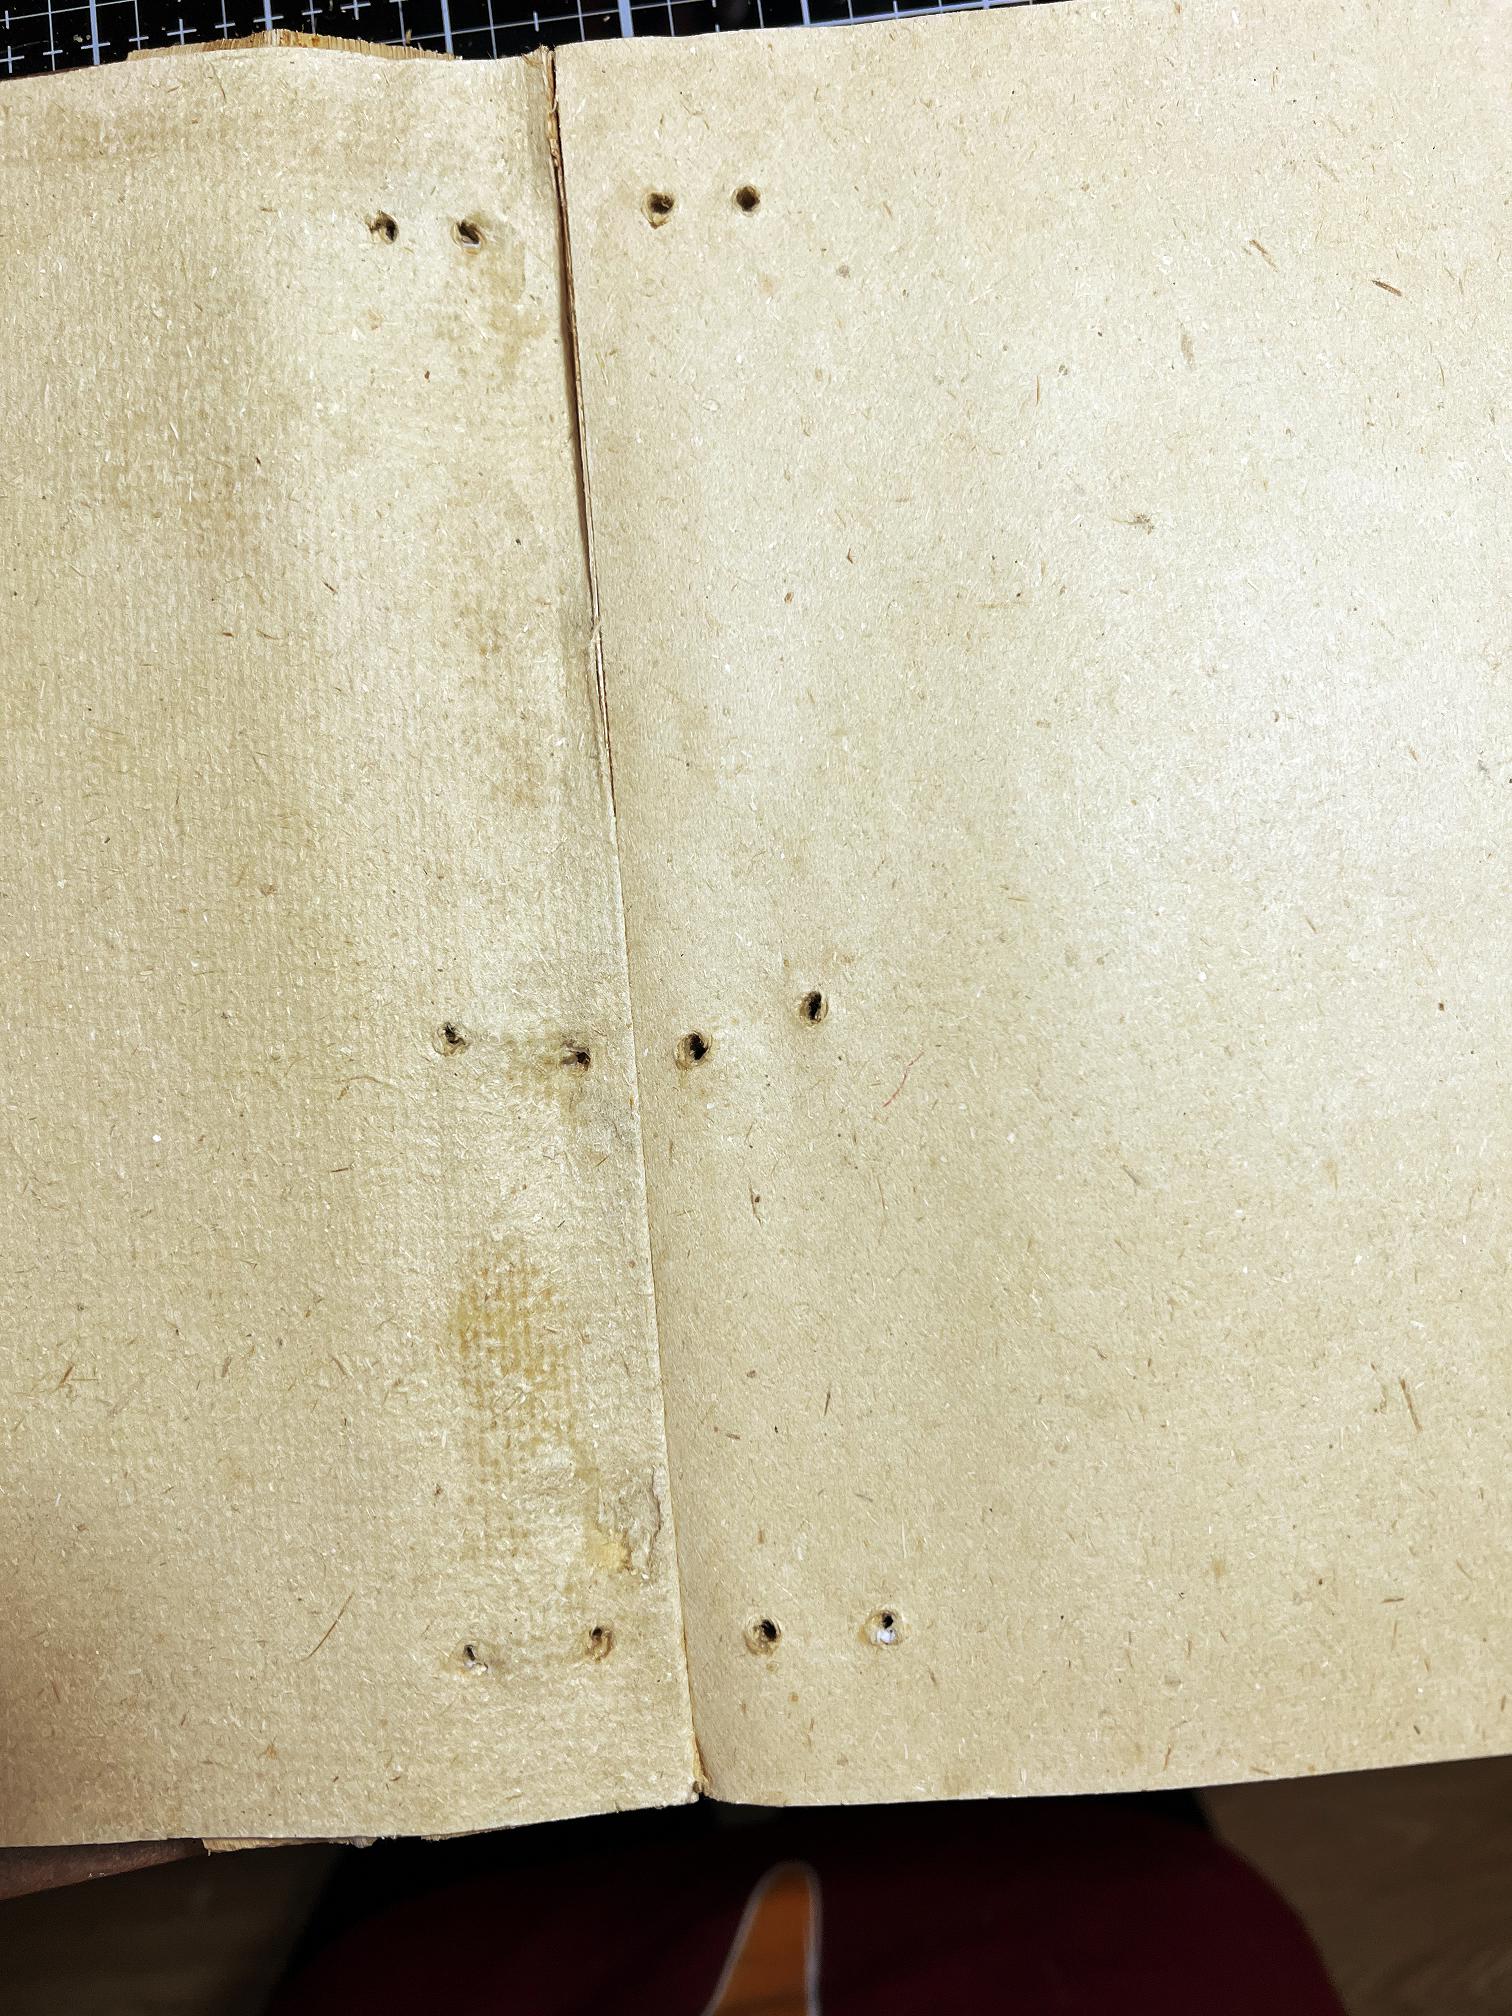
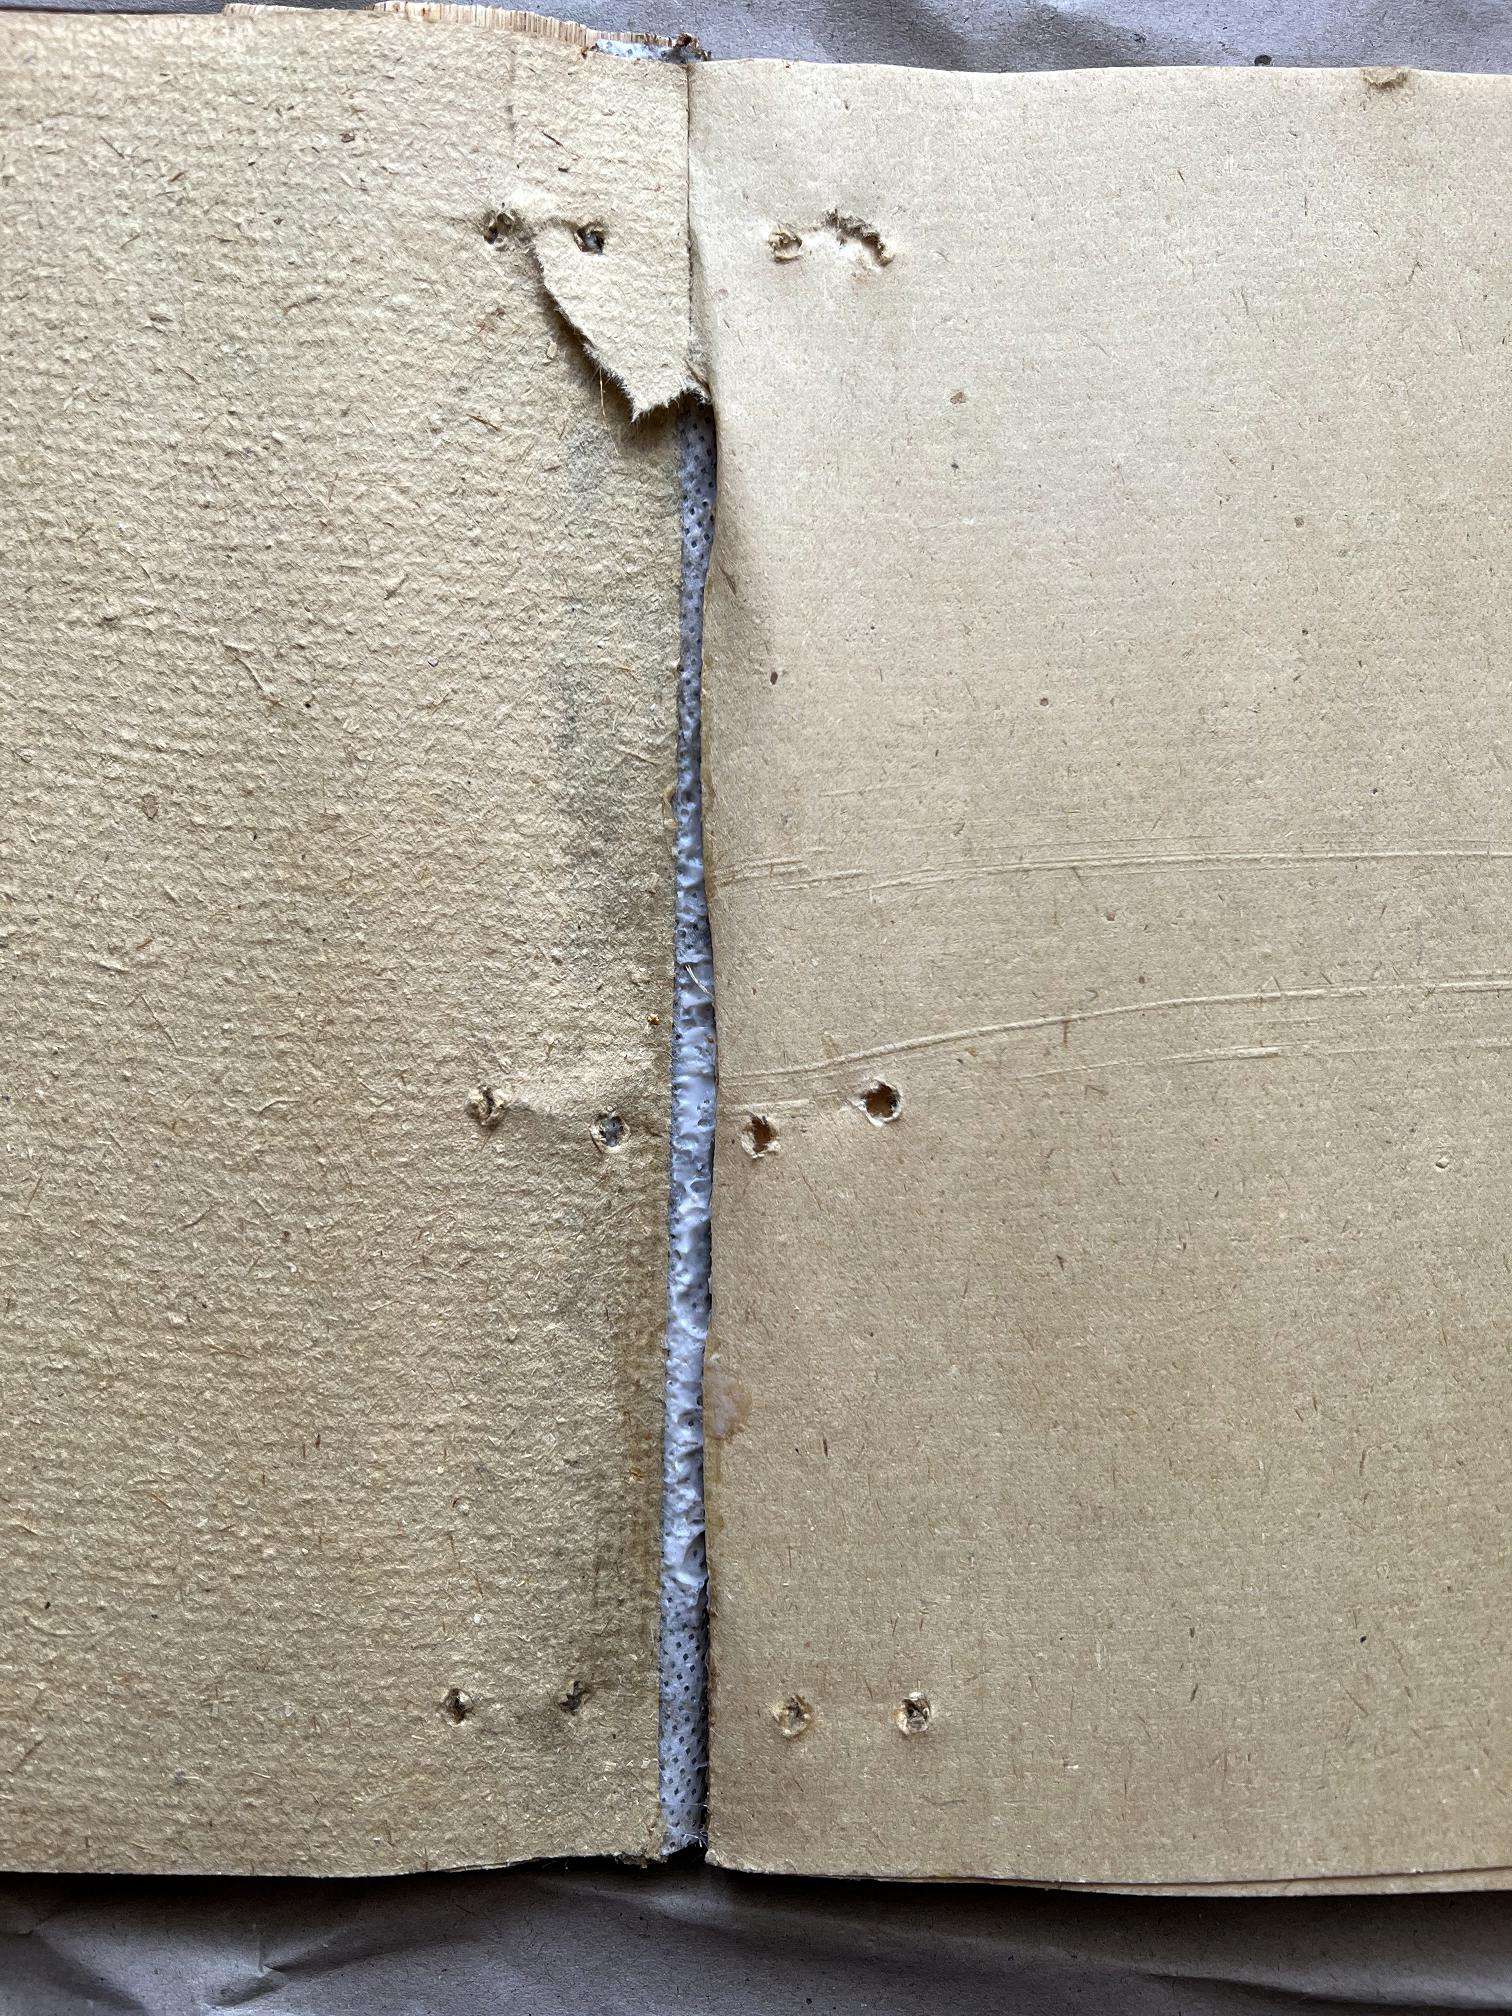
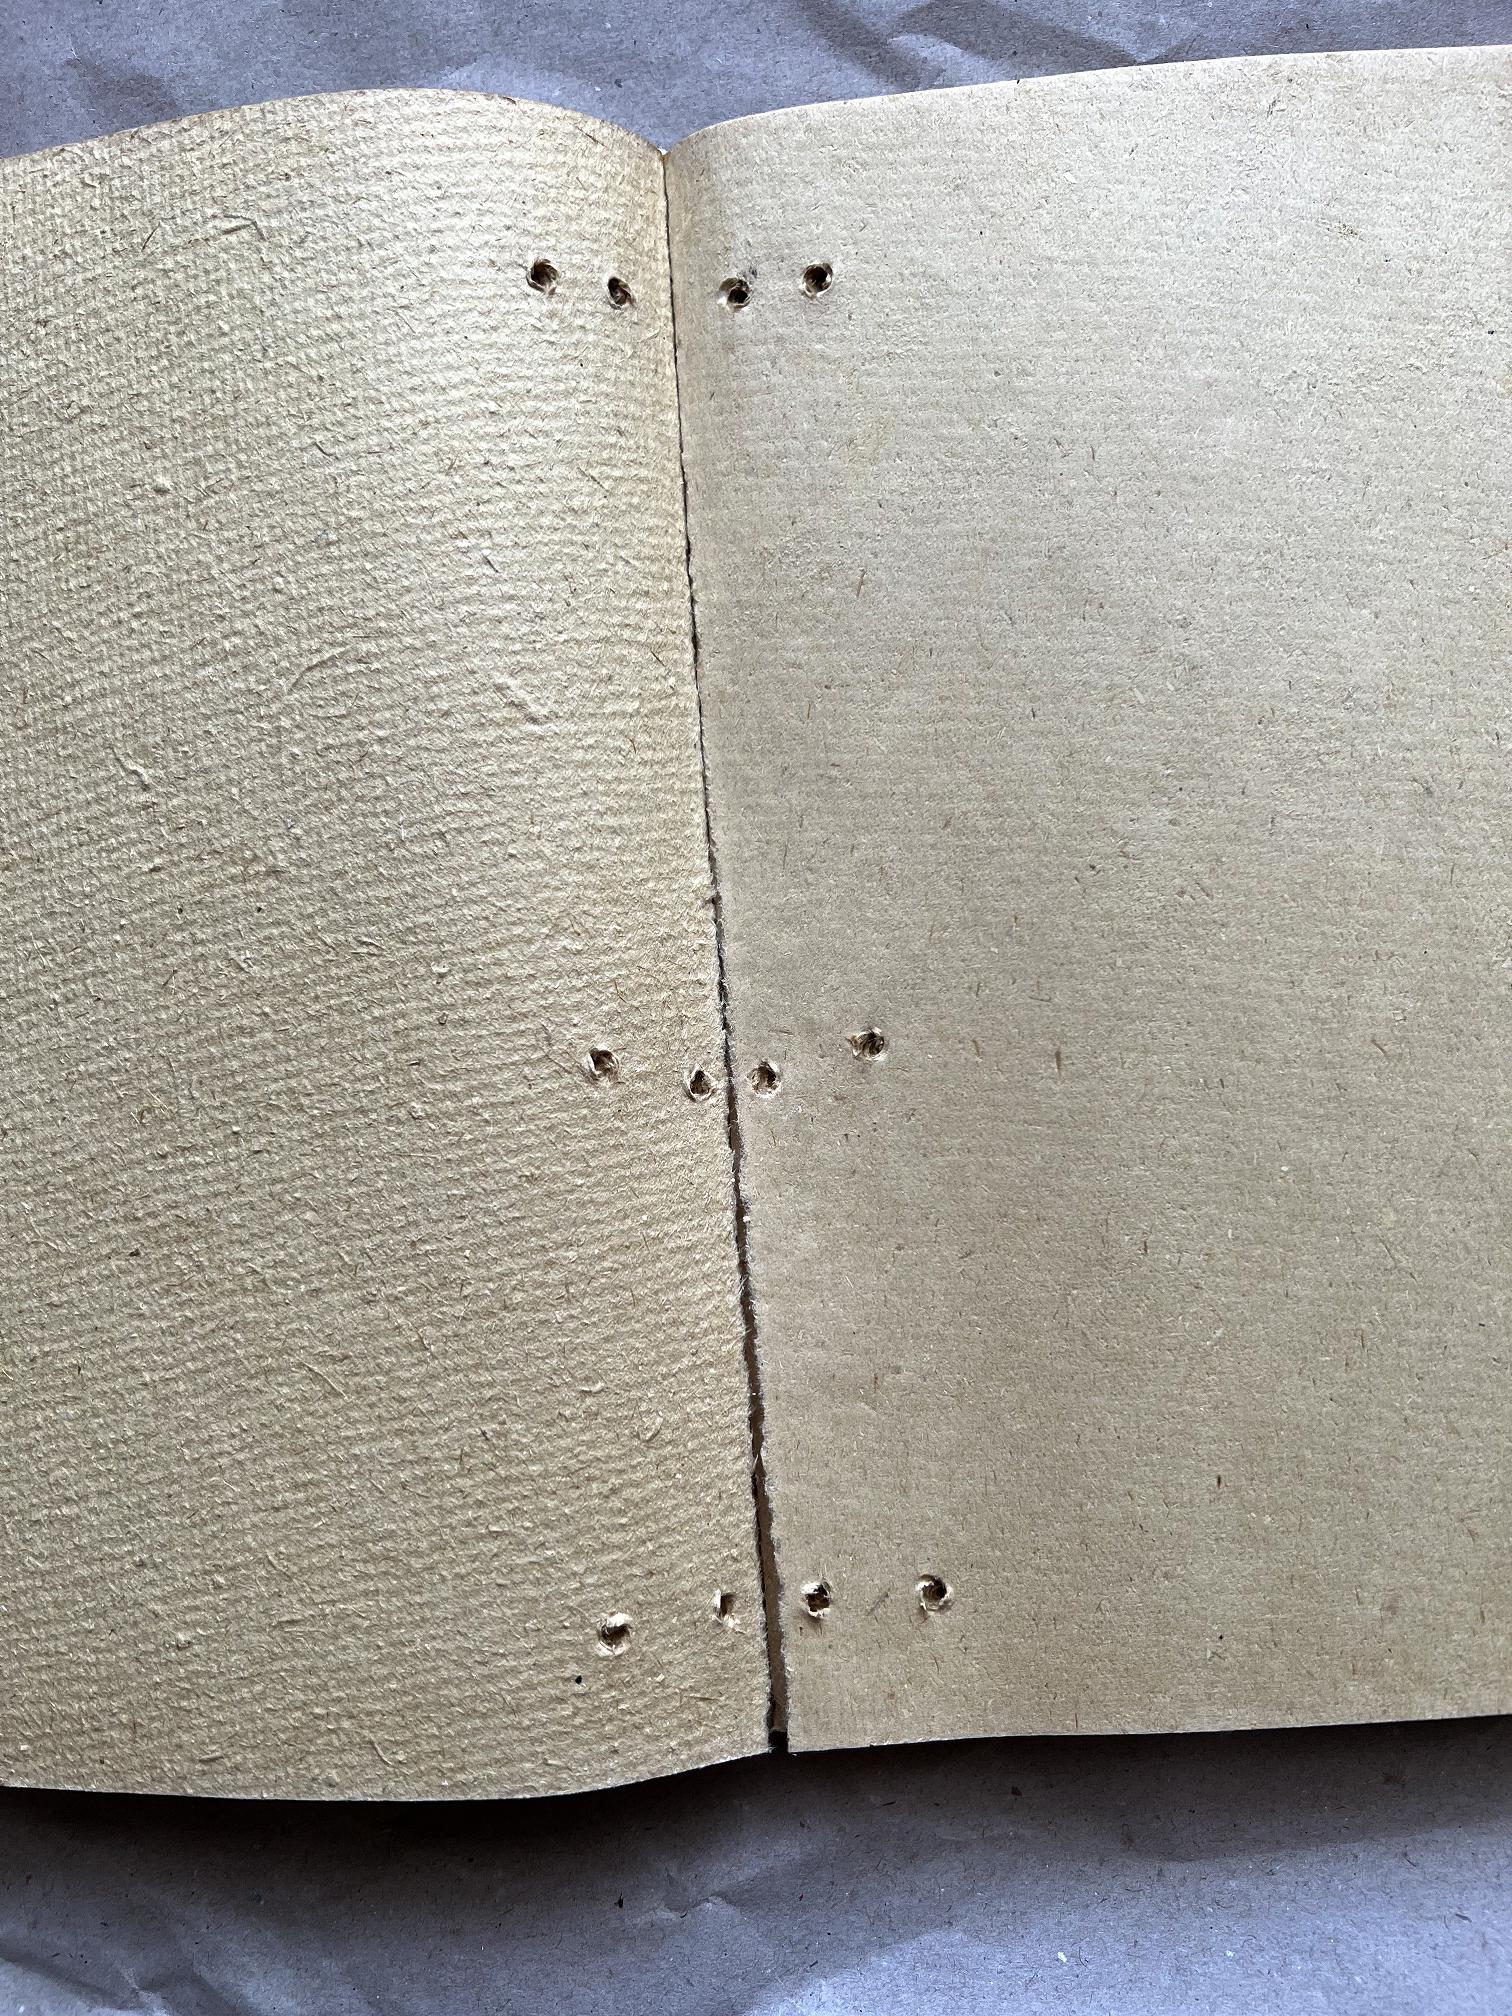
This is the back of the book, showing the holes where the binding string had been.
Opening up the book, I could now lay it flat. You can see the binding holes. These can be taped over once I start working in it – the tape will add extra texture!
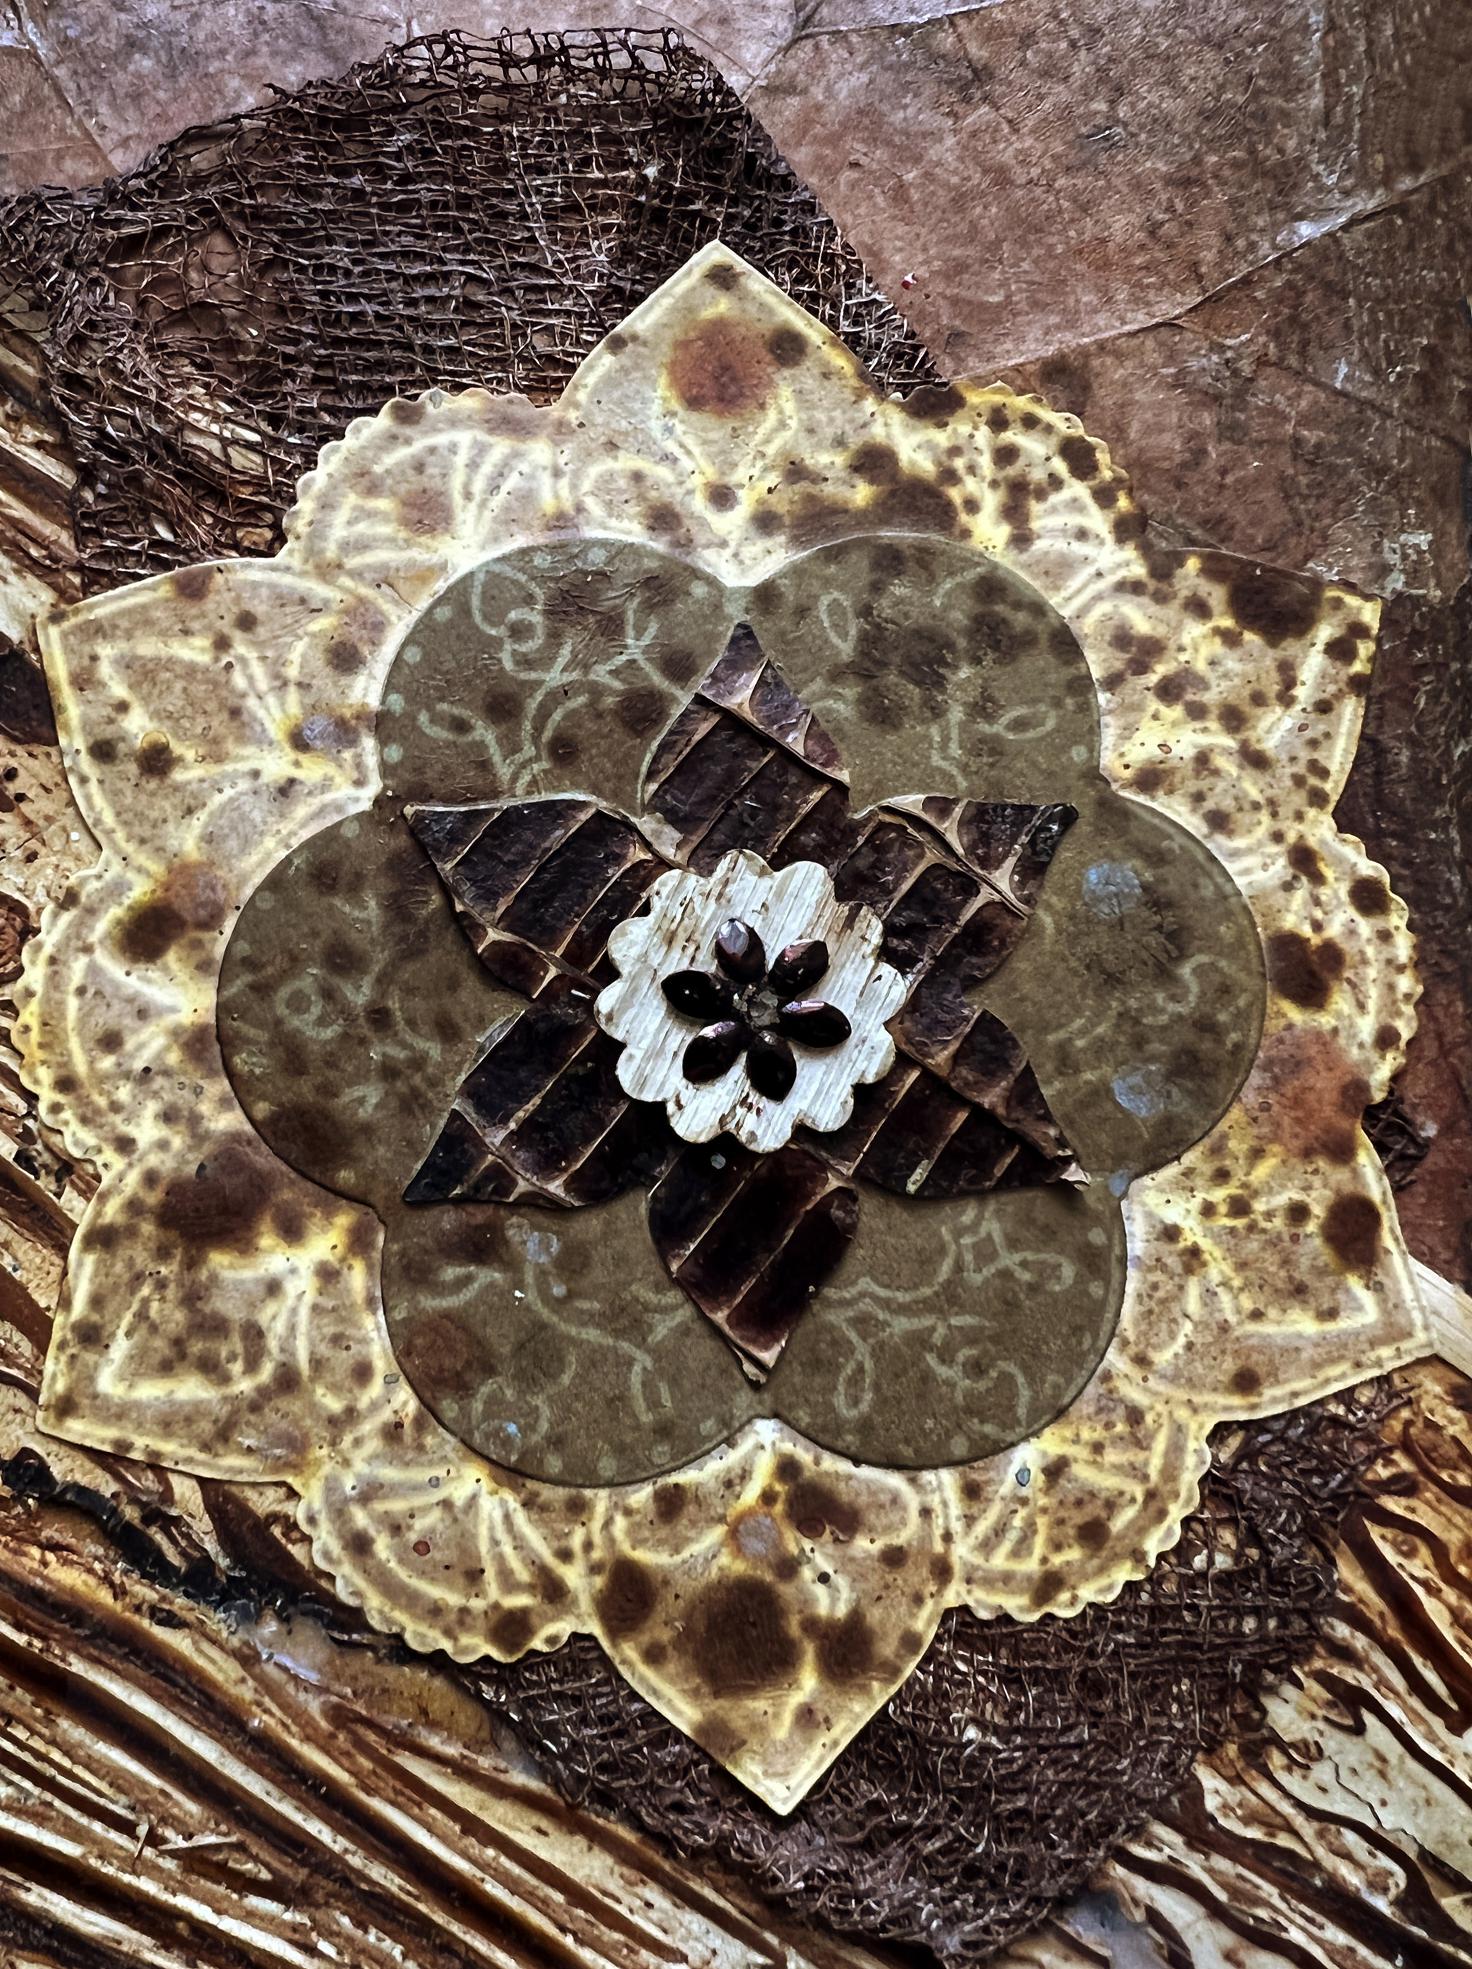
I was delighted to be able to remove the unwanted “yin and yang” motif from the front cover with no problem at all. The two pieces of organic material had been glued to a disc of thin card, and I was able to insert a palette knife under this and gently prise away the whole motif. You can see the slight depression in the front cover where it had been.
Here is the book with the motif pieces removed. You can see the circular mark more clearly on this picture, where the motif had been.
Last year I bought a matching stamp and die set by Catherine Pooler. I had not used it yet, and thought it would make a nice new motif to decorate the front of the book.
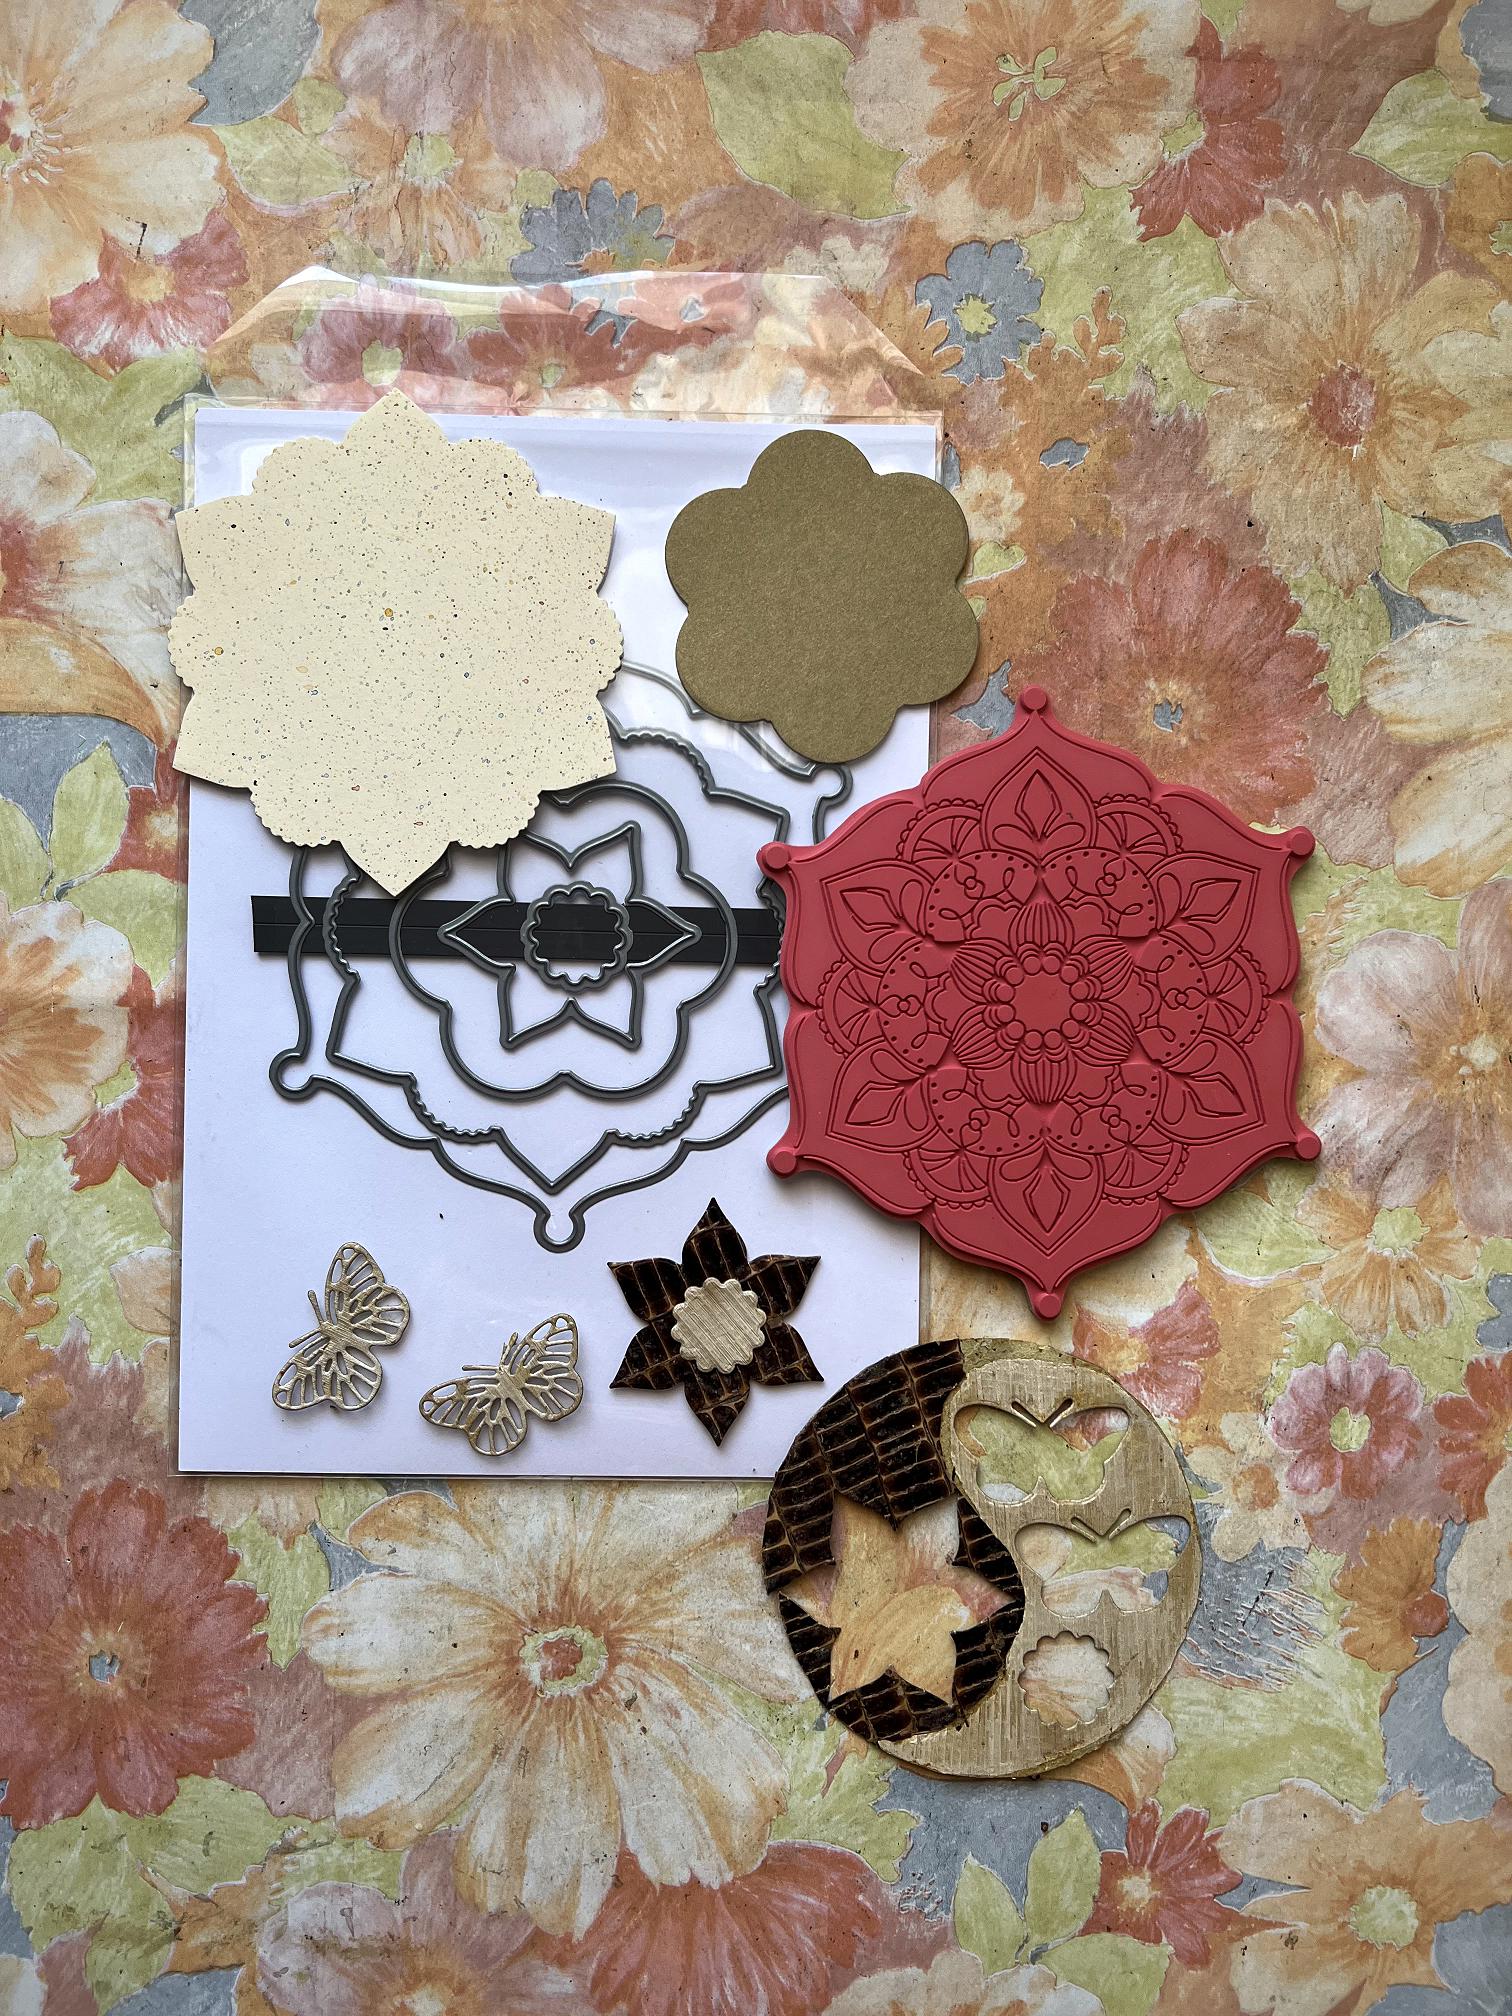
I was astonished and delighted at just how well the organic material making up the “yin and yang” cut with a die. I began with the six-petalled flower cut from the darker side, and feeling more confident that this material would indeed cut, I cut a smaller centre from the light side. The definitions of the tiny scalloped pattern around the edge proved to me that even an intricate die would probably cut this stuff, so I cut two small butterflies as well. In the end, I decided not to use these on this project as they were a superfluous distraction on the final design, so they can go in my stash for another time.
I used all but the outermost die from this set to cut the layers, cutting the larger pieces from card. I stamped them both, lining up the stamp in my stamping platform and using a template I had cut with the die. There was a lot of trial and error in this as I couldn’t initially remember how to do it and had to find some YouTube videos to help me!
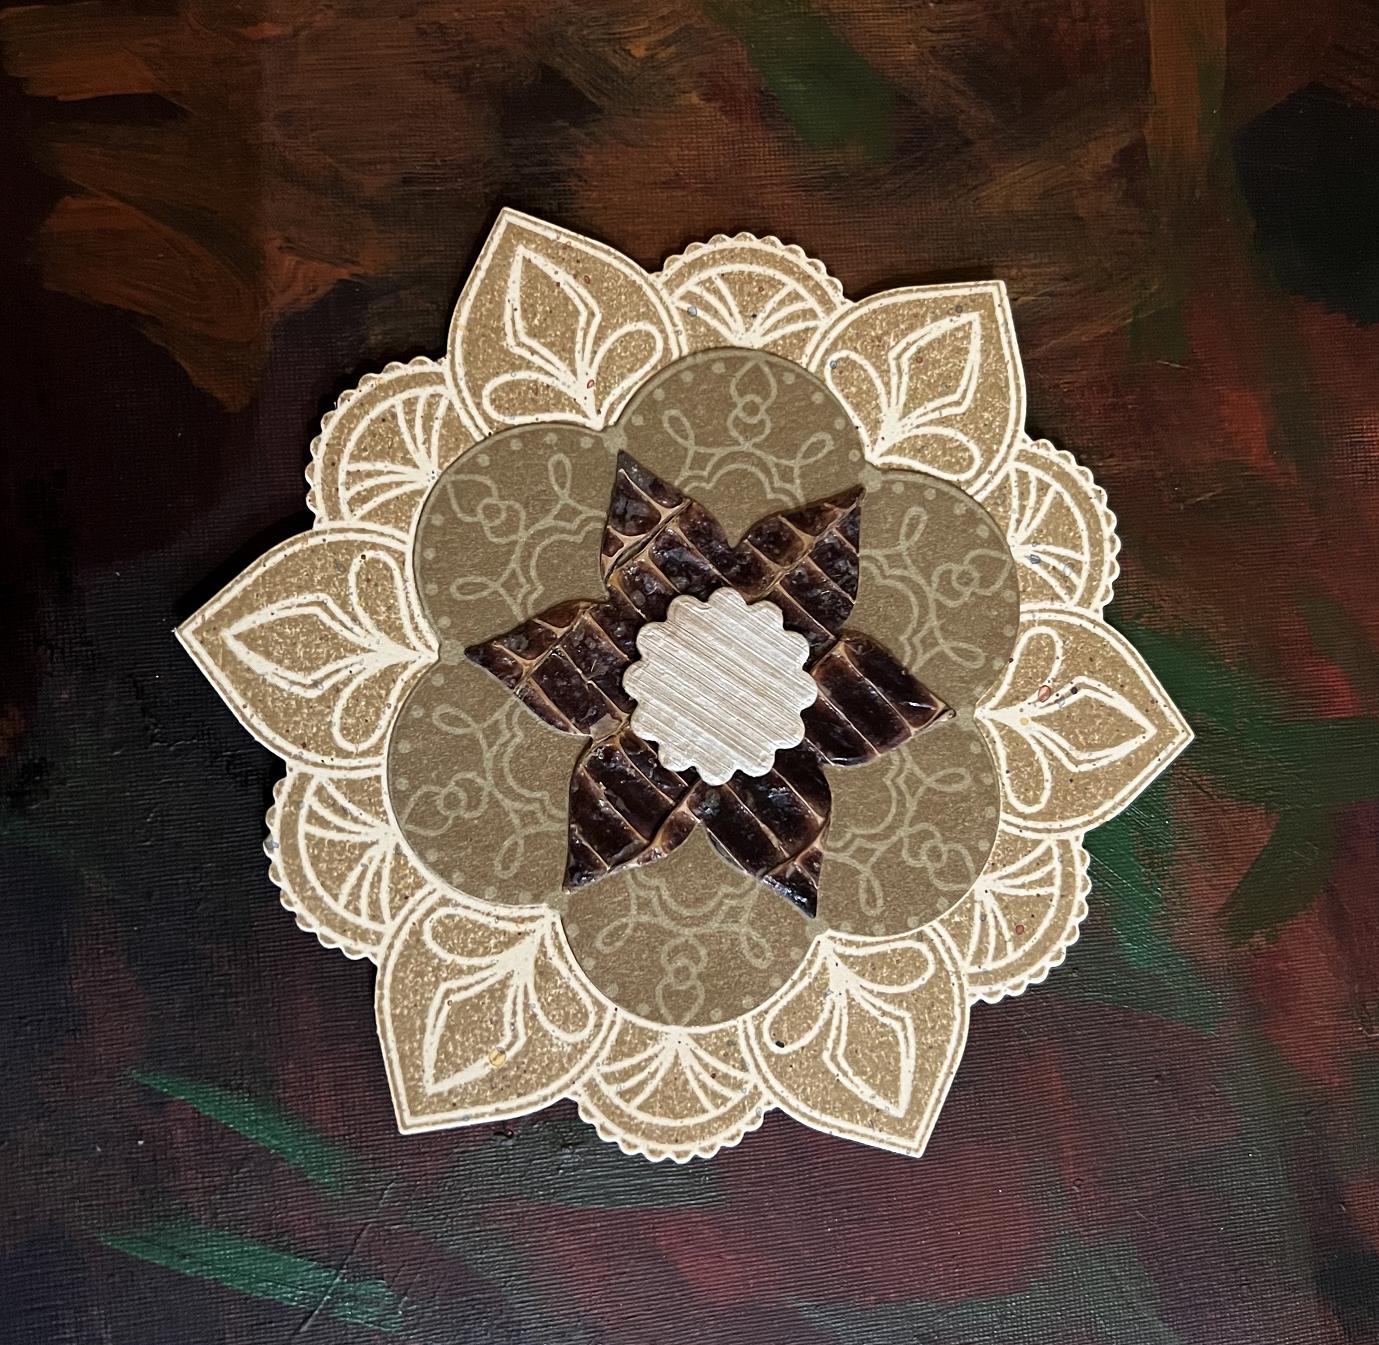
When I showed my hubby, he liked the motif but said it wan’t really in character with the book cover. I could see his point – it was a bit too pristine and regular. I therefore added some more ink and spritzed the pieces well with water to soften the stamping a bit, and took one of my new Distress Spray Stains and spattered it with the tube from the bottle. The stamping is less defined now, merging more into the background and adding texture and interest. Altogether a much more suitable result.
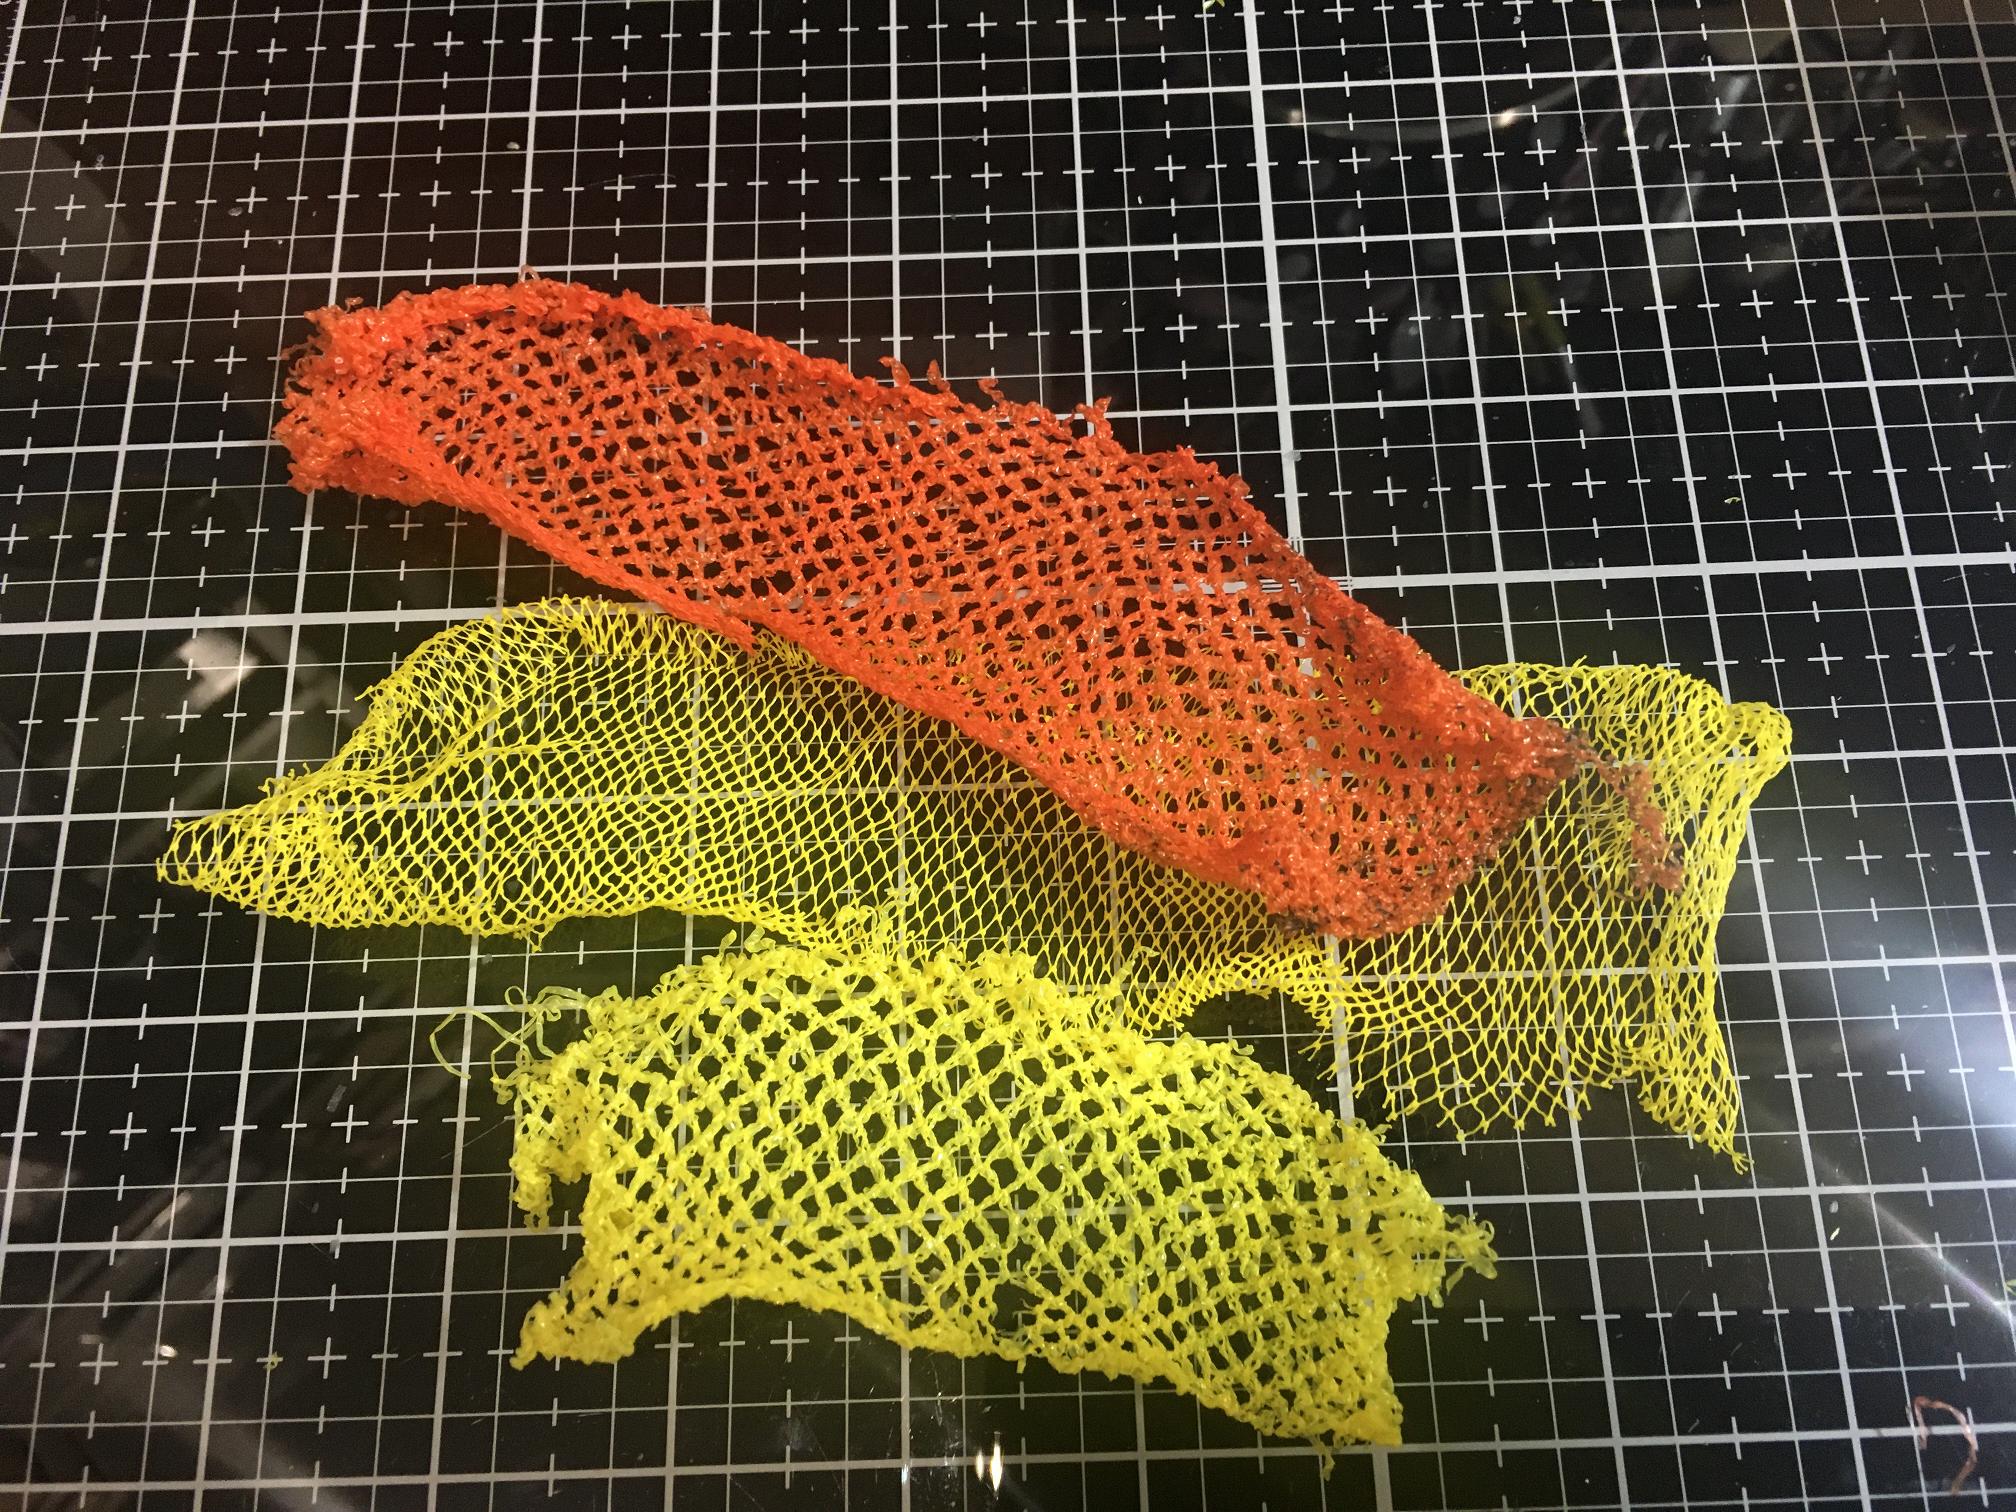
I did some experiments melting some fruit nets – I had done this before, many years ago, to make a finer mesh fishing net for a tag I made, adding small flat wooden spacer beads to the edges to create the look of floats.
Here are some of the fruit nets. This orange one is quite flimsy.
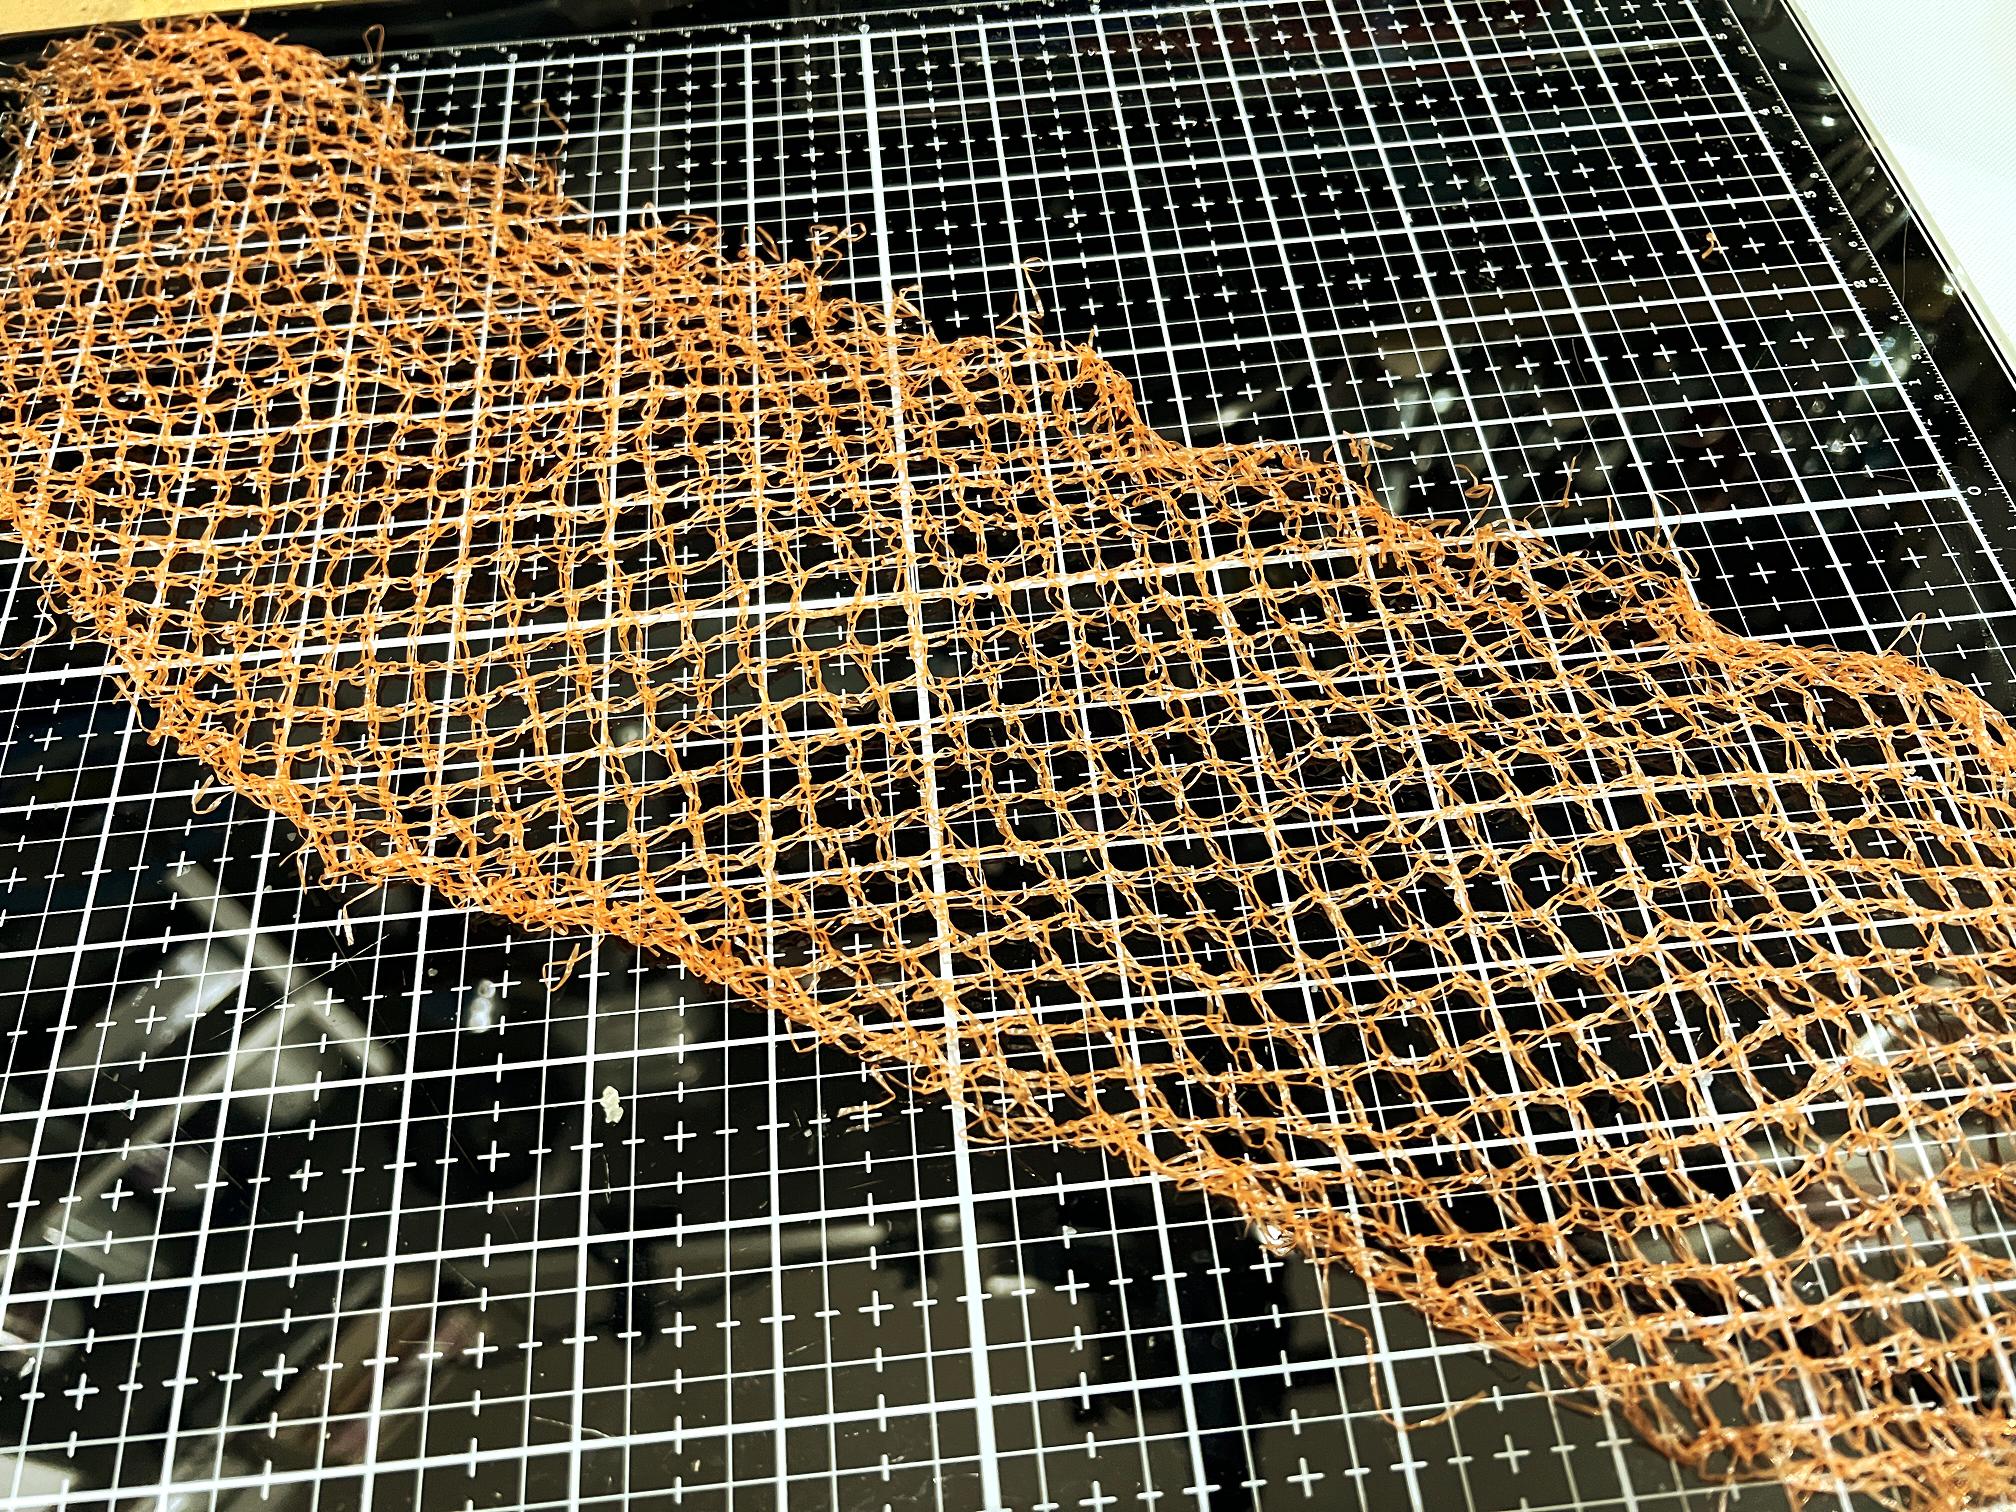
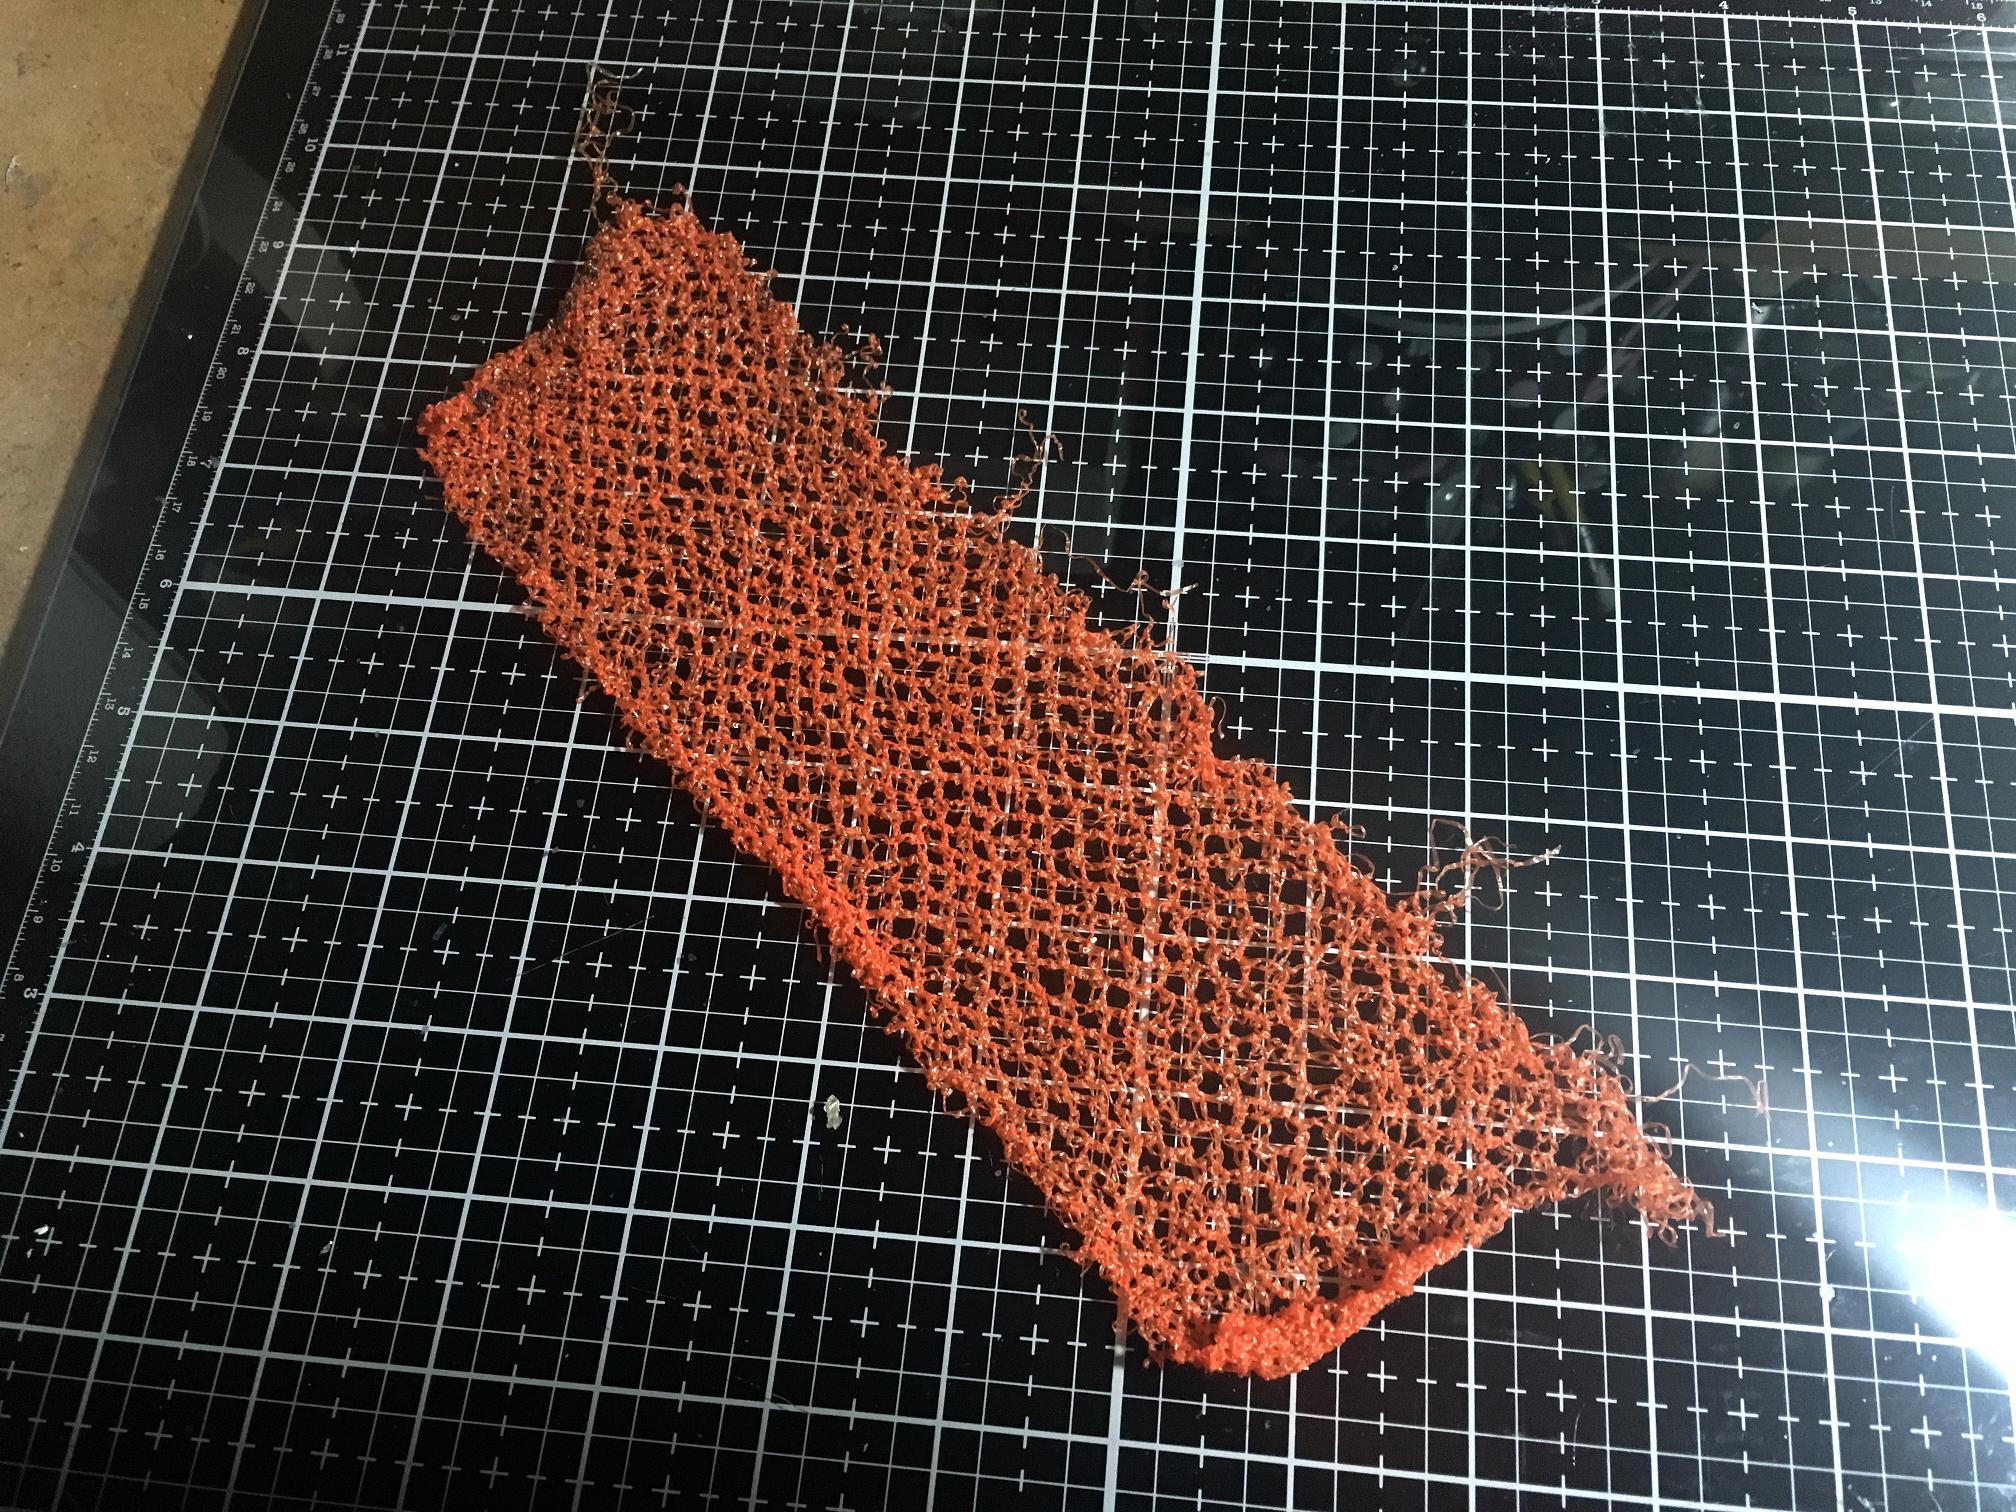
Here it is, partially melted. When you heat it with a heat gun, it rapidly shrinks and shrivels and becomes harder. You can also iron it between parchment paper to get a flatter result.
I think this piece was originally a bag containing chocolate coins. It is not woven like fruit net, and is much more springy and plasticky.
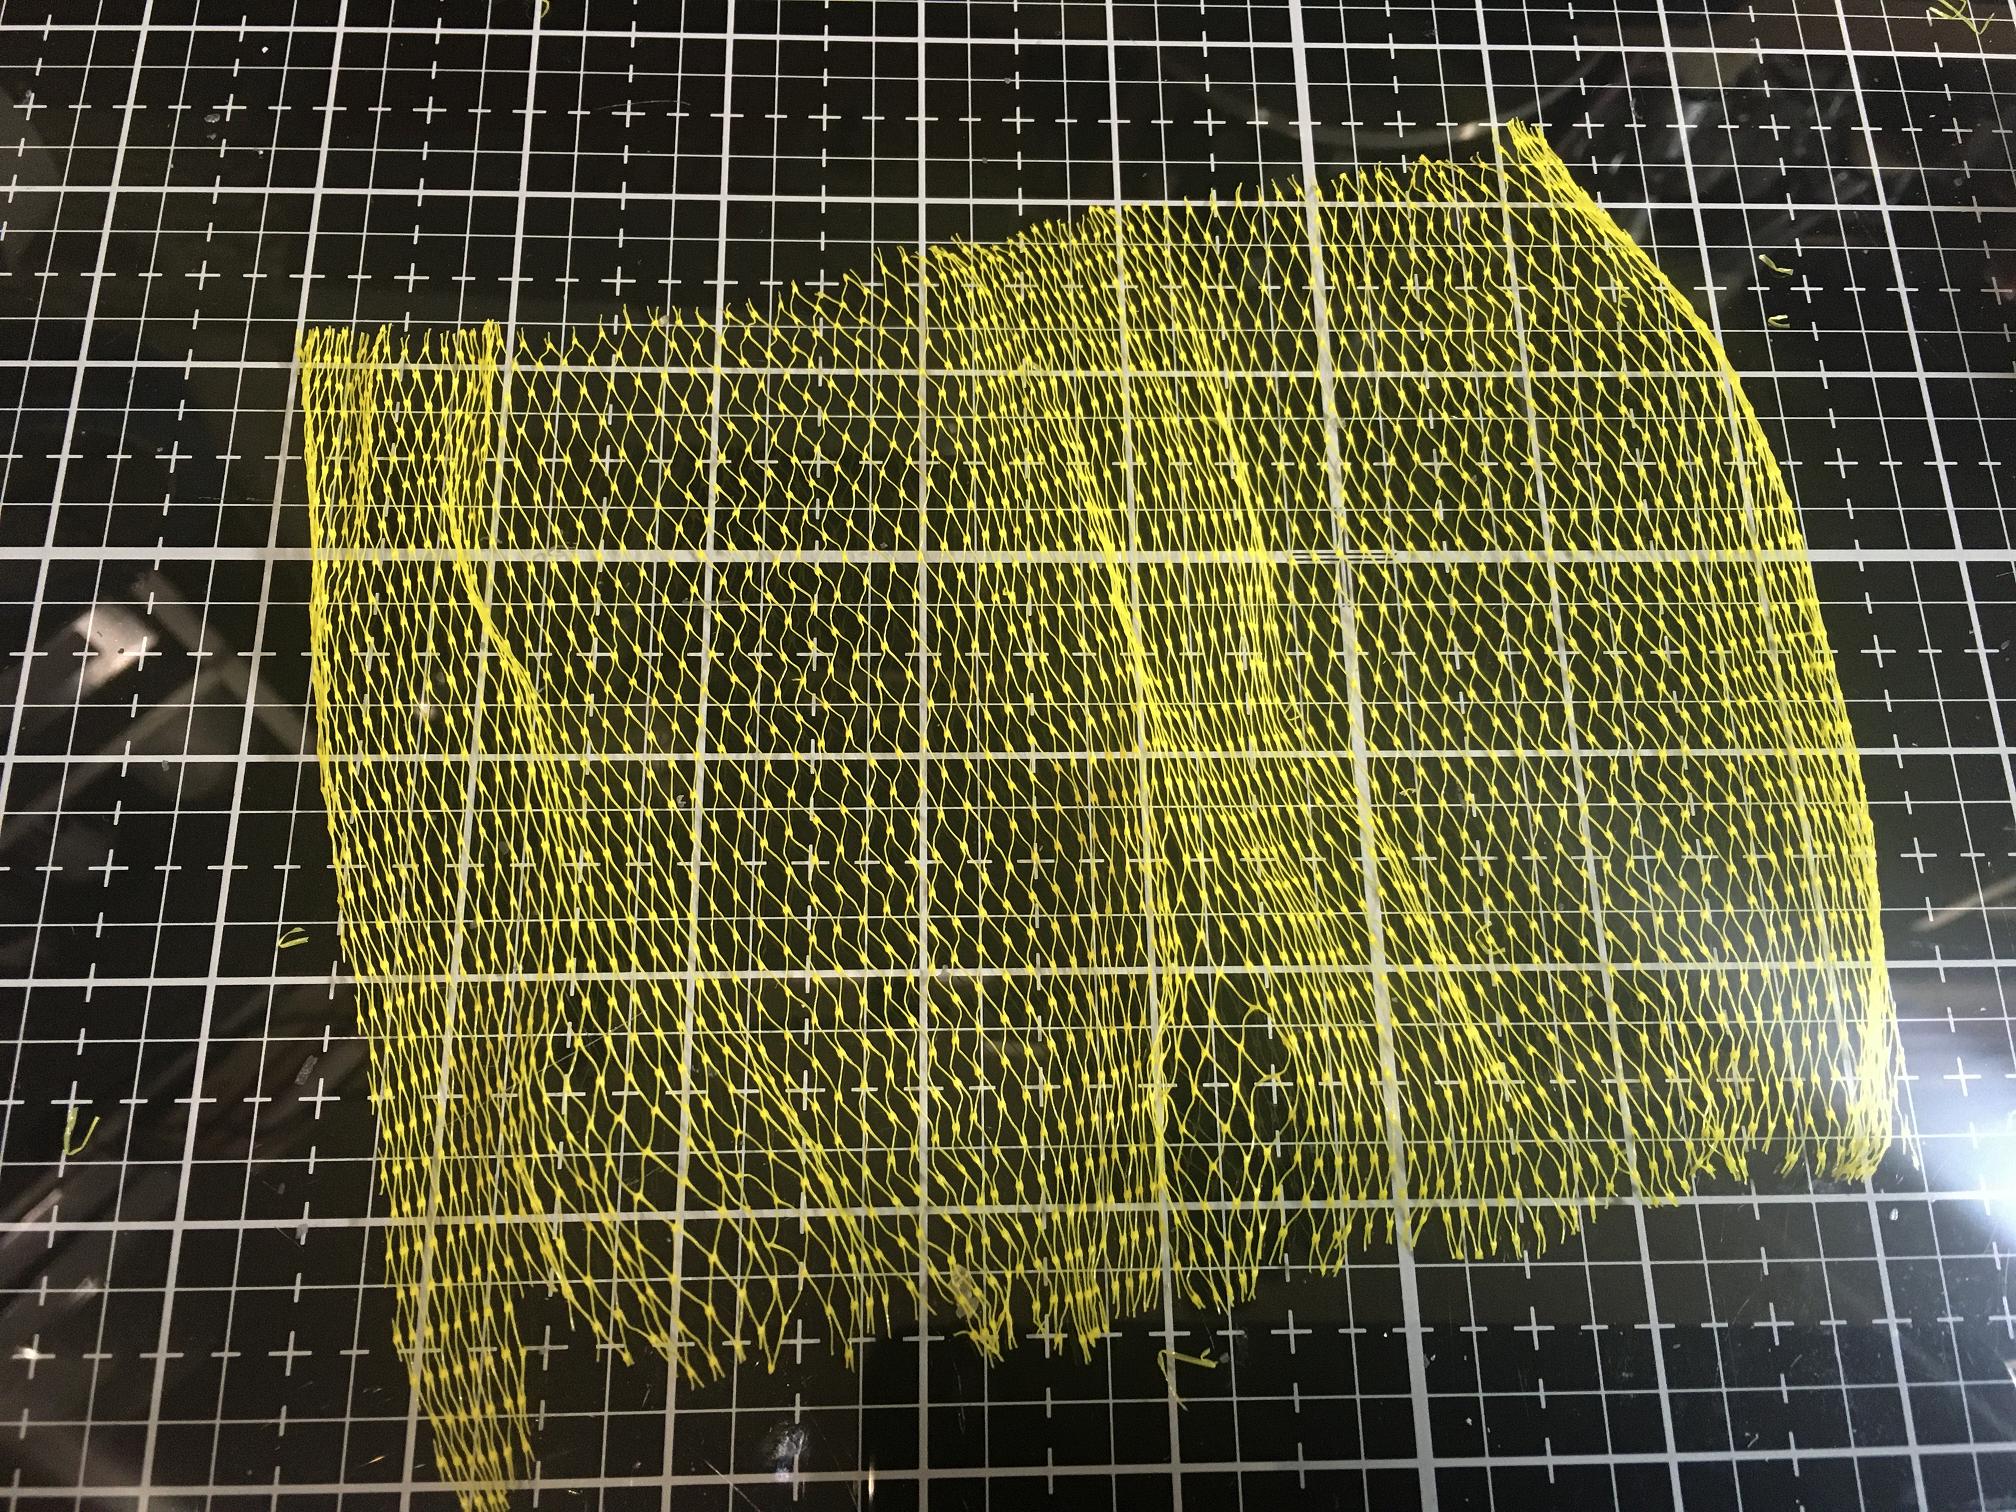
Both pieces, together with another yellow fruit net, all melted.
I also took some scrim from the roll that I have, and put it with the melted fruit nets, and painted them all with a mixture of acrylic paints in different shades of brown.
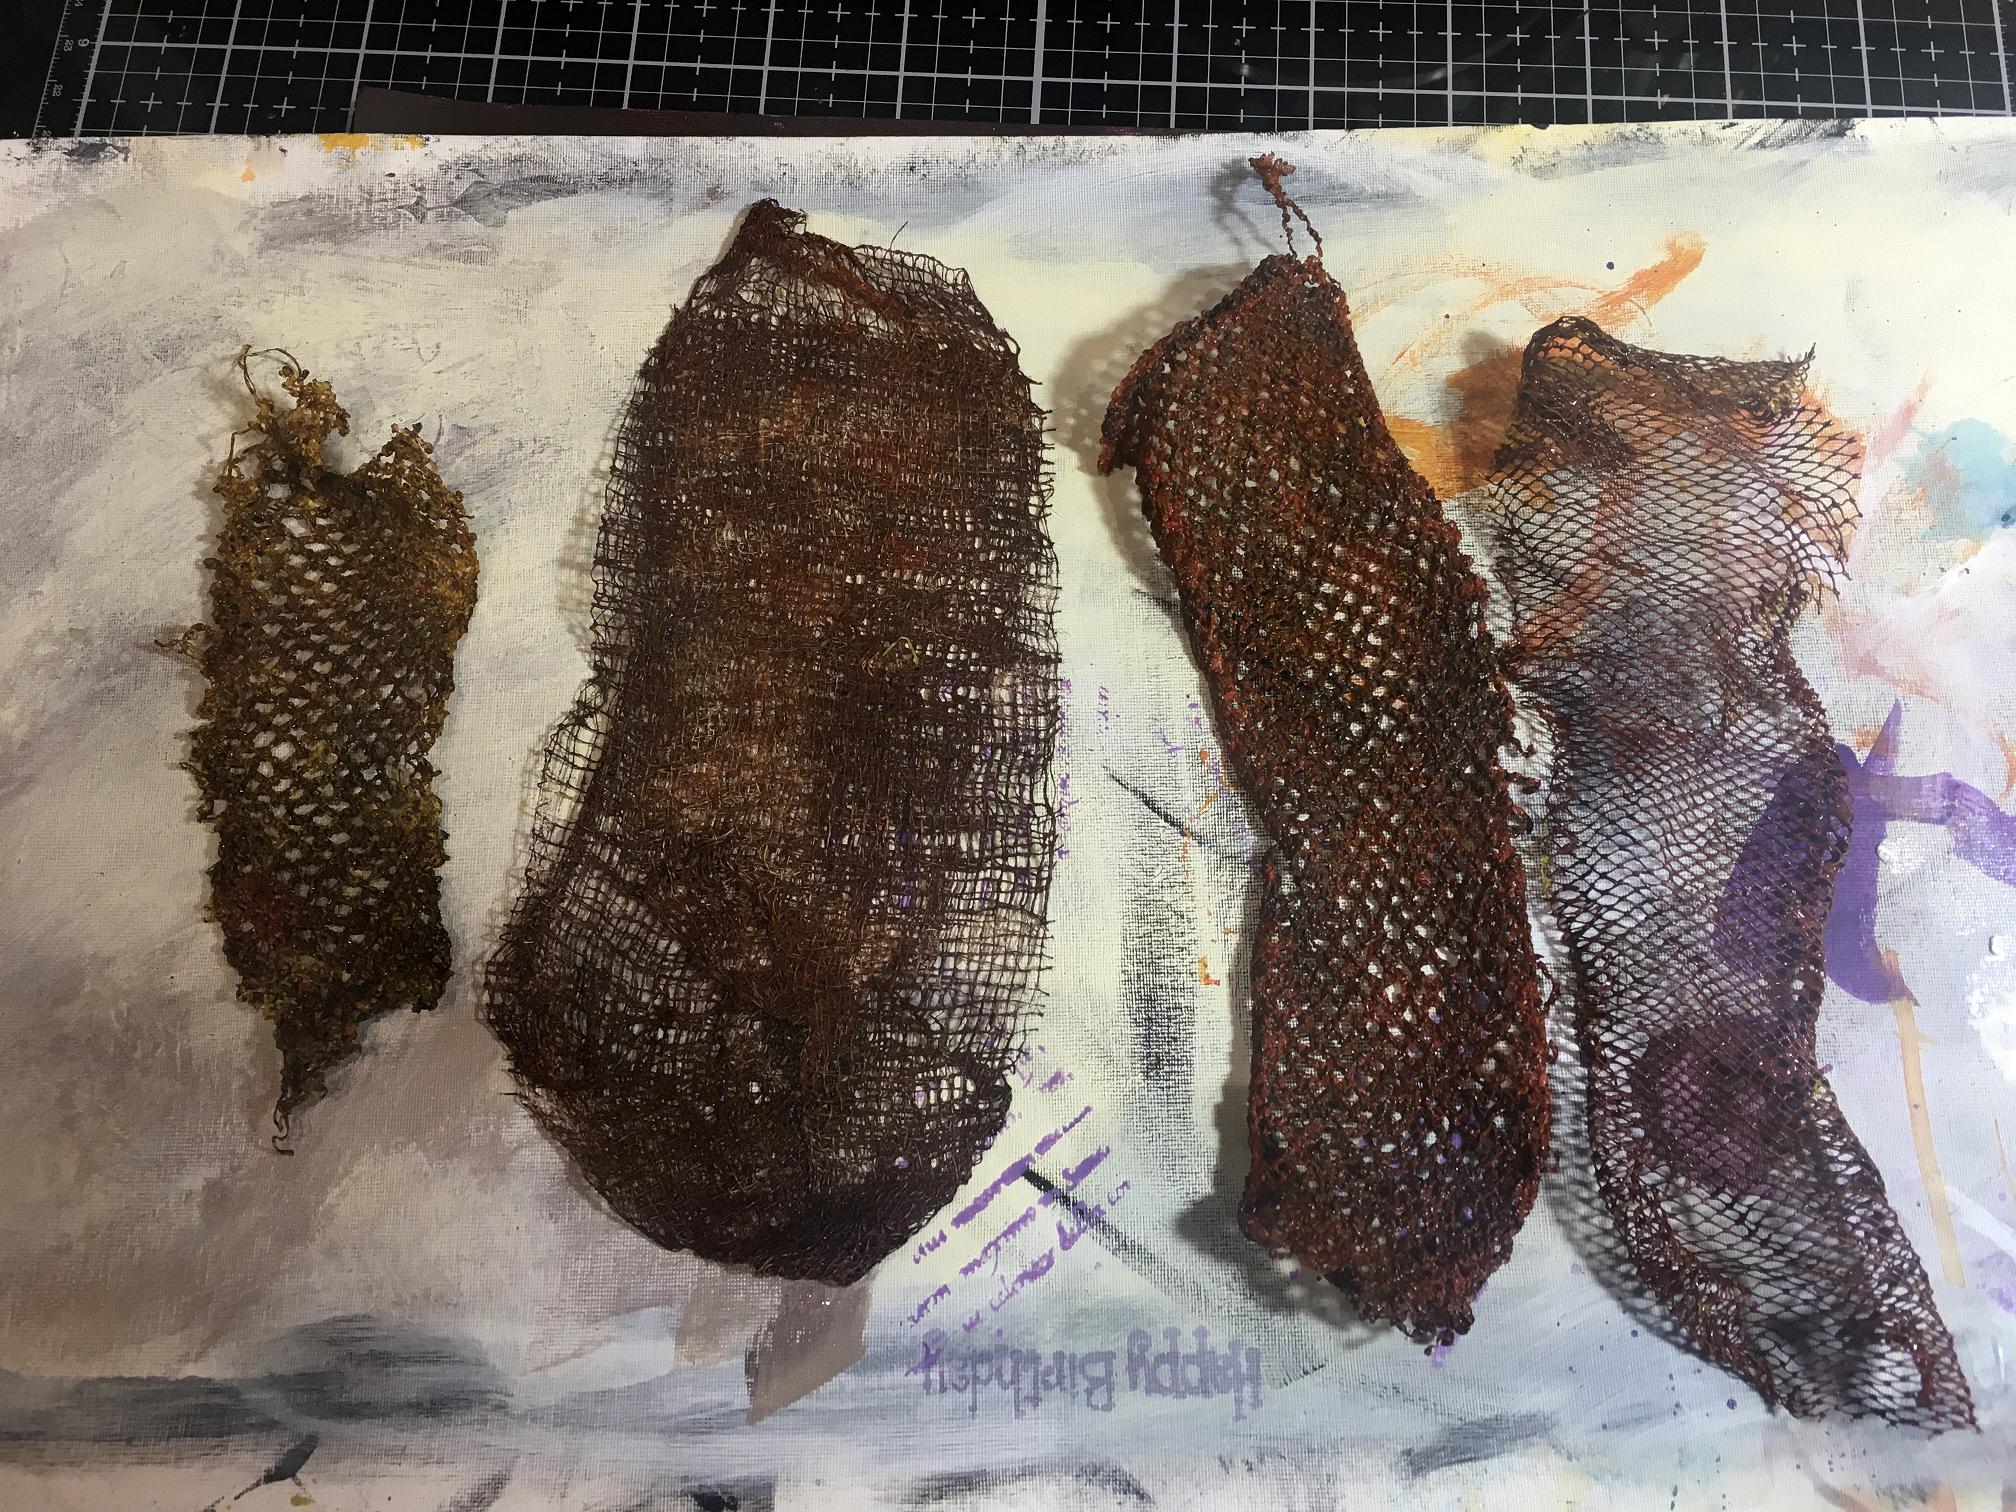
When I had finished, I used up the remaining paint, and cleaned off the brush, by painting randomly on some pieces of heavy cream coloured scrap card. Some were with fairly dry paint. The second from the left was wetter, as I added water to the palette and mashed it around with the brush. The one on the far right was created by smooshing the card in the paint residue which I had put onto the glass media mat. I smooshed and dried, smooshed again and dried, until I got an interesting result and the paint was all used up. The darker patches on the two to the left of that one were done by pressing the wet painted nets onto the paper.
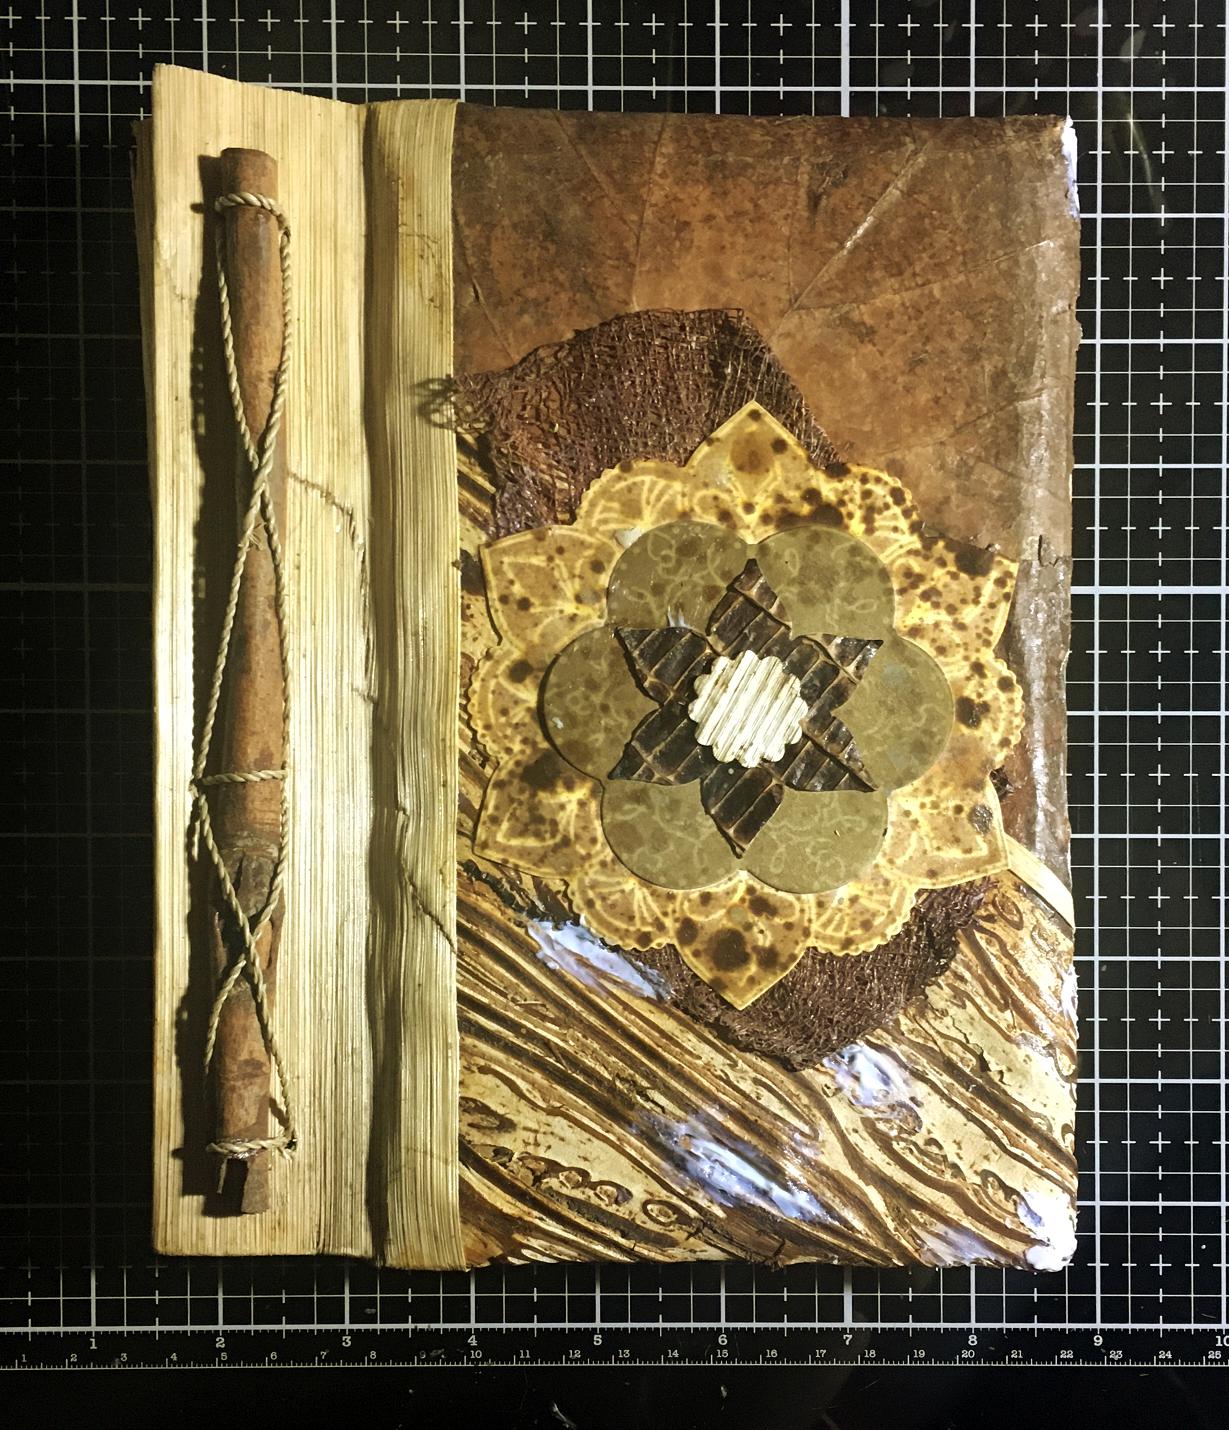
My idea was to put a piece of the treated fruit net under the circular motif on the front of the book. I did mock-ups with the various pieces and in the end decided that the scrim was the best. It had been folded over several times before painting, which stuck the layers together, but the resulting piece was too long, and rather than cutting it and losing the random edge, I folded a pleat in the centre to decrease the length. This was hidden under the motif.
Here it is, glued to the front of the book. I also got some 3-D gel medium and filled the holes in the textured part at the bottom of the cover, and the damaged corner at top right. Once dry, they were translucent, and now just need a touch of brown acrylic paint to merge them completely into the background.
On Monday I worked on the spine. After removing the binding, the pages were very much less secure and likely to fall out. They had been glued to a strip of the papyrus-like stuff and bits of this had flaked off. I pulled the rest of it away. I cut a length of roofing felt from a large piece which the builder let me have after they did the roof on our house when we first moved. This stuff is soft like fabric, but has the properties of fabric Tyvek. I have used it for books before as it is very strong as well as flexible. I painted it with dark brown acrylic paint.
I applied a generous amount of tacky glue along the edges of the pages and stuck the roofing felt down. I attempted to press the edges between the block of pages and the front and back covers using my bone folder, but with the manipulation, both covers fell off. This made it easier to complete the job.
When the glue was partially dry, I applied more to the sides of the roofing felt on the page block and stuck the front and back covers back on. The whole thing was secured with numerous rubber bands and left to dry fully overnight – although by the evening it felt dry enough, I wasn’t sure about the glue underneath and thought it best to leave it till the following day.
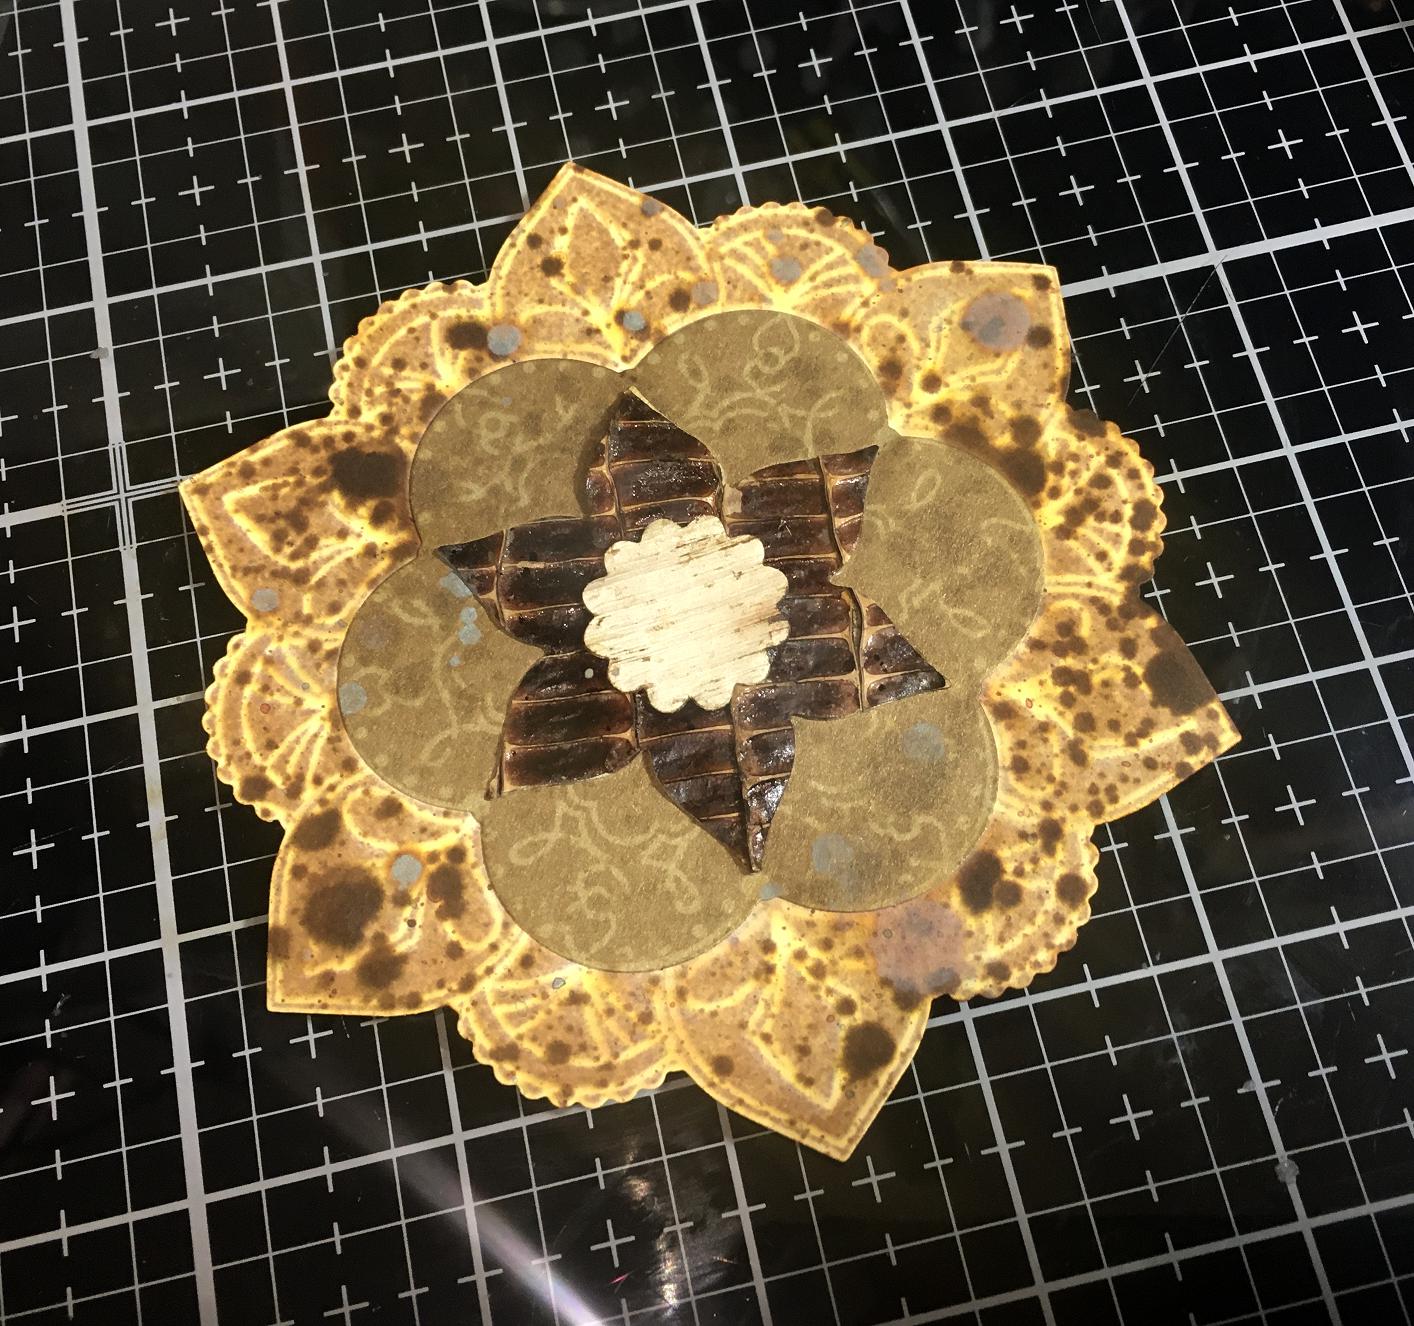
In this picture, you can see that I have also added a small embellishment to the centre of the motif. This was a little flower-shaped sequin which I painted with brown alcohol ink and glued down. I also added a dull gold bead in the centre, but as I anticipated, one knock and it fell off. There is a small bright spot in the middle of the flower but that is fine.
I went to bed hoping that when I removed the rubber bands, a) the glue would not have seeped between the pages and stuck them all together and b) that the whole thing wouldn’t fall apart!
The next day I was relieved to find that all was well once I removed the rubber bands. A couple of pages did fall out and several were loose. The front cover attachment to the page block was the most problematic. I stuck the first page down onto the inside of the cover but I had a job getting the PVA adhesive to stick initially. The paper is very absorbent and just soaked it up. I found the best way of doing it was to paint on a layer of glue and let it more or less dry before adding another coat and then sticking it down. I had a terrible time trying to get the masking tape to stick the join closed, because it was wet, but in the end, with the aid of my valiant heat tool, it was OK.
When this was accomplished, I took one of the pages which had fallen out, and ripped the edges, and stuck this down over the join. The final step was to coat the whole surface with clear gesso, and leave it to dry. Later, it seemed fine, and ready to apply some art.
One of the inner pages which seemed to be OK. Covering the holes with a spare sheet seems to be the best option. I will probably reinforce each centre with masking tape first, when I come to work on the individual pages.

One of the pages that requires repairing.
(Looking at this batch of photo one after another, you could be forgiven for thinking the papers were different colours! However, they are all identical. It’s a matter of lighting, and too much effort involved in photo editing to try and get the shade just right. The main point of the photos is to show the damage and repairs so I hope you’ll forgive the variations in colour.)
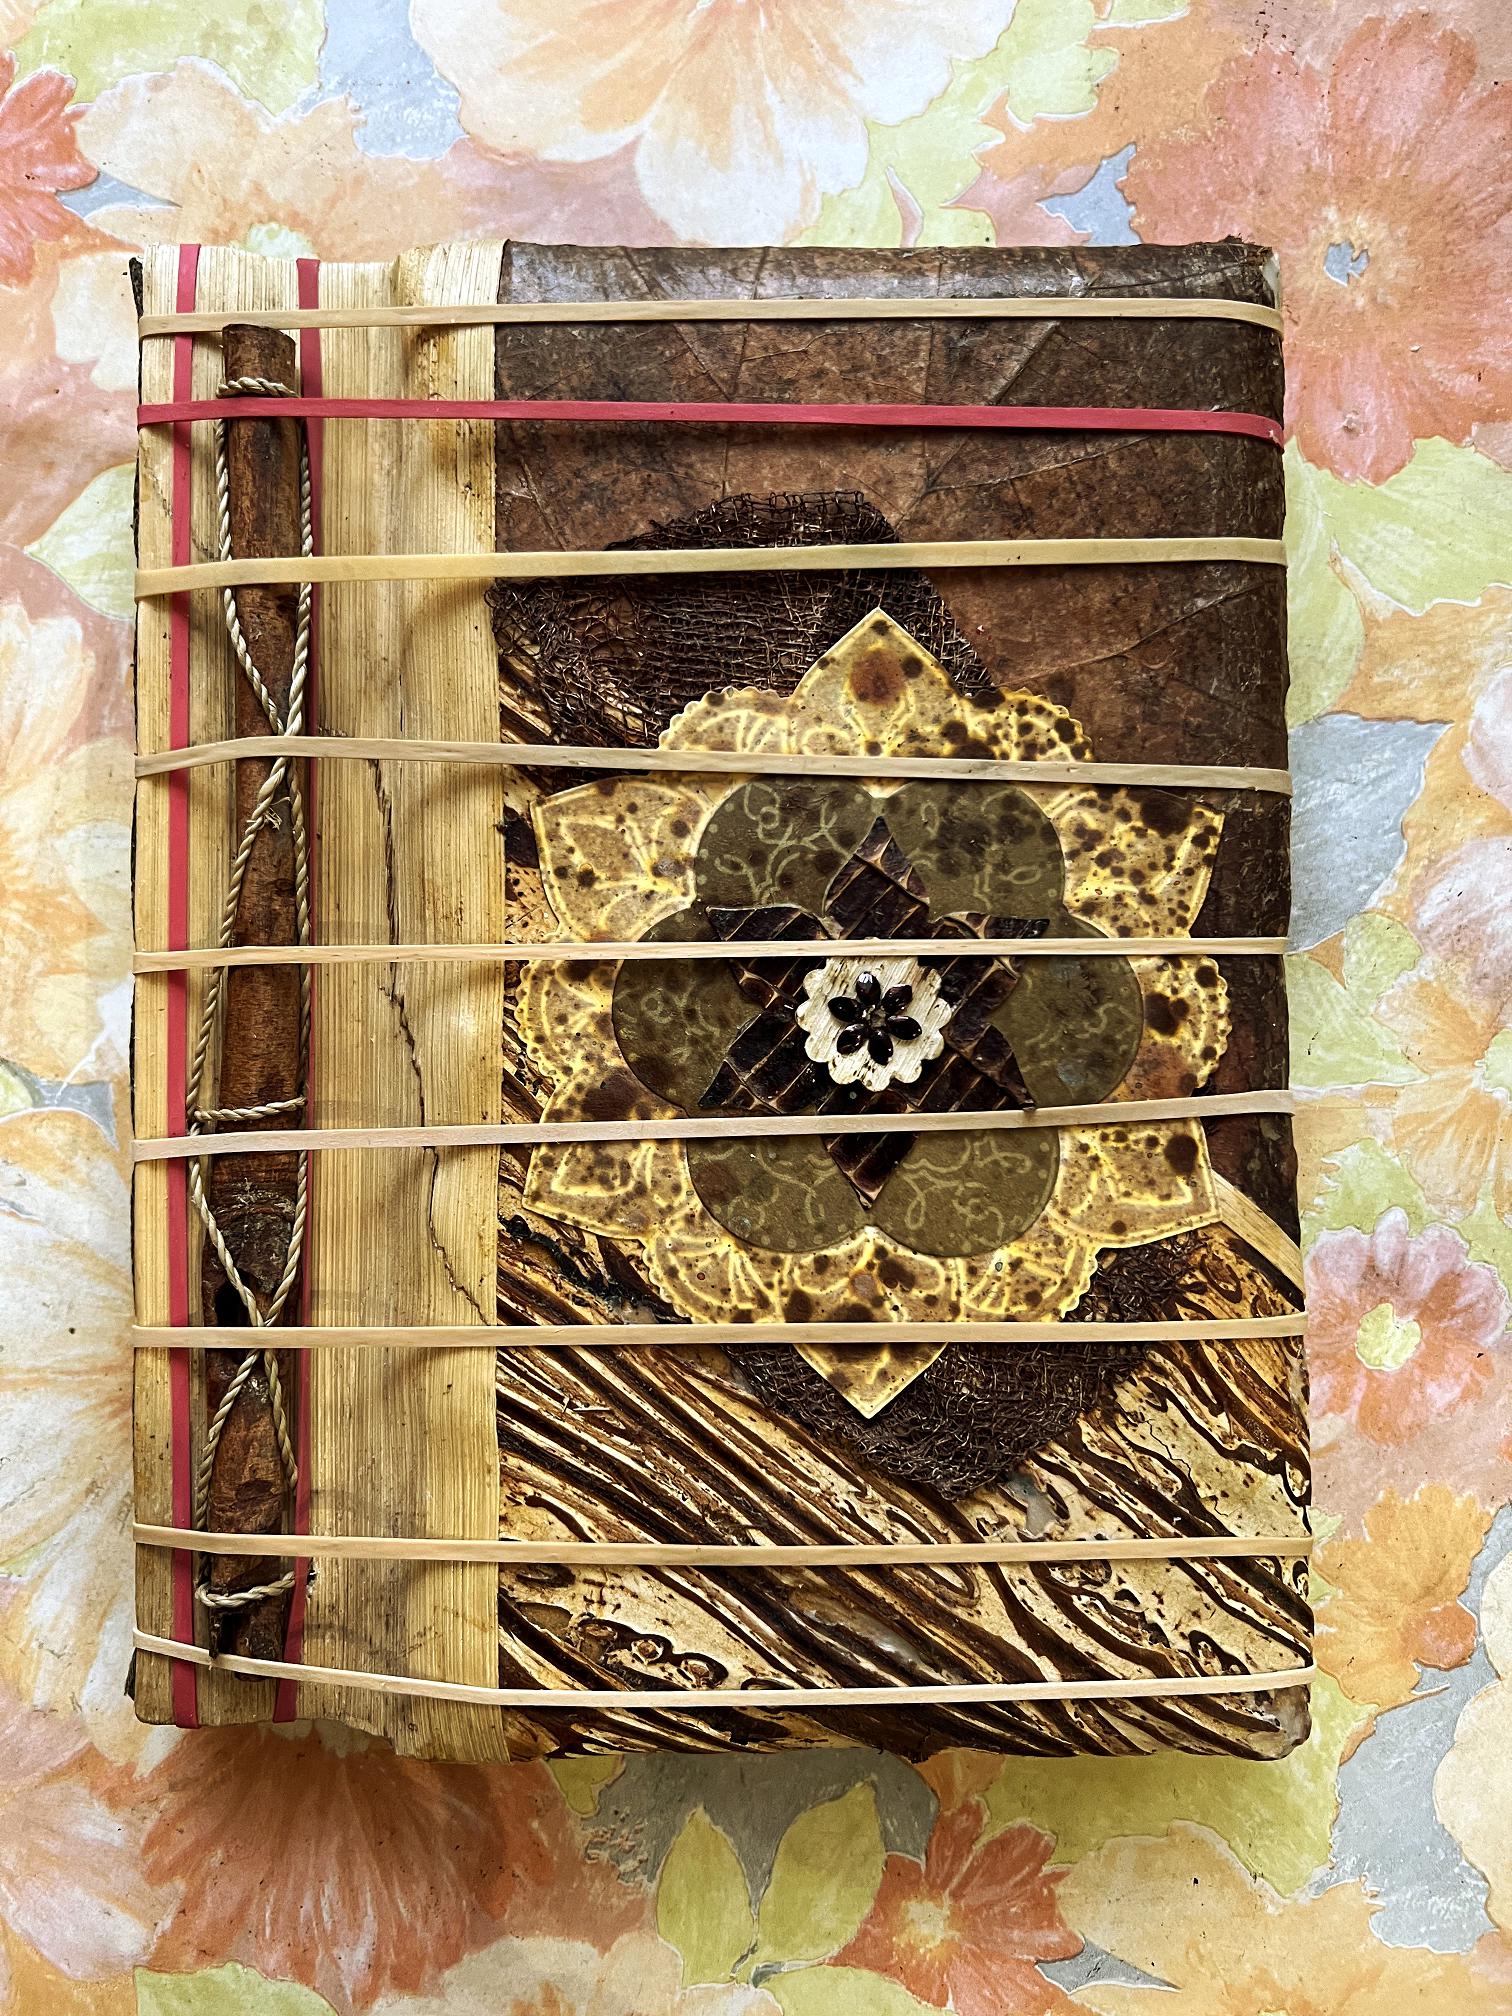
Moving on to the outside of the book, the repair to the spine, adding the brown painted roofing felt, seems to have worked very well.
The front cover, with the completed new decorative motif. The only thing remaining to be done is to touch up the repairs with some brown acrylic paint.
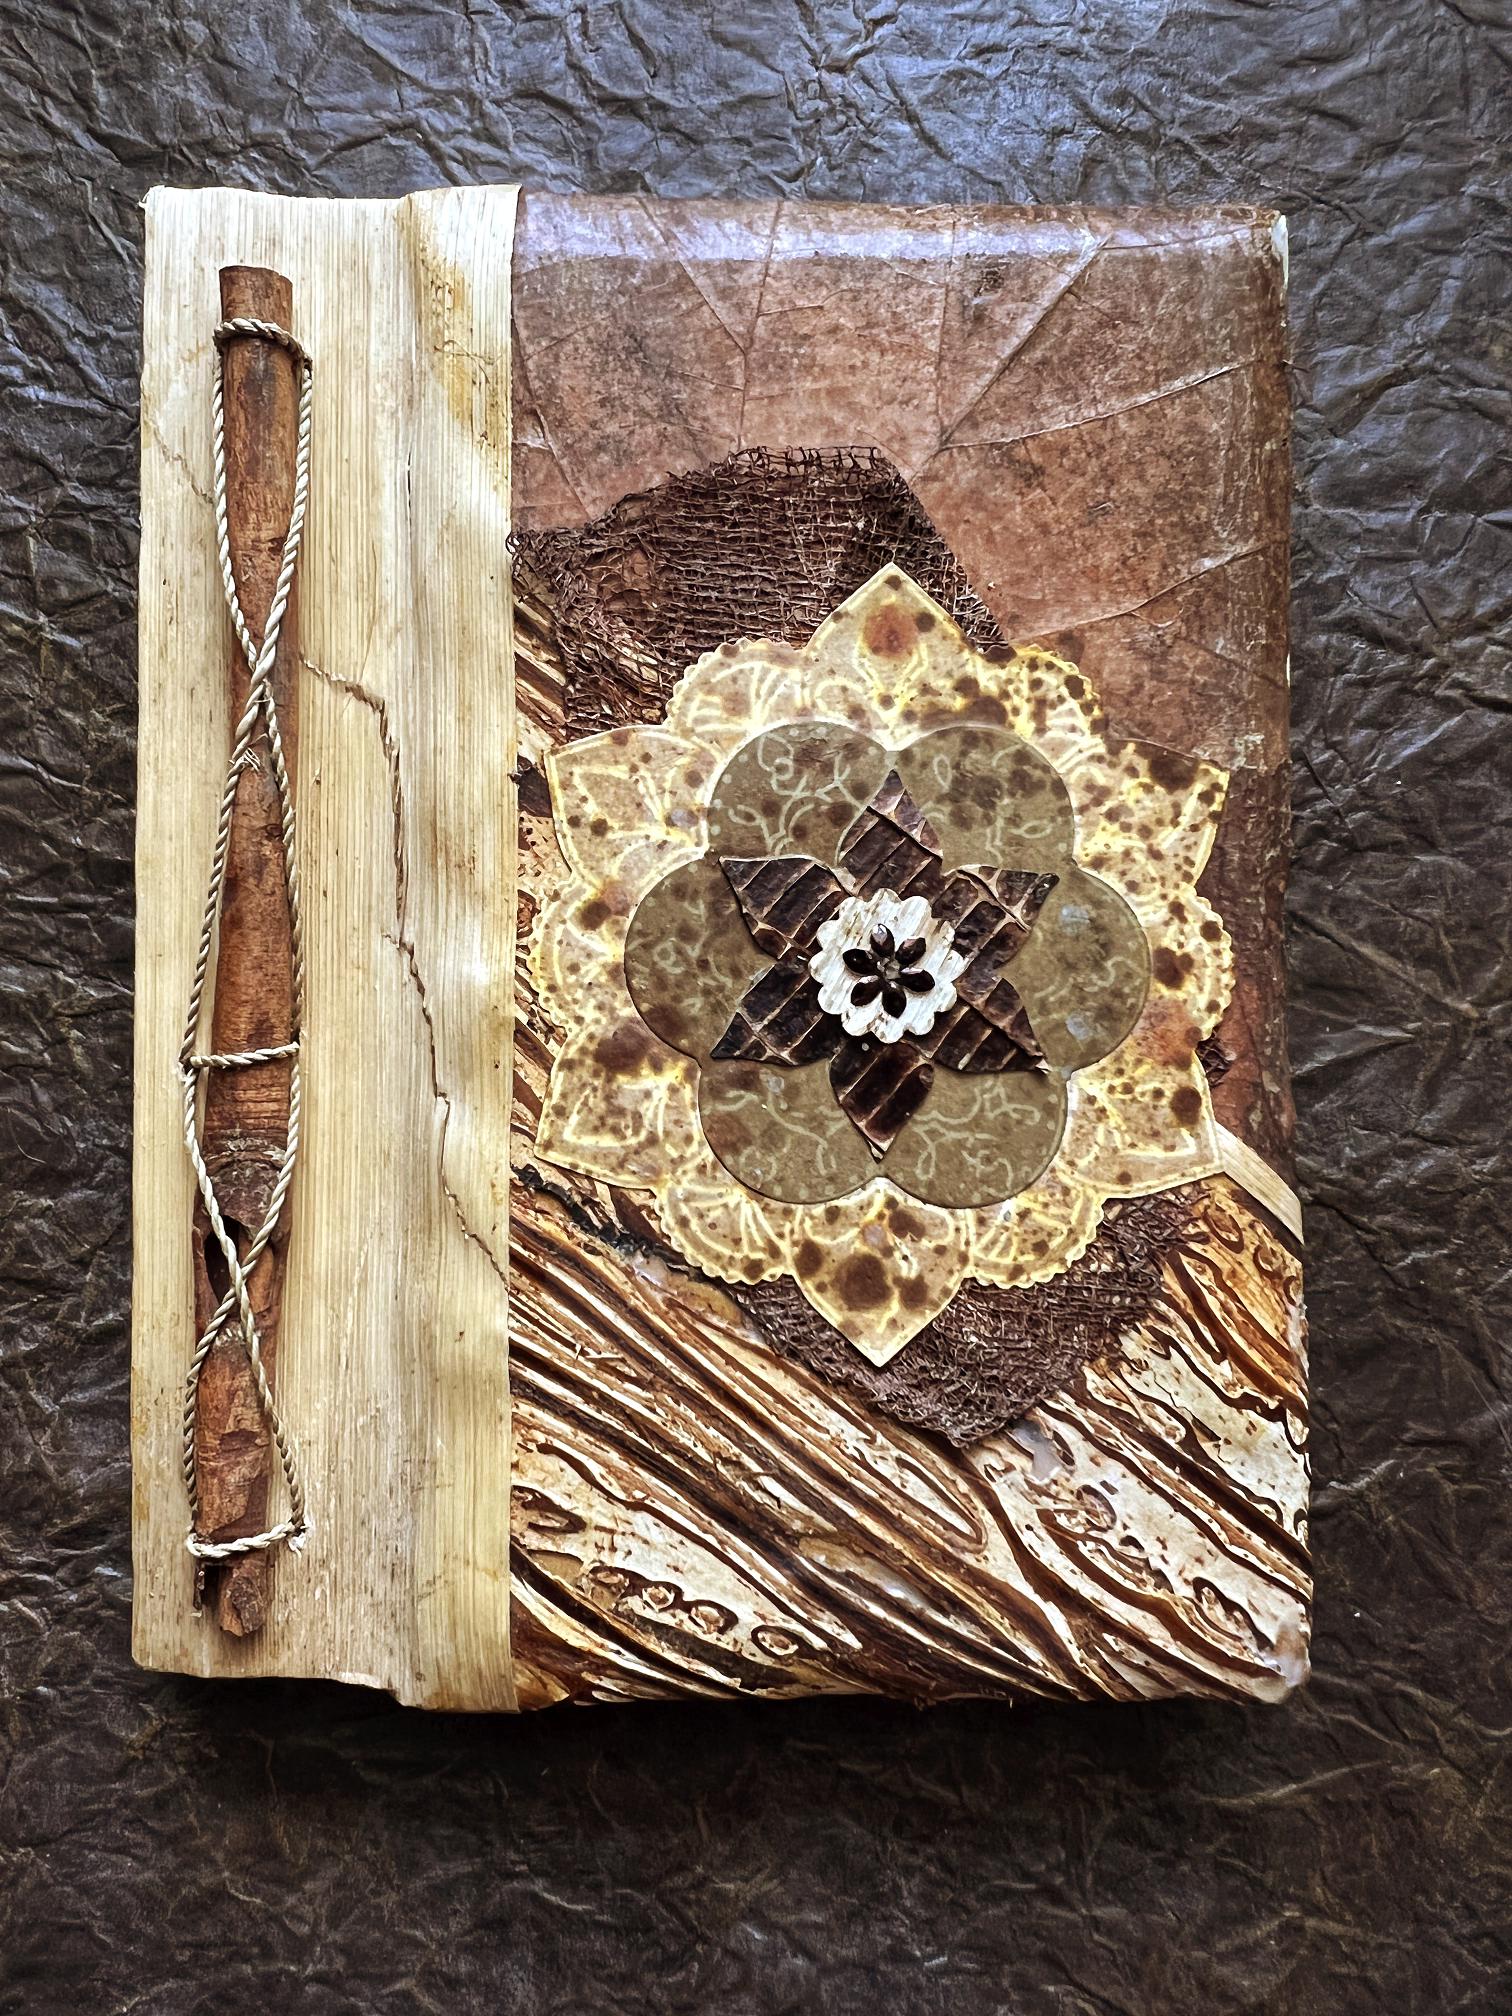
Detail of the motif.
This is such a gorgeous book, and well worth spending a few days altering it and repairing it, to make it useable as a mixed media journal. It’s a real treasure, and all I want to do now is enhance it even further, and I hope my efforts will be worthy of it.
Someone went to a lot of trouble to make this book, collecting the various natural materials and carefully assembling them into a unique piece. I have no idea who made it, or when, or its country of origin. The materials do have a tropical look about them. Perhaps this is a journal for someone stranded on a desert island!
Upcoming attractions
I have now completed the second of my two teabag mini-albums and am very pleased with how this turned out. I shall be doing a blog post about it in due course, with the final photos.
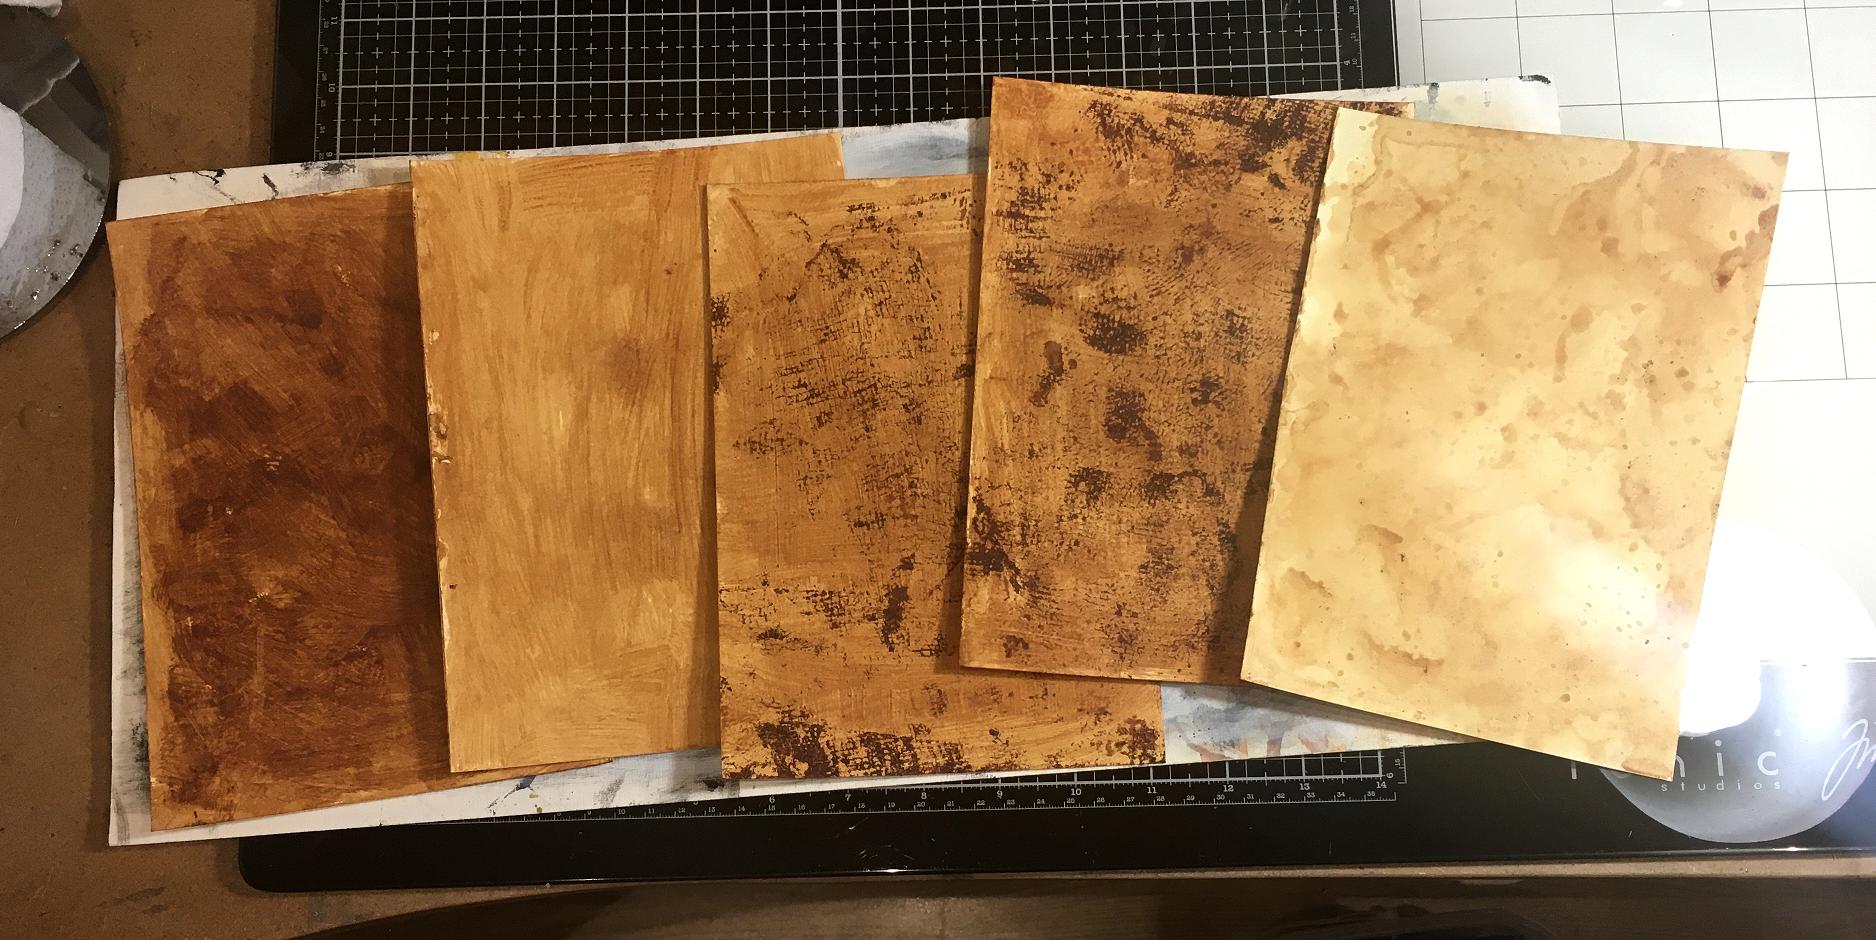
On Monday afternoon, while waiting for the gesso to dry on my new album page, I did some coffee painting to create some backgrounds and collage papers.
I also made a card for my hubby for our wedding anniversary on 24th, as a companion to the birthday card I made for him recently. Details and photos to follow.