CURIOUSER AND CURIOUSER – MAKING USE OF PACKAGING
I recently searched online for some black striped washi tape which I have seen several people using, and which seems quite hard to find. Eventually I came across an online shop called Curiouser and Curiouser – the name itself was enough to make me want to visit! They have a physical shop in Edinburgh and their Instagram page is full of gorgeous photos of the sort of things they sell. They appear to be a good outlet for local artists and craftspeople to sell their creations, and they also do picture framing and sell art materials.
They had a wide range of washi tapes and I was able to select several for my basket. The following day I had a phone call from Rachel who owns the business, informing me that one of the tapes I had chosen was out of stock, and did I want a substitution or a refund. I chose the former, and while she was on the phone I found another striped black one. We had such a lovely chat on the phone!
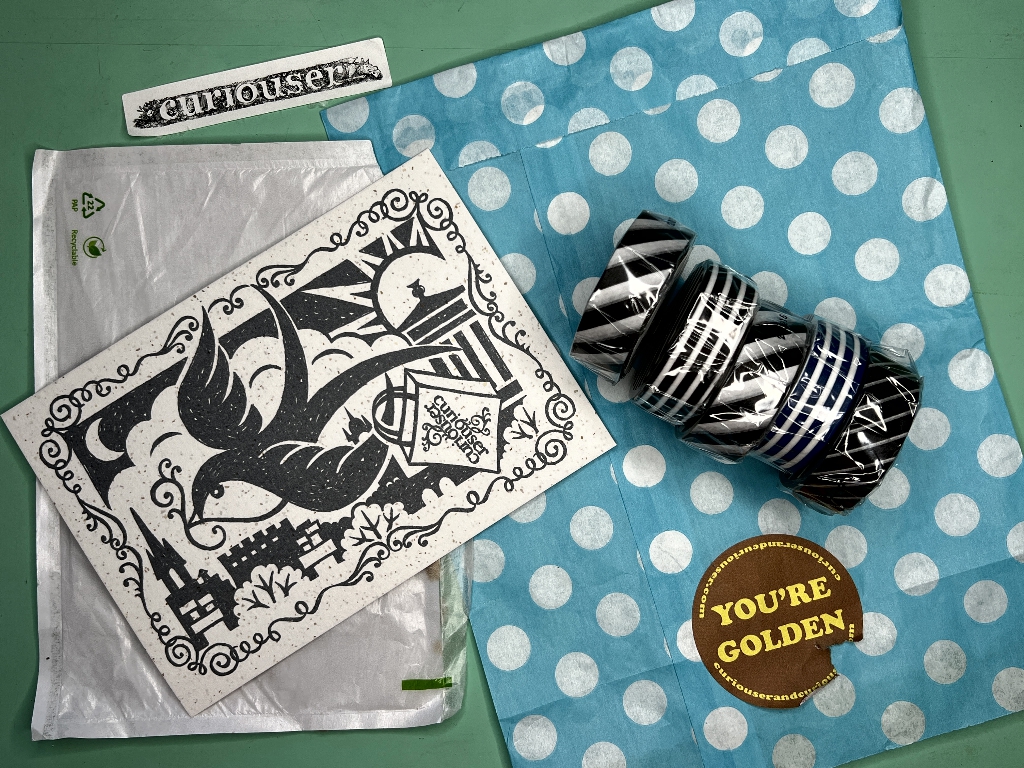
The parcel arrived the following day and I was absolutely delighted – not just with the gorgeous washis but also with the packaging. This included a delightful card with a personal message on the back from Rachel. Almost every element of the parcel had potential for use in projects. I never throw stuff away without examining it closely to see if I could use it.
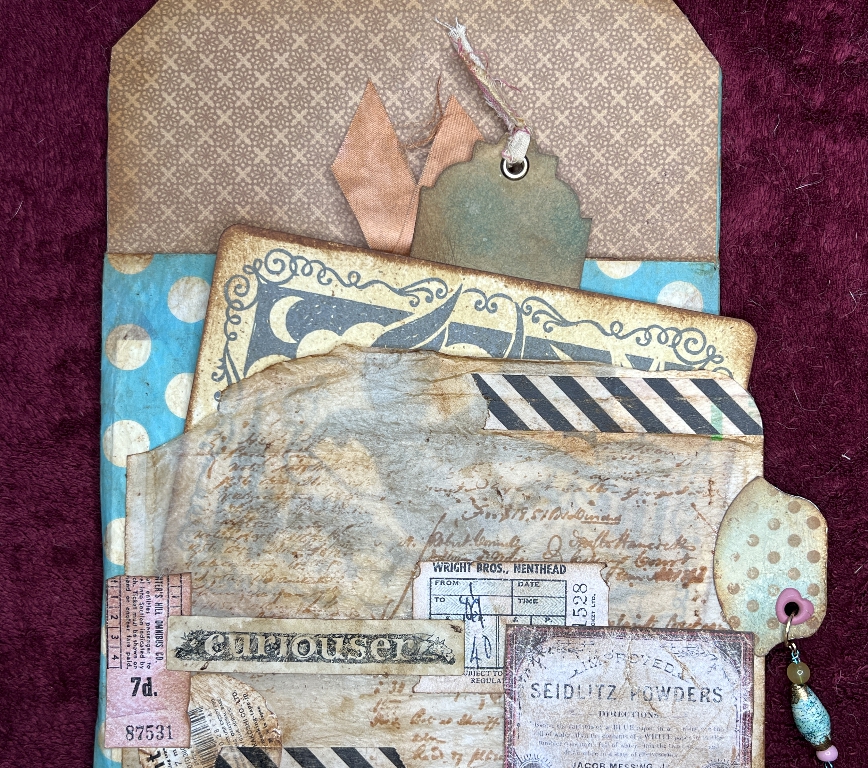
From top left, clockwise:
A small strip of sticky tape which peeled off easily. I love the word and the text style. Definitely usable!
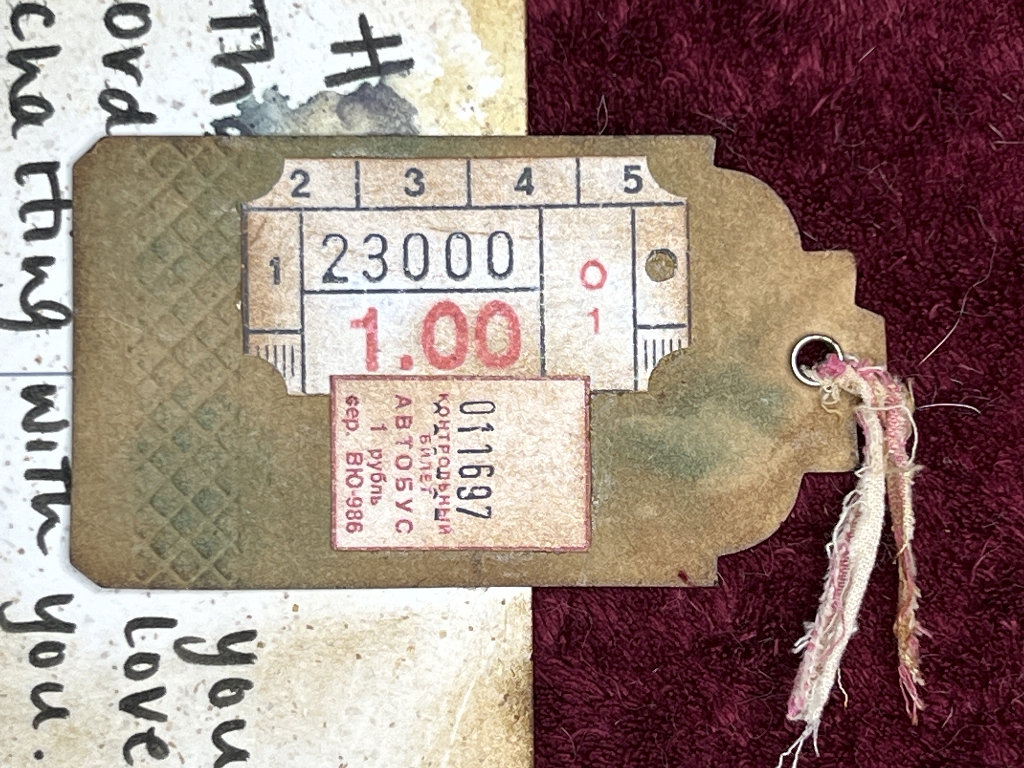
Blue spotty paper bag. This was what contained the washi tapes (lying on top of it). The “You’re Golden” sticker (lovely!) got a bit damaged when I opened the bag but no matter. Easy to cover up any small blemishes!
Glassine bag. This bag has glassine on the front and adhesive paper on the back. I was able to peel it off the padded envelope carefully, but I did damage one corner. Again, no matter – these slight damages all add to the grunge or can be layered over! This bag contained the address label. Being translucent, the glassine shows whatever I put inside the bag. I thought it would make a lovely pocket for a journal page.
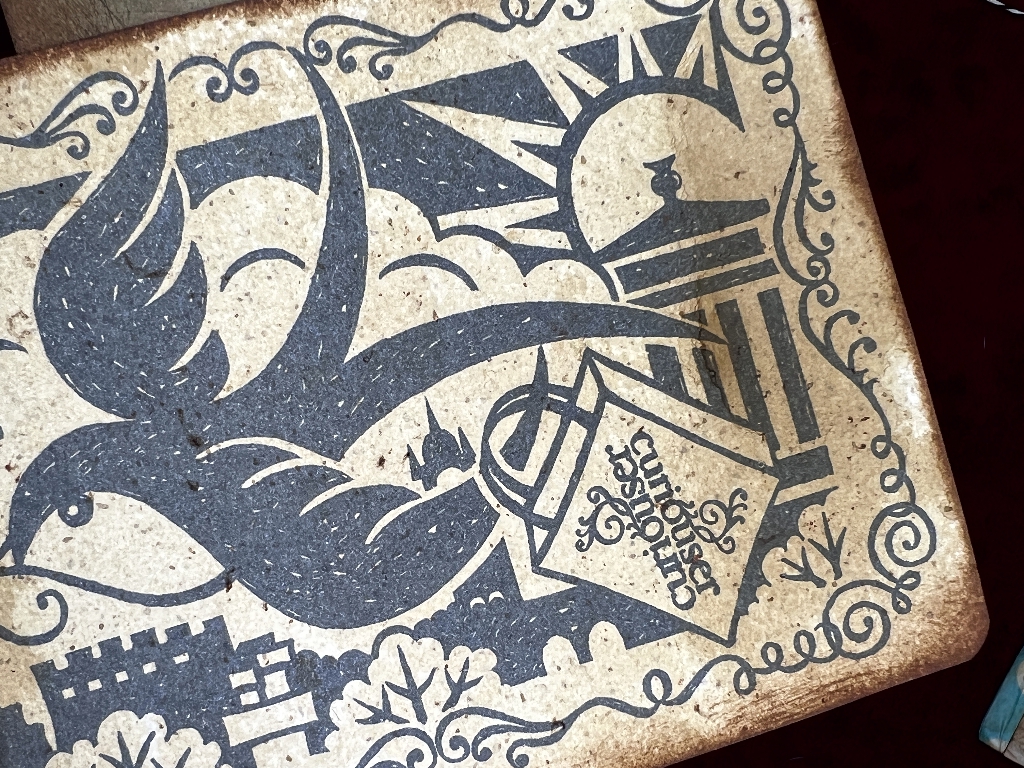
Printed card. This is the card on the back of which Rachel had written her message. It also gives the shop address and contact details and social media. This card has a hand-made paper feel about it and I just love the design of it which looks like a lino print. You can see the shop logo on the carrier bag that the bird is holding on its wing.
I sent Rachel an email thanking her for this delightful parcel and for all the goodies included with the washi tapes, and had a charming reply from her. I subsequently corresponded with her colleague and said what I was planning to do with this material. By this time I had had a chance to visit their social media and was not disappointed. Have a look at their Instagram page. My only regret is that it is too far away for me to visit! It is stuffed with all the sorts of things that I enjoy. This purchase has been a real find for me and I’m now on their mailing list.
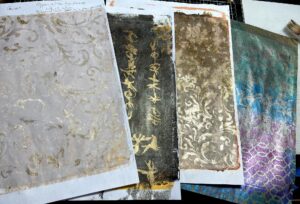
Tea dyeing and general grungeing up
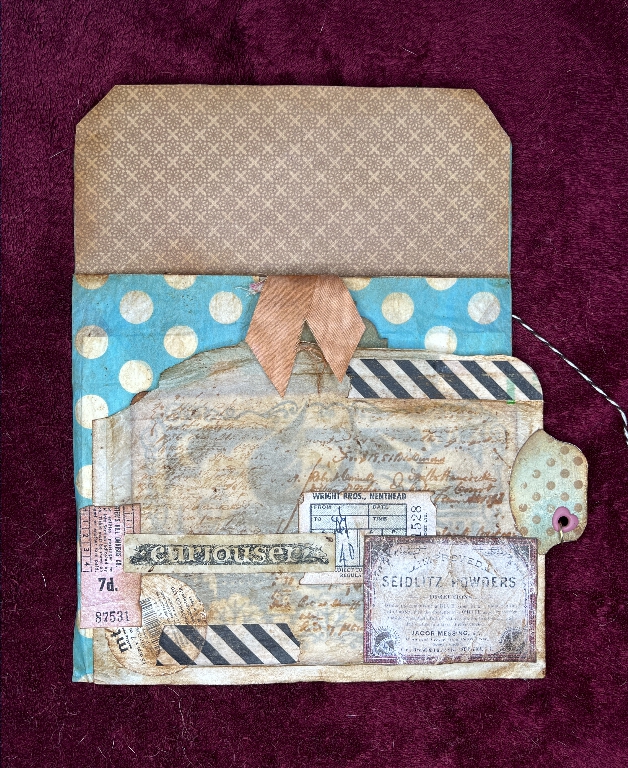
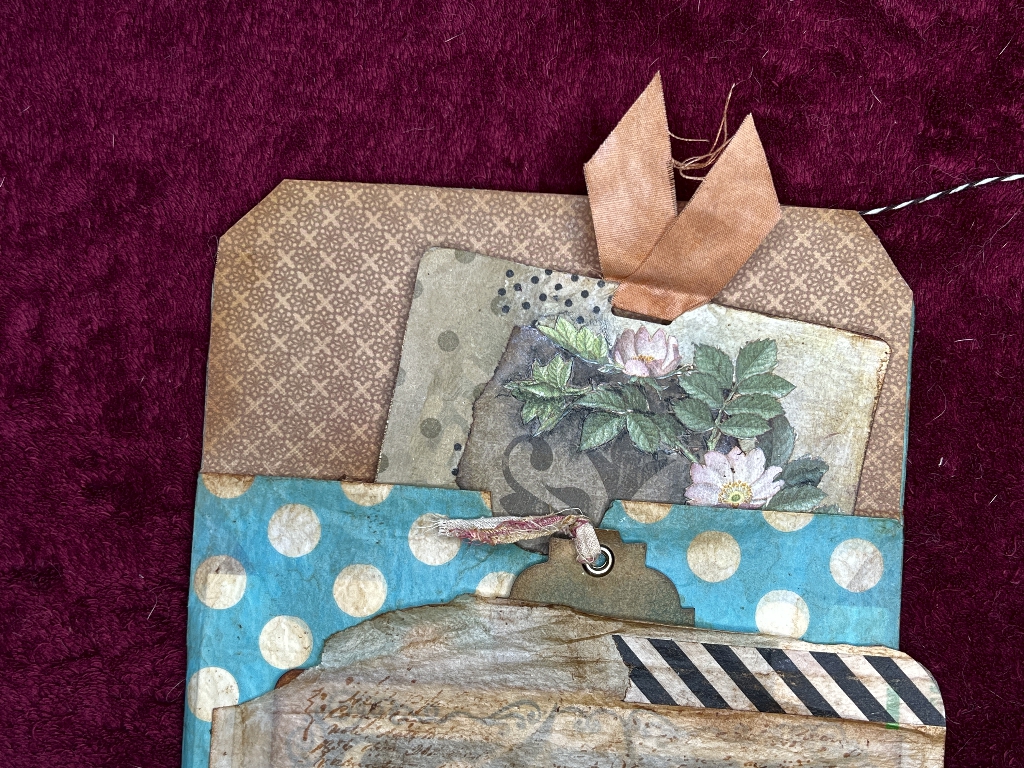
Most things seem to need a bit of grungeing up in my studio! I laid out these packaging elements on some plastic sheeting and sprayed them with tea. A little while later when it was mostly dry, I added some more. I added stamping to the glassine bag, and stuck down lots of grunged up tickets and labels from some recently acquired digital downloads. The whole pocket is based on the blue spotty paper bag which I reinforced with some card and made into a pocket with a closure. Here’s the finished result.
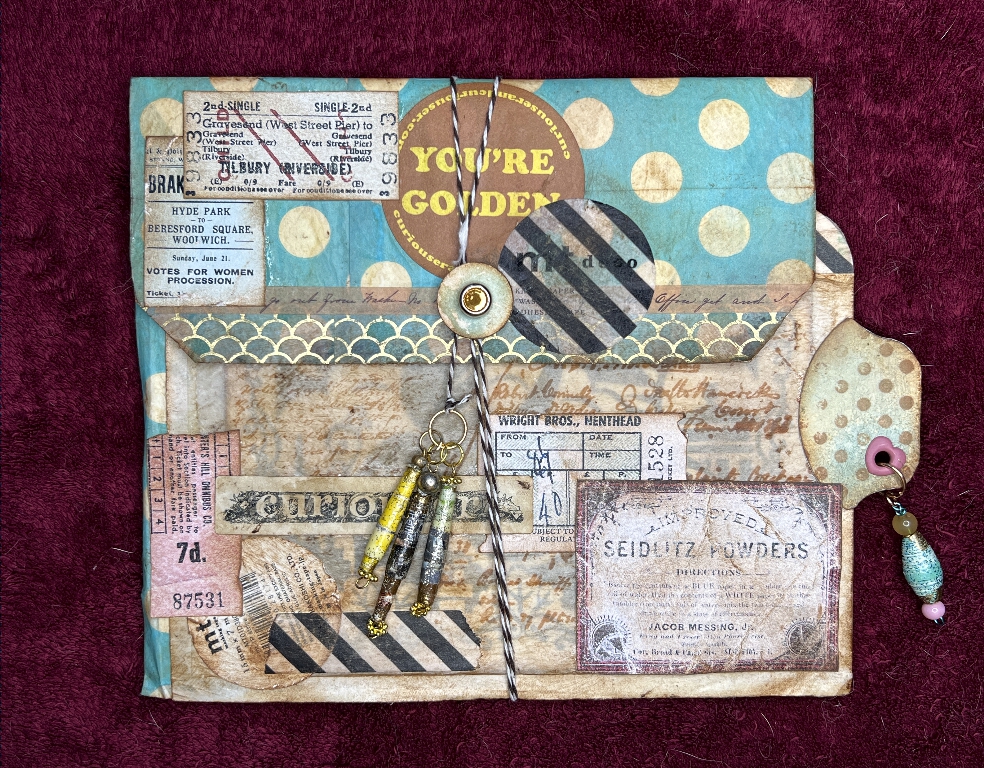
Now for some details
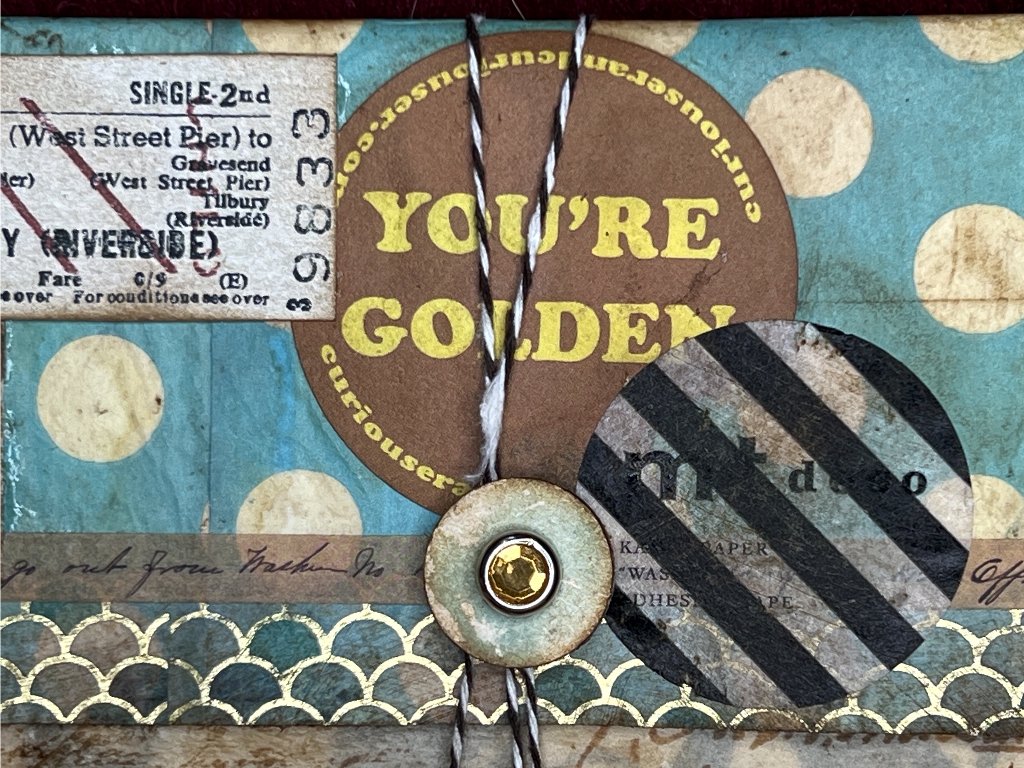
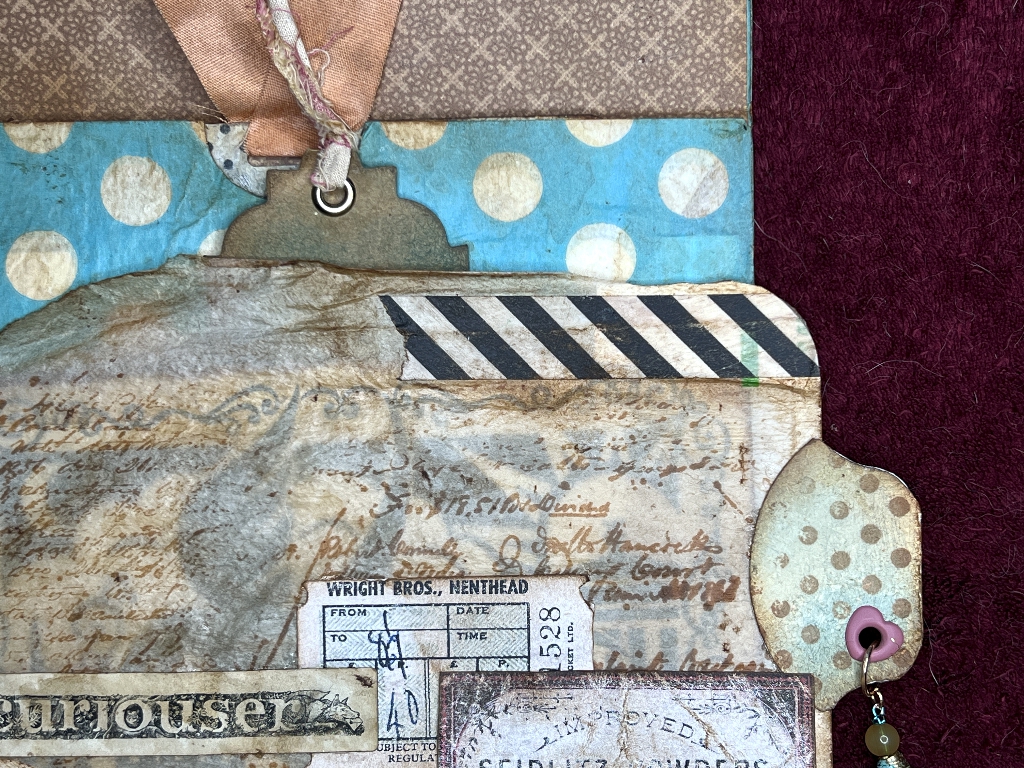
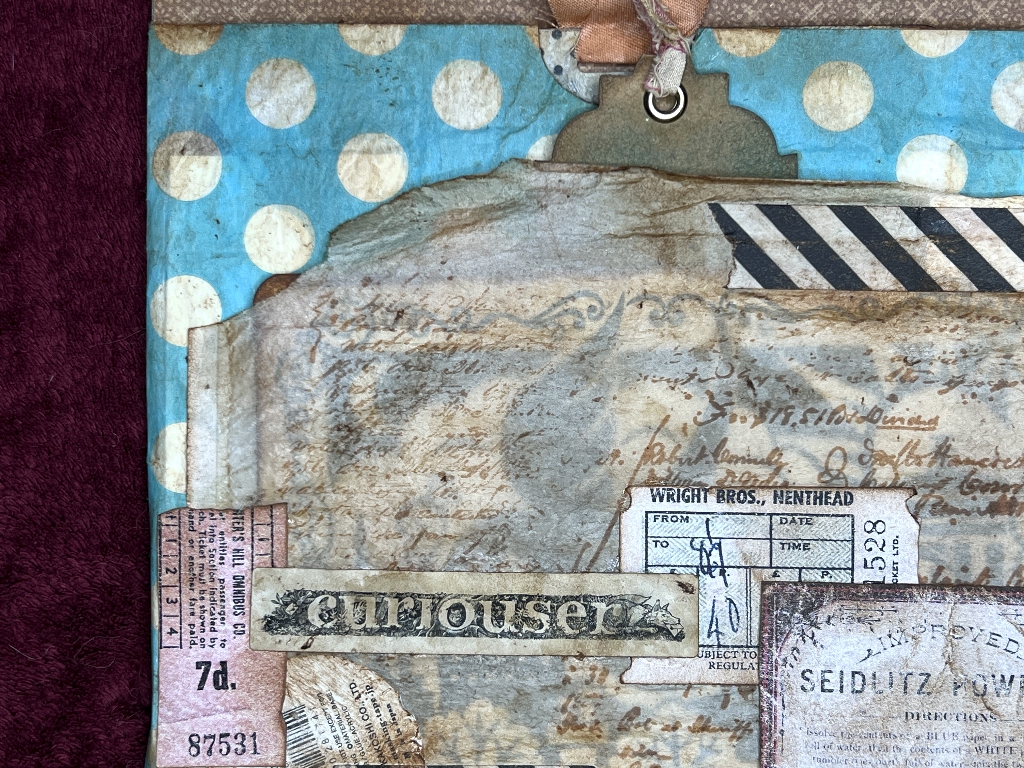
I love the “You’re Golden” sticker which was on the bag! The striped circular label is from the top of one of the washi tapes which I opened and used for this project. The closure is a disc made of stacked layers of cardstock and a jewelled brad, around which is wrapped a string closure. The scalloped washi tape and the narrow text one are from my existing stash.
The circular label is the one from the back of the washi that I opened. Nothing needs to go to waste! Suitably grunged, it has its place on any project! Some of the new striped washi over it. I followed Toni’s recommendation (of Crafty by Toni) to sand washi after laying it down – this makes it really blend into the background. I recently got a small sanding tool which is a lot more convenient than bits of sandpaper or my sanding block which is too large. The discs of sandpaper have Velcro on the back and they fit on the standard Ranger ink blending tools. I’ve written “SANDING” with a black Sharpie on the handle so I don’t inadvertently grab it when I think I’m going to be inking something!
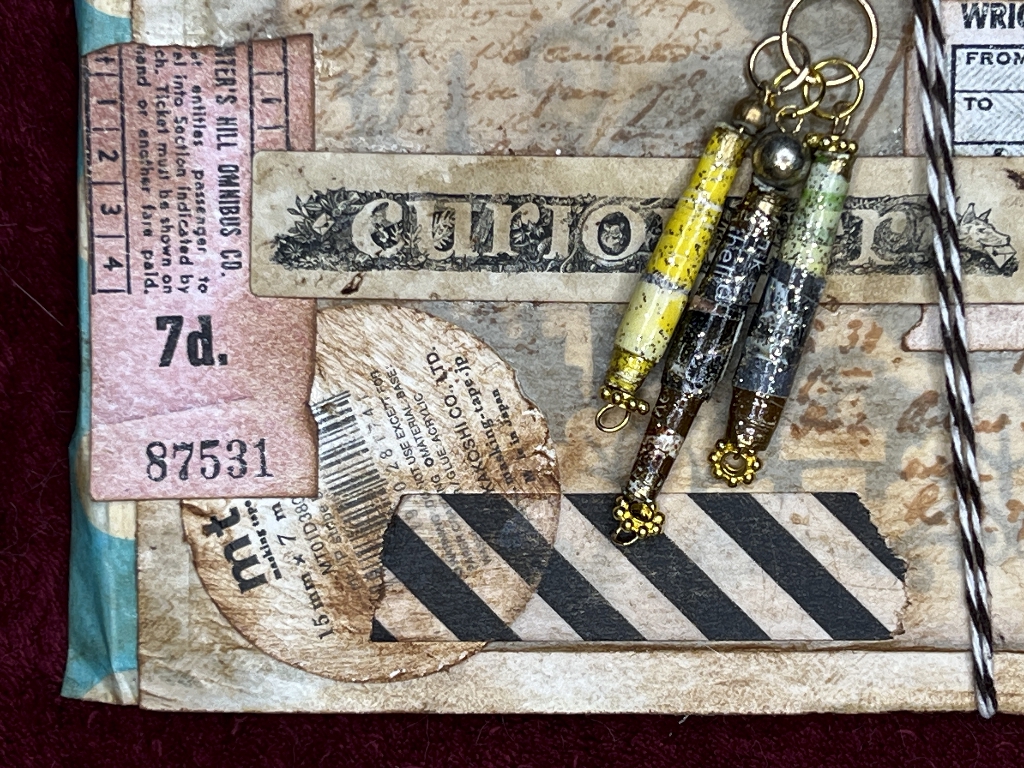
I made the paper beads several years ago, from magazine pages cut into long triangles and wrapped. They were finished with some glaze into which I stirred a bit of glitter. I threaded wire through them, added some beads, and attached them to the string closure with jump rings.
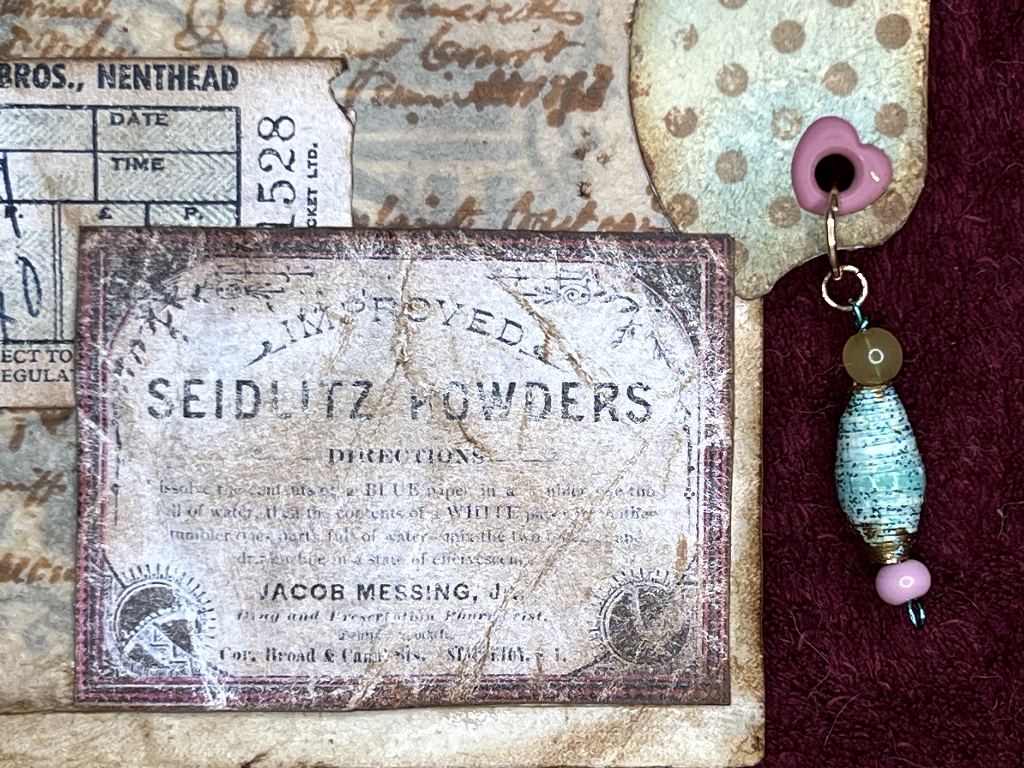
The smaller paper bead, also made from a magazine page, hangs through a heart-shaped eyelet attached to a page tab. I made a box of these recently and to this one, I added a bit of Speckled Egg Distress Ink to co-ordinate with the project. The label on the bottom corner of the project was one of the haul of digitals I got recently – I scrunched it up before inking it and I love how grungey it’s come out. You can see the stamping I did on the glassine bag.
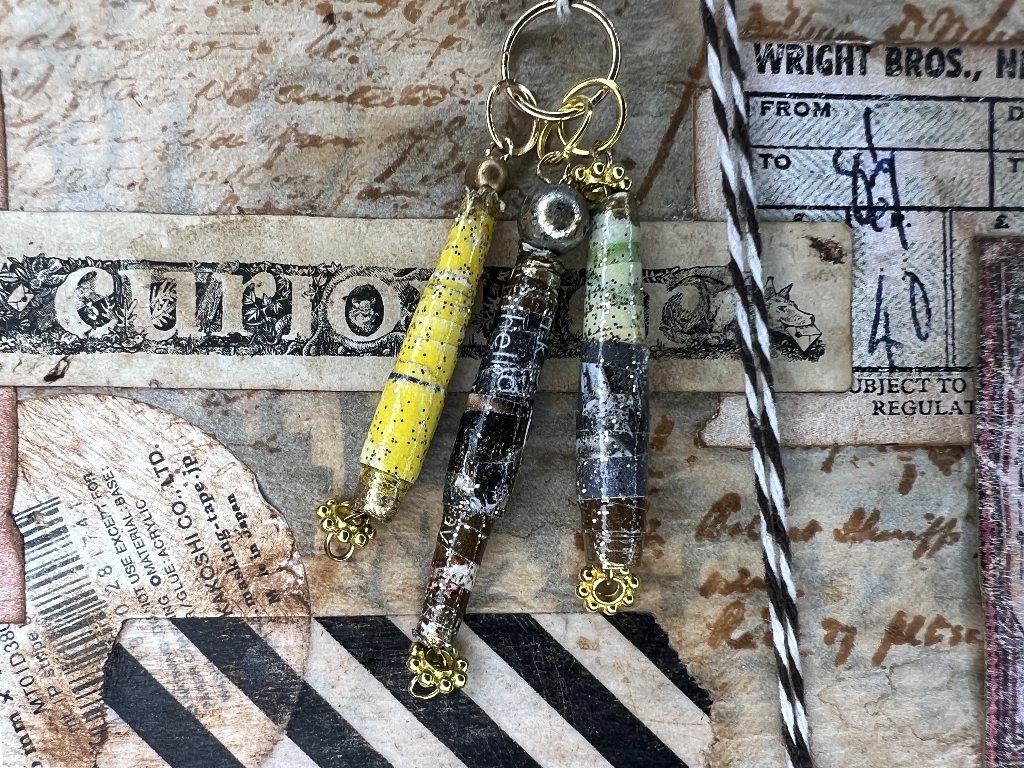
Another detail shot of the paper beads. The strip with the word “curiouser” is a fragment of sticky tape used to secure the parcel. You can see how translucent the striped washi tape has become, over the circular label, after I sanded it.
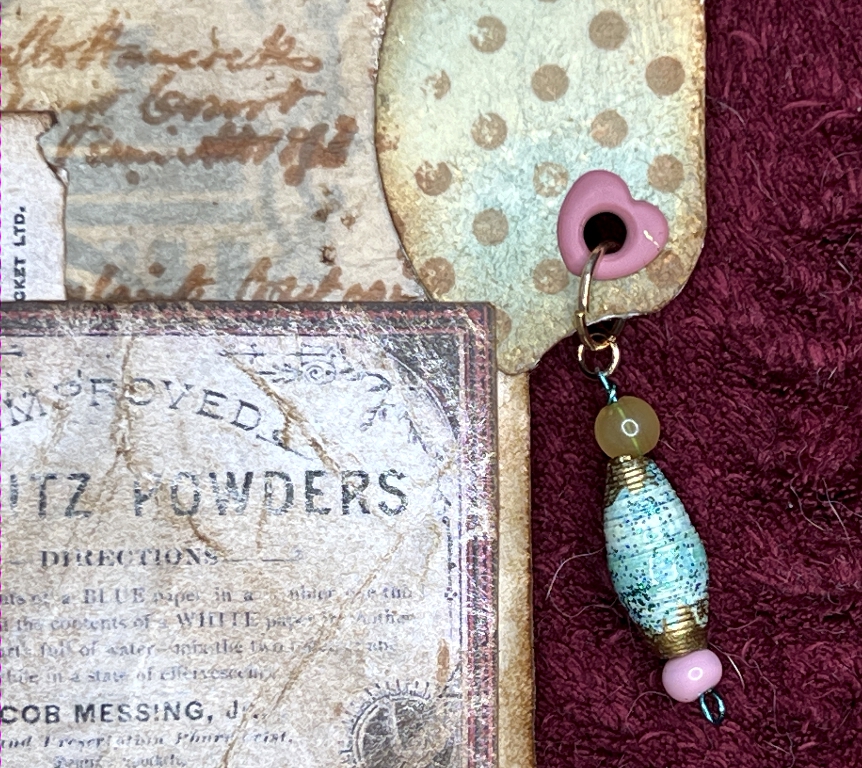
A close-up of the paper bead on the page tab. Tipping these beads with a bit of gilding wax almost makes them look like those glass beads with metal inserts.
The back of the piece
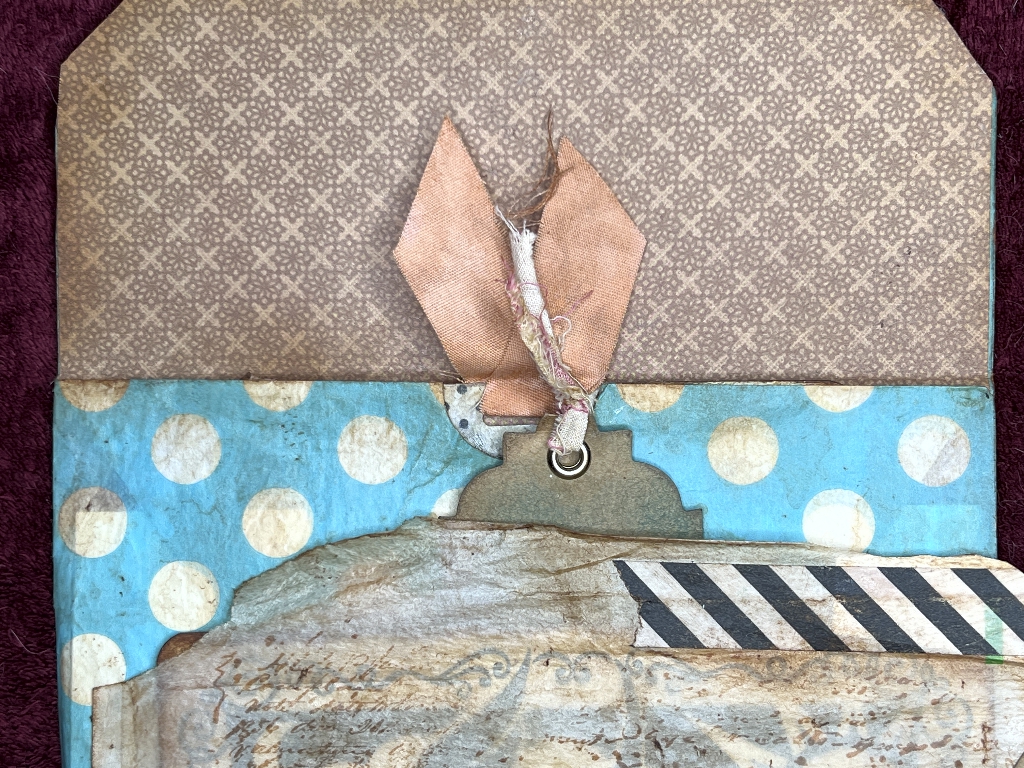
Originally I wasn’t going to do anything with the back, thinking I would probably stick the element down onto a page. Then I stuck the glassine bag onto it and fortunately realised just in time before the glue set, that I’d stuck it on the wrong side! I peeled it off, and was able to rub away most of the glue but it was a bit of a mess. Also, once I’d done the string closure, I realised that if I stuck the element down, this closure would no longer work. Easy solution to all problems: stick something on the back!
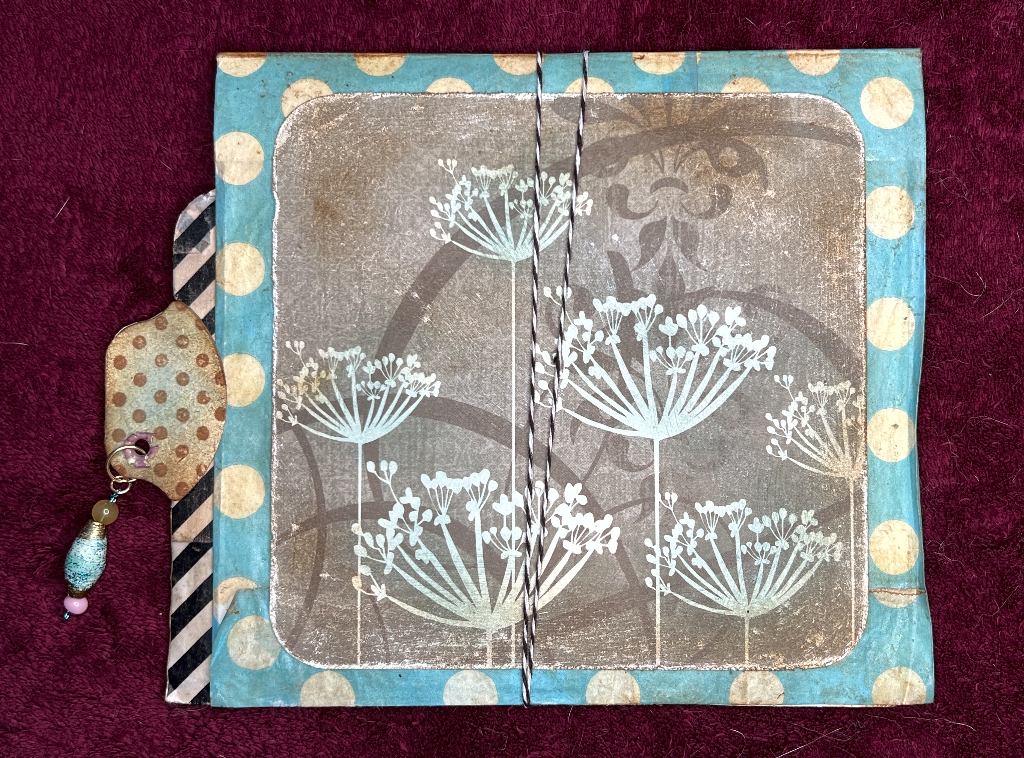
The glassine bag pocket stuck on the front sticks out beyond the edge of the blue bag. I covered the back of it with some of the new striped washi tape before adding the page tab with its bead.
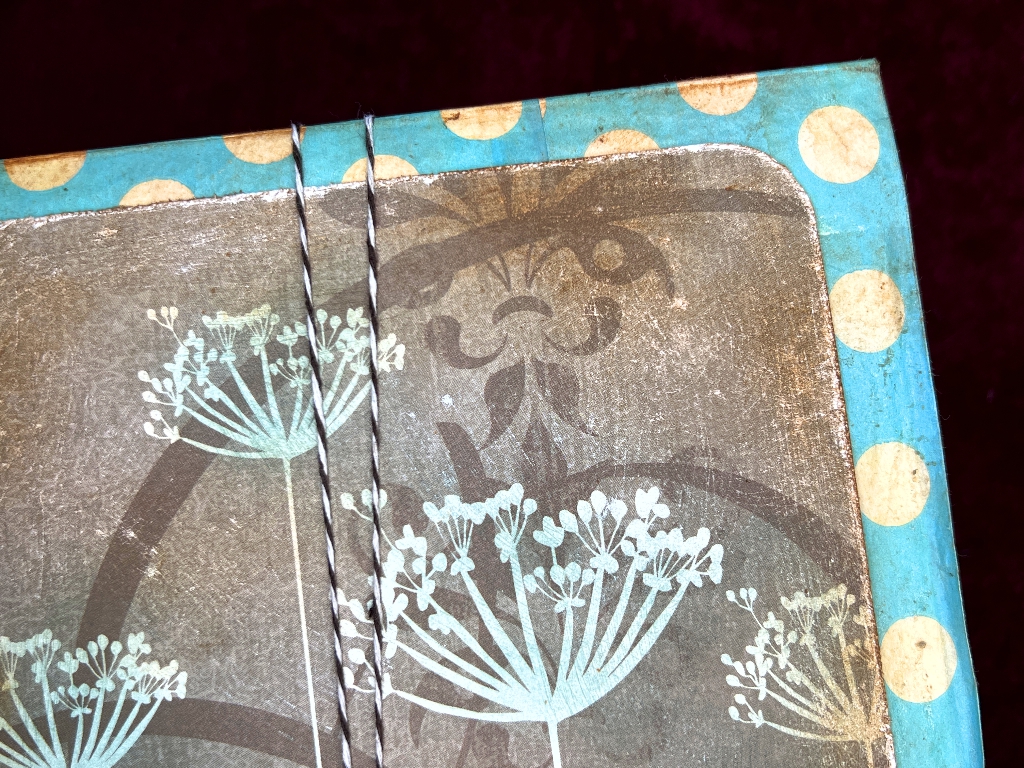
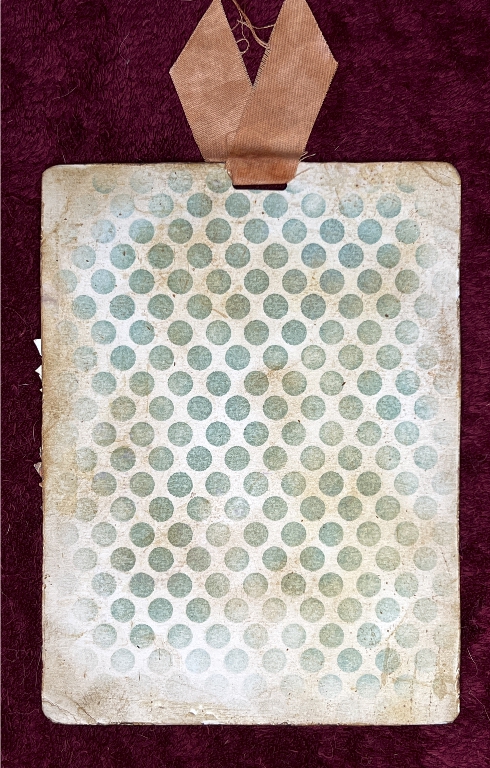
Many years ago I was sent a freebie from a company – a really nice mostly monochrome 12 x 12-in scrapbooking paper pad, and I have hardly used any of it. I cut this piece from one of the pages, rounded the corners and proceeded to distress the edges. First of all I used my little distressing tool to rough up the edges and then I sanded it. I am thrilled to have discovered this technique recently because most printed papers will sand beautifully, giving a lovely worn vintage look. The flowers were much too stark white so I added some Speckled Egg Distress Ink with an ink blender to mute them a bit, and to add a little co-ordinating colour. Very pleased with the result!
Opening the flap
Returning to the front of the element, here it is with the flap opened.
I had to reinforce the blue bag with some card because it was much too flimsy. You can see the damage to the corner of the glassine bag which happened when I pulled it off the outer envelope. I stuck some more of the striped washi tape on the right, and you can see the stamping on the tea-dyed glassine, and you can just see what is inside the pocket. The inside of the flap is covered with some paper that has been in my stash for years. I’m making a real effort to start using up some of the stuff I’ve got. I’ve now learnt enough to be able to alter things I really don’t like, so that they fit better with my projects.
The piece inside the glassine bag is topped with a small clothing tag in order to pull it out. I inked this tag, and added a fragment of seam cut from the pair of pink striped pyjama bottoms that I bought in a charity shop and tea-dyed. The eyelet was already in the tag but it was very bright silver, so I dulled it down with a bit of alcohol ink. I love the shape of the top of this little tag.
With the flap opened, you can see more of the stamping on the glassine, and also some more of the card inside which is showing through.
A detail shot of the top left-hand corner. I chose a pink ticket to go there, which ties in nicely with the colour of the little tie on top of the clothing tag.
Pulling out the card
The clothing tag is stuck to the back of the gorgeous card that Rachel included with the parcel.
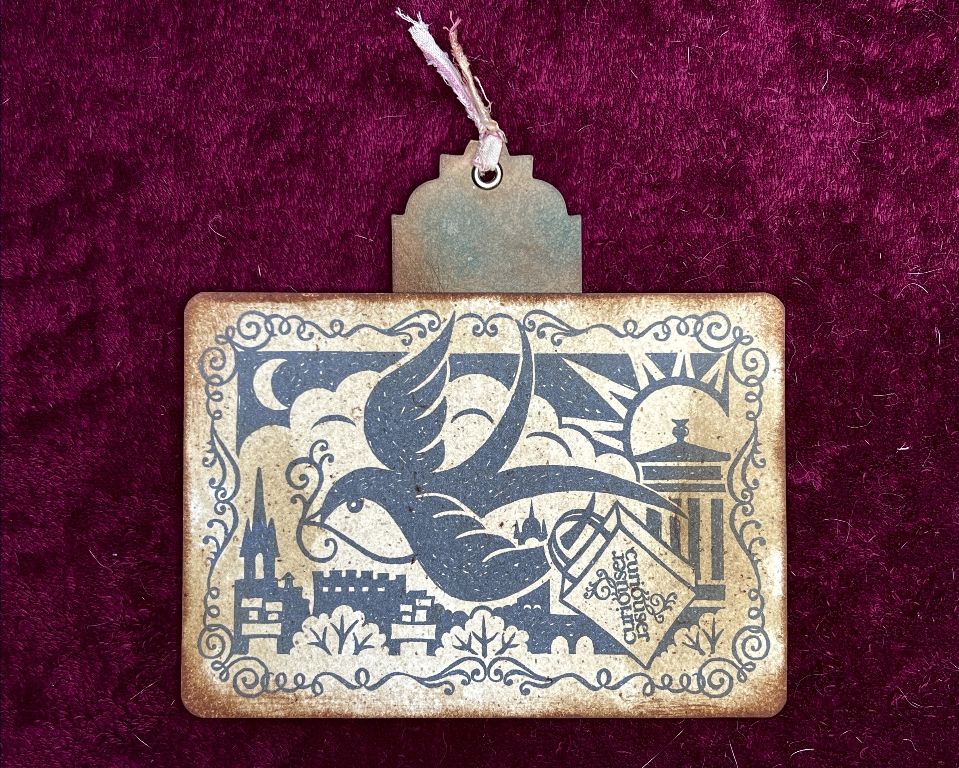
I rounded the corners of this card and tea-dyed it, and distressed the edges. I love this design which looks like a lino print. It has scenes of Edinburgh in the background, and the little bird is carrying the shop’s carrier bag with the logo over its wing. This card just had to be included in the project – it is utterly fabulous!
The back of the card
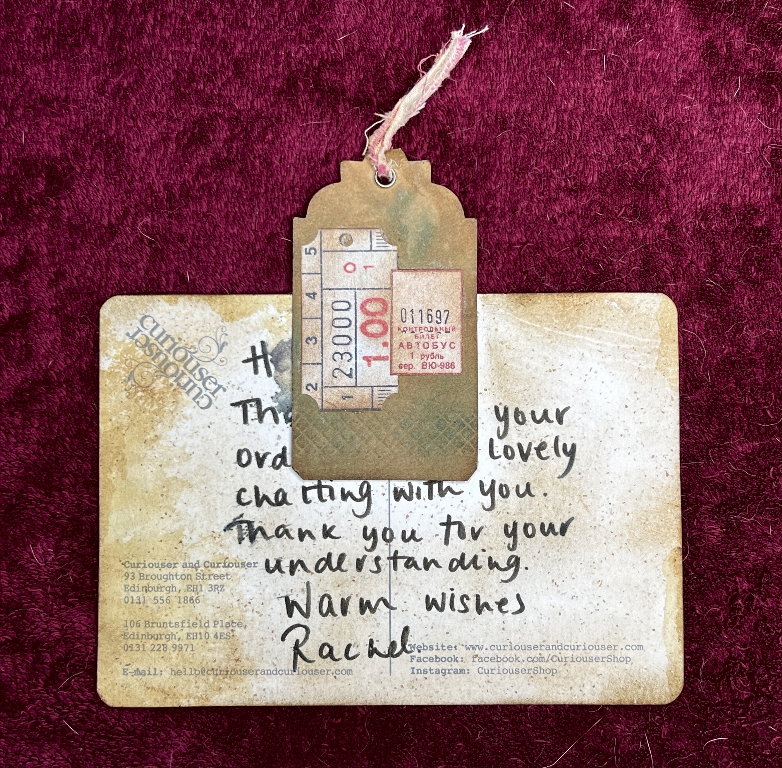
The little clothing tag has an embossed strip across the bottom and such a pleasing shape. Inking it gave it some more dimension and interest, and I covered the text with a couple of tickets. This is Rachel’s sweet message. The printed card shows the shop’s logo and contact details as well.
I do love the tatty striped pyjama fabric! I’ve still got a lot of this so it should last a while.
The second tag
In the main pocket of the blue paper bag is another tag. I punched a slot in the top and threaded through a tiny fragment of rather frayed pink tape which was in my stash (nothing gets thrown away!!) – the colour was a bit too bright pink so I tea-dyed it, and then when it was dry I rubbed it over the surface of an ink pad to add some texture.

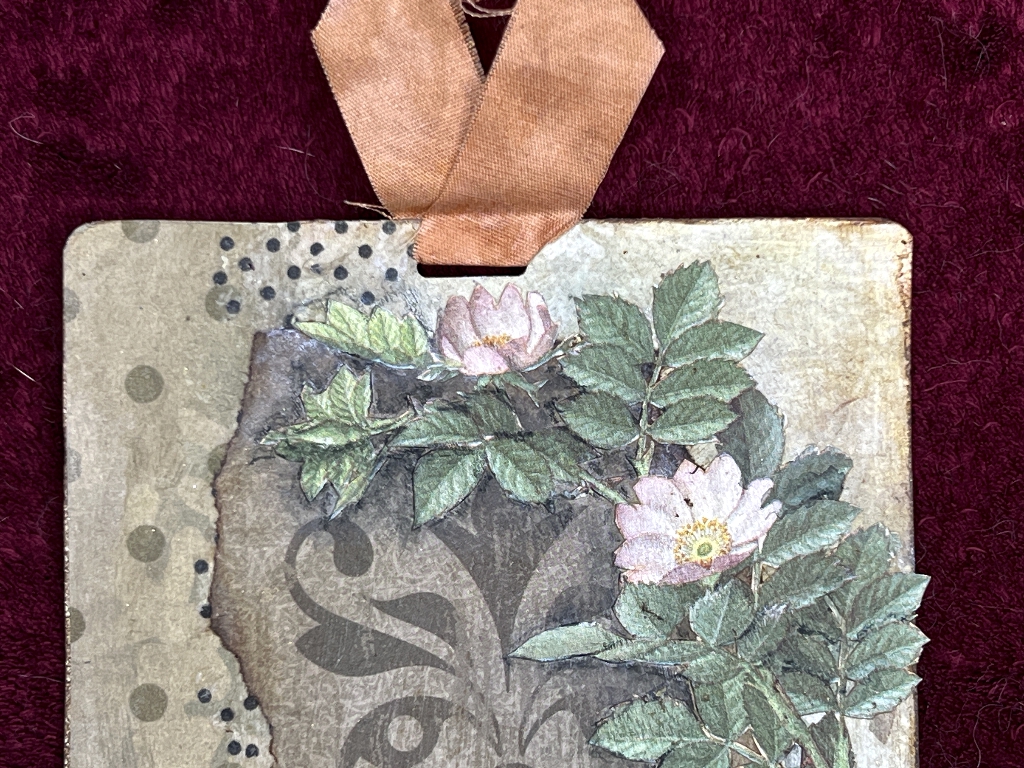
This large tag was made entirely from stuff already in my stash. It doesn’t include anything sent in the parcel. I used a piece of scrapbooking paper from a 6 x 6-in pad that I bought in a bit of a mad moment at a craft show several years ago and never used. It had a winter theme and if you look closely you can just see the shape of some snowflakes on the left. The paper was so pale and the design didn’t really show up very well. I tore the brown strip from a page from the other paper pad mentioned above, and laid this down over some spotty tissue paper which was part of a pack of fairly small pieces. Laid down with matte medium, tissue paper blends into the background to produce a lovely effect.
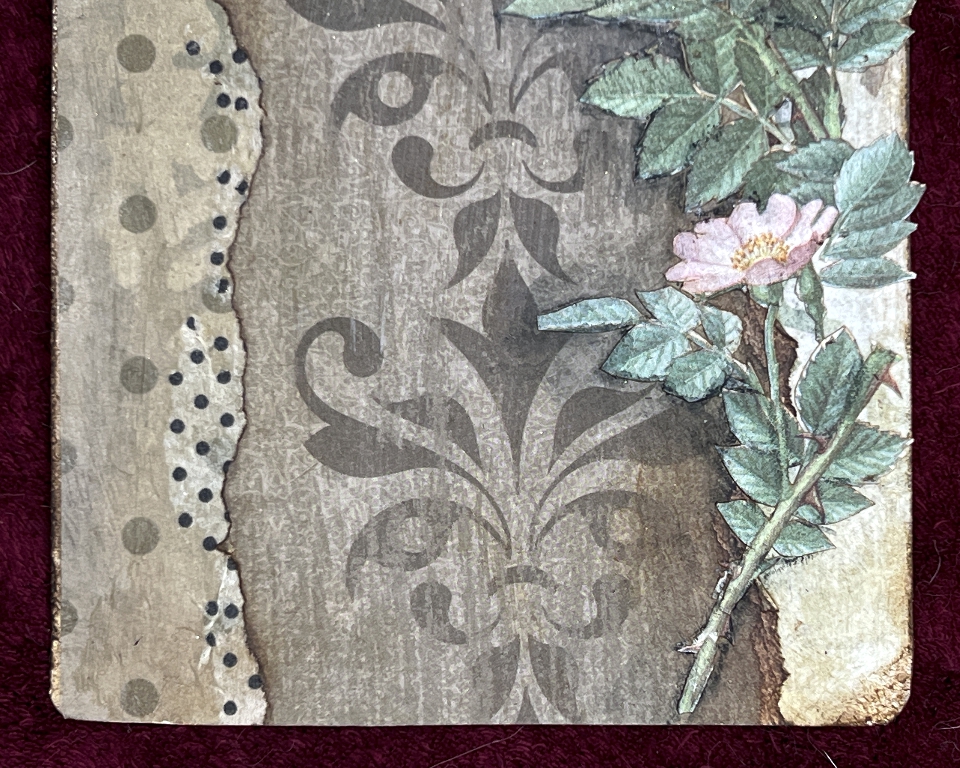
The wild rose was a fussy cut from an old British wild flower book I got on Ebay a few months ago. I did a huge amount of fussy cutting, leaving a white border around everything. Sometimes this is the effect you want, but you can always trim it off for a cleaner, less sticker-like appearance. In this case, I trimmed all around the edges with fine scissors, and then settled down for a while with an Exacto knife with a fresh blade and my self-healing cutting mat, and proceeded to weed out all the tiny pieces between the leaves and flowers! It took ages but I am so pleased with the result. When I stuck it down onto the tag – it took very careful handling as it was extremely delicate – it was a bit disappointing because it merged into the background too much. I went around it with a black watercolour pencil and gently blended it out with a wet brush, and it looks much better now. I am extremely pleased with how this tag turned out, and how the very tips of the leaves extend beyond the edge of the paper. It has quite a 3-D appearance.
The back of the tag. I embellished this distressed piece with some simple inking and stencilling.
A final look at the finished project once more. I am so pleased with how this came together, and how the muted shades blend so well.
I am so grateful to Rachel for going the extra mile and sending my order so attractively packaged and with her delightful card. I have tagged her on social media and hope she sees what I have done with her bits and pieces! I was so inspired when I opened the parcel and just knew I had to take advantage of the potential of the elements, which most people would probably have thrown away without a second glance. It is my greatest joy in my creative sphere to look carefully at things and see their potential, however humble they may be.