DOUBLE TRI-FOLD JUNK MAIL FOLIO PART 5 – DECORATING THE SECOND FOLIO
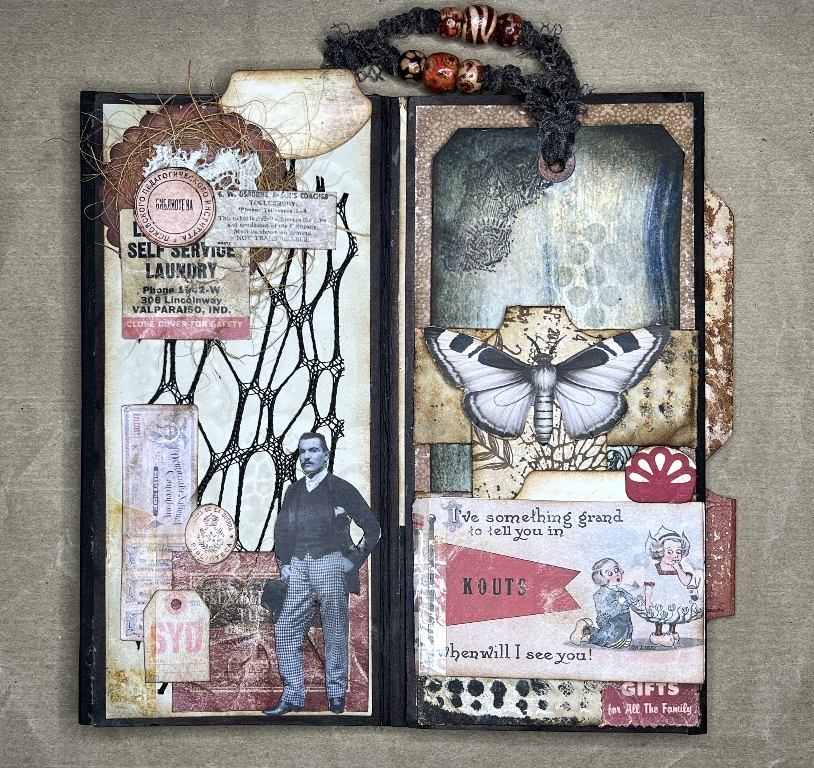
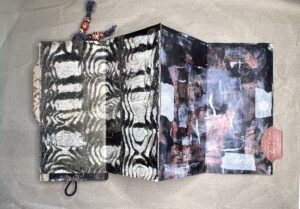
I have now begun work on decorating the second folio in this project. Again, as you open it, you see the inside of the first panel and the outside of the third. At this stage, I have completed the inside of panel 1 and the outside of panel 3, and this is the result.
Again, I have kept the theme vintage, and have added some of my faux vintage tape, and distressed some of the elements with creasing and sanding.
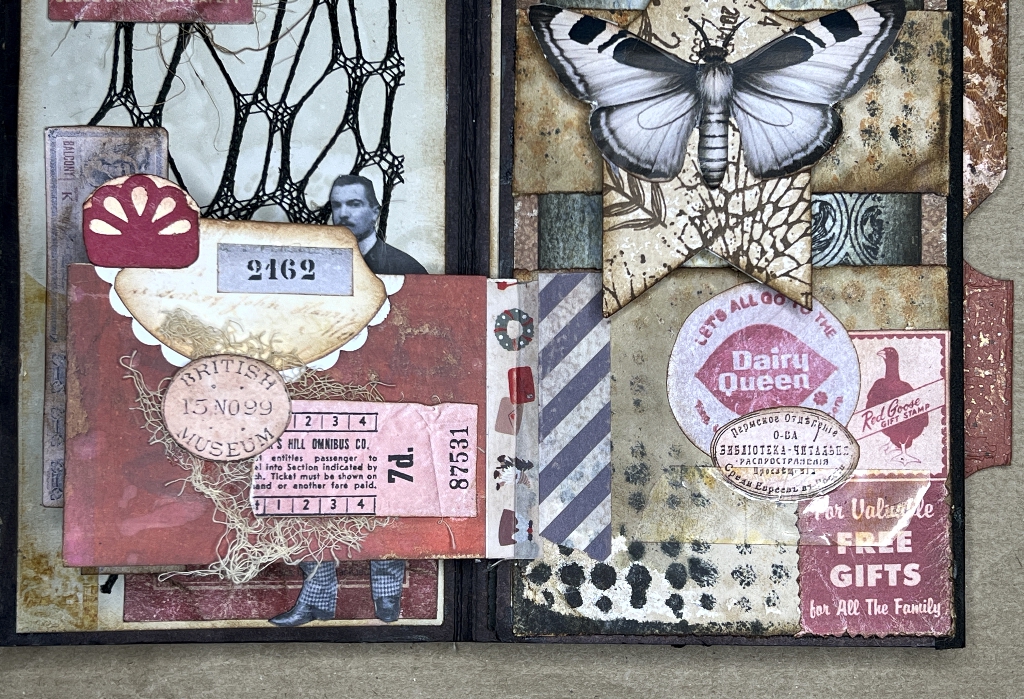
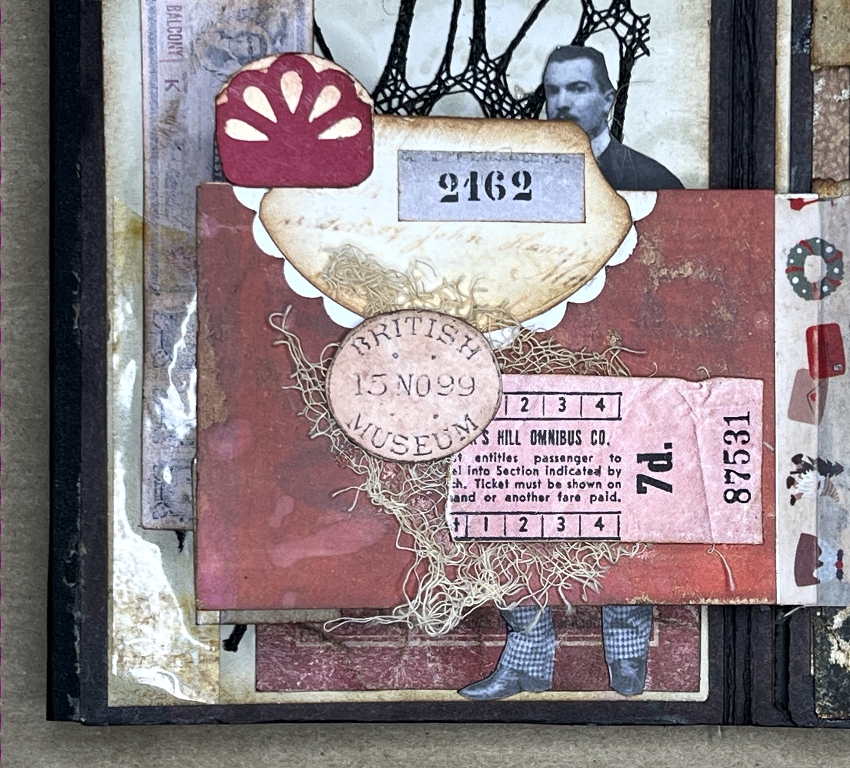
The first panel
There are two clusters of labels and tickets overlaying the black mesh background, and the addition of another gentleman, who is now called “Syd” – see his name label!
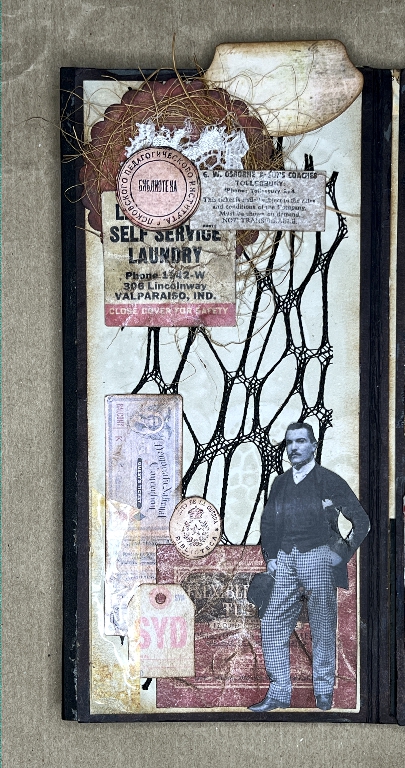
The first cluster
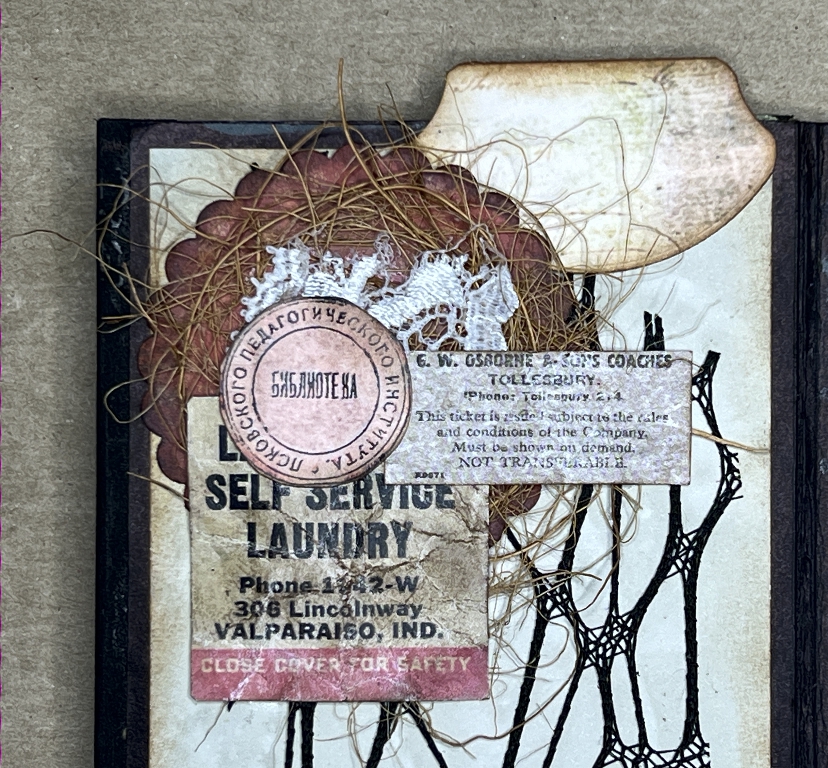
I punched out a scalloped circle for the base, and used the negative space later – see below. I stuck down some of my recently acquired coconut fibre and a fragment of lace, and then added the labels. The scalloped circle was cut from a scrap of paper from a project I made ages ago – I never liked the papers and had a job at the time, altering them, as they have a slightly waxy surface which didn’t take water-based media that well. Since that time, I have learnt a lot more about different media and techniques, and it was easy to mute the colours and pattern on the paper, resulting in something with a more interesting texture than a simple plain coloured piece of card would have had.
The whale tail tab was from my stash – I mass-made a batch some time ago and this one was relatively plain with a suggestion of text on it.
The second cluster
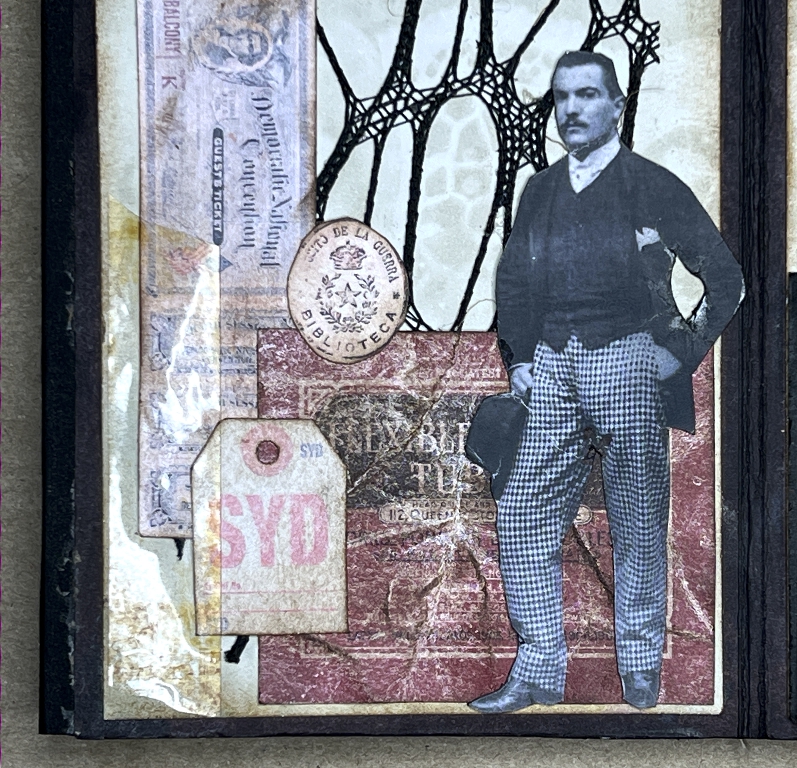
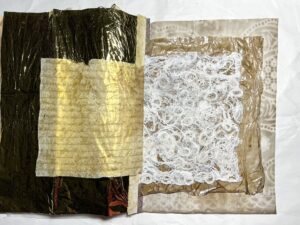
You can see the faux vintage tape on the left, and quite a bit of distressing. In all these pictures, you can still make out the vegetable-dyed paper background with the lace pattern on it. It’s very subtle but adds depth and texture with the addition of more layers.
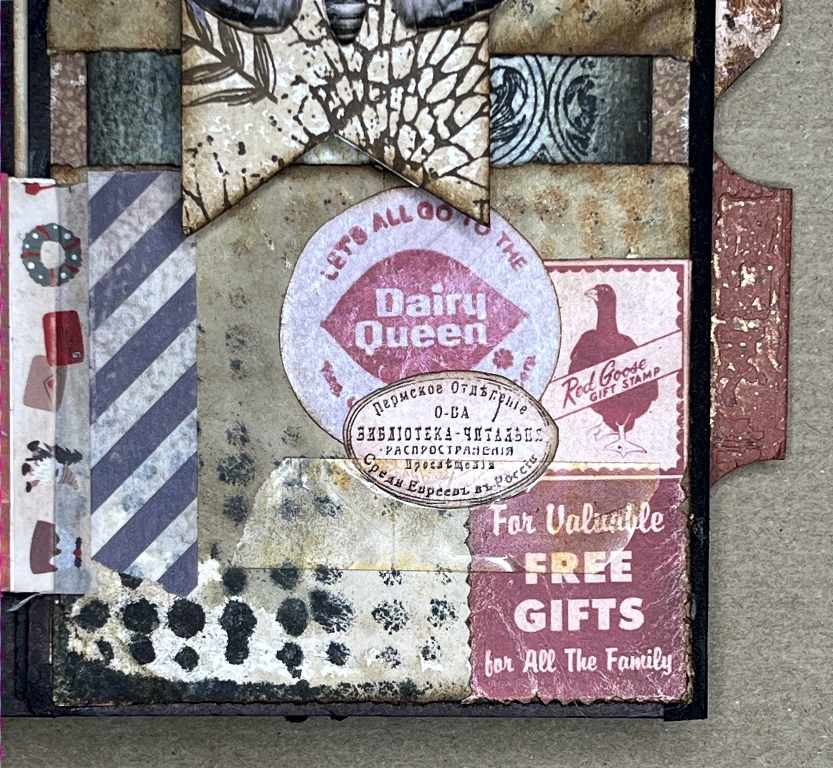
The back of the third panel
This is the panel which would be opened to the right, to expose the complete opened folio. I have yet to decorate the inside.
This panel has some interactive elements, including the removable tag which I did in a previous session.
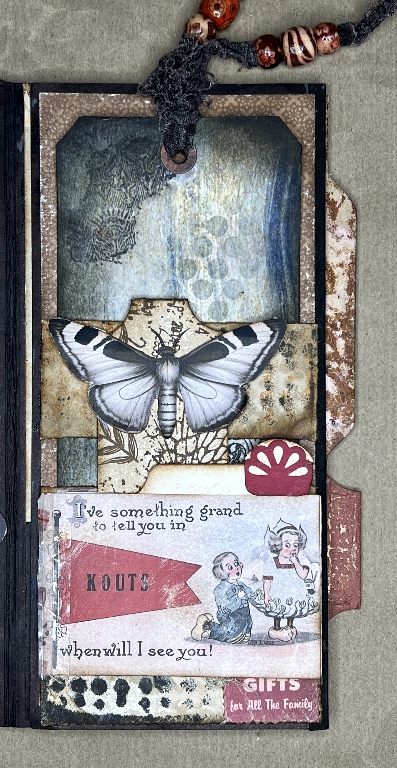
The belly band above the bottom pocket is now embellished with a tab and a butterfly. This opens upwards, and is held closed by the flip-out at the bottom.
Detail of the top of the panel
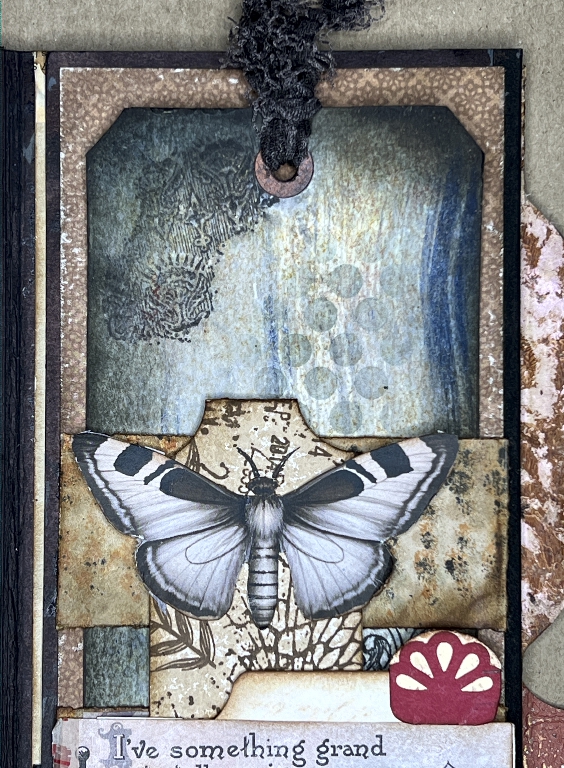
The tab on which the butterfly sits was made from one of a series of coffee-dyed scrap strips I made some time ago. I laid out a whole lot of card strips on my table so they were all touching, and then stamped them randomly, so that the different background stamps went across the edges of them. These strips have proved very useful for cutting up and adding as elements in projects.

I have just cut and folded a whole box of banner tabs, ready for embellishing, and I used one of these for this project. I shall be posting about that when I’ve decorated them.
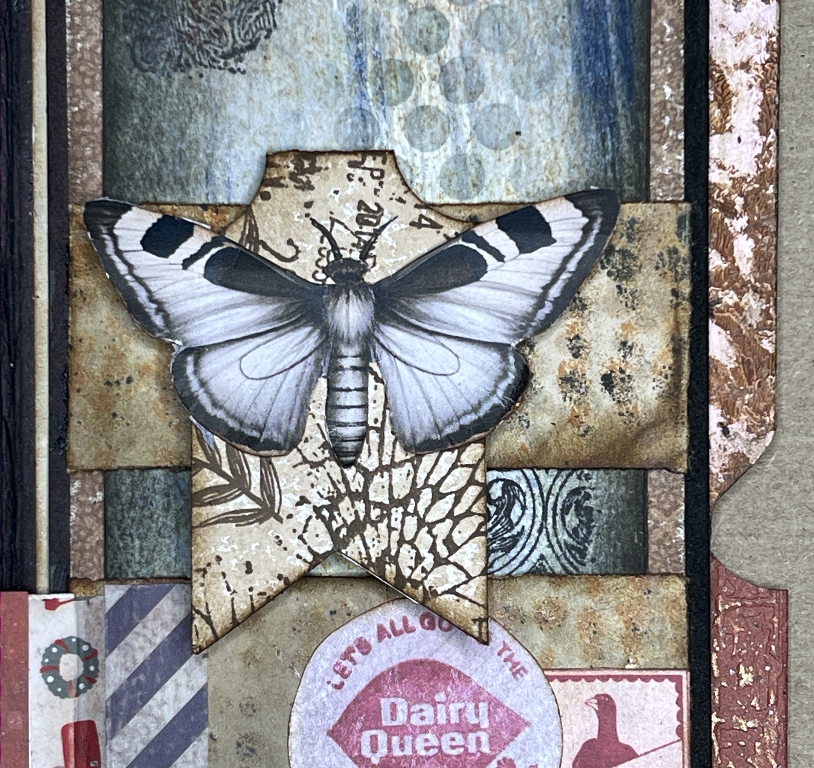
Detail of the bottom of the panel – the flip-out
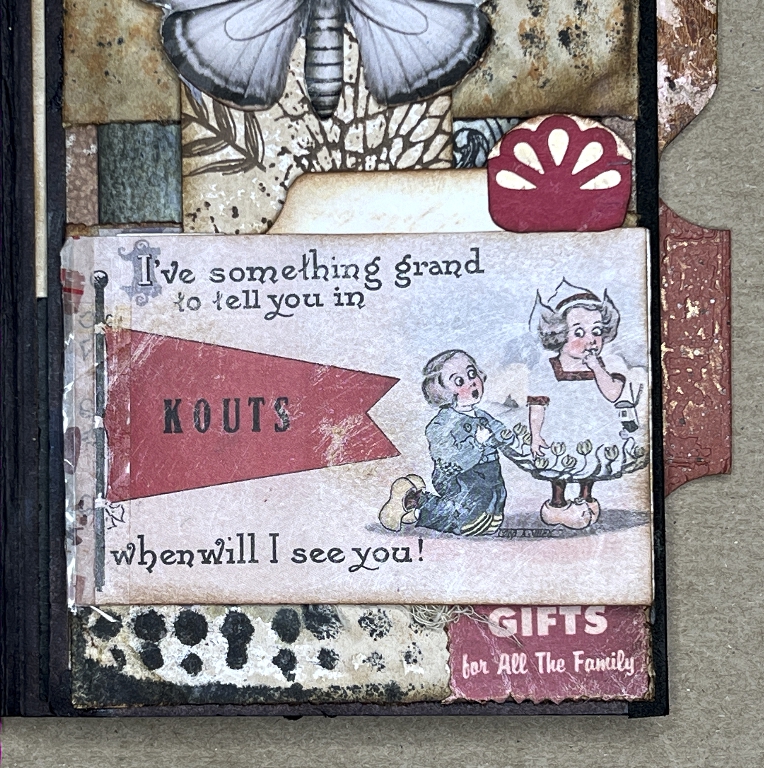
I found this charming little label in my recent set of digital print-outs (sorry, can’t remember the source) and thought it would be great for this project. I aged it by sanding it lightly. It is attached down the left-hand side with washi tape and some of the faux vintage tape, and is a flip-out, revealing more decoration inside.
This flip-out covers the banner tip of the butterfly tab and serves to keep it closed.
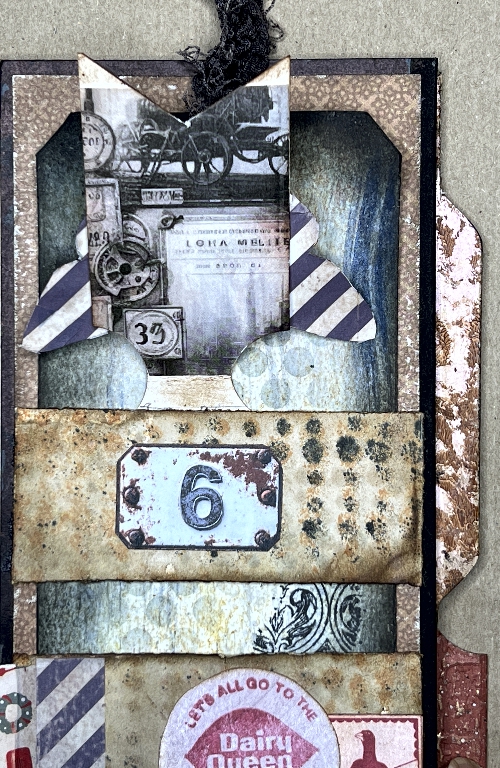
Here is a detail of the left-hand side of the inside.
The scalloped edge is the piece of altered paper from which I cut the scalloped circle base for the cluster on the first panel. Quite serendipitously, it fitted exactly around the whale tail tab! I made those tabs on a separate occasion, presumably using the same sized (plain) circle punch. I was really pleased to see how this worked.
The cluster on this paper consists of some tea-dyed scrim and a couple of tickets/labels, with everything co-ordinating with the red colour scheme of this folio. The tiny fan-shaped tab at the top was one left over from a set of page tabs I made for another project a couple of years ago, which just happened to fit.
Here’s the detail photo of the right-hand side of this element opened up.
The background paper is what forms the pocket and belly band on this panel, and was created by stencilling through one of my punched medication sheets. I didn’t want to cover all of this up because I really like it. You can see the washi tape on the left which serves as the hinge for the flip-out, and some more faux vintage tape. There is also some grey and white striped washi tape and some labels, and you can see the tips of the banner tab at the top. Behind this is part of the bigger tag that fits in the pocket and behind the belly band. This all adds to the multi-layered effect.
The banner tab flip-up
I folded the banner tab over the belly band and marked the bottom layer so I could cut it off flush with the bottom of the belly band. I glued the back part of the tab onto the inside of the belly band to keep it in place, and stuck the butterfly down. This flip-up is held closed by the closed flip-out.
Lifting up the flip-up, another image is revealed on the back, trimmed to the shape of the banner tab, and also one of Luise Heinzl’s faux metal number digitals. The tag in the pocket serves as a background.
The backs of the butterfly wings were plain white and sticking out at the sides. I didn’t like the look of this so I covered them with some more of the grey washi tape.
Conclusion
As always, it is very hard adequately to describe any interactive elements. Once the folio is finished, I shall be making a video flip-through of it, and anything unclear through my descriptions here should then be a lot easier to understand!
The next step is to decorate the inside of the second folio, which is revealed when the third panel is opened up. I am hoping to complete those two final panels in a single studio session, if Life doesn’t intervene!
These are amazing Shoshi! Who’d have thought that you could make such a thing of beauty out junk mail and Check-A-Trade leaflets! You’re so creative, and you really do have a USP with your own individual style, it’s so intricate and details and absolutley fascinating – every item draws you in to explore the texture or the text, or the picture – whatever it is. Brilliant!