JUNK JOURNAL – MAKE A JOYFUL NOISE PART 23
Binding
At last I have reached the point when I can bind this book! I have chosen to use a 5-hole pamphlet stitch binding rather than the standard 3-hole, because I wanted to be sure that all the different sized pages would be firmly secured in the book.
End papers
I felt that the book needed some end papers rather than launching straight into the content immediately inside the cover.
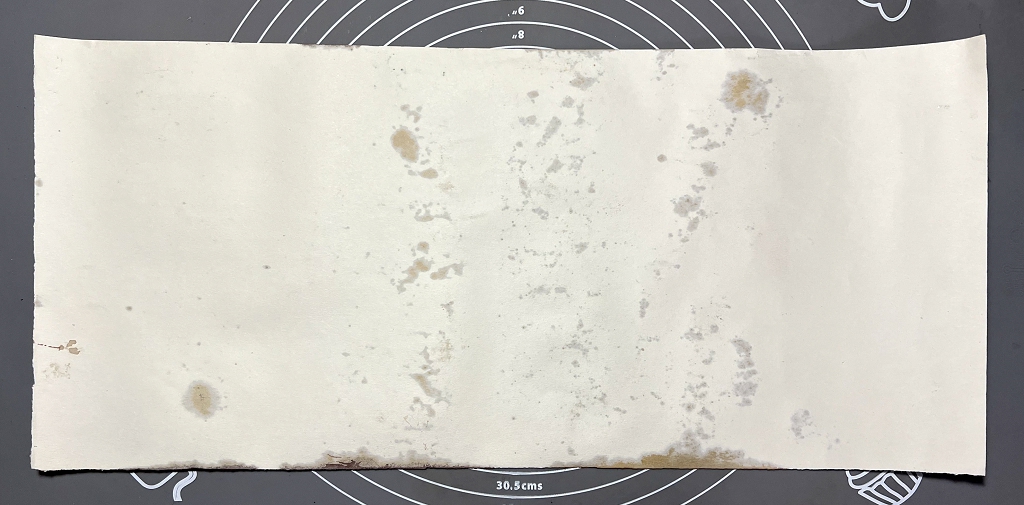
On our last shopping trip, I bought a roll of wallpaper in a charity shop. It is embossed and with patches of gold. I thought this would be an ideal choice, but it was a bit too bright white. I did some experiments with rust water as seen below. It isn’t very easy to see much difference between the samples but they are more obvious in real life.
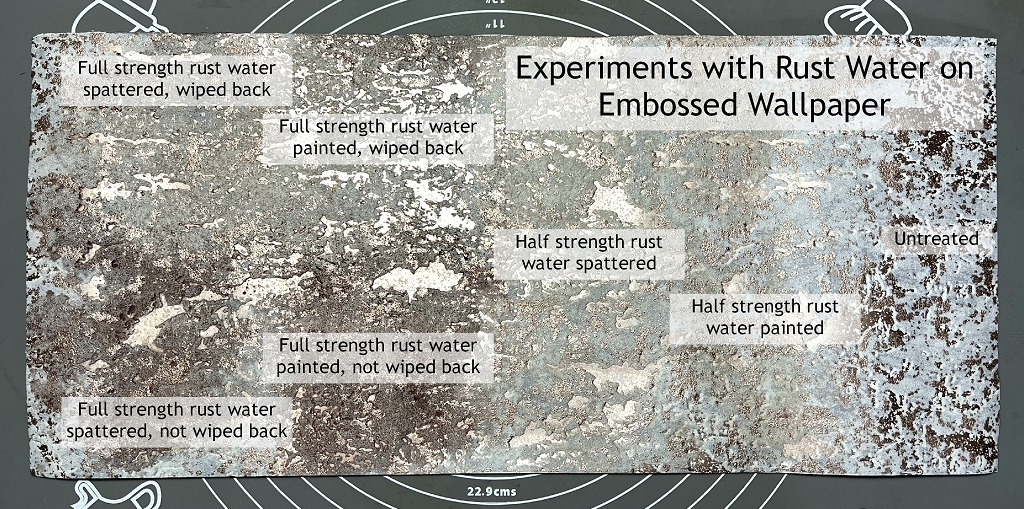
In the end I chose the full strength rust water spattered on, and gently wiped back with a dry cloth rather than a damp one, which removed too much.
I was a bit concerned about bleed-through but this was minimal.
Here is the piece of wallpaper I cut for my end papers.
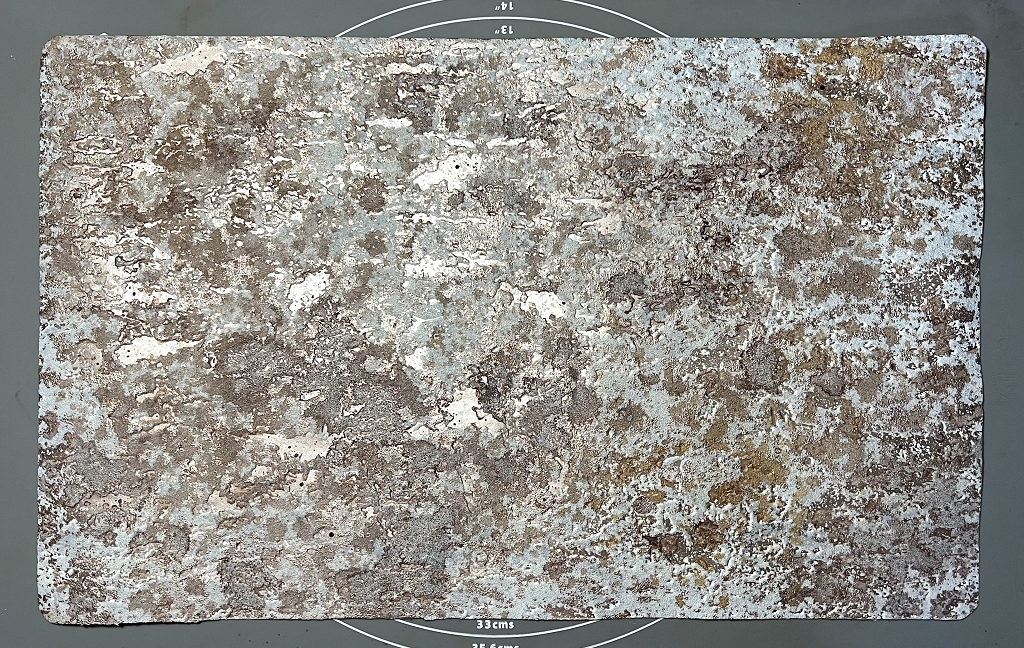
On the back, I spattered it with half-strength rust water, and when this was dry, I stencilled a design using Vintage Photo Distress Ink. I’d done some experiments with this stencil, using rust water alone, mixed with heavy body gel medium and with heavy gesso but in the end I thought the inked version was the best.
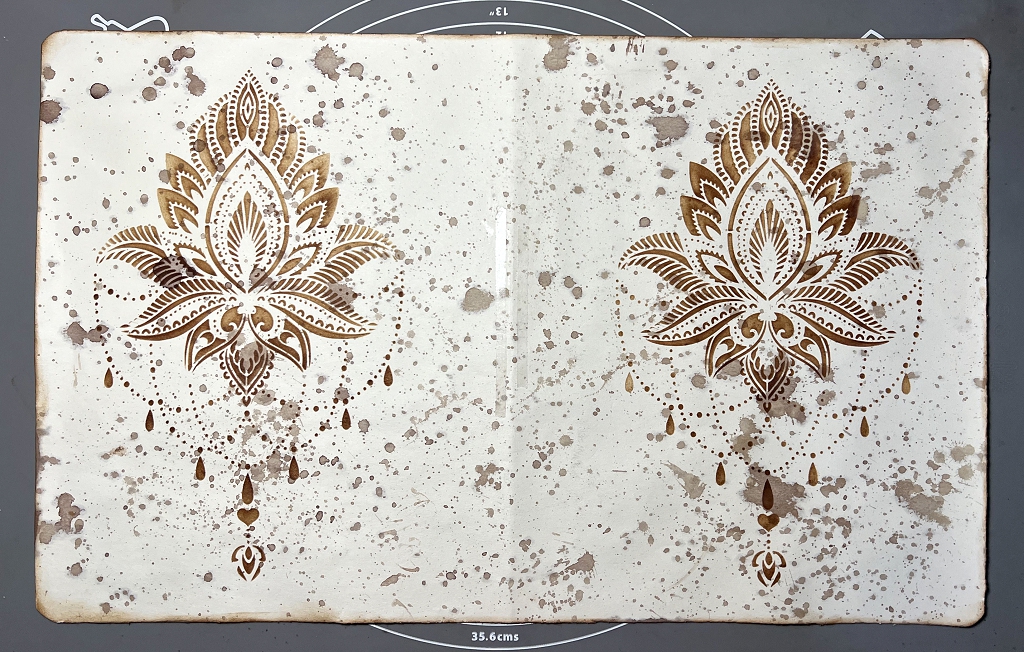
I rounded the corners and distressed the edges with the Vintage Photo Distress Ink. When the paper was bound in the book, it projected too far beyond the pages, so I trimmed it back by half an inch and redid the corner rounding and inking along the fore-edge.
Materials and equipment for binding
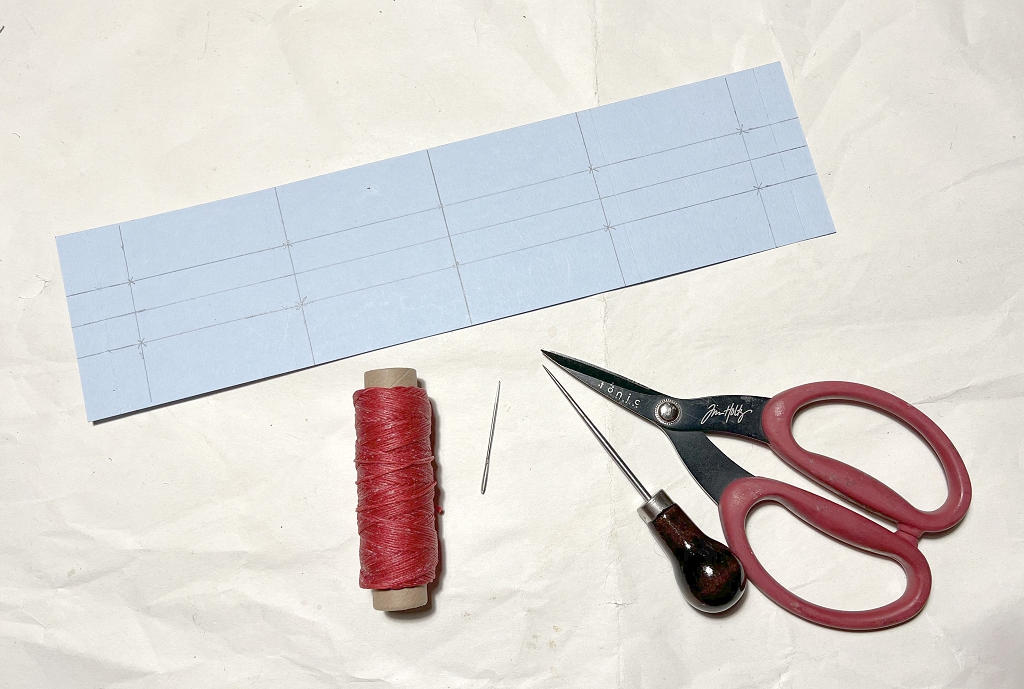
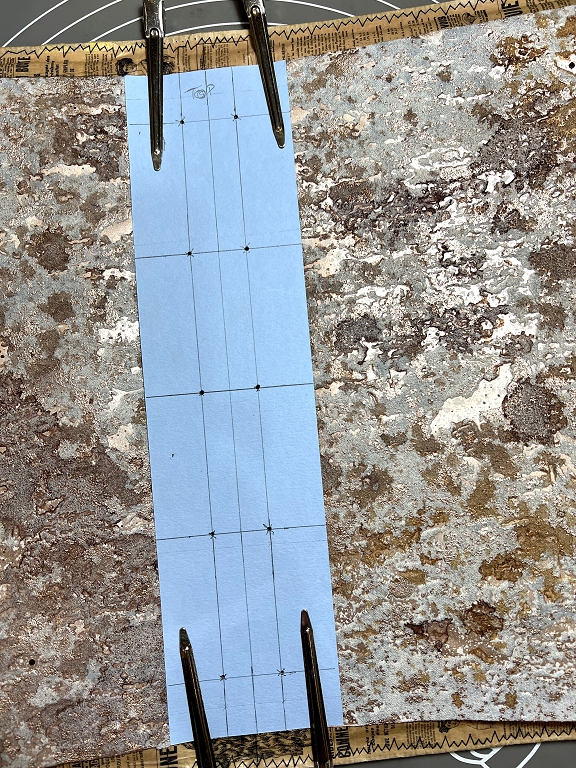
I chose a red waxed twine for the binding. I also needed a tapestry needle, an awl for piercing the holes, and a pair of scissors. At the top of the picture is the piercing template I made for this book. I marked the vertical and horizontal centres, and two lines either side of the centre where the binding for the two signatures would go and other horizontal lines to show where to pierce the holes.
I put a couple of small strips of double-sided tape on the back of the end paper to hold it in place on the cover, and then clipped the template on top. I used some long hairdressing clips for this. I then pierced through both the end paper and the cover at the marked points, using the awl.
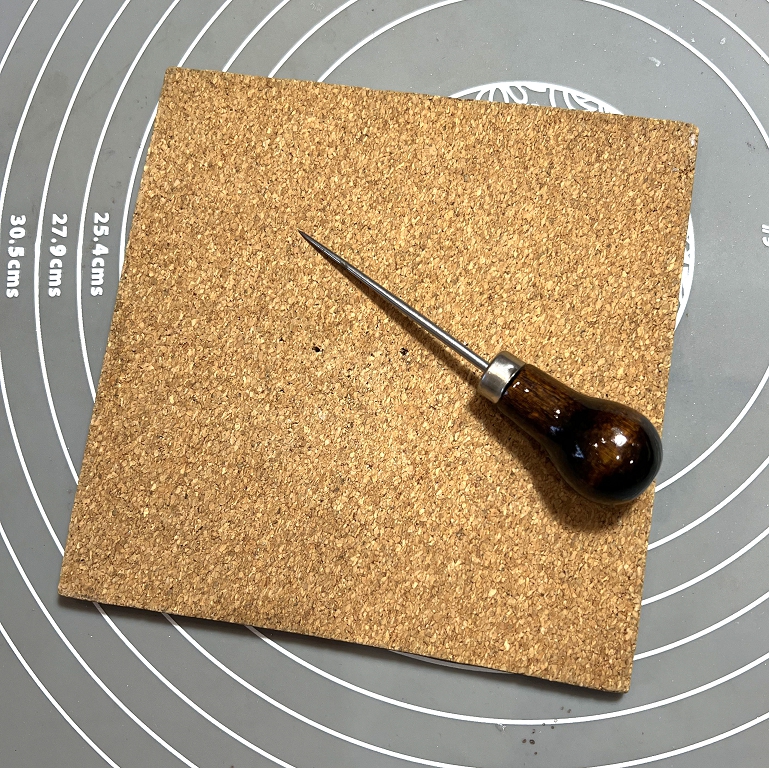
I have a small cork board which I made decades ago. It is a layer of cork glued to a piece of hardboard, and it is an invaluable tool for piercing into, to avoid damaging one’s work surface.
I was then able to remove the template. I folded it along the two lines for the signatures.
I went through both signatures and carefully arranged all the irregular-sized pages where I wanted them vertically, and then folded the signature, making sure each page fold was pressed as firmly as possible into the crease. I clipped the pages together top and bottom with the hair clips, and then put the folded template inside, tight against the fold, clipping it top and bottom, and pierced the holes through from the inside while keeping the fold in place. I didn’t photograph any of this process because I was fully occupied and it was hard to put it down.
Once the holes were pierced, I removed the template. I cut a length of the twine about 3 1/2 times the height of the spine. You really only need about 3 times the height but I wanted to be sure I had enough and also I wanted to use the excess for threading on some beads once the book was finished.
You have a choice whether to start binding from the outside or the inside. If you begin on the inside, the final ends will be on the inside, and you can tie them off and trim them back, so virtually nothing shows, and you have a neat finish on the outside of the spine. If you begin on the outside, the ends will be on the outside, which is what you want if you are going to use them as an embellishment.
I started at the top, and wove in and out of the five holes down to the bottom, and came back up again, filling the spaces, until I reached the top. I didn’t go back inside the final hole, but tied off the ends at the point of the hole, as you can see in the next photo. I repeated the process for the second signature. You have to be careful not to split the thread when you go back through the holes, or it is impossible to tighten the bindiing when the time comes. Fortunately I only had one incident of this, and it was right at the end, so I didn’t have to undo too much to put it right.
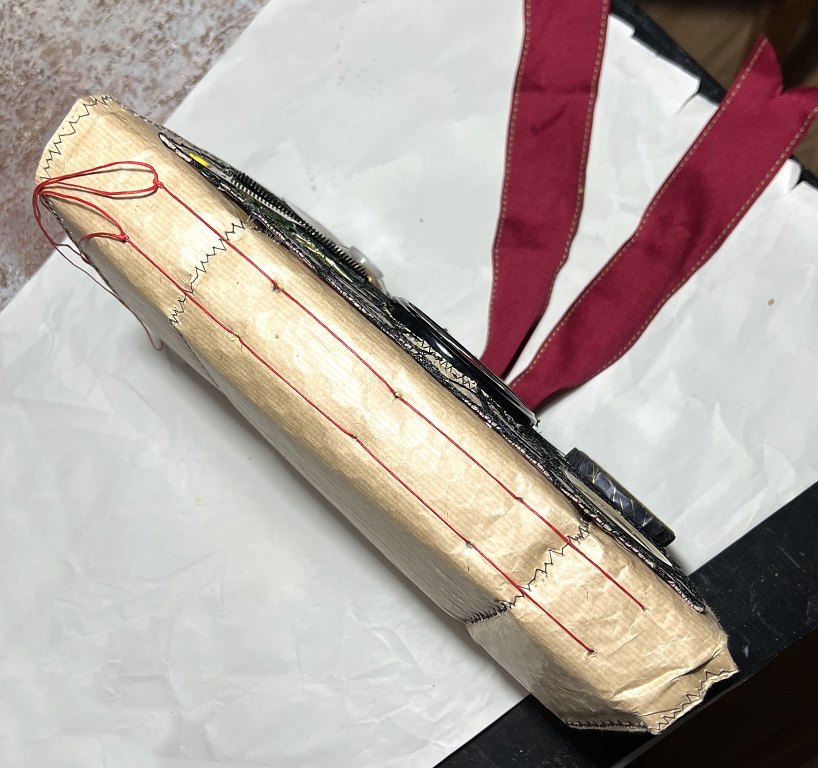
I think this exposed binding is quite attractive, especially if you have multiple signatures. You can also thread beads on as you go, for a more decorative binding.
Opening the book
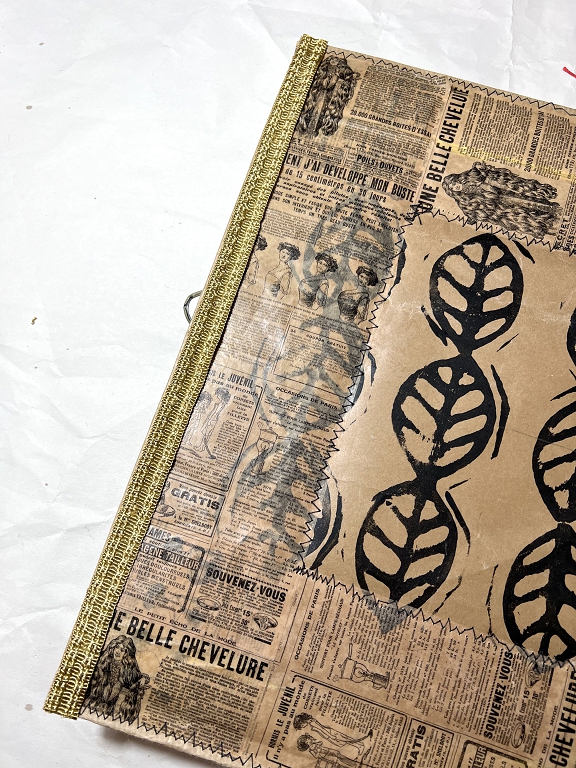
Inside the front cover, the front end paper is revealed.

This is the reverse side of the end paper. (I removed all the pocket insertions etc. before binding so they wouldn’t get in the way or add bulk.)
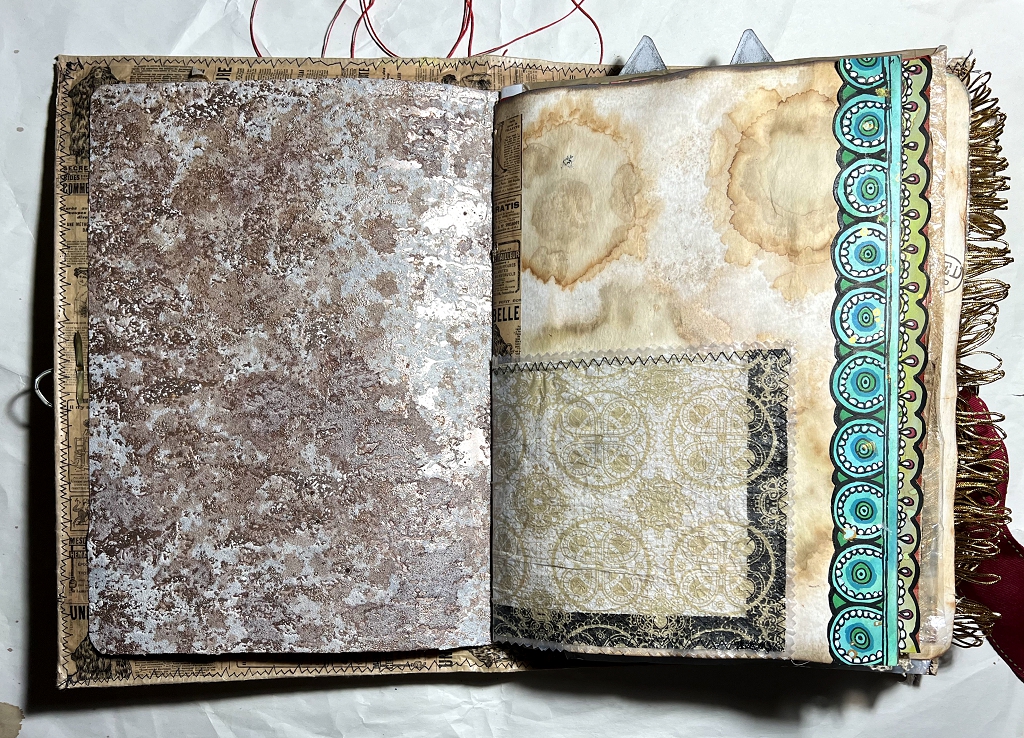
This is the centre of the book, between the two signatures. The space looks quite large, but the pages bulk up either side of the fold and there needs to be room to accommodate this. It is nice to see the end paper design here, as it gives a better finish than if it was just the inside of the cover that was visible.
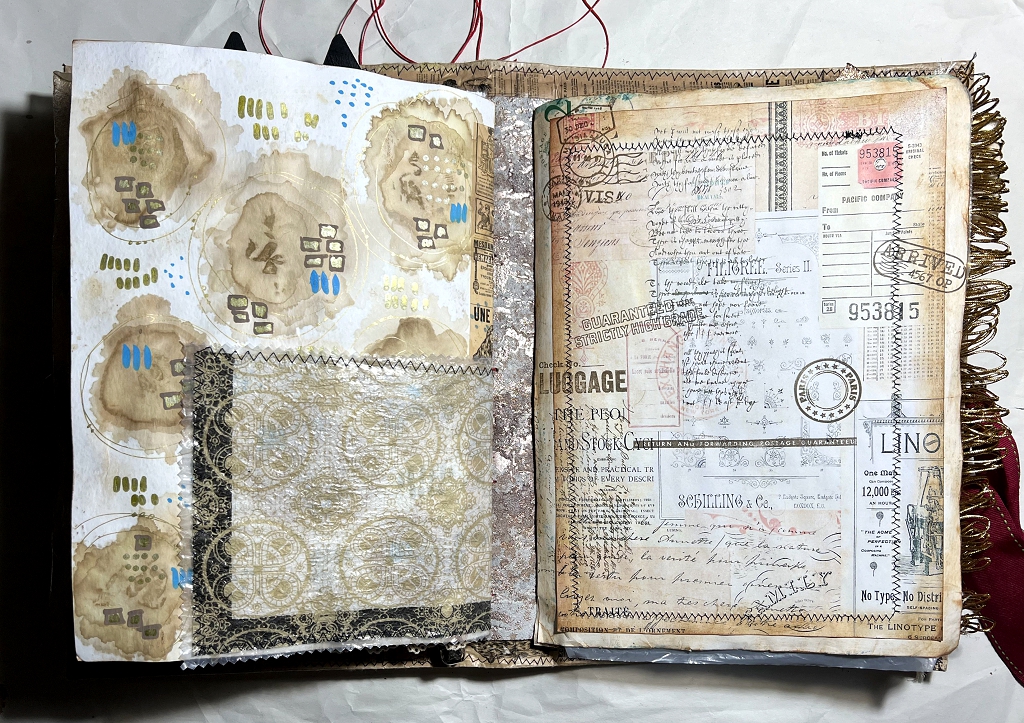
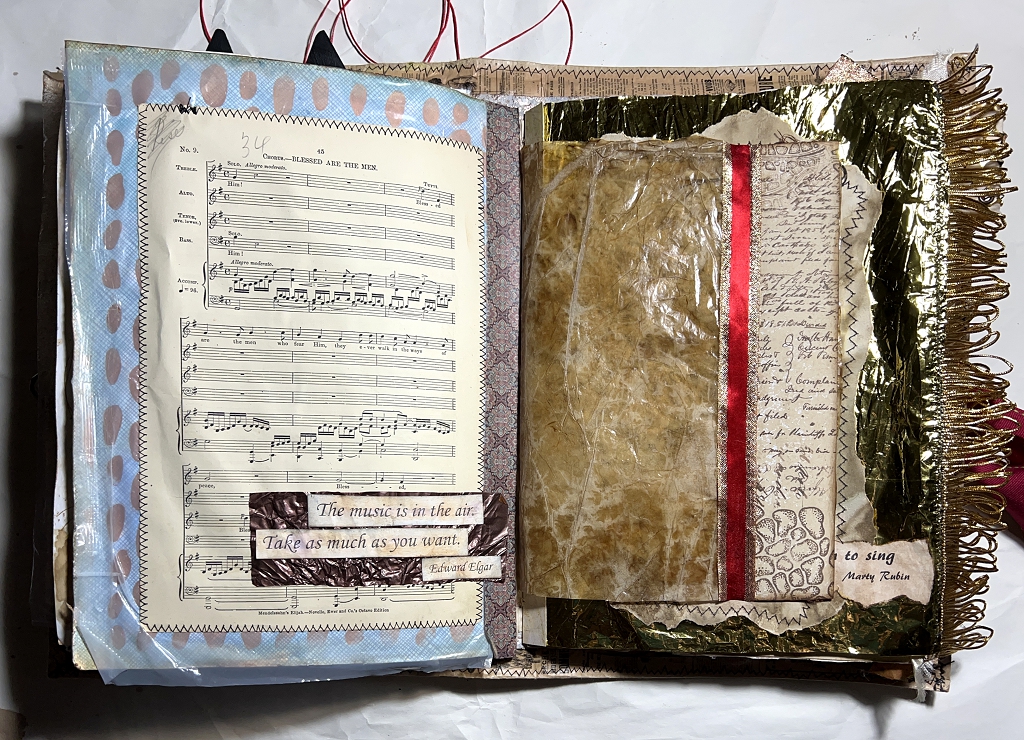
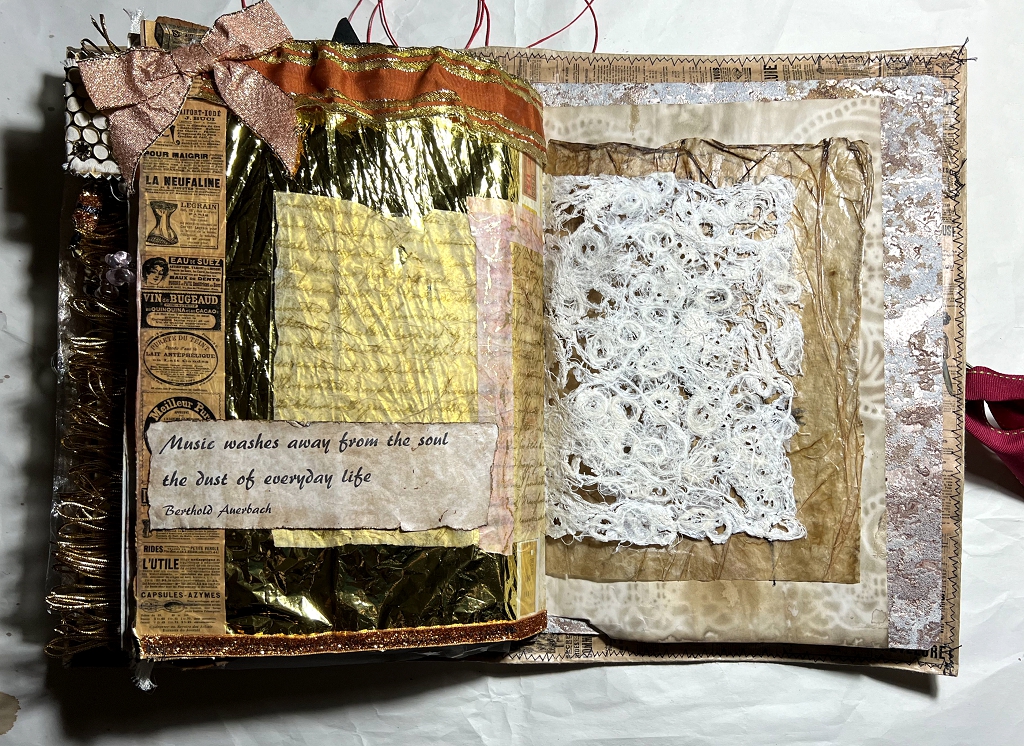
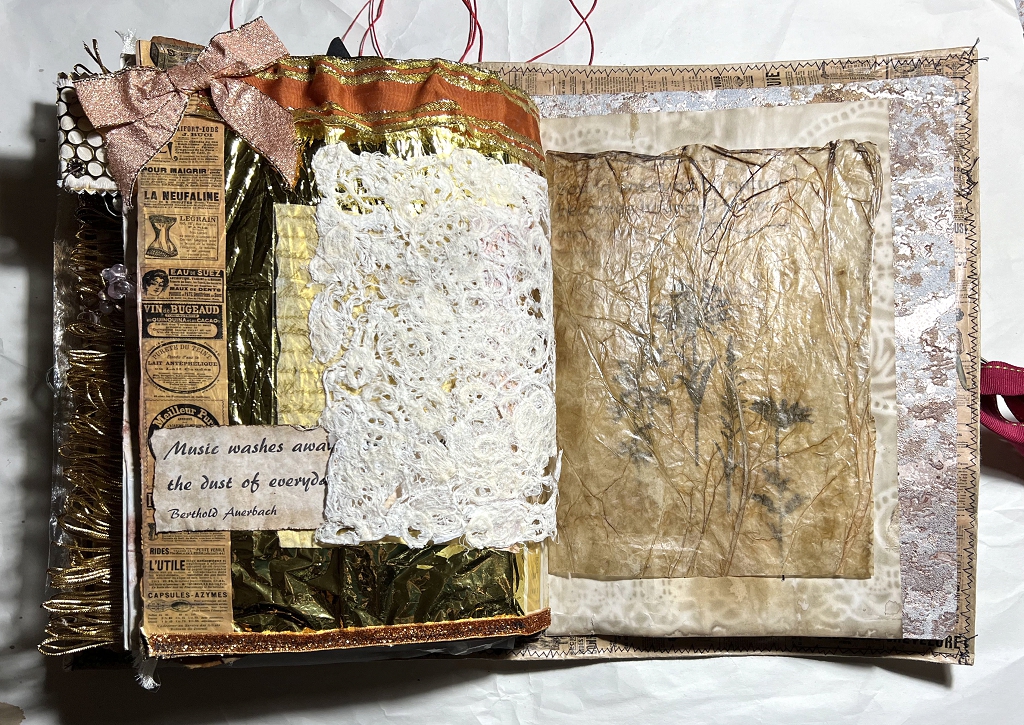
Turning a few pages at random, to show how neatly the book has come together with this binding.
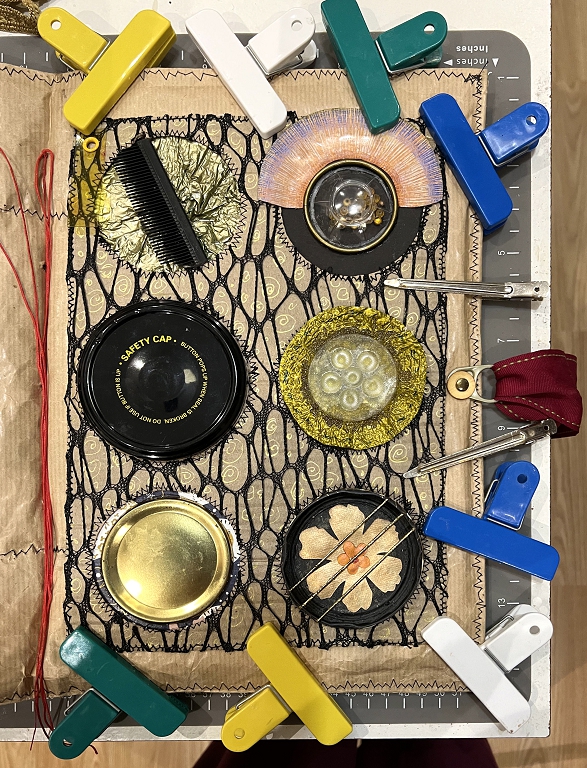
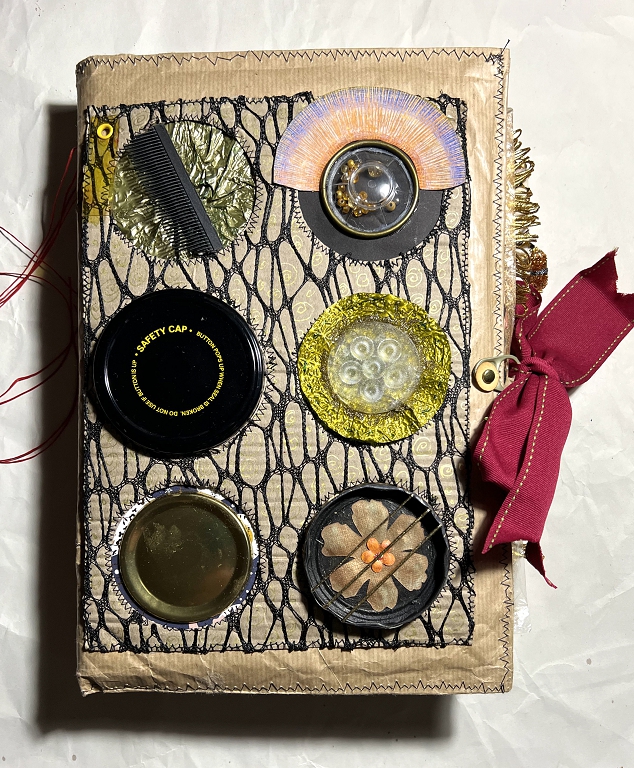
The cover topper
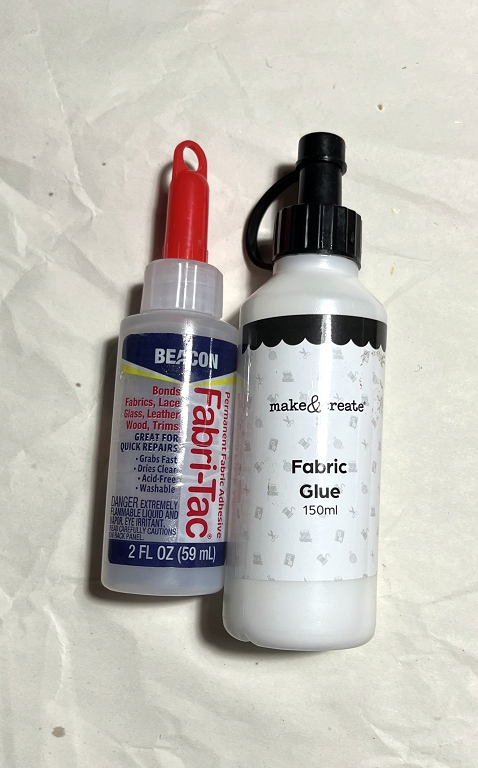
This was an exciting stage. I made the cover topper right at the beginning of this project, and it’s been hanging around all this time. Because of the thickness of it, and the bulky and bumpy surface of the soft cover of the book, I wasn’t sure how I was going to attach it. It would have been ideal to sew it, but there was no way my Baby Brother machine would cope with that, and there was already stitching around the edge of it. It therefore had to be glued, and I hummed and hawed about which glue to use.
My Fabri-Tac adhesive was almost empty. This is a strong and flexible glue designed for fabrics. Last time we went shopping, I bought a bottle of fabric adhesive from The Works (their own brand) and was delighted with it. It is much less gloopy than the Fabri-Tac, so easier to use, but the nozzle has rather a big hole so you have to proceed with caution. I was also pleased that this glue is quite a bit cheaper than the Fabri-Tac. Next time we go shopping, I shall buy some more.
Here is the cover topper glued in place, being held with numerous clips while the glue dried.
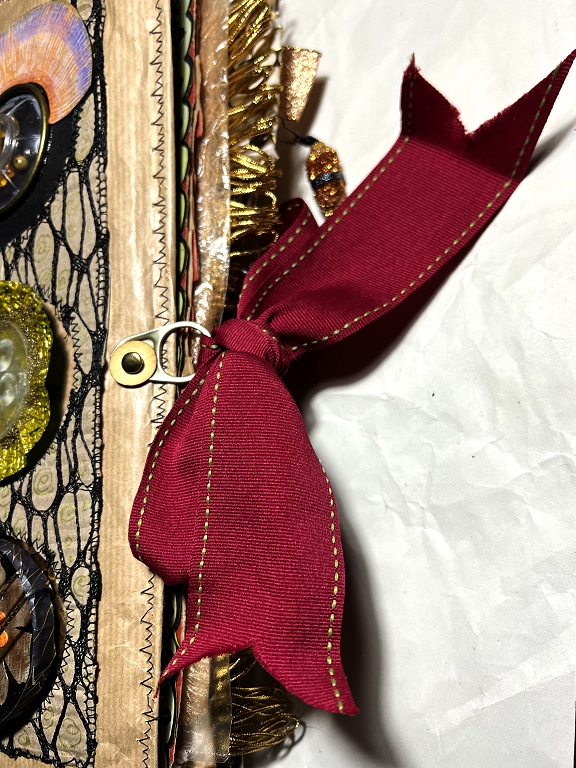
The closure
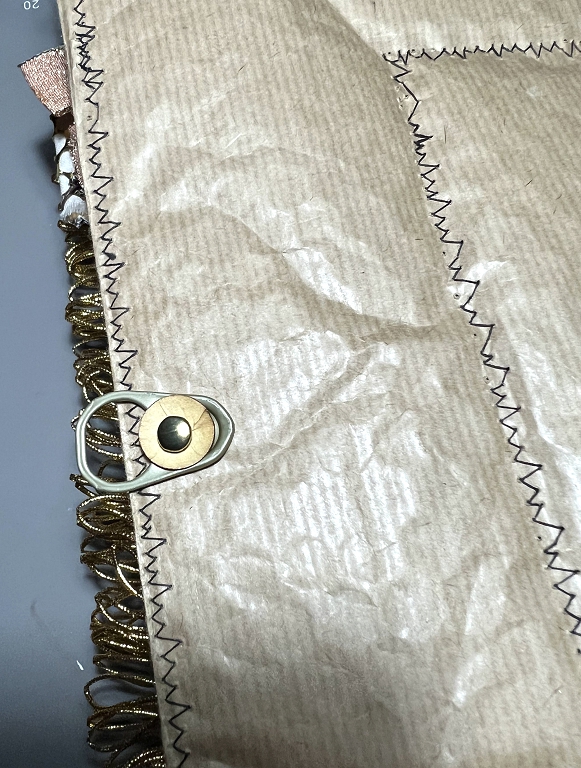
I had wanted to do something fun and fancy by way of a closure for this book, but it wasn’t to be, because it would have interfered with the cover topper which occupies the whole of the front surface. I therefore opted for a couple of ring pulls attached with brads, and a strong wide ribbon threaded through for a simple closure.
I have several quite nice large brads but the legs on them are very short, and would not penetrate the thickness of the cover. I therefore chose ordinary office brass paper fasteners, and cut a couple of 5/8 in discs from sturdy cream card which I inked around the edges., and then pierced a hole in the centre. I put this in the smaller aperture of the ring pull and then poked the paper fastener through. I pierced a hole in the cover with the awl and attached the ring pull. Without the disc, the paper fastener would have not have been big enough to hold the ring pull.
The legs of the paper fastener were an unattrative addition to the inside of the cover.
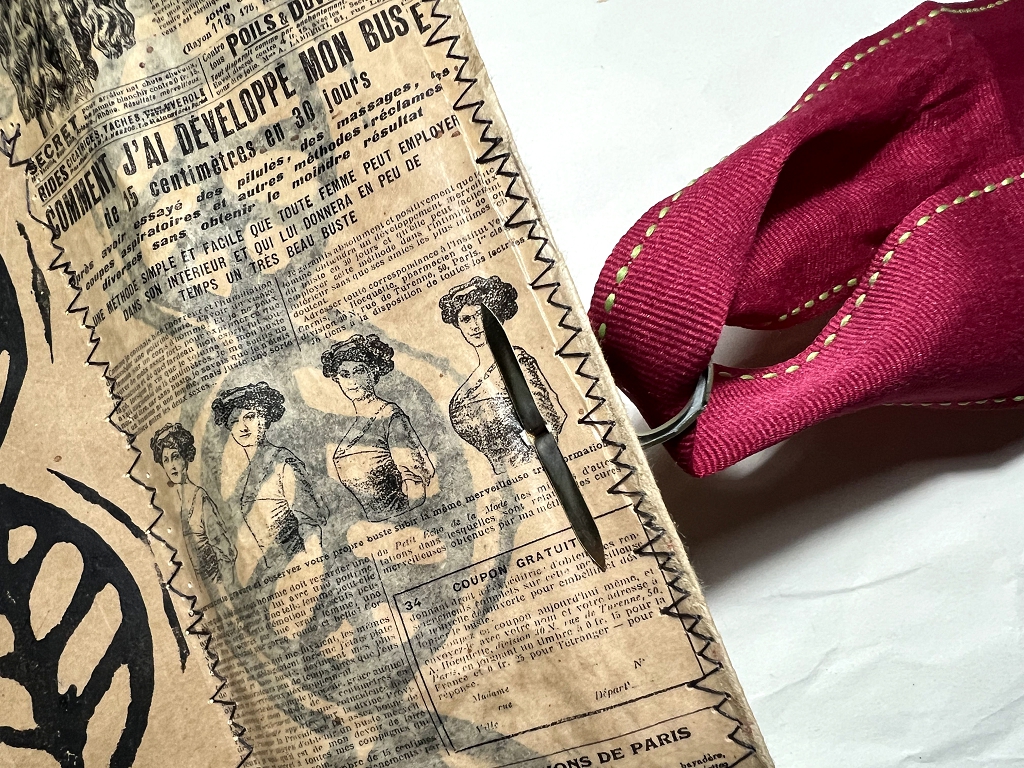
I therefore cut two lengths of fabric trim from my stash, and glued them down the inside of the cover to conceal them, using the new fabric glue. I added clips to hold it in place while the glue dried, taking special care with the corners.
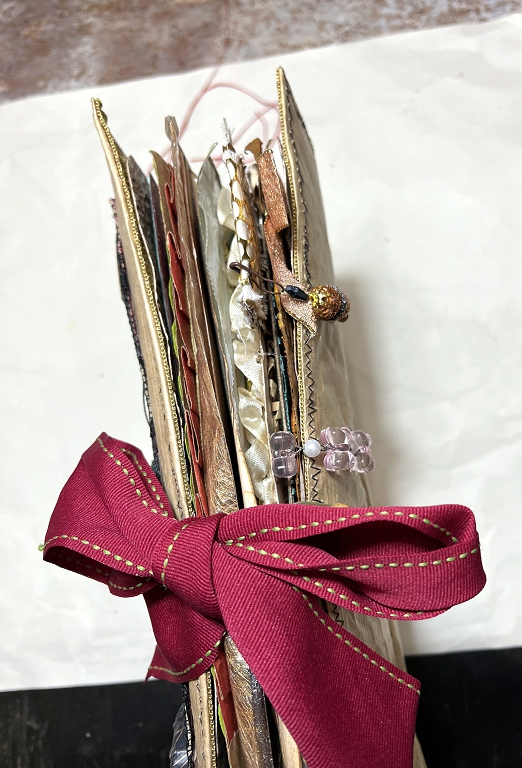
The ribbon threaded through both ring pulls and tied in a bow.
The page edges.
Completion of the binding
The completed binding and closure, with the cover topper firmly glued in place.
Still to come
There will be additional embellishments in the form of tabs, danglies and other fun stuff, and I shall thread beads onto the binding threads. I shall probably also make a detachable dangle embellishment for the top of the spine. Apart from that, this book is complete.