MORE SKETCHBOOK DABBLING, PENS AND DIGRESSIONS, CATARACT NEWS AND SEEING PATTERN EVERYWHERE
…in fact, a bit of a waffle, this blog post! Read on if you’re interested in some idle chat about the kind of things that fascinate me.
Sketchbook
My (almost) daily sketchbook is filling up with some eclectic stuff – experiments, messes, trying out new techniques and materials… what every sketchbook should be. Not a book full of masterpieces!
Branching out into pen and ink
Not a great idea for this particular little sketchbook whose pages are 100 gsm printer paper. The ink bleeds through. Badly. Ruins what’s on the previous page… The next one I make will have better quality paper that will stand more than pencil.
Staedtler Pigment Liners
I began with a trial of my new Staedtler Pigment Liner permanent black markers. These pens are very easy to use. They behave in exactly the same way as other brands such as Sakura Pigma Micron pens (Japanese), which is one of the most popular brands.
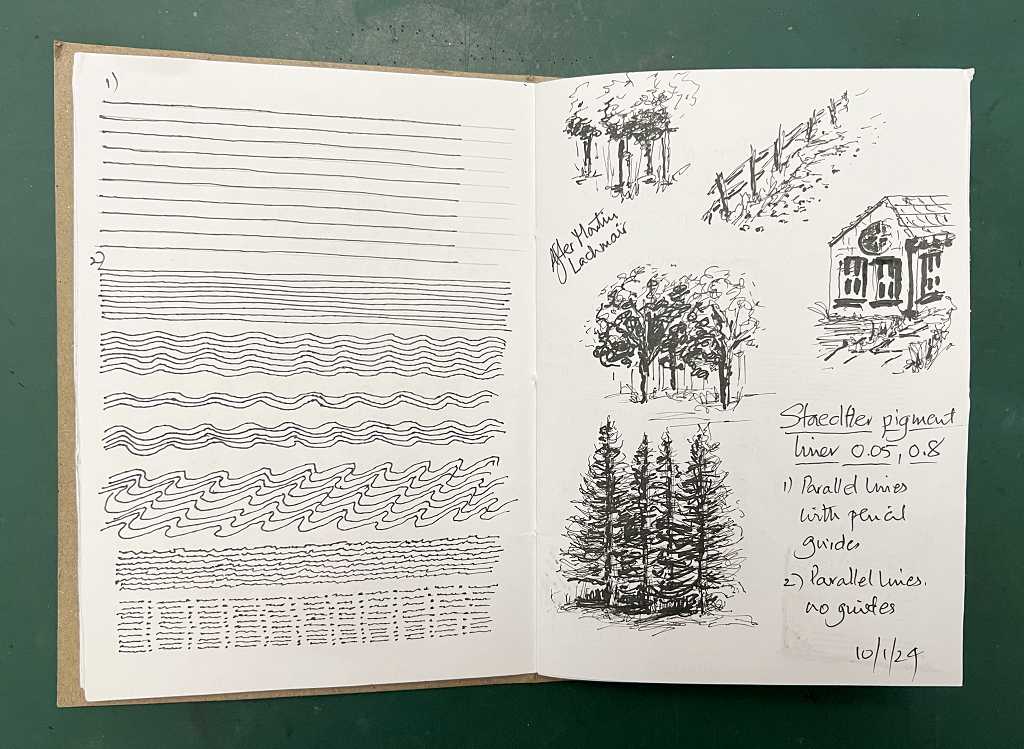
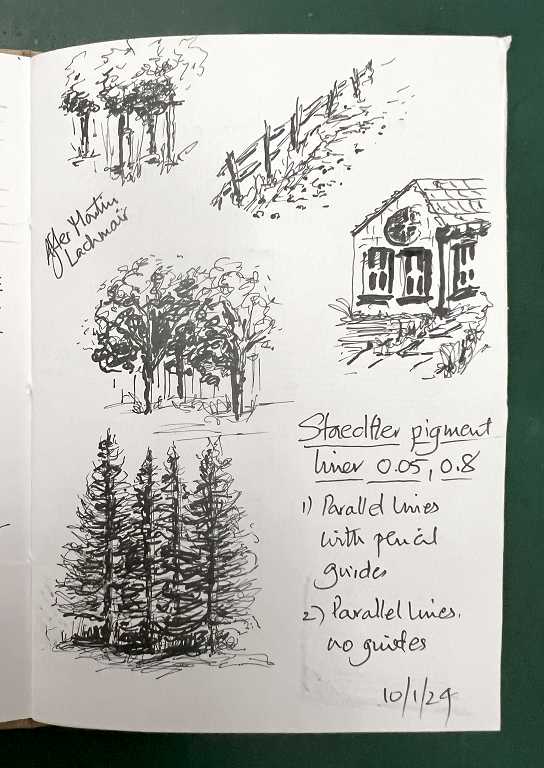
The left-hand page was just practising parallel lines. For the first ones, I ruled some pencil lines first and tried to draw exactly on top of them, and all the subsequent ones were without guidelines.
The right-hand page was just a few little sketches inspired by the Austrian artist Martin Lachmair whom I recently started following on YouTube. He does exquisite line drawings of cityscapes and trees, and adds ink or watercolour washes. These first little sketches I did were just using the Staedtler Pigment Liners with no added shading in any other medium. Pretty sketchy but quite effective.
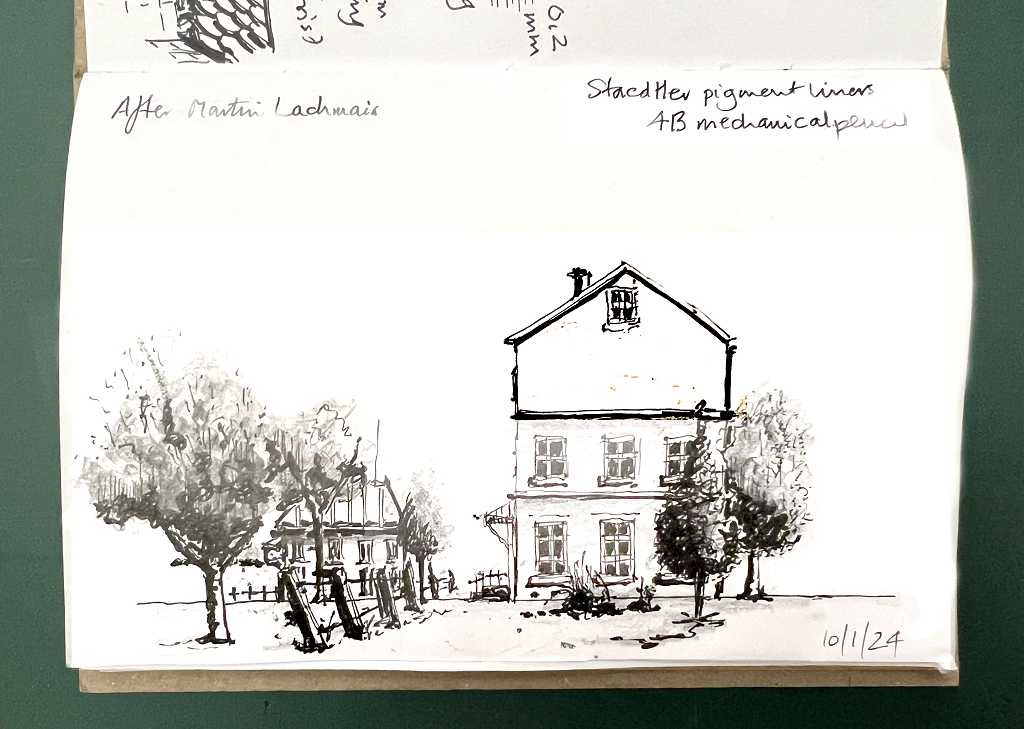
Here is a close-up of the right-hand page. I didn’t make any effort to be super-accurate with the fence or house.
Turning the page revealed the bleed-through from these pens.
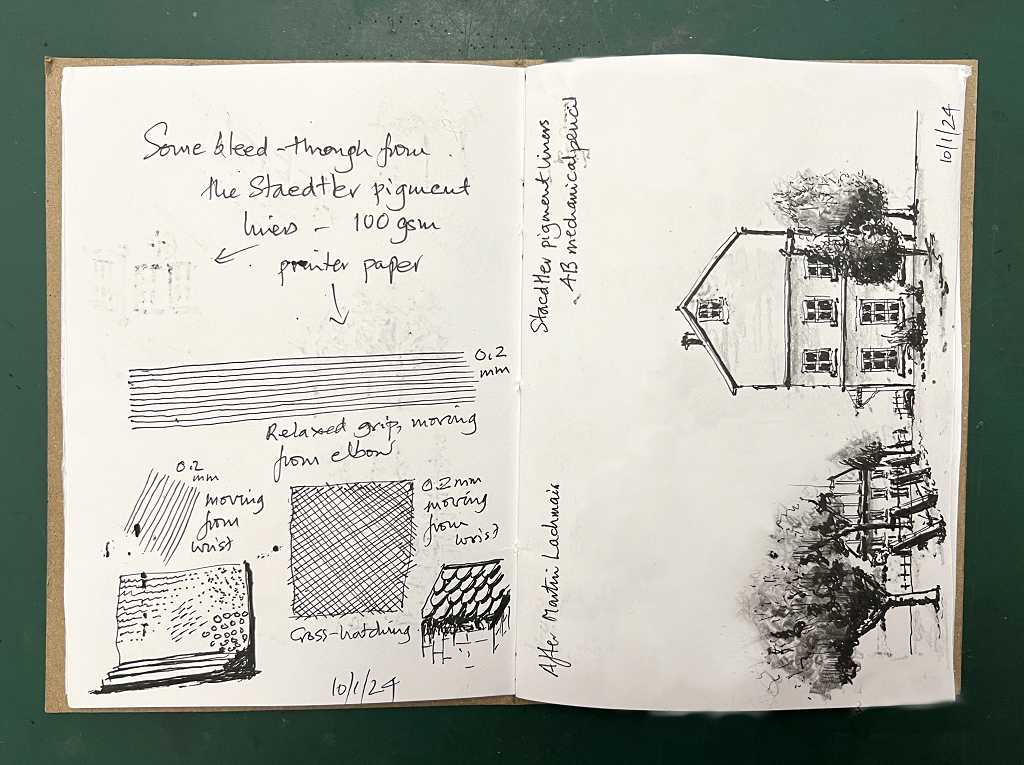
I did some more practice lines and some stippling and cross-hatching experiments.
On the right-hand page I did a more detailed drawing, following along with one of Martin Lachmair’s pictures. Unfortunately I did not remember to photograph this until I had drawn on the other side, and there was a tremendous amount of bleed-through that ruined it, so I spent a lot of time using the clone tool on my photo editing software to try and remove it, with varying degrees of success! The above smaller version is really better than the close-up (following) as I managed to retain the shading on the house.
Anyway, you get the idea! I can refine these and do much better and larger drawings on different paper, and spend more time on them.
Martin used a black watercolour wash for the shading on his trees but I couldn’t be bothered to go upstairs to the studio and get my watercolours, so I used one of my new mechanical pencils. I extended the 2 mm 4B lead sufficiently that I could use the side of it, and it worked a treat. I’m quite pleased with this little drawing, and am keen to pursue Martin’s style as it will be good practice. Drawing buildings is very good practice for learning how to draw straight lines.
Dip pens
This experiment was not 100 percent successful. There was very bad bleed-through from the permanent black ink I used (which ruined the Martin Lechmair-inspired drawing). I had only bought a cheap set of dip pens and the nibs are OK, but none of them were flexible enough to create the glorious splatters that Martin achieved. I watched one of his early videos where he spoke about the nibs he uses, which are obviously of much better quality, and the width and flexibility of them is specified, so you can choose the right ones for each purpose. He uses a very flexible nib to achieve amazing spatter effects by sticking the tip down onto the paper and flicking it upwards. I was unable to achieve this effect with any of my nibs.
My experiments with these nibs are on the left-hand page.
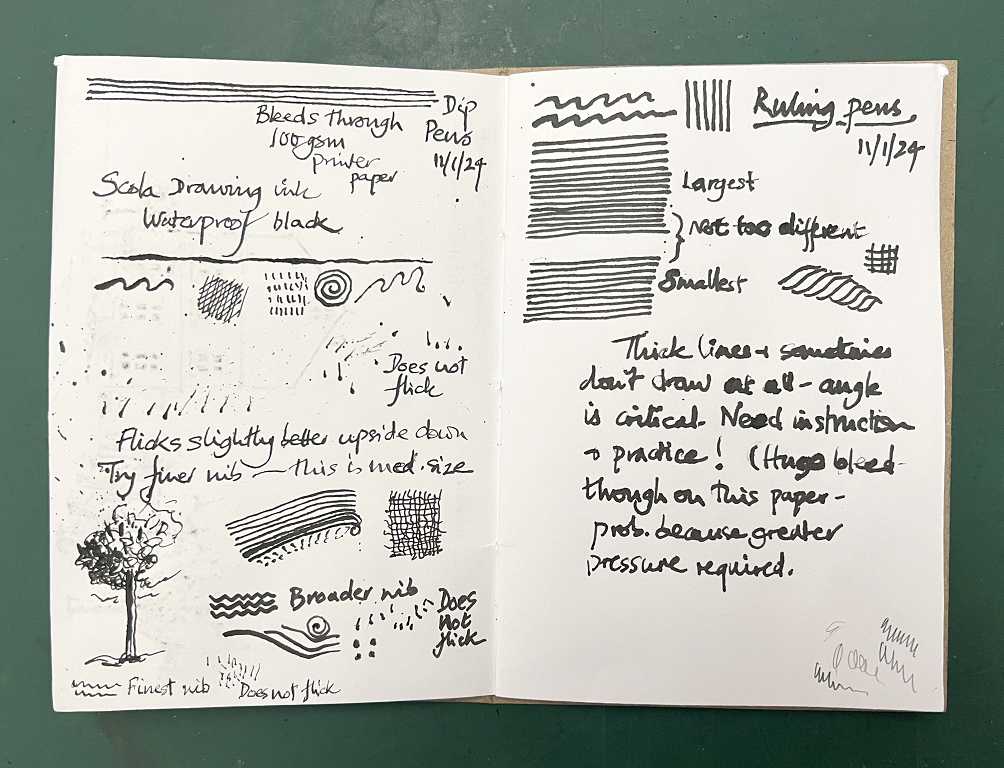
I like the way you can vary the thickness of the line by varying the pressure.
I have a very large bottle of this permanent black ink (500 ml). I used a plastic pipette to transfer a small quantity into a glass egg cup which I stood in a plastic container. I noticed that Martin does this too; it’s a good practice because if you do happen to knock the ink over, it is saved by the plastic container and doesn’t ruin your furniture or the floor! (Poor Peter of Peter Draws had a disaster on one of his videos – he showed us a big ink stain on his floor – that day he knocked not one, but two bottles of ink onto the floor! He said he was able to clean up most of it but the grouting between the floor tiles was a problem. Not to mention the waste of ink…)
Ruling pens
You can see my efforts on the right-hand page.
I tried these out without following any instructions and really had no idea how they should be used. The experiment was therefore not successful! “Always read the instructions…” I must be getting like Mum. She never read any instructions and always thought she knew best how to do absolutely everything, which usually resulted in a total mess! She was known for it in the family. Dad and I used to exchange glances and then gaze heavenwards…
The pens I bought were very cheap, and were probably not the best quality.
After I’d done this page, I looked these pens up on the Internet and found a gorgeous blog post and accompanying YouTube video by a British Islamic artist. She referred her readers to a further article which I am now in the process of reading, and there’s a lot more to these pens than meets the eye. They were the preferred drafting pens of engineers and designers and more or less went out of production in the 1940s when more sophisticated technical pens were developed, but according to the writer of the second article, this had its disadvantages. While they were easier to use, these pens were disposable when empty, and those fillable ones could take only certain limited media. The ruling pens, on the other hand, could be filled with any liquid medium from water, through watercolour, gouache, shell gold, and gold leaf size, to masking fluid – in fact any liquid that would drip, and if you looked after it, the pen would last a lifetime.
Digression: I discovered that shell gold is a glorious water-based paint created from the waste pure gold left over from gilding with gold leaf, jewellery making etc. It is ground into a fine powder and mixed with gum arabic and used as a paint. Digging a bit deeper into this subject, I found one website that was selling a quarter-pan for nearly £30. If you want pure gold, that’s what you have to pay. Some were considerably more expensive. That site also sold water-based pigments made from precious stones such as lapis lazuli. Interesting factoid: the reason the Virgin Mary is always depicted wearing blue is that Renaissance artists wanted to honour her by reserving their most precious and costly pigments for her robes. There is absolutely no evidence that Mary ever wore such expensive clothes – the dyes to create blue and purple in the ancient world were also extremely costly. She was probably clothed in humble brown homespun.
The ruling pens are adjustable with the screw on the side, which increases or decreases the space between the twin nibs. The wider the gap, the thicker the line. I was dipping my pen into the ink, but this is not the way they should be filled. You load a brush with the medium, and gently stroke it across the nibs so that the medium is transferred to the space between them. After carefully wiping the outer surface of the twin nibs, you are ready to draw with the pen, which is held in a vertical position above the paper so that both tips are in contact with the surface.
I was doing ALL these things wrong, which is presumably why my results were so horrendous!
To rule a line, you need a ruler whose edge is raised above the surface of the paper so that no smudging occurs. A regular plastic ruler is usually dome-shaped on top, and you just flip it over to achieve this result, and there are specialist rulers as well, such as those made by Rotring.
The Islamic artist lady also showed a compass attachment, enabling you to draw circles with a ruling pen, and she demonstrated this with some beautiful metallic watercolours.
I have instructions on how to draw the beautiful repeating abstract Islamic designs so often seen on tiles, and this is certainly something I have wanted to do for years. I have always admired their intricacy and colour, and was blown away by their beauty when we visited Southern Spain several years ago.
Preparing for the next module in the online art course
All this is in view of getting ahead before Module C of the art course begins – ink pen and wash drawing. Today, I found another artist, Ian Fennelly from the UK, who is doing pen and wash, in a very different style from Martin Lachmair – much looser, and sometimes with a disregard for perspective which is quite liberating and fun! I think it is good to explore other artists’ work to see what is possible and to inspire one, before embarking on the next module of the course which by its very nature has to be somewhat limited. I can’t wait to get through the rest of the charcoal module because I really dislike this messy, dirty looking medium! I still have the final undirected challenge to do, but have not had time to settle down and tackle it for the past few days. The pen and wash is going to be much more to my taste, I think.
My hubby used to do quite a bit of pen and watercolour work. I keep trying to persuade him to get back to it because he hasn’t really done any for several years. He’s getting more interested in drawing now, though, seeing what I am up to, and he is very interested to see what the next module in the course will be like. He has provided me with a pad of cold pressed watercolour paper which is a great help. If he gets inspired, though, I shall have to give it back!
Cataract news
This morning I went back to the optician’s for my four-week follow-up after my first cataract was done. I can’t believe a whole month has gone by, or that it is now a week since my hubby put in the last of the rather unpleasant thrice-daily drops! The optician said that the right eye was still strictly speaking not quite ready to be done, but since the clinic where I had the operation said it was, and I am now in this between-state of unbalance between my eyes, he would push it through. I told him my vision wasn’t that good at present, because the left eye has the implant which has greatly improved my distance vision, but I have no reading correction or astigmatic correction, whereas the right eye has both of these, and it also has the cataract. The right eye feels really bad, and he said that it was definitely borderline and only a whisker away from definitely being ready, so he had no problem with referring me straight away.
I should hear from the clinic fairly soon with an appointment to go in and have the other eye done, presumably without the pre-op appointment this time, since the optician has already done it.
He told me that after the second one is done, a six-week follow-up would be more beneficial than a four-week one, in order to give the eye plenty of time to settle down. When I attend for that appointment, they will be able to test me for my new glasses, and he told me to bring in every pair that I’ve got, and they can update them all. That will be really good.
It’s a relief to know that everything is now going ahead, and all being well, I should be through all this in the next couple of months.
Seeing pattern everywhere
I can’t help myself. I see pattern and beauty and potential for art everywhere, even in the most humble situations. The other day I was doing some cooking which needed some red onion. These are so pretty when cut – a lovely carmine shade between the layers, quite apart from their dark, glossy red skins. I discovered several years ago that the way to avoid crying when slicing onion is to avoid cutting into the root. I trim off the top of the onion and peel it, and then a thin slice from the side in order to provide a flat surface. I lay the onion down on this, and slice vertically from the top towards the root, and then slice across, until it is no longer safe to cut any closer to the root. I then stand the root up vertically on the cut edge and slice downwards so that I am left with a stub of root which is polygonal in cross-section.
At this point I saw that the layers of red onion were exposed in a most attractive way!
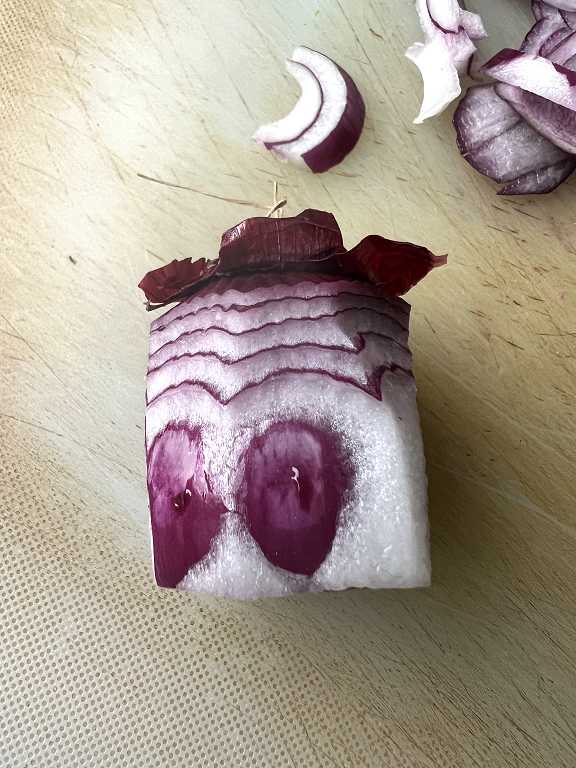
It looks almost like oriental architecture. I must make some art out of this. After being photographed, it got tossed with the rest of my vegetable trimmings into the pot to make vegetable stock. It had its moment of glory.
Humble fruits and vegetables are beautiful if you only take the time and trouble to look at them.