ONLINE ART COURSE – MODULE C – INK PENS
Yesterday I started on the next module on the drawing course. I have done a lot of work with my fineliner black archival marker pens in the past but never for “realistic” drawing of the kind we are being taught on this course. Having got through the charcoal module at last – and what a relief to have that behind me, as I really didn’t like charcoal! – I have been looking forward to starting with the pens.
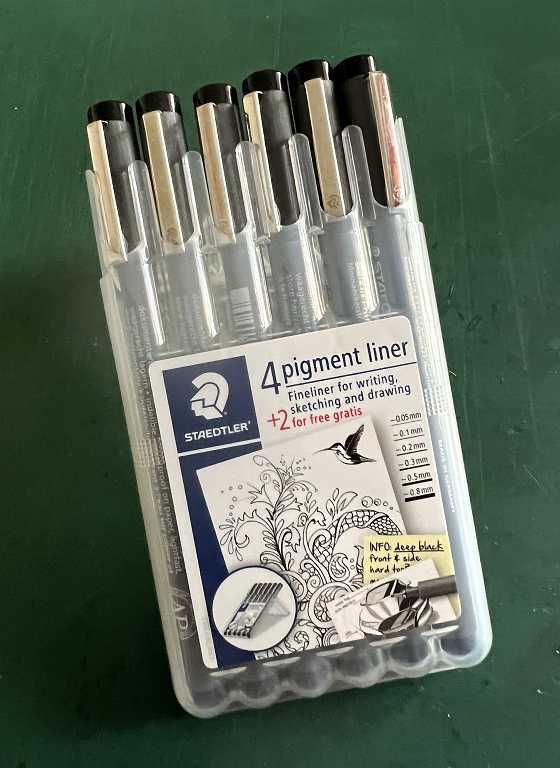
I have quite a collection of different ones, of different thicknesses, but decided to buy a new set, this time of Faber Castell ones which I have read last longer than other brands. I think they are all much of a muchness really, and as long as they are permanent and not water-soluble, they do the trick.
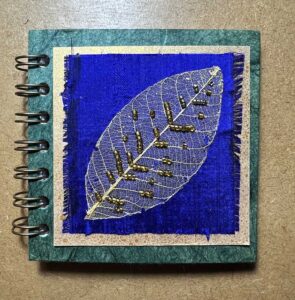
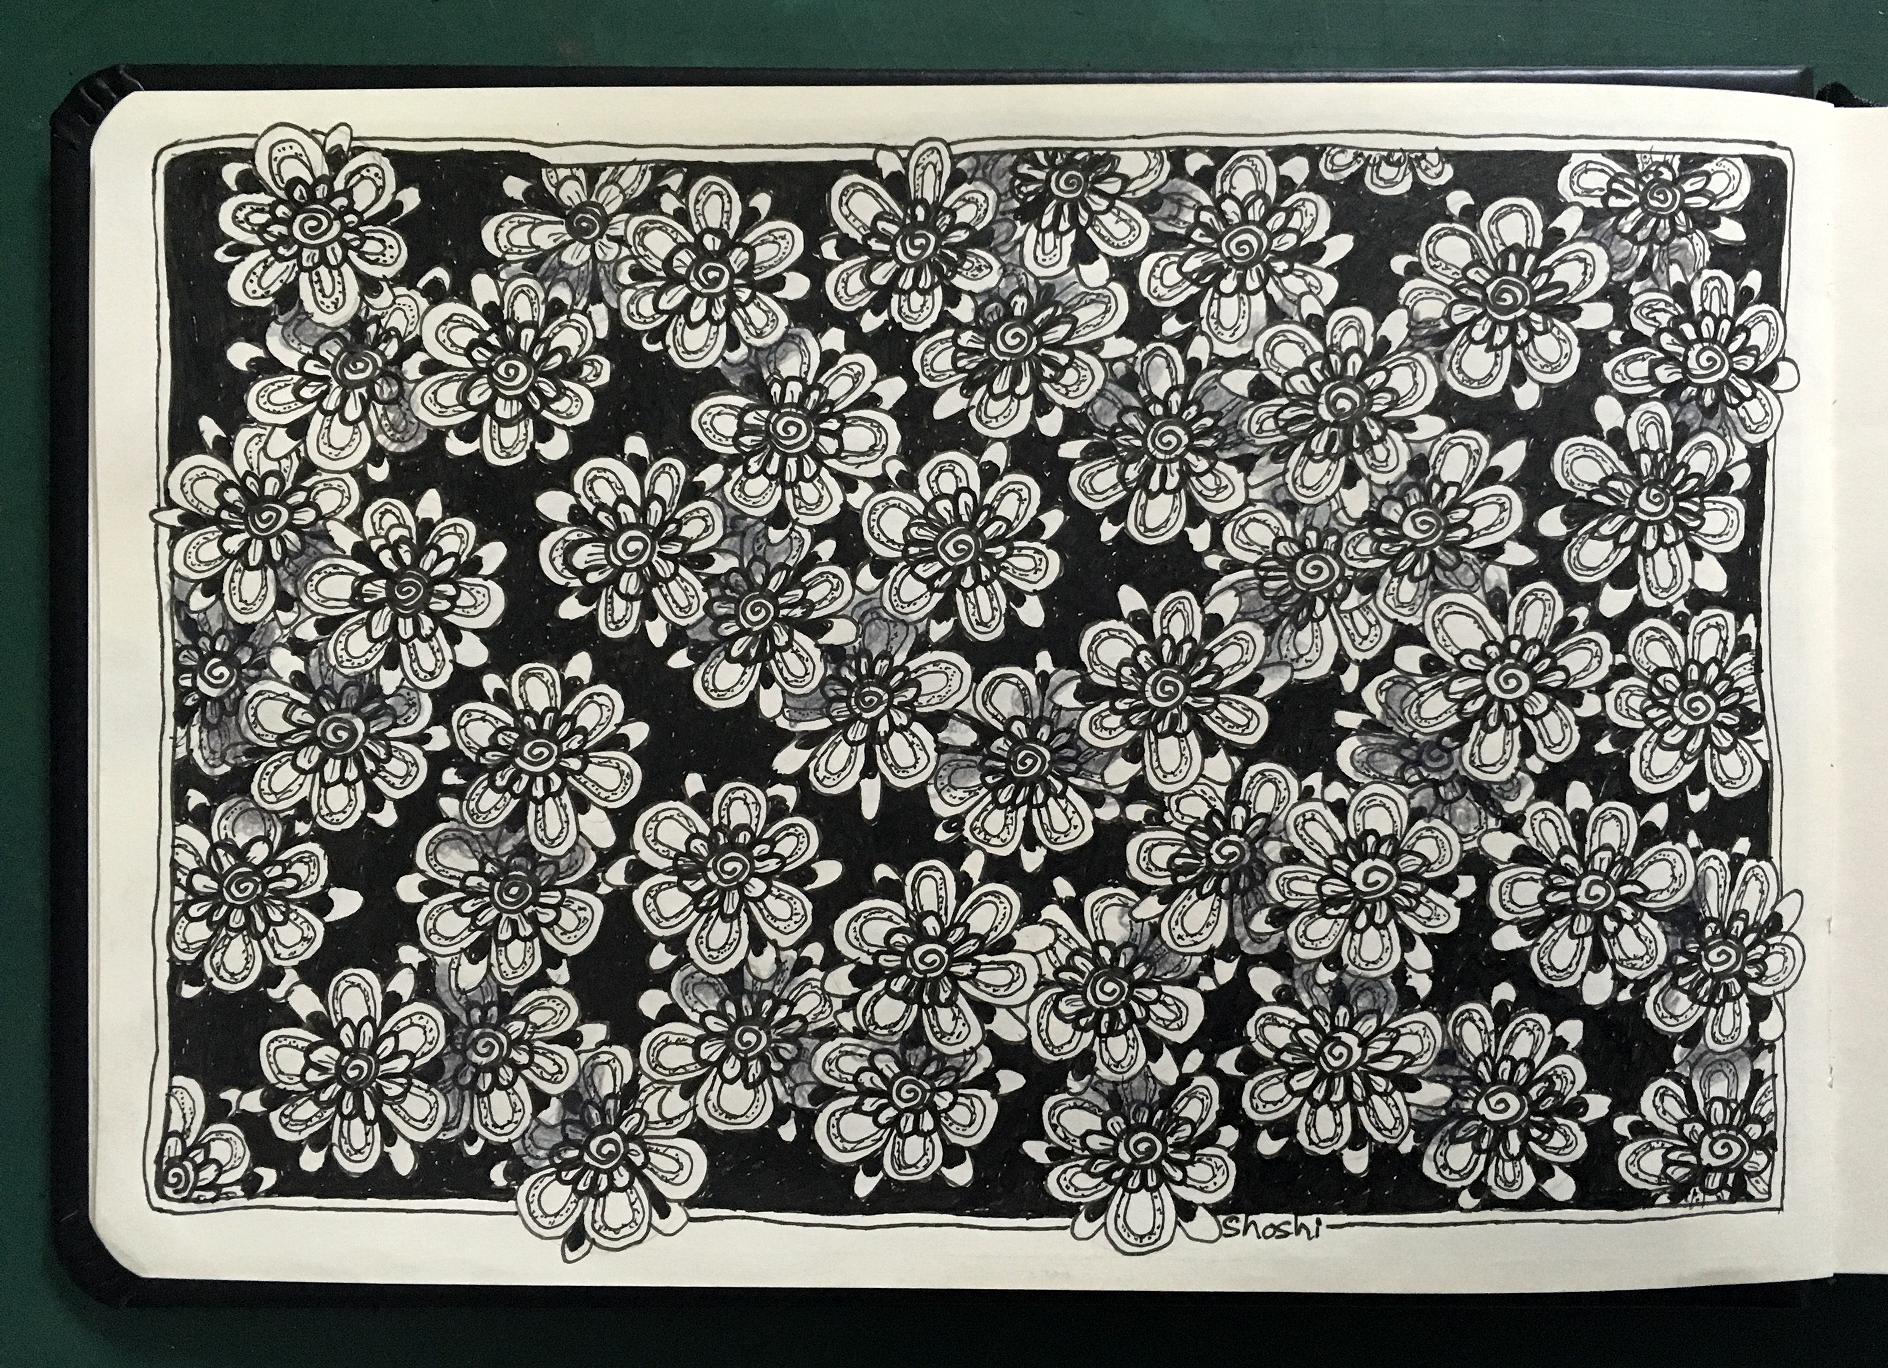
Drawings done in the past with my pens
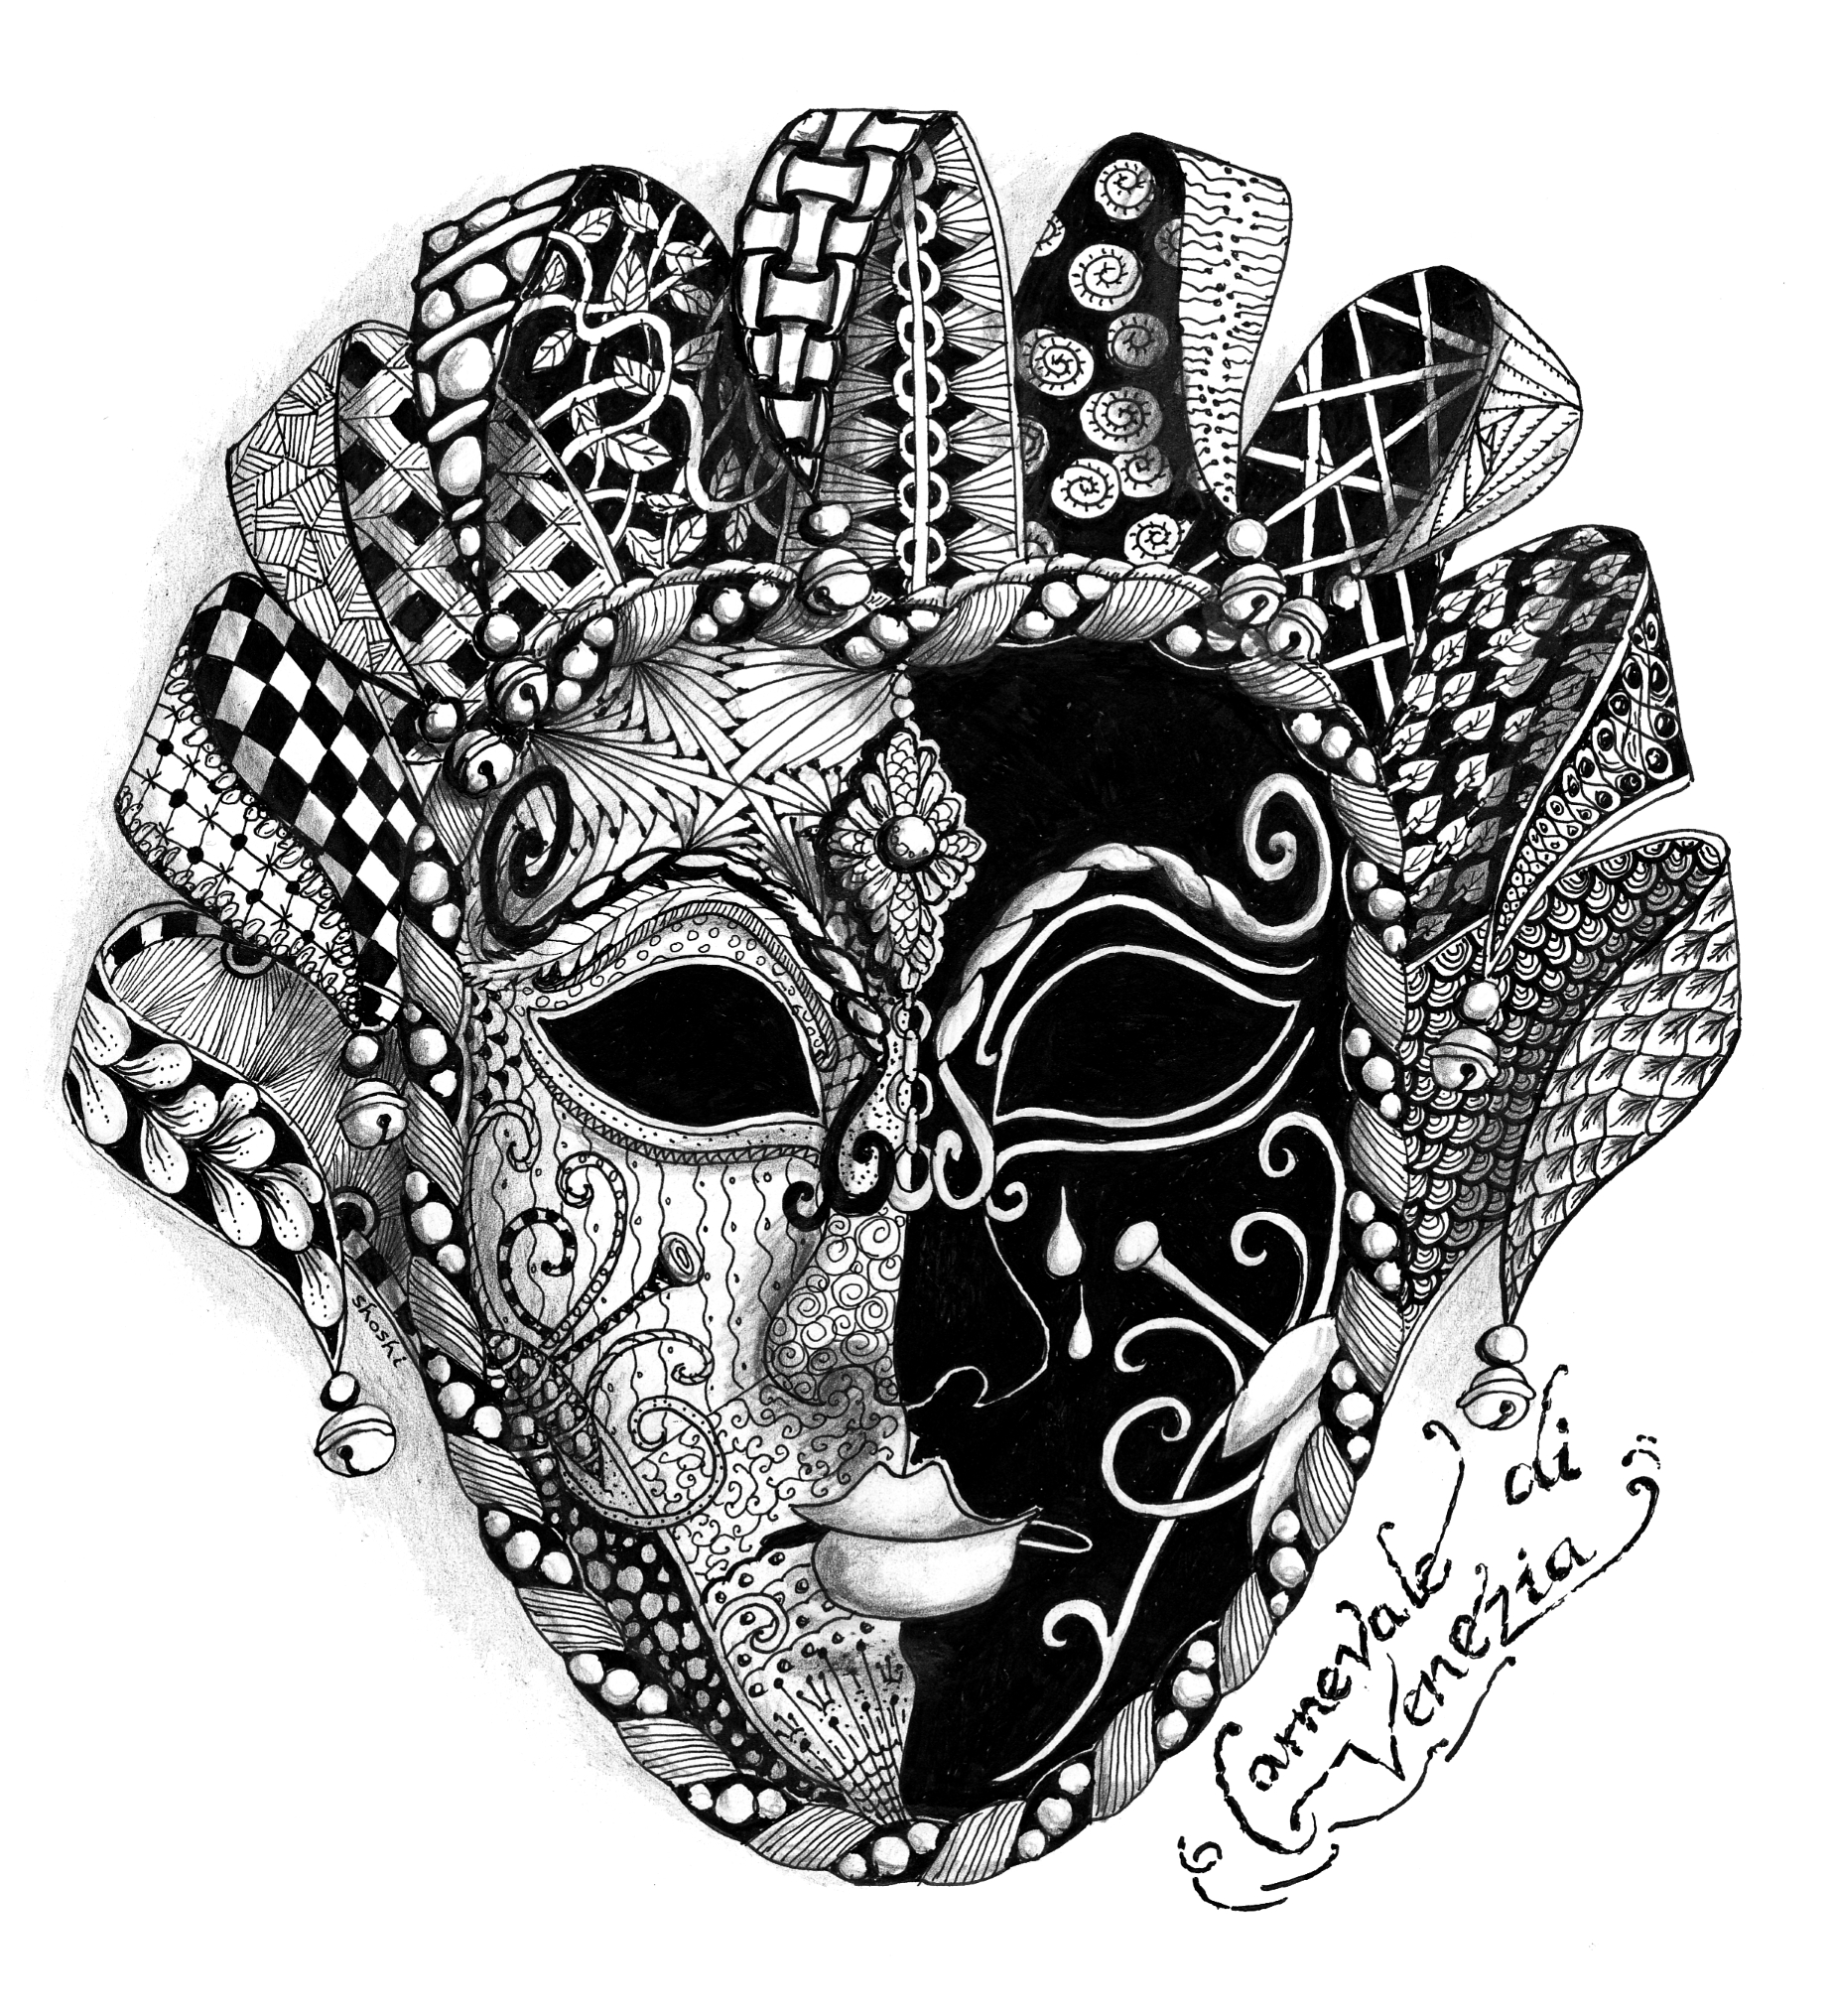
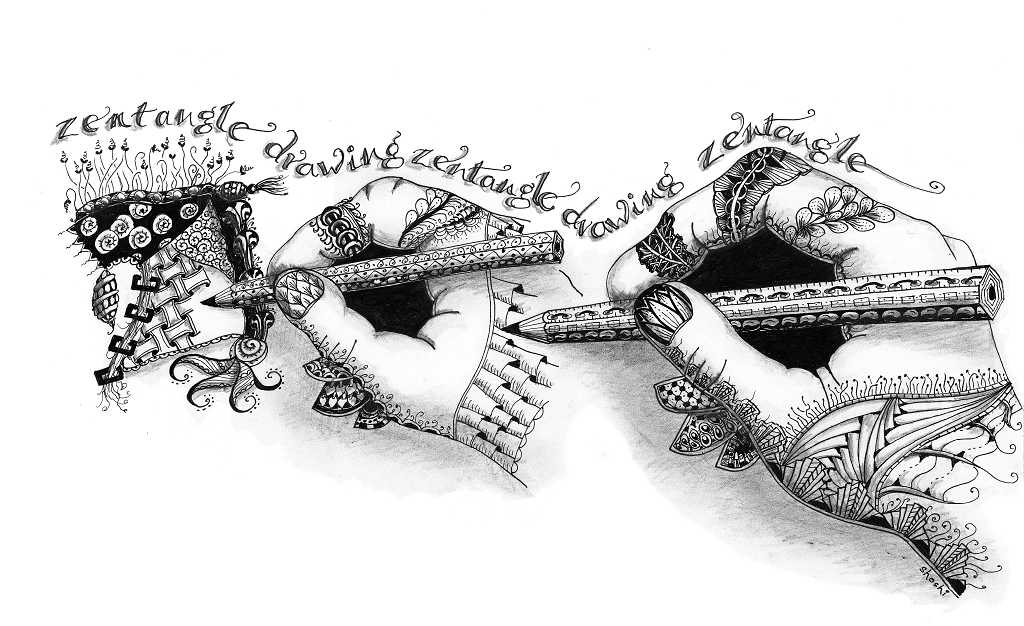
I have blogged about the kind of drawing I have done with these in the past, including a lot of Zentangle drawing. Zentange-inspired art has always been a favourite of mine, and I made these drawings several years ago:

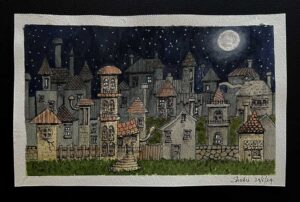
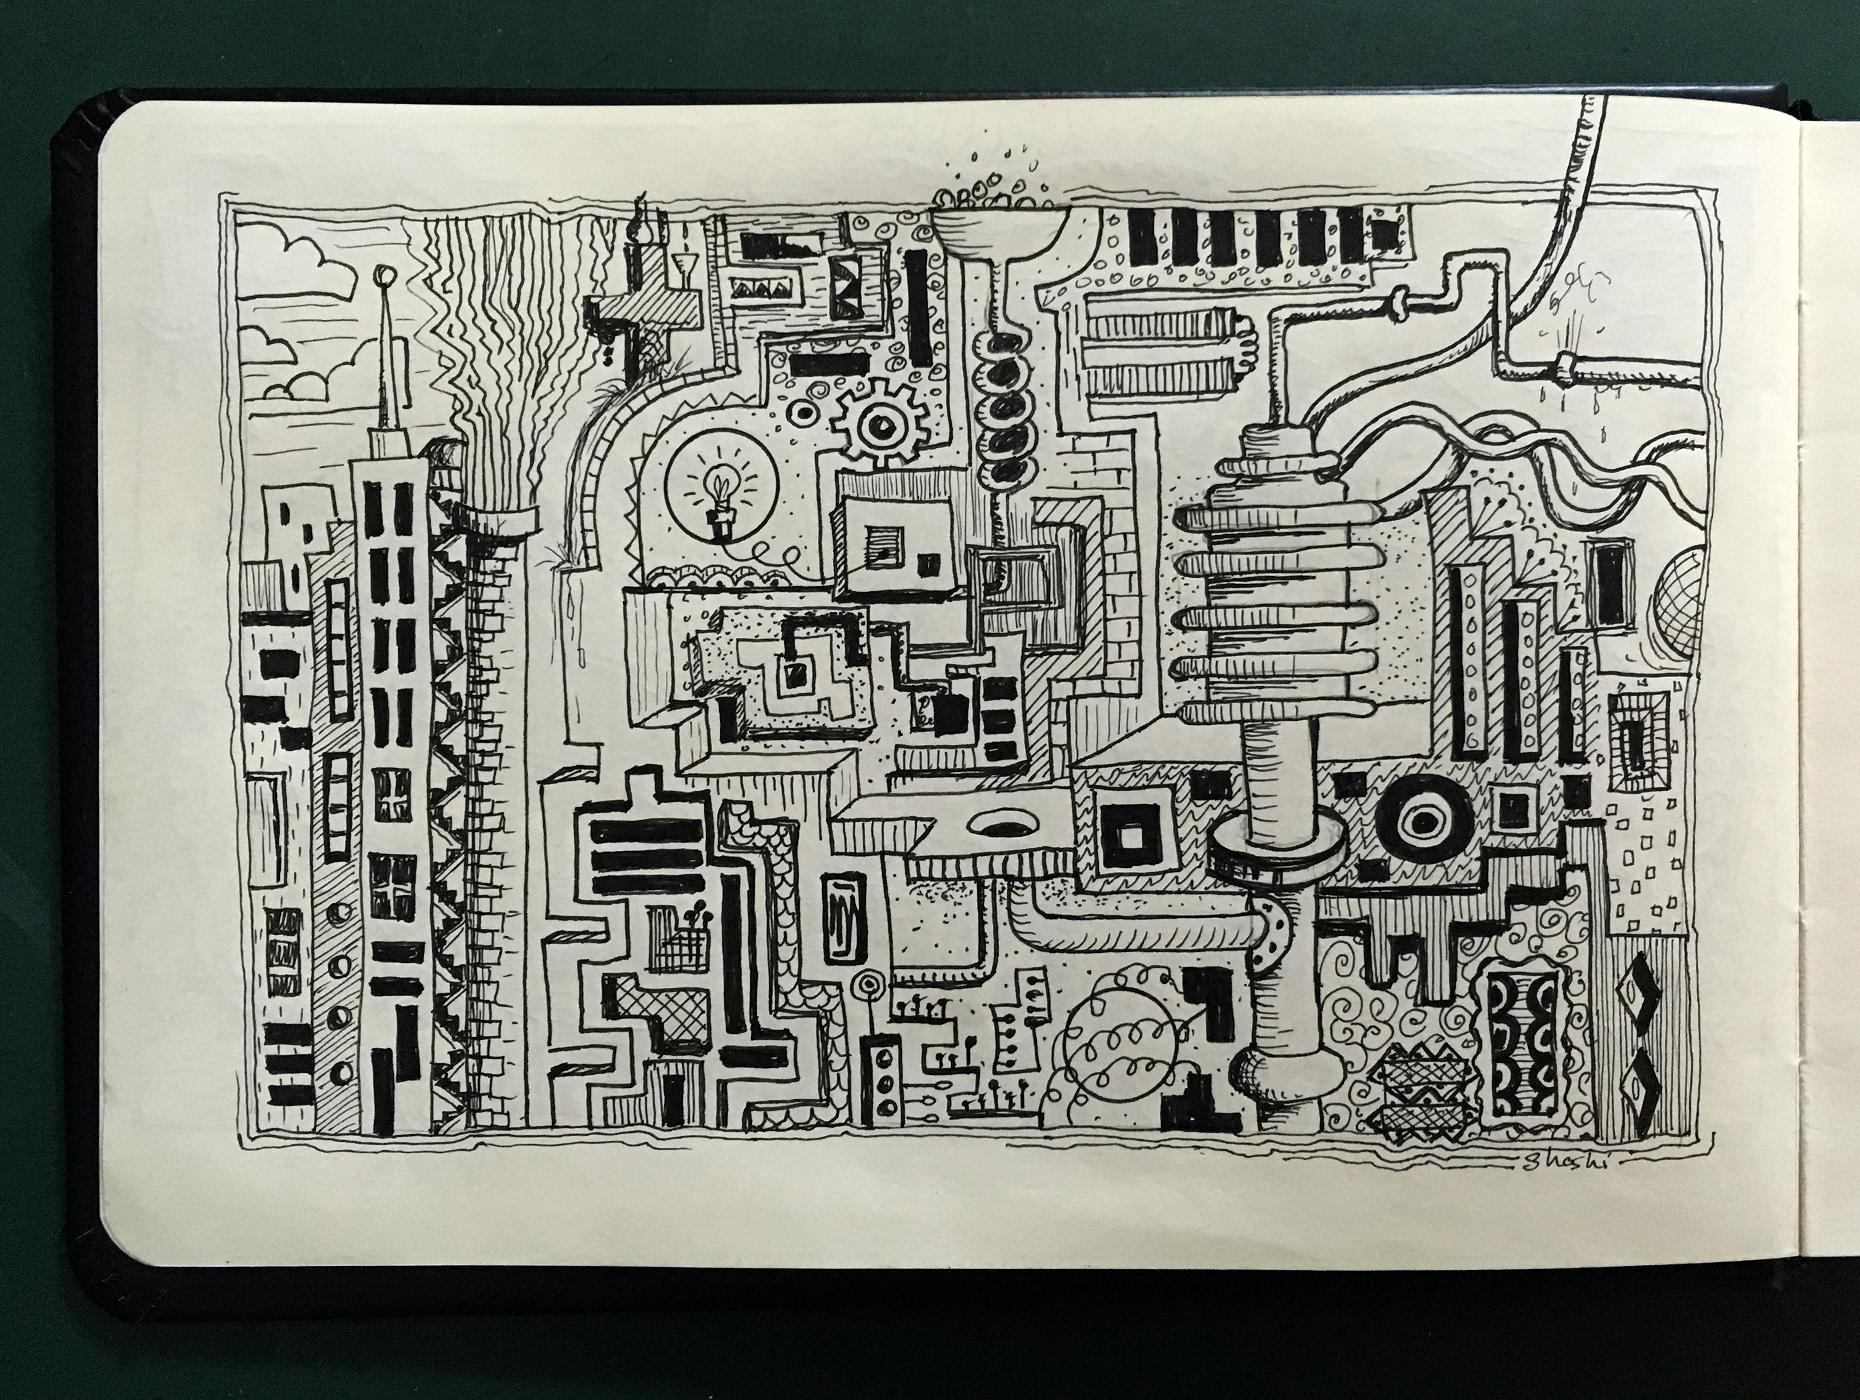
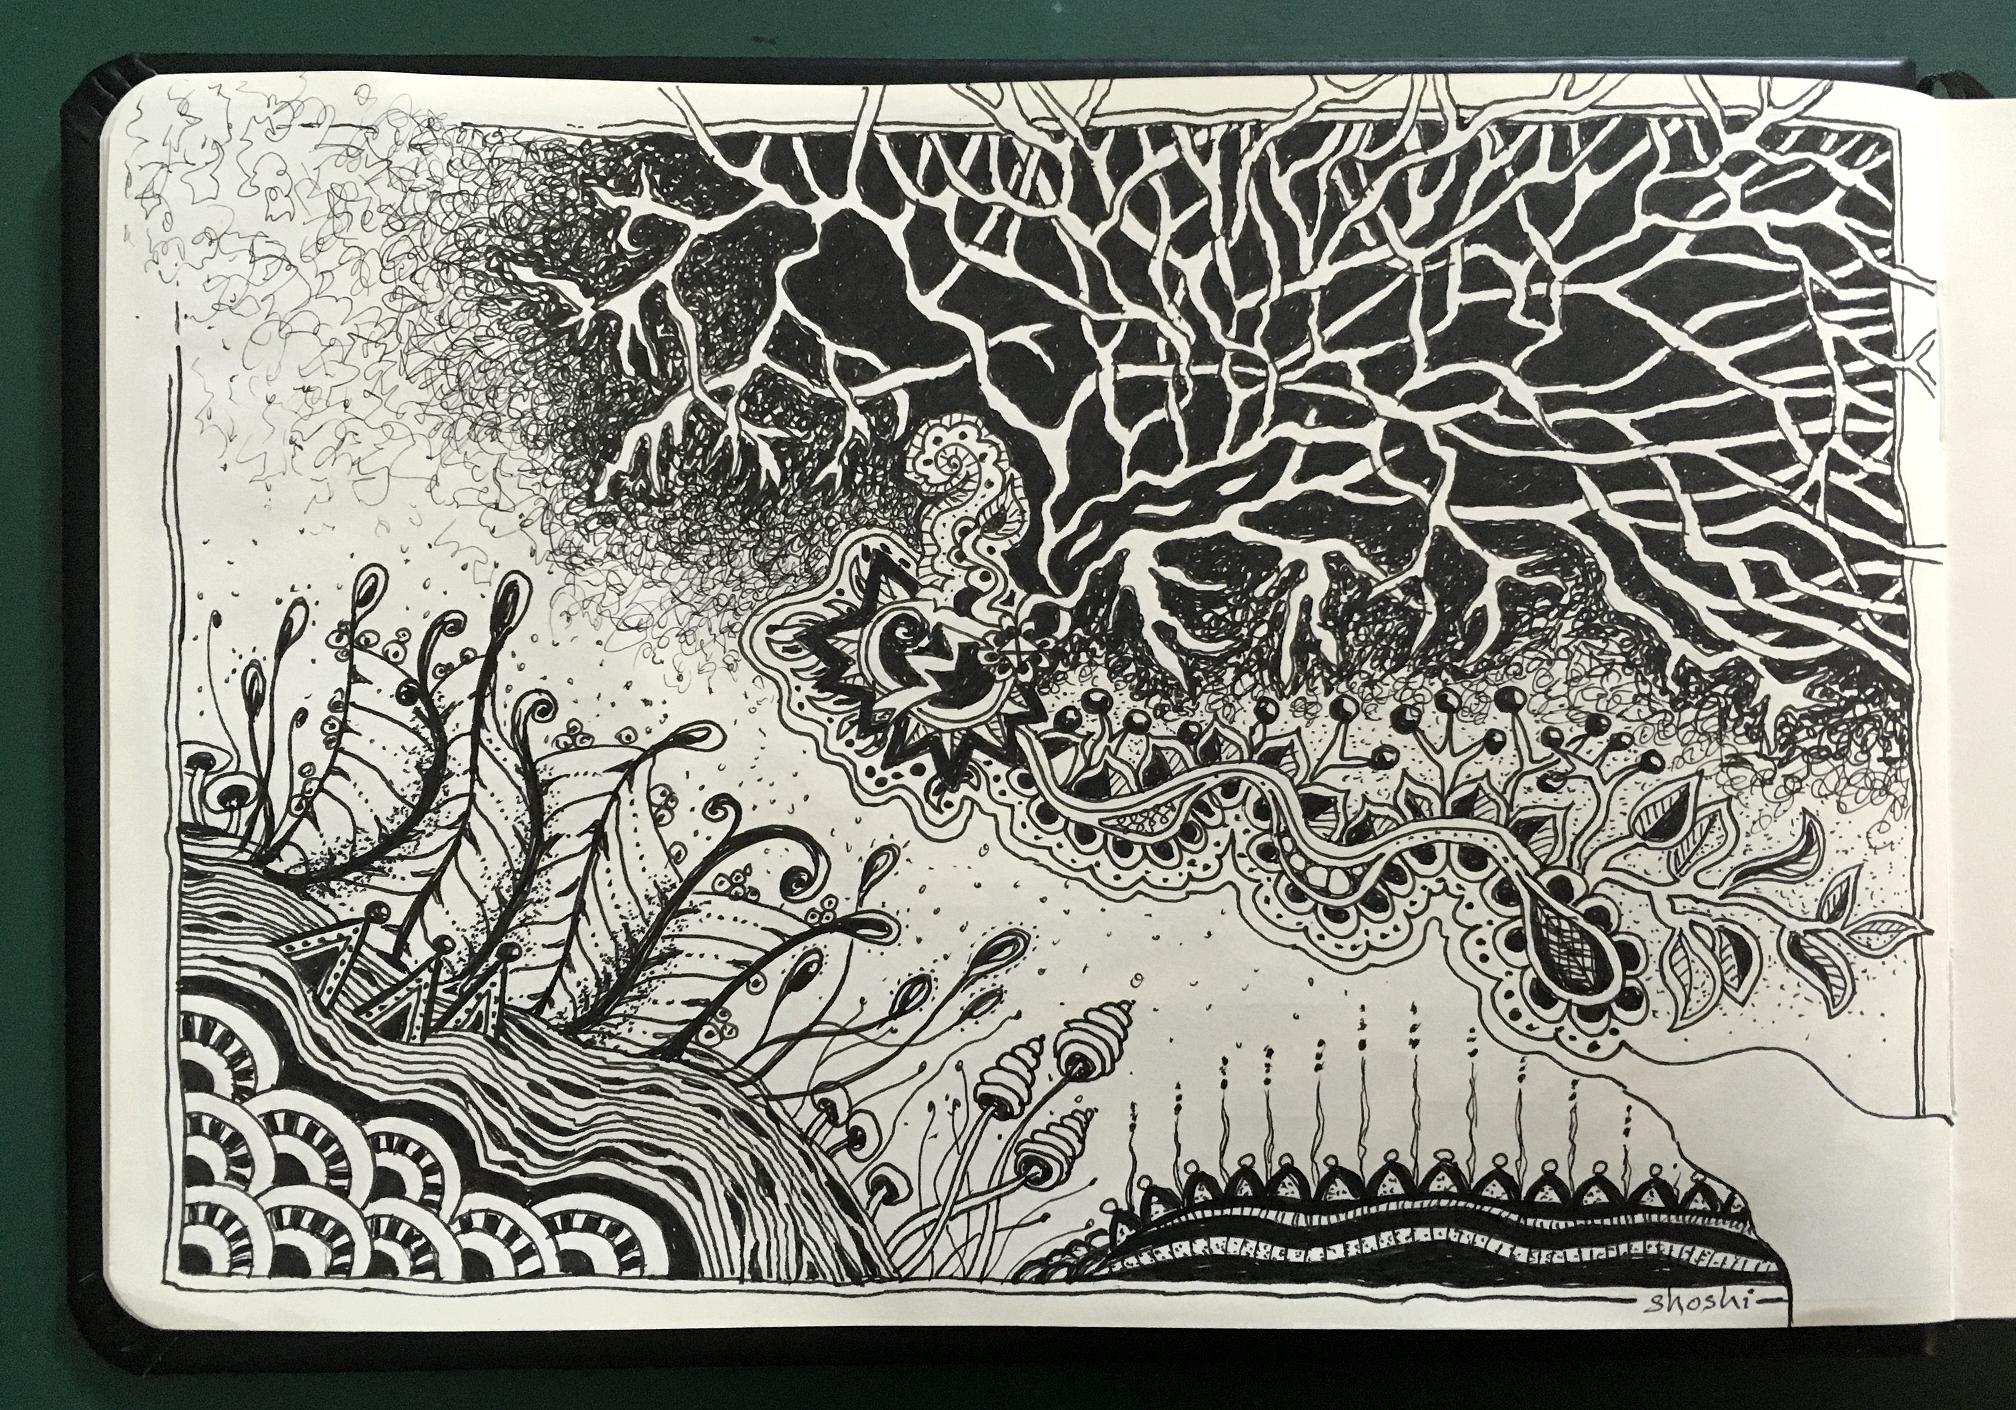
I also started a gorgeous little Rhodia drawing book which I dedicated to black ink drawings only, and I haven’t done anything in that book for some time. Here are some examples.

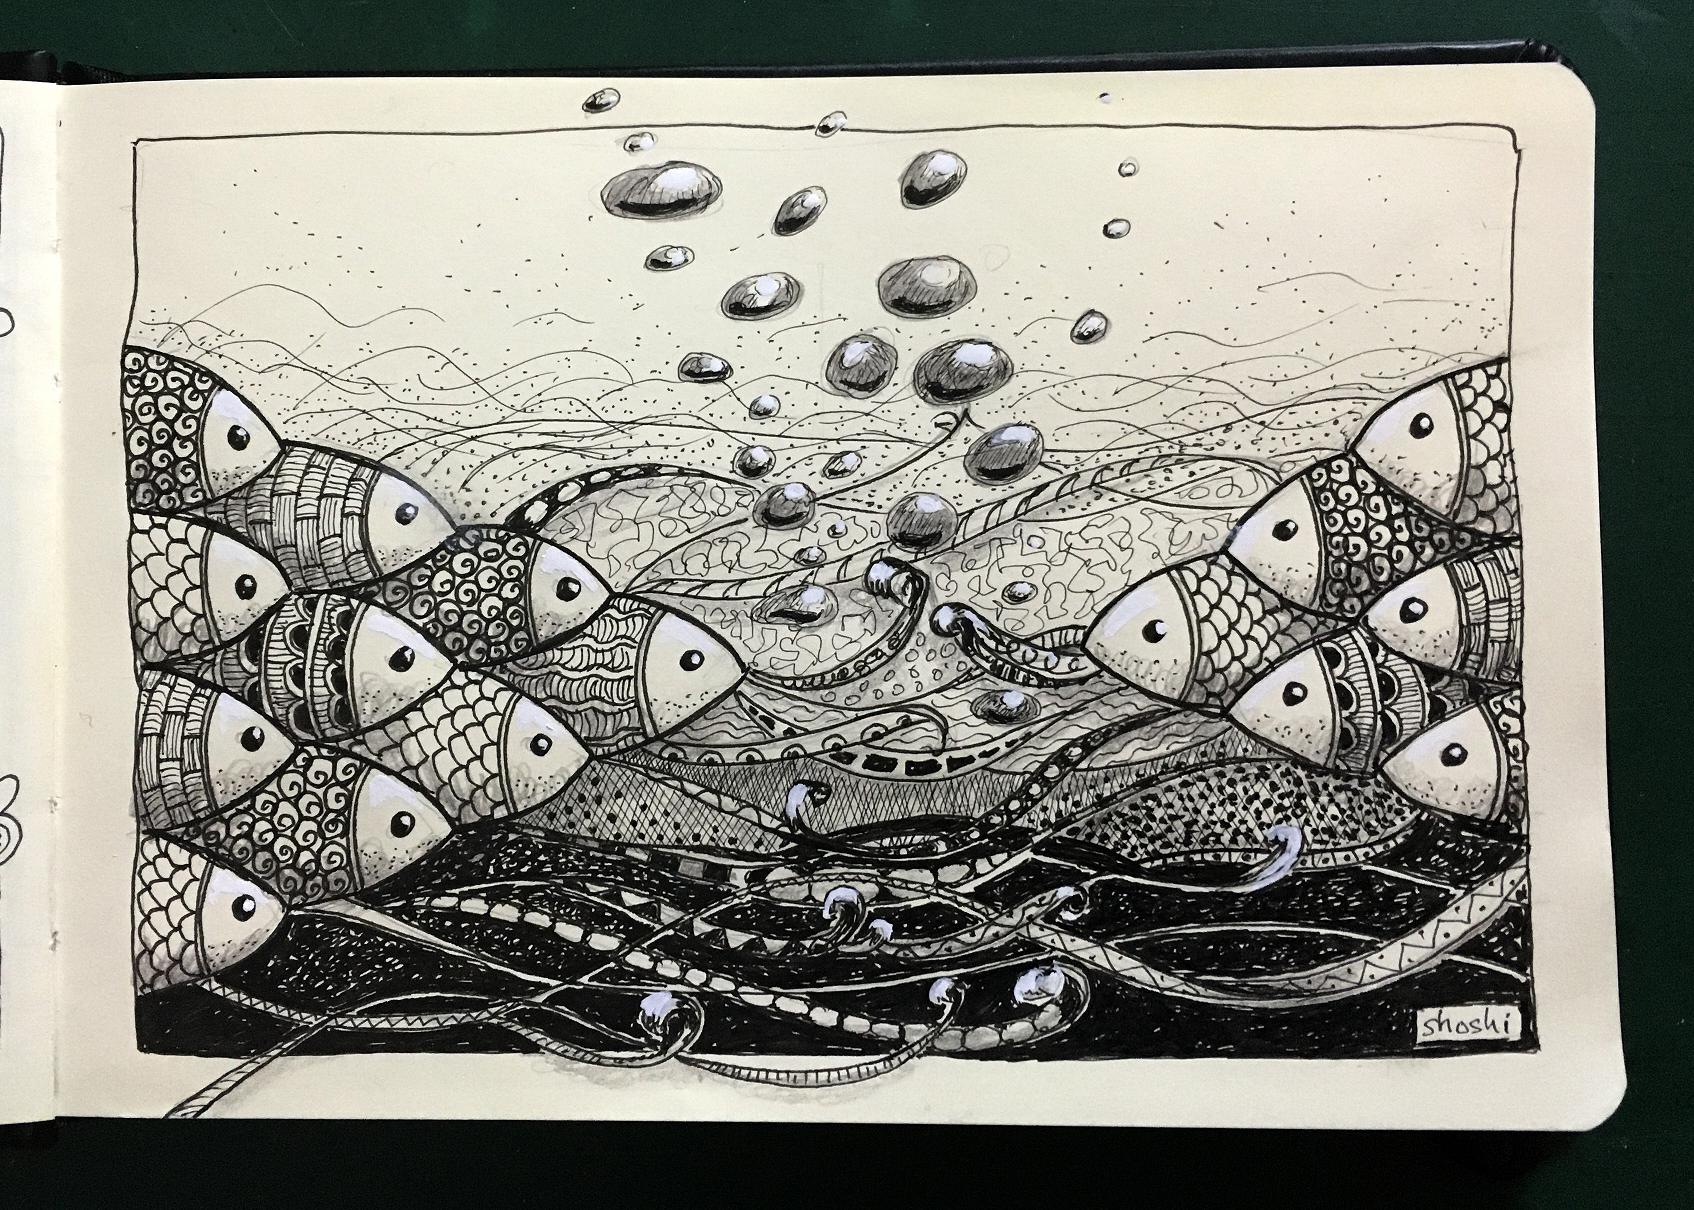
Depending on how the current course goes, I may start to add some “realistic” drawings to that book as well. The paper is beautifully smooth. I am not sure how well it would stand up to watercolour or ink washes, though – I’ll have to experiment.
Dip pens
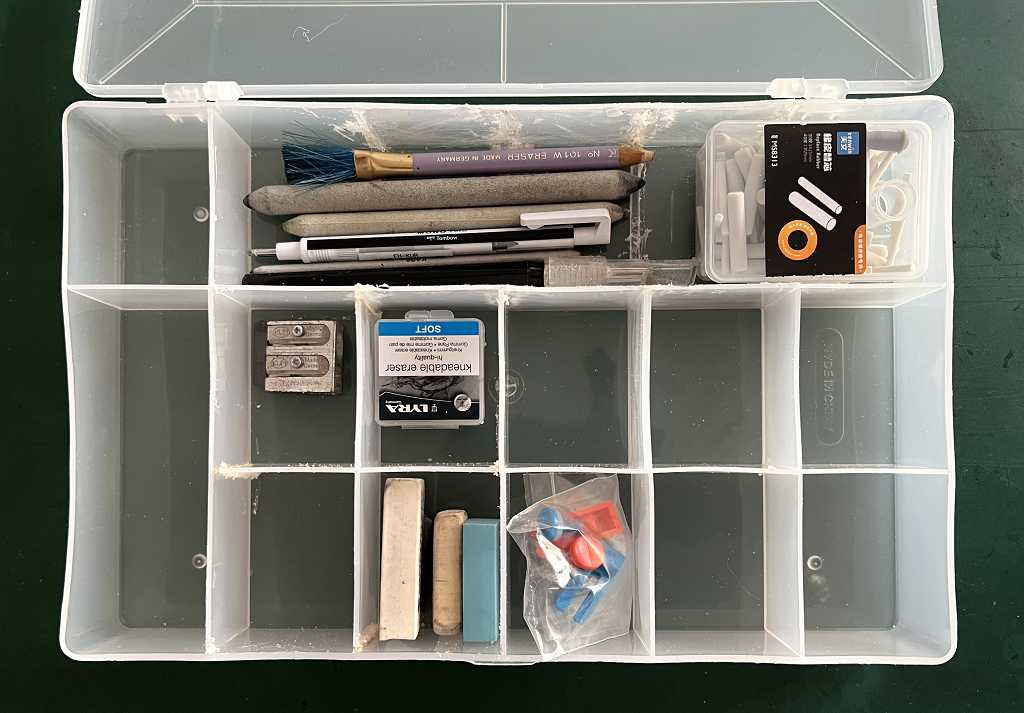
In addition to the marker pens, which are the most convenient ink drawing tools, I have also become interested in dip pen drawing, and bought a cheap set, and also a set of ruling pens which I have tried once, without much success. This was because I tried them before watching some instructional videos, and it’s no wonder they didn’t work, because I wasn’t using them properly! I shall definitely be giving them another try. These are in the section at the top of the photo.
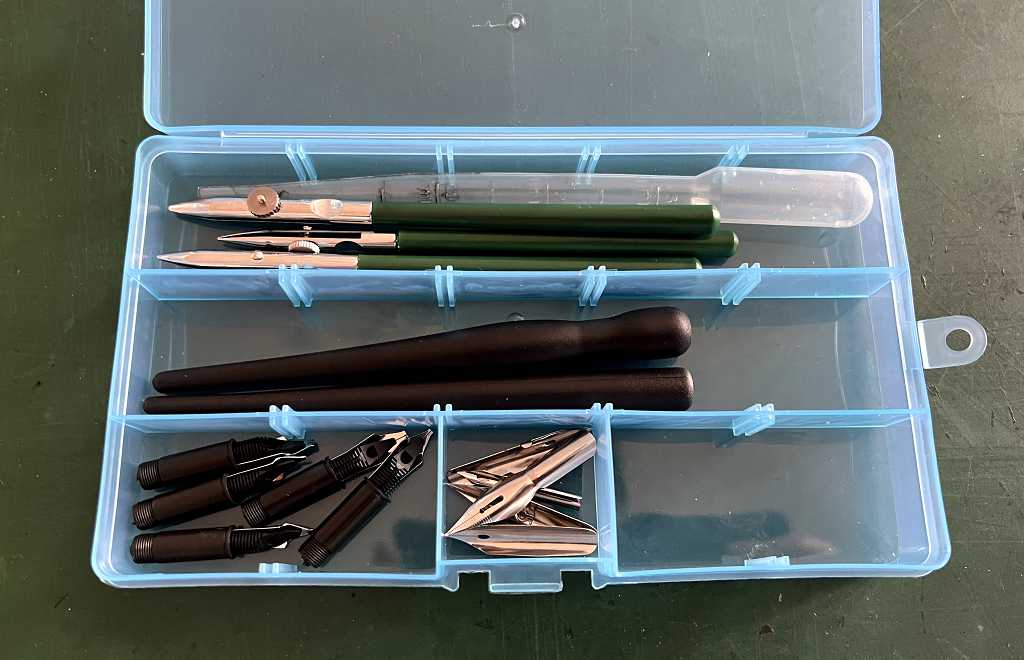
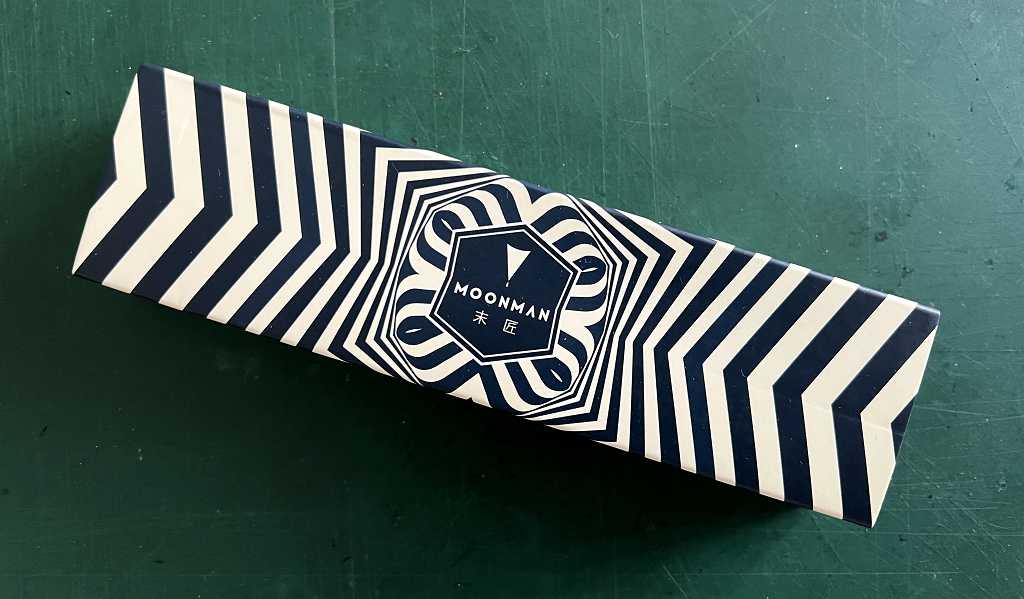
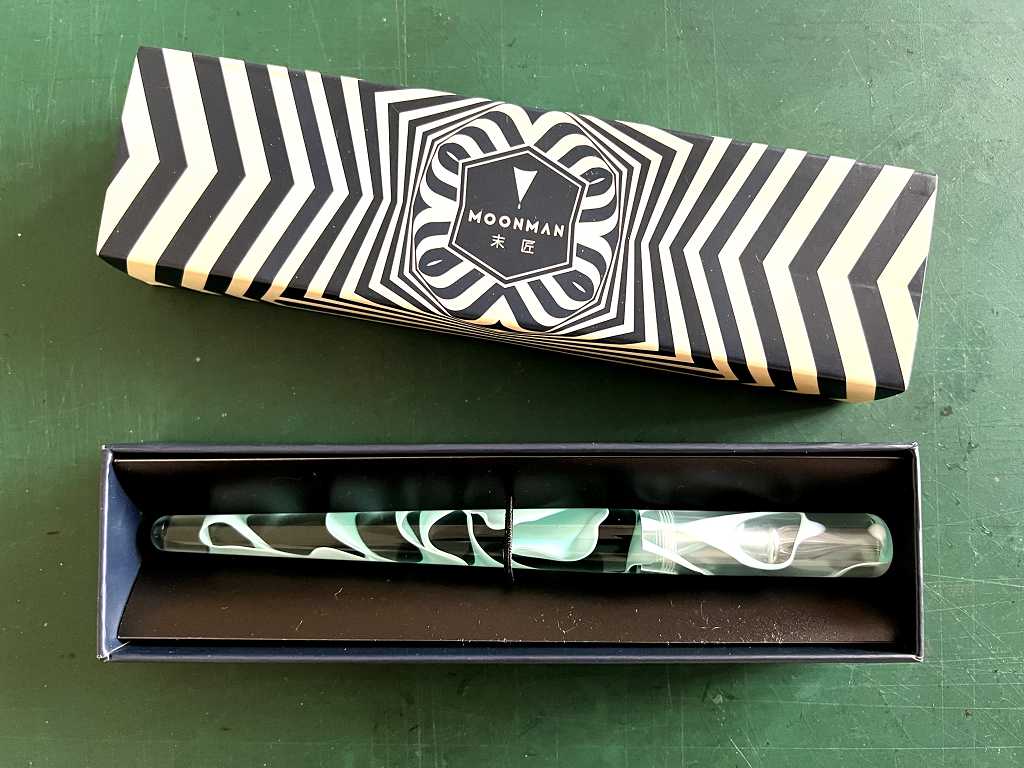
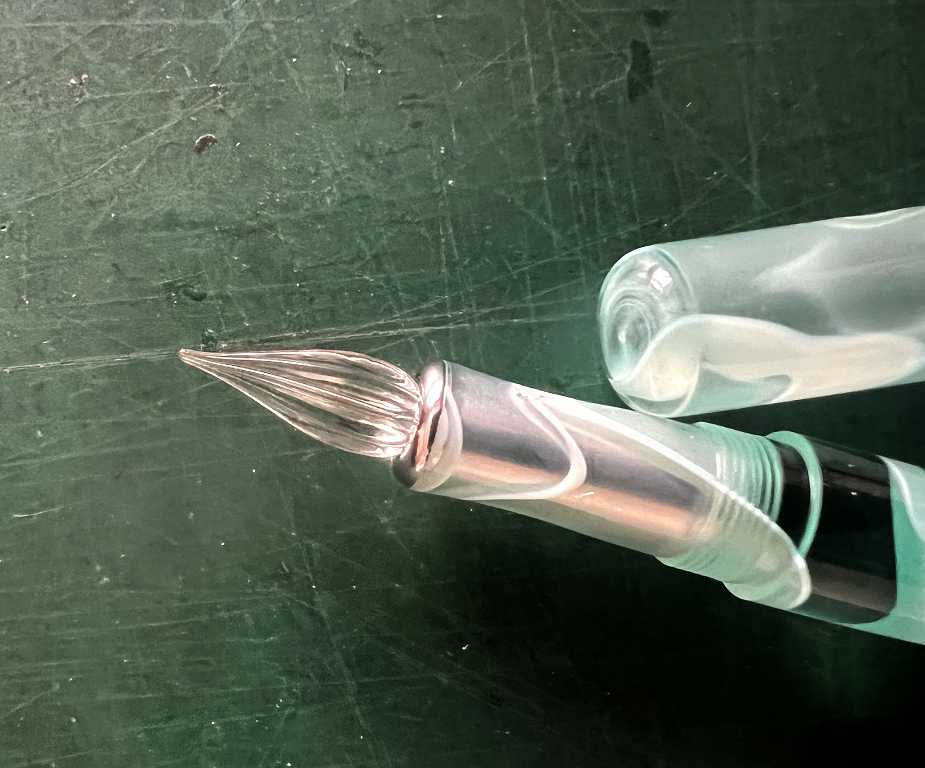
This week I also bought a pen holder with a set of interchangeable nibs of differing widths, which include an ink rreservoir. These are in the bottom left section in the photo. It will be interesting to see how much this extends the drawing time before having to re-dip. The pen holder came in a stylish box, and is really pretty, with a screw cap flush with the barrel. Included in the set is a small glass nib, and I have now experimented with this a bit, and I am quite pleased with it. It has a nice fine tip, but the grooves on it are vertical and not spiral, and it is also quite small, so it does not hold as much ink as other regular glass pens – I am keen to get hold of some of these and see how I get on with them.
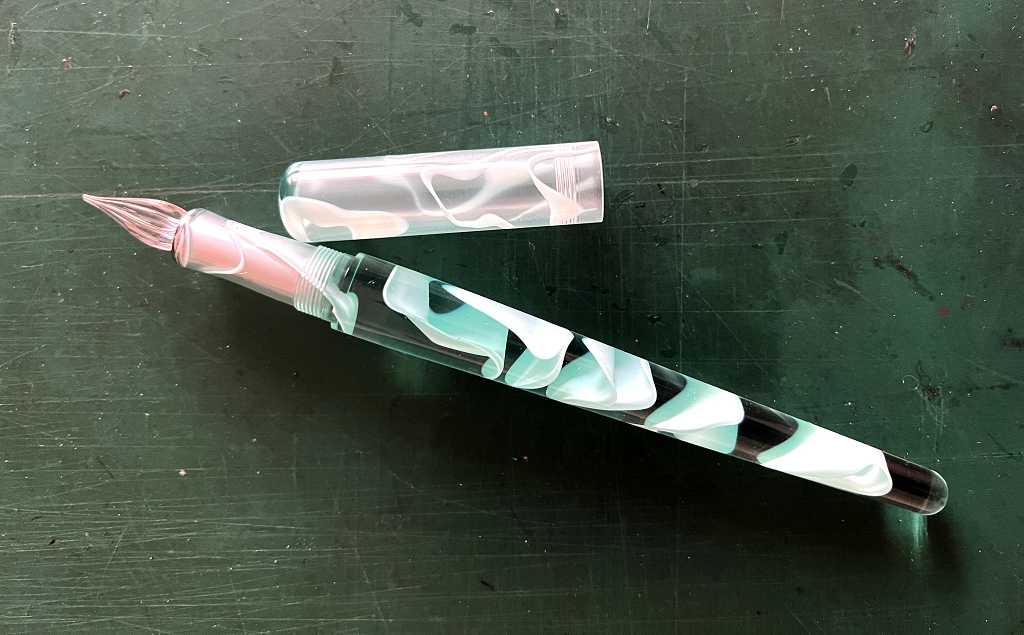
Dip pens are great because they are a lot more economical than marker pens, which you have to replace when they are empty, which always seems pretty wasteful! You can also use dip pens with other media, such as liquid watercolours, gouache, and different coloured inks, and you can change rapidly between different media. With regular metal nibs you can vary the line thickness depending on the pressure, but of course with glass pens, the line width is fixed.
Sketchbooks
I also got some new sketchbooks. Martin Lachmair, the Austrian artist whom I follow on YouTube, was recommending some different ones, including a dual pack of small (about A5-size) but quite thick books with soft removable covers and Coptic binding, which means that the pages lie flat wherever you open the book.
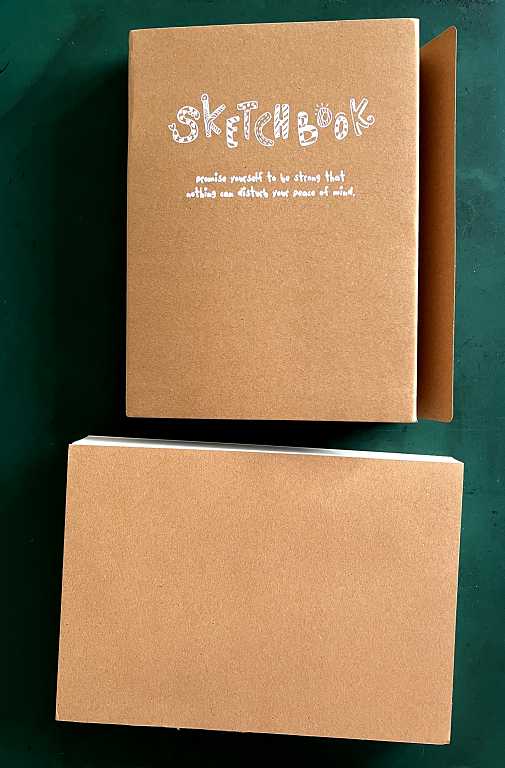
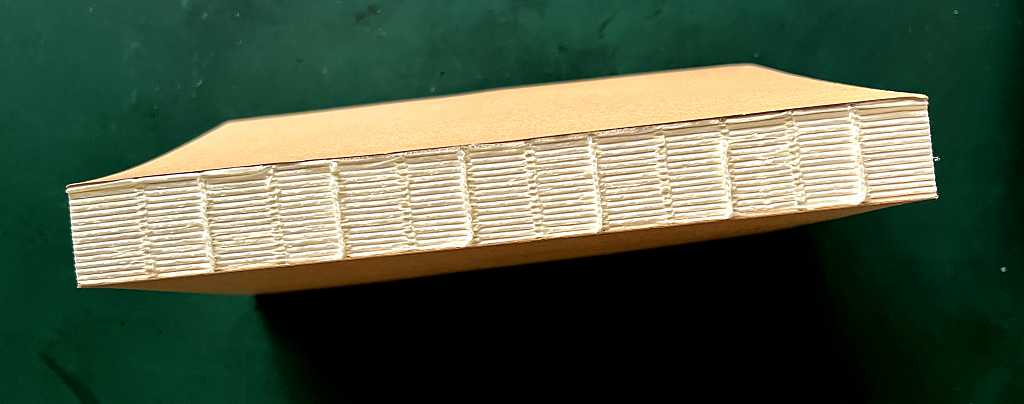
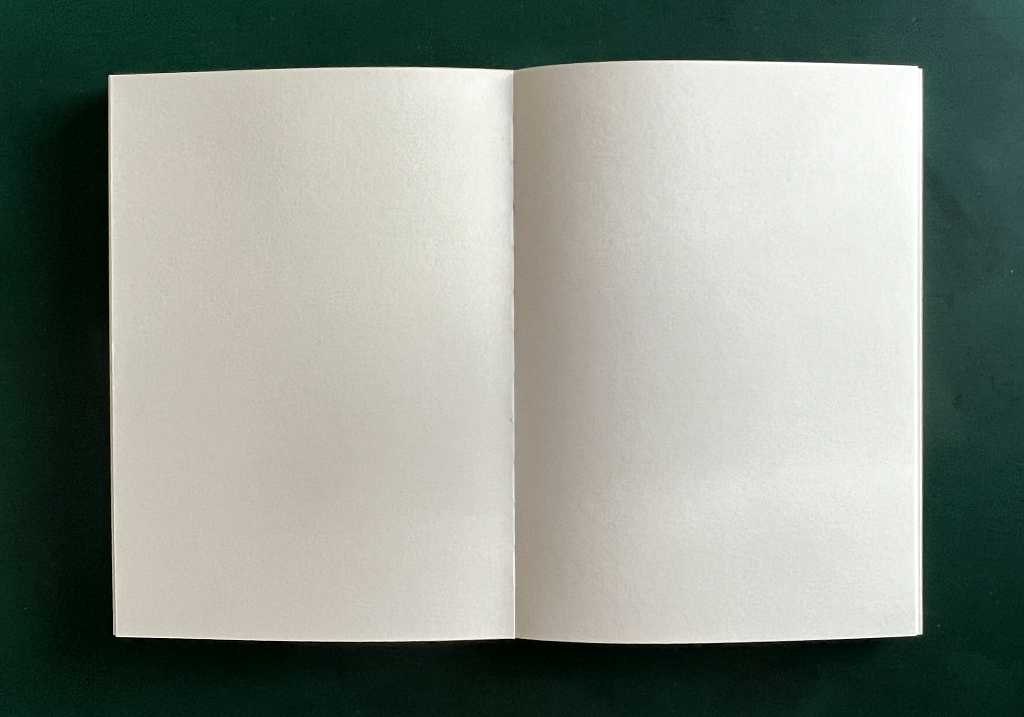
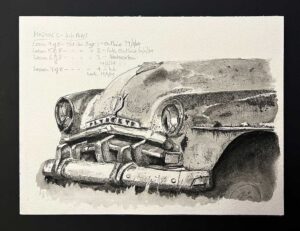
The Amazon reviews of these books were varied – some people singing their praises to the rooftops and other people saying they were rubbish! Having seen Martin with his, I decided to take the plunge. The paper isn’t very thick, and it’s definitely not watercolour paper, but I was surprised how little bleed-through there was with my first drawing, which was done with Tombow Dual Brush Markers and blending with a wet brush. The glass pen, using permanent black drawing ink, was as good. (Pictures below.) There is a small amount of bleed-through but nothing like as bad as on my tiny A6 sketchbook which I made myself from 100 gsm printer paper. I’ve decided to reserve that simply for pencil sketches, and maybe tuck it into my handbag for when I go out, as it is very compact, but not suitable for wet media. The new Coptic-bound ones have loads of pages and I think I can splash around and scribble and have fun to my heart’s content without feeling I am wasting best quality materials.
Following Art Prof on YouTube and going on their website, I am learning a lot about how people use sketchbooks, which are not for fine works of art but mostly for brainstorming, experimenting, noting things down as you come across them – making visual and verbal notes to remind you of ideas, etc.
Starting my new sketchbook
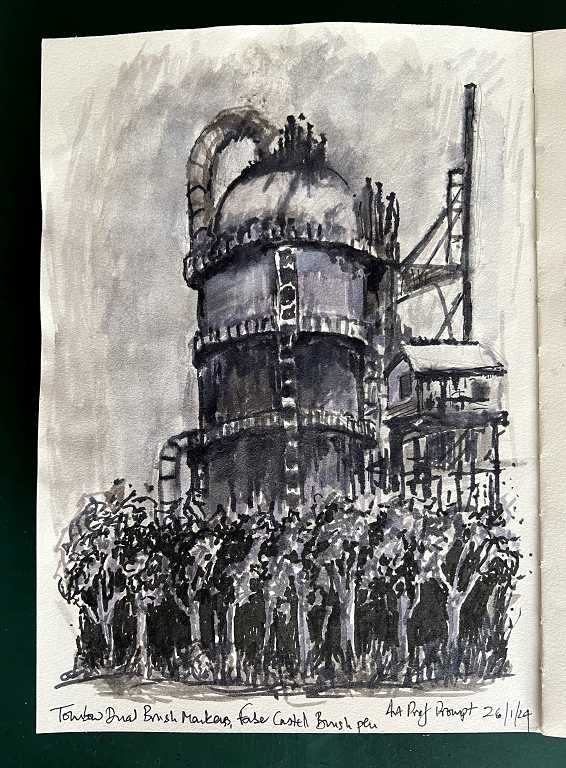
Last night I drew along with the Art Prof team as two of them made a drawing of what they called a power station, but my hubby said it looked more like a grain silo. This video came up when I searched their channel for brush pen drawing. They were working with colour, but I opted for half a dozen different shades of grey from my set of Tombow Dual Brush Markers. I was quite pleased with the result which wasn’t as detailed as theirs, and because I started the picture a bit too high on the page, I decided to add some trees in the foreground. These came out a bit too uniform for my taste but it was an interesting exercise.
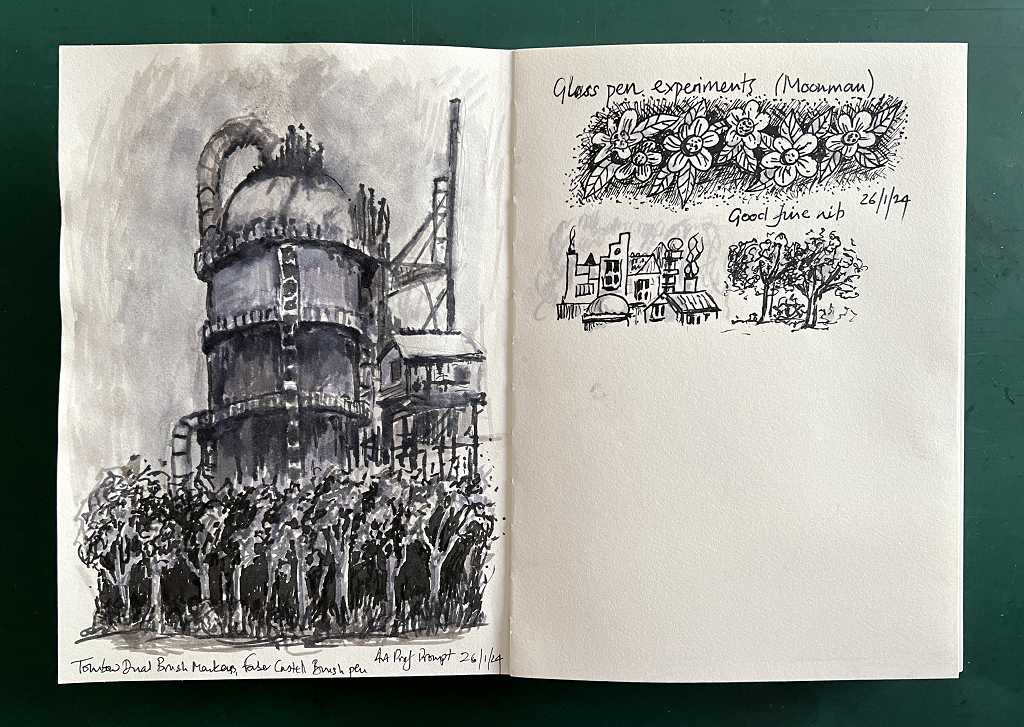
On the next page a did a few small sketches with the Moonman glass nib. Really quite nice to use.
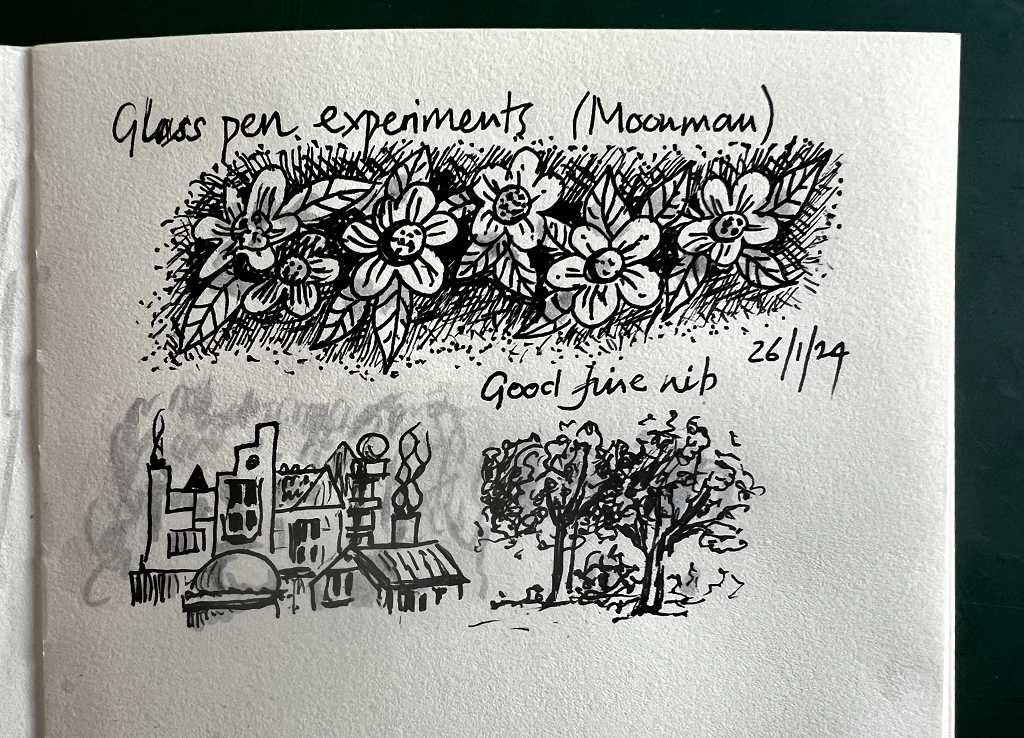
I shall definitely be exploring glass pens further. It’s an intriguing idea, and these pens are also very beautiful – hand-made from glass, and some are highly ornate and decorated. The only disadvantage I can discover is that they are very fragile and will definitely break if you drop them. I shall need to be very careful, and be especially careful not to leave them out where Lily, one of our cats, can get at them – my hubby is always mentioning that one of her favourite pastimes is to jump up on his desk and knock his pens and pencils onto the floor!
First project in the ink pens module
The first project of the ink pens module was a warm-up session, and my hubby joined me in doing this, which was great. I have been trying to encourage him to get back into his watercolours for ages as he was really quite good, and his favourite was pen and wash. He expressed interest when I told him what the next module would be, and he said he’d like to sit in. The warm up exercises were all about producing different values with the various thickness of the pens, using different mark-making such as hatching, cross-hatching, stippling etc. I am very well acquainted with all these methods, and it was fun making the little swatches in my drawing book.
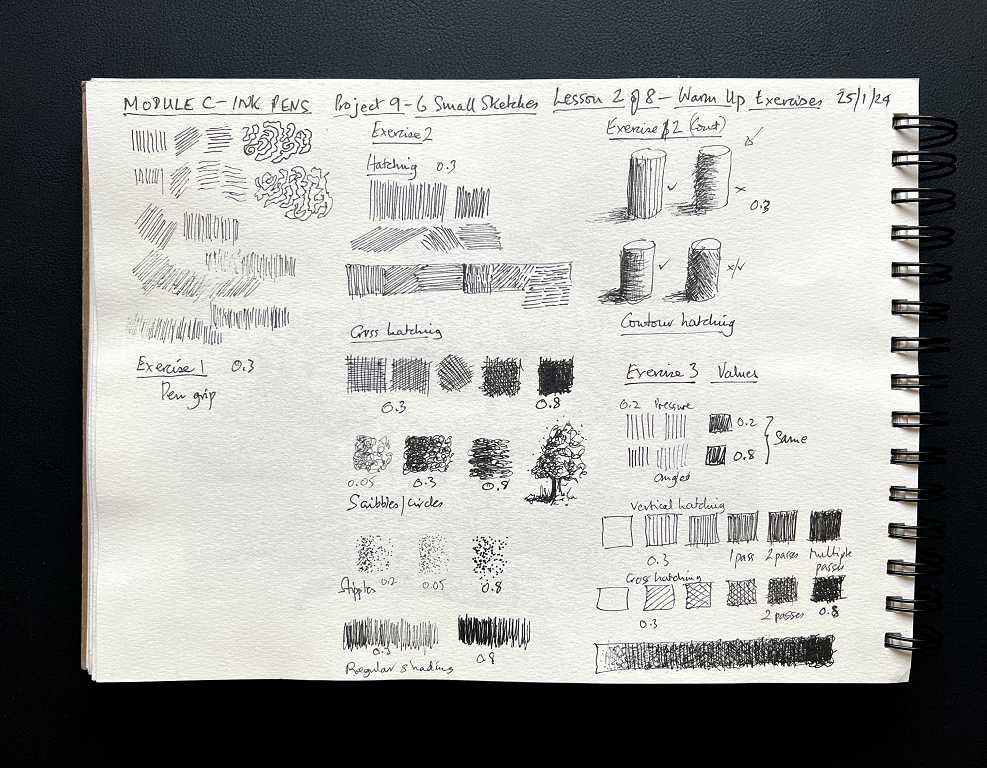
Phil, the teacher, is taking a much more sketchy and loose approach than I have been accustomed to, and I think this is going to be very freeing. I’m really looking forward to the upcoming projects, and learning how to interpret what I see in this medium, which I have always used in a much more stylised way in the past. I do enjoy that aspect of the pens and shall continue with it, but it is going to be great to have another string to my bow. I really enjoy working in monochrome. A future module deals with ink pen drawing with watercolour wash, introducing some colour, and I know my hubby will be interested in that one.
Art materials
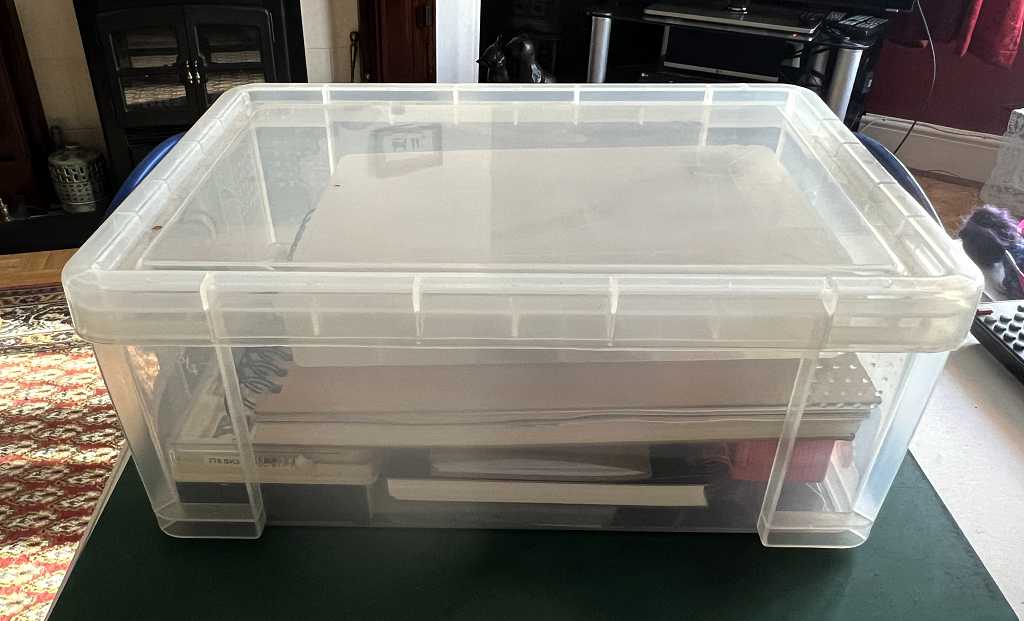
I have now transferred my art course stuff from a shallow 4-litre Really Useful Box to a standard depth 9-litre one as I accumulate more materials.
I recently ordered some more smaller storage boxes with compartments. These are supposed to be for embroidery thread storage, and when I ordered them, I did not realise that the internal compartments were fixed. They are all fairly small rectangles, which really isn’t a great deal of use. I have smaller boxes where the partition pieces are removable (see the small blue box with my dip pens) but these are not big enough for my other art stuff. I spent some considerable time this morning trying to remove some of the partitions, firstly with a hot knife, which was semi-successful, and then I had greater success with my Dremel but this had the disadvantage that the friction made the plastic melt. A combination of sawing, filing and chipping away with a decorating scraper did a half-reasonable job and I managed to remove enough partitions to create a longer section for blending stumps and other tools. The whole process was exhausting, and the result is pretty messy, but what I have done so far will keep me going for a bit. I may investigate other storage boxes online, making sure that the partitions are removable and adjustable!
As we complete each module, I shall probably remove any materials not immediately required, and store them in the studio, from where I can retrieve them as required. The charcoal stuff is already there, and will probably stay there!! Some things will be in constant use, though, such as my graphite pencil sets and my ink pens, erasers, proportional dividers and other bits and pieces, course drawing book and sketchbooks, and they will remain in the box downstairs.
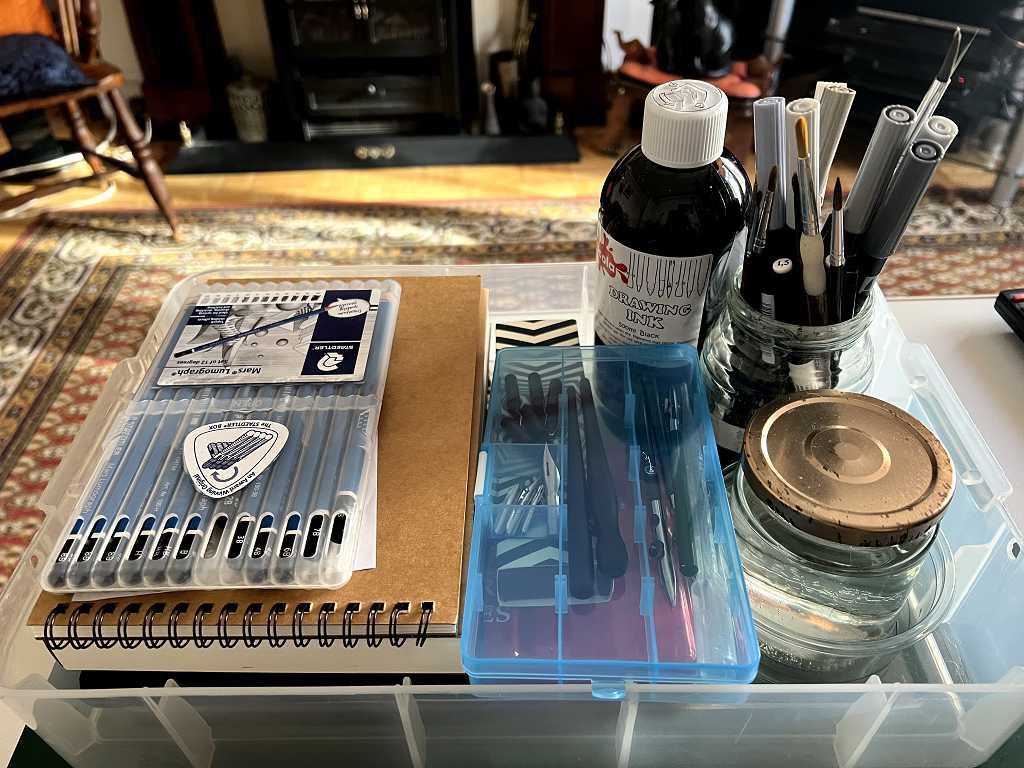
I’m using the tall lid from another 9-litre one as a tray for my ink materials. The lids work well for this purpose and keep everything contained and stop pens and brushes rolling off onto the floor. I use them as trays when working on other projects as well, such as embroidery. I have a small glass egg cup which I am using as an inkwell, pouring a little into it from my large bottle of black ink, and then standing the egg cup in a plastic container so if it does get knocked over, the ink can be saved and won’t make a mess.
What I am now looking forward to, above all, is that my skill will improve! I feel such a rank beginner still, and very much admire the work of more experienced artists and aspire to match their skills! The secret is to keep at it, and in as consistent a manner as possible. It isn’t always possible to draw every day but I’m going to try, even if it’s only for a few minutes.