Another studio session this afternoon, which I wasn’t expecting to have. We had a phone call a couple of weeks ago postponing our dental appointment to 31st August (today). We have to travel about an hour to get to our dentist – we have always been with him and decided to stay with him after we moved because I am pretty nervous about going, and we know and trust him, and he usually manages to put me at my ease, although having anything done is always mega-stressful! Anyway, we arrived, only to find that they had us down for 7th September! Definitely some wires crossed somewhere, so we just drove back home again. A huge waste of time, effort and petrol and I was pretty fed up, especially as I’d psyched myself up to go in the first place!
Definitely in need of some de-stressing and art therapy, so off I went, up to my studio and got stuck in.
Sorting my gel prints and collage papers
I have now created a lot of papers and they were getting pretty out of hand, sitting around in heaps and making it difficult to find anything. A while back, I bought a pack of 30 polywallets from Ebay (or it may have been Amazon?) and had only put things in a couple of them. Several months ago I started collecting ephemera because I was going to make a junk journal, and there was a whole box of bits and pieces, including some full-sized backgrounds, blotting off sheets and so on. I decided to rationalise the whole thing and sort them all out properly into separate polywallets.
The only papers that I didn’t include in this were the paper mesh experiments, and a big pile of large sheets of Amazon packaging paper and newsprint paper with mark making. They are too big to go in a polywallet and I have to think of alternative storage for them. The hand-made papers just about squeezed into a polywallet, but it wouldn’t close. This situation will improve once I start using these fairly thick papers.
Once I had sorted the papers into their respective polywallets, which included “gel prints,” “gel prints needing further work,” “blotting off sheets,” “Vonich images,” “printables,” “text and music” etc., and of course, my essential scrap folder, there were far too many to go in my original vertical magazine holder. I needed a box or basket to store them in, and couldn’t find anything the right size. In the end I combined all my coloured card scraps with the black and white ones in a single Really Useful Box, freeing up the other one. I discarded the lid, and put the polywallets in – they fit perfectly! This box is now in front of the window beside my baskets of organised dies and card-making materials.
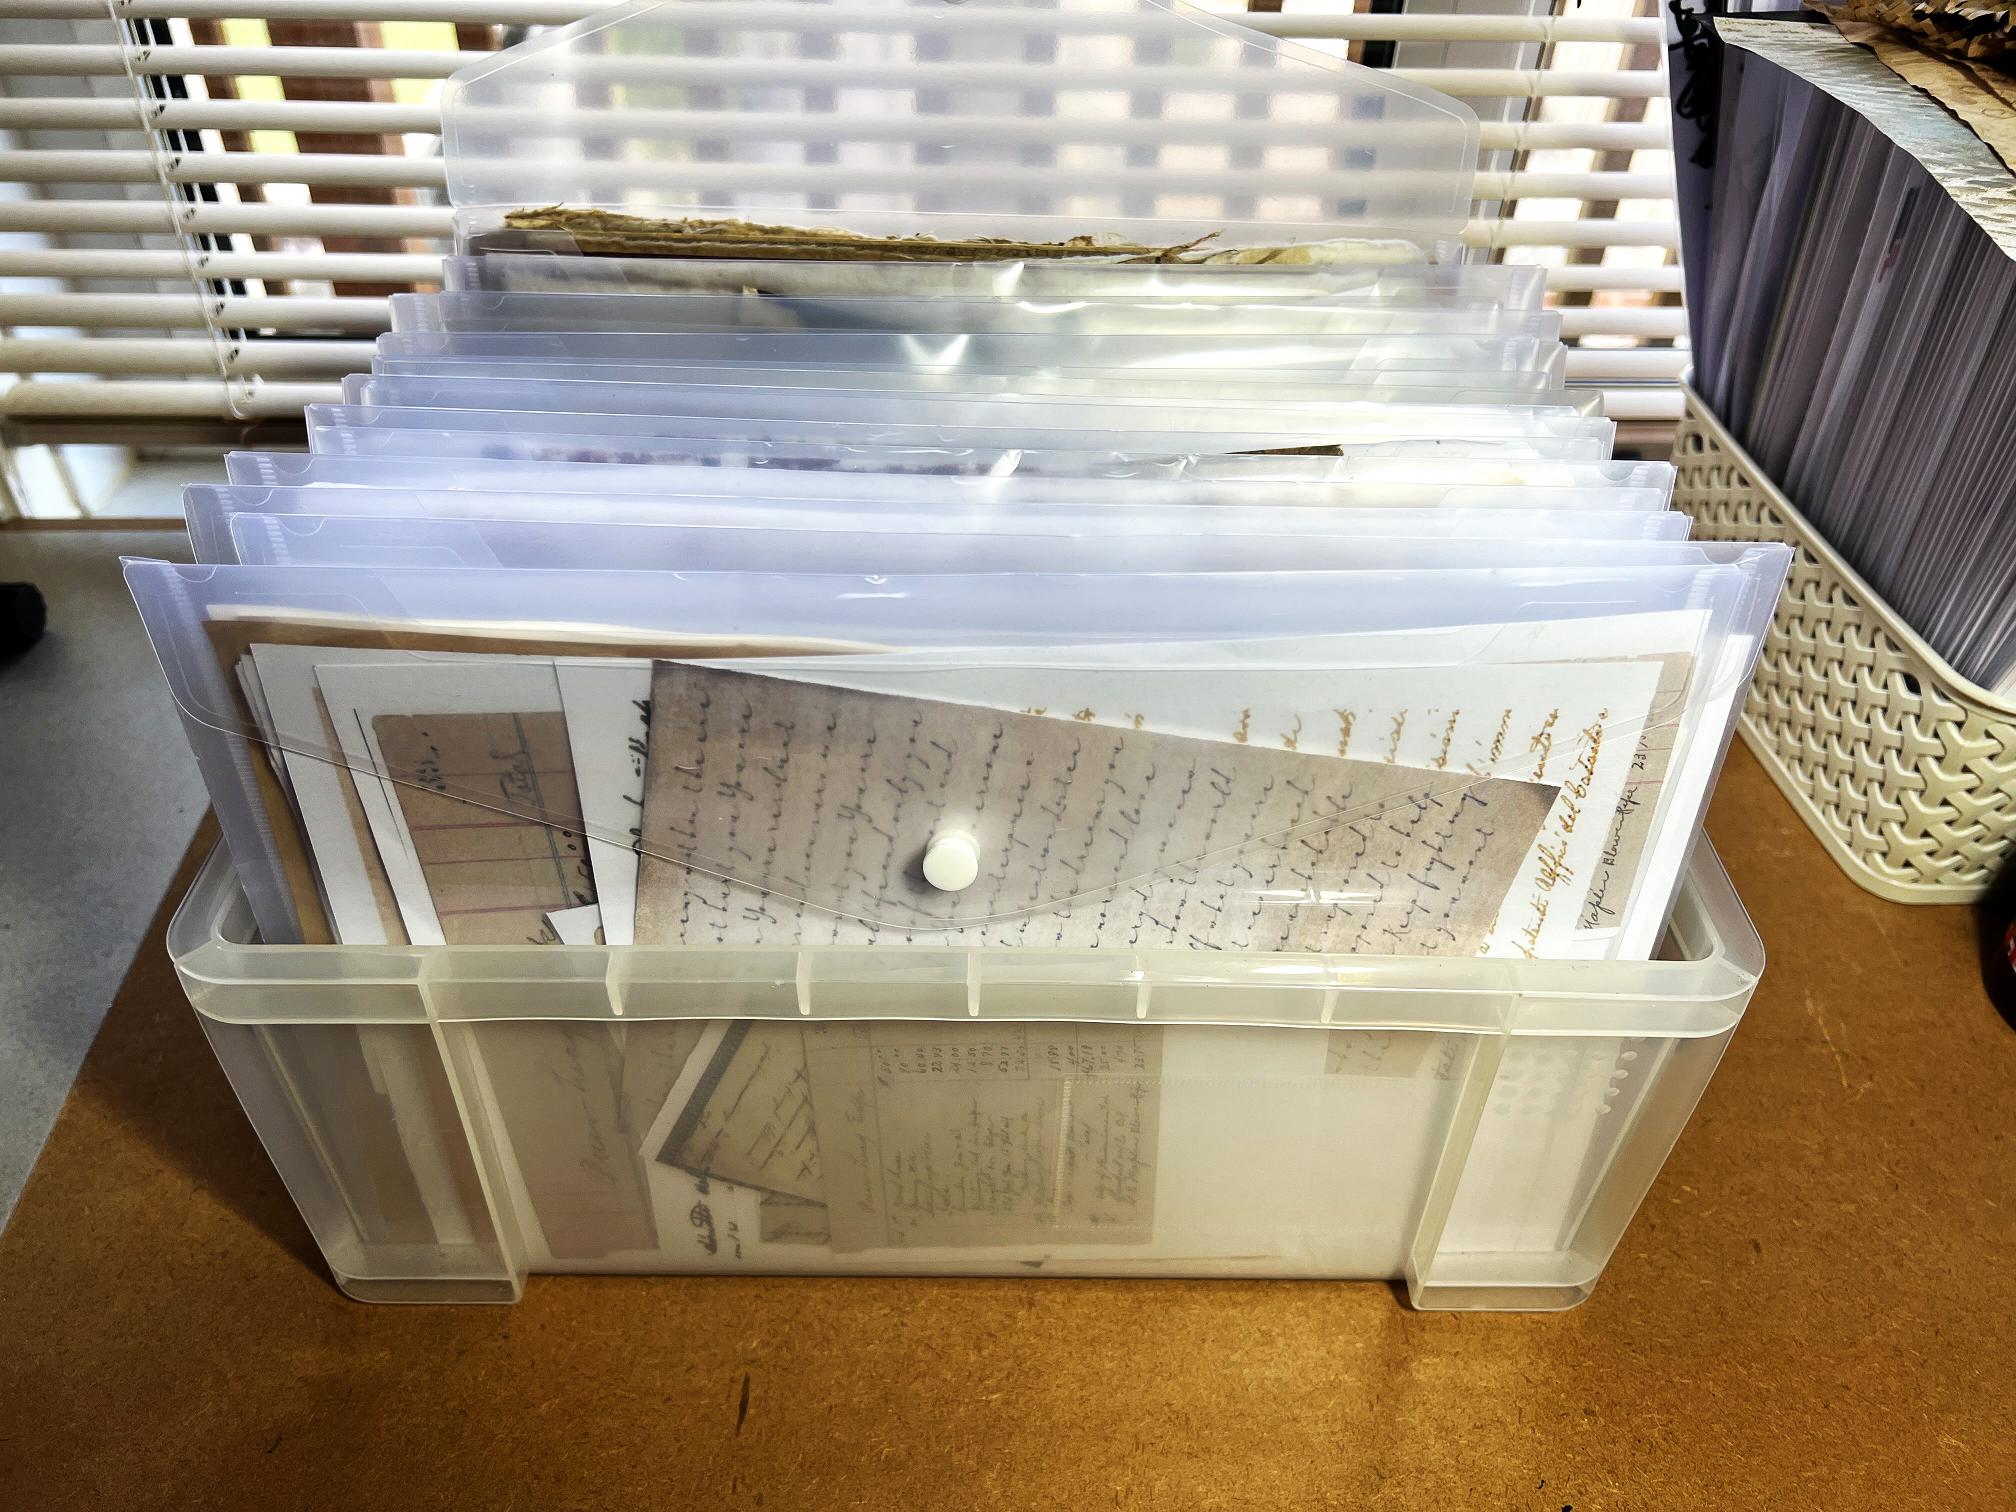
I may need to add some sort of tag to the top of each wallet so that I can go quickly to the wallet I need.
I reckon that was a good job done, and I did feel better seeing a tidy surface again!
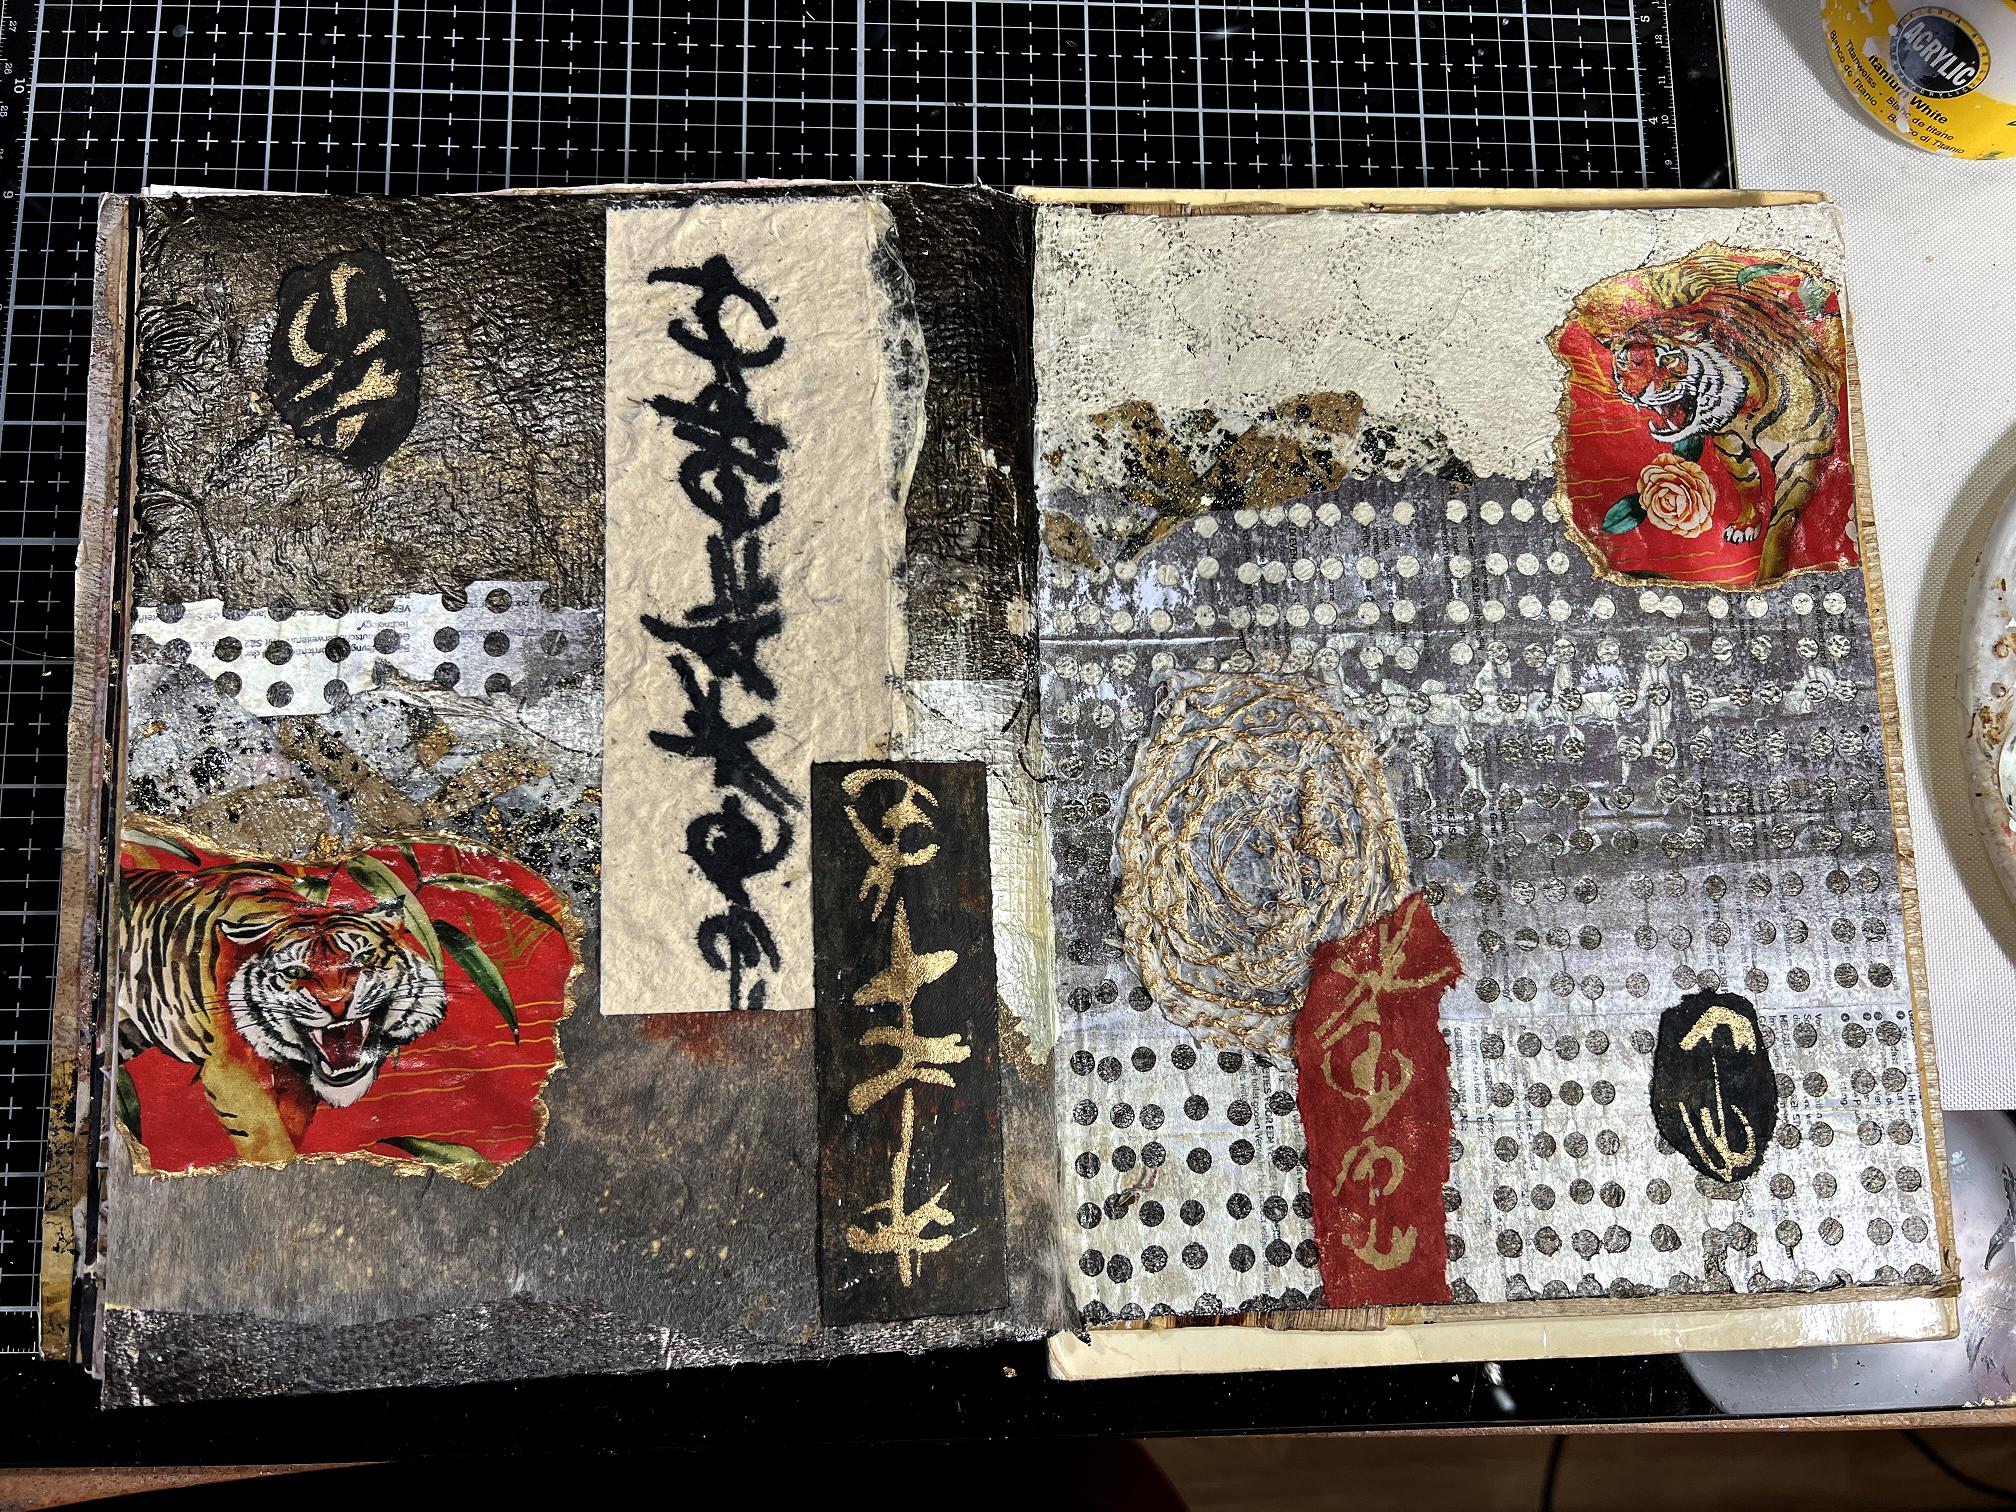
Organic Journal – Tigers page
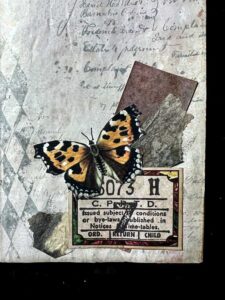
While sorting through all those papers, I had a quick rummage through the ephemera. Some time ago I went through a lot of junk mail and leaflets that had arrived on our doormat, including a Joe Brown’s catalogue, from which I had cut out quite a lot of small images. I found a pair of tigers and I thought it would be fun to make a page incorporating them. The colour was bright and predominently red, but being small, I thought they would just add a pop of colour and focal points without departing from my chosen colour palette of muted, earthy browns, creams and gold.
Choosing the papers
The usual process – pulling stuff out at random and either choosing or rejecting them, and later, omitting some, and adding more, but this pile was a starting point.
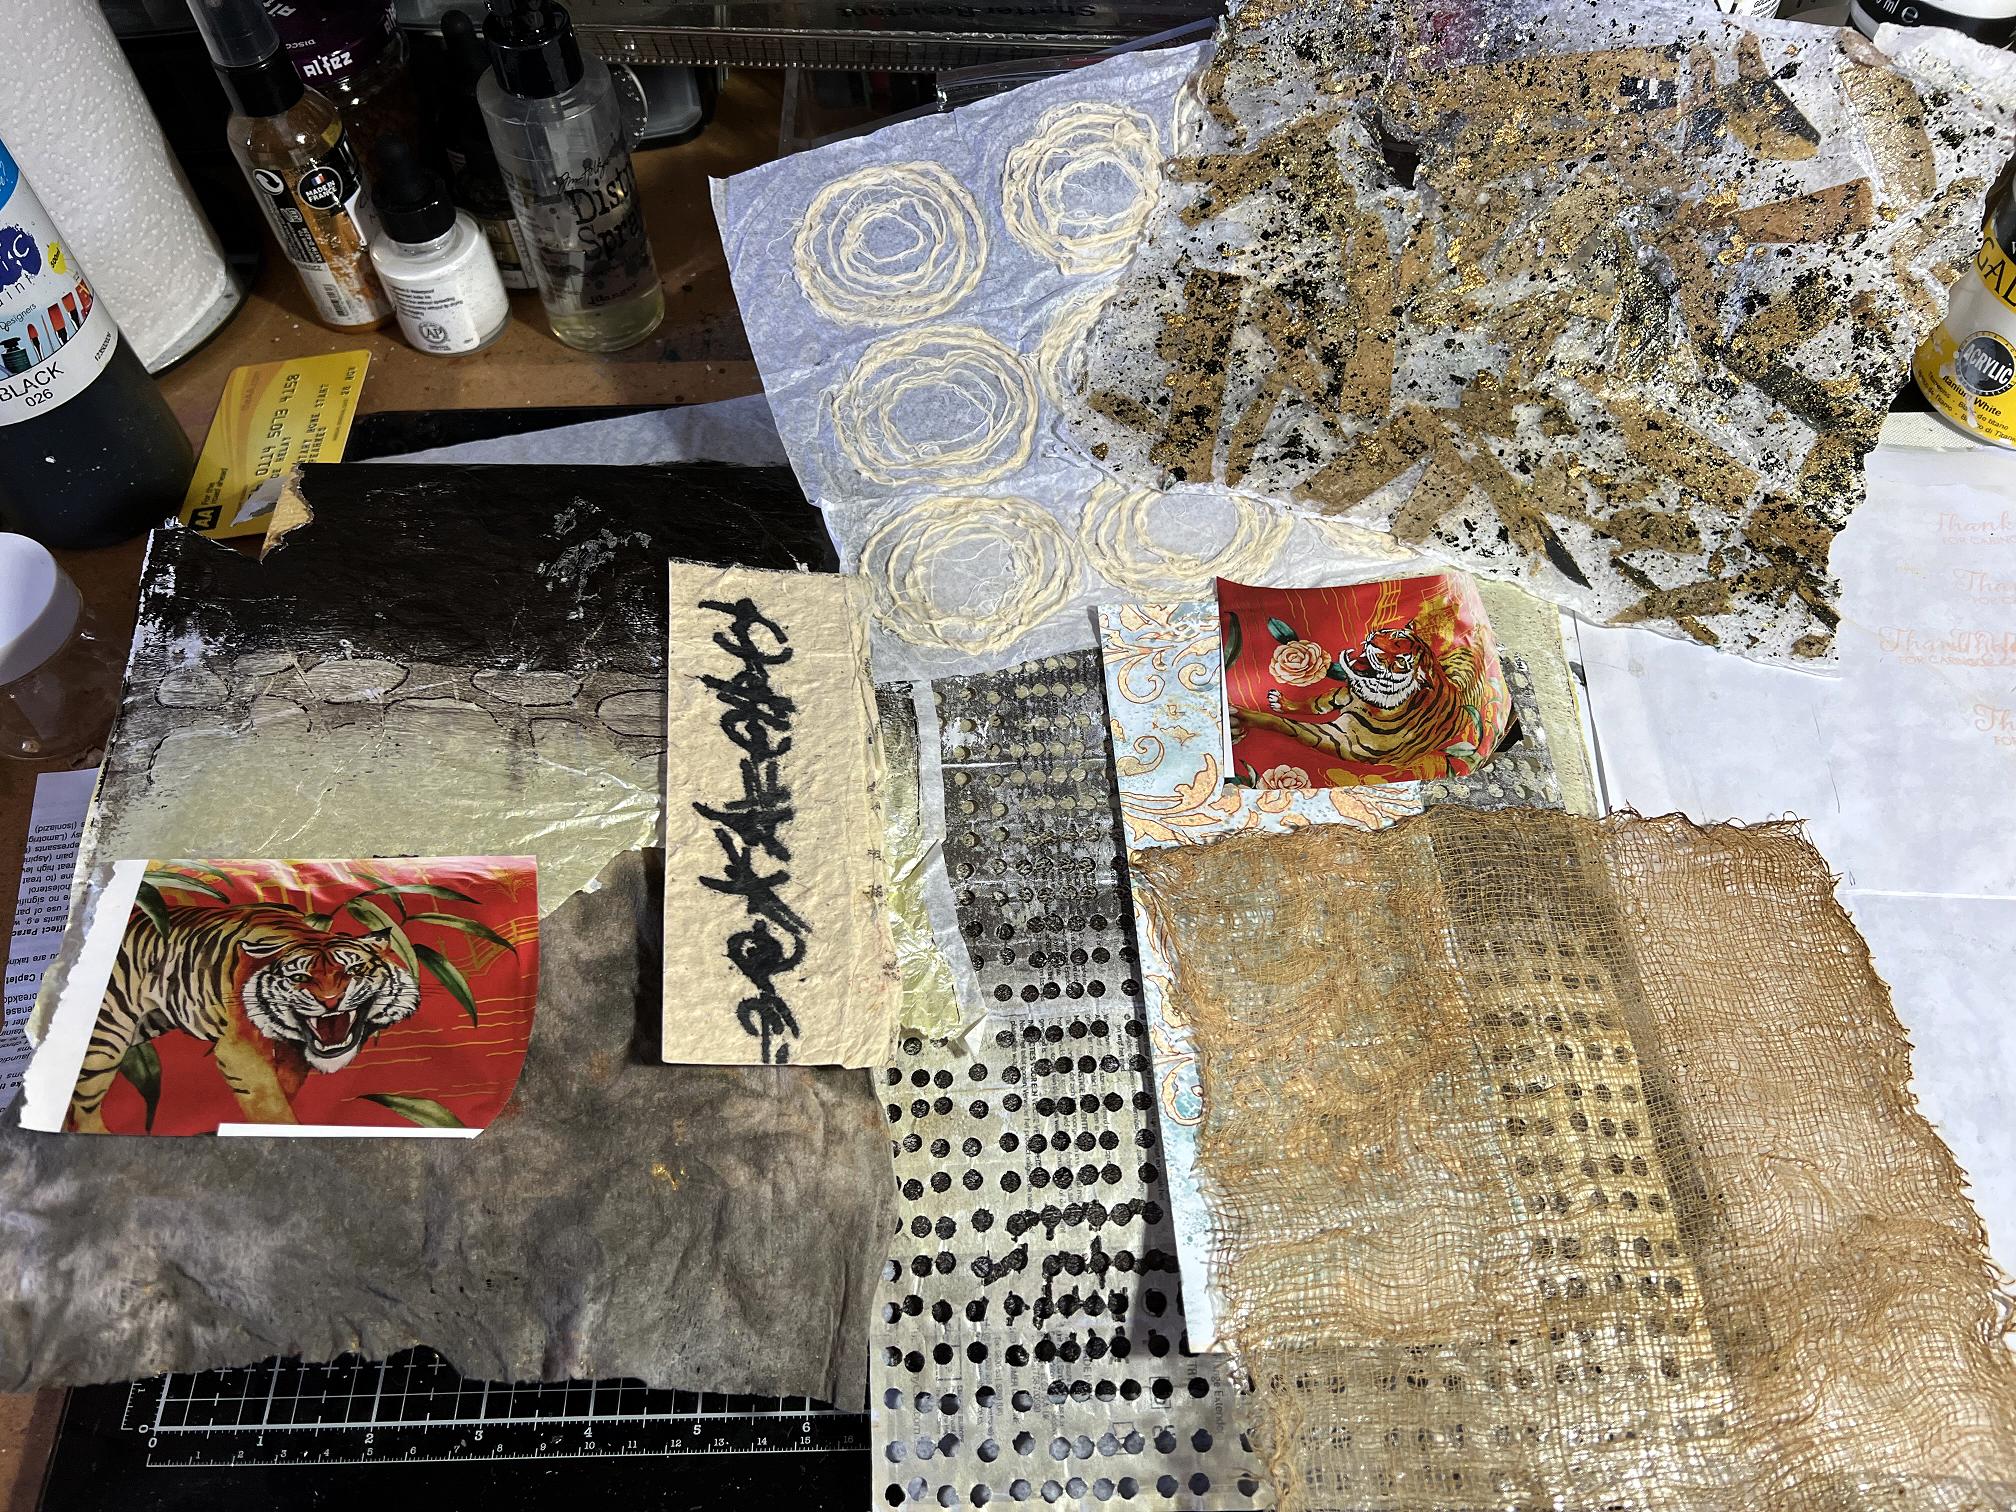
In the end I didn’t use the mesh piece at bottom right, or the swirly background underneath it.
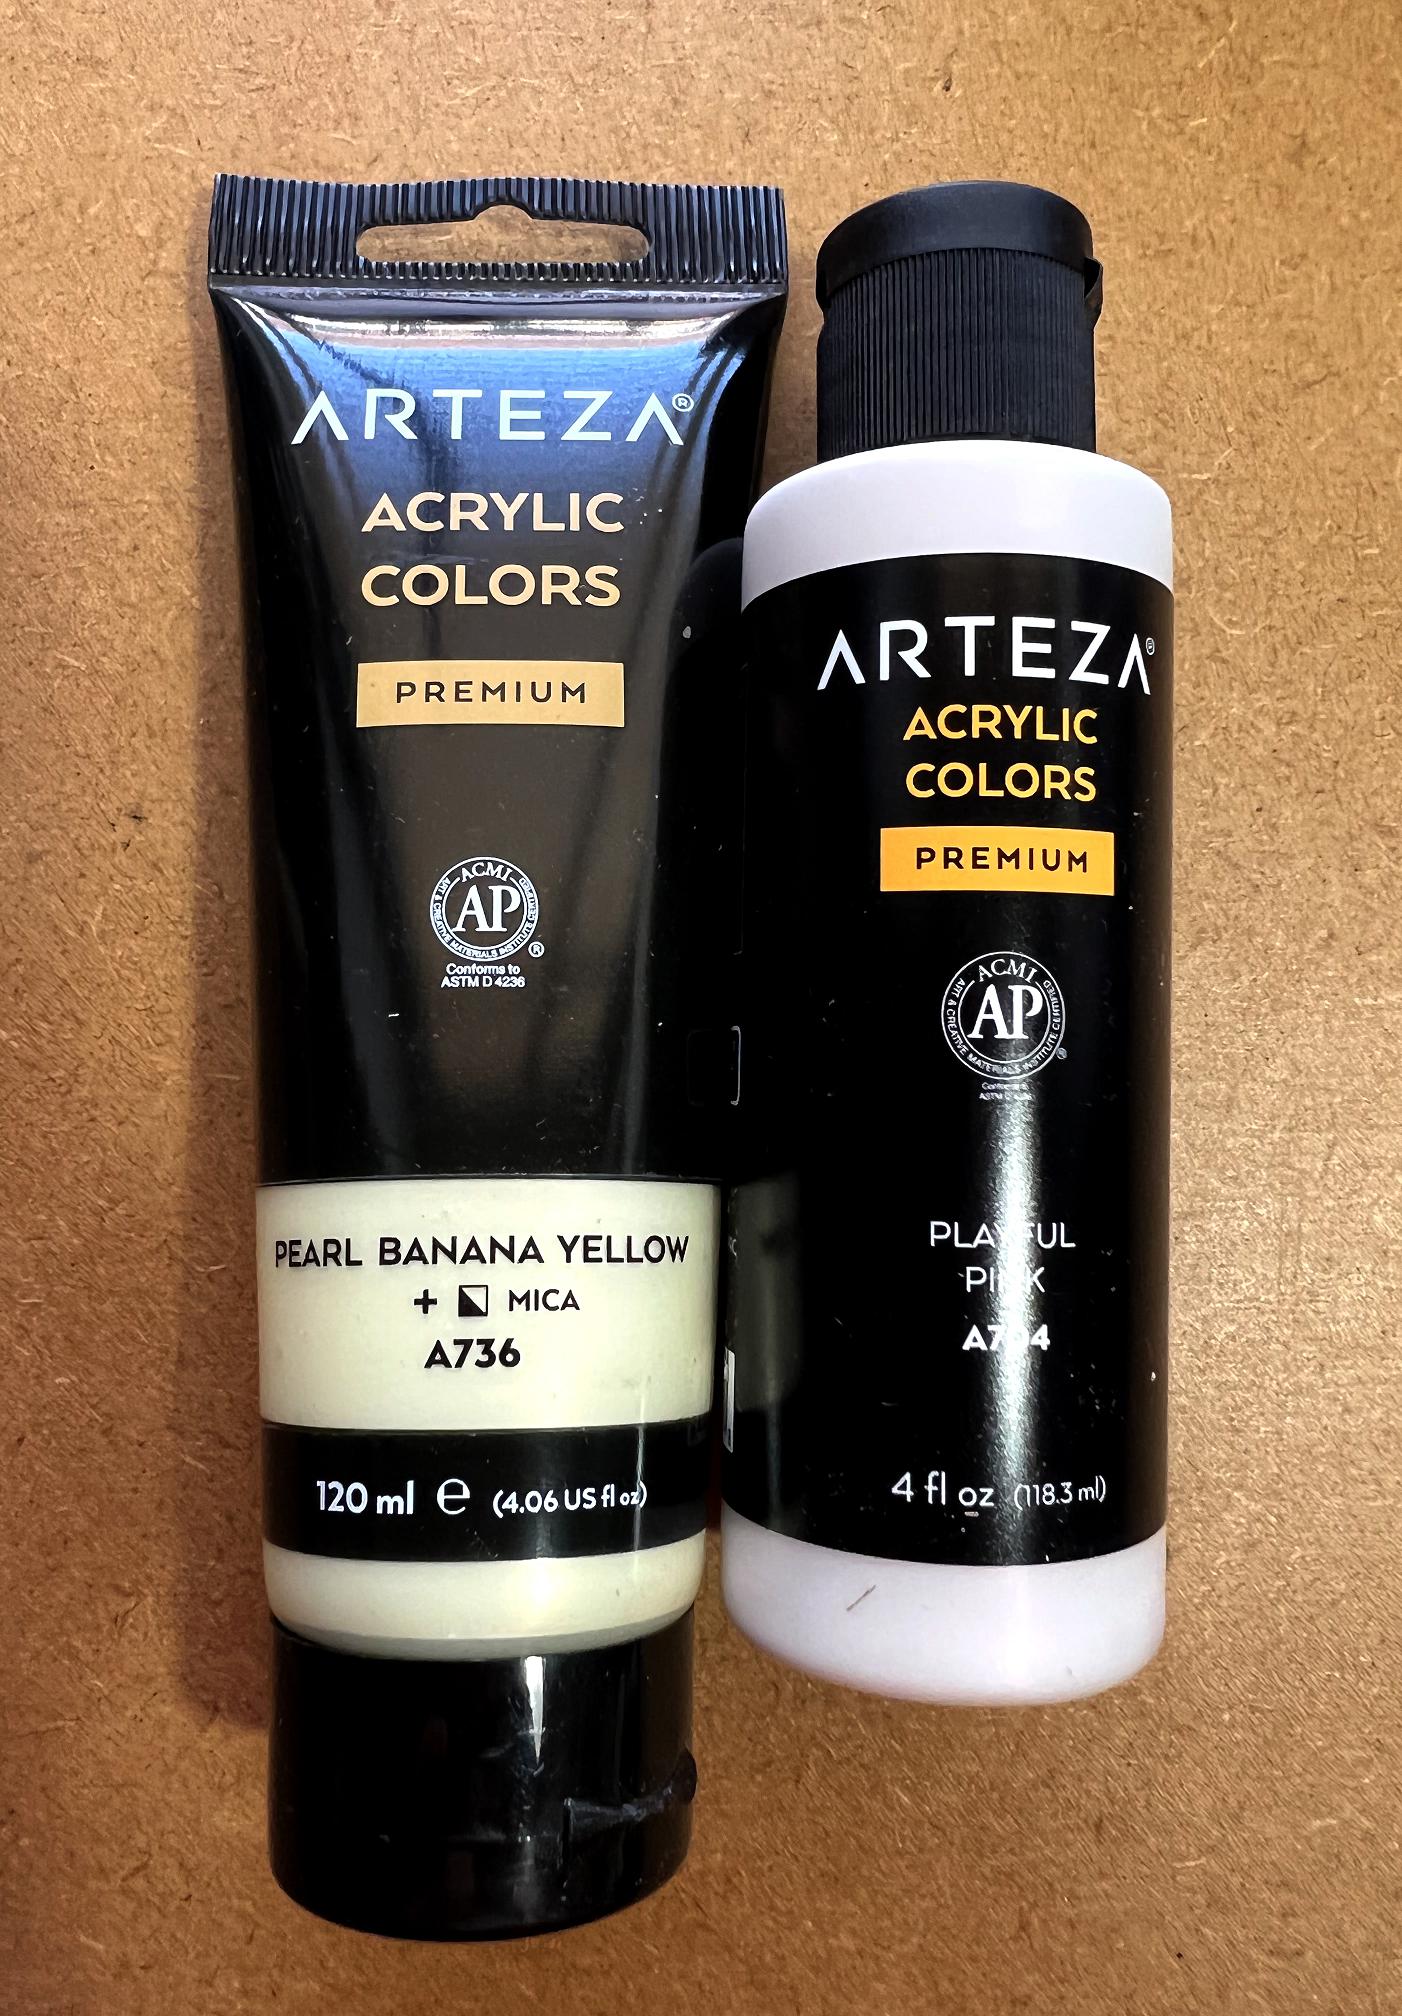
Arteza iridescents
I absolutely love these paints, which I acquired a few weeks ago. My favourites are Fancy Black, which has a brownish tinge and a definite metallic sheen, together with Pearl Banana Yellow, seen here with another favourite Arteza paint: Playful Pink (not used in this project).
When I first got these iridescents, I made quite a few gel prints in what Robyn McClendon calls the “Mark Roscoe style” – half-and half, or banded horizontal sections of block colour, blended across the join.
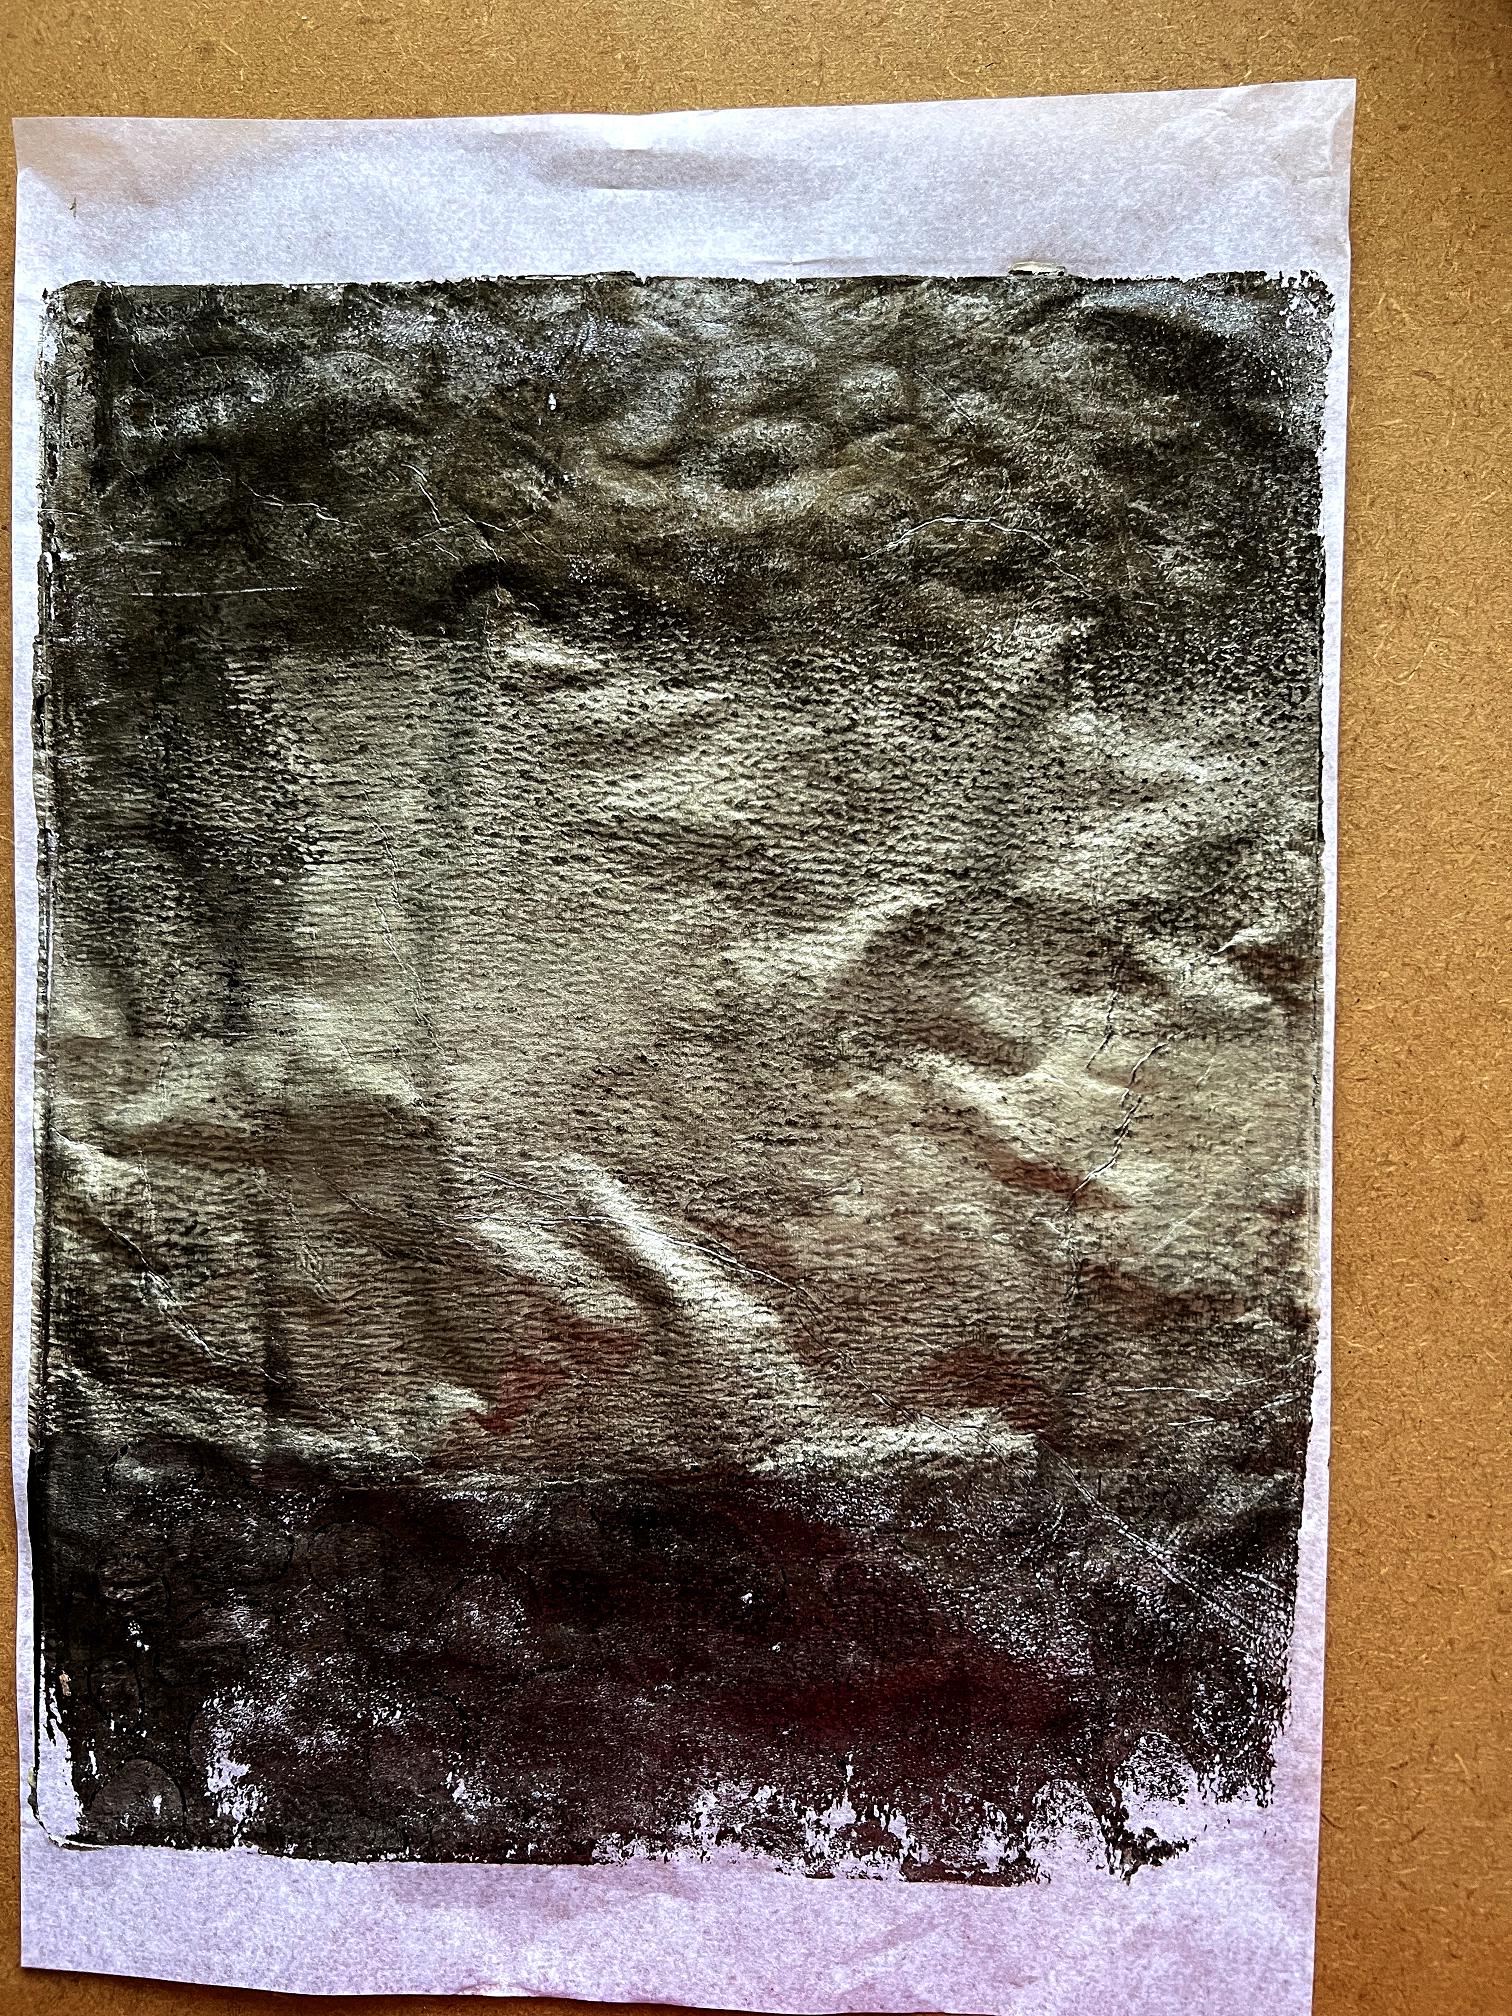
The first print I made using these paints was on tissue paper and I ripped it. I nearly threw it away but then realised that it had some useabe parts on it, and today I pulled it out and used it. I love the ghost printed stencilled ovals across the centre.
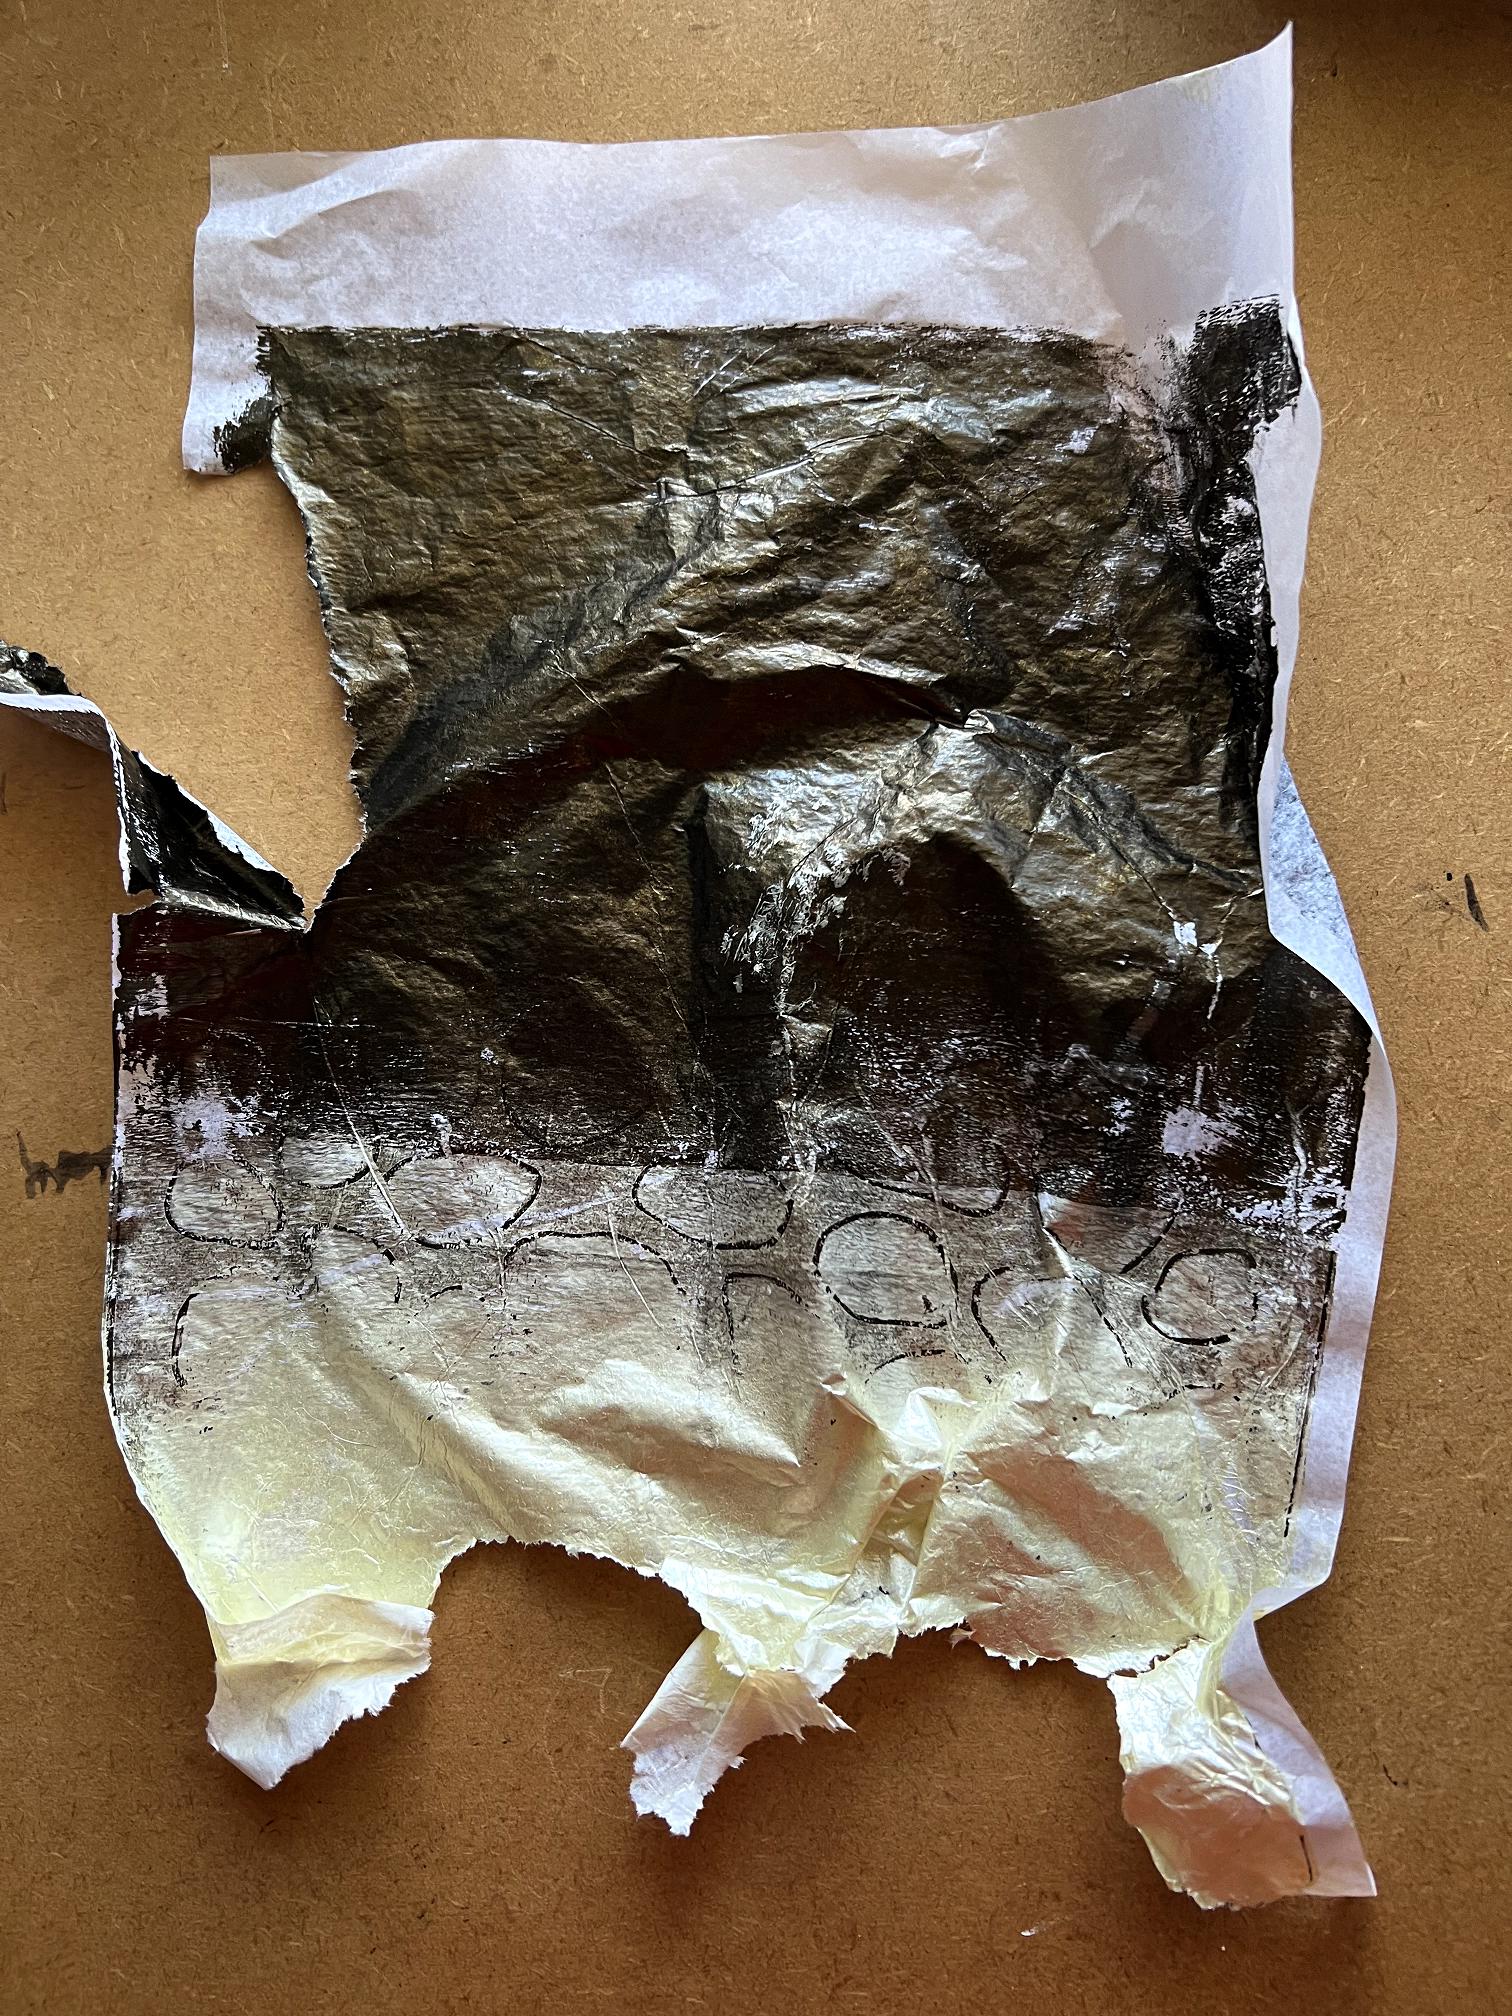
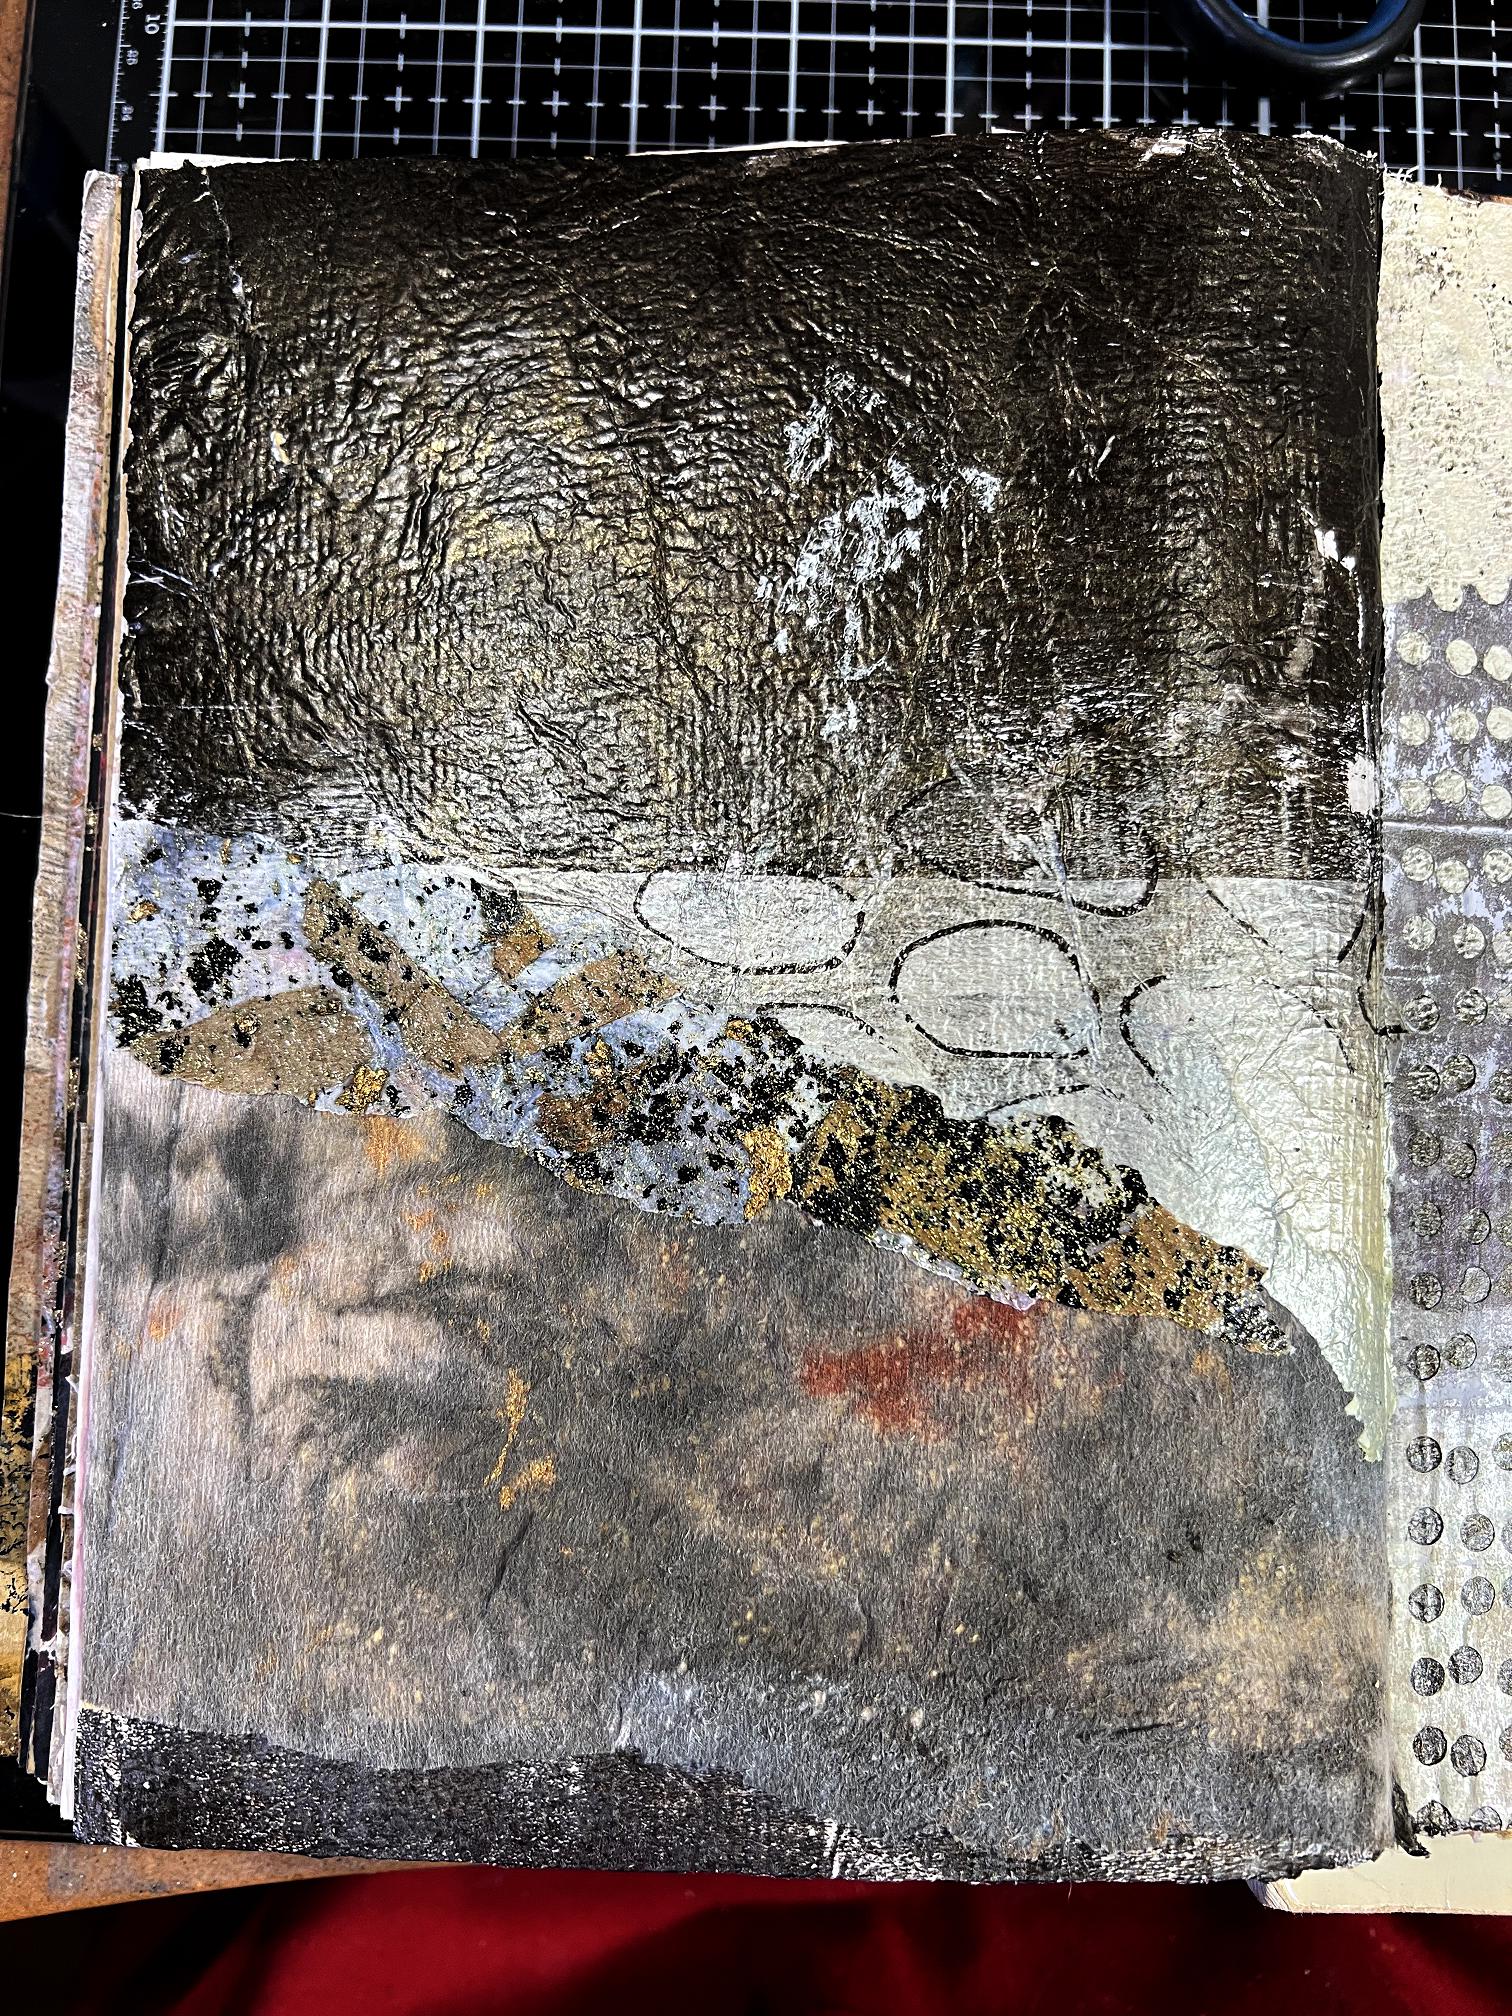
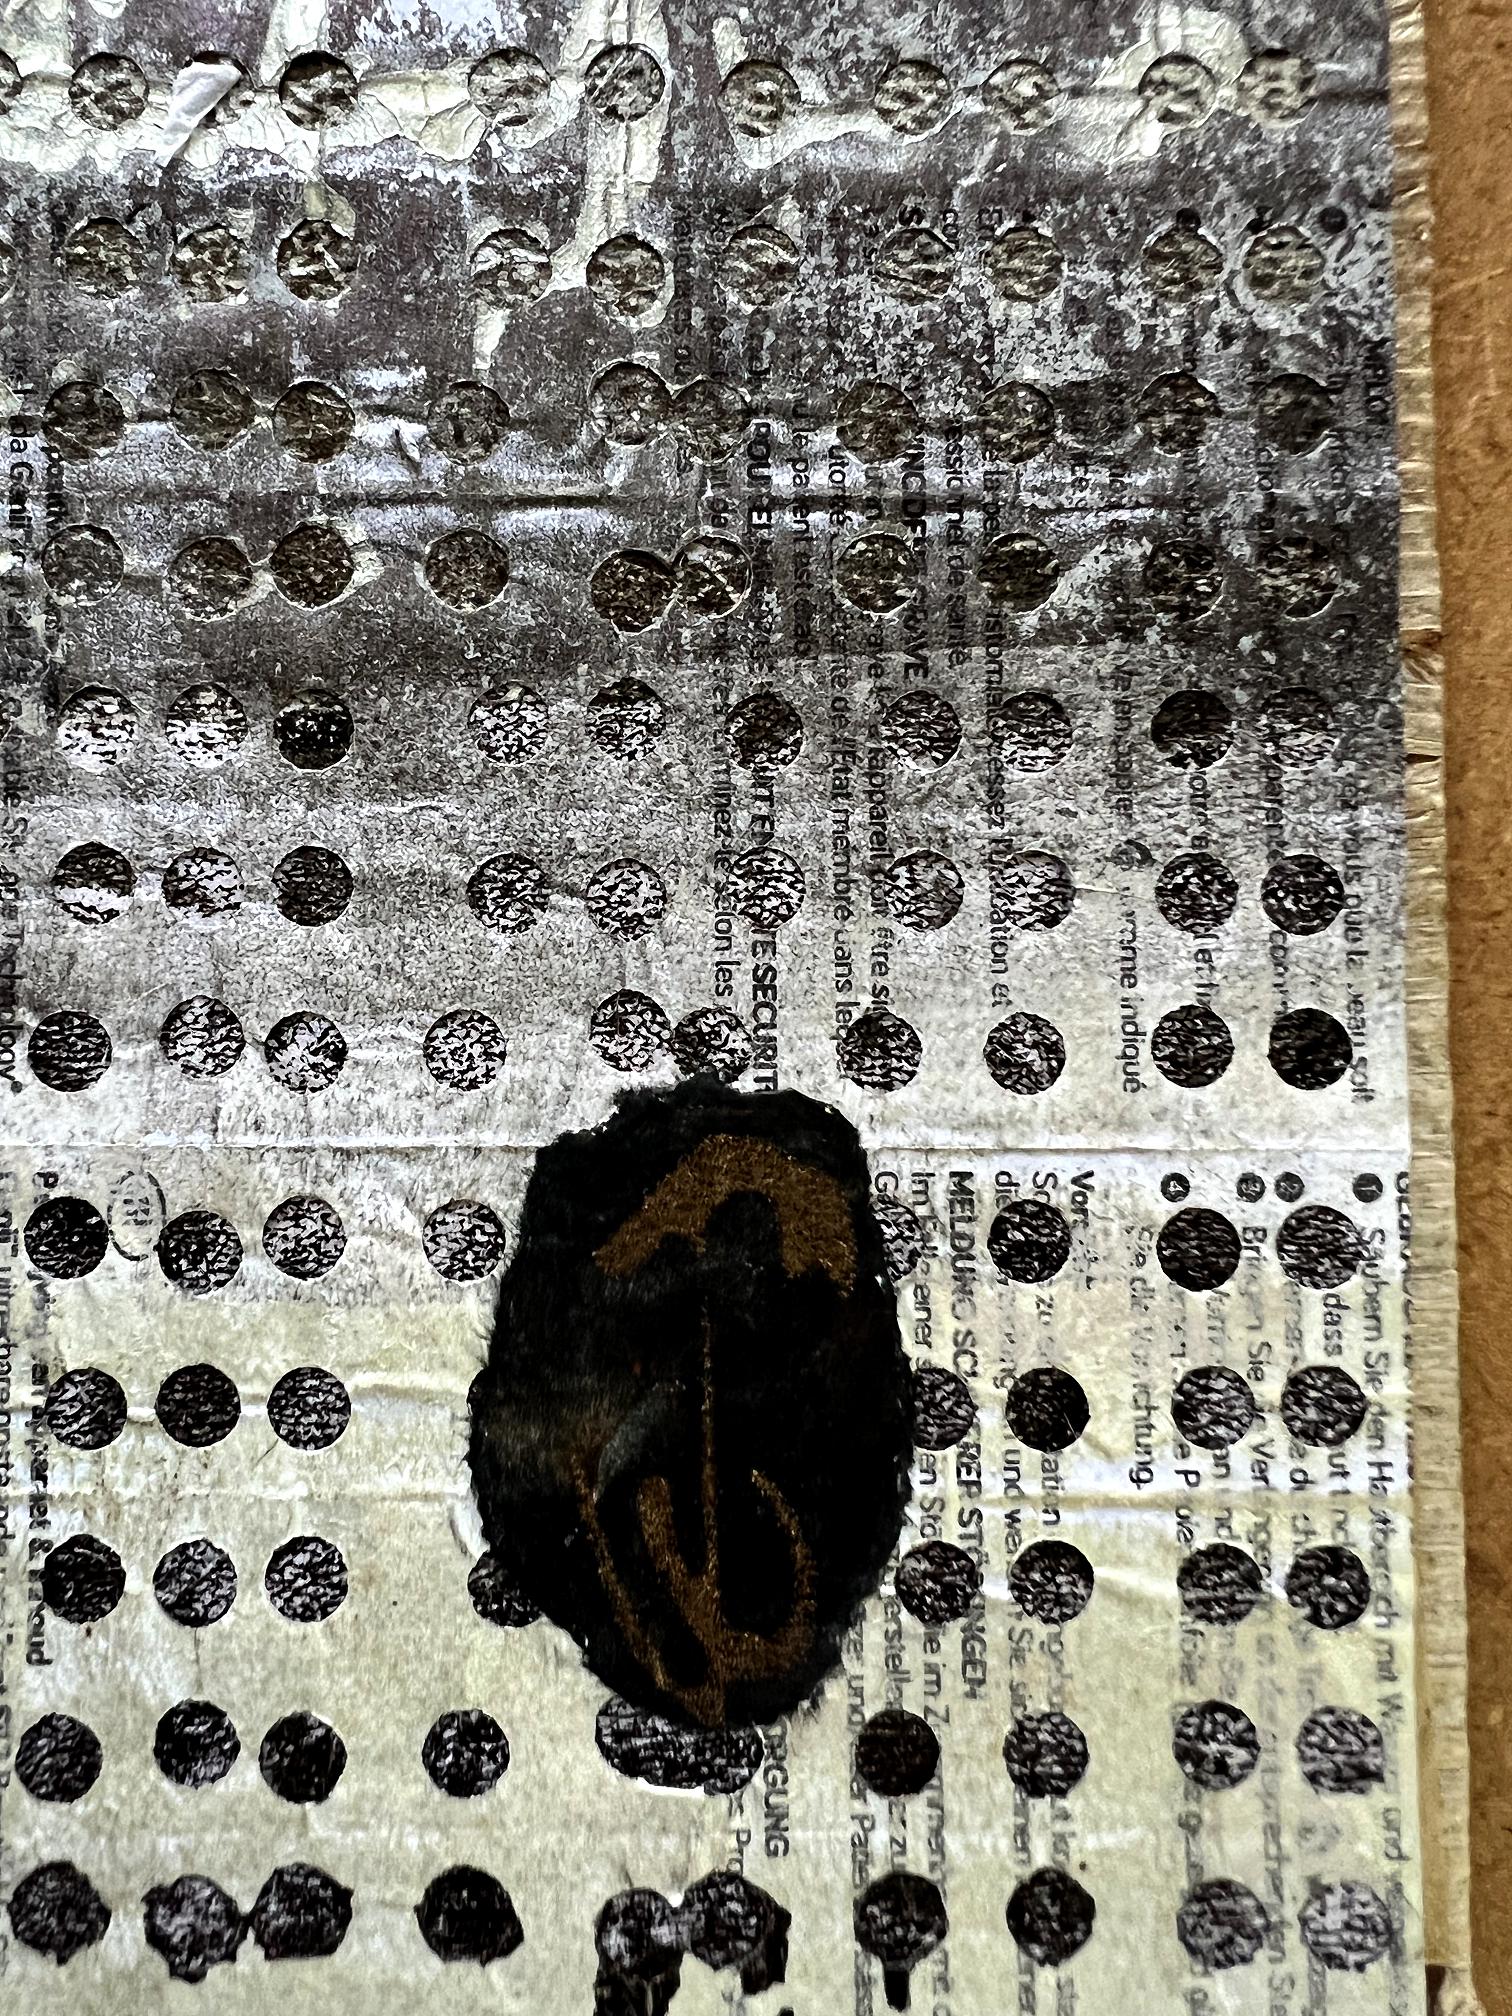
For the right-hand page background, I chose one of the “Mark Roscoe” style prints – I can’t find a photo of this – and overlaid it with one of my pierced medication leaflets. This one was also printed in the ombre style and I lined it up so that the light parts were over the dark parts of the gel print underneath.
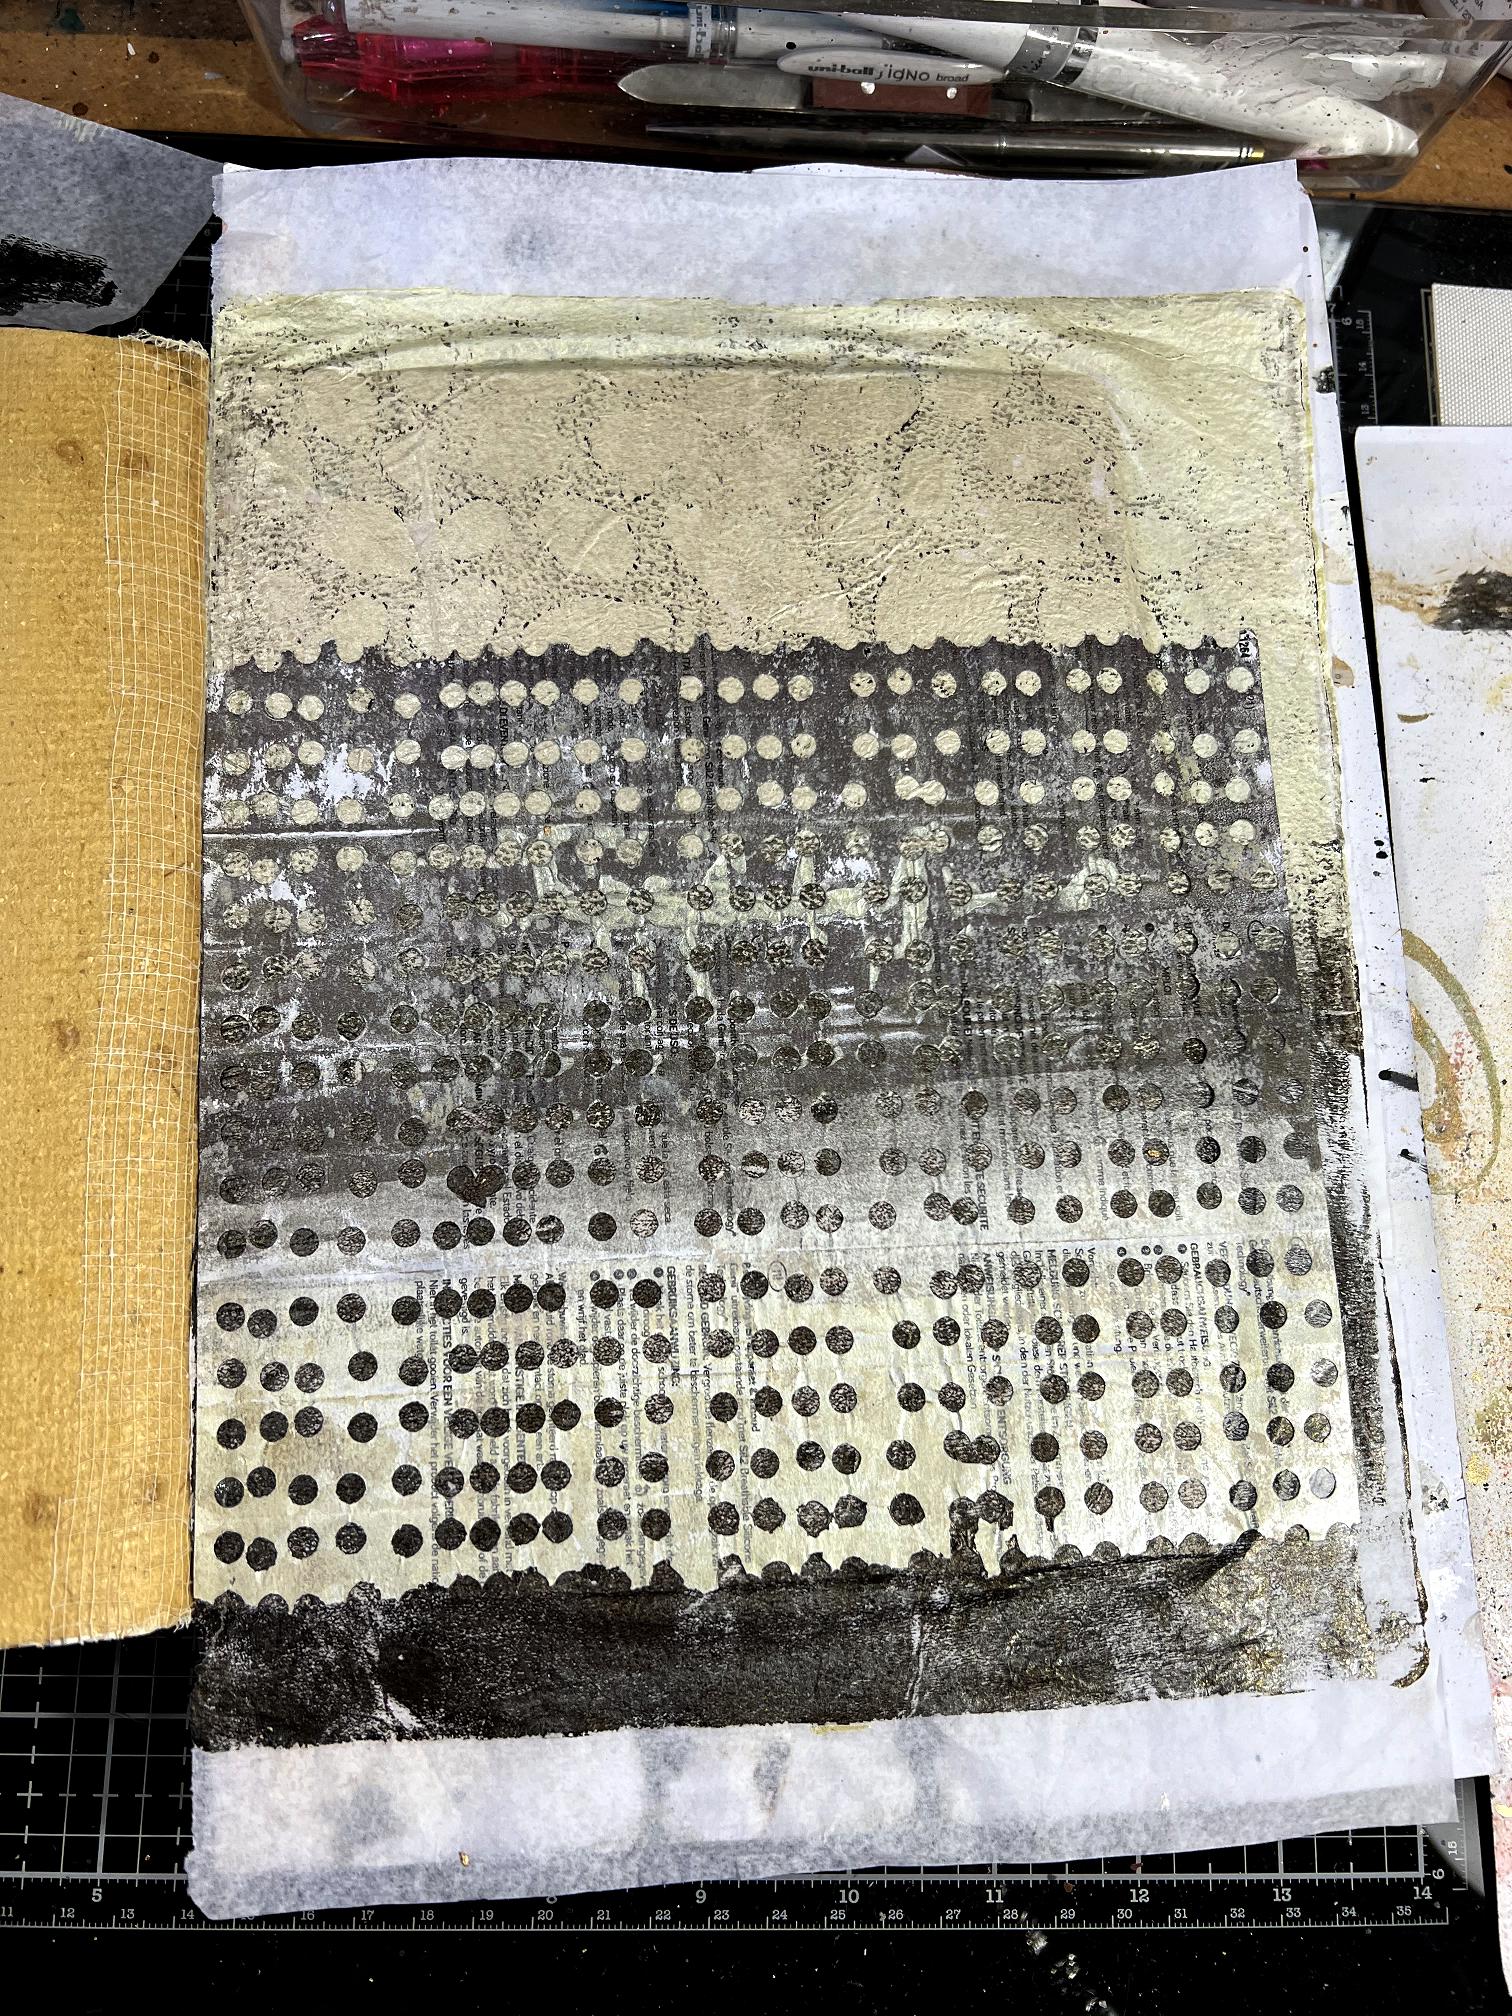
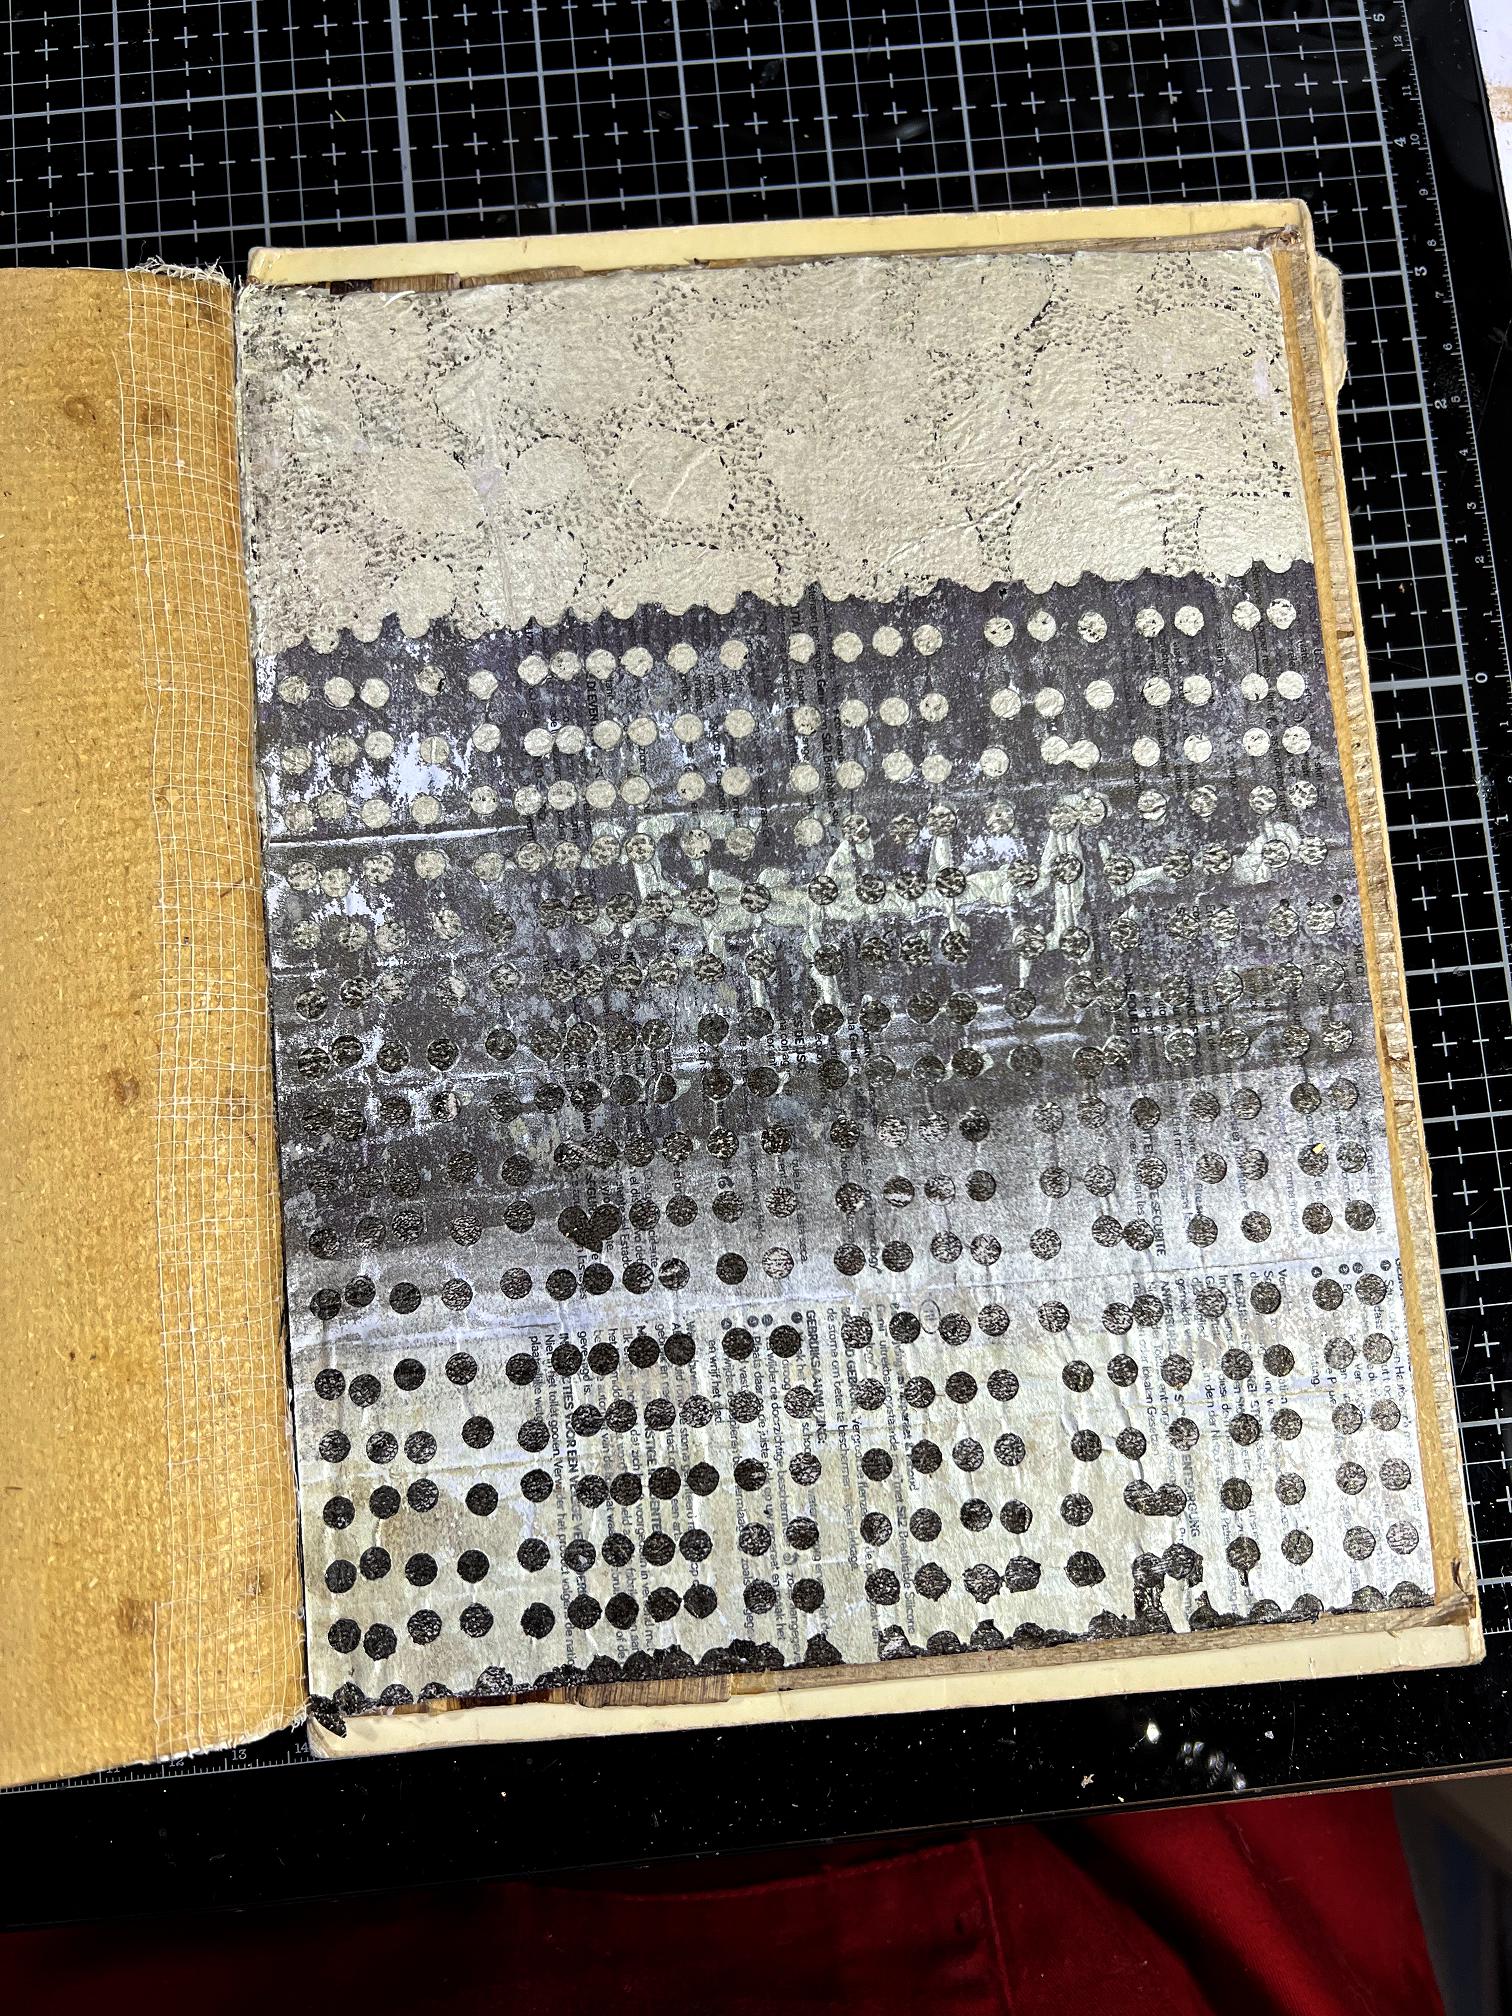
Here is the background after I had trimmed off the excess.
Moving over to the left-hand page, I chose a used baby wipe with some interesting colour on it, and trimmed it. I added a scrap along the bottom to cover a gap.
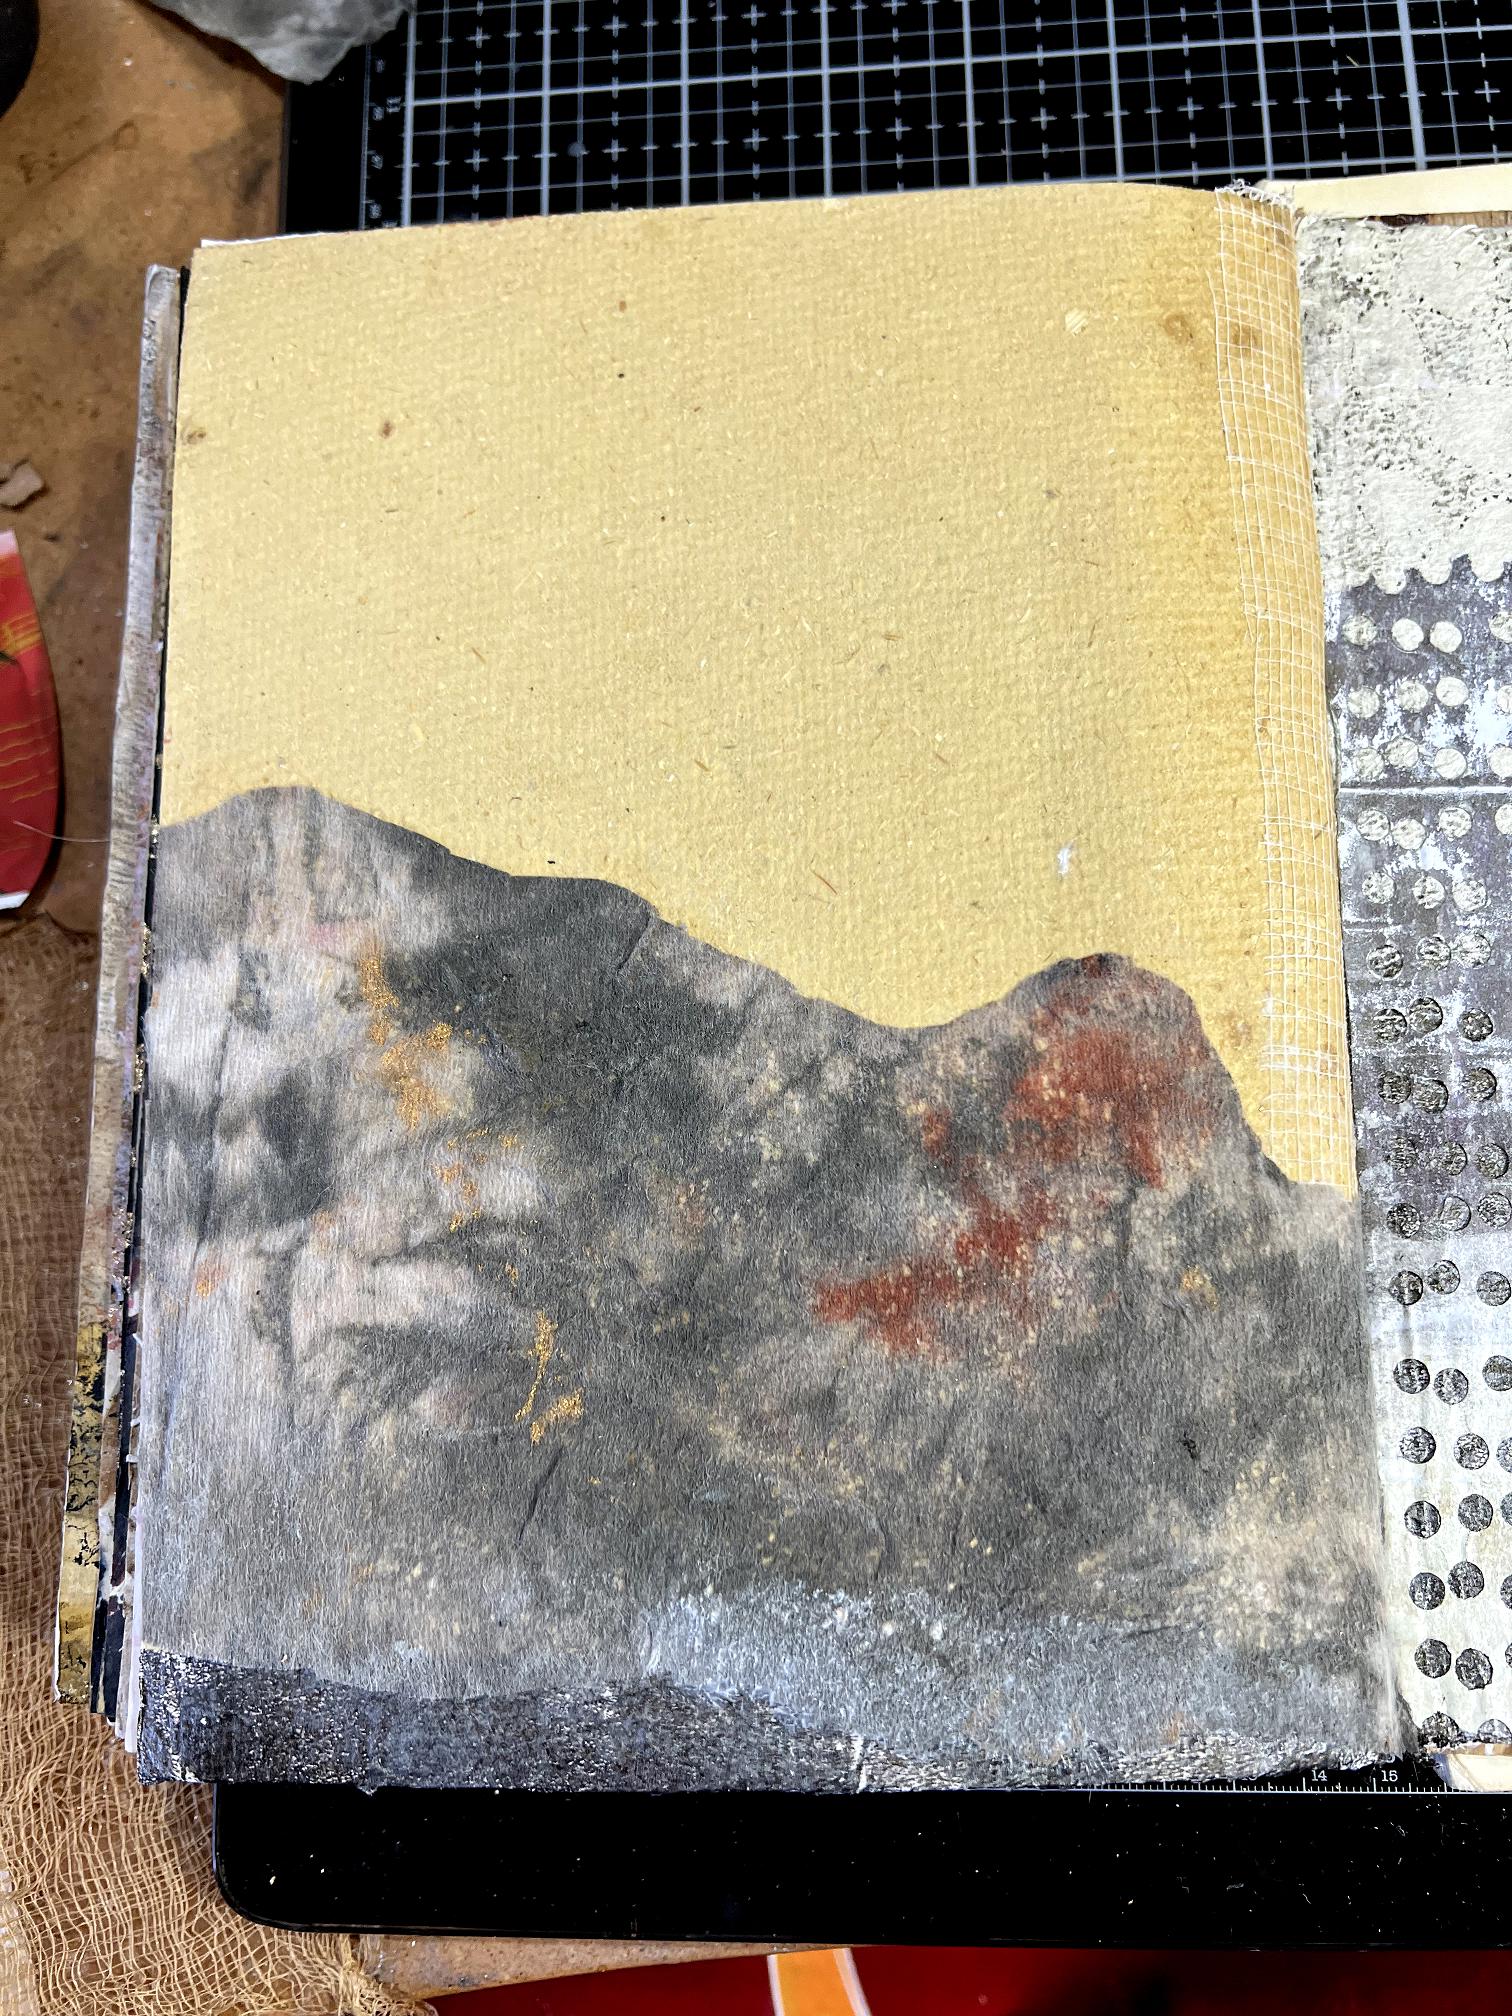
I added what I could rescue of the torn gel print for the top half of the page background.

I wasn’t entirely happy with the junction between the two papers so I dug out the piece I had made with scrap paper and gilding flakes on an acrylic polymer:
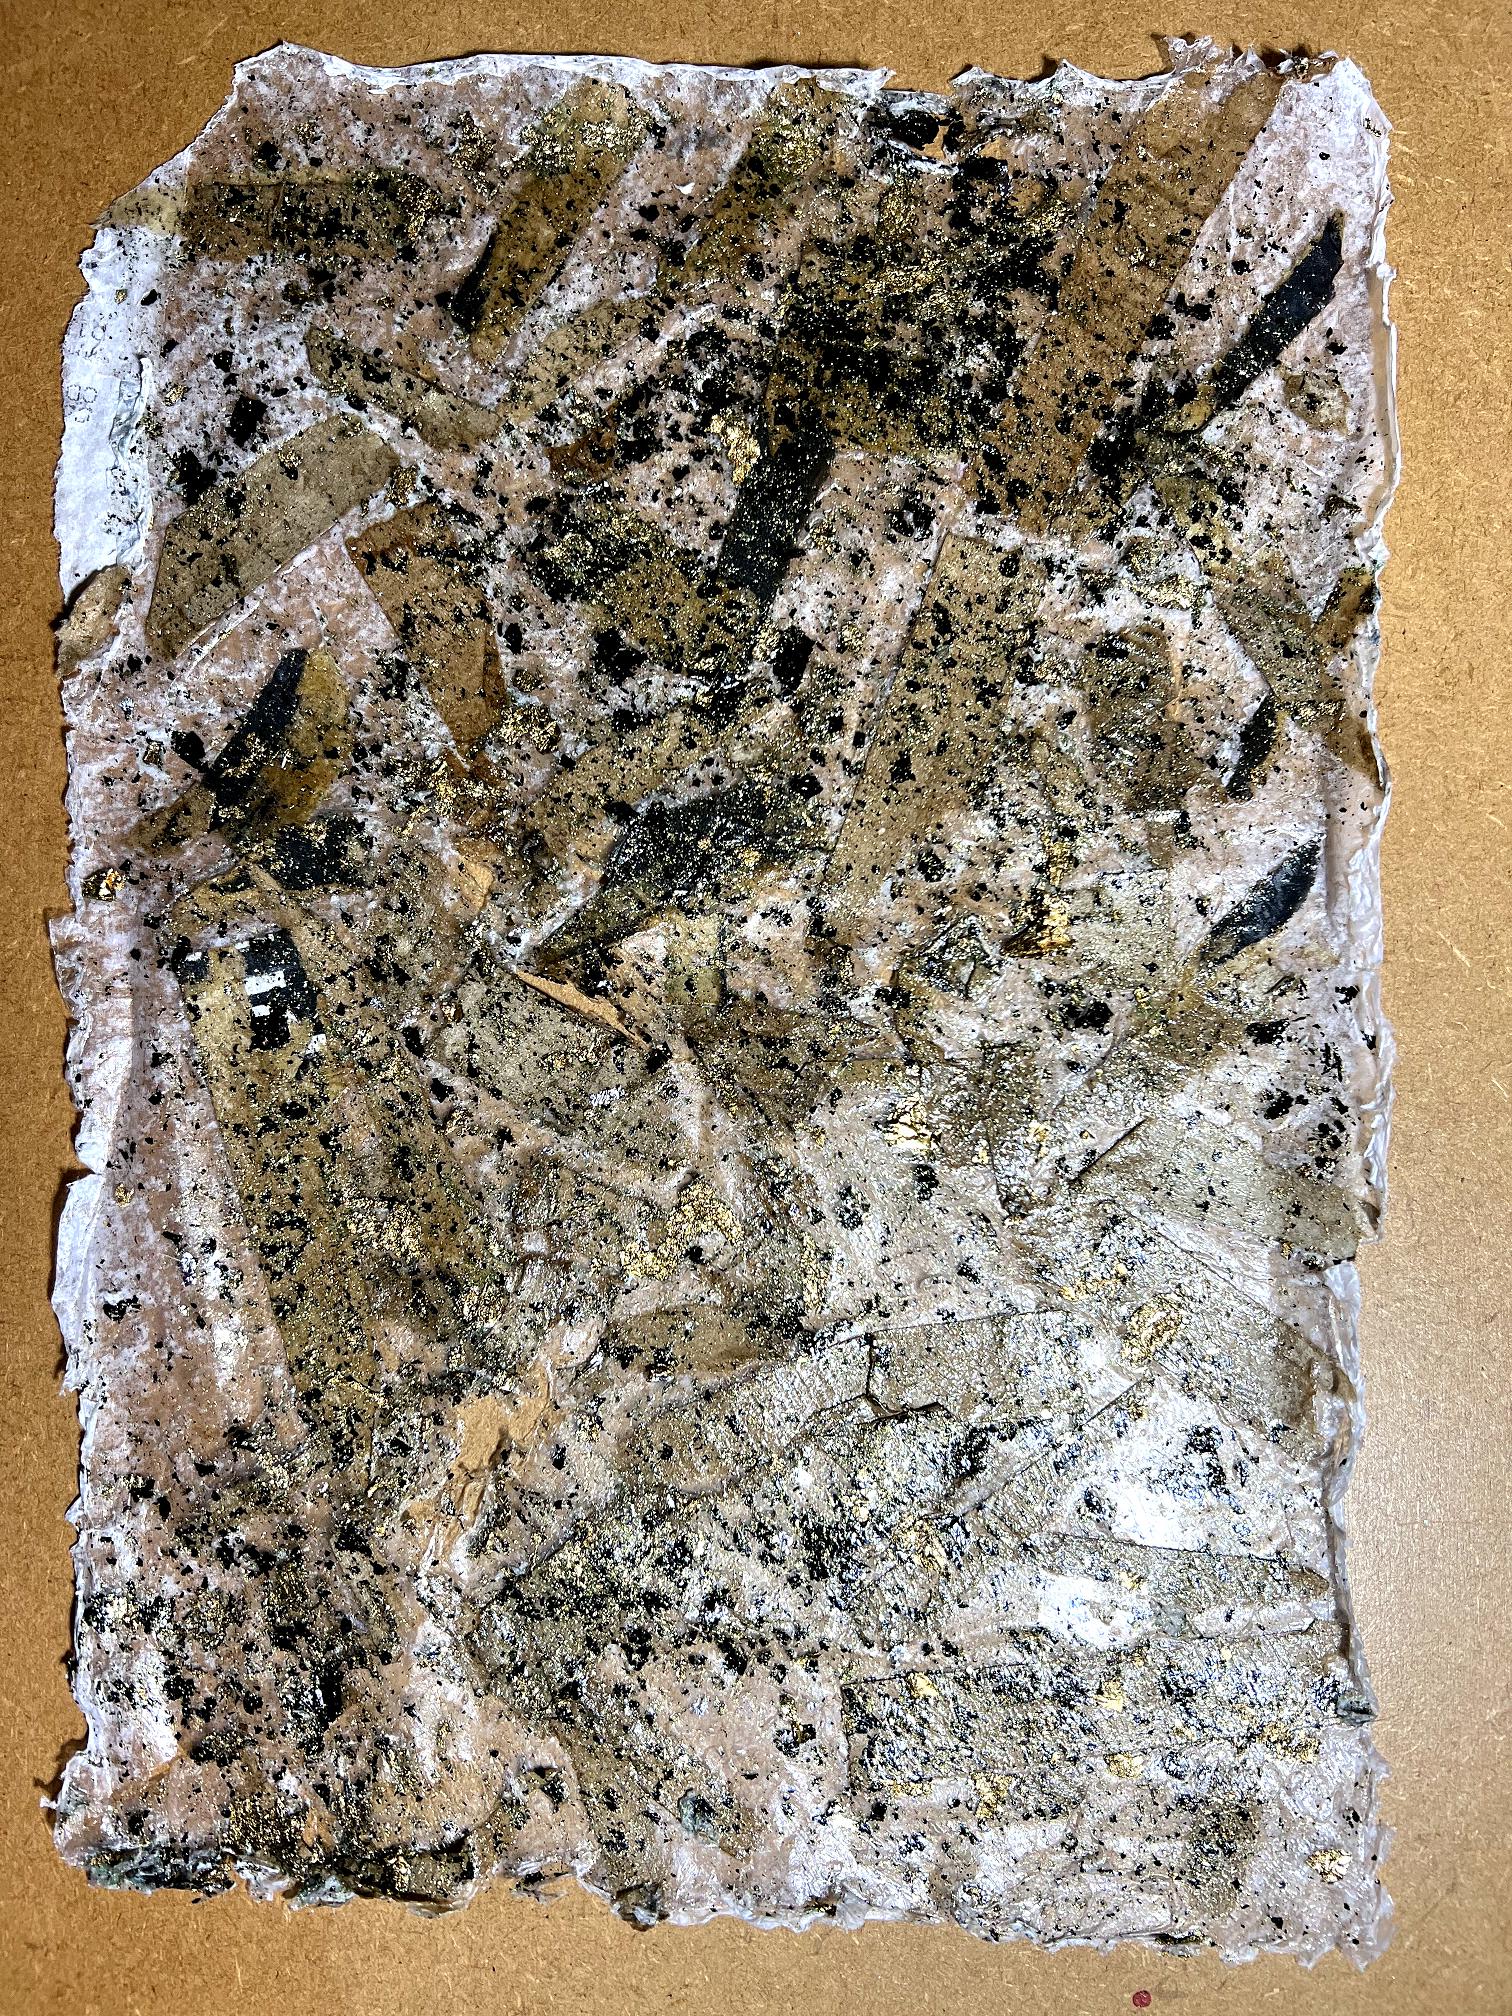
I ripped off a small section of this and applied it over the join.
Time to add the tigers. I tried to use the wet brush method of tearing the paper in a conrolled fashion, but being shiny paper, this didn’t really work. I managed to tear away all the straight edges with the exception of the ones which would abut the edge of the page. I painted the torn edge with Golden Iridescent Brone Fine, which is simply The Best gold metallic paint I have ever come across – there is so much pigment that it looks like gold leaf!
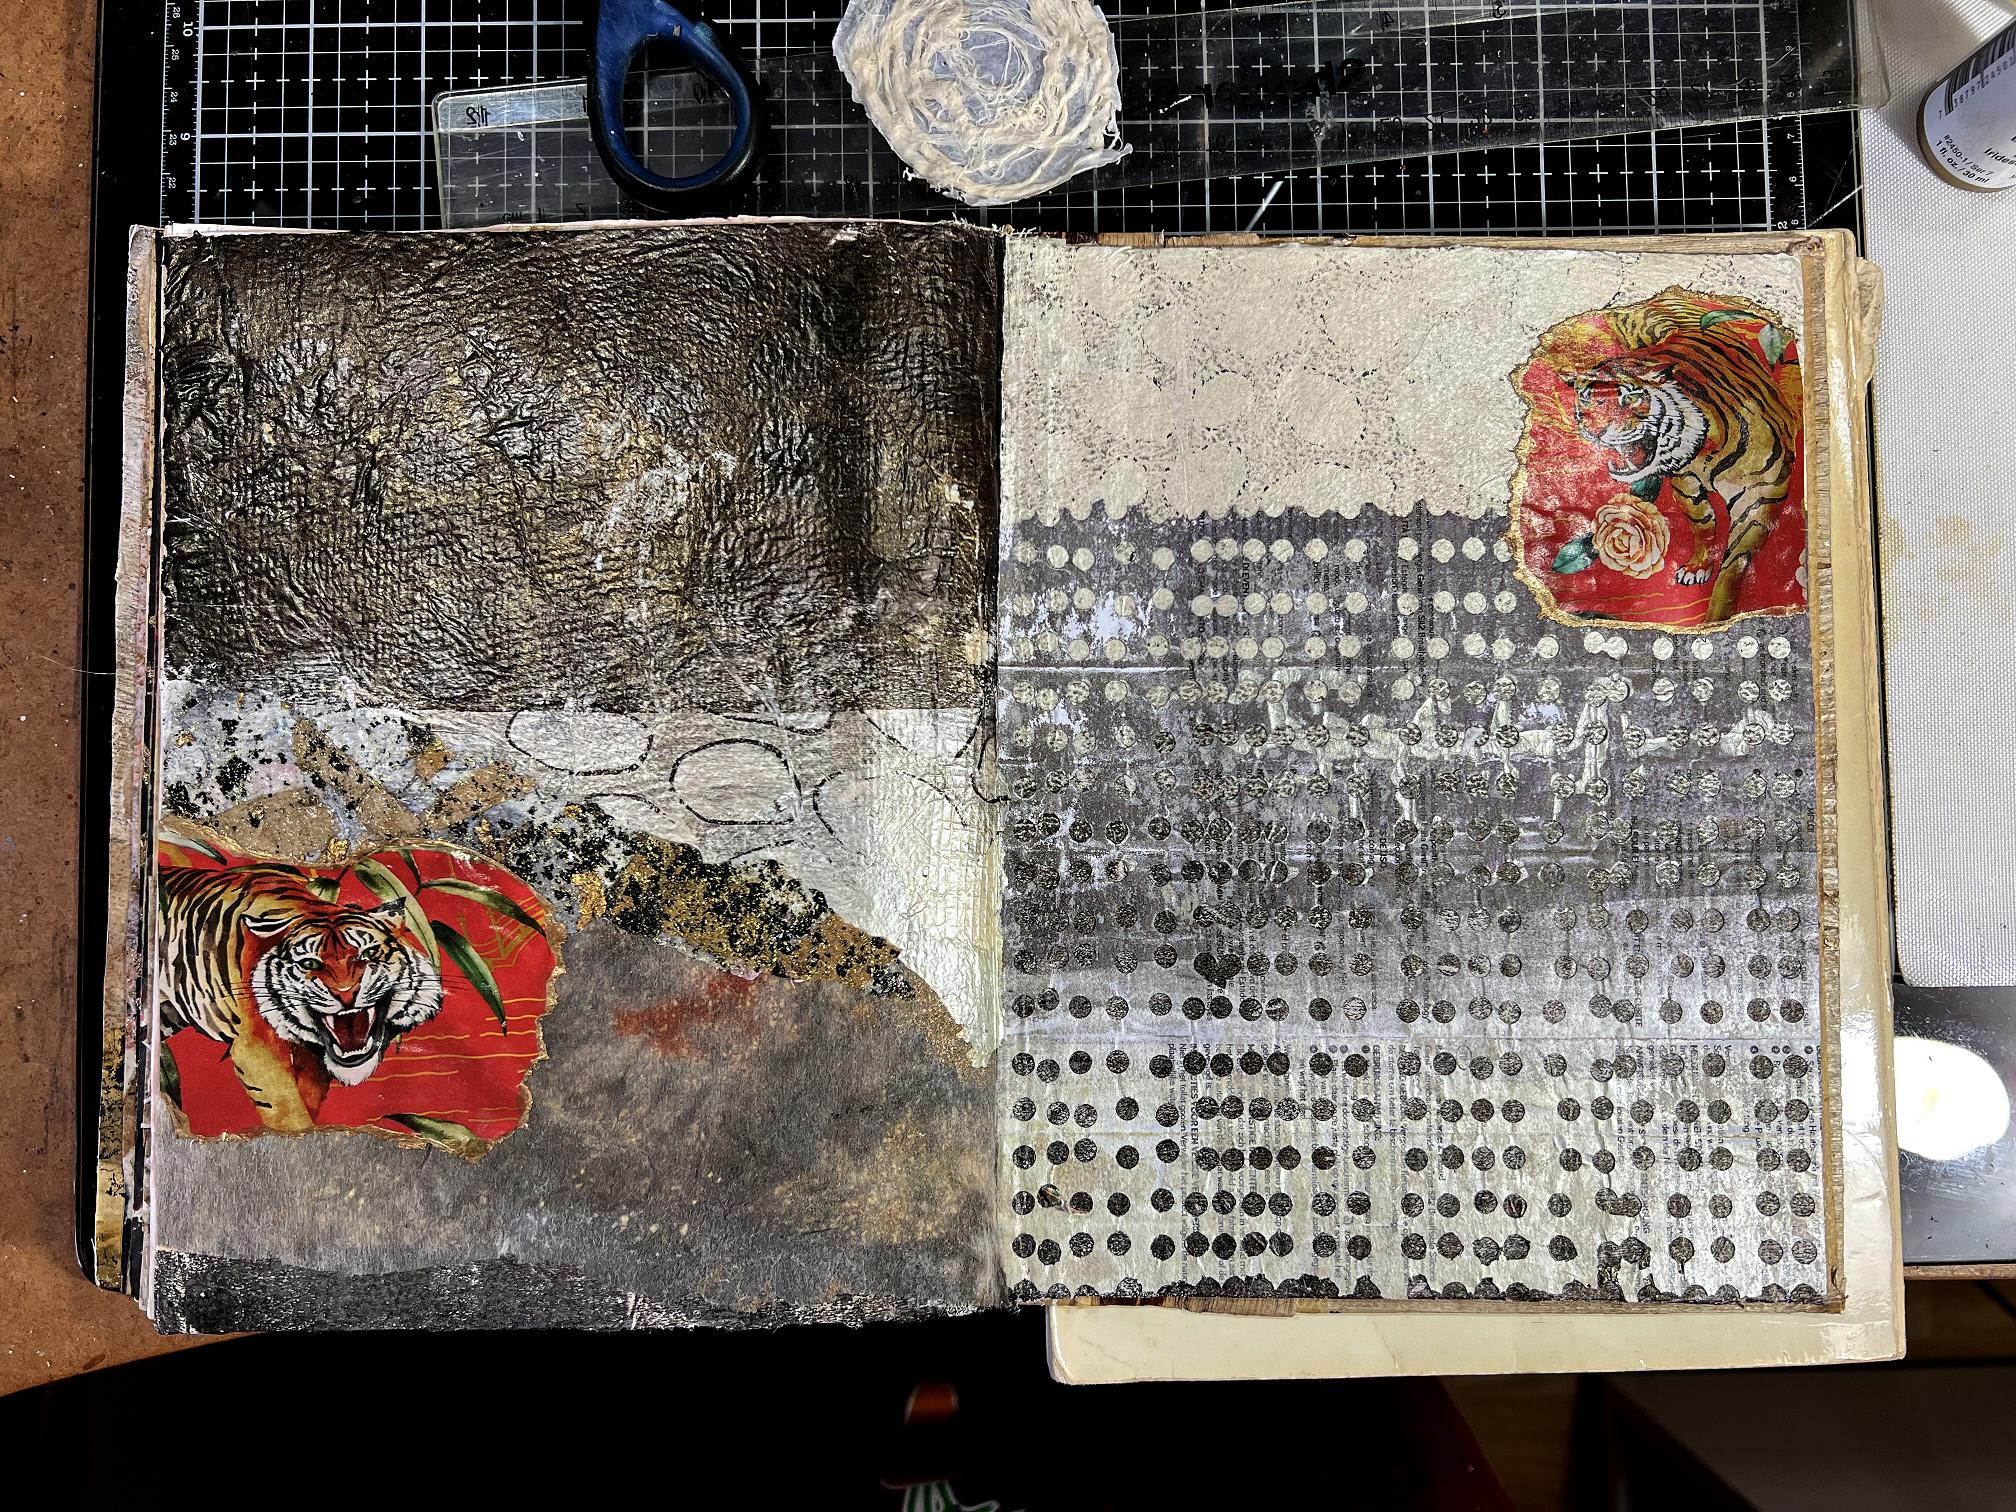
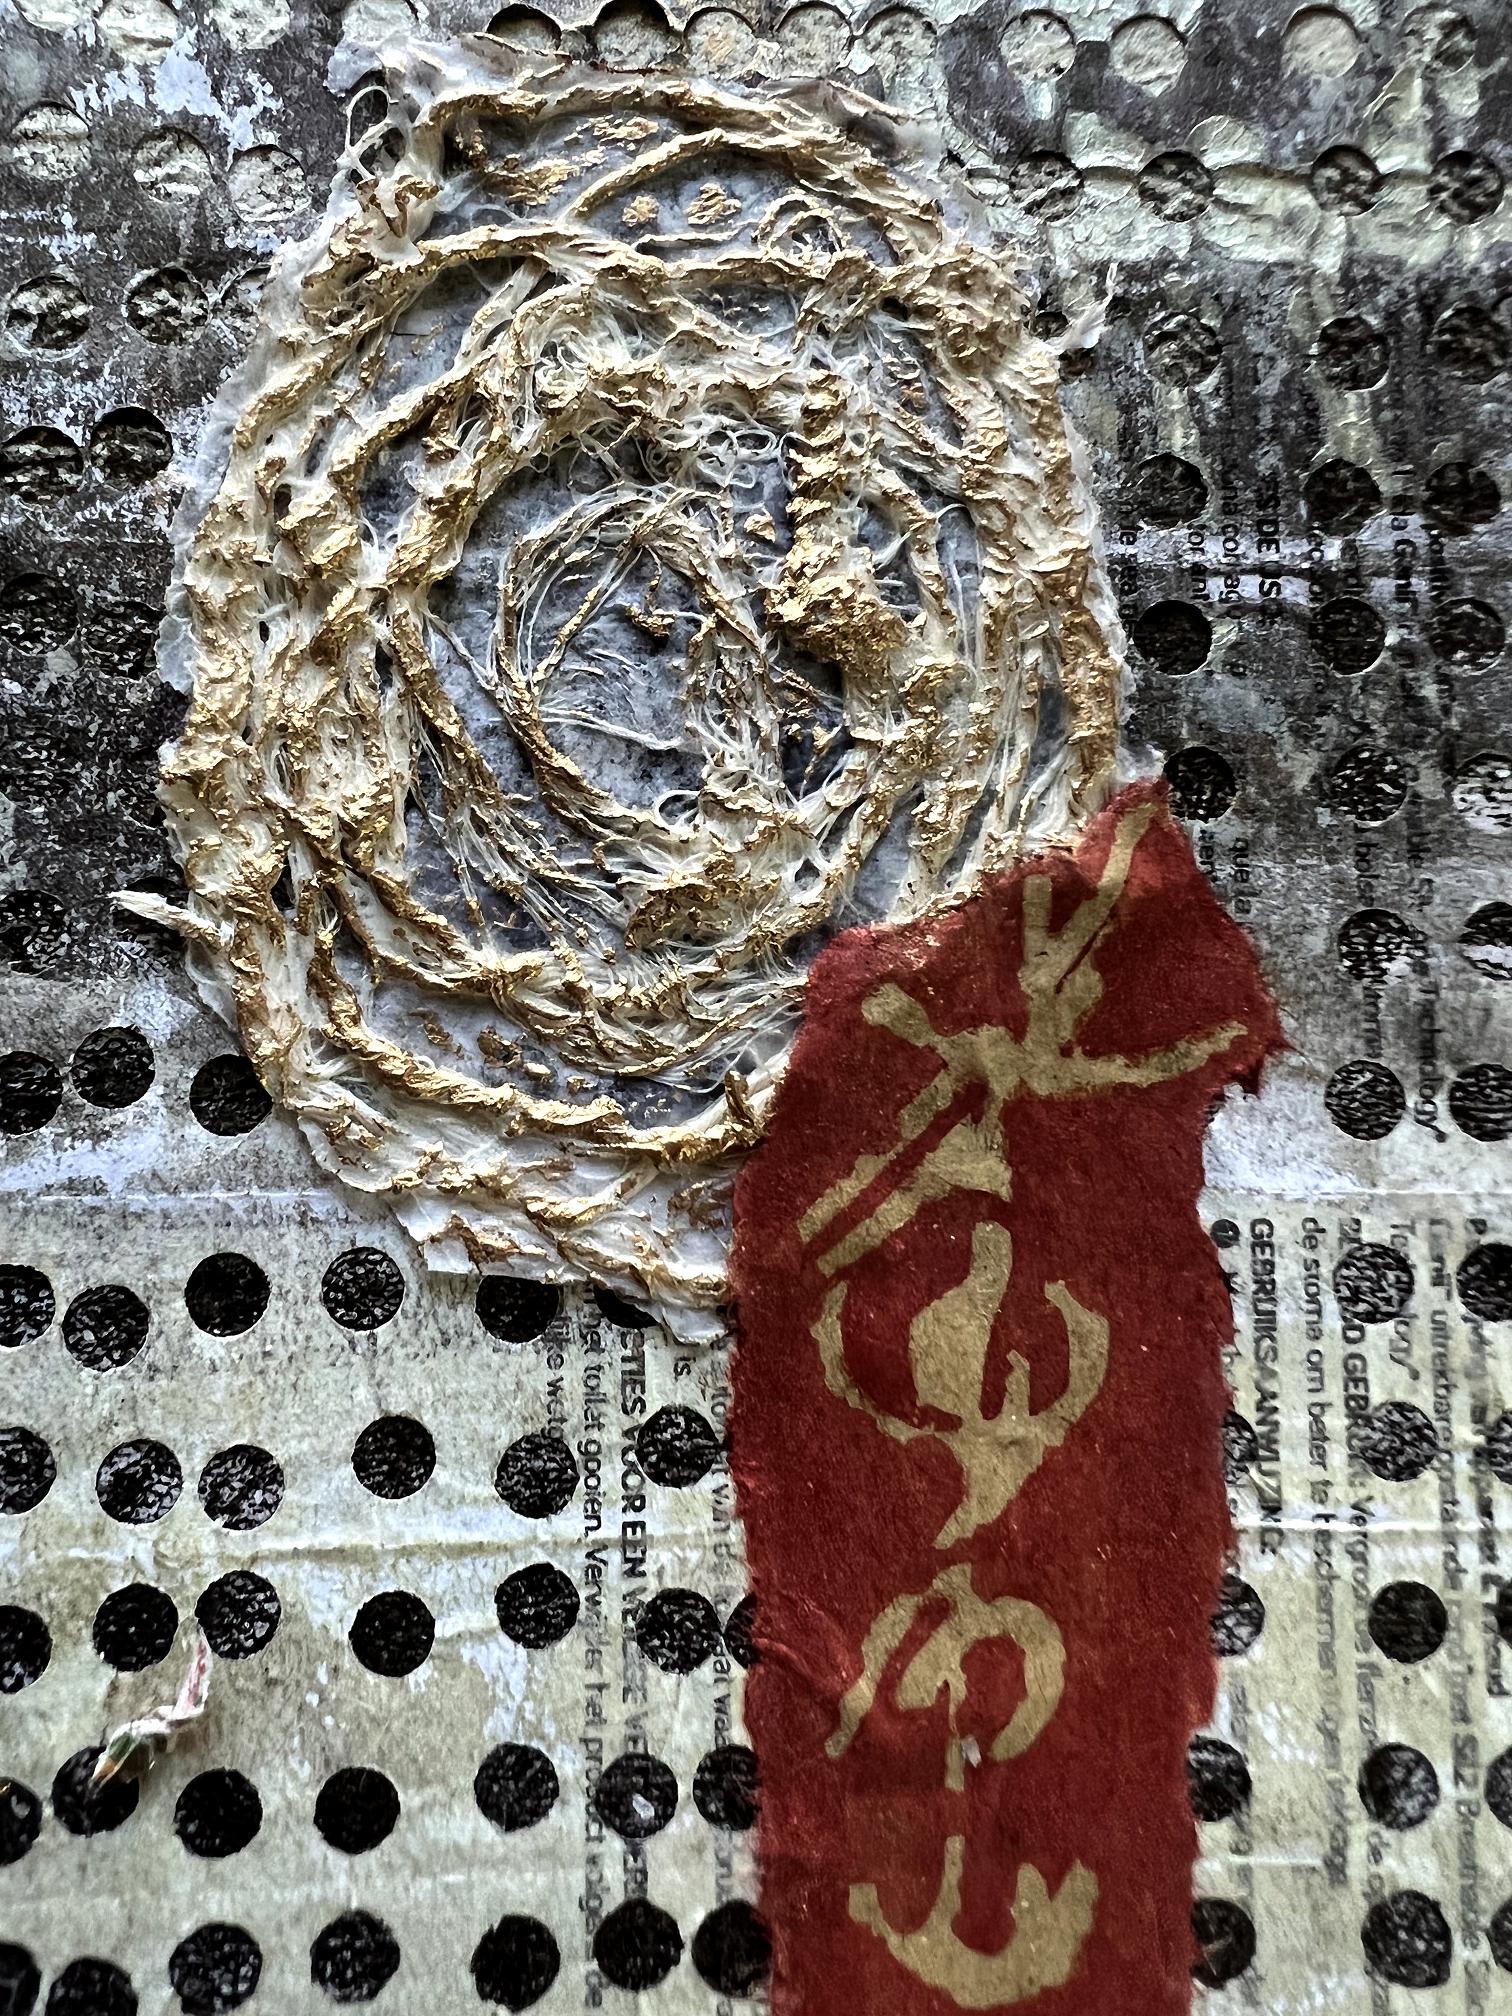
I pulled out some Oriental Script pieces, the first being on a strip of hand-made paper, and also one of my DIY paper roses, made by laying down fibres pulled from grout cloth, onto tissue paper, stuck with acrylic polymer. When applied to a page, the tissue between the solid areas will virtually disappear and blend into the background. I also added a bit more of the paper scraps/polymer piece to the top of the right-hand page.
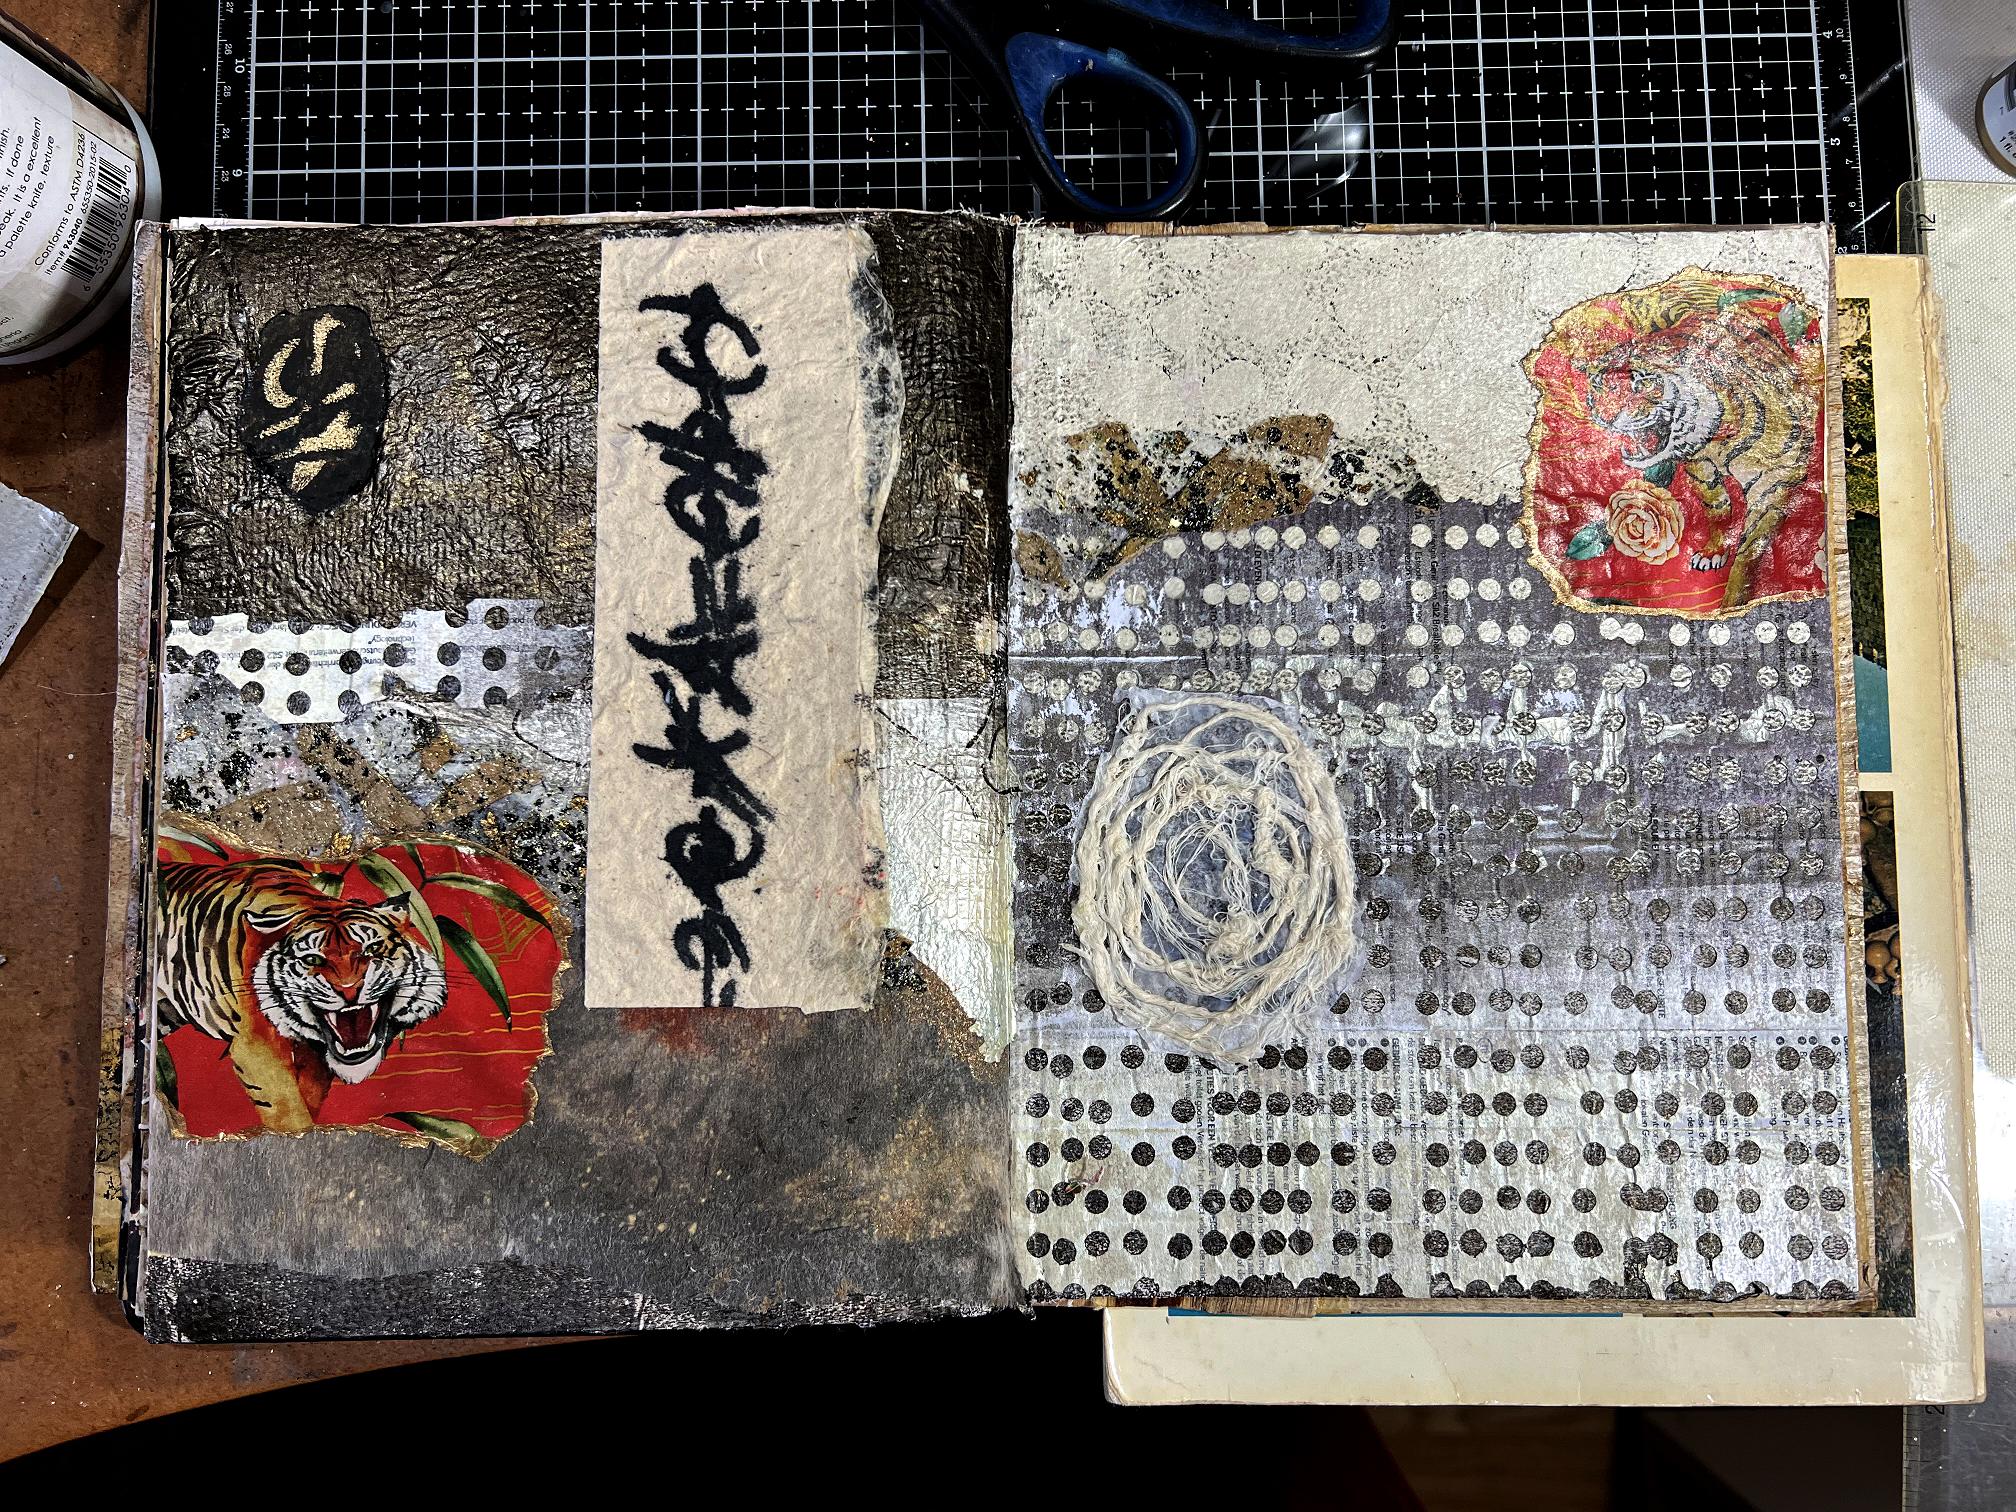
Adding further script elements, and applying gold gilding wax to the DIY rose.
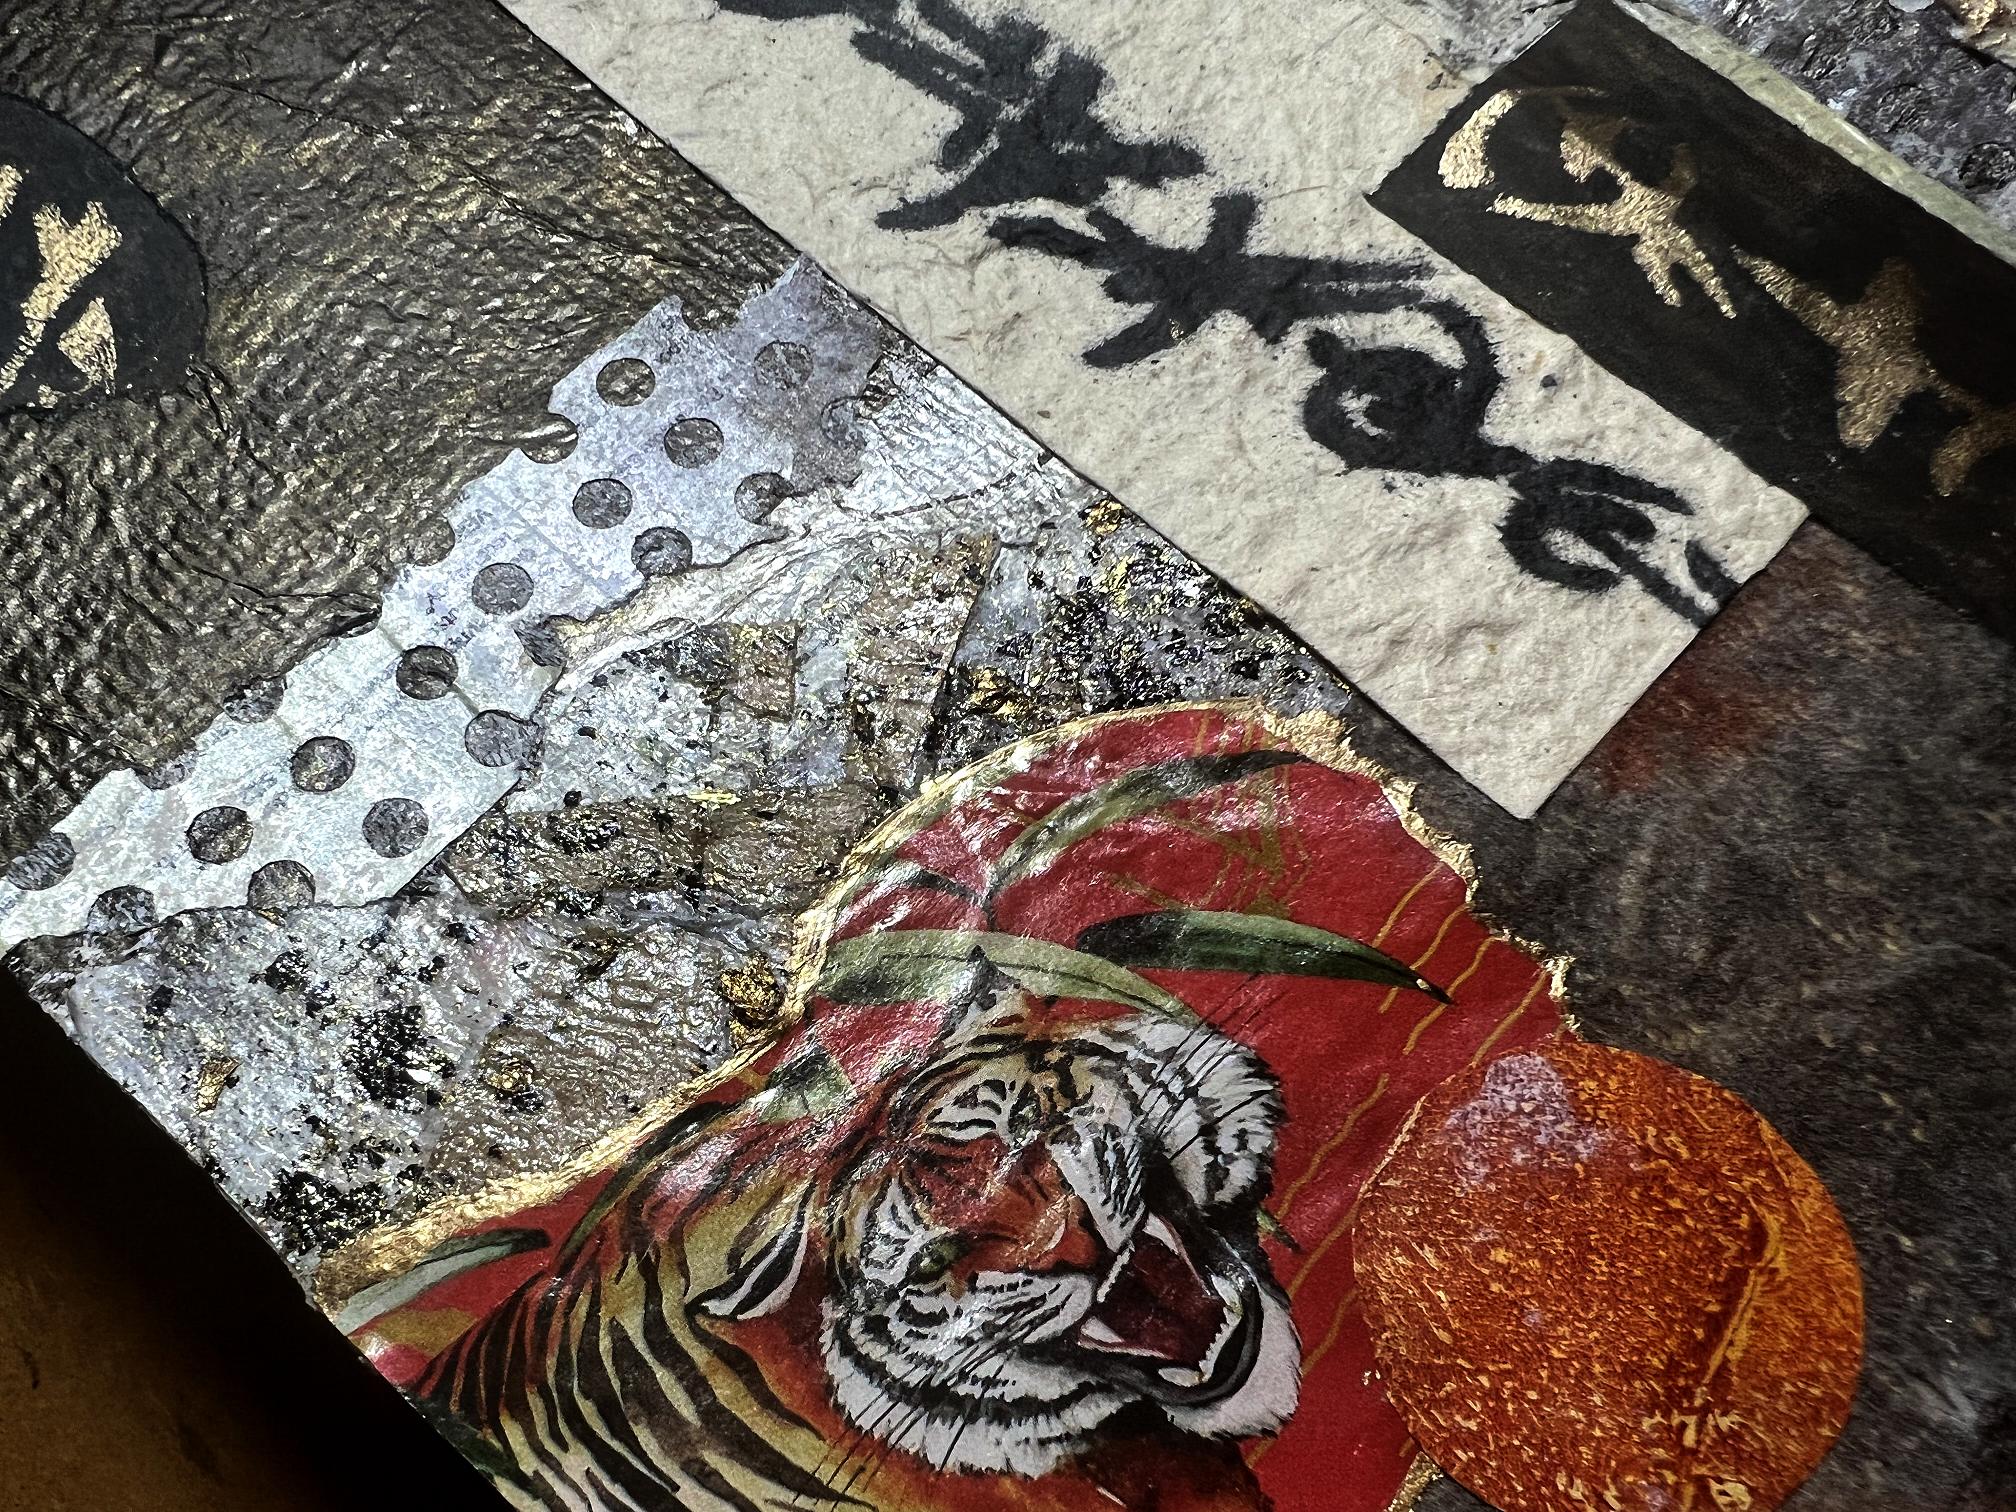
Here is a detail shot of the rose with its gilding wax, and the overlaid red and gold scripting strip.
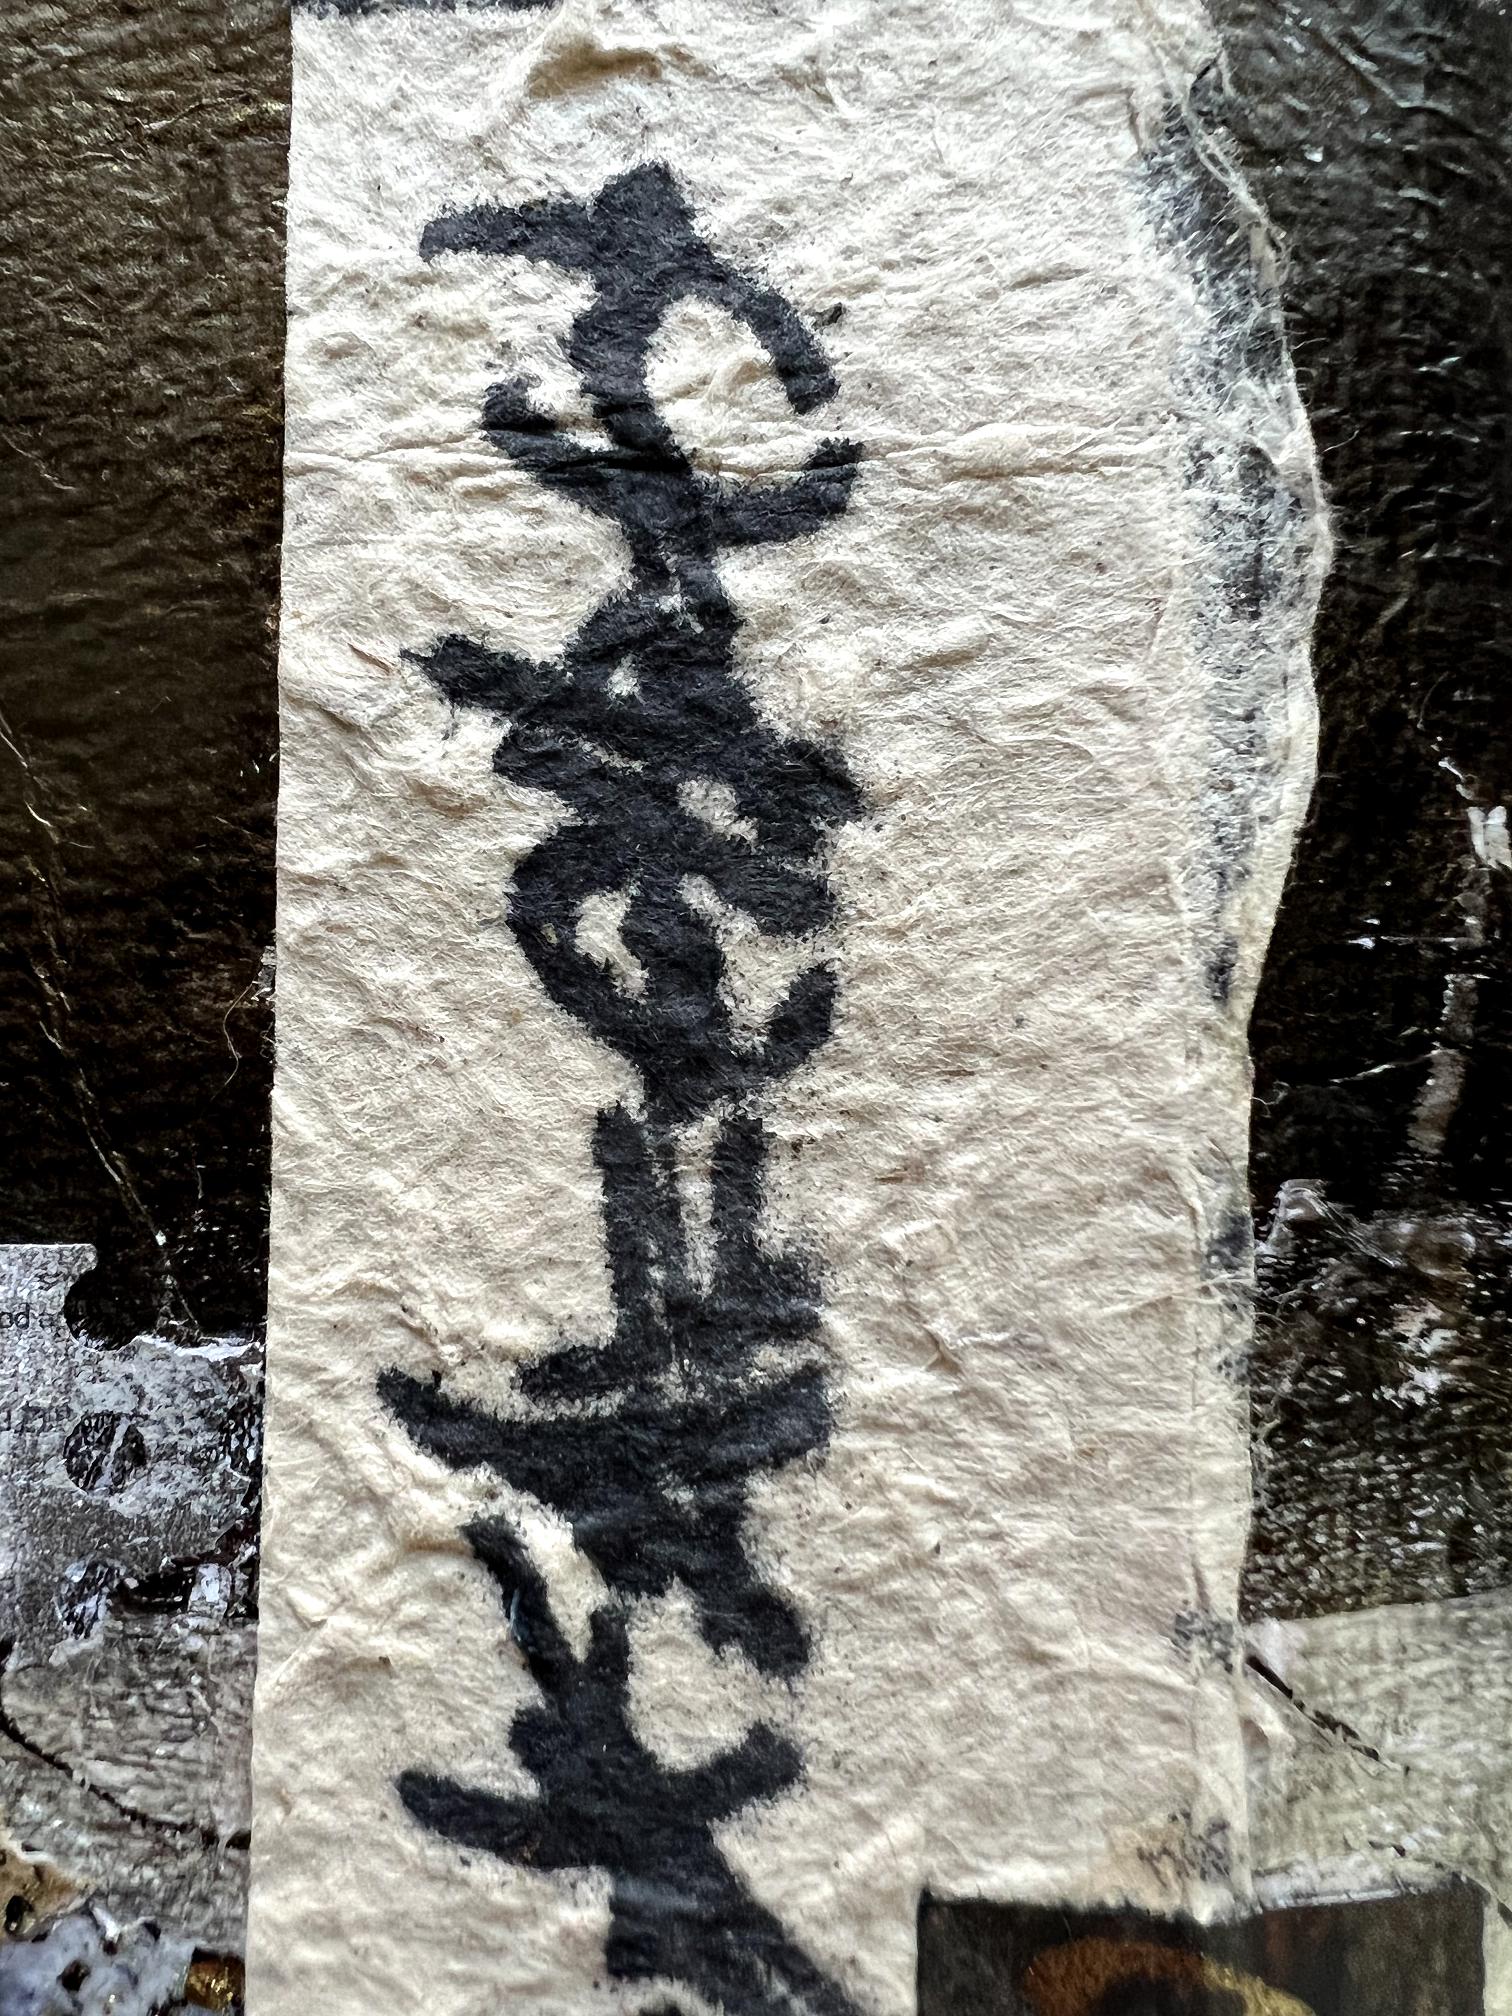
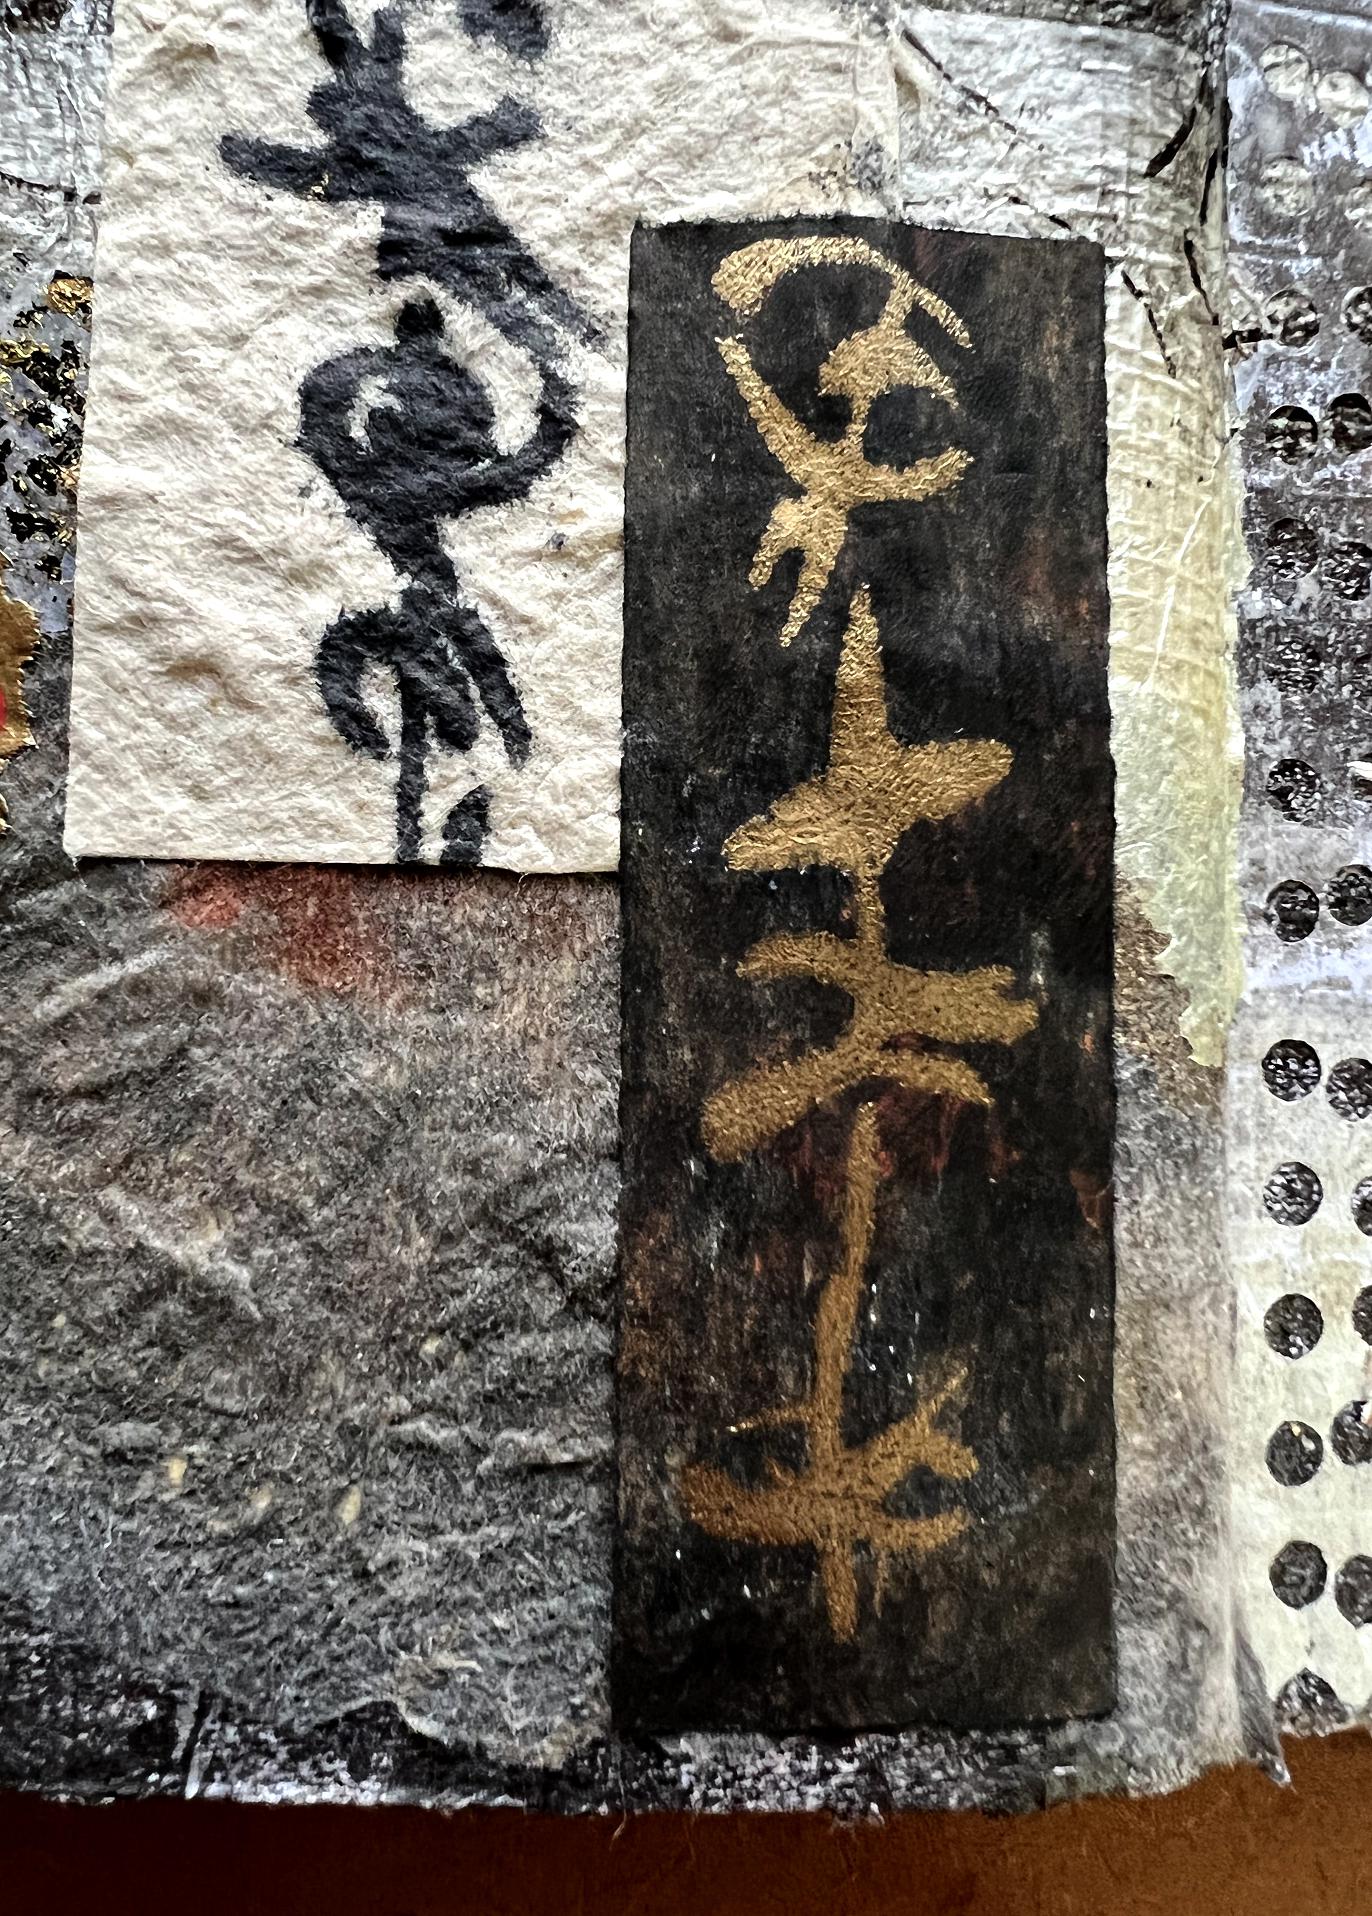
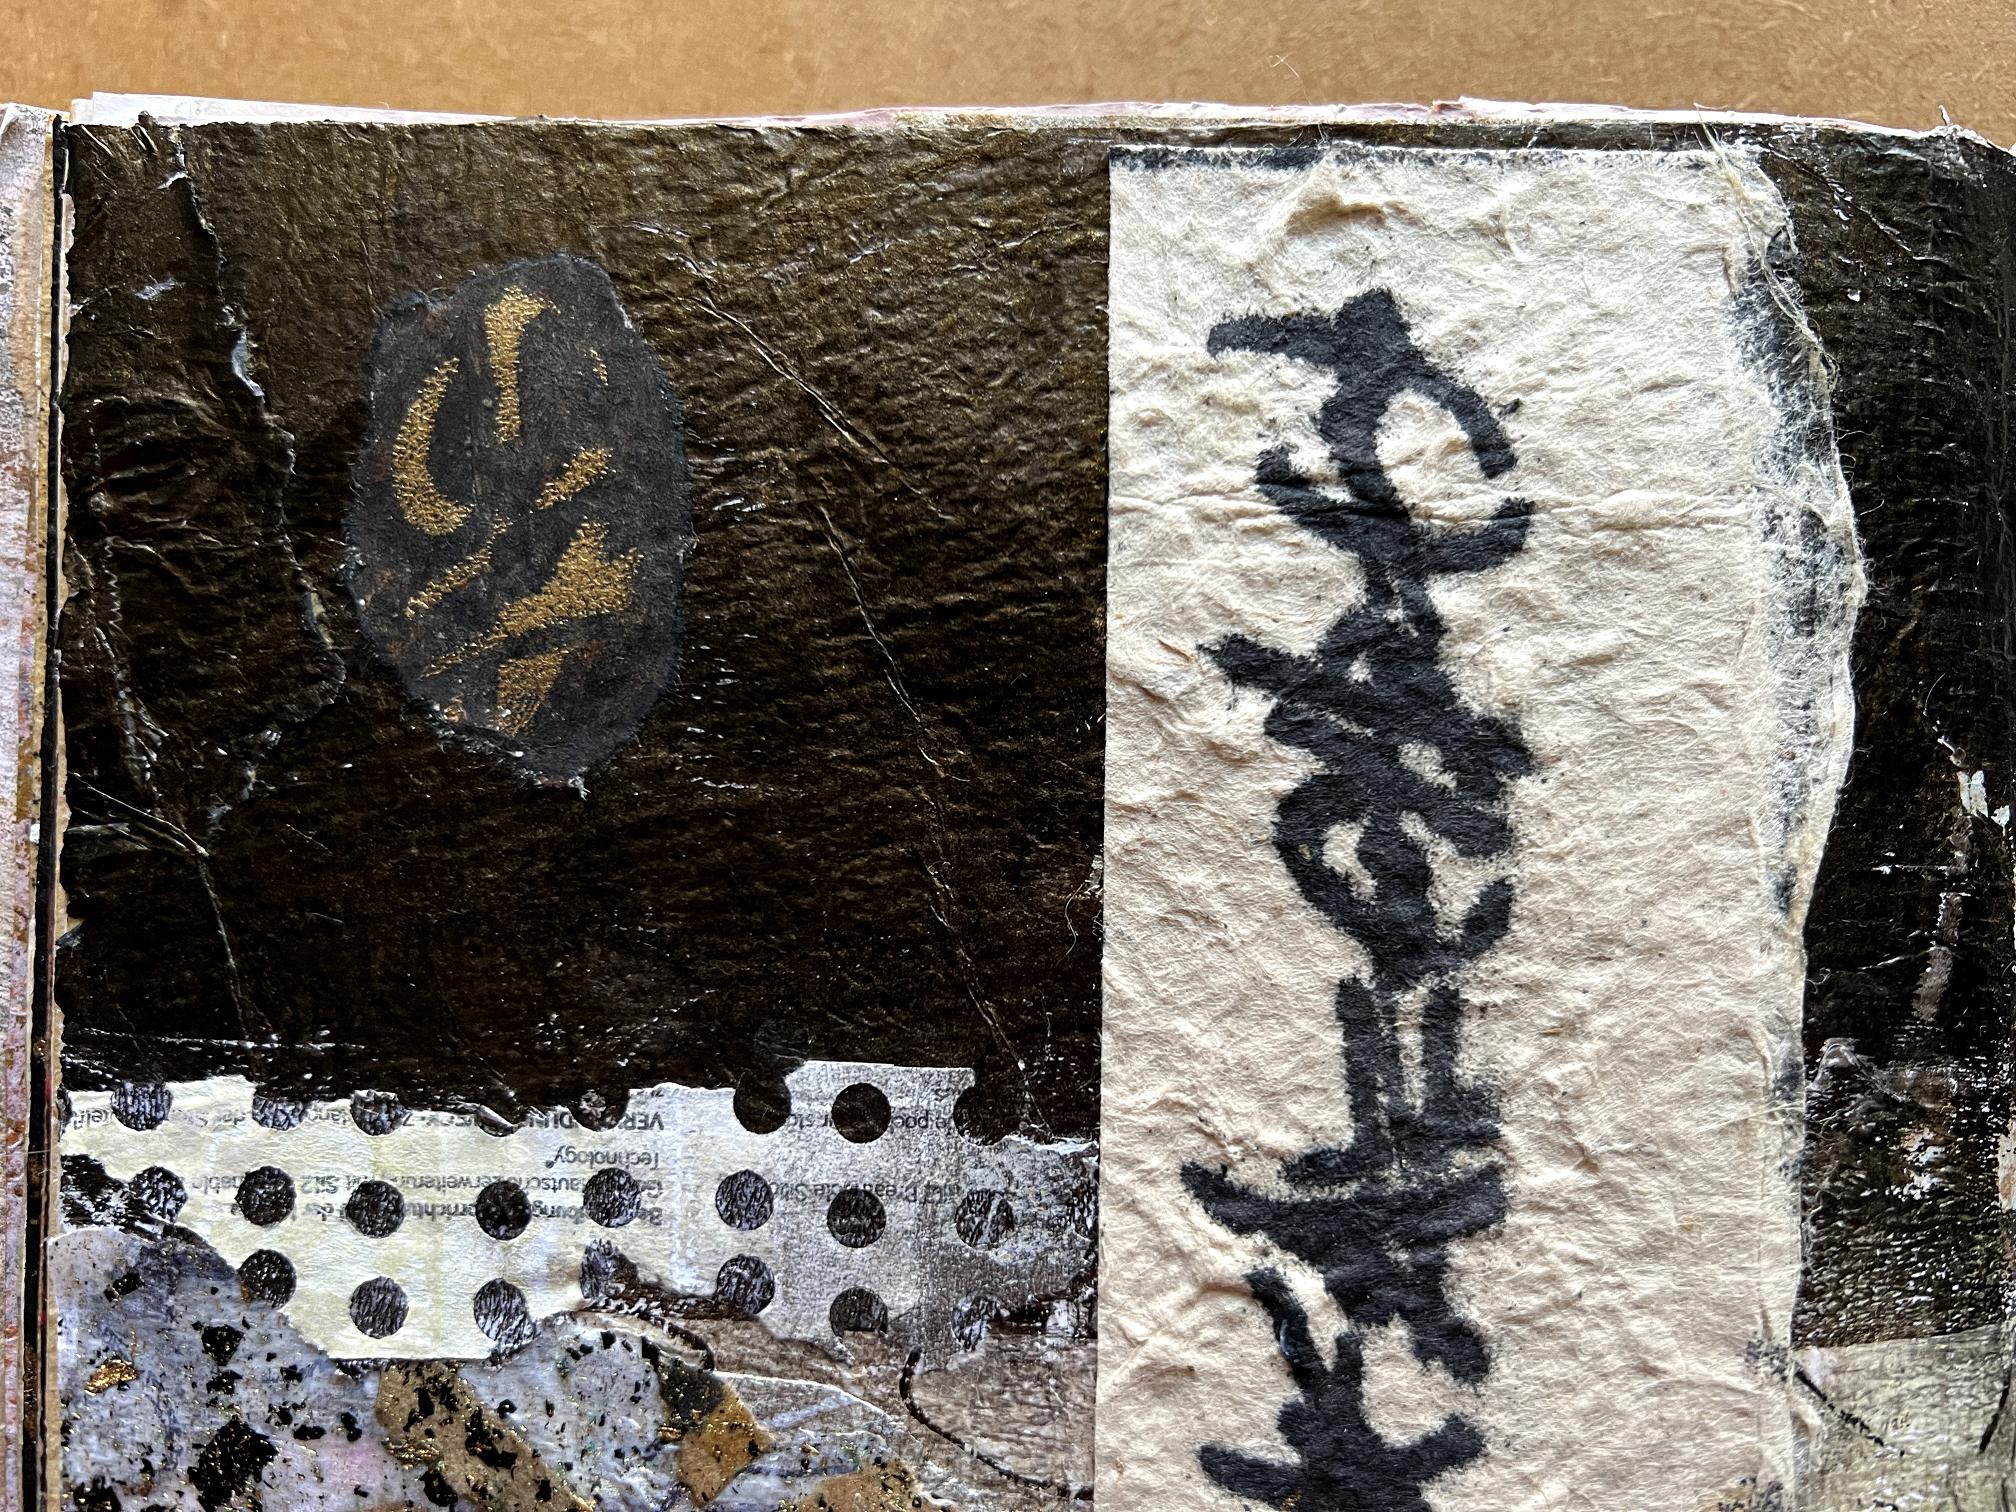
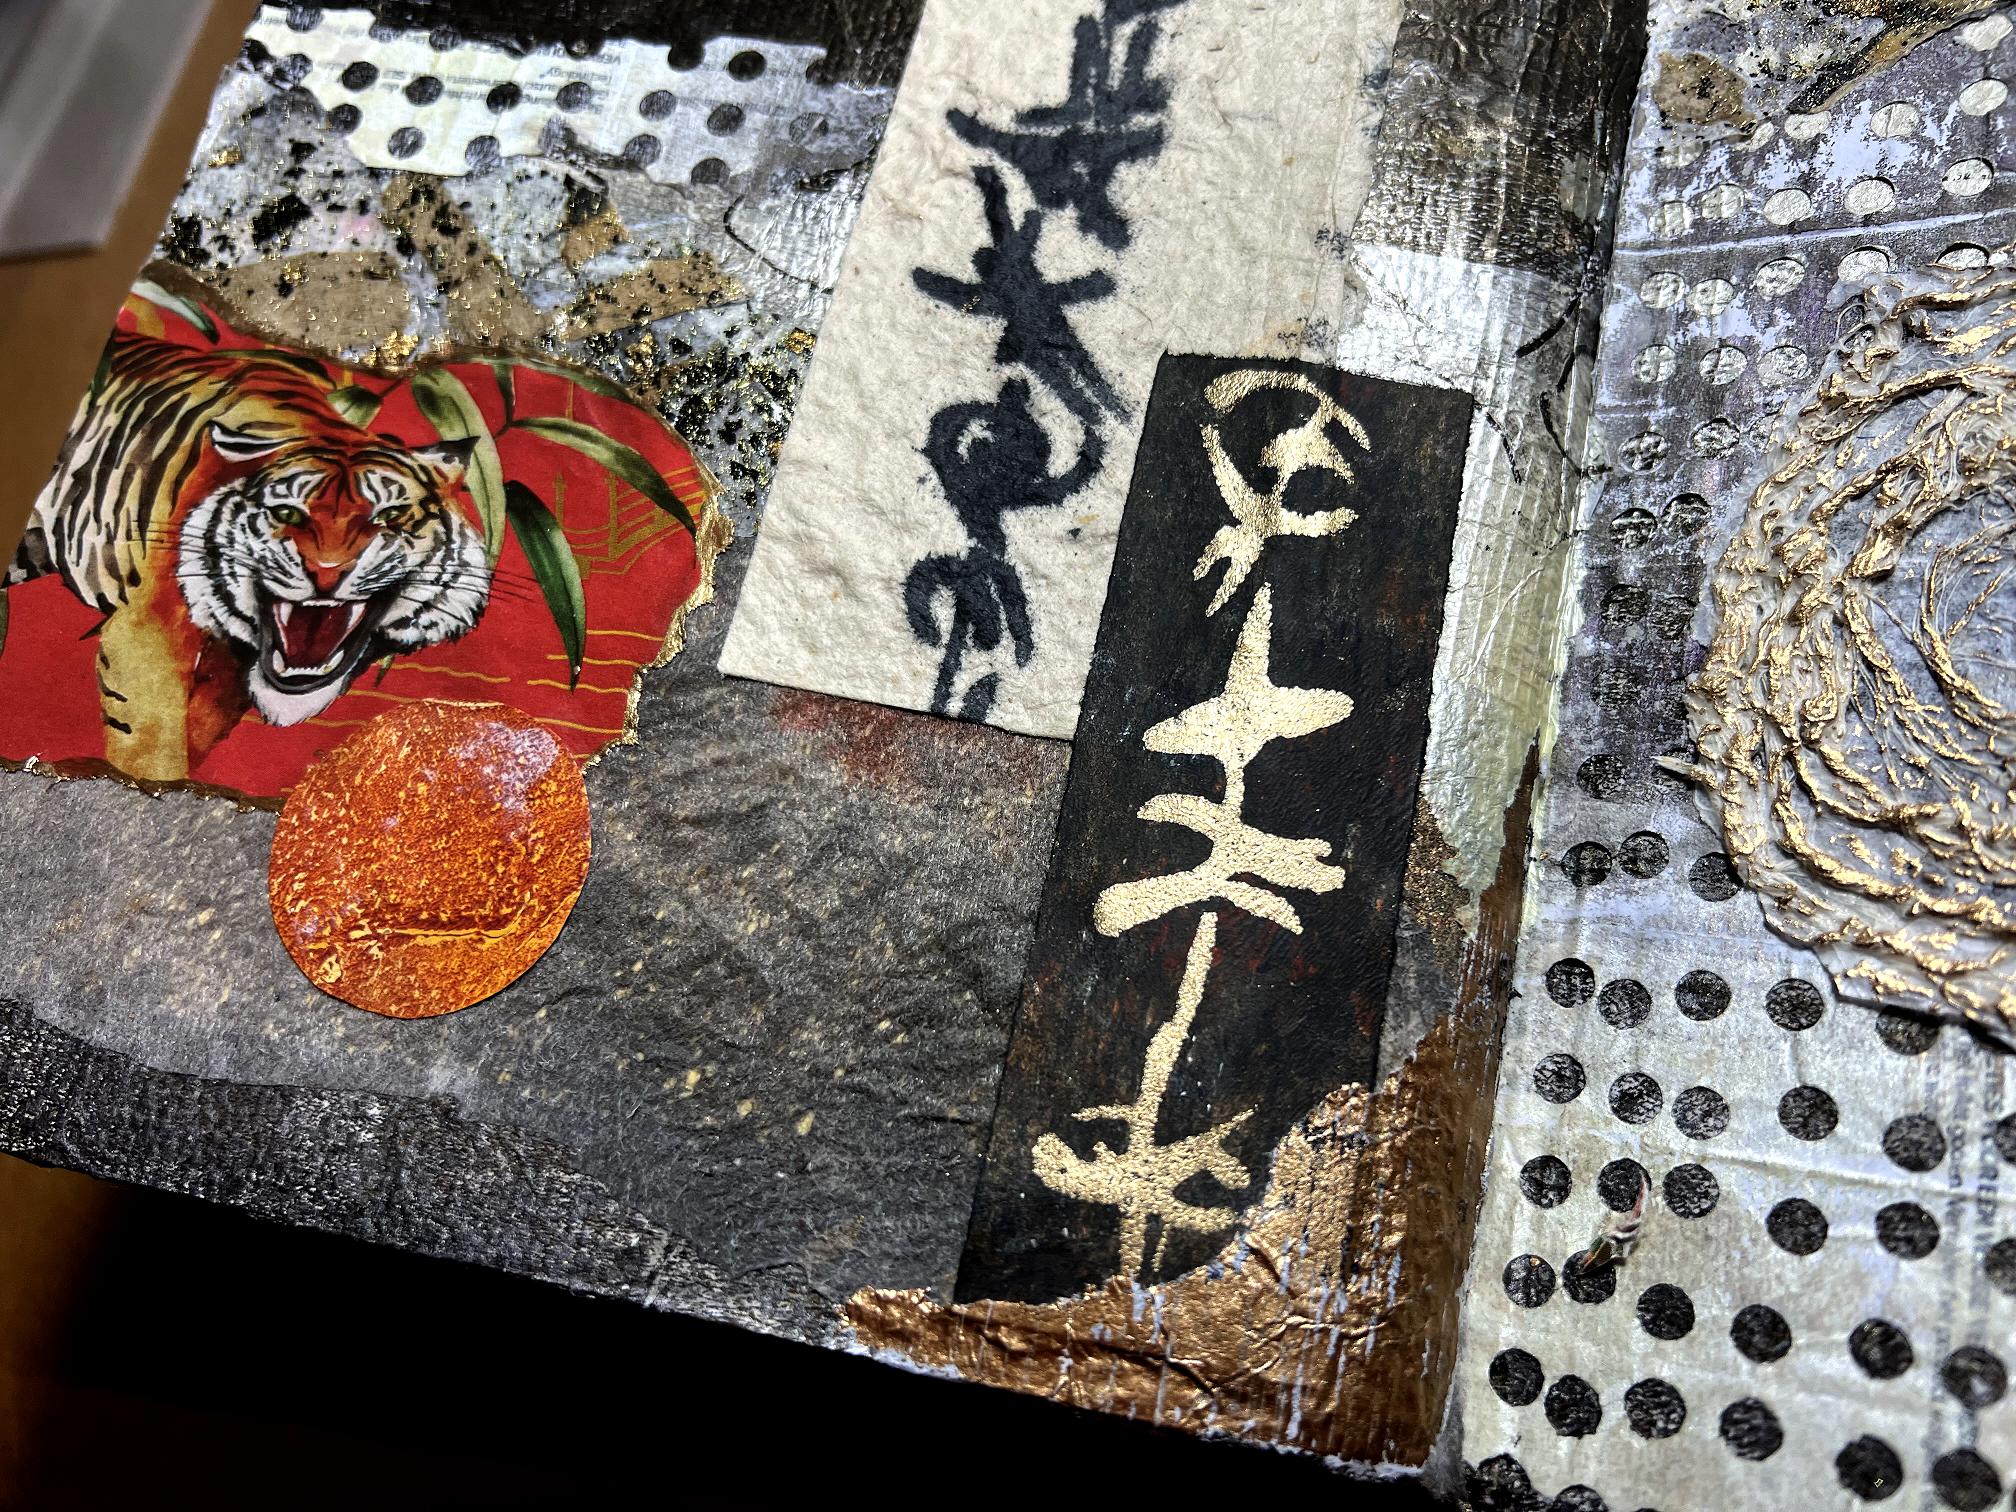
A couple of detail shots of the script.
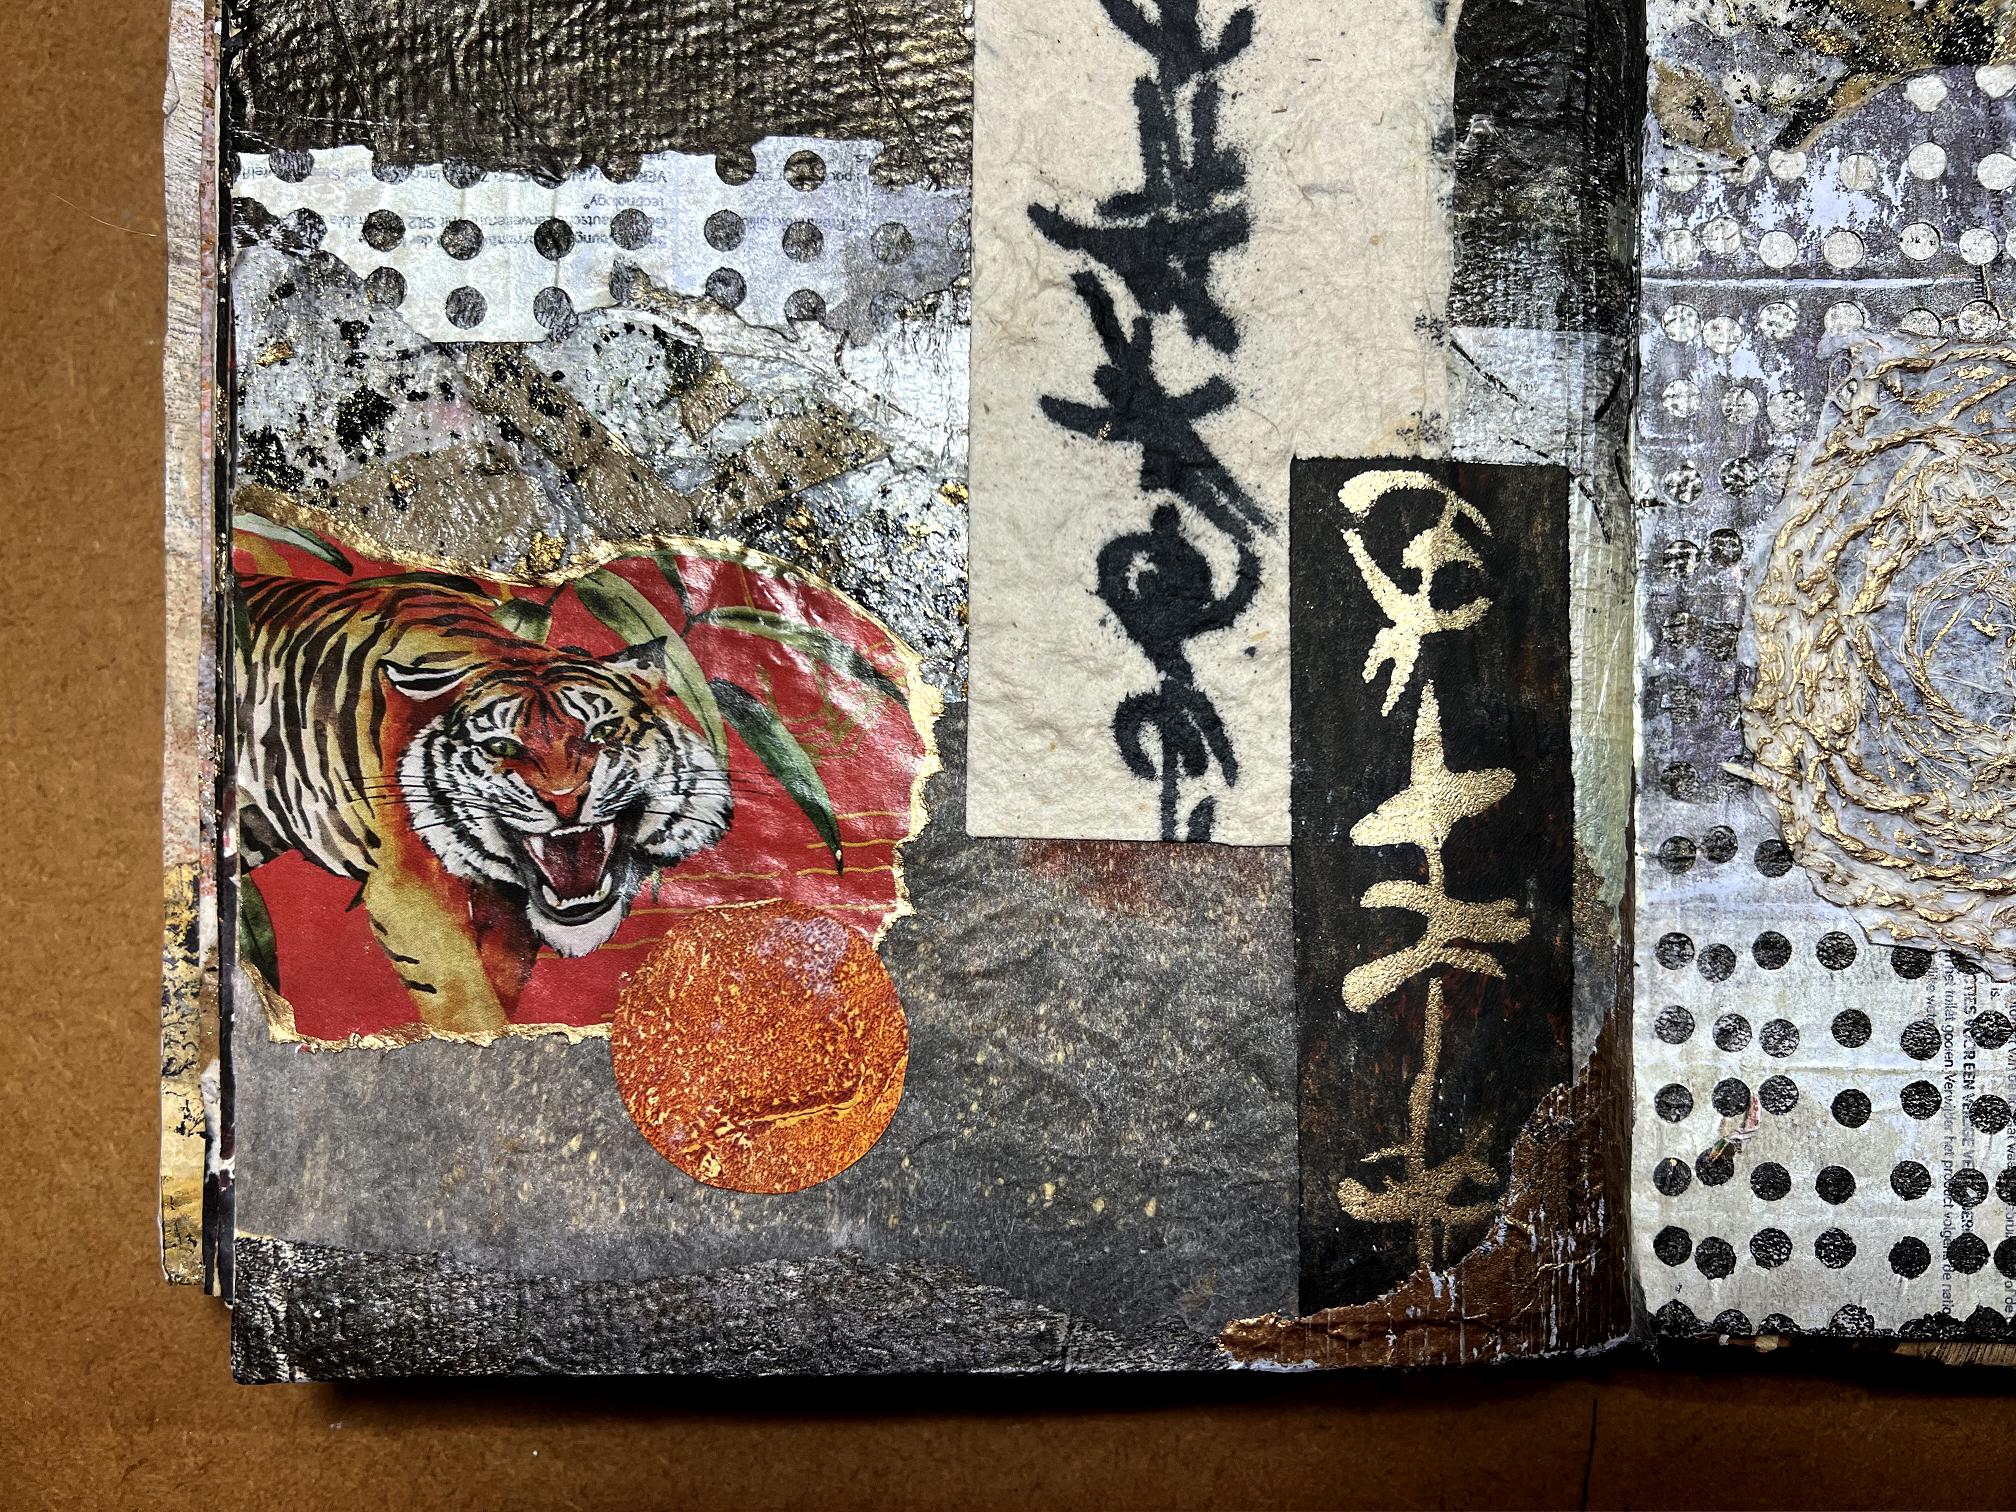
Detail shots of the tigers, beginning with the left-hand page.
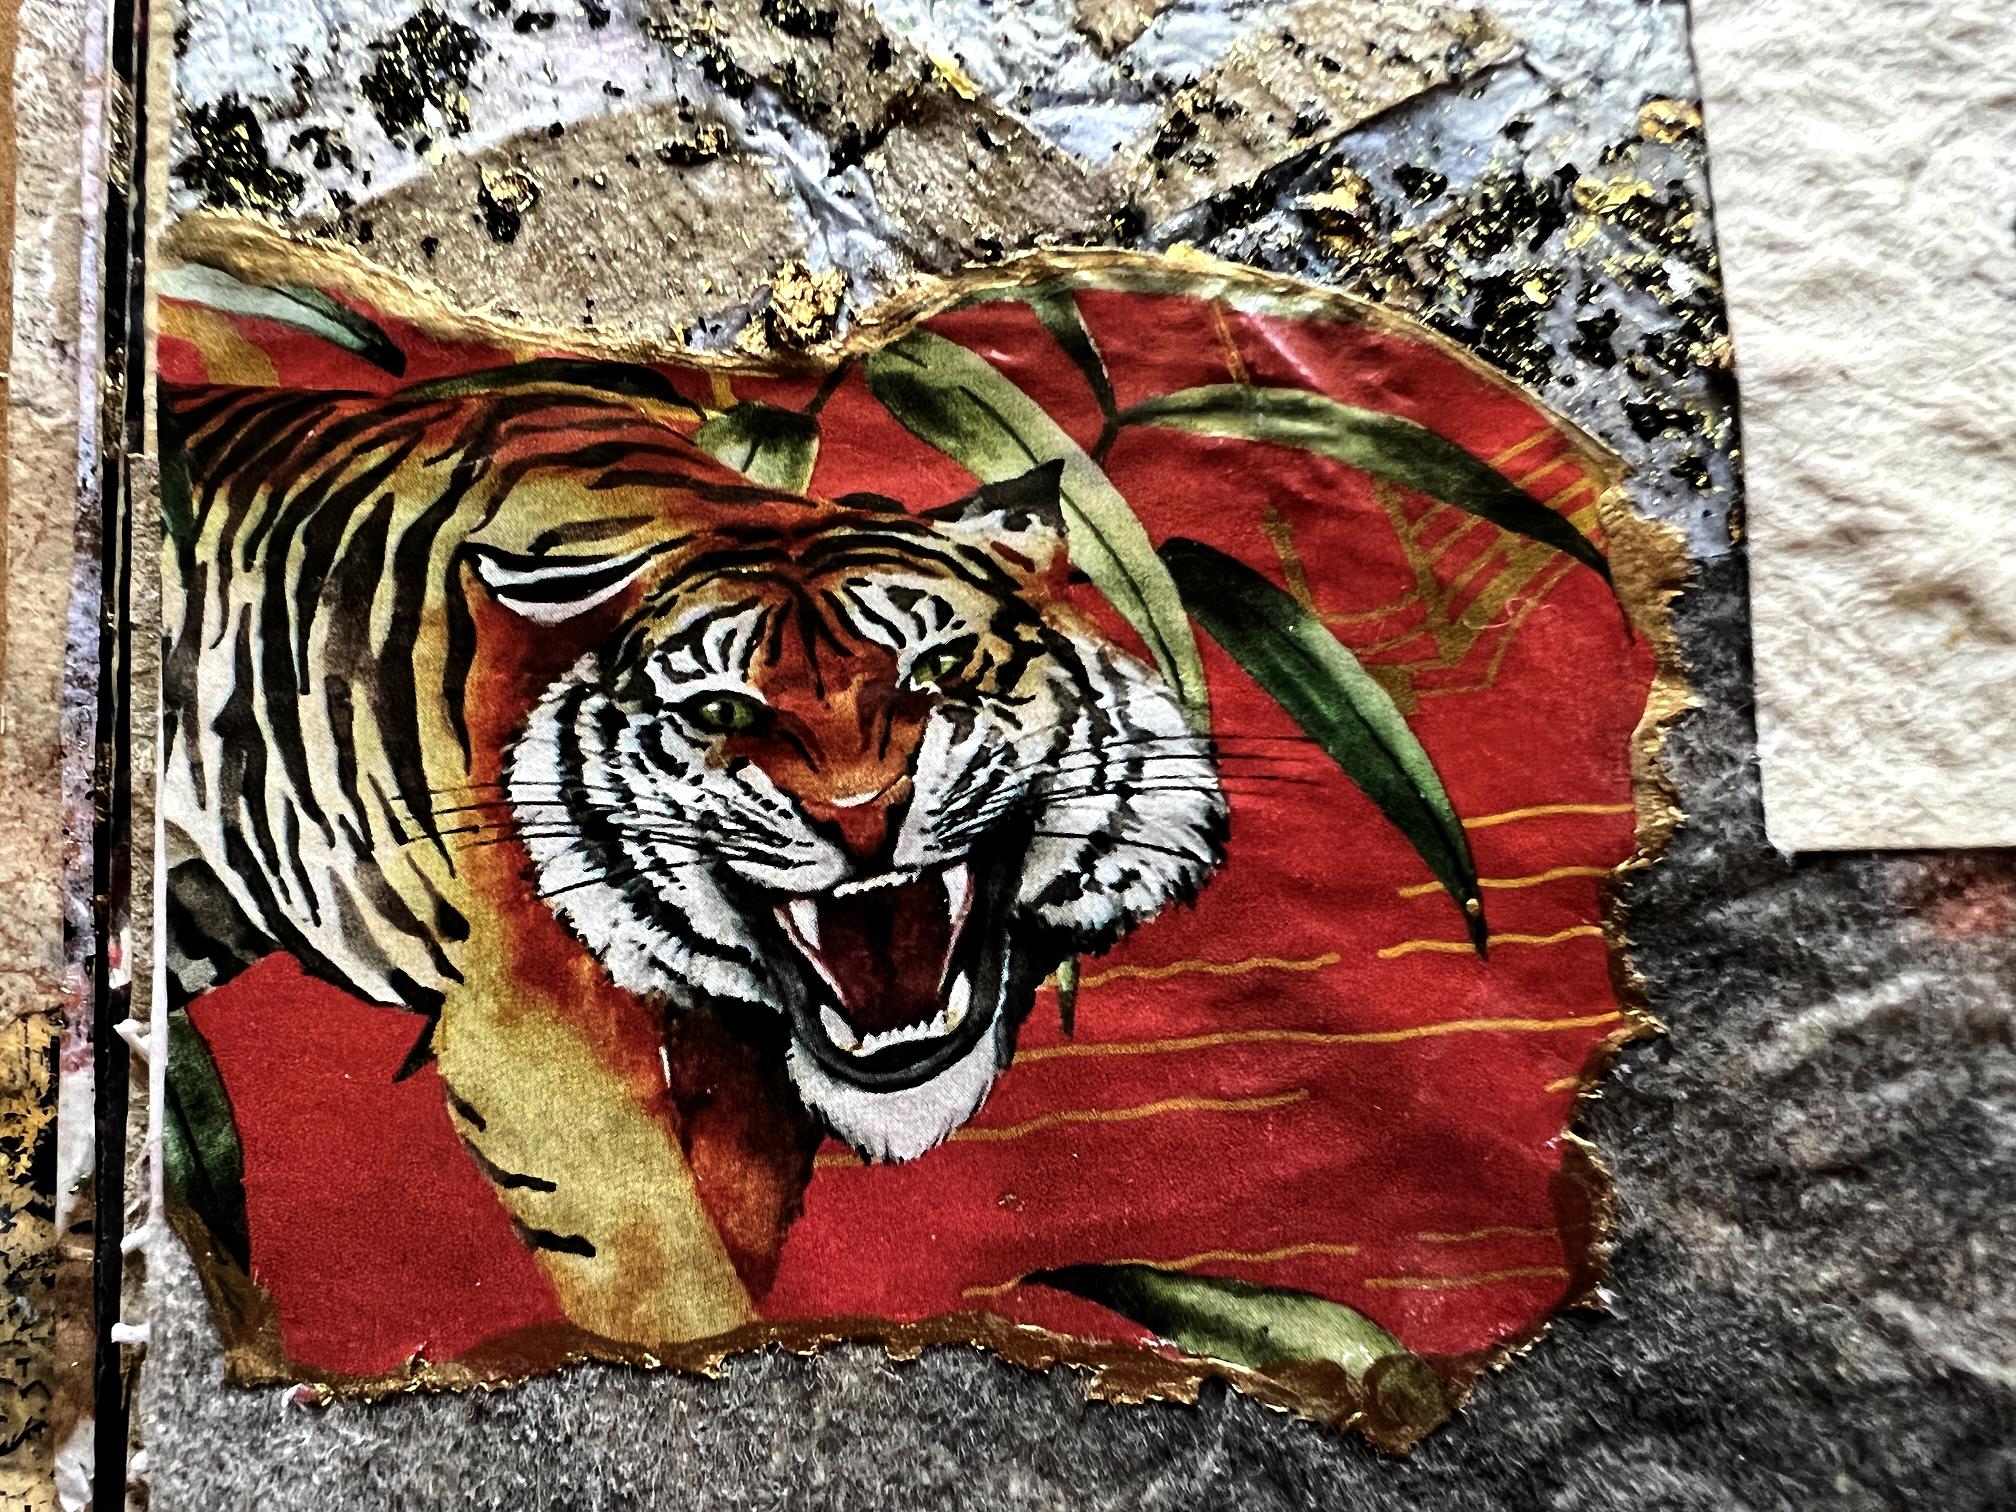
You can see the gold paint along the ripped edges.
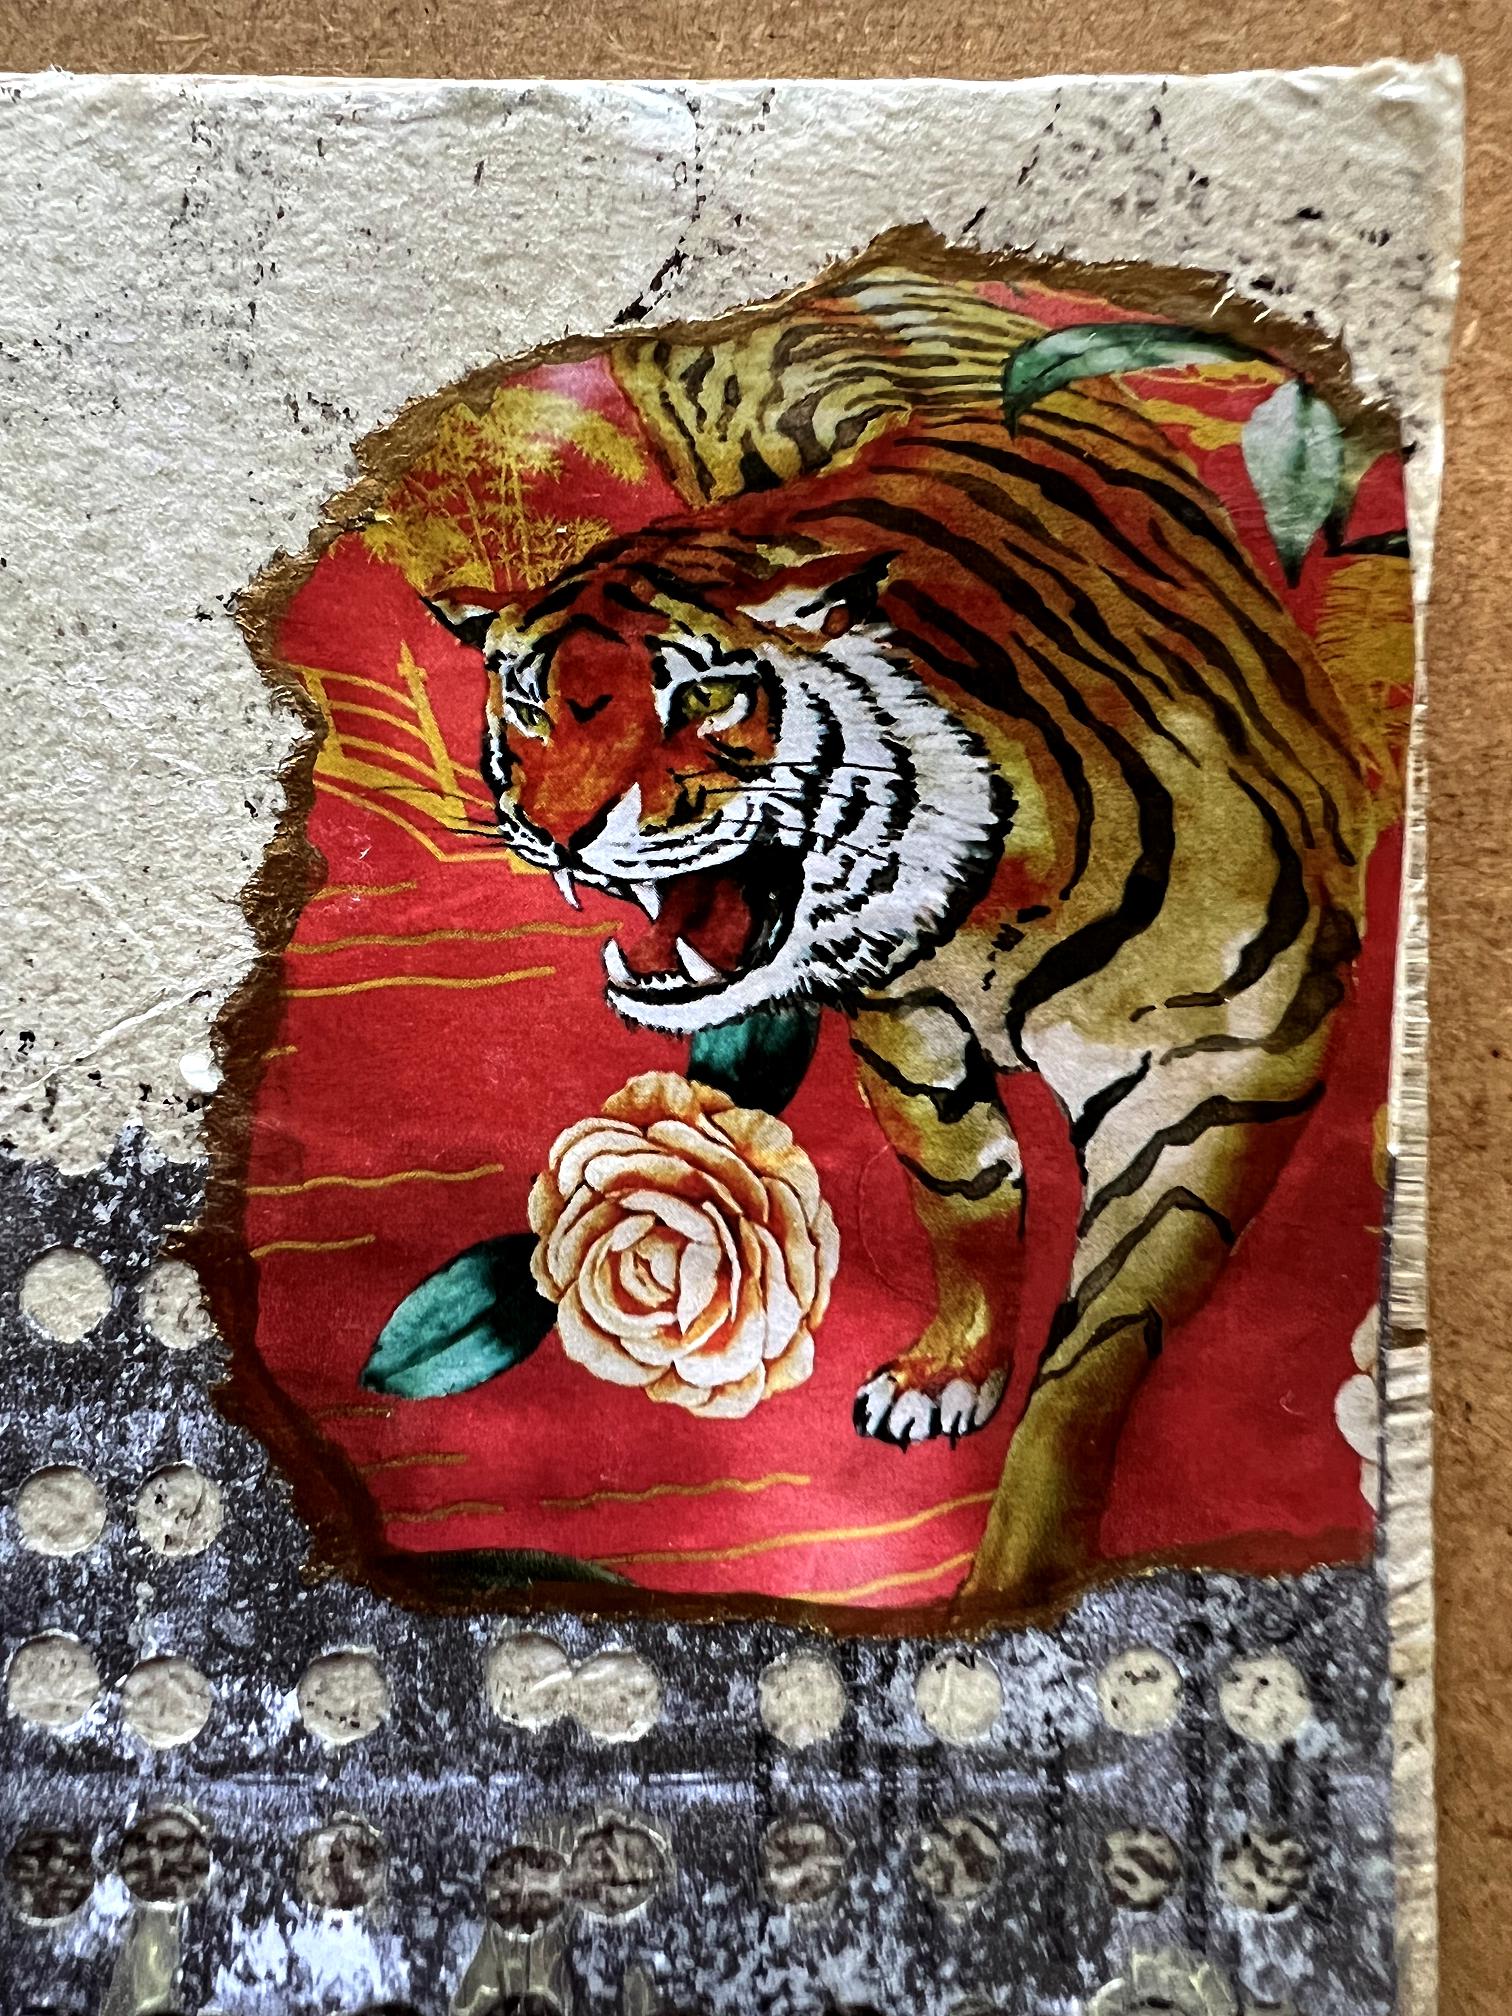
This detail shot of the right-hand page unfortunately doesn’t show the script oval very clearly, but I’ve included it because you can see the pierced paper background in detail, complete with the printed text on it, which is lovely for additional texture.
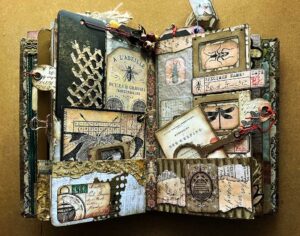
The completed spread.
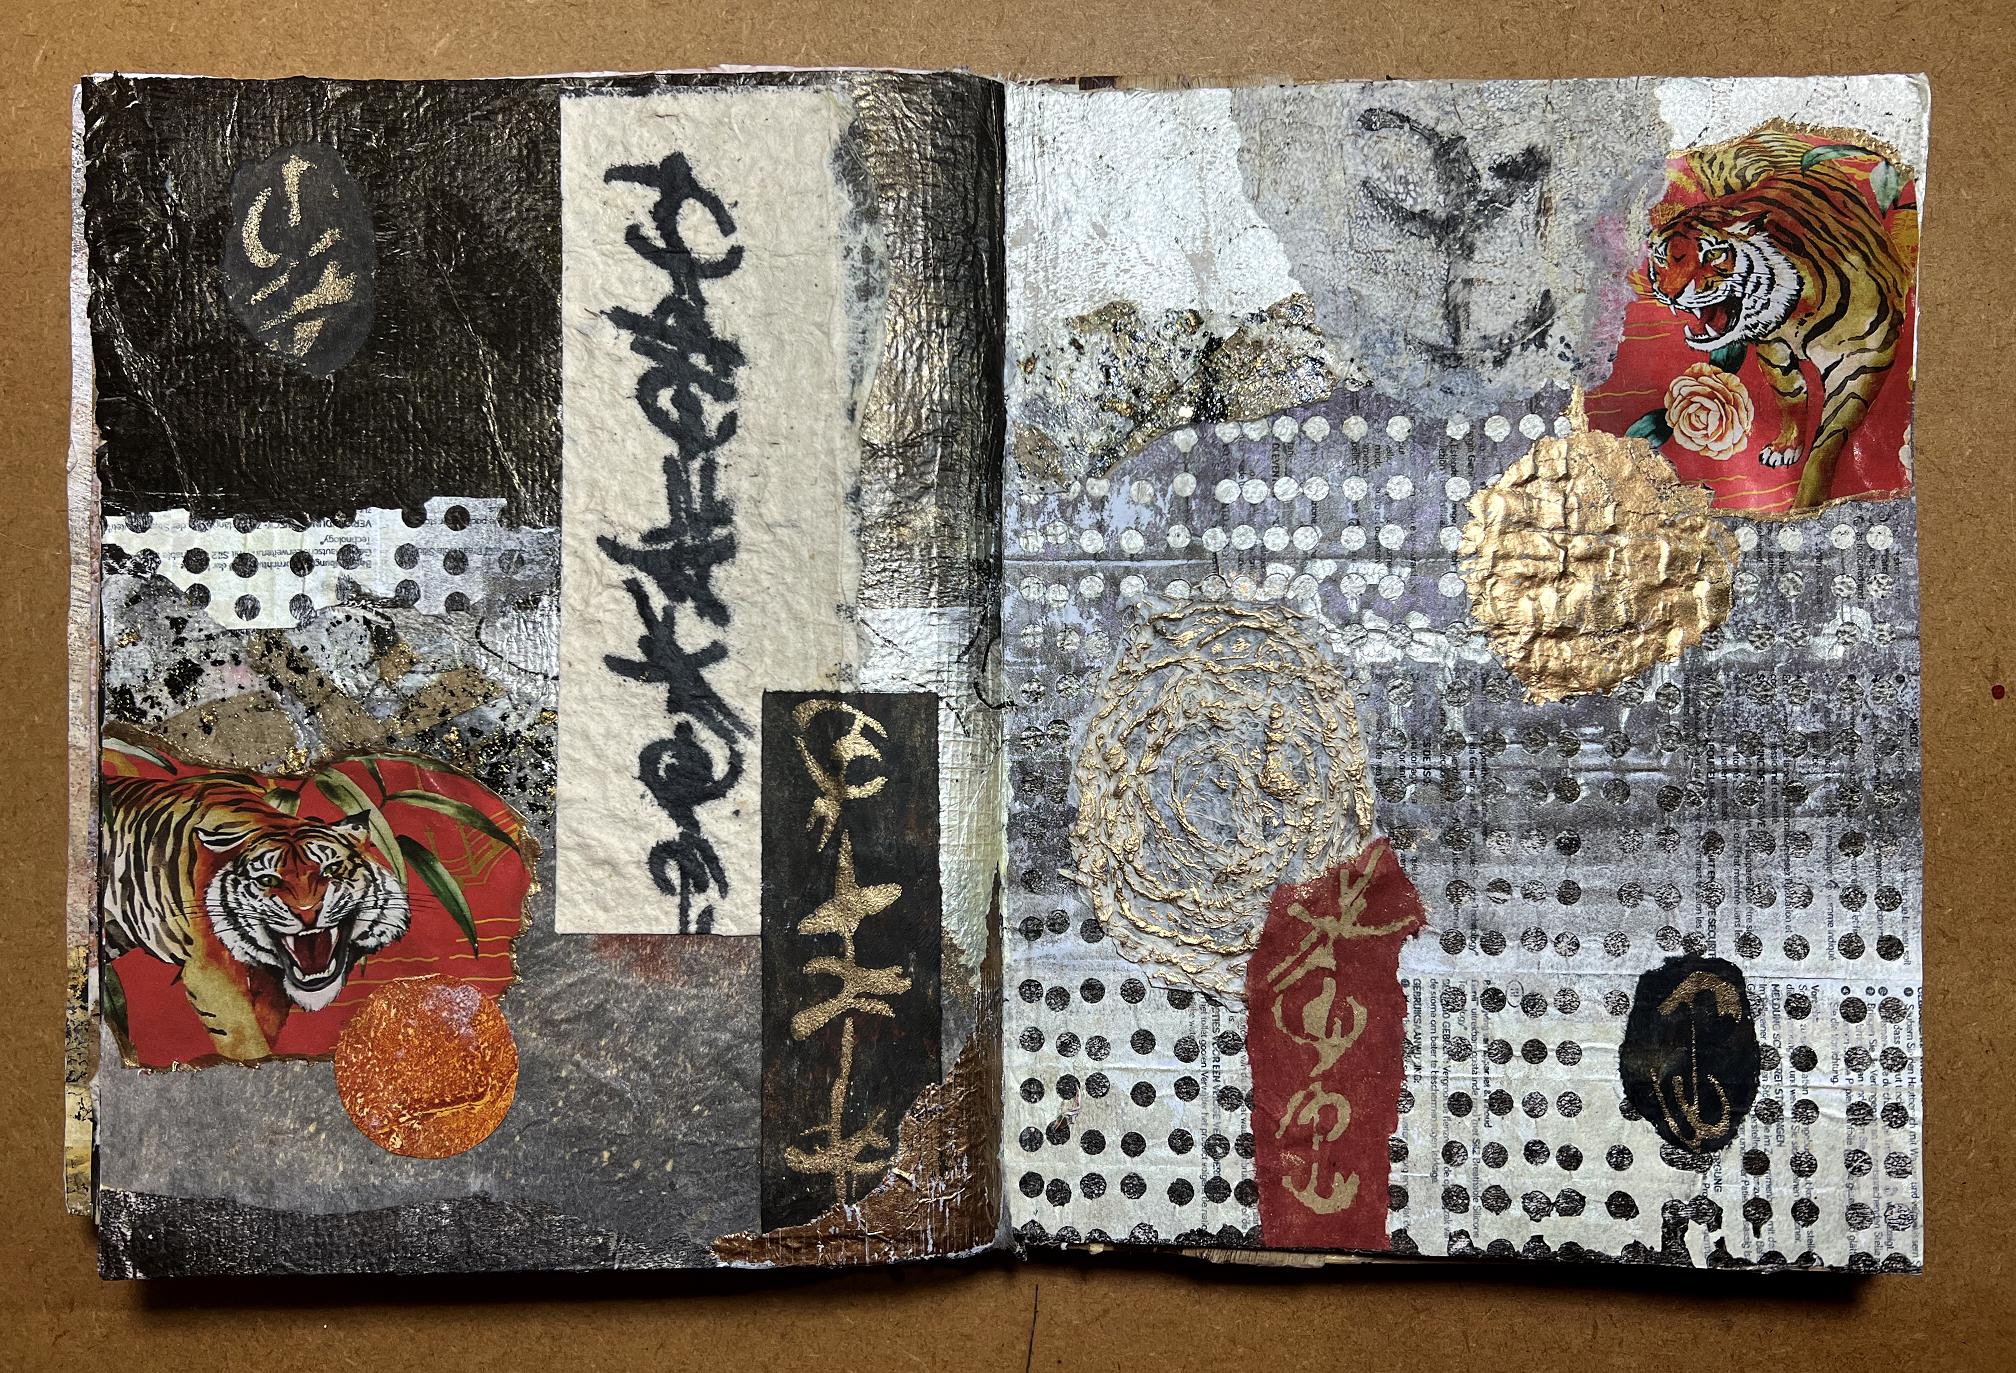
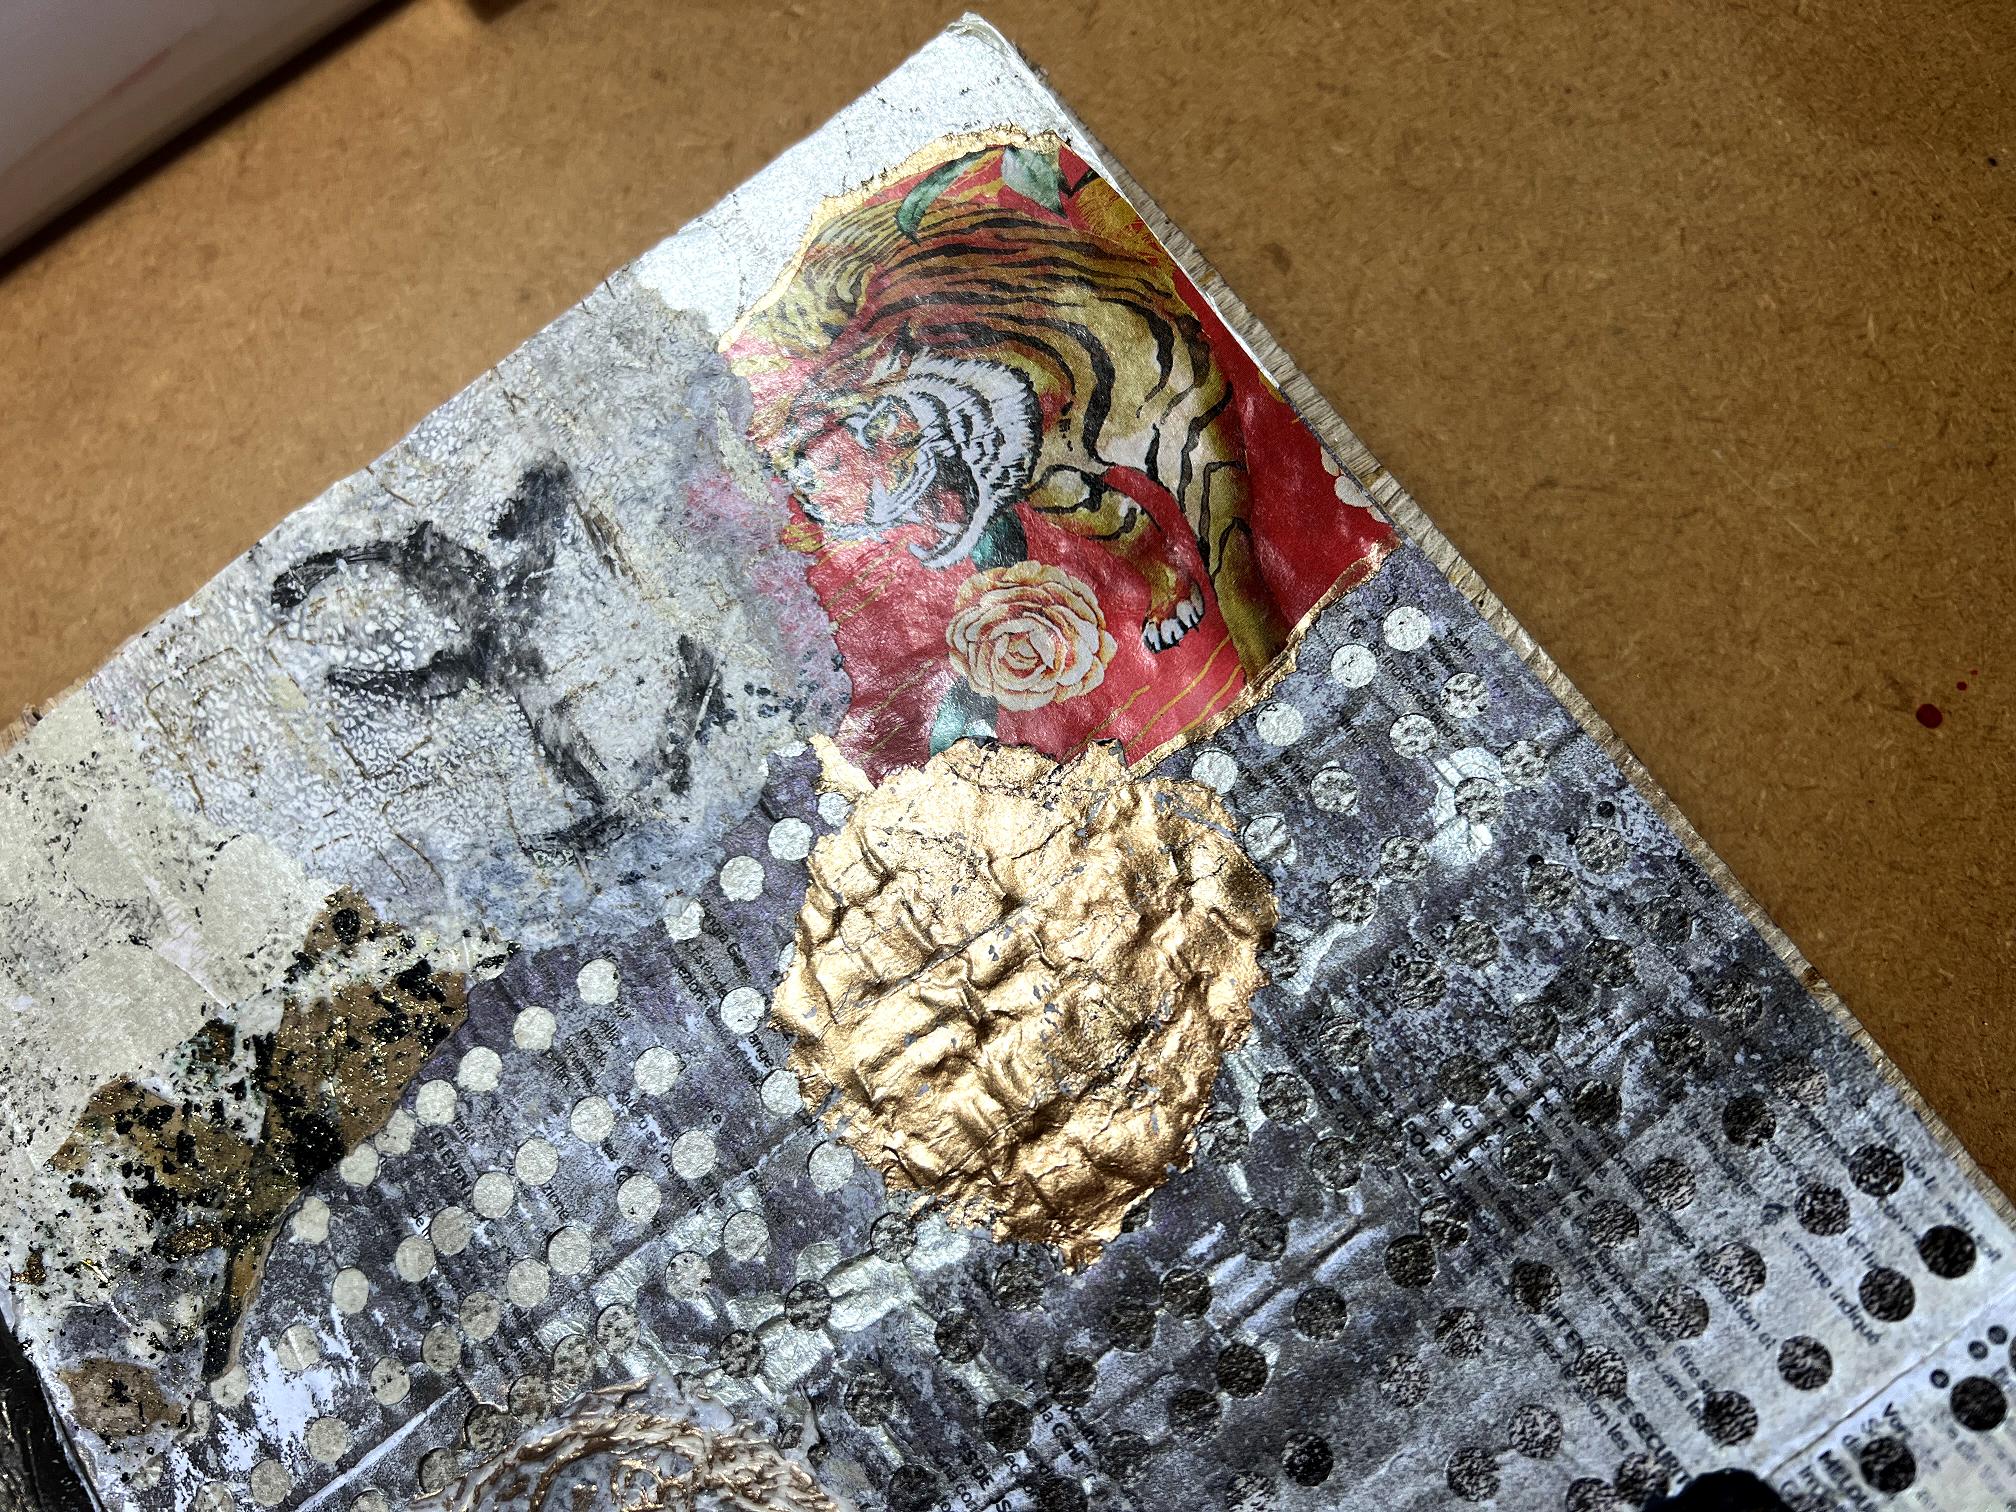
You can see that I added a few more collage elements – the gold tissue circle and the tissue character on the right-hand page, and another circle overlaying the tiger on the left-hand page. I also found a scrap of gold printed on tissue that I applied over the bottom right corner of the left-hand page.
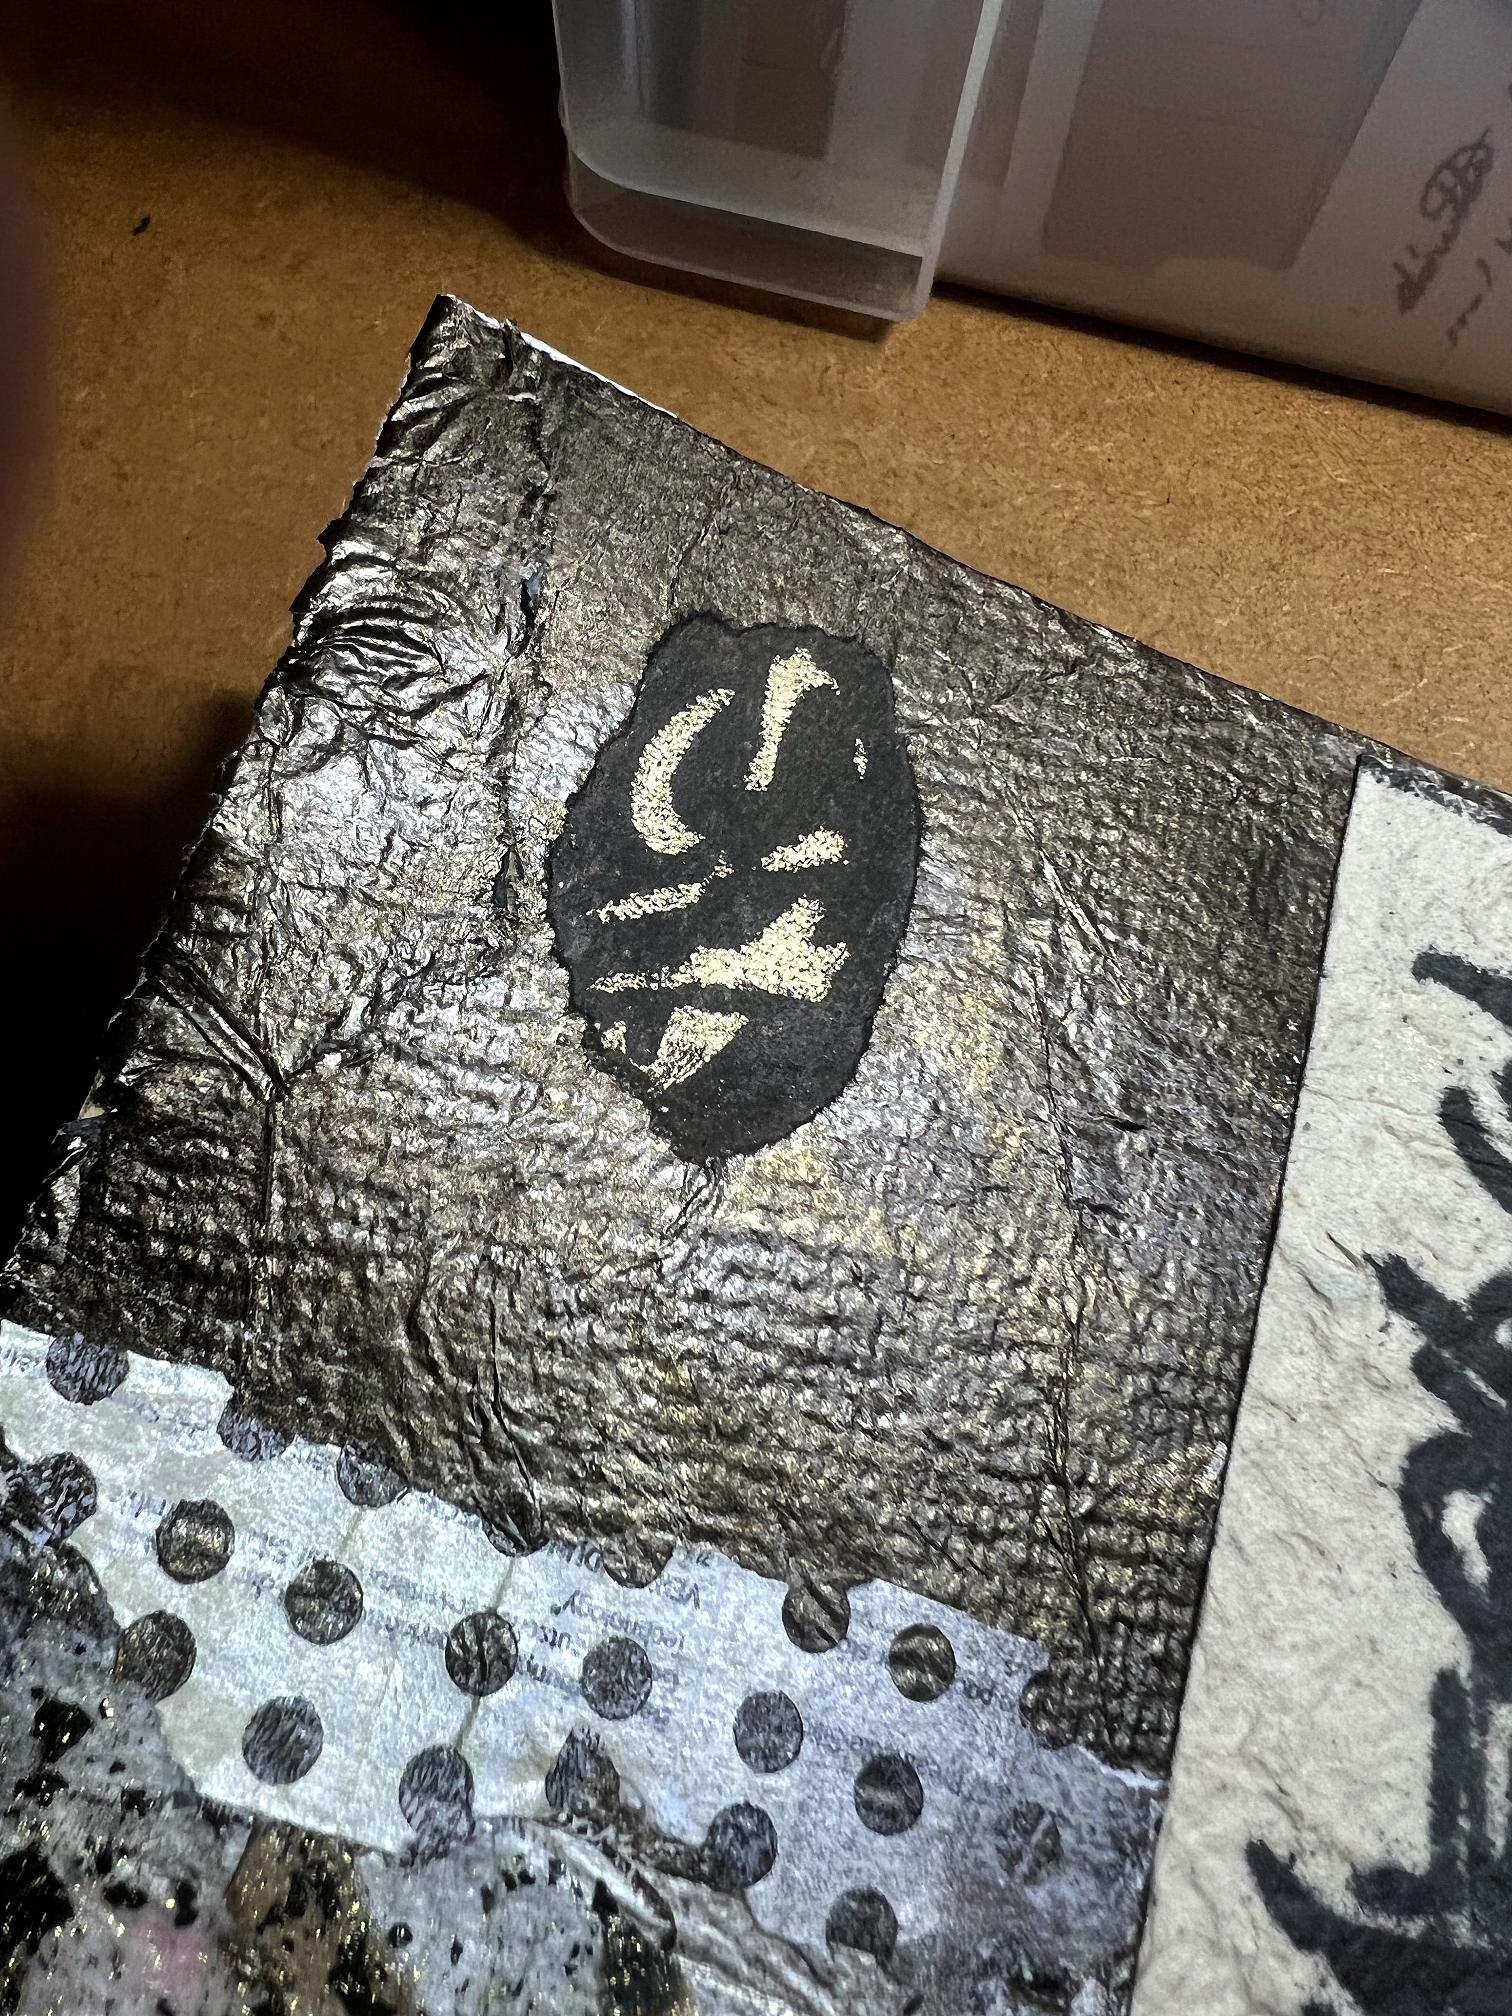
The top of the left-hand page.
The bottom of the same page.
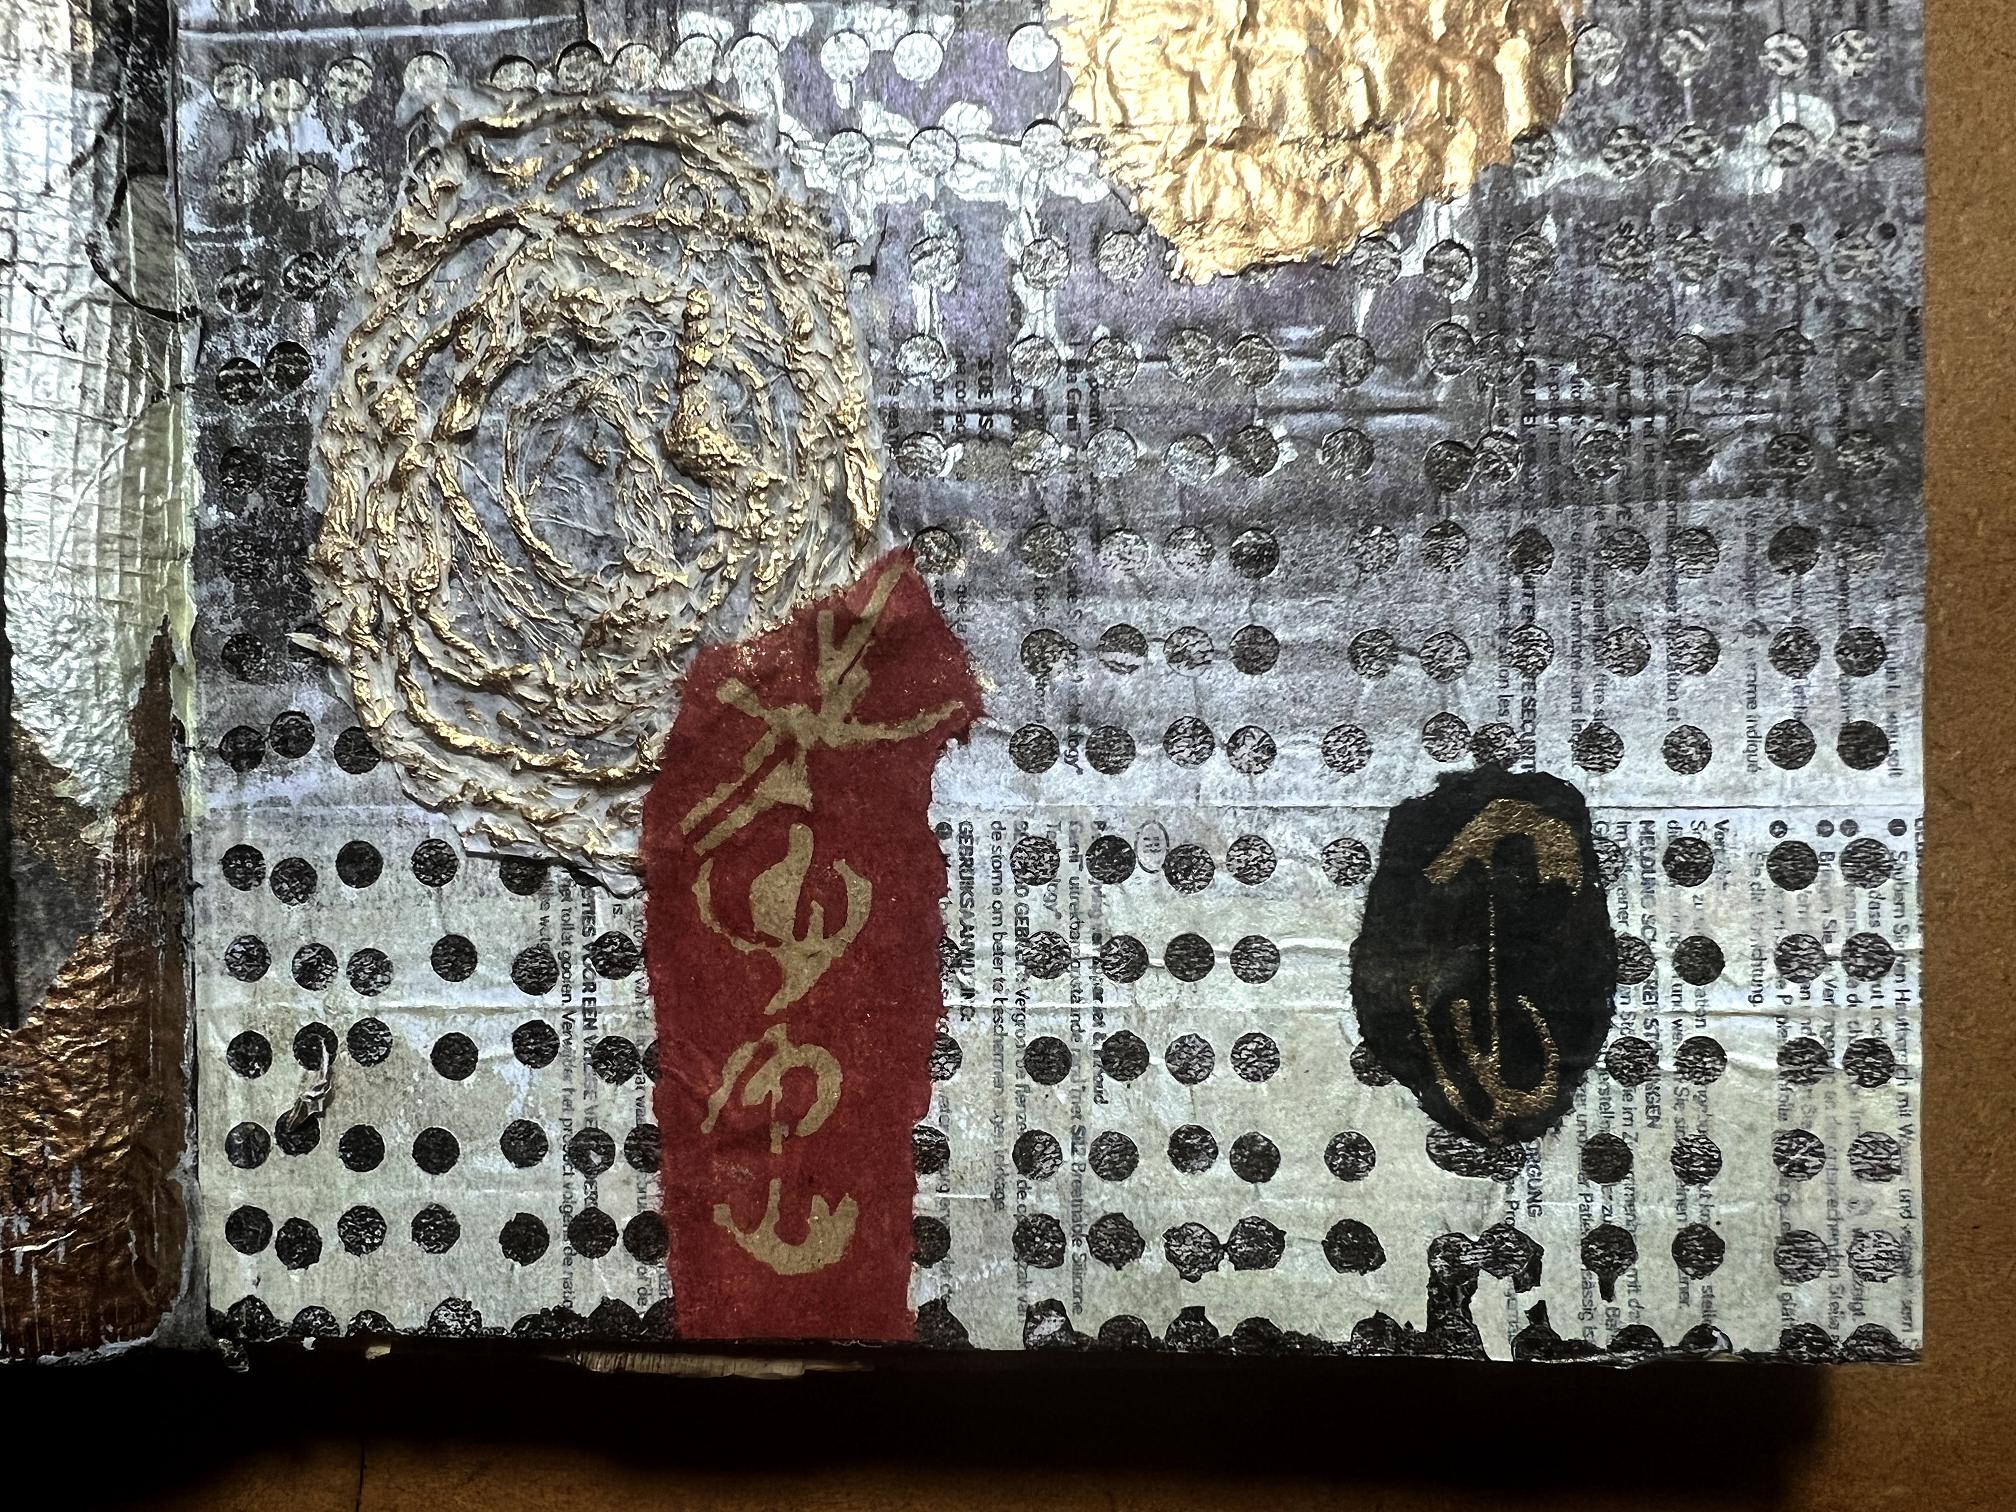
The top of the right-hand page.

The bottom of the right-hand page.
I decided to take a few more pictures, at an angle, in order to capture the gold and iridescent metallic surfaces as best as I could.
A final view of the completed spread once more.
This page really grew on me as I built up the layers and added more script and collage elements. I have remained true to the chosen colour palette while allowing myself a little flash of red!
Very lovely Shoshi – I love how the red in the tiger pictures stands out, the background you created is perfect!